Hood design-Week 2
AIM:
To Design & Assemble Hood outer panel, inner panel and the necessary reinforcements by following the Design parameters & Master section which is given to us as an input.
ABSTRACT:
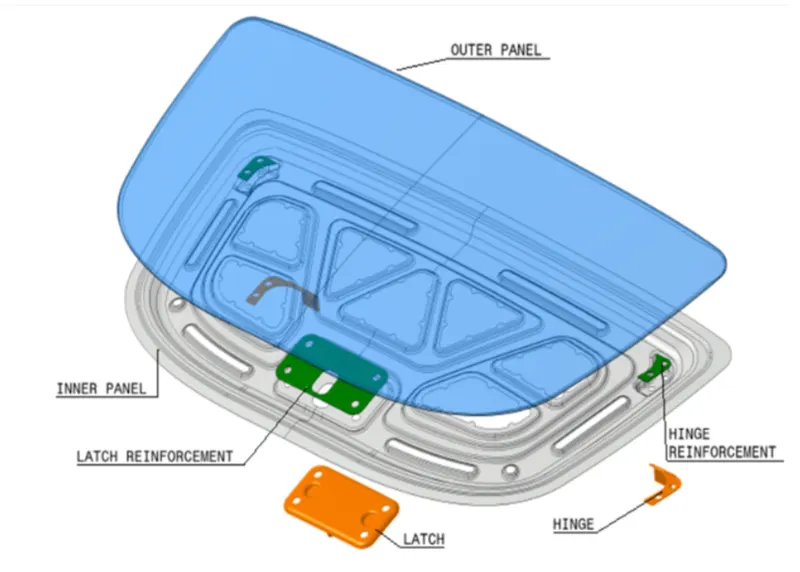
The project report deals with the explanation of steps and procedure followed while developing the HOOD Assembly of a car using CATIA V5. Using the styling surface and master section as input, we were able to create HOOD outer panel and inner panel with features like embossments and mastic points. After creating the HOOD outer & inner panels, we have created a complete HOOD assembly consisting of the outer panel, inner panel, latch, hinge & reinforcements.
INTRODUCTION:
Here, we are going to study about how to create a hood inner panel, outer panel, positioning the hinges, striker and its reinforcements in siemens Nx Application. Using this application, how we are going to use tools step by step to complete the design. Then complete explanation about tools used to create hood and its safety considerations to be followed in designing a hood.
HOOD:
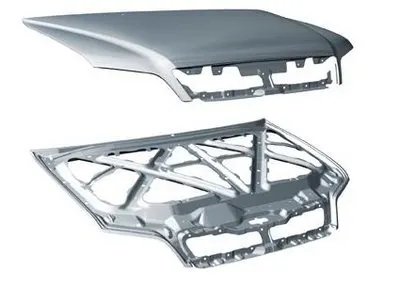
The hood or bonnet is the hinged cover over the engine of motor vehicles. Hoods can open to allow access to the engine compartment or trunk on rear-engine and some mid-engine vehicles for maintenance and repair. It generally covers the engine and other essential accessories like battery, Radiator, electrical components, etc. of the car which are exposed outside. The Hood consists of an outer panel and an inner panel. The inner panel provides strength and support, where the outer panel is a metal cover that has styling factors. While designing the hood, a design engineer needs to make sure that the following design requirements are followed.
- Pedestrian safety
- Occupant safety
- Vehicle quality
- Styling
- Ability to manufacture
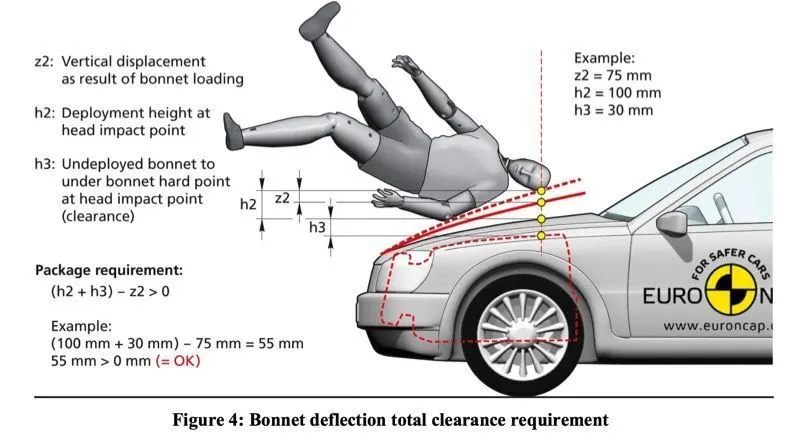
Out of these requirements, Pedestrian safety & Occupant safety are the most important factors. Euro NCAP is a voluntary vehicle safety rating system that will provide European consumers with information regarding the safety of passenger vehicles. The more stars, the better safety it will be provided to the customer. Thus, a design engineer must need to follow these requirements to provide better safety to the customers.
Points to be considered before designing hood:
- Opening angle of hood
- N CAP Crash Test
- Wrap Around Distance (WAD)
- NVH (Noise, Vibration, Harshness)
Opening Angle of Hood:
This is one of the main criteria in designing of the hood. This opening angle varies from person to person and country to country. For example, the average height of the Indians is 5.8 feet whereas in the European countries the average height will be 6 feet, based on these heights the opening angle may varies. The opening angle is considered important criteria because when the opening angle is less there is a chance of head injury to the human. The hood need supports to set an open angle according to the countries. There are two types of supports were there to hold hood. They are
- Support Rod
- Gas Stay
Support Rod:
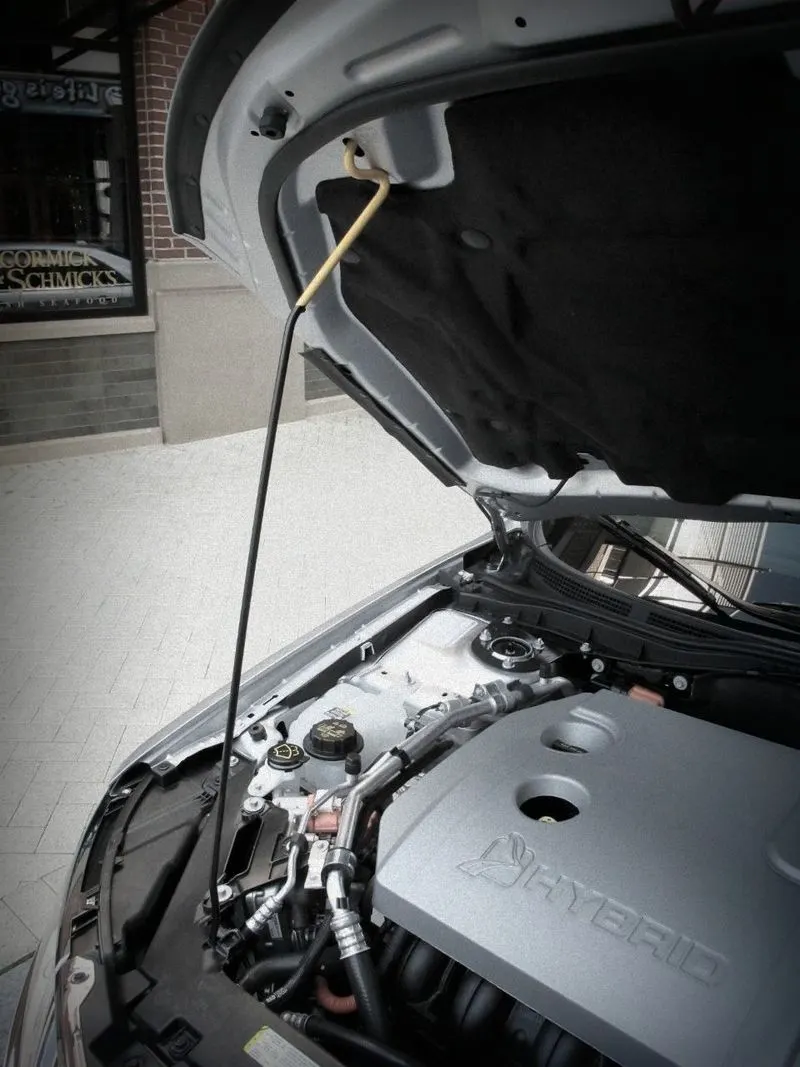
This support rod is quite simple in design and cheap in cost. This is widely used in many low budget cars. In this type, we have to lift the hood by ourselves and place the support rod in the space provided in the hood or engine compartment. In support rod, small bend needs to provide in the rod to strengthen the support rod. We need to consider this point into an account, the battery must be fixed in the engine compartment before providing space for support rod. If the above point didn’t consider, it results in failure, because we can’t able to access the battery part, because the rod will be hinderance to handle the battery.
Gas Stay:
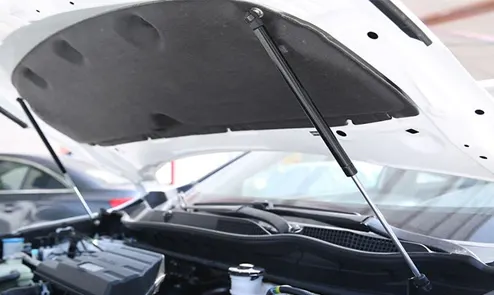
The gas stay is also used to lift the hood or bonnet automatically by means of gas pressure. Here, no man power required to lift the hood. This type is used where the car bonnet size is heavy to lift. The only disadvantage is costlier.
NCAP Crash Test:
Euro NCAP, or the European New Car Assessment Programme to give it its full name, is an independent crash-test safety body, which rigorously assesses the safety of cars, and helps to further the advancement of car safety technology. With safety at the forefront of all car makers minds, and many firms and organisations signing up to the ‘Vision Zero’ initiative – which aims to eliminate all deaths and serious injuries from our roads – Euro NCAP’s test programme is an ever-evolving one, with its architects periodically updating crash-test regimes to ensure cars are assessed using the most stringent criteria possible. The current Euro NCAP safety regime includes a dual rating, with cars tested both with and without various high-tech safety features. This means some cars may get five stars if they are configured with autonomous emergency braking, for example, but drop to four stars for the second rating if this feature is not standard.
Wrap Around Distance (WAD):
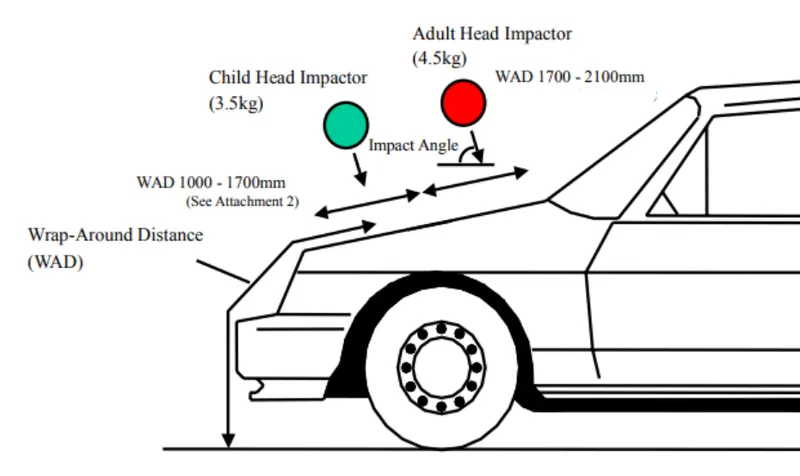
When a car crashes on the pedestrian, the whole human body wraps around the front shape of the car, and the head impacts on the bonnet or the windscreen. The distance at which the head impacts on the car from the ground is mentioned as wrap around distance (WAD).
To be specific the Wrap Around Distance is a measurement of the distance from the ground to the head impact zone over the outer surface of the car. The wrap around distance is measured longitudinally in the centre of the vehicle from the ground.
The severity of the injury caused by the frontal crash depends on the type and shape of the vehicle, the speed of the vehicle, and the movement of the pedestrian relative to the vehicle. In addition to these parameters, the wrap around distance plays a major role in the safety measures of a pedestrian.
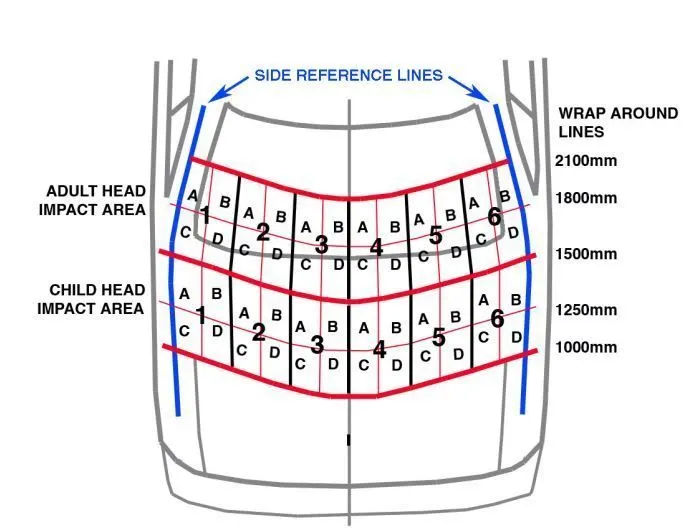
During crash analysis, based on the wrap around distance, two test areas will be created namely the Child Head Impact Zone and the Adult Head Impact Zone.
Test Area:
- The child and adult head impactor test will be considered for the regulation.
- Test area for child head impactor: 1,000mm ≤ WAD ≤ 1,700mm
- Test area for adult head impactor: 1,700mm ≤ WAD ≤ 2,100mm
Impactor:
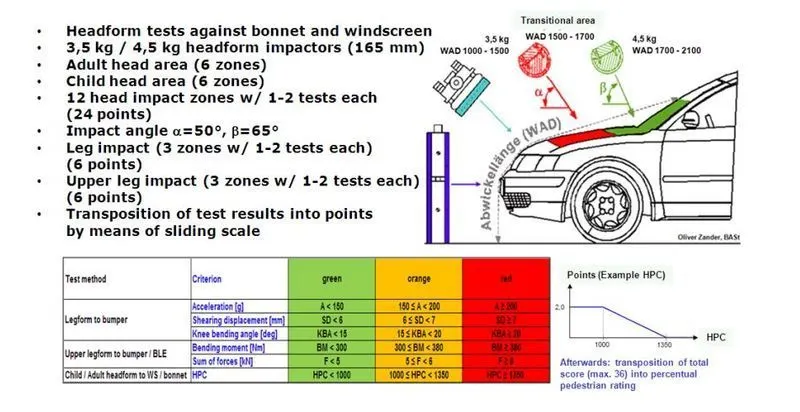
- Child head impactor: Diameter 165mm, weight 3.5kg
- Adult head impactor: Diameter 165mm, weight 4.5kg.
NVH (Noise, Vibration, Harshness):
Noise, Vibration and Harshness (NVH) is the study and modification of the noise and vibration characteristics of vehicle, particularly cars and trucks. To improve NVH, mastic sealants were provided on the inner panel to attach with outer panel. Here mastic points on the inner panel plays a major role to avoid Noise and Vibration into the cabin. NVH is measured by the instruments, namely microphones, accelerometers and force gauges, or load cells. Component and subassembly NVH tests are most commonly performed using a vibration shanker while entire vehicles usually on the test track or road stimulator testbeds.
SAFETY REQUIREMENT WHILE DESIGNING HOOD:
Safety is the most important criteria in automobile designs which concentrates on both pedestrian and occupant safety. The pedestrians are the most vulnerable road users and are at high risk of traffic accidents. The major reason for the fatality of the pedestrian in traffic accident is due to the head injury resulting from the hard impact of the head against the stiffer hood or the ground. This leads to the necessity of new inner hood panel which is less stiffer and pedestrian friendly.
The head impact analysis on the present hood of the car was done to study the response of the adult head form at two different locations. Structural and modal analysis for the same present hood assembly was done to observe the local and global stiffness. In order to reduce the head injury of the pedestrian the local stiffness over the area of head impact has to be reduced thus the new design of hood inner panel was focused on that and the structural and model analysis was done for the new design. The design with lesser local stiffness and similar global stiffness compared to the existing hood was finalized.
Child Head Impact:
Car-pedestrian accidents account for a considerable number of automobile accidents in industrialized countries. Head injury continues to be more concerned with Automobile impacts. Because the head is the most seriously injured part in many collisions including in pedestrian automobile collisions. To reduce the severity of such injuries international safety committee have proposed subsystem tests in which head foam impactors are impacted upon the car hood
Currently in India, Automotive Indian Standard (AIS) 100, Amendment 1 is used to evaluate the performance of vehicles against pedestrian safety. This standard has been harmonized from the international evaluation standard Global Technical Regulation No. 9 (GTR 9), whose purpose is to bring about an improvement in the construction of the fronts of vehicles and, in particular, those areas which have been most frequently identified as causing injury when in collision with a pedestrian or other vulnerable road user. The tests required are focused on those elements of the child and adult body most frequently identified as sustaining an injury, i.e. the adult head and leg and the child's head. To achieve the required improvements in the construction of vehicles, the tests are designed in such a way that they will represent the rear world accident scenario.
Pedestrian Safety:
According to the requirements of the Australian New Car Assessment Program (ANCAP) for pedestrian protection, it needs to define zones of car hood for analysis, as shown in Figure 4. It can be noted that when the collision projection point locates between (Wrap Around Distance) WAD 1000 and WAD 1500, the head type will use the children head type. The adult head type will be used while the collision projection point locates between WAD 1700 and WAD 2100. In the collision projection point located at WAD 1000 when the children head type will be used.
SHEET METAL OPERATIONS:
- Blanking and piercing
- Deep drawing
- Embossing
- Hemming
Blanking and piercing:
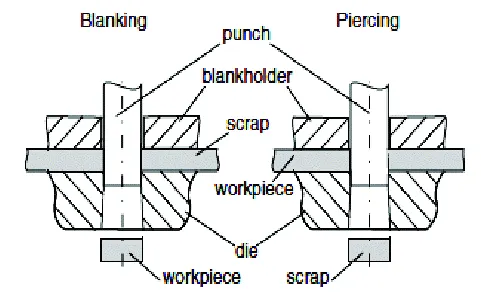
In the blanking, piercing, and shearing process a punch and die are used to modify webs. The tooling and process between the two are the same, only the terminology is different. In blanking the punched-out piece is used and called blank whereas in piercing the punched-out piece is scrap. The process for parts manufacturing simultaneously with both techniques is often termed pierce and blank, an alternative of piercing is punching.
Pros
- Reduces the body weight
- Improves the strength of the body
- Distributes the impact forces
Deep drawing:
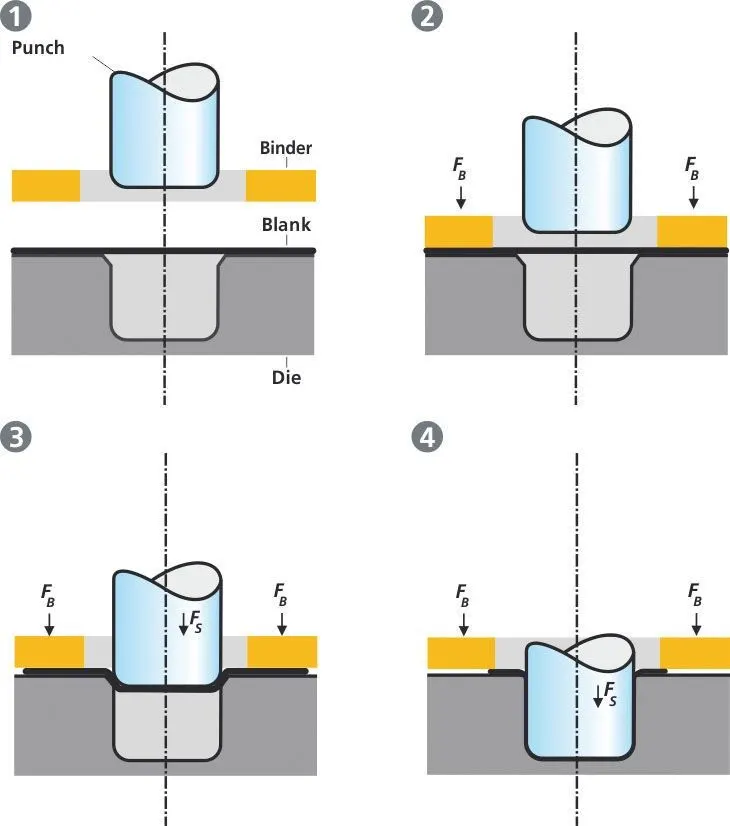
Deep drawing of sheet metal is used to form objects with depths. It is plastic deformation in which a flat sheet metal or plate is formed into a recessed 3-D part with depth several times the thickness of metal. In this sheet, a metal blank is radially drawn into a forming die by the mechanical action of a punch. It is thus a shape transformation process with material retention. The material used is generally aluminium as it can absorb twice the crash energy as of mild-steel while keeping the overall weight lower than mild-steel.
Pros
- It is a very cost-effective method of producing various types of individual parts which are seamless products
- Faster cycle times
Embossing:
Sheet metal embossing is a stamping process for producing raised or sunken designs or relief in sheet metal This process can be made by means of matched male and female roller dies or by passing sheet or a strip of metal between rolls of the desired pattern.
It is done by pressing a sheet into a female die which has a design attached to it. this is usually done with a male counterpart underneath the paper so that the two and design is transferred to the sheet
Pros
- Embossing enables us to highlight the important elements of the products .
- Transfers even the finest details .
- Permanent design that lasts forever.
Hemming:
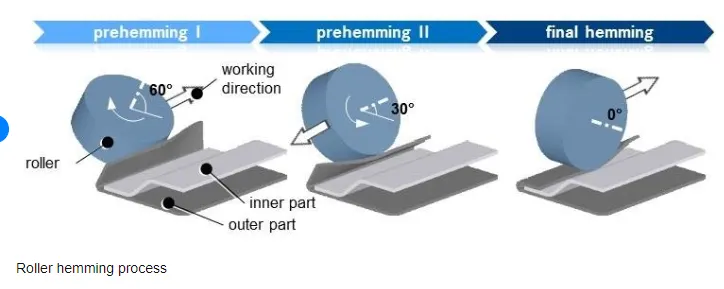
Hemming is a sheet metal forming process in which sheets are joined by bending them to 180 degrees. Automotive body panels and automotive parts such as deck-lids, doors, hoods, and tailgates are formed by the hemming process, in this process usually, a sheet is bent with the help of the inner and outer sheets. hemming is formed in which the edge of the sheet is folded over another parting to achieve a tight fit.
Pros
- To fasten two sheet metal parts by folding the edge of the sheet back on itself.
Types of hemming
- Rolled hemming
- Closed hemming
- Teared drop hemming
- Open hemming
Mastic Points:
Mastic points are areas where the inner hood panel is joined with the outer panel hem using a mastic glue. This mastic glue keeps the inner panel stuck to the outer panel.
The main purpose of the outer panel is for the aesthetic looks. Thus we cannot use bolts or welding. This has to be done with the help of the hemming and mastic sealants. Mastic sealants are elastic compound that behaves like the rubber. It is placed between the outer and inner panel. Initially is it in paste form, but after the hot furnace bath it gets hardened thus joining the outer and inner panel. Mastic sealant has the tendency to increase the strength of the panel and has influence of 80mm diameter. 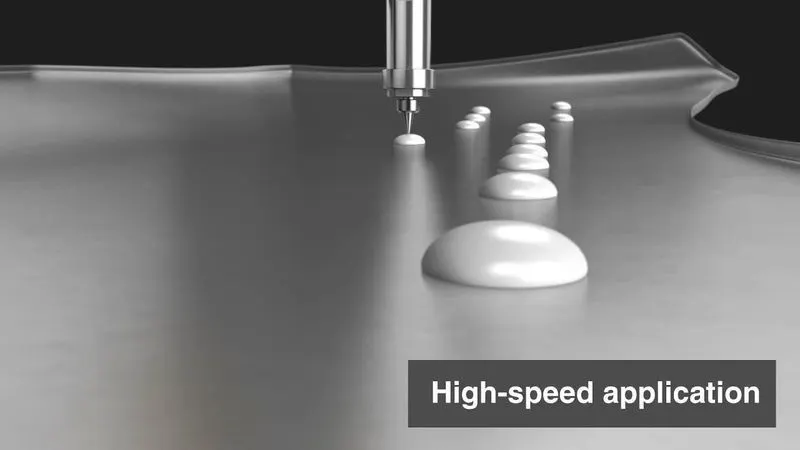
Pros
- One positive characteristic of mastic sealant is that it has a very smooth exterior while keeping its rigid form underneath.
- Surfaces do not have to be primed when using this type of sealant, and although applied thick, it adheres smoothly to any surface. It is important that the area to be joined or sealed be clean and dry, just like any other sealant on the market.
- Mastic sealant may be used outdoors as well because of its waterproof quality. It can be applied on rain duct leaks outdoors, for example.
- It is also favored for areas under high or low temperatures such as heater vents or drier vents and contains ultraviolet inhibitors to make sure that it is protected from damaging effects of the sun that will often weaken other types of sealants. That makes it a good choice for use on roofs, or any surface that is constantly exposed to sunlight. Most mastic sealants will also work well with metal because they do not corrode over time.
- It functions well in areas with mild vibration and heat, like heating ducts.
Cons
- Mastic sealant is not recommended for areas that have too much joint movement, or anything that will be moved a long length.
- It works well with constant pressure on it, but not constant movement.
- It also works best when applied thickly and is not recommended if only a thin layer is needed such as touch ups. Another sealant is a better choice for those types of repairs.
Parts of a Hood
- Hood outer panel
- Hood inner panel
- Latch and Striker
- Hinge engine compartment
- Hinge hood part
DESIGN METHODOLOGY:
- Creating Hood Inner Panel
- Creating Hood Outer Panel
- Creating Embossment for Hinge
- Creating Embossment for Latch
- Creating Reinforcements
- Assembling the components.
DATA TO BE USED:
- Hood outer panel thickness = 0.75mm
- Hood inner panel thickness = 0.75mm
- Reinforcement thickness = 1.5mm
- Minimum fillet radius = 3+0.75= 3.75mm
- Providing reliefs at corners to reduce stress concentration.
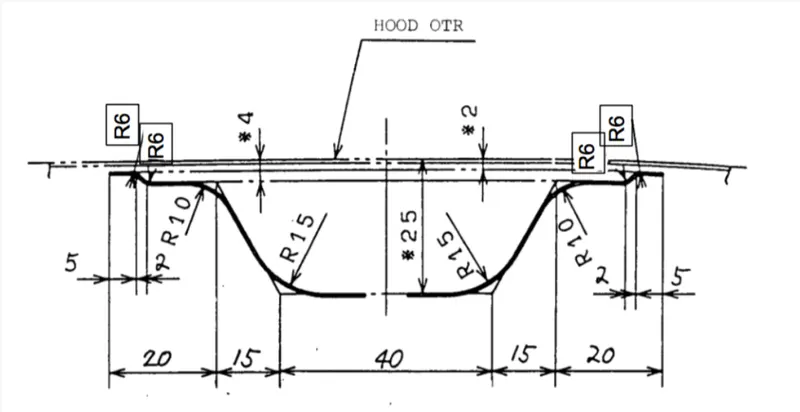
MASTER SKETCH:
HOOD OUTER PANEL:
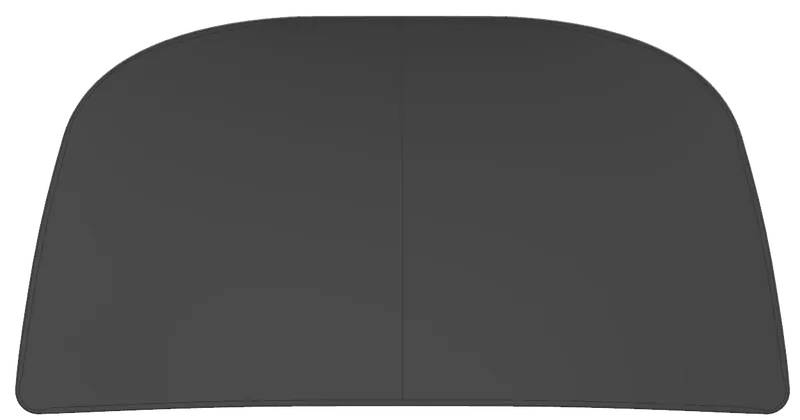
Outer panel is nothing but a outer skin of inner panel. Otherwise called as a cover of inner panel. It is the part, which gives luxurious look to the hood or bonnet. Outer pannel and inner panel cannot join by any welding process like spot welding or rivet, which spoil the outer look of a car.
Design of Outer Panel:
The given Class A surface has been used to create the outer panel.
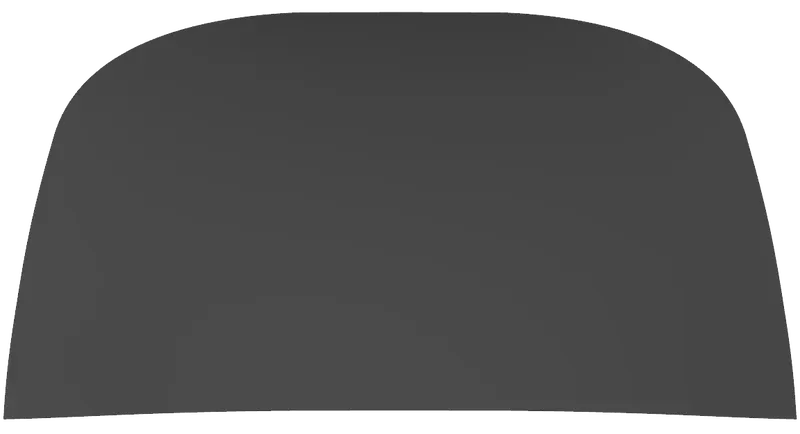
It is then trimmed into half using the XY plane.
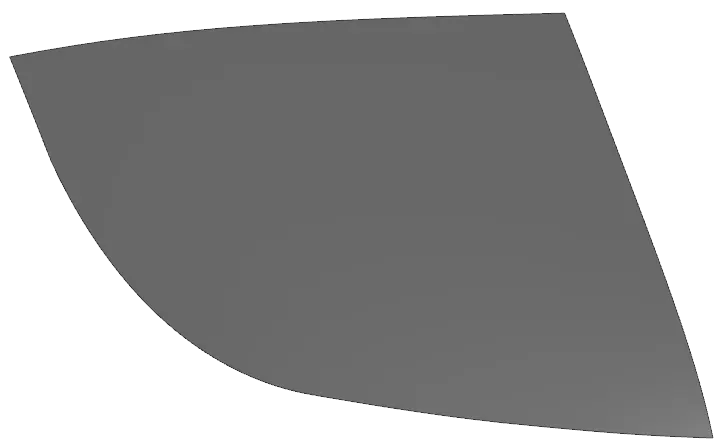
The outer surface is offset to a distance of 0.5mm and the sharp edge is filleted to a radius of 30mm and the main panel is split with the offset created.
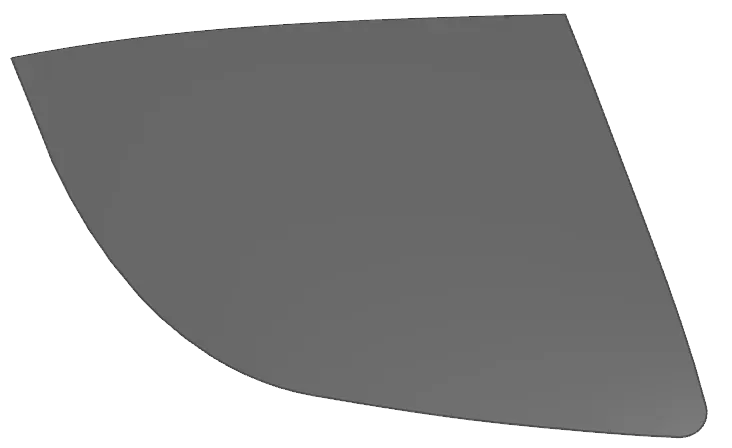
Then the outer edge is swept using Law extension and the offset is created for the Sweept model at a distance of 20mm.
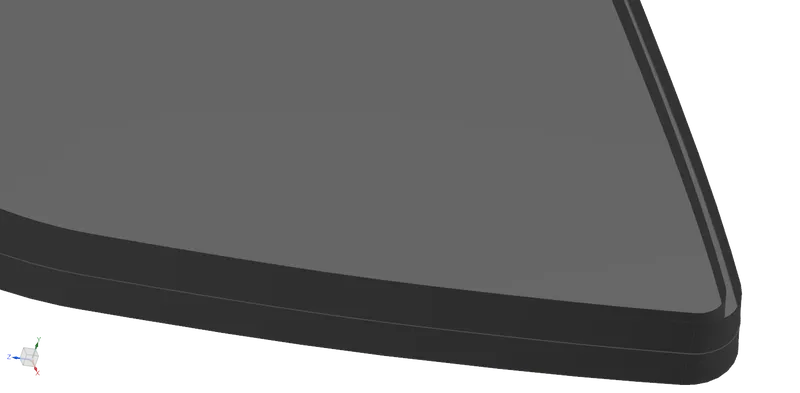
An offset is created with the main panel at a distance if 3.25mm and the inner surface if the panel is trimmed with the offset.Then considering all the top panel,offset panel and the Law extension an edge blend using the three surfaces is created.This is the hem that is required to create in the panel.
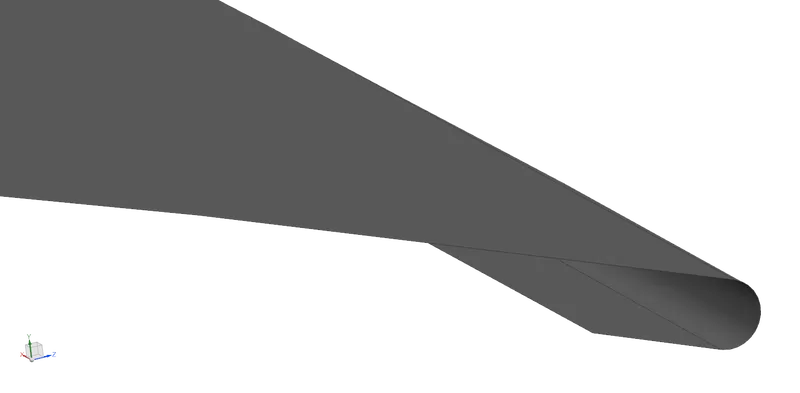
Inorder to give reliefs in the front and right of the panel draw splines using G1 continuity on the front and back side of the hem as shown.
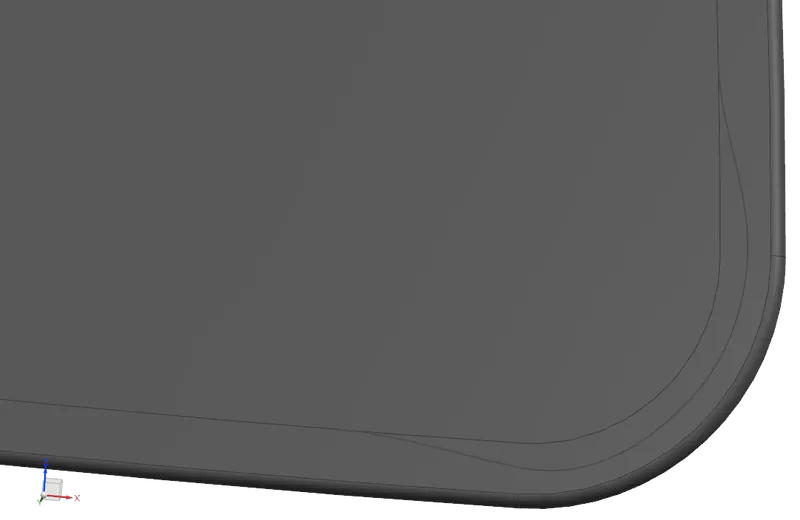
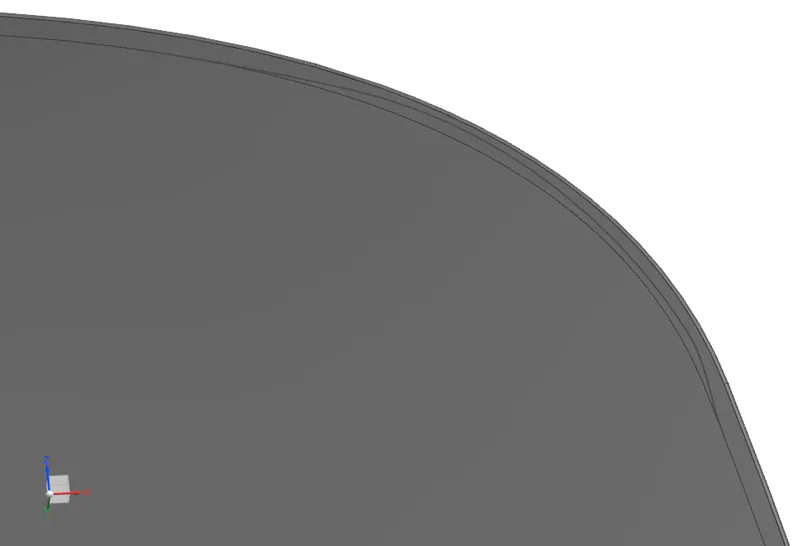
After trim the surface using the created lines.
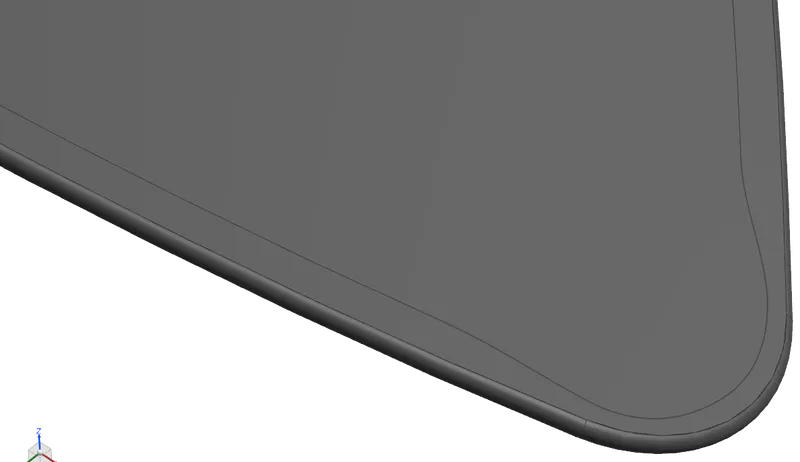
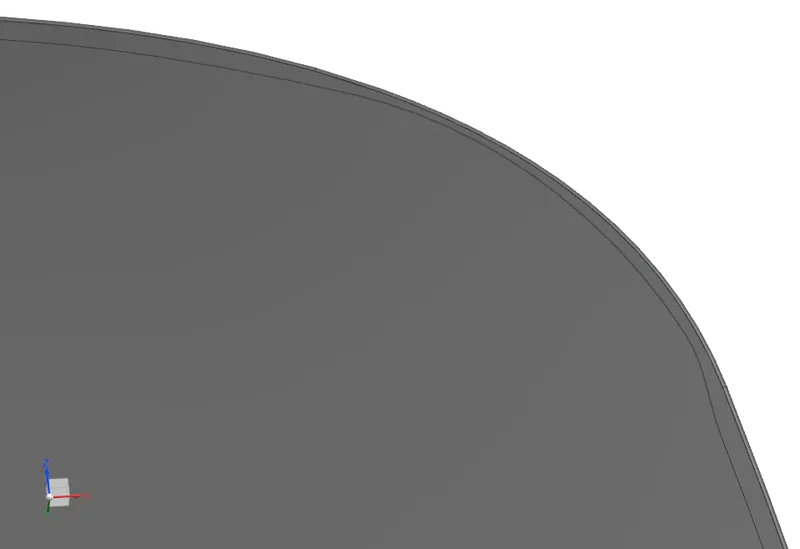
Mirror the obtained panel using Mirror geometry and Sew the surface.
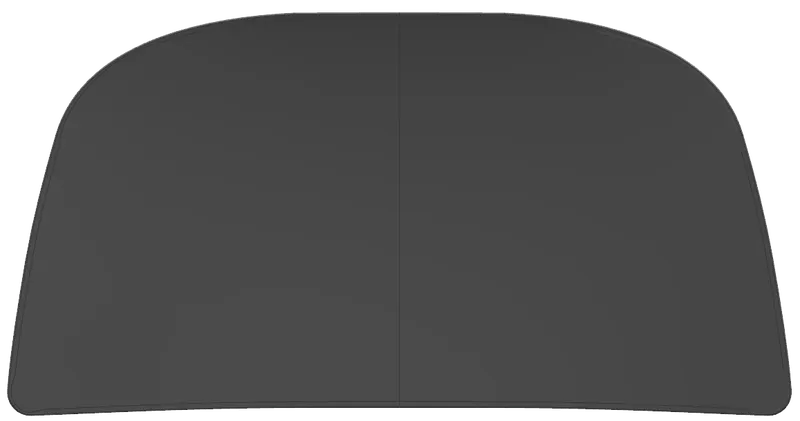
HOOD INNER PANEL:
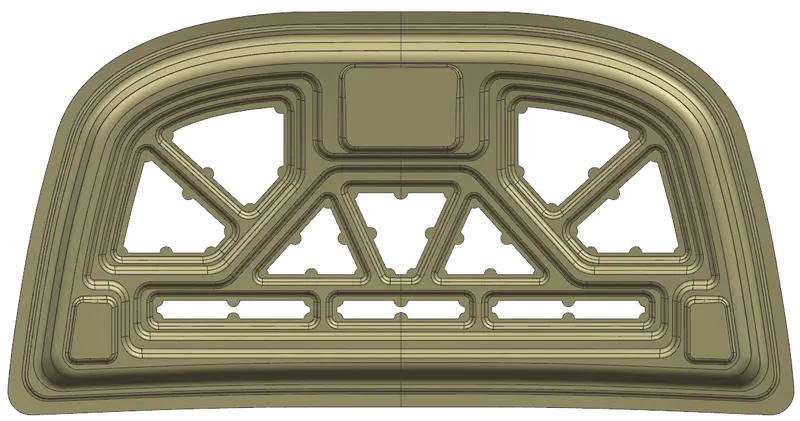
This study introduces a new method for decreasing the hood stiffness, by making a hole on the inner hood panel. To determine the most effective hole position on the inner hood panel, the method of modal stiffness was employed, in an attempt to reduce the HIC from a collision between a vehicle and a head-form impactor. FRF (frequency response function) results for the reference vehicle model on head-form impact simulation were obtained. In addition, modal analysis of the entire vehicle model was simultaneously carried out. Subsequently, using the results of these two analyses, dominant frequencies (41.7 Hz and 83.3 Hz) were obtained, which related to deformation of the inner hood panel. Then, adequate hole positions at each modal frequency were selected, and the inner hood panel was improved, by making a hole at these positions. Finally, through head-form impact simulations on the improved vehicle model with the hole, it was demonstrated that the new method applied in this study is acceptable and useful. In the case of the improved vehicle model with a 40 mm diameter hole on the inner hood panel, this showed a significant reduction in the HIC of approximately 12.2%, compared to the original vehicle model.
Designing of model:
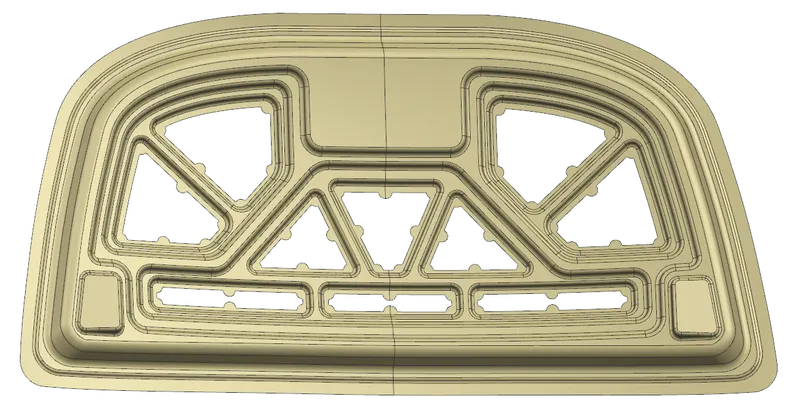
The inner panel is designd using the given Class A Surface.
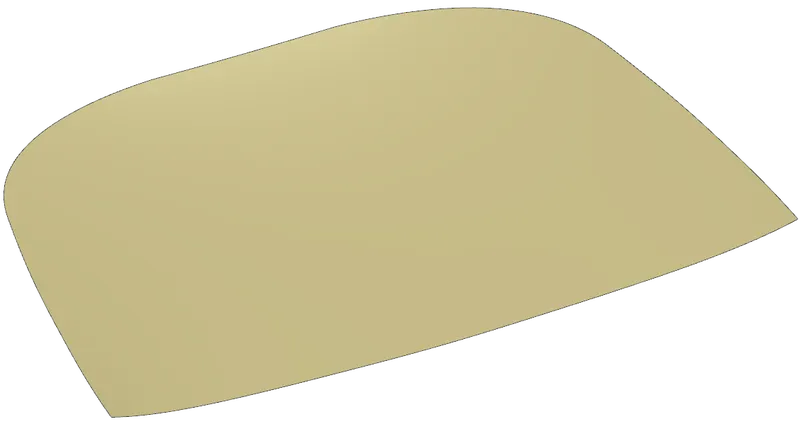
Trim the Surface using the XY plane.
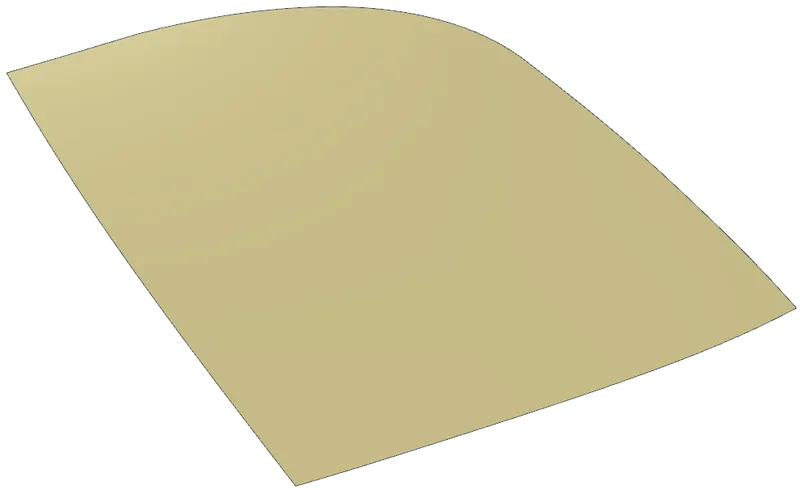
Offset the Surface to 2mm,4mm and 25mm and create offset to the boundaries at distance of 20mm on first offset ,22mm and 35mm on second offset,50mm on the third offset respectively.Trim the sheet as per the offset and discard the material from the sheet as required.
Then use through surface and join the three sheets as required and then use edge blend to give fillet to the edges of the surfaces.
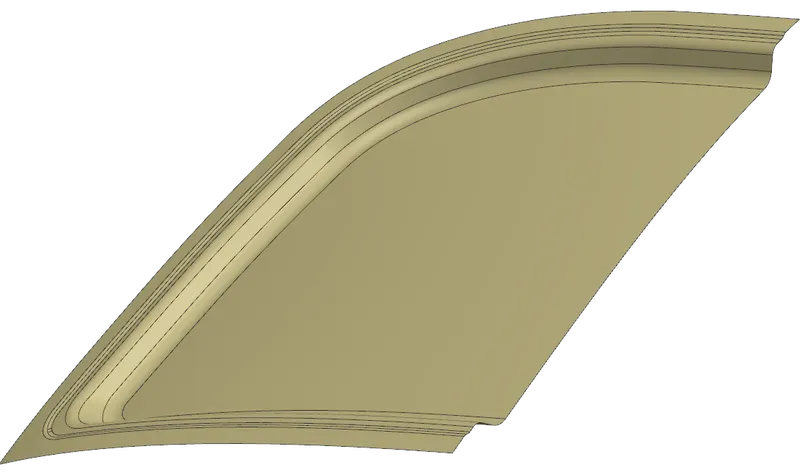
Allow pace for latch and Hinges and then create a profile to create an emboss on the surface.On this emboss create separate profiles and emboss them also to a distance of 7mm.
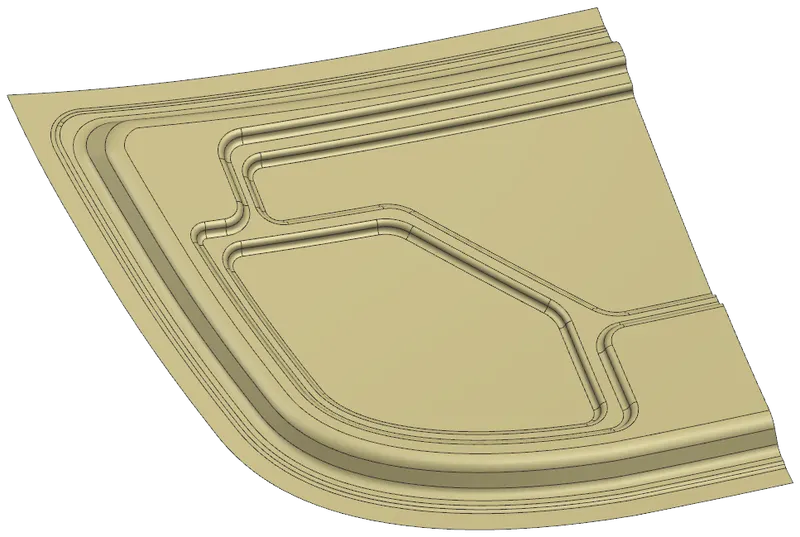
Create individual profiles on these profiles and also emboss them.
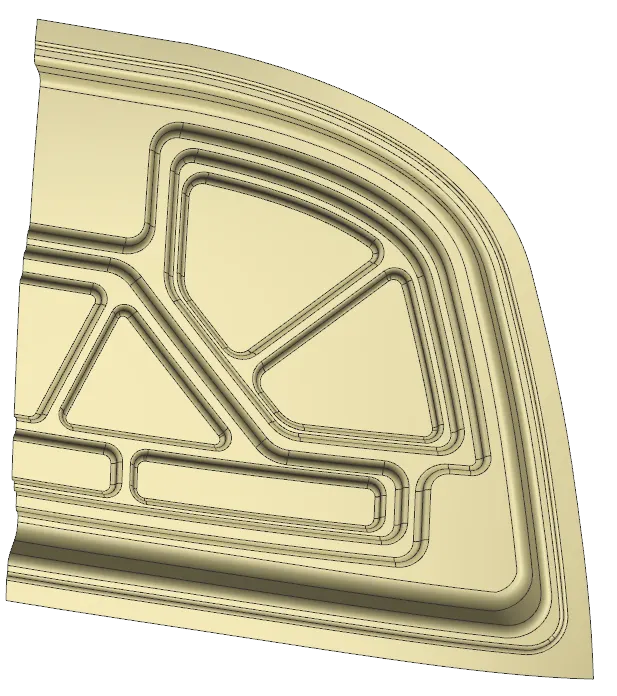
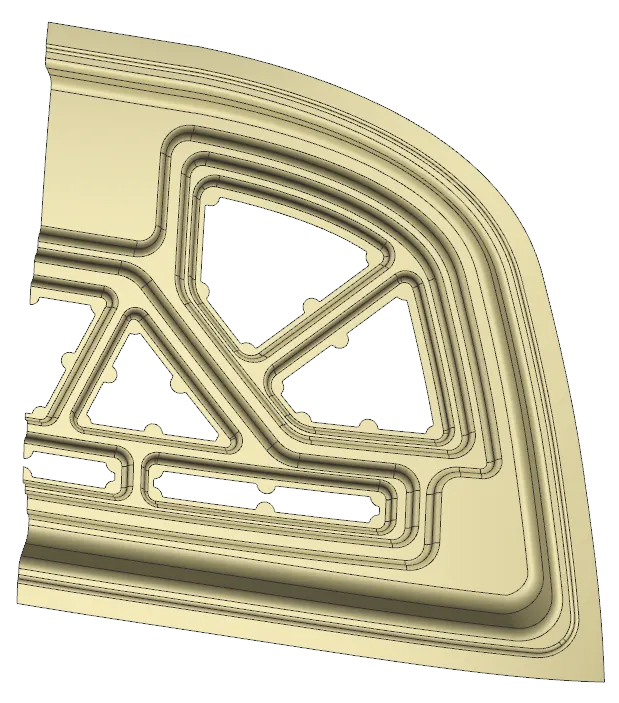
In these emboss create profiles allowing places of the mastric points such that the mastric points are given at these places and then trim these profiles from the obtained emboss sheet.These profiles are mainly added for weight reduction of the hood and also for reducing the head impact.
In the left over pace at the bottom left corner create a plane at an angle of the orientation of the panel and then then a profile is drawn on the plane for adjusting the hinge on the panel and it is embossed from the plane to get a straight emboss.
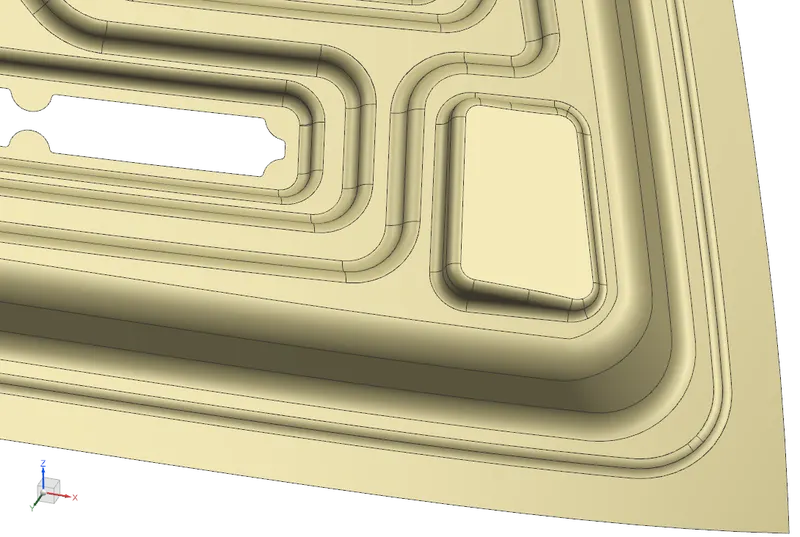
Then the panel is mirrored using mirror geometry and it is then sewed together to get a single panel.
HINGE REINFORCEMENT:
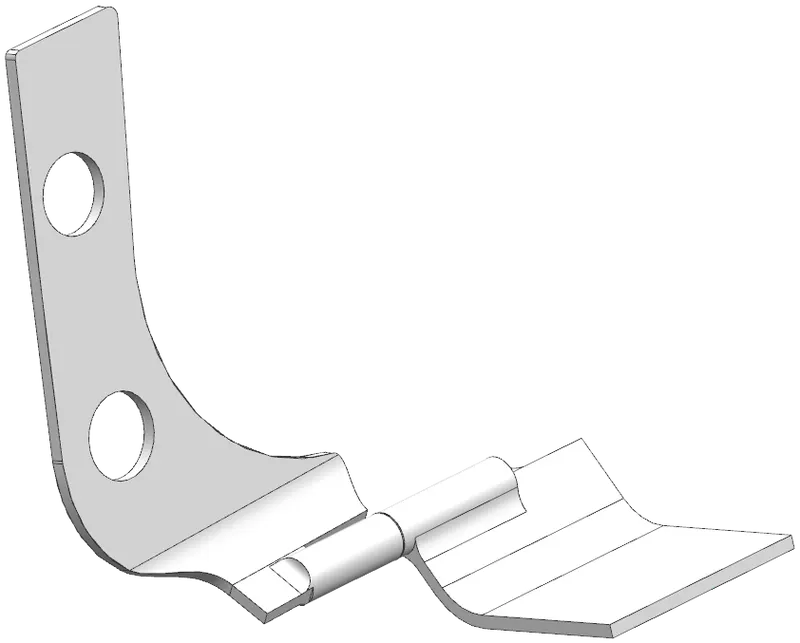
Devices for preventing movement between relatively-movable hinge parts for maintaining the hinge in two or more positions, e.g. intermediate or fully open the maintaining means acting perpendicularly to the pivot axis with a coil spring perpendicular to the pivot axis specially adapted for vehicles
The present invention concerns a hinged door check, for vehicle doors in particular, consisting of two hinged parts which are connected swivelling around an axis of rotation by a hinge pin and which have a holding device integrated between them defining different relative rotational positions. The holding device consists first of at least one catch element kinematically connected with the first hinged part and spring-loaded in a working direction perpendicular to the axis of rotation, and secondly of a track kinematically connected with the second hinged part , essentially shaped like the sector of a circle and arranged coaxial to the axis of rotation with respect to its radius of curvature, having at least one latching point cooperating with the catch element . The hinge pin is connected detachable from the first hinged part by fasteners , so that the hinged parts are separable when unloosening the fasteners while keeping the connection between the hinge pin and the second hinged part and the holding device assigned to the latter.
Designing model:
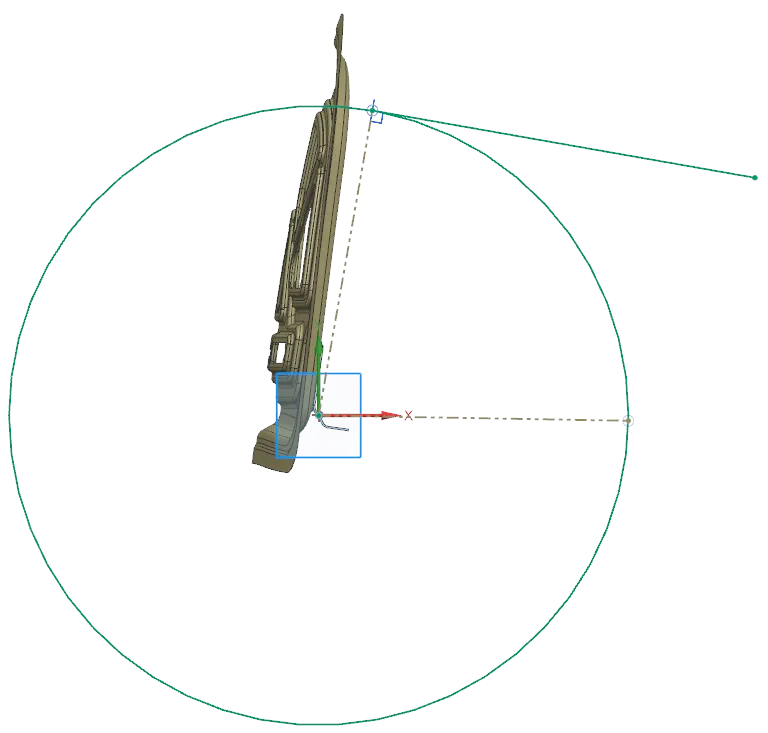
After the inner panel is completed the Hinge Assembly is adjusted on the the surface of the inner panel as shown.
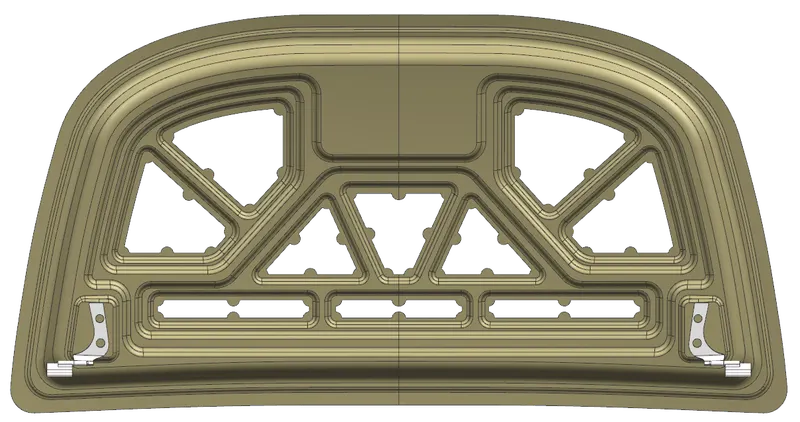
Then a line is drawn creating points on the centres of the hinge assemblies and it is made parallel to the X axis.
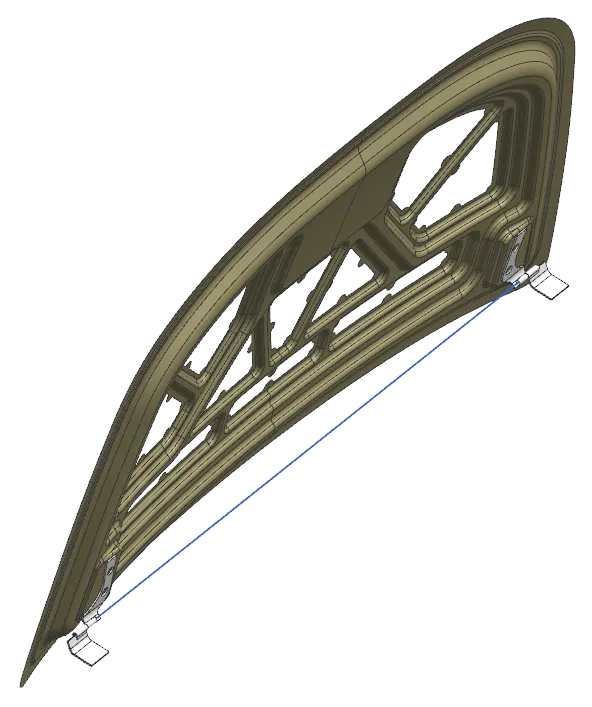
With the line as centre a circle is drawn and a tangent is created to the circle as shown.
LATCH AND STRIKER:
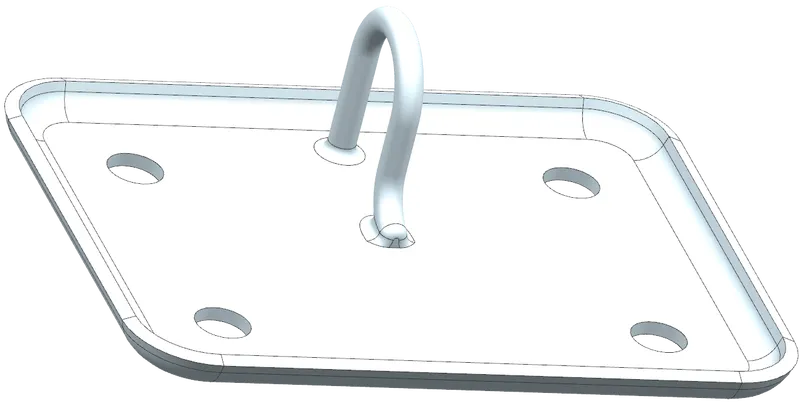
A latch or catch (called sneck in Northern England and Scotland) is a type of mechanical fastner that joins two (or more) objects or surfaces while allowing for their regular separation. A latch typically engages another piece of hardware on the other mounting surface. Depending upon the type and design of the latch, this engaged bit of hardware may be known as a keeper or strike.
A latch is not the same as the locking mechanism of a door or window, although often they are found together in the same product.
Latches range in complexity from flexible one-piece flat springs of metal or plastic, such as are used to keep blow moulded plastic power tool cases closed, to multi-point cammed latches used to keep large doors closed.
Designing Model:
The Latch is brought near the Inner panel and a sketch is drawn as show in the figure.
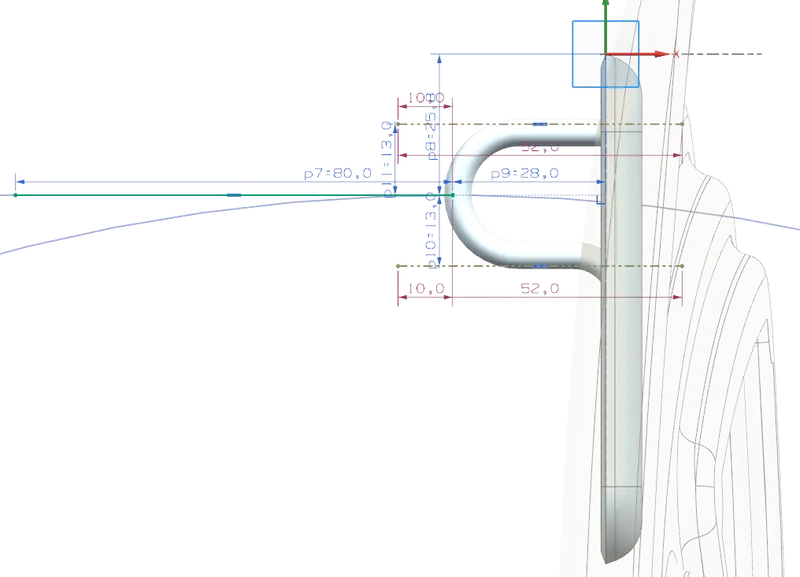
Then the drawn sketch is coincided with the tangent in order to freeze the moving direction of the Latch and striker mechanism.And A plane is created on the base surface of the striker and a profile is drawn for the placemnet of the Latch as shown.
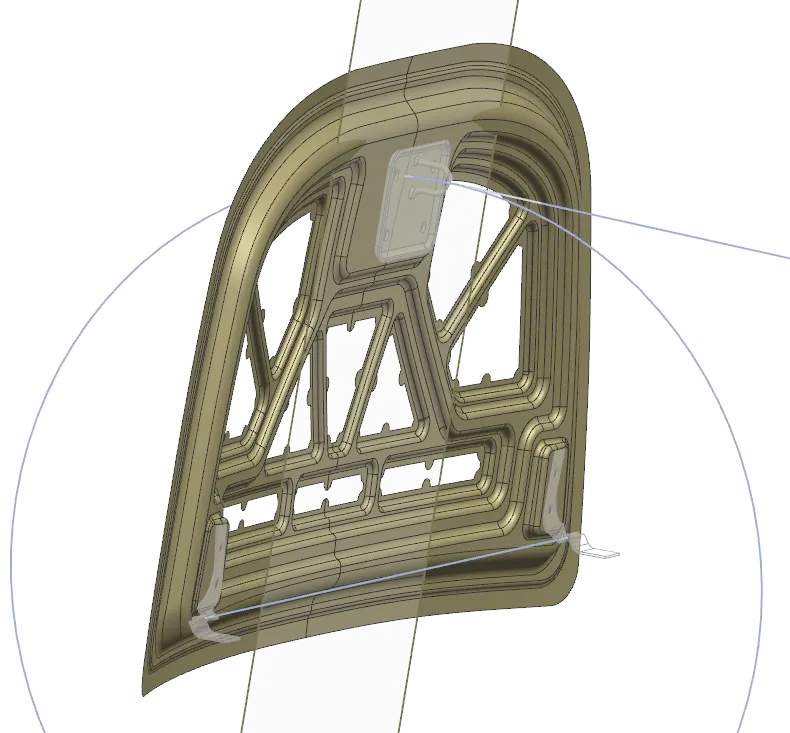
The profile drawn is embossed onto the Panel to get a straight surface.
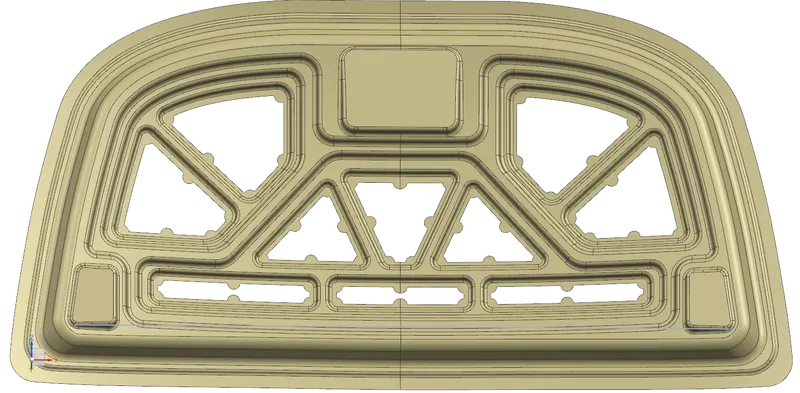
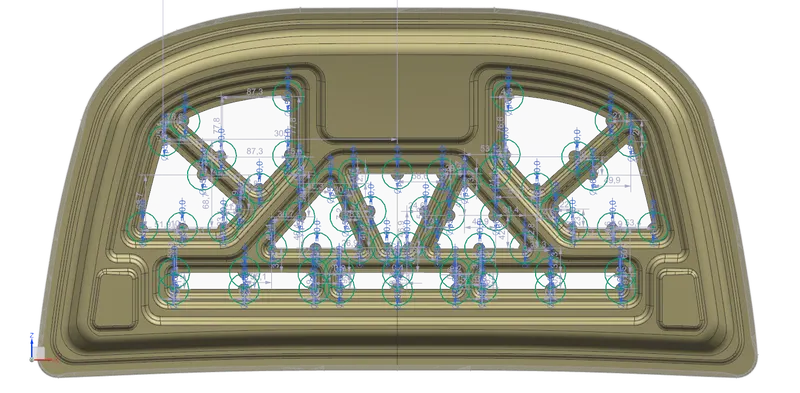
Mastic Data:
The challenges of automotive metal bonding described previously are still present. One difference between the two applications is bondline thickness. A hem flange maintains a very thin bondline, around 013 mm (0.005 in), while an anti-flutter bondline thickness is generally around 20 mm (0.75 – 0.8 in). The shape of the applied adhesive is also very different. Instead of a bead, the adhesive is applied in the shape of a gumdrop or chocolate drop. It is strategically spaced across the inside surface of the outer panel, aligning with the shape of the inner panel. The placement also provides support for the outer panel to pass compression tests (developed to survive someone sitting on the hood without causing a dent). After application of both adhesives, the inner panel is placed and the perimeter of the outer panel folded over to form the hem flange.
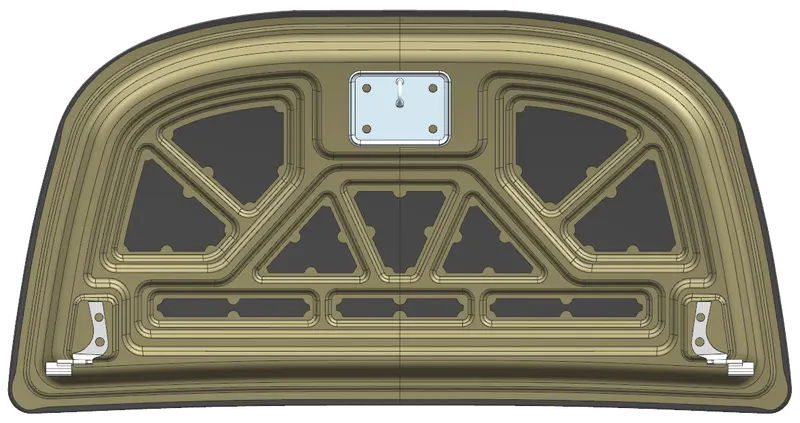
The Final Assembly of the Hood Design os as shown below:
CONCLUSION:
In this challenge Hood or Bonnet is designed successfully in a top-down approach and a creating the Inner panel using given Master Sketch and assemble the Latch and striker and hinge assemble with reinforcement. Which satisfies the industry manufacturing requirements.