Coin Holder Plastic Component Design Using CATIA V5
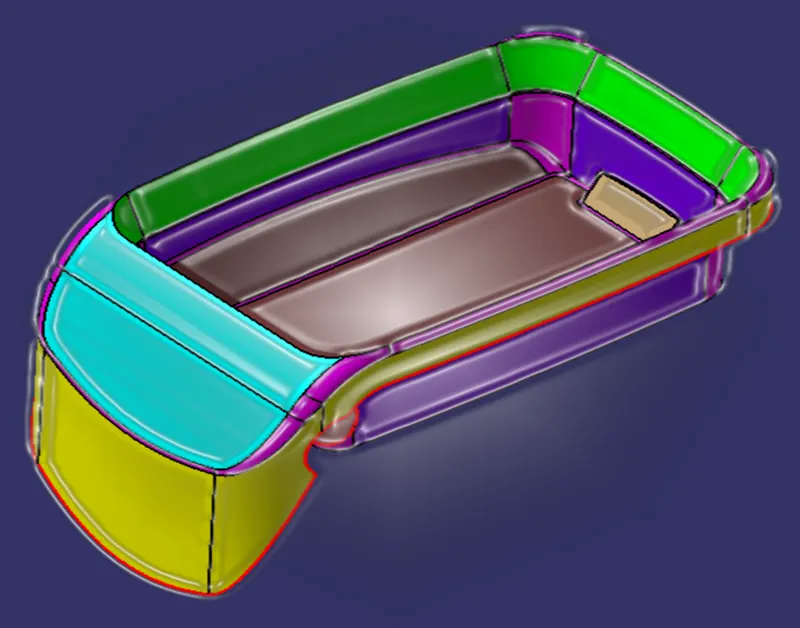
AIM: Coin Holder Plastic Component Design Using CATIA V5.
OBJECTIVE: Creating Center console Coin Holder Plastic Design from given CLASS A and Draft analysis of the component.
Key Points:
- Bisecting method for generating Main Tooling axis
- Generating CLASS B surface from given CLASS A
- Generating CLASS C surface from given CLASS A
- Trimming CLASS B and CLASS C
- Generating Final trim for CLASS A, B, C surfaces
- Generating final plastic component from Surface component
- Generating draft analysis on component
- Conclusion
Tooling Axis (Bisecting Method):
Tooling Axis is an imaginary axis in which direction the tooling operation is performed. In Injection molding, the direction in which the mold is opened / closed, is called tooling direction.
The draft angle, which also plays a major role in plastic component design, is decided with reference to the main tooling axis of the component.
Bisecting method for generating Main Tooling axis of component.
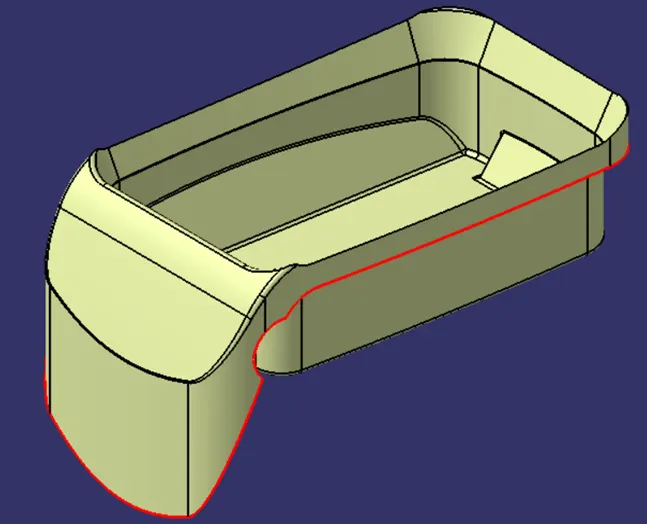
- The given Input will be CLASS A Surface of the component, which we need to verify for boundary discontinuities.
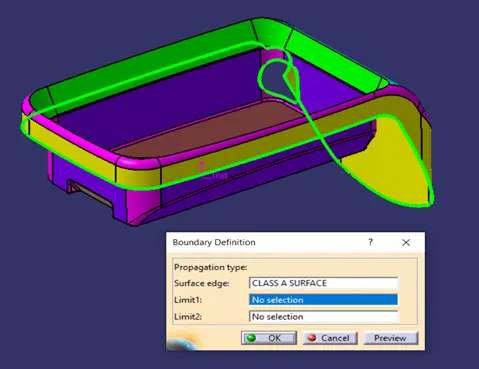
2. Then we can make a dummy tooling axis for reference by approximating from part geometry.
Observing component from different directions, we can assume the dummy tooling axis location. That would also help as first step of bisecting method.
The Z direction tooling axis, clears the drafts on sidewalls of the component and also top surface of the bezel. It is evident from below image that Z direction should be the Tooling axis of the given component.
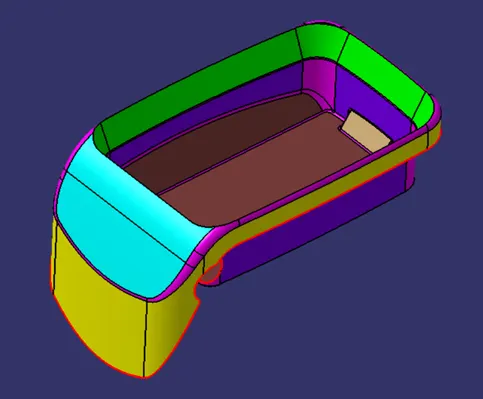
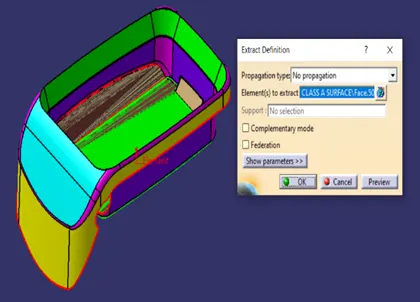
3. For that we have to create an AXIS System on component to facilitate the Bisecting method for tooling axis creation.
Extract a base surface and make a point of surface. Create new axis system on that point. This axis system acts as reference to create dummy and main tooling axis.
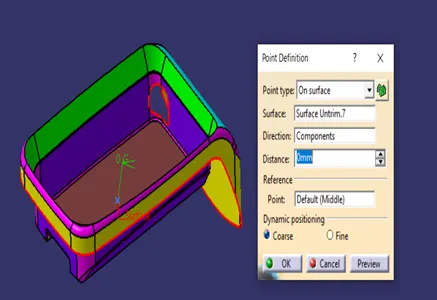
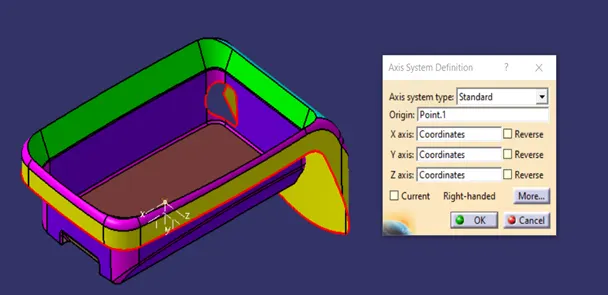
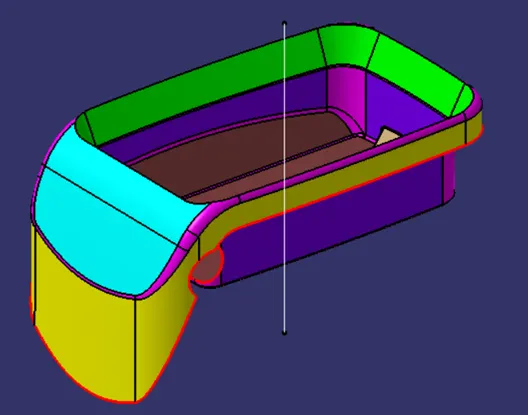
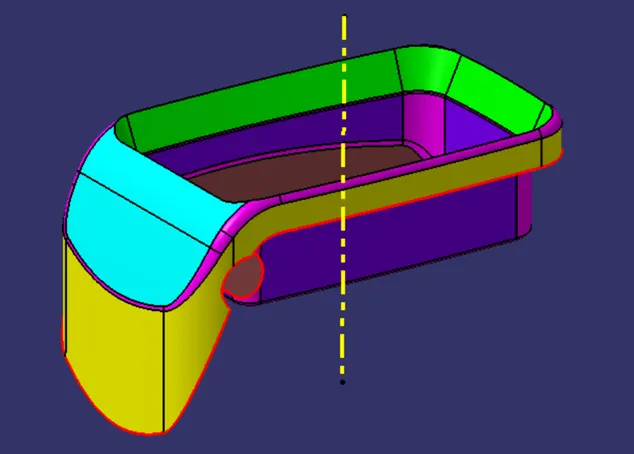
4. Now that the tooling direction is defined, we can make temporary tooling axis for the part as shown below. Taking the point as a reference, below image shows temporary tooling axis in Z direction. Taking it as a reference, we can proceed to define actual tooling axis using bisecting method.
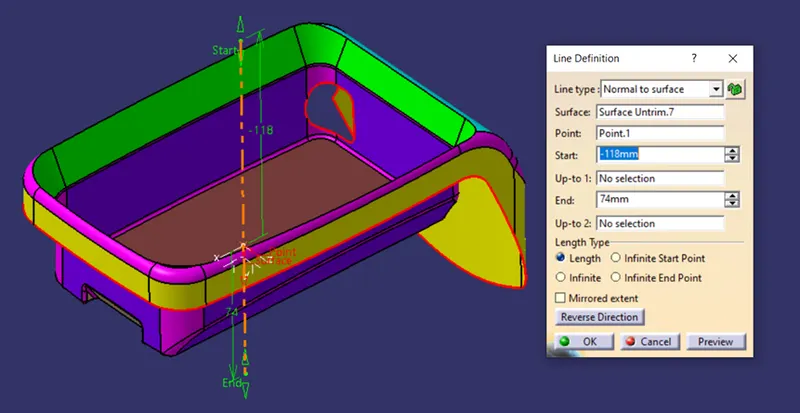
5. By looking at the component and desired bisecting approach, we can assure that the Main Tooling axis is in the same direction as of dummy axis. Moreover, upon looking for symmetry of the component, we defined the Main tooling axis as in the same line of previous axis. It is as shown below.
Generating CLASS B Surface from CLASS A Surface as Input:
We are given a CLASS A surface as an input. Firstly, we have to generate CLASS B surface from given surface to generate solid component. CLASS B is generated by offsetting CLASS A surface. The critical parameter to consider is the component thickness. CLASS B is surface offset equal to part thickness.
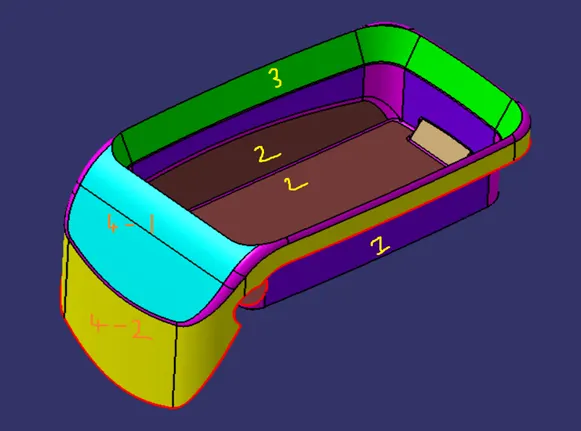
Given CLASS A is divided into four main surfaces which will be helpful in generating CLASS B surface. Below image shows the CLASS A, and methodology to follow in next steps.
Offsetting Bin Walls:
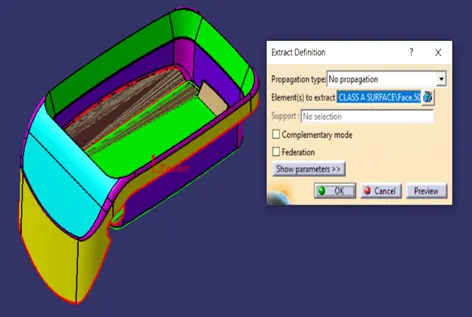
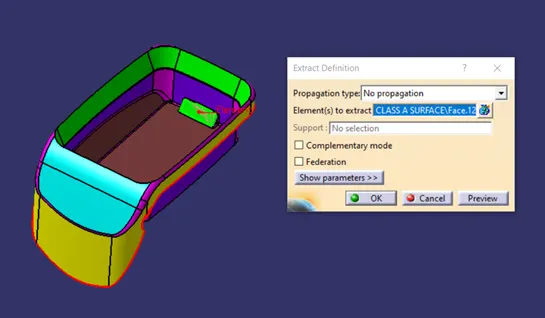
Avoiding fillets given here, Walls in violet colour can be divided into 4 surfaces. Each surface is extracted from CLASS A, Untrimmed and extrapolated to get the desired output. It will form the base for final CLASS B surface.
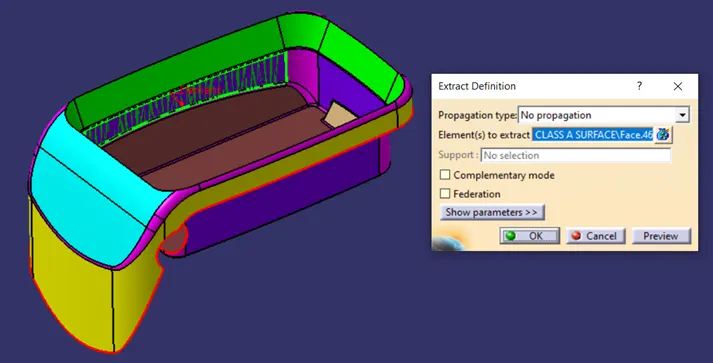
Extracting the surface highlighted in green, using “Extract” command.
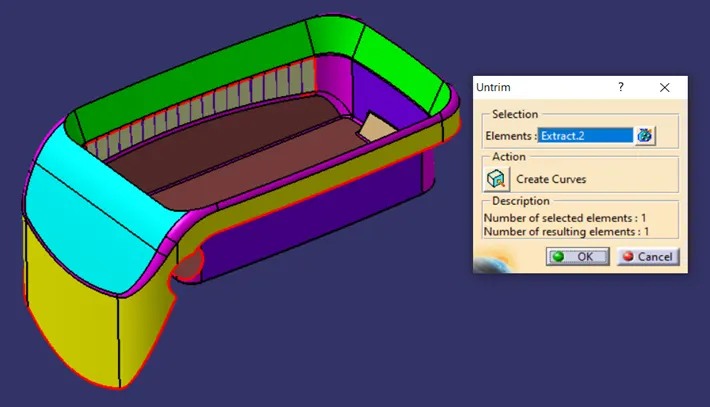
After extracting the surface, Untrimmed it using “Untrim” command.
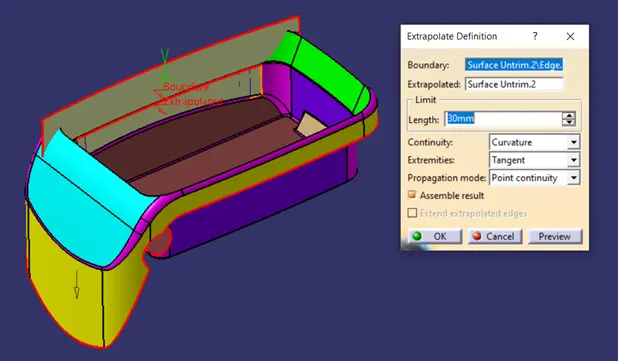
To further extend the surface, we can use “Extrapolate” command. It will extend the surface tangentially in all the directions. It will be useful in final trim of the component.
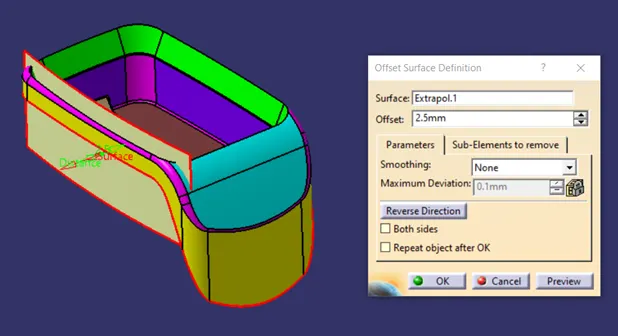
Further offset this surface, with value equal to part thickness. Here part thickness is 2.5 mm.
Further continue the same process to Extract, Untrimmed, Extrapolate the surfaces to form CLASS B surface.
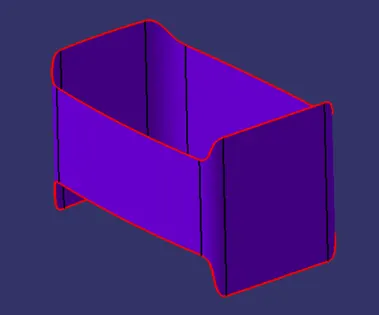
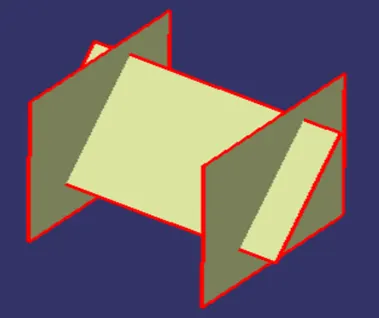
All surfaces of bin wall are extracted from CLASS A input. These surfaces, after Untrimmed, Extrapolated, shown below.
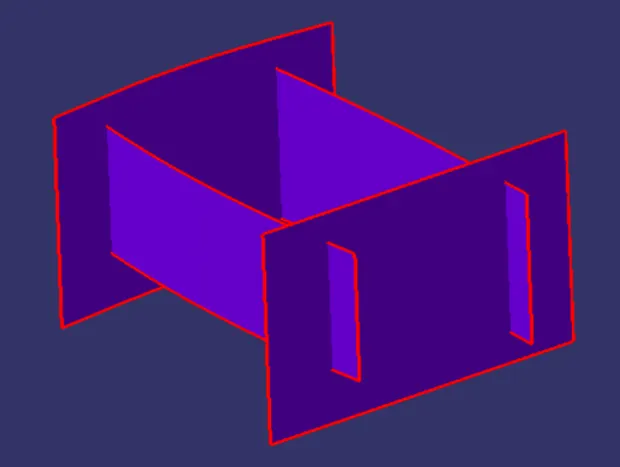
Now that we have surfaces offset, we can trim them together to get initial bin wall CLASS B. And we can also give fillets to the output surface.
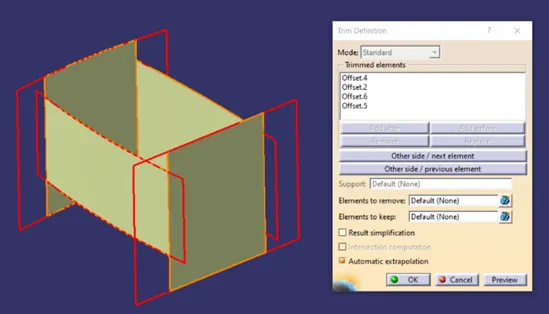
Offset the base:
Similarly, we can extract wall base surface, untrimmed and extrapolate it. And offset it by 2.5 mm.
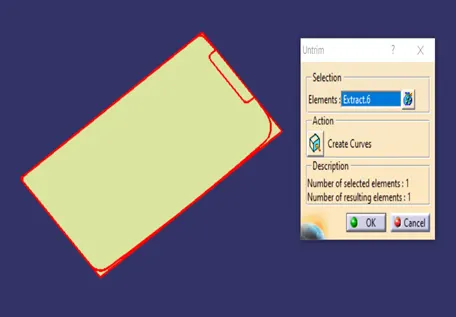
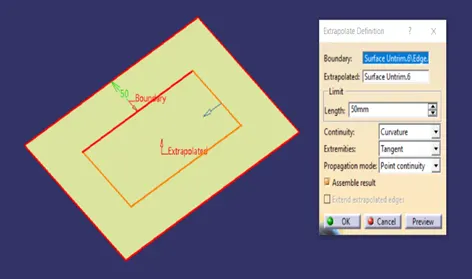
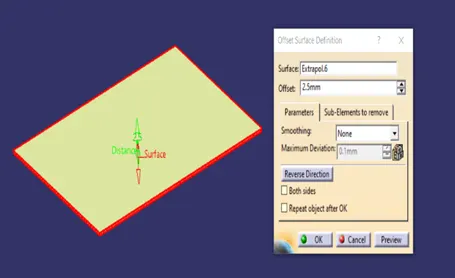
As it is evident from CLASS A, that base of bin has two different surfaces. Which are extracted, untrimmed, extrapolated, and offset to given value.
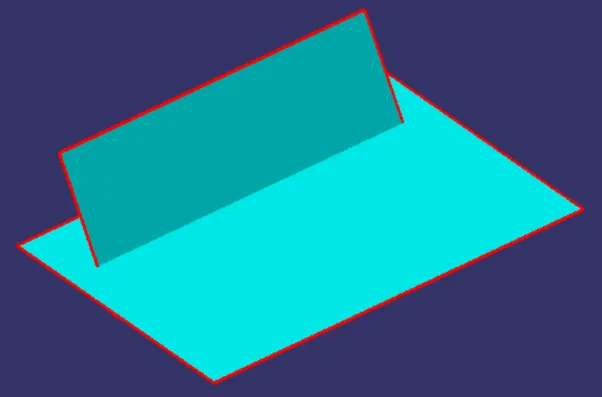
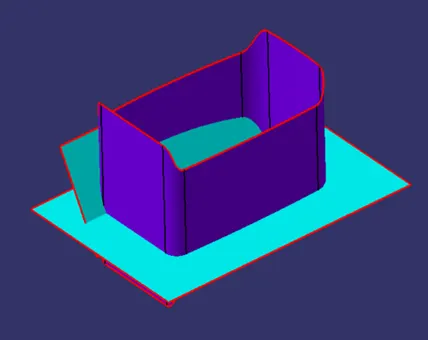
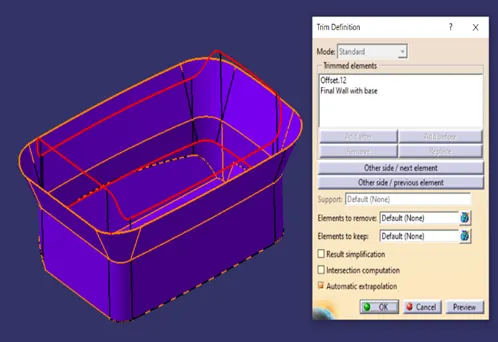
At this stage we have bin wall and base. These we need to trim to form CLASS B of the BIN portion.
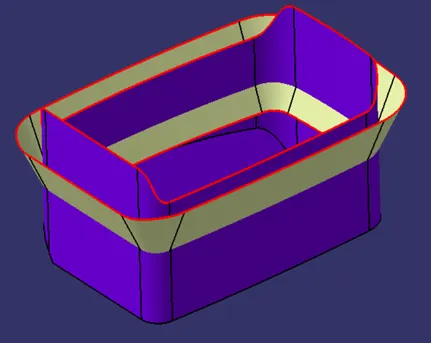
Offset Outer Top surface:
Similarly extract top surface outer border from CLASS A, untrimmed and extrapolate it. And offset it by 2.5 mm.
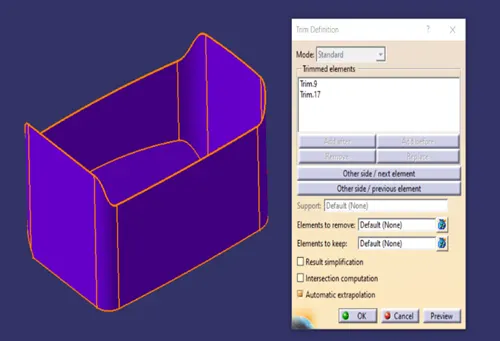
Again, this surface needs to get trimmed with above output surface to complete Bin walls along with base and outer surface at top of the Bin.
Offset Outer Flanges:
Here we have a Complex outer flange surfaces which we need to extract and offset separately.
Here is the first offset of outer flange.
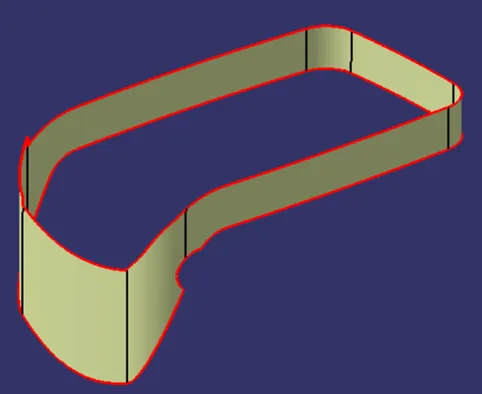
Here is the second offset of the flange. It is extracted, untrimmed, and joined together to get one surface and then it is offset to 2.5 mm value. Below shows both surfaces output.
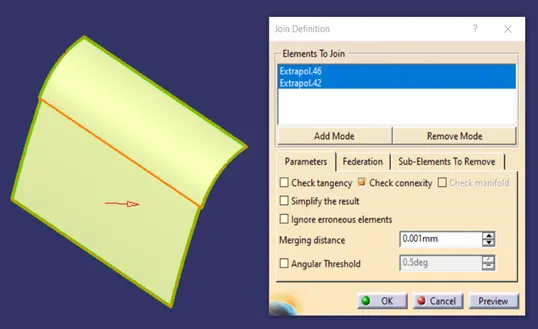
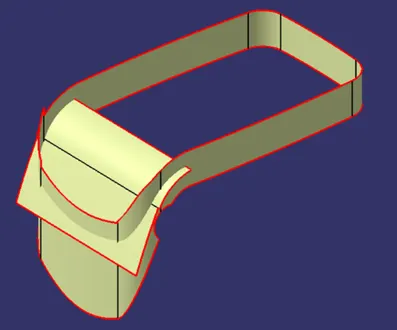
These surfaces are trimmed together and final output is as below.
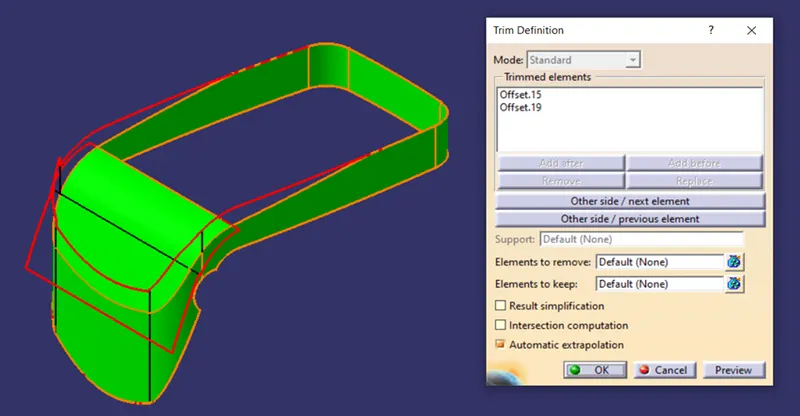
Now that we have outer flange ready as a separate surface, we can trim it with the bin wall output.
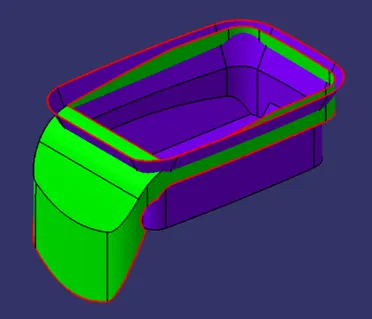
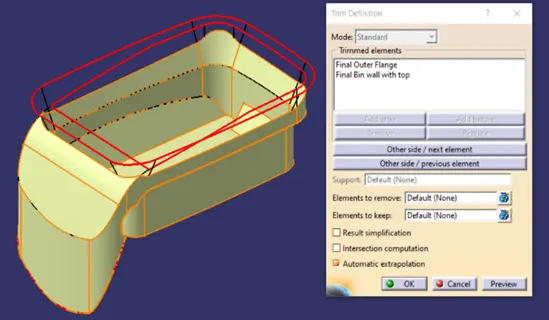
Now after carefully observing component, it has some sharp edges at top of bin, which is corrected and fillets are given on the component. This would complete our work o CLASS B surfaces.
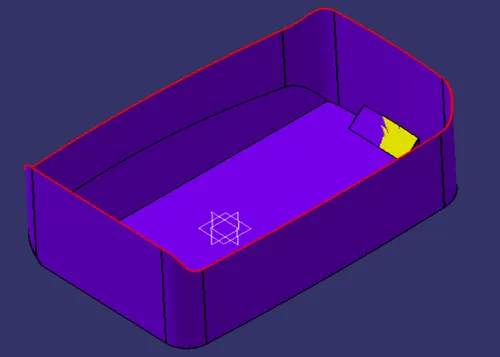
Before Proceeding with CLASS C, we have another small portion at wall base, that we need to work upon. There is some protruding part inside base wall. We will follow same procedure to extract, untrim, extrapolate, trim and offset the portion. At the end, we trim it with wall output.
Generating CLASS C surface from CLASS A surface:
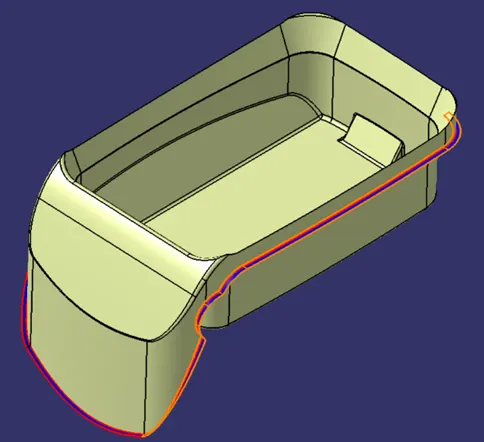
CLASS A surface is used as reference to generate CLASS C surface. We need to extract outer boundary from CLASS A surface. Extract boundary using “Multiple Extract” Command. Here we can use tangent continuity option to select appropriate edges. We have to use this command several times to extract all edges.
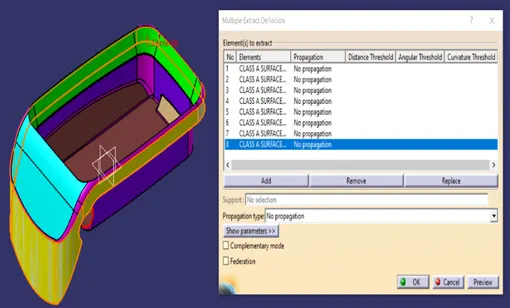
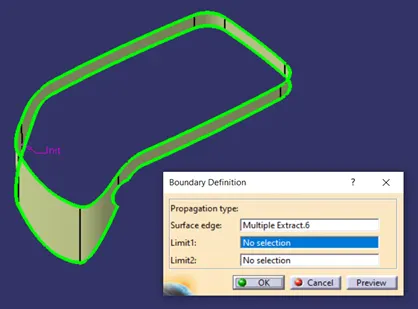
To make CLASS C surface, we only need outer most edges. So, we extract that boundary again.
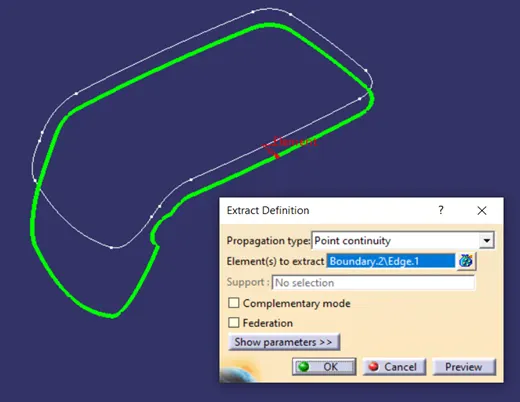
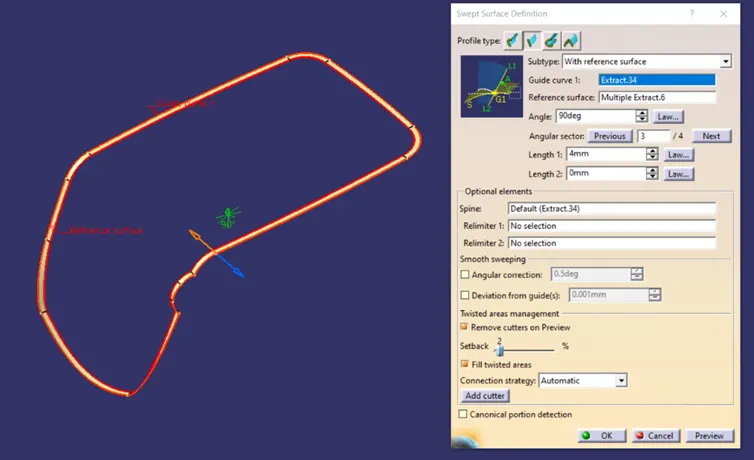
Extracted boundary is used to generate CLASS C surface using “Sweep” command. This surface is sweep along main tooling axis to generate draft angle along tooling direction. We need to be careful while generating draft angle wrt tooling axis. In our case, we need the CLASS C sweep along 90° angle wrt the class A surface to generate closed surface. This outputs our final CLASS C surface.
Trimming CLASS B and CLASS C:
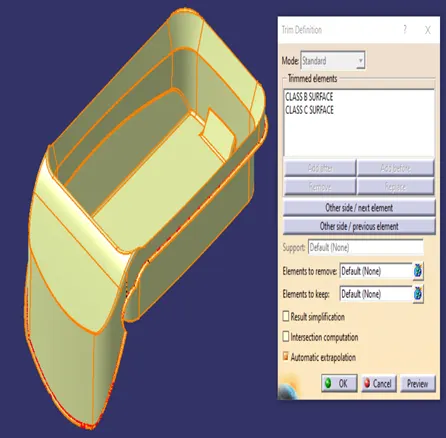
Below image shows CLASS B and CLASS C surfaces ready to trim with respect to each other.
Trim CLASS B and CLASS C surfaces together. Output is shown below.
Generating Final Trim CLASS A, CLASS B and CLASS C:
In our case, CLASS A need to be joined with above output to get closed component.
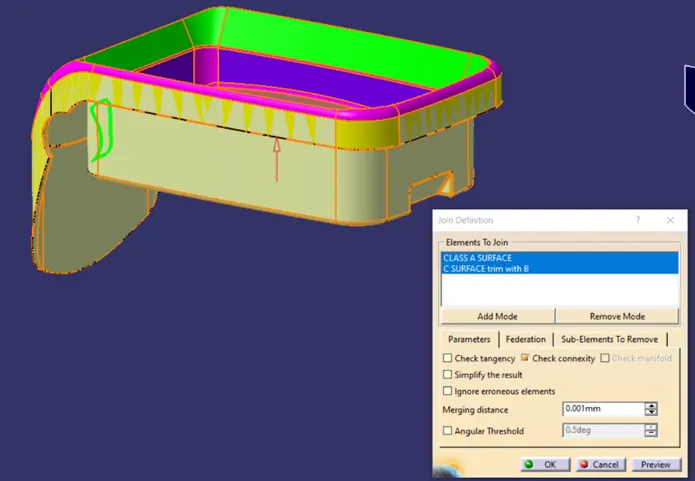
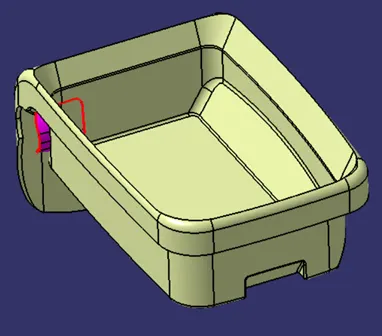
In the above image, we can see one small patch boundary at bin walls, it shows that side core hole profile is required to be trimmed along with CLASS B surfaces.
We extract the hole boundary and sweep it along 90° wrt to CLASS A surface.
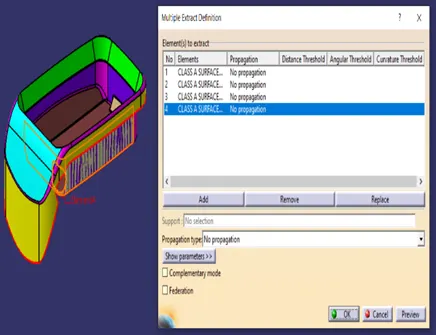
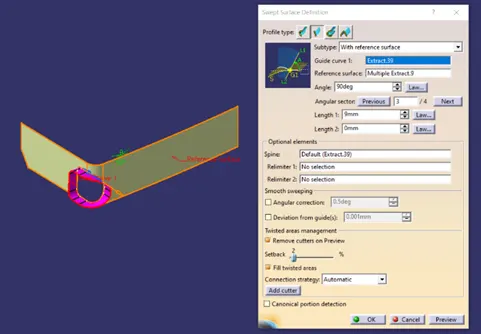
Finally, we can trim that side hole profile from our Last output, to get final surface component.
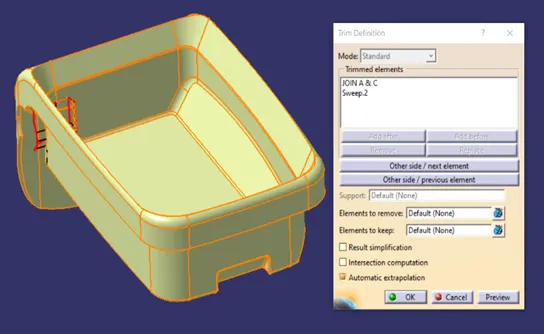
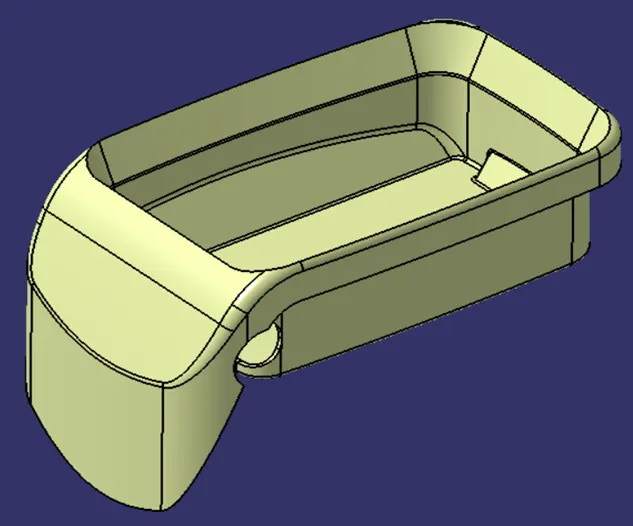
The output final closed surface part is shown below.
Generating final plastic component from Surface component:
Above method has given a closed surface component as output. But, for manufacturing purpose, we need to have a solid body part. For that we need to migrate to CATIA V5 part workbench.
Here, in part workbench, we need to insert new body, insert menu “Body” command. This creates a new body inside part module.
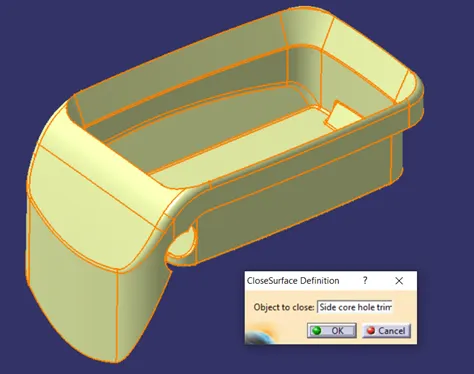
In body, we can use “Close Surface” command to convert our closed surface component to Solid body part. As the name suggests, all surfaces should be closed to get proper solid body.
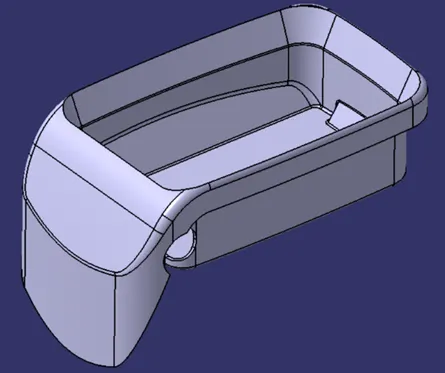
Choose the command and select our surface component. It will be converted to Solid body component. One of the main points is that, it won’t convert surface part to solid body if any of the boundary is open from surface component. And the final output solid part will be as shown in image.
Generating draft analysis on component:
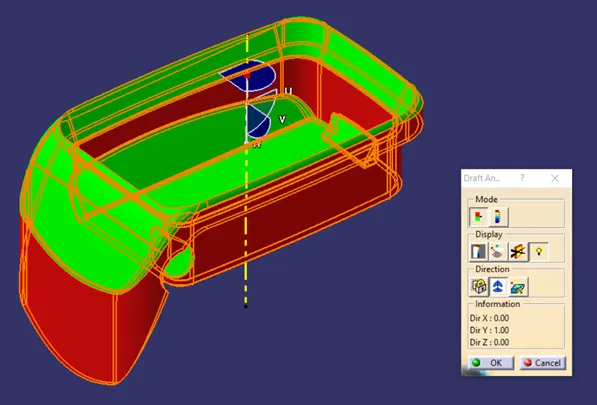
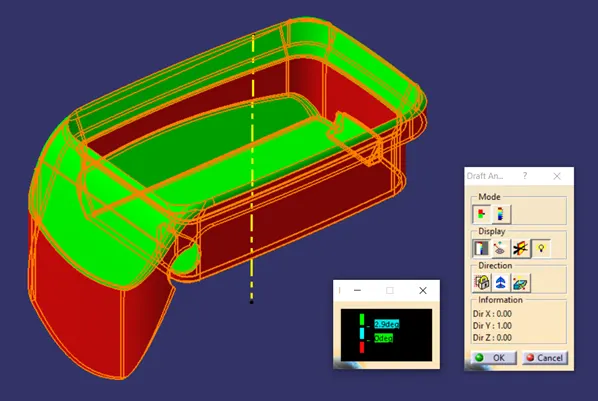
Draft analysis gives you the overall information about draft angles required with reference to main tooling axis of the component. While designing, we could give the draft angles to desired faces to clear the tooling direction. To evaluate given draft angles, we use draft analysis tool in CATIA V5.
Draft analysis steps.
- Material mode plays a vital role in generating draft analysis. The tool calculates draft angles required based upon material properties and behaviour during tooling operation. Not setting up, will give you a warning message.
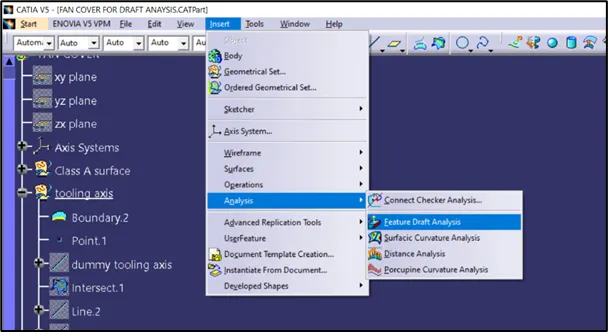
- After setting material mode, click on “Feature Draft analysis” from Insert menu. A dialogue box will be opened.
3. Use the compass option from the box, to align the current axis system with main tooling direction. It would create draft analysis with reference to tooling axis. Carefully align the axis system with main tooling axis and click on the component anywhere to create draft analysis.
Conclusion:
- Created the Tooling axis using bisecting method.
- Created CLASS B and CLASS C surfaces out of given CLASS A as input.
- Generated Solid body component from closed surface part.
- Used the main tooling axis for creating draft analysis on the component.
Hence, we have successfully created CLASS B and CLASS C surfaces using given CLASS A, resulting in closed surface part. This surface part is converted to solid plastic component. Used bisecting method for main tooling direction and learnt about importance of draft angle and tooling axis for plastic manufacturing process.
References: