Modified on
The Basics of Mold Design: Selecting the Right Parting Surface

Skill-Lync
By now you would already be aware of parting surfaces from the previous articles on the basics of mold design. These surfaces are used for a variety of reasons in the molding process.
In this article, you will look at five examples of parting surfaces to acquire a better understanding of how to select the appropriate one for different plastic components.
What are Parting Surfaces and Parting Lines?
The line of separation on the plastic portion where the two halves of the plastic injection mould meet is known as a parting line. It runs through any plastic mould that has a core and cavity design. A surface that divides the mould block into the cavity and the core is known as a parting surface.
Example 1-Parting Surface
Since the parting surface defines the mold blocks, the selection of a parting surface will also affect the difficulty and complexity in creating the mold for the part. This can be explained using a hexagonal component, as shown in the image below.
_1668178413.png)
The blue region that you see is the component to be manufactured. You can see two different parting surfaces on the left and the right for this model.
In the left case, you can see that once the component is molded, the core can easily move to the left, and the part can come along with it.
However, in the right case, the part cannot move along with the core. It will be stuck in the cavity; an undercut will form due to the parting surface at the end. The undercut does not allow the plastic component to come out along with the core.
That shows how the selection of the parting surface can increase or decrease the difficulty of the demolding process. You need to choose such a parting surface that leads to a minimum number of undercuts. This selection will ensure that the demolding process is also simple.
For the specific model in the image, the selection of the parting surface in the left diagram is preferable.
Example 2- Parting Surface
Here is a case that shows how having an angled parting surface is more appropriate.
_1668178533.png)
The example component is on the upper right-hand side in the image above. First, take a look at the left side where a straight parting surface was used. Here, the blue part is the component, and the green color indicates the parting surface.
In this case, the parting surface was selected along the flat base of the component. But once the material is injected and solidifies, it will not be possible to remove the part from the mold due to undercuts that will be formed.
Consider the case where an angled parting surface is selected instead of a straight parting surface for this component (as shown in the right-hand side diagram). With this surface, the part can be easily ejected from the mould, as no undercuts will be present.
Since machining straight parting surfaces is easier, it is typically a good practice to avoid going to other types of parting surfaces and always stick to straight parting surfaces. But in this case, the use of an angled parting surface helps you in avoiding undercuts, which cannot be achieved using this straight parting surface.
Hence, an angled parting surface is preferable to design the mold for this particular model.
Example 3
Here is another example where you would have to use a profiled parting surface because the base of the spoon (shown in the image below) is not in a single plane. Hence, a parting surface that is along the profile of the spoon should be used.
_1668178585.png)
You can see the parting lines in any plastic spoons in your household along its sides. The red line in the above image indicates the inlet for material injection into the mold.
Example 4- Parting Surface
This is another example where an angled parting surface would be used.
_1668178624.png)
In this case, assume the material injection to happen along the path represented in the color red. As the molten plastic's injection pressure is very high, it will push the upper cavity block towards the left. If this happens, the part dimension will not be accurate.
So, in such cases, a similar angled profile would be made on the block in the opposite direction. From the image below, you can see how an angle can lock the core and cavity blocks.
_1668178670.png)
This locking issue will only happen if you are molding only one component. If you were to mold two pieces together, you would not have to worry about the blocks moving in the horizontal direction. The injection of the molten feed material will happen from the center, and all the forces will be balanced.
Example 5- Parting Surface
Suppose you want to create a mold for another component, as shown in the top right-hand side corner of the image below.
_1668178720.png)
There are two possibilities to get a flat parting surface, and there will not be any undercuts in either of the cases. So, as far as the ease of demolding and machining is concerned, there is no difference between the two parting surfaces.
But in the first case, the parting surface will leave a mark on the model, unlike in the other case. The parting surface on the right-hand side will be most appropriate because of its contribution to the final model's aesthetics.
Therefore, in some instances, the selection of parting surfaces is purely made for aesthetic reasons.
Conclusion
This article covers five unique scenarios in the injection molding process. It is important to note that, contrary to what one might think or assume, the reason for the selection of a particular parting surface may not always be technical but could also be based on aesthetics.
Moreover, depending on the customer's requirements, the aesthetics may sometimes supersede functionality, technicality, and the economic factors of the molding and demolding process.
In the next part of this series, we will dive into matching drafts, shrinkage, and inserts of the injection molding process and mold design process. Find more such courses online to upskill yourself only at Skill-Lync!
Author

Navin Baskar
Author
Skill-Lync
Subscribe to Our Free Newsletter

Continue Reading
Related Blogs
Learn how to render a shock-tube-simulation and how to work on similar projects after enrolling into anyone of Skill-Lync's CAE courses.
09 May 2020
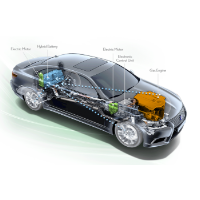
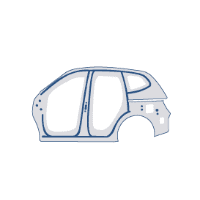
In this blog, read how to design the frontal BIW enclosure of a car (Bonnet) and learn how Skill-Lync Master's Program in Automotive Design using CATIA V5 will help you get employed as a design engineer.
09 May 2020
Tetrahedral is a four- nodded solid element that can be generated through the tria element by creating a volume and also through the existing volume of the geometry. These elements are used where the geometry has high thickness and complexity. The image attached below is a representation of a Tetra element. The Tetra element will have 4 triangular faces with four nodes joining them together
01 Aug 2022
A connector is a mechanism that specifies how an object (vertex, edge, or face) is connected to another object or the ground. By often simulating the desired behaviour without having to build the precise shape or specify contact circumstances, connectors make modeling simpler.
02 Aug 2022
One of the most crucial processes in carrying out an accurate simulation using FEA is meshing. A mesh is composed of elements that have nodes—coordinate positions in space that might change depending on the element type—that symbolise the geometry's shape.
03 Aug 2022
Author
Skill-Lync
Subscribe to Our Free Newsletter
Continue Reading
Related Blogs
Learn how to render a shock-tube-simulation and how to work on similar projects after enrolling into anyone of Skill-Lync's CAE courses.
09 May 2020
In this blog, read how to design the frontal BIW enclosure of a car (Bonnet) and learn how Skill-Lync Master's Program in Automotive Design using CATIA V5 will help you get employed as a design engineer.
09 May 2020
Tetrahedral is a four- nodded solid element that can be generated through the tria element by creating a volume and also through the existing volume of the geometry. These elements are used where the geometry has high thickness and complexity. The image attached below is a representation of a Tetra element. The Tetra element will have 4 triangular faces with four nodes joining them together
01 Aug 2022
A connector is a mechanism that specifies how an object (vertex, edge, or face) is connected to another object or the ground. By often simulating the desired behaviour without having to build the precise shape or specify contact circumstances, connectors make modeling simpler.
02 Aug 2022
One of the most crucial processes in carrying out an accurate simulation using FEA is meshing. A mesh is composed of elements that have nodes—coordinate positions in space that might change depending on the element type—that symbolise the geometry's shape.
03 Aug 2022
Related Courses