Modified on
How To Stitch Images In Sequence To Get Smooth Animation?

Skill-Lync
We can use the PIL (or Pillow) module in Python to generate an animation out of the.png images we got from executing the second-order ODE algorithm. We may import the Image module from the library. A class with the same name is provided by the Image module and is used to represent a PIL image. The module also offers a number of factory functions, including tools for generating new images and loading images from files.
Additionally, we need to use Python's built-in glob function. The glob module uses the Unix shell's rules to identify all pathnames that match a given pattern, however, the order in which the results are returned is random.
Now, you can stitch the images together with the help of these libraries and functions in the following manner:
Method 1: Modify the code in VSCode as shown below
Before you start making any changes in the code, you need to install a couple of libraries, i.e., natsort and pillow.


Step 1 - On installing the two libraries, you need to import them in your code. These are all the libraries you need to import.

Step 2 - Now, to get all the .png files from your working directory, we make use of the glob.glob() command, as shown below. We need to create a variable called "imgs" to include all the .png files in that variable.

You can also make use of a print statement to display how to glob function gets the .png files and when you do that, you will observe that these files are taken at random, and in no specific order, as shown in the screenshot below:

It’s evident from the terminal (in VSCode) that the image names are jumbled and not in any specific order. To sort the whole image array in ascending order, we use a python library called natsort.
Step 3 - imgs is the array of images which are to be sorted.
reverse=False will arrange all the images in ascending order.

The print statement here displays the .png files in ascending order, as shown in the snippet below.

Step 4 - If we want to create an animated GIF, we need a group of images that make up the individual frames.
frames=[] is a list of opened Pillow Image objects, here is how you would save it:

frames=[] is an empty array in which we will be adding separate images by using the Image module from the PIL.
The for loop is used to call the Image module from PIL to open each image in the current folder/ directory.
Image.open() opens and identifies the given image file.
frames.append(new_frame) allows the opened image to be appended into the empty array ‘frames’.
Step 5 - Once all the images are appended to the empty array named 'new_frame', now we can start creating the animation for the images stored in the frames array.

frames[0] tells the compiler to start the animation from the 0th indexed .png image.
save() is the command used to save the images in form of a GIF.
‘Pendulum_Animation_using_Python.gif’ is the name of the GIF you’re about to save.
format=’GIF’ will specify the format of the intended file.
append_images is a list of the images to save.
Since the first image (images[0]) is used to make the call, the extra images consist of images[1] and beyond. We use a slice to select those images from the full list.
save_all tells Pillow that we want to save multiple images in the same output file.
duration controls how long each frame will be displayed for, in milliseconds. It is the inverse of the frame rate.
Setting it to 100 milliseconds gives 10 frames per second. You can decrease the duration to give a smoother animation.
loop controls how many times the animation repeats.
The default, 1, means that the animation will play once and then stop (displaying the last frame). 2 means it will repeat twice before stopping, and so on. A value of 0 means that the animation will repeat forever.
Method 2: Modify the code in Octave as shown below:

This command will save the file name starting with zero and will have 5 digits. Since we are increasing the value of “ct” by 1 in every loop, each frame will get a unique name and will be in sequence like shown below,

Now that all the frames are arranged sequentially, they will be stitched sequentially to generate a smooth animation, with the help of third-party software called ImageMagick. This software will be used in the command window.
The command to stitch all frames (i.e. .png files) in the command window is as follows:
magick *.png Pendulum_animation.gif
*.png command makes sure that ALL .png files are tsken into consideration (* means ALL)
Pendulum_animation.gif - It is the name given to the GIF file which will be created. You can give any name you'd like.
Remember to add the extension .gif after giving a name to the animation.
Author

Navin Baskar
Author
Skill-Lync
Subscribe to Our Free Newsletter

Continue Reading
Related Blogs
Learn how to render a shock-tube-simulation and how to work on similar projects after enrolling into anyone of Skill-Lync's CAE courses.
09 May 2020
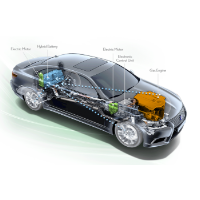
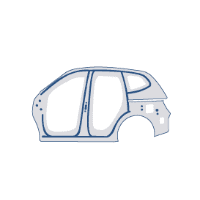
In this blog, read how to design the frontal BIW enclosure of a car (Bonnet) and learn how Skill-Lync Master's Program in Automotive Design using CATIA V5 will help you get employed as a design engineer.
09 May 2020
Tetrahedral is a four- nodded solid element that can be generated through the tria element by creating a volume and also through the existing volume of the geometry. These elements are used where the geometry has high thickness and complexity. The image attached below is a representation of a Tetra element. The Tetra element will have 4 triangular faces with four nodes joining them together
01 Aug 2022
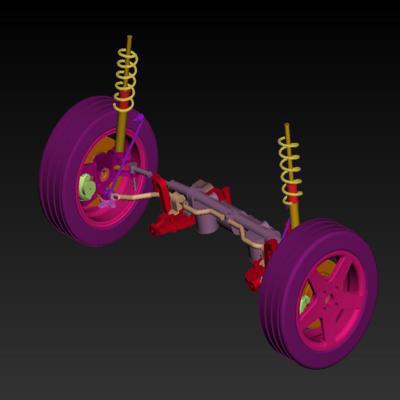
A connector is a mechanism that specifies how an object (vertex, edge, or face) is connected to another object or the ground. By often simulating the desired behaviour without having to build the precise shape or specify contact circumstances, connectors make modeling simpler.
02 Aug 2022
One of the most crucial processes in carrying out an accurate simulation using FEA is meshing. A mesh is composed of elements that have nodes—coordinate positions in space that might change depending on the element type—that symbolise the geometry's shape.
03 Aug 2022
Author
Skill-Lync
Subscribe to Our Free Newsletter
Continue Reading
Related Blogs
Learn how to render a shock-tube-simulation and how to work on similar projects after enrolling into anyone of Skill-Lync's CAE courses.
09 May 2020
In this blog, read how to design the frontal BIW enclosure of a car (Bonnet) and learn how Skill-Lync Master's Program in Automotive Design using CATIA V5 will help you get employed as a design engineer.
09 May 2020
Tetrahedral is a four- nodded solid element that can be generated through the tria element by creating a volume and also through the existing volume of the geometry. These elements are used where the geometry has high thickness and complexity. The image attached below is a representation of a Tetra element. The Tetra element will have 4 triangular faces with four nodes joining them together
01 Aug 2022
A connector is a mechanism that specifies how an object (vertex, edge, or face) is connected to another object or the ground. By often simulating the desired behaviour without having to build the precise shape or specify contact circumstances, connectors make modeling simpler.
02 Aug 2022
One of the most crucial processes in carrying out an accurate simulation using FEA is meshing. A mesh is composed of elements that have nodes—coordinate positions in space that might change depending on the element type—that symbolise the geometry's shape.
03 Aug 2022
Related Courses