Modified on
XML syntaxes and Coding

Skill-Lync

Usually, apps and wizards contain XML code and python code. XML codes help in generating GUIs and buttons and python codes contain the APIs written in python logic. These XML codes are not exactly the normal XML syntaxes but are used only for the Ansys automation and are only available for ANSYS. These XML syntaxes are called primary elements and there are secondary attributes called secondary elements for each and every primary element. This article deals with the definitions of various XML syntaxes.
The <extension> Element in XML

The main element for an XML extension definition file is the <extension> element, which provides initialization and configuration information for the extension.
This is the base tag or ‘root’ element under which all other elements fall.
All the other elements come under <extension> that creates the whole extension.

Attributes for the <extension> element:
Version: defines the major version of the extension, mandatory attribute
version=’[version number (intger)]’
Name: it is the name of the extension, mandatory attribute
name=’[extension name (string)]’
Minor version: it is the minor version number for the extension, an optional attribute
minorversion=’[minor version number (integer)]’
Icon: icon image for the extension, optional attribute
Author: Defines the author of the extension, no sub-element tags, attributes or callbacks
<author>[name of the author or organisation (string)]</author>
Description: defines the extension's description, no sub-element tags, attributes or callbacks.
<description>[Description (string)]</description>
Guid
Guid is the unique identifier for the extension. ACT considers two extensions with the same guid as the same extension. This is very important when the extension is deployed to ensure that two different extensions are never in conflict. When the extension is updated, a new version is created or features are added, the GUID must be kept unchanged.
<guid shortid=’[name (string)]’>GUID</guid>
Interface: defines the user interface for the extension
<interface context=’[Project | Mechanical]’>
Sub-elements in <interface> element:
<images>: defines the default folder where images to be used by the extension are stored
<images>[folder]</images>
<toolbar>: it defines a particular toolbar
<toolbar name=’[toolbar internal name (string)]’ caption=’[toolbar display name (string)]’>
<entry>....</entry>
</toolbar>
Script: This syntax provides the path for the python script. You can use the src attribute to specify the path to the script
<script src=’my_path\filename.py’ />
UIDefinition: Defines one or more layouts that can be used for wizards
<uidefinition>
<layout>
</uidefinition>
<wizard>
The wizard syntax is used to define a wizard in ANSYS. It defines one or more wizards within the extension.
<wizard>
<author>
<description>
<step></step>
</wizard>
Sub-element tags for the <wizard> element
<callbacks>: specifies the callbacks that invoke functions from the ironpython extension script
Attributes for the <wizard> element
<context>: context or combination of contexts for the wizard. Mandatory attribute
<name>: it is the name of the wizard. Mandatory attribute
<version>: it is the version of the wizard. Mandatory attribute
<caption>: it is the caption for the wizard. Optional attribute
<icon>: it is the icon for the wizard. Optional attribute.
<description>: it is the description for the wizard. Optional attribute.
The above syntaxes are only for Ansys automation and it cannot be used anywhere else. Mostly, the coding stuff is never done from scratch most of the time for reducing time. Mostly the codes are reused from the previously used templates. These templates contain basic logic for the desired uses. Changing the basic logic and adding steps will give you the required extension or wizard. Hence, code reusability is always carried out in automation.
Other attributes present in the XML
<step> </step>: This syntax defines every step in a wizard. These can only be used when creating a wizard and not in an APP.
Attributes associated with <step>:
<version>: to display its version. Mandatory Attribute.
<caption>: to give a detailed description to that particular step. Mandatory attribute
<HelpFile>: to display the help file and its location that is already created using HTML. Mandatory Attribute
<step name="Geometry" version="0" caption="Geometry" HelpFile="help/Geometry1.html">
<propertygroup>: this syntax is used to group a set of properties together. They are displayed as a drop-down list in Ansys when loaded. One can add multiple <property> under each <propertygroup>.
Other attributes associated with <propertygroup>:
<name>: to enter the name of the property group. Mandatory attribute
<caption>: to enter some detailed description for that propertygroup. Mandatory Attribute
<parameterizable>: this is to select whether that particular propertygroup can be selected as parameter for performing a parameter analysis. Optional Attribute
<help>’message’</help>: this help is used to display a small question mark bubble next to the property group which when clicked, displays the message written.
<help>Friction_Coefficient for Frictional contacts</help>
<callbacks> and their types:
As mentioned earlier, <callbacks> are used to call any specific function from the python file and run the code below. Below are some of the callbacks used in our work,
To know whether only the desired face is selected. <isvalid>’name of the python function’</isvalid>: this callback is used to check whether the selection made is valid or not. The required code is written inside that particular function name and whenever this callback is called, the code inside that function will run and check whether our selection is right or wrong.
<onupdate>’name of the python function’</onupdate>: this callback is used to update the following selected face of the component.
<onreset>’name of the python function’</onreset>: this callback is used to reset or delete the already created options in the tree.
There are more callbacks available, but they can be extracted from any templates and understood.
Author

Navin Baskar
Author
Skill-Lync
Subscribe to Our Free Newsletter

Continue Reading
Related Blogs
Learn how to render a shock-tube-simulation and how to work on similar projects after enrolling into anyone of Skill-Lync's CAE courses.
09 May 2020
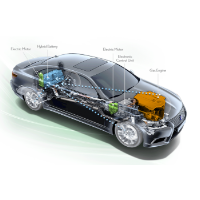
In this blog, read how to design the frontal BIW enclosure of a car (Bonnet) and learn how Skill-Lync Master's Program in Automotive Design using CATIA V5 will help you get employed as a design engineer.
09 May 2020
Tetrahedral is a four- nodded solid element that can be generated through the tria element by creating a volume and also through the existing volume of the geometry. These elements are used where the geometry has high thickness and complexity. The image attached below is a representation of a Tetra element. The Tetra element will have 4 triangular faces with four nodes joining them together
01 Aug 2022
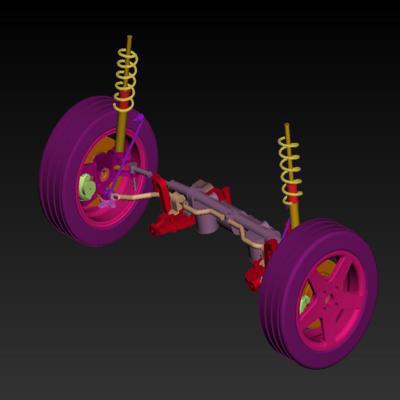
A connector is a mechanism that specifies how an object (vertex, edge, or face) is connected to another object or the ground. By often simulating the desired behaviour without having to build the precise shape or specify contact circumstances, connectors make modeling simpler.
02 Aug 2022
One of the most crucial processes in carrying out an accurate simulation using FEA is meshing. A mesh is composed of elements that have nodes—coordinate positions in space that might change depending on the element type—that symbolise the geometry's shape.
03 Aug 2022
Author
Skill-Lync
Subscribe to Our Free Newsletter
Continue Reading
Related Blogs
Learn how to render a shock-tube-simulation and how to work on similar projects after enrolling into anyone of Skill-Lync's CAE courses.
09 May 2020
In this blog, read how to design the frontal BIW enclosure of a car (Bonnet) and learn how Skill-Lync Master's Program in Automotive Design using CATIA V5 will help you get employed as a design engineer.
09 May 2020
Tetrahedral is a four- nodded solid element that can be generated through the tria element by creating a volume and also through the existing volume of the geometry. These elements are used where the geometry has high thickness and complexity. The image attached below is a representation of a Tetra element. The Tetra element will have 4 triangular faces with four nodes joining them together
01 Aug 2022
A connector is a mechanism that specifies how an object (vertex, edge, or face) is connected to another object or the ground. By often simulating the desired behaviour without having to build the precise shape or specify contact circumstances, connectors make modeling simpler.
02 Aug 2022
One of the most crucial processes in carrying out an accurate simulation using FEA is meshing. A mesh is composed of elements that have nodes—coordinate positions in space that might change depending on the element type—that symbolise the geometry's shape.
03 Aug 2022
Related Courses