Modified on
All About the Types of Mold

Skill-Lync
The first part of this series briefly touched upon the components of a 2-plate mold. In this part of the basics of mold design, you will gain an in-depth understanding of the following topics:
- Breakdown of parts of the mold
- Types of mold
Breakdown of Parts of Mold
Core and Cavity
The image below shows the surfaces formed by the core and the cavity.
_1669101746.png)
The surface formed by the cavity is called the A-surface, and the one formed by the core is called the B-Surface. The surface between the A and B surfaces is called the C-surface.
Specification Diagram
Let us now look at the actual specification diagrams of the mold assembly parts. Below is the image of an entire mold tool.
_1669101793.png)
On the left side is the front view of the mold tool. The circles at the four corners are the guide pillars, and the smaller circles are used for clamping.
There are certain standard available dimensions for selecting the mold block. For example, if you need a 196x196 block size but the market availability is only 200x200, then you would have to buy the larger one and cut it to your requirement.
On the right side of the image, you will see the following:
- BP (bottom plate)
- SP (spacer block)
- CB (core backplate)
- CR (core plate)
- CV (cavity plate)
- EB (ejector backplate)
- EP (ejector plate)
Guide Pillar
_1669101852.png)
The part of the guide pillar that enters the core when the mold is in the closed position is known as the core region. In the diagram, the part of the guide pillar to the right of the yellow line is the core region.
The guide pillar will be sliding in and out of the core thousands of times while making the components. Thus, the core region of the guide pillar needs to be hardened.
The inverted triangles in the diagram denote the surface roughness of the guide pillar.
Guide Bush
_1669101922.png)
Here, you can see that the interior surface also needs finishing as the guide pillar will be sliding through it.
Ejector Return and Guide
_1669101973.png)
You'll find the ejector guide pin at the bottom part of the picture. The purpose of this component is to align the entire ejector system with the core plate.
The ejector guide bush surrounds the ejector guide. The component at the top is the return pin.
Sprue Puller Bush
_1669102103.png)
This component is present on the core side and pulls the sprue from the cavity side.
The reason for the inverted taper is that more force is required to pull compared to a straight section. This form will ensure that the material is not cooled down at the cavity section itself, which will block the passage of the material. This tapered section is also known as the cold slug well.
Sprue Bush
_1669102162.png)
Here, you can see that the taper for the sprue bush is one and a half degrees, which is standard for sprue bushes.
A point to note is that the core thickness must be more than the cavity thickness. This is because the molten material will enter the core side at high pressure and may cause depression at the core side. So, to avoid that, more thickness is always provided at the core side compared to the cavity side.
Register Ring

The centerline, which you see in the image, must align with the centerline of the molding machine.
Ejector Pin

The ejector pin is also case-hardened because it will be engaging with other components in every cycle. Hardening reduces the wear on the part.
Types of Mold
There are two types of molds present:
- 2-plate mold
- 3-plate mold
Since the 2-plate mold has already been explained in great detail in the previous part of the basics of mold design, let us jump over to the 3-plate mold.
3 Plate Mold
The first thing to know is that there are three plates in the 3-plate mold, as the name suggests.

- The first plate you see on the left is fixed and contains the sprue.
- The second plate (in orange color) contains all the runners and the cavity. So, in this case, we see that the cavity plate is also moving, whereas, in the 2-plate mold, the cavity region was static or fixed.
- The third plate contains the core and ejection systems. So, this part is the same as the moving plate of the 2-plate mold.
You can see that the only difference in the construction of the 3-plate mold is that the fixed plate of the 2-plate mold itself is split into two parts. Moreover, as there are three plates, in this case, the runner and the main part are automatically separated in the molding process.
In the 2-plate mold, the material in the runner system is attached to the main part and must be manually separated. So, the advantage of the 3-plate mold is that the secondary operation of cutting the feed system is avoided.
Due to this mechanism, the overall production time is reduced. This is the biggest reason industries prefer the 3-plate mold for mass production. However, the cost of a 3-plate mold is also relatively higher than the 2-plate mold.
Conclusion
This article gives a detailed breakdown of the parts in a mold. You should now have a general understanding of molding parts like guide pillars, register rings, and more in addition to the knowledge of different molds.
The next session will cover the following points:
- Draft
- Parting Lines
The program on the basics of mold design is one of the many industry-relevant advanced courses that Skill-Lync offers. You can register today for this and many other programs by clicking here.
Author

Navin Baskar
Author
Skill-Lync
Subscribe to Our Free Newsletter

Continue Reading
Related Blogs
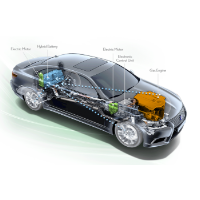
Learn how to render a shock-tube-simulation and how to work on similar projects after enrolling into anyone of Skill-Lync's CAE courses.
09 May 2020
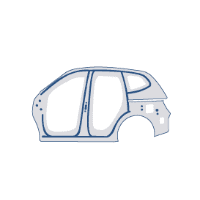
In this blog, read how to design the frontal BIW enclosure of a car (Bonnet) and learn how Skill-Lync Master's Program in Automotive Design using CATIA V5 will help you get employed as a design engineer.
09 May 2020
Tetrahedral is a four- nodded solid element that can be generated through the tria element by creating a volume and also through the existing volume of the geometry. These elements are used where the geometry has high thickness and complexity. The image attached below is a representation of a Tetra element. The Tetra element will have 4 triangular faces with four nodes joining them together
01 Aug 2022
A connector is a mechanism that specifies how an object (vertex, edge, or face) is connected to another object or the ground. By often simulating the desired behaviour without having to build the precise shape or specify contact circumstances, connectors make modeling simpler.
02 Aug 2022
One of the most crucial processes in carrying out an accurate simulation using FEA is meshing. A mesh is composed of elements that have nodes—coordinate positions in space that might change depending on the element type—that symbolise the geometry's shape.
03 Aug 2022
Author
Skill-Lync
Subscribe to Our Free Newsletter
Continue Reading
Related Blogs
Learn how to render a shock-tube-simulation and how to work on similar projects after enrolling into anyone of Skill-Lync's CAE courses.
09 May 2020
In this blog, read how to design the frontal BIW enclosure of a car (Bonnet) and learn how Skill-Lync Master's Program in Automotive Design using CATIA V5 will help you get employed as a design engineer.
09 May 2020
Tetrahedral is a four- nodded solid element that can be generated through the tria element by creating a volume and also through the existing volume of the geometry. These elements are used where the geometry has high thickness and complexity. The image attached below is a representation of a Tetra element. The Tetra element will have 4 triangular faces with four nodes joining them together
01 Aug 2022
A connector is a mechanism that specifies how an object (vertex, edge, or face) is connected to another object or the ground. By often simulating the desired behaviour without having to build the precise shape or specify contact circumstances, connectors make modeling simpler.
02 Aug 2022
One of the most crucial processes in carrying out an accurate simulation using FEA is meshing. A mesh is composed of elements that have nodes—coordinate positions in space that might change depending on the element type—that symbolise the geometry's shape.
03 Aug 2022
Related Courses