Wiring harness routing & packaging Rules Week 3 Challenge
Q1. Download following cad data & define it as Electrical support using Electrical Part design Workbench. Define all the necessary properties.
P CLAMP
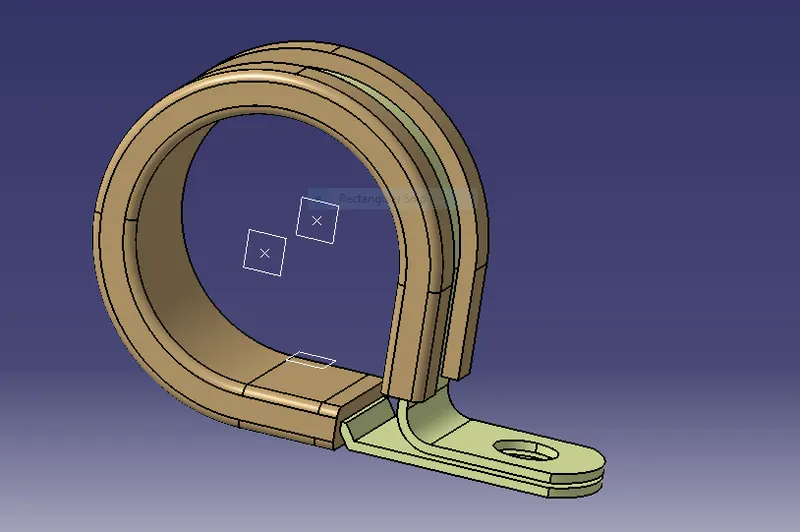
first create entry point and and plane
then create exit point and plane
then add base plane for it
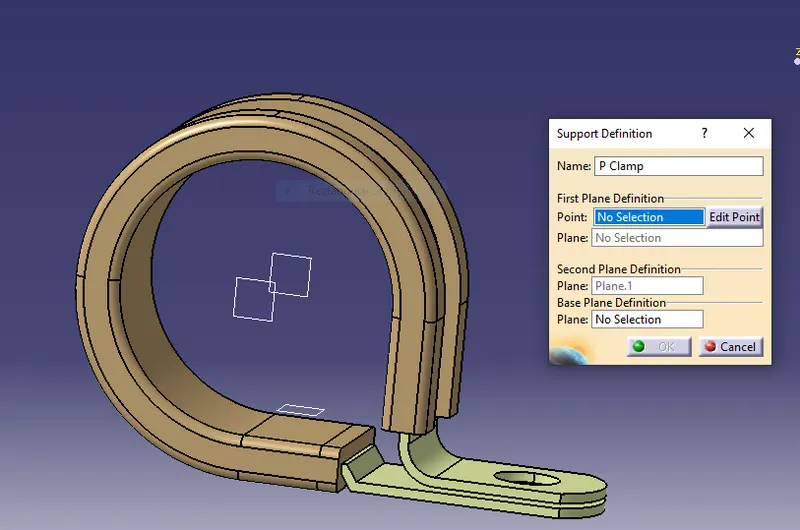
go into electrical work bench and click support definition.
first add entry point entry plane exit plane and base.
then click support definition again and add the exit pont exit plane and the base plane
note If you face any issue with point definition, point selection, Right-click on the point definition window and use the reset option.
Q2. Download following Back shell cad data & define it as Electrical back shell using Electrical Part design Workbench. Define all the necessary properties.
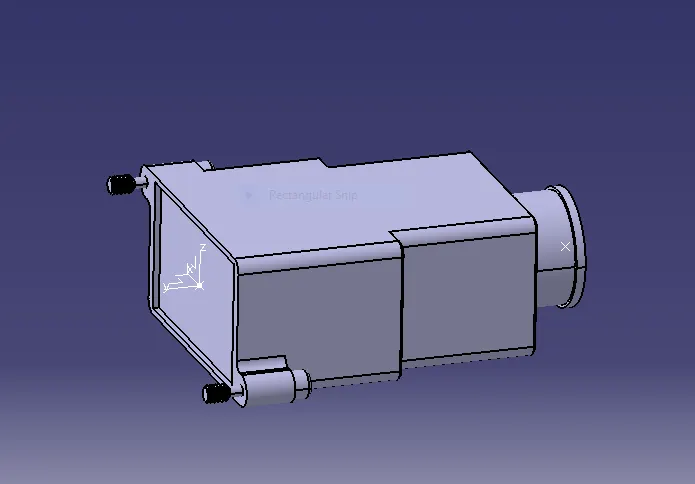
first define the bundle entry point and the shell fixing point also add the axis system to the fixing point make sure
the axis is in same direction as the of connectors.
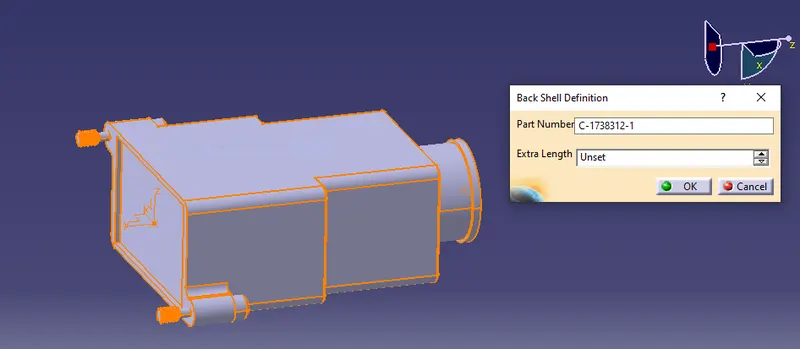
define the shell as an electrical body
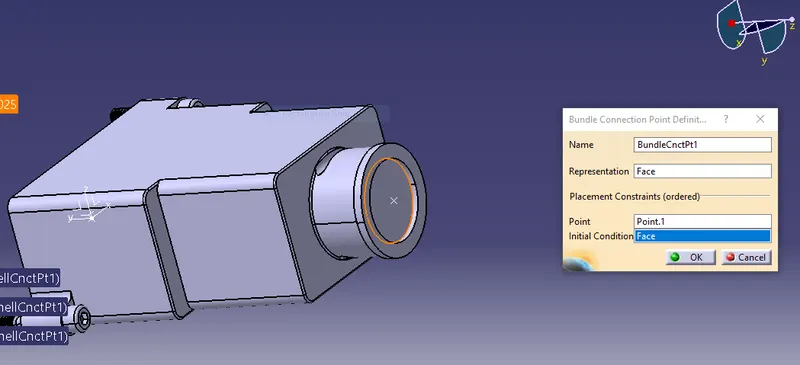
add bundle entry parameters.
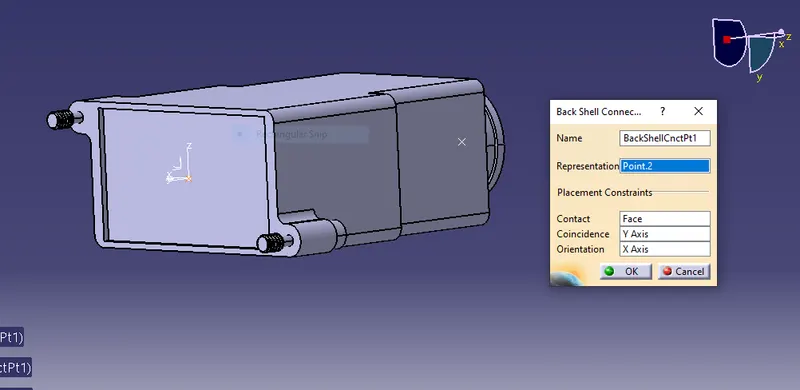
add the back shell parameters.
Q3. Create Following Corrugated tubes & Add them in Catalogue under “Slit COT” family.
example for 20 mm cot
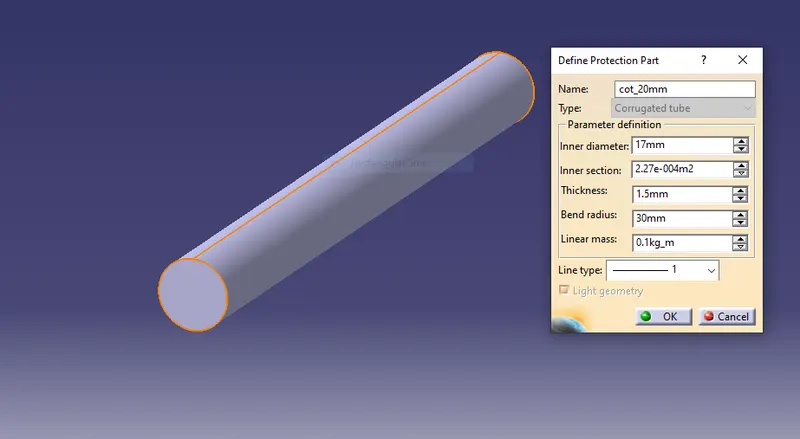
click on define protection and fill
inner diameter, thickness, bend radius=1.5*outer diameter
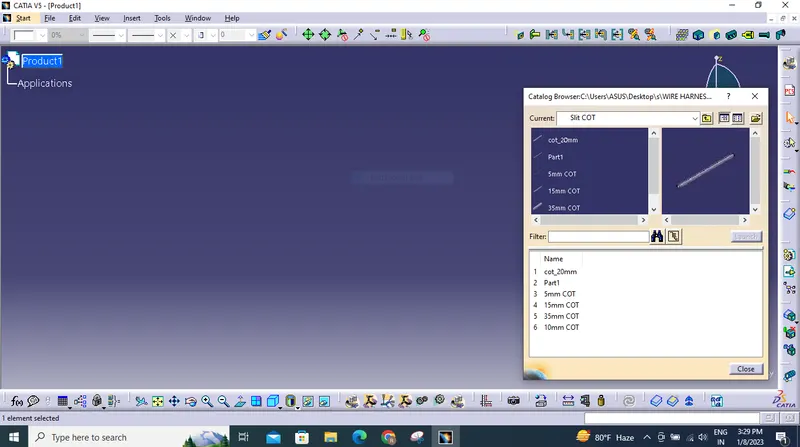
defined all the cot in 1 catlog