Wiring harness routing & packaging Rules Week 3 Challenge
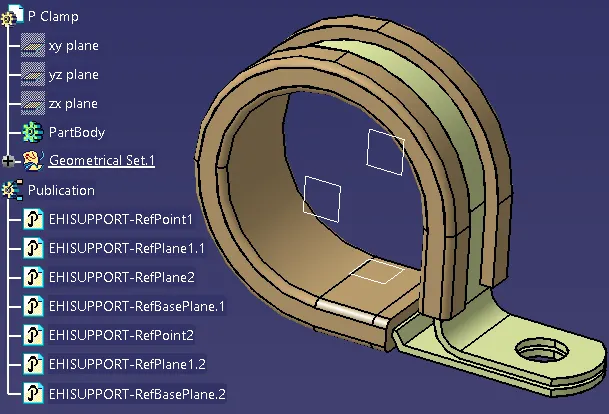
Q1. Steps followed to define P-Clamp as electrical support using Electrical Part design Workbench.
1. Download the CAD file, save the .igs file to .CATpart file.
2. In part design, define Entry point and exit point with corresponding entry plane and exit plane. Later define the base plane.
3. Save and Enter to the Electrical Part design Workbench, Select Define support part and select the entry point, plane, exit plane and base plane.
4. Similarly Define the next set of entry and exit points and planes by selecting selecting the previous exit point as entry point and corresponding plane as entry plane because each of the clamp or support have two entries and two exits.
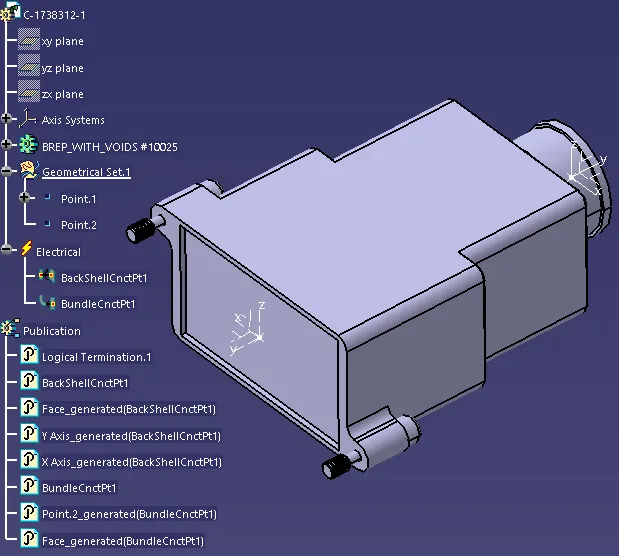
Q2. Steps followed to define back shell as electrical back shell using Electrical Part design Workbench.
1. Download the CAD file, save the .igs file to .CATpart file.
2. In part design, define Connector Connection point and axis with bundle connection point and axis.
3. Save and Enter to the Electrical Part design Workbench, Select Define Back shell and select the component, enter the part no. and extra length.
4. Select Back Shell Connection point and provide the details as Representation : Origin point, Contact : Contact Face, Coincidence : Y-Axis and Orientation : X-axis.
5. Now to define the bundle connection select bundle connection point and provide the details as Representation : Contact Face, Point : Origin, Initial Condition : same contact face which was selected earlier.
Q3. To create Corrugated Tubes catalog, New > Catalog document > Add family > Name : Slit COT, Type : Electrical > ok > Save catalog.
To create the said Corrugated Tubes,
1. New > Part > Name : 15mm COT > ok
2. Define Protection Part > click on part body >
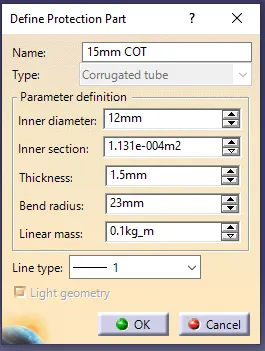 > Enter the given data such as name, type, ID, thickness and calculate the bend radius from OD (bend radius = 1.5xOD).
3. Save and add the part to catalog by selecting Store Device > choose the Saved catalog from the path and family name as slit COT.
4. Similarly create the parts with the given parameters and add them to the same catalog by choosing the same slit COT family.