Wiring harness design in CATIA V5 - 3D modeling Week 7 Challenge
Wiring harness design in CATIA V5 - 3D modeling Week 7 Challenge
Aim:
Flatten the harness assembly completed in “ week 4 challenge”. Place the flattened view on drawing sheet. Ensure bundles with protective coverings has different visuals on drawing view.
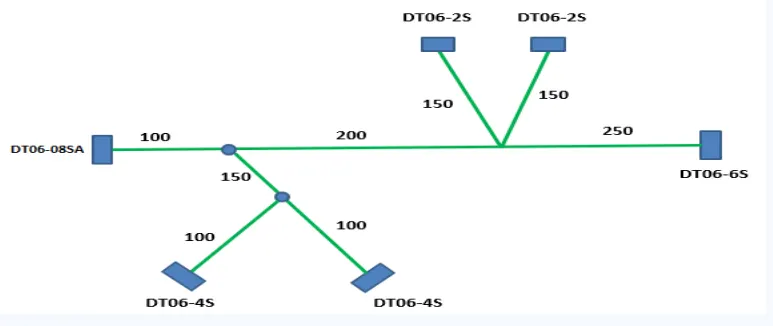
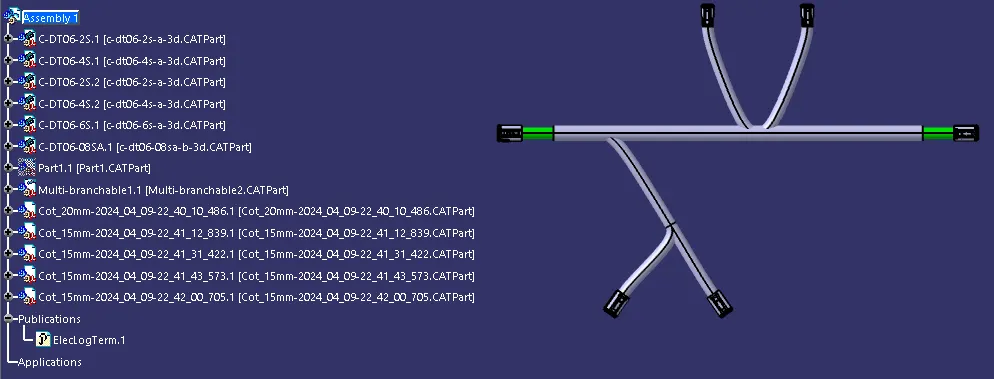
Flattening the Harness Assembly in CATIA V5
1. Preparation:
Open Product File:
- Start by opening a new product file named[Assembly Wiring Flattening Product] in CATIA V5.
Switch to Electrical Harness Flattening:
- Go to the Electrical Harness Flattening workbench.
- Adjust settings in General & Drawing under[Harness Flattening Parameters] to configure how the harness will be flattened.
- Tile vertically the files Assembly week 4 challenge and [Assembly Wiring Flattening Product] to view them side by side.
- Use the Extract command to pull the harness data from the original assembly. Ensure you are extracting the correct components and wiring details for flattening.
2. Flatten the Assembly:
- Select Flatten Command:
- With the harness data extracted, use the Flatten command.
- Choose the active plane as the Connector Top Plane.
- Select all branches to include in the flattening process
- Click ok to proceed. The flattened assembly will be created based on the selected plane.
3. Create Drawing:
Open New Drawing File:
- Open a new drawing file and set the sheet size to ISO A0.
- Save the drawing file appropriately (Harness Drawing File).
Create BOM and Dimensioning:
- Insert a Bill of Materials (BOM) to list all components and their details.
- Add connector names and dimensions to the drawing sheet for clear representation of the flattened harness.