Week 9 - Project - Master Section Development
AIM:- To create B piller using given Master Section and create Engineering features following design rules and perform the Draft Analysis on the final part body.
TOOLING AXIS:-
Tooling Direction is basically the direction that the core pulls apart from the cavity. And some components have ribs, pockets, walls.... are going to be drafted based on the Tooling Direction. So make sure the tooling direction which is cover all phases of the components and Core pull apart from the Cavity, nice and clean.
Here using Bisecting method to create a Tooling Axis. There are so many methods to create a Tooling Axis for differnt type of components.
Bisecting Line:-
- First visually check given class A surface for to find out tooling axis which is cover all faces. Herer in this case viewing from Z direction we can clear the face in tooling.
- So in order to create the tooling axis in Z-direction, we first need to create a reference point
- A reference point can be created using the master section 1 given as an input. Create a point using the point in between option and select the two end points of the master section Dog House which will give us a point at the center. Once we get the center we get the center point change the point in between option to coordinates and using this points create a line in Z - direction, this line will give us the tooling axis
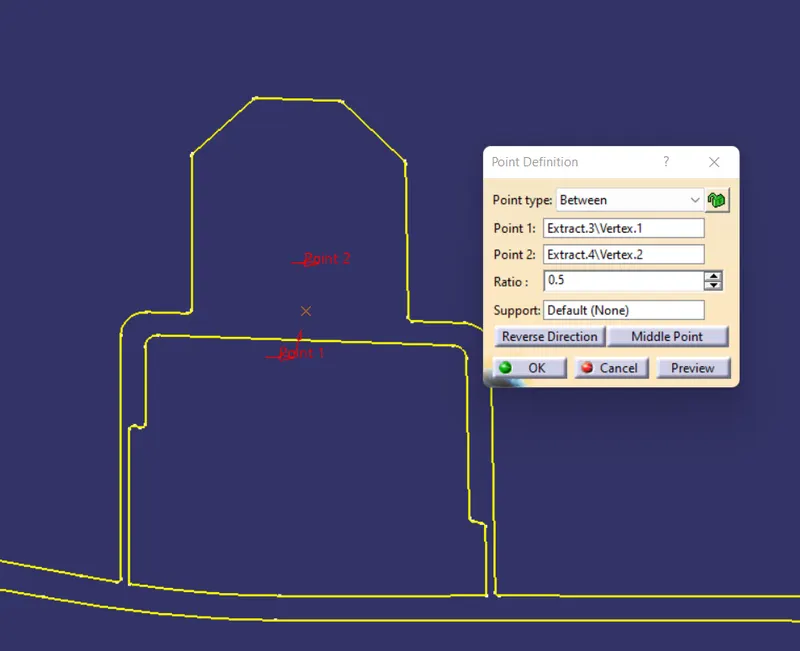
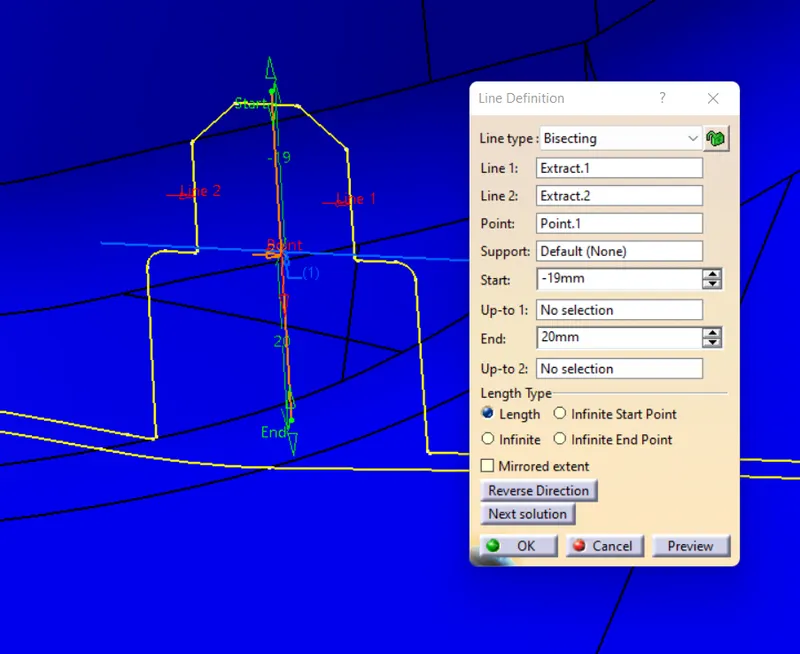
Draft Analysis on Class A Surface:-
The Draft Analysis command enables you to detect if the part you drafted will be easily removed. This type of analysis is performed based on color ranges identifying zones on the analyzed element where the deviation from the draft direction at any point, corresponds to specified values.
- To perform the darft analysis the view parameters are first set to material mode.
- then go to insert -analysis-feature draft analysis, the following window will be appeared.
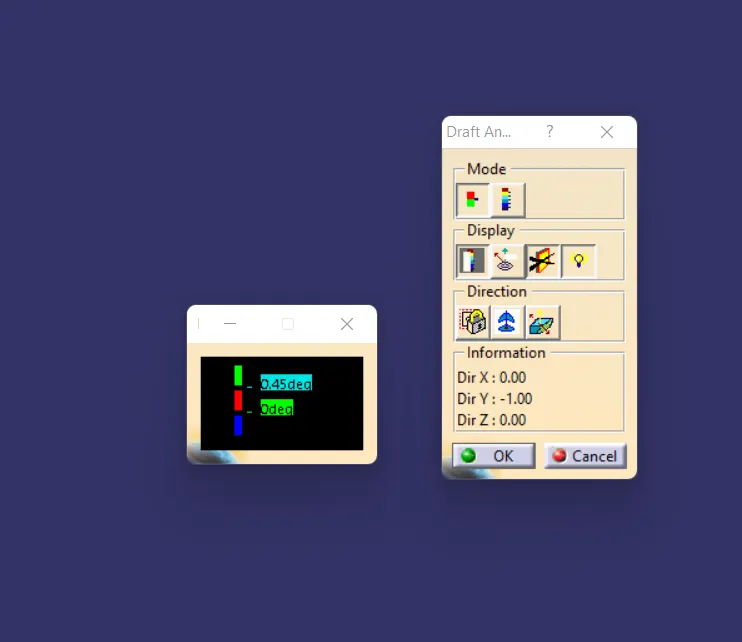
- First select the axis system and drag the axis system to the tooling axis and lock the orientation. This axis system defines the draft direction according to the tooling axis
- Switch on the colour scale and set the draft value 3 degree using colour scale and it will be displayed in green colour any draft angle below 3degree will be shown in red colour.
- Now select the runing point tool to measure the draft angle at the various locations.
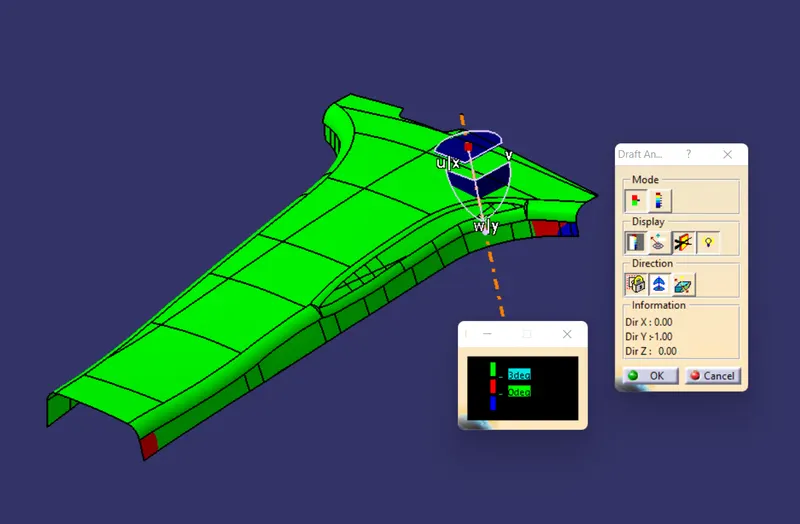
Since there is a minor issue with Class A surface, a few portions of the surface are showing red in colour which means the draft angle is negative for that portion of surface. In this challenge we are ignorng that negative portion because a change in tooling direction wil result in the draft analysis to fall on the final CAD model.
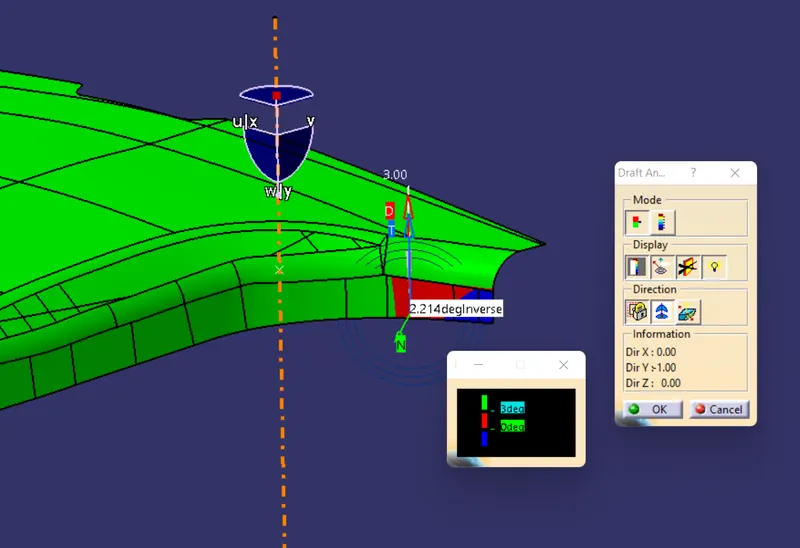
Note: Draft value ranging from 0-3 deg will show the component Blue in colour
using the Analysis option under display tab, we can check or analysis the exact darft value at any point on the given model
CLASS B SURFACE:
To create a Class B surface we first need to extract the Class A surface. After extracting the surface, offset it to 2mm
The thickness of the component can be measured from the master sections.
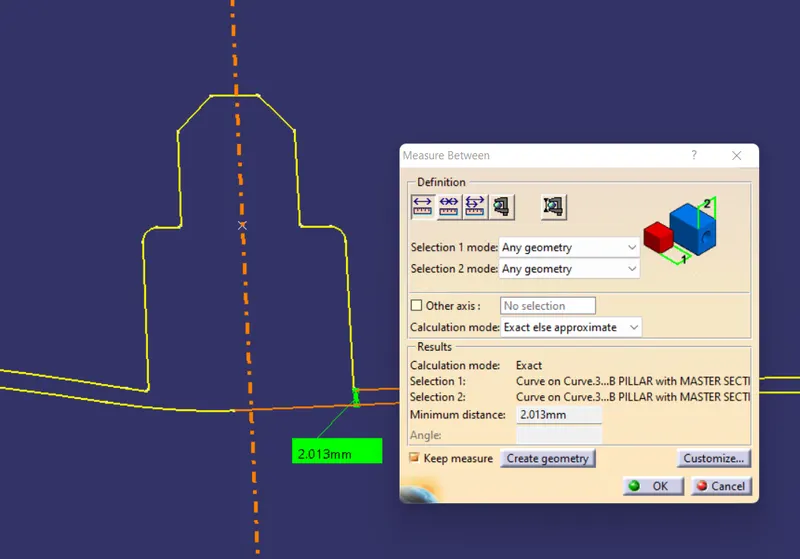
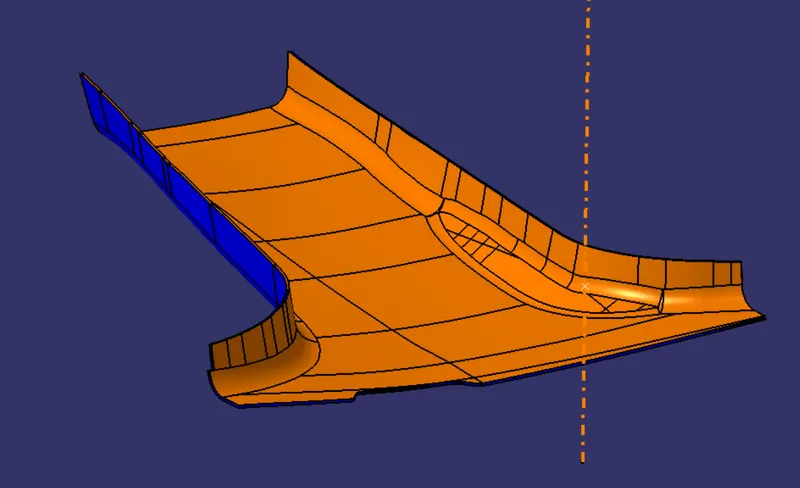
FLANGE:
From the master section it can be observed that the B pillar is having Flange but the styling surface or Class A surface which was given to us an input don't have any Flange.
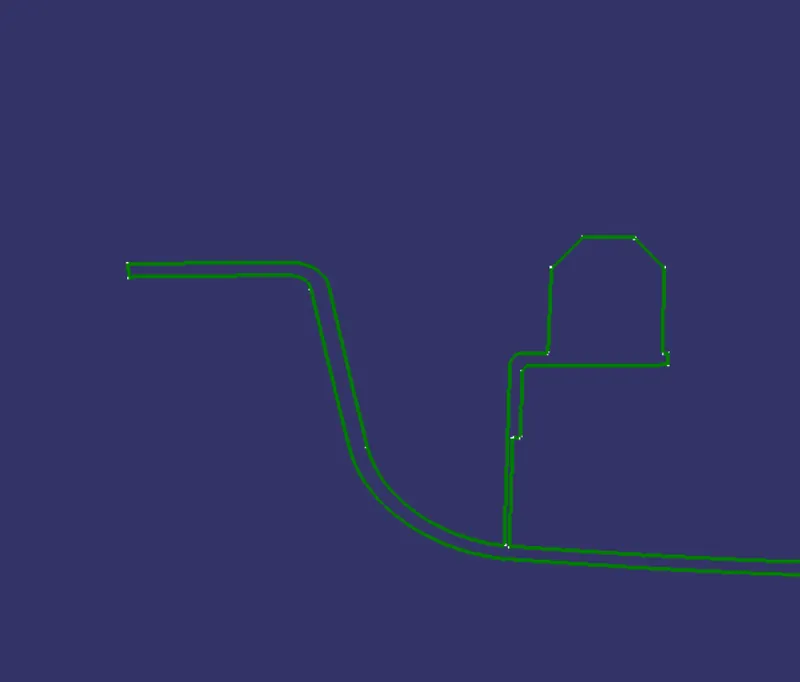
So in order to create a Flange on both A and B surfaces we first need to extract the boundaries of the Class A or B surface
After extracting the boundaries, apply a smoothe option to it in order to avoid any surface continuity issues.
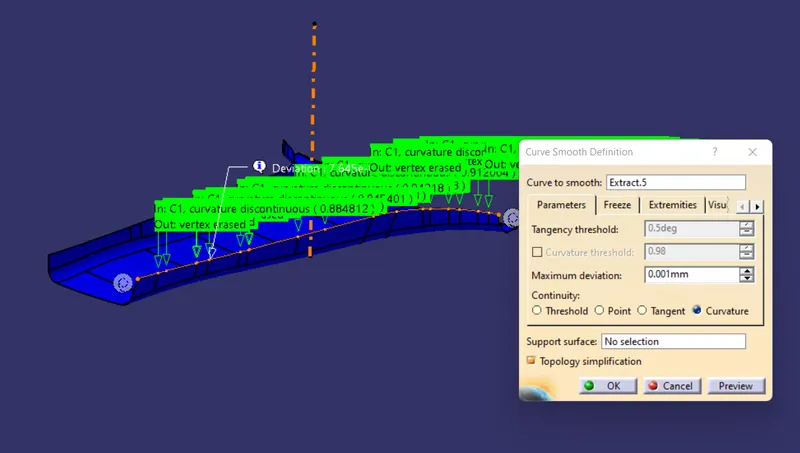
Surface of Class A or B whcih are attached to the boundary need to be extracted first which will act as a reference surfae for the Flange while Sweeping.
Now sweep the boundary with the reference surface (surfaces which we extracted) and give an appropriate angle such that the Flange is aligned with the master section.
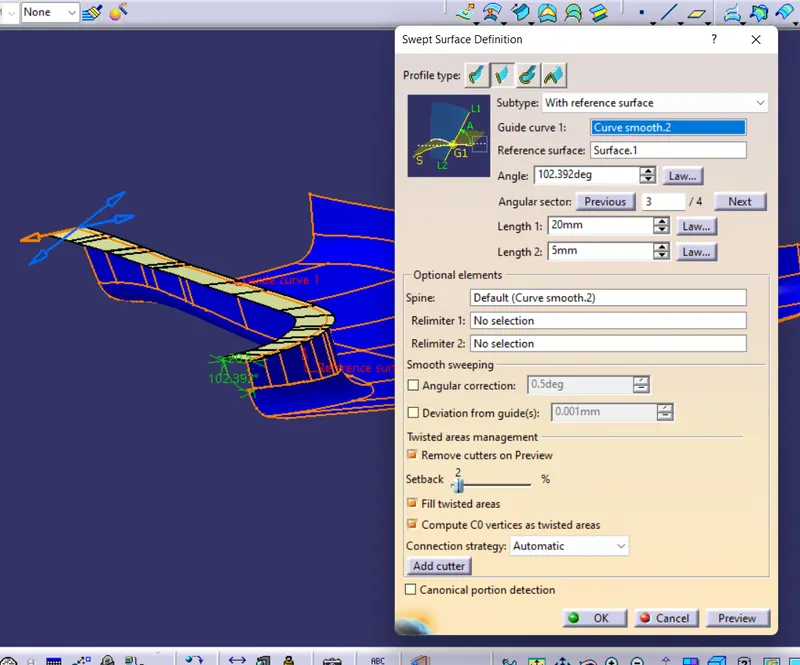
Onece the Flange is created, join it with the Class A or B surface (join the flange with the surface for which it was created and aligned with the master section)
Note: The Flange needs to be created on both sides of the B pillar by following the above mentioned procedure. Flange for Class A and Class B surface needs to be created separately.
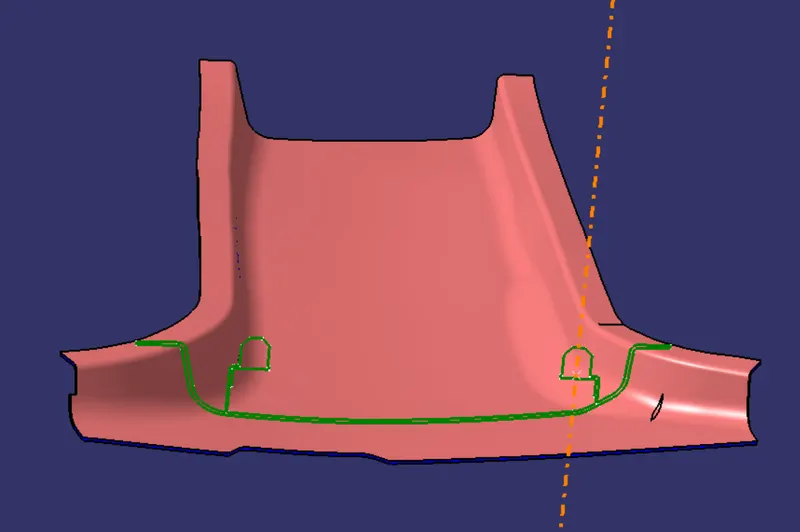
CLASS C SURFACE:
- To create a Class C surface, first extract the boundaries (all edges separately) of the Class A surface (the surface with Flange)
- After extracting the boundary we need to perform smooth (max. deviation as 0.001mm) operation on it in order to create a continous tangent surface
- Now using the sweep option create the surface. Select guide curve is extract boundary of the Class A surface and draft with direction of Tooling Axis and angle as 3 deg
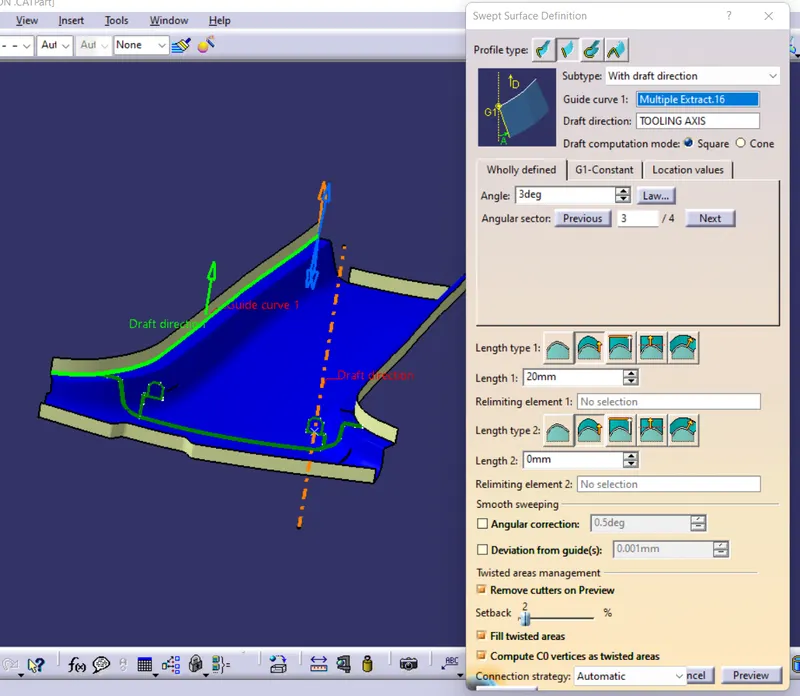
Onces these sweep surfaces are created, trim them to join the surfaces. This will give us a Class C surface.
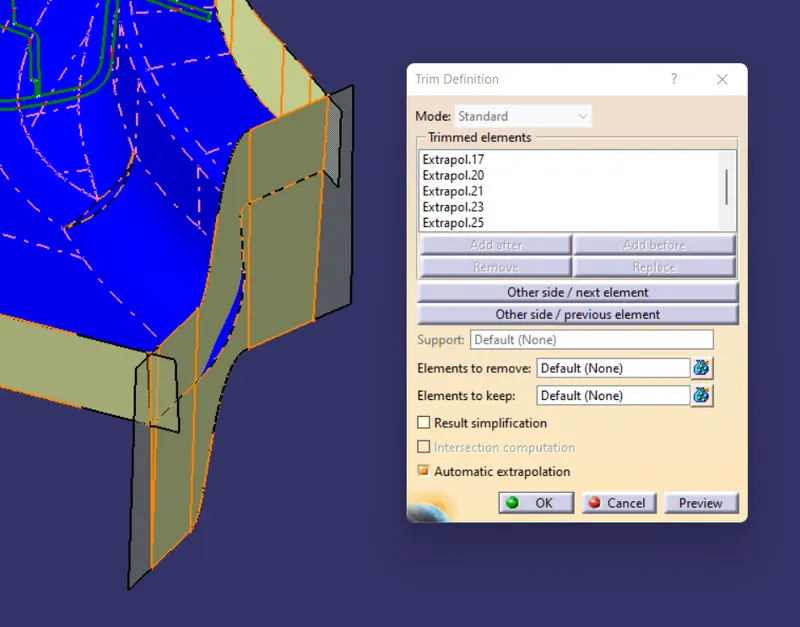
Join Class C with Class A surface
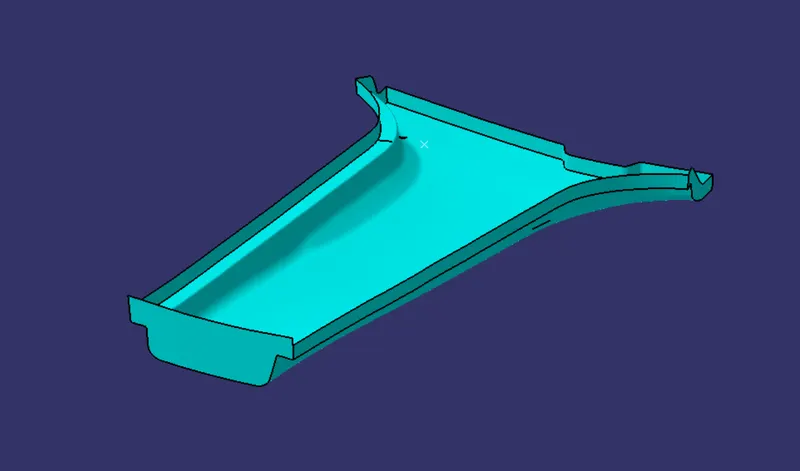
FINAL TRIM:
First join the Class A surface with the Class C surface and then trim this joined surface with the Class B surface to get the final output.
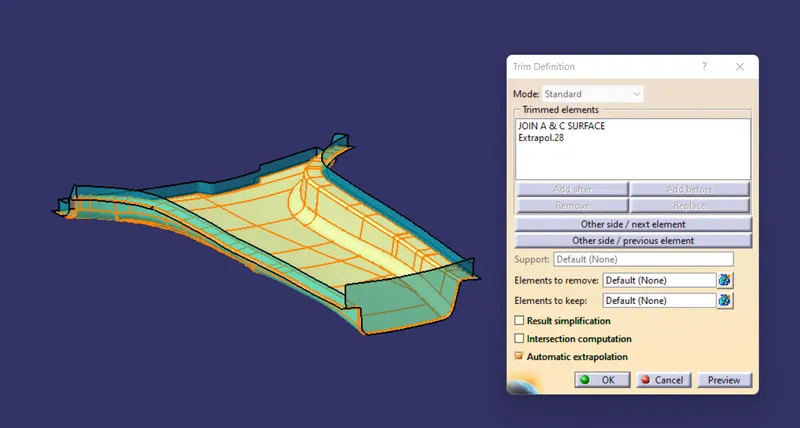
Closed surface
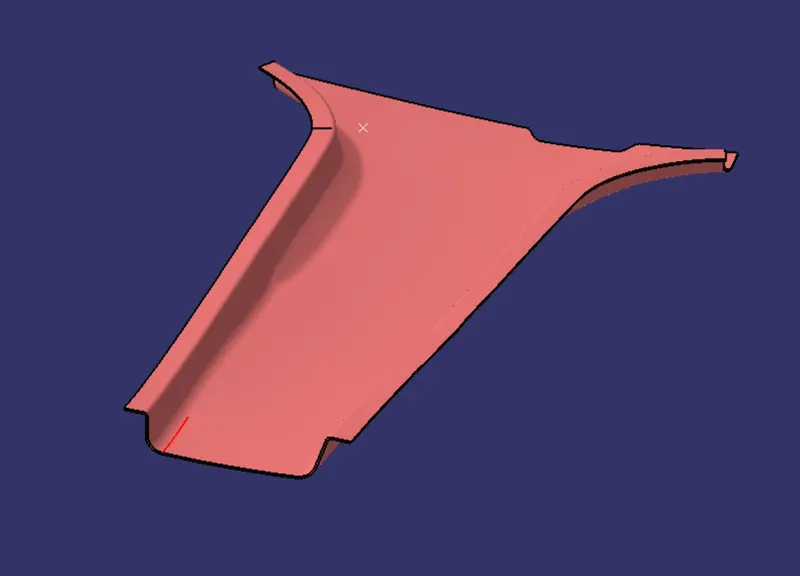
Solid Body
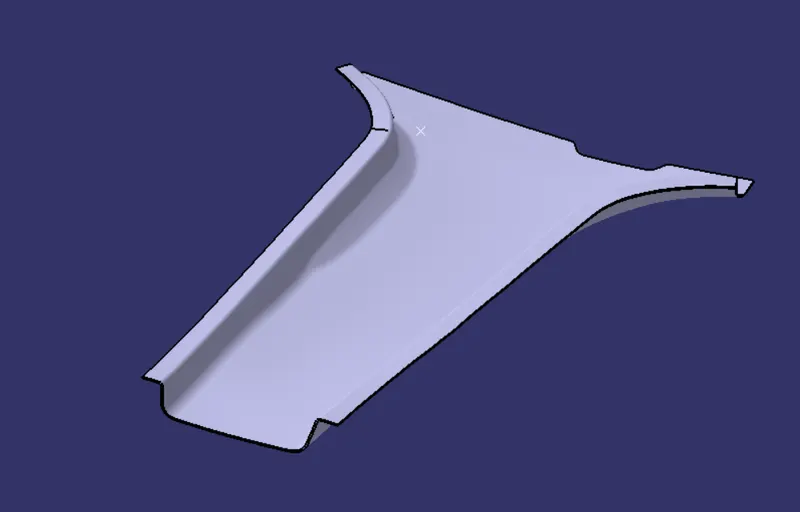
ENGINEERING FEATURES:
Dog House:
Dog House is and engineering feature that is used in plastic trim design. It is used as a supporting feature for other engineering features like snaps, locatros etc. that are mounted on the Dog house to increase thier strength and also to avoid the sink marks.
To create a Dog house we need to follow the master sections which were given to us as an input. the top surface and the supported walls of the Dog House on which the locators is laid is created by simply extracting the lines from the master section in a sketch and extruding it to a certain length
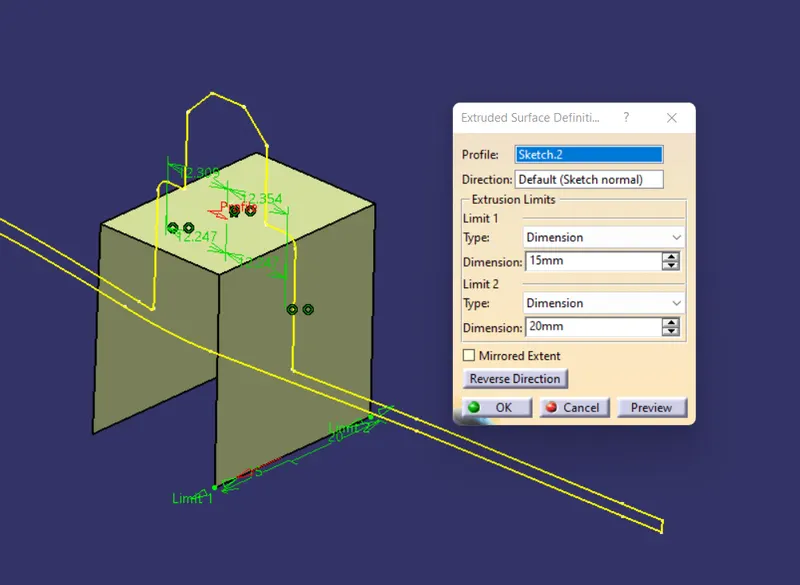
Now with the help of the master section 2, the wall closing the Dog house is created and another wall is created at the open end of the Dog house to split it with solid body
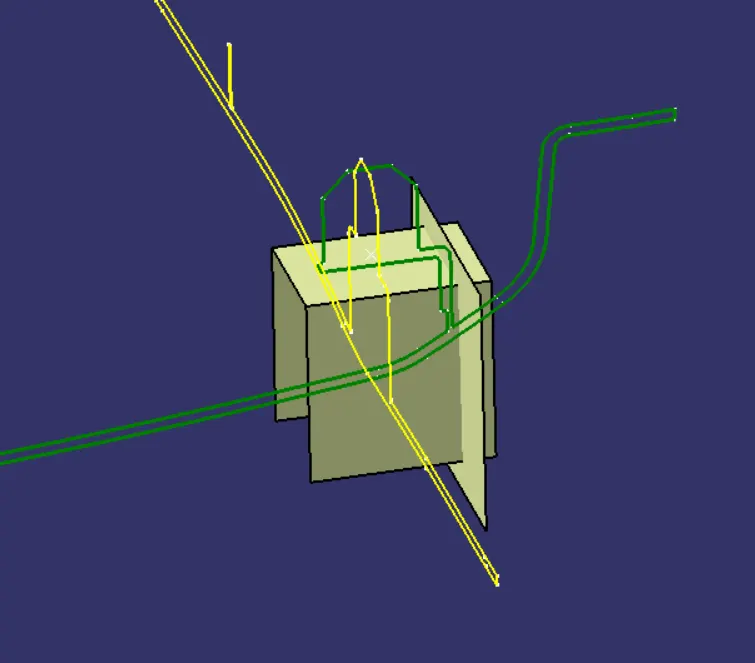
these surfaces are now trimmed to form a Dog house and it is them thickened by 2mm to create a sold body
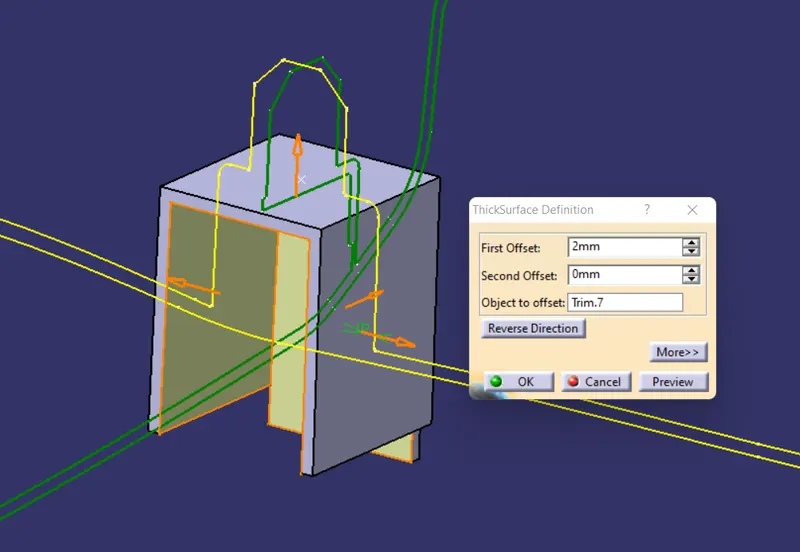
The inner walls of the dog house are created at an offset value of 1.2mm from the outer wallls and the top surface fo r the inner walls is created by intersecting the Class A surface with the back wall of the Dog House
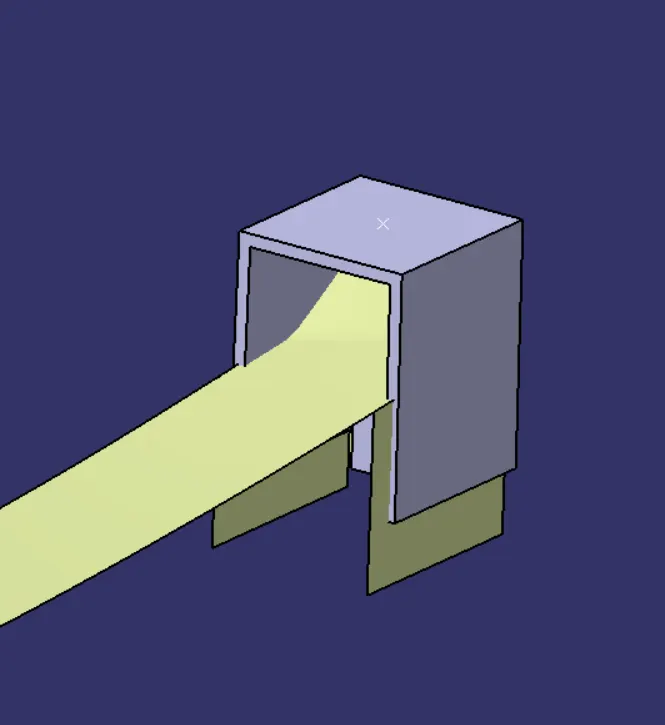
This surface is then split with the close solid to create the inner walls at the dog house
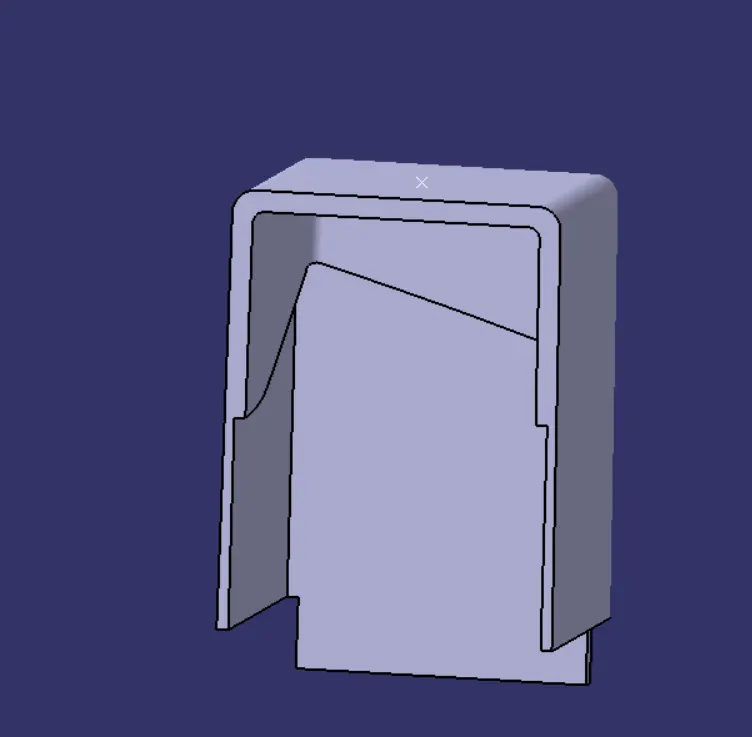
4 WAY LOCATOR:
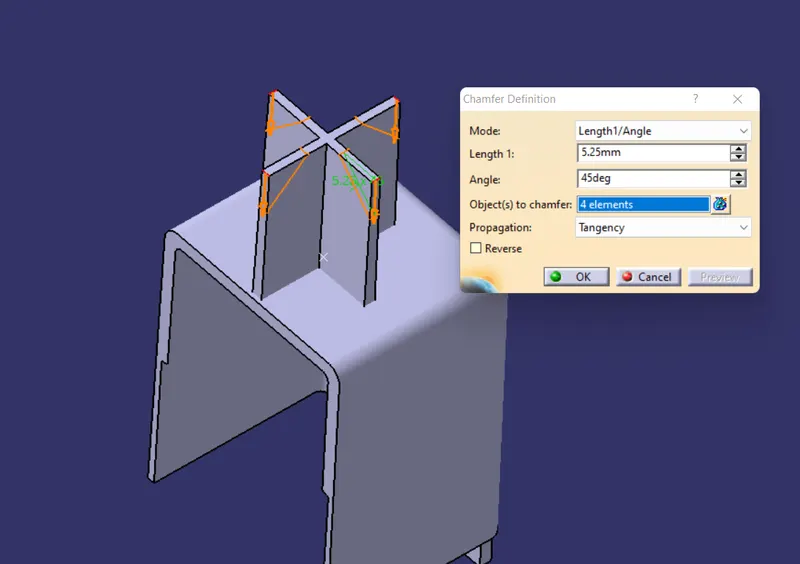
Locators are a great way to make sure the parts we are putting together fit the way we want them to fit. To create a 4 way locator, we need to create a sketch with two lines intersecting each other perpendicular forming a + once the sketch is created pad it to form a locator.
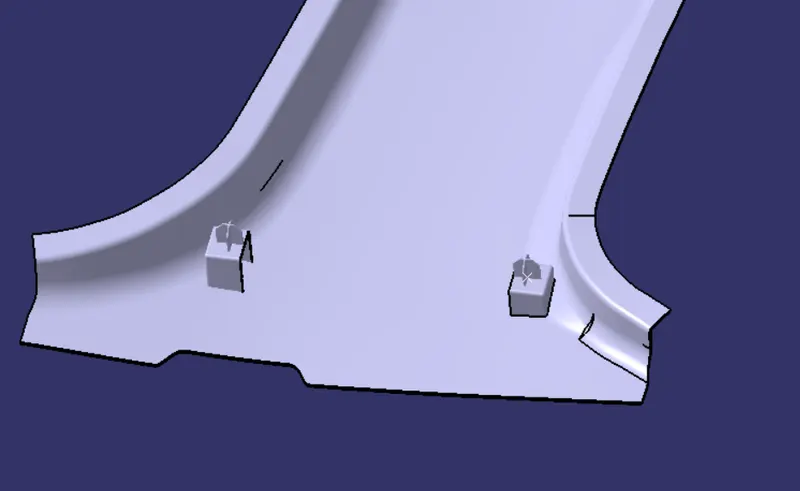
The 4 way locator is created on the top surface of the dog house following the master sections
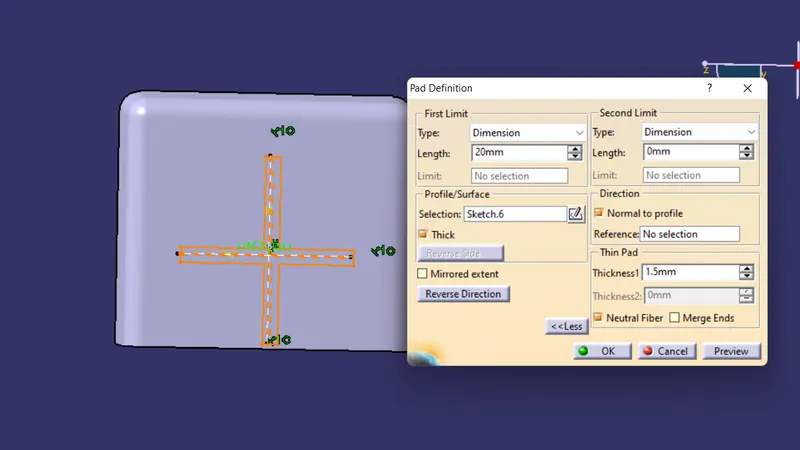
A draft of 0.5deg is given to the locator and also a chamfer of 5mm at 45 angle s given to the edges of the locators.
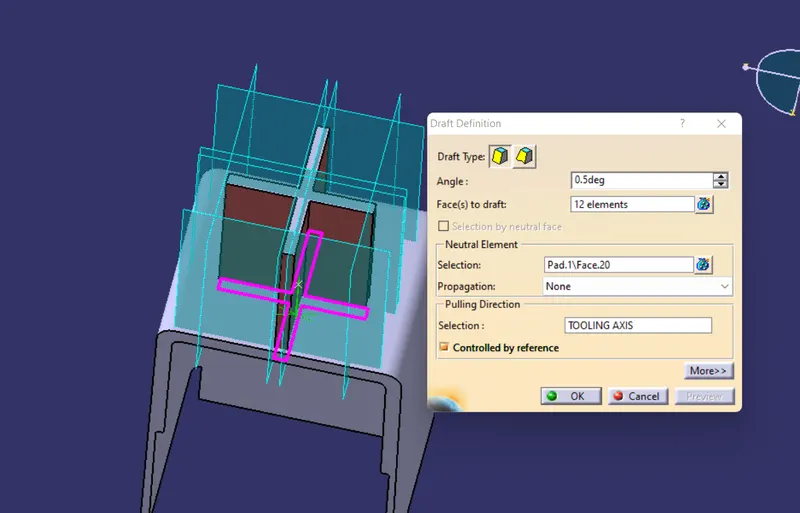
the dog house can now be mirrored by creating a plane between the two dog house using the master section
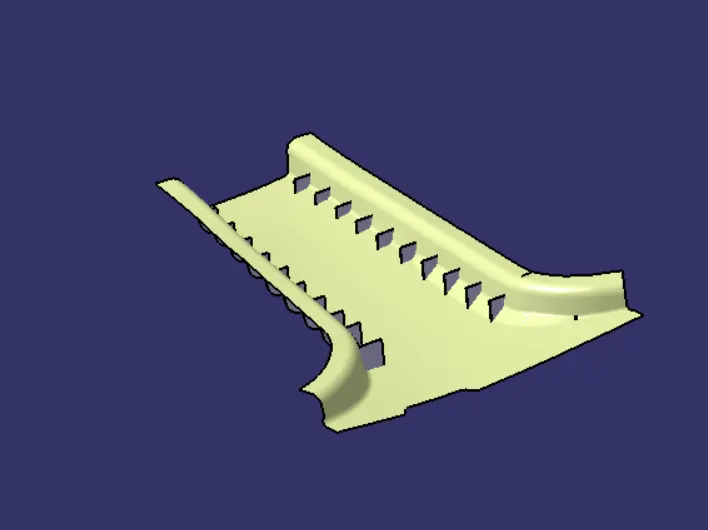
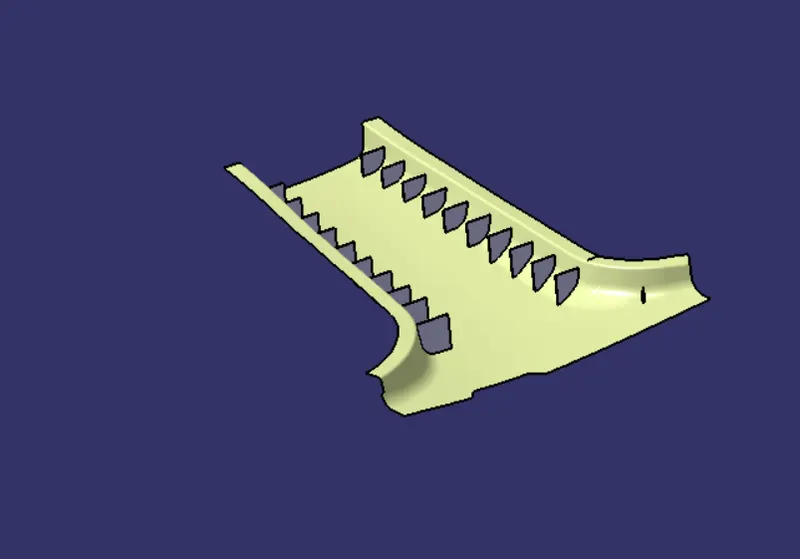
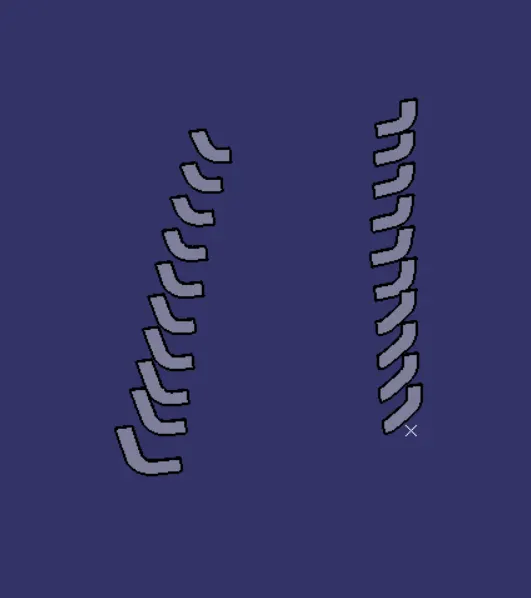
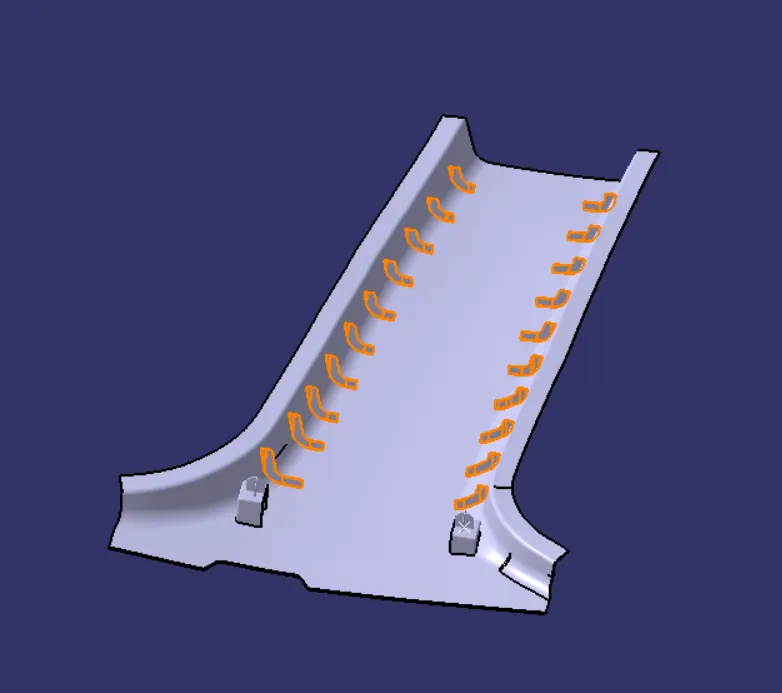
Ribs:
Ribs are created to increase the strength of a part without increasing the thickness of its walls, Because less material is required ribs can be a much more cost effective solution as well.
To create a rib, we first need to draw a straight line in the sketcher workbench where we want a rib. After creating line, extrude it and pad it.
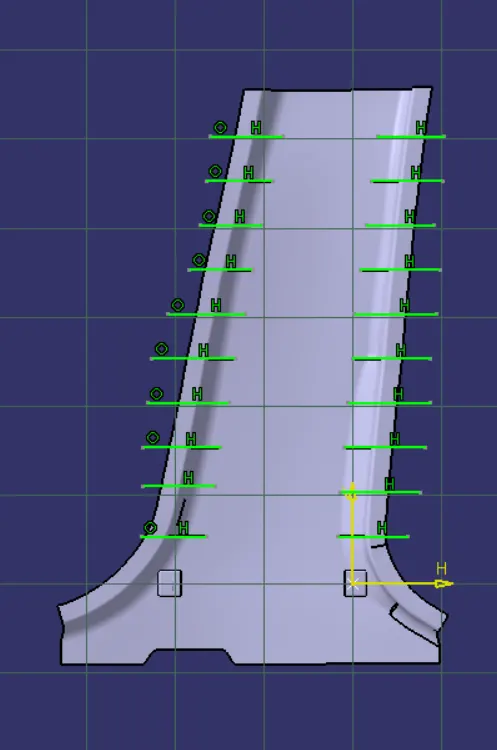
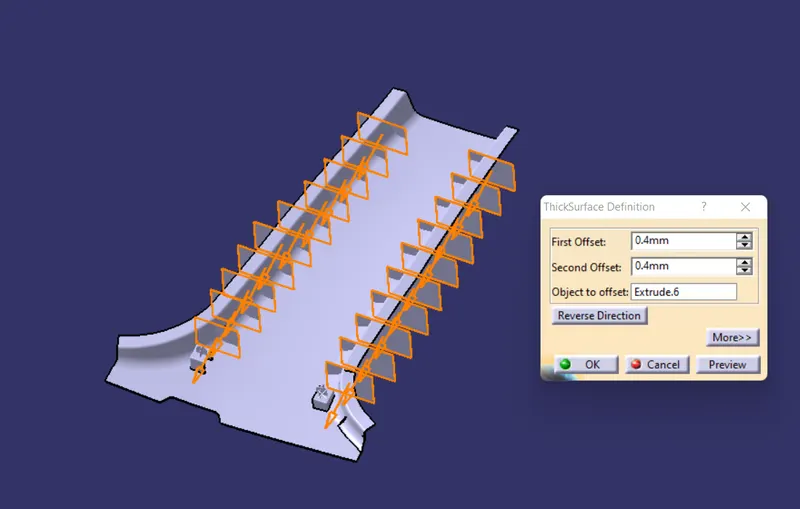
Afthe that split the ribs with offseted surfaces
DRAFT ANALYSIS ON FINAL MODEL
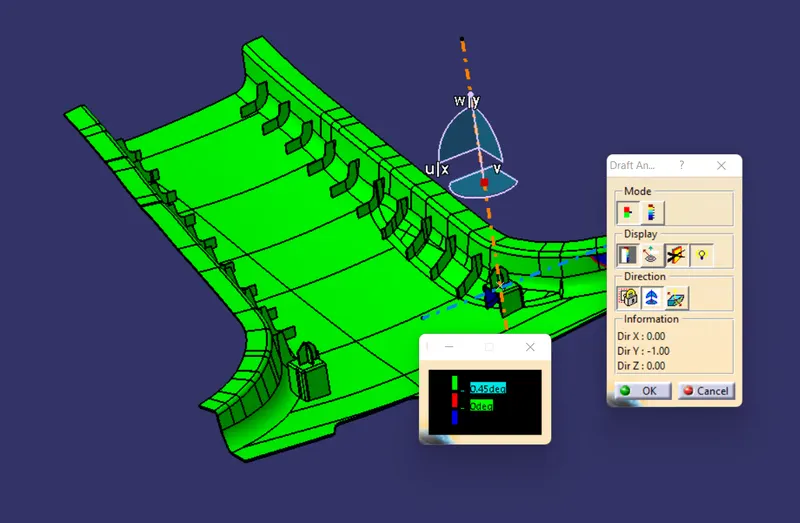
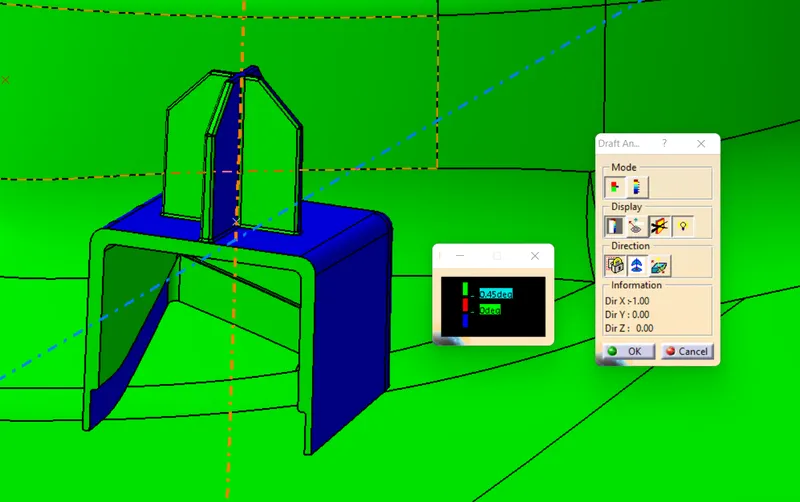
To perform Draft analysis , use the compass and align it with the tooling axis which we created for the model. Once it is properly aligned, select the surface of the model which will show us the draft angle given on the component. Draft value ranging from 0 - 3 deg. Here using 0.45 deg in both Tooling Axis.
Main Tooling Axis:
Lifter Tooling Axis:
RESULT:
B pillar component with engineering features using the master section have been successfully created and draft ananlysis have also been performed.