Week 9-Creation of 1D Connectors Challenge
Objective:
To mesh the components with target element length of 5 units, satisfying the given quality criteria and joining them with connectors as per the given details.
Quality criteria:
|
S.N |
Quality Criteria |
Value |
|
1 |
Aspect Ratio |
5 |
|
2 |
Skewness |
45 |
|
3 |
Warping |
15 |
|
4 |
Taper |
0.5 |
|
5 |
Min. Length |
2 Units |
|
6 |
Max. Length |
8 Units |
|
7 |
Min angle Quad |
45 |
|
8 |
Max angle Quad |
135 |
|
9 |
Min angle Tria |
30 |
|
10 |
Max angle Tria |
110 |
|
10 |
Tria % |
15 |
Procedure:
- The given components are all surfaces and hence we can directly mesh after checking for unnecessary free edges. Some free edges are removed using the toggle edge option.

- The meshing is done in sections, using the automesh panel in the 2D tab (F12 key), so that we can get better control over the mesh quality.

- After meshing is done the quality is checked using the qualityindex tool in the 2D tab. In the cleanup tools, the drag tria element is used to remove tria elements if possible.
- To remove minimum and maximum length errors of the elements the distance tool is used (F4 key).
- After checking the elements against the given quality criteria we can start deploying the connectors.
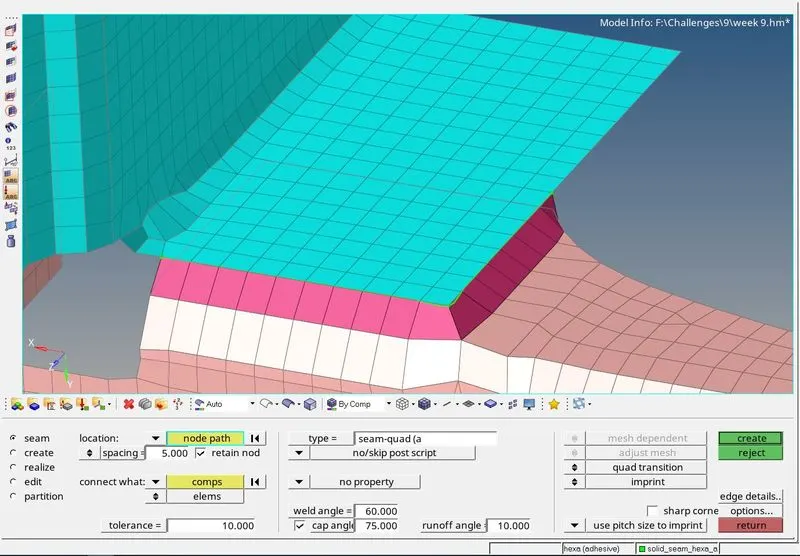
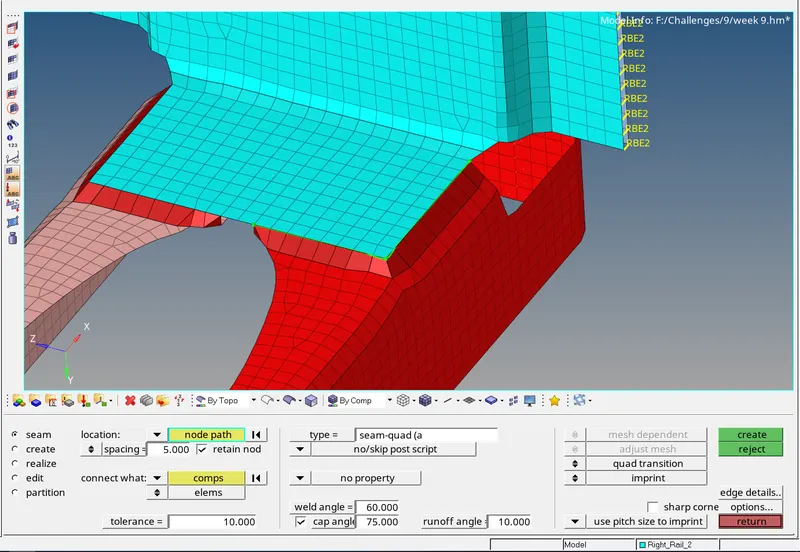
Right_Rail_2 & Front_truss_1:- Seam-Quad(angled+capped+L)
- In the connectors tool in the 2D tab the seam option is selected and in the type seam-Quad(angled+capped+L) is selected.
- The nodes where the connector is to be created are selected by node path.
- The spacing is given as 5 units as the element size is 5 units and the retain nodes checkbox is checked.
- Then the components to be connected are selected.
- The components are remeshed after the connector is created to have a proper mesh flow.
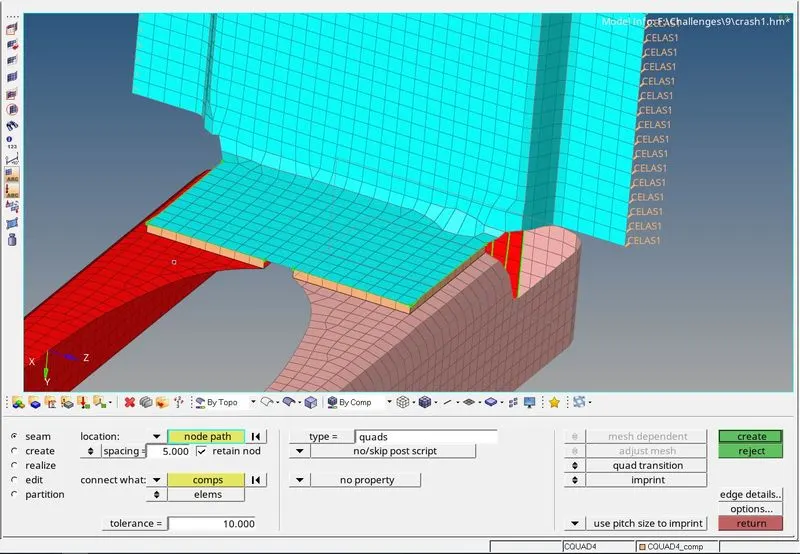
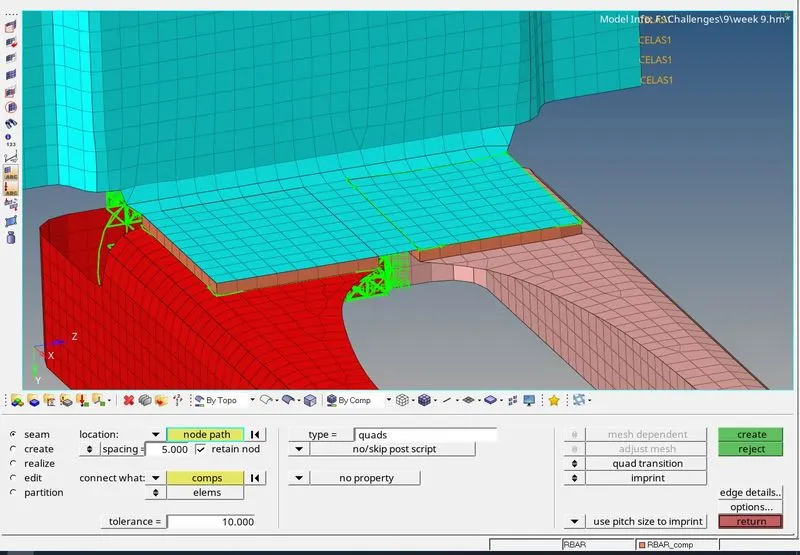
Left_Rail_2 & Front_truss_1:- Quad elements
- In the connectors tool in the 2D tab, the seam option is selected and in the type, quads is selected.
- The nodes where the connector is to be created are selected by node path.
- The spacing is given as 5 units as the element size is 5 units and the retain nodes checkbox is checked.
- Then the components to be connected are selected. The tolerance value is given as 10.
- The components are remeshed after the connector is created to have a proper mesh flow.
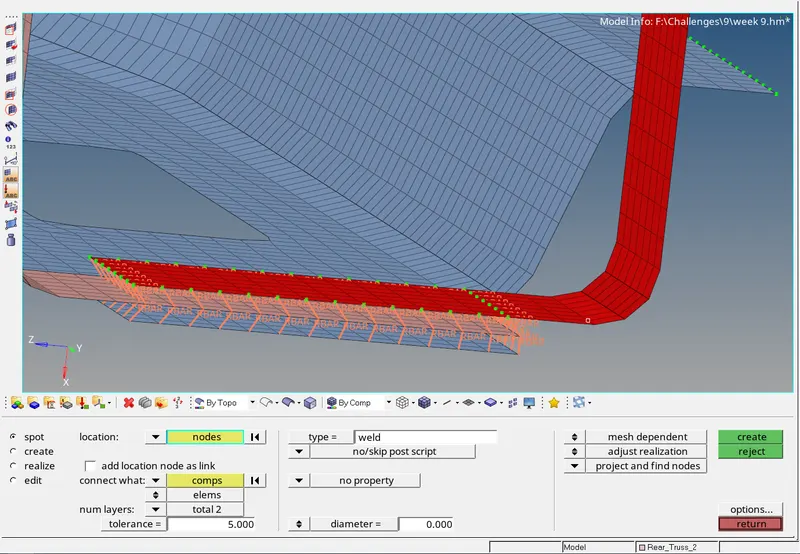
Front_truss_2, Front_truss_1 & Right_Rail_1:- Spot weld with 2 Layers and 5 mm Diameter
- In the connectors tool in the 2D tab, the spot option is selected and in the type, weld is selected.
- The nodes where the weld should be present are selected by using the by path option.
- Then the components to be connected are selected.
- The number of layers is changed to two.
- The tolerance value is given as 10 and the weld diameter is given as 5 as per the given dimension.
- Then the connector is created.
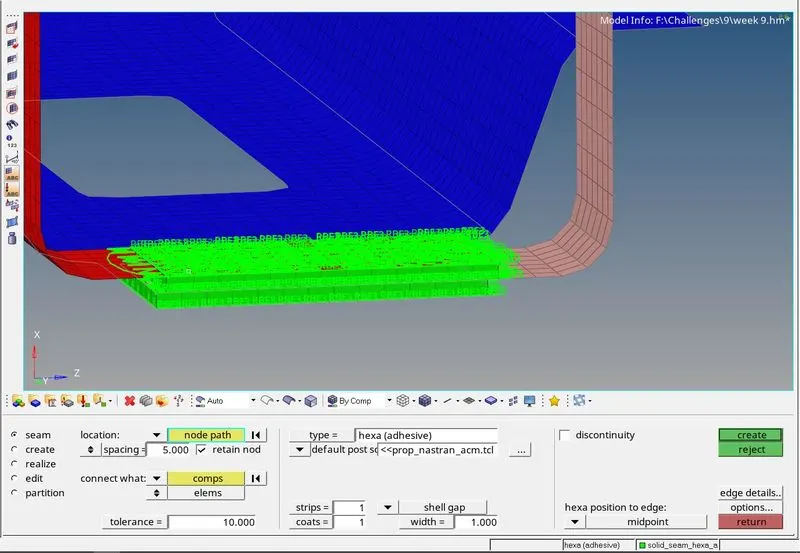
Front_truss_2, Front_truss_1 & Left_Rail_1:- Hexa (Adhesive)
- In the connectors tool in the 2D tab, the seam option is selected and in the type, hexa (adhesive) is selected.
- The nodes where the connector is to be created are selected by node path.
- The spacing is given as 5 units as the element size is 5 units and the retain nodes checkbox is checked.
- Then the components to be connected are selected. A tolerance of 10 is given.
- The components are remeshed after the connector is created to have a proper mesh flow.
- The same steps are repeated to create a connector to join the other two components.
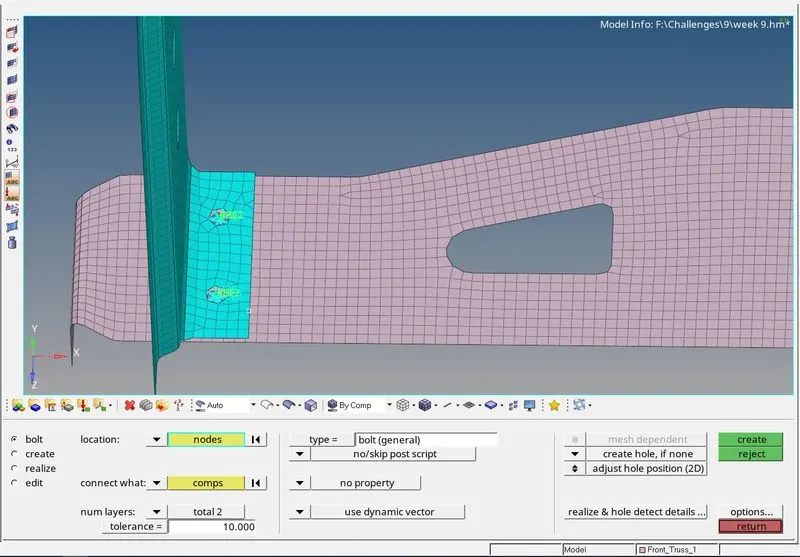
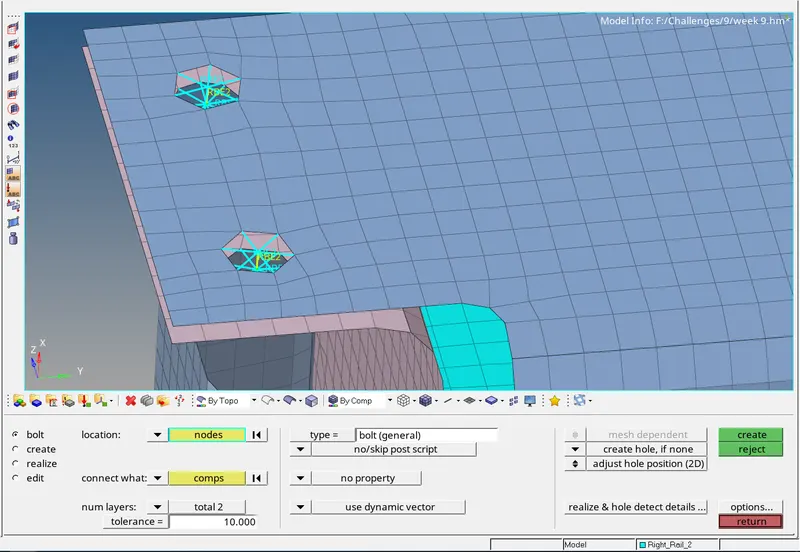
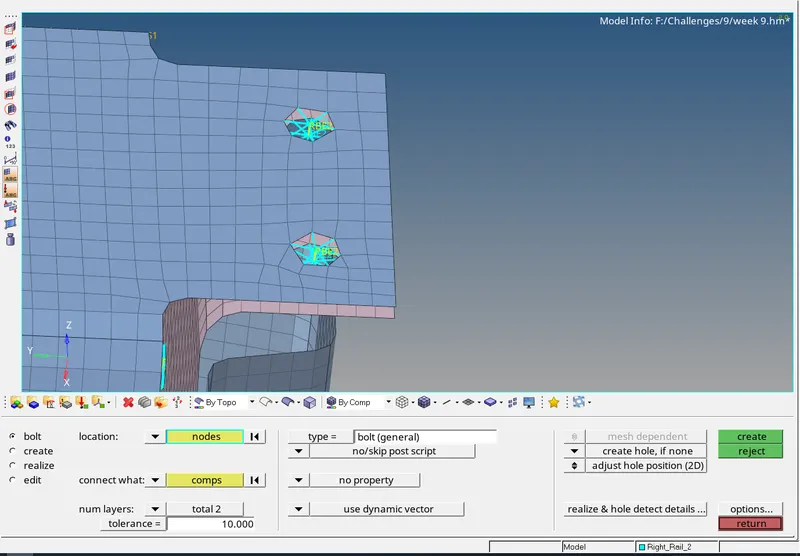
Rear_truss_2 & Right_Rail_2 and Rear_truss_2 & Left_Rail_2:- Bolt Connector
- In the connectors tool in the 2D tab, the bolt option is selected and in the type, bolt general is selected.
- The nodes where the bolt connection is to be created are selected.
- Then the components to be connected are selected. A tolerance of 10 is given.
- Then the create hole, if none option is selected because there is no pre-existing hole on the surface.
- The components are remeshed after the connector is created to have a proper mesh flow.
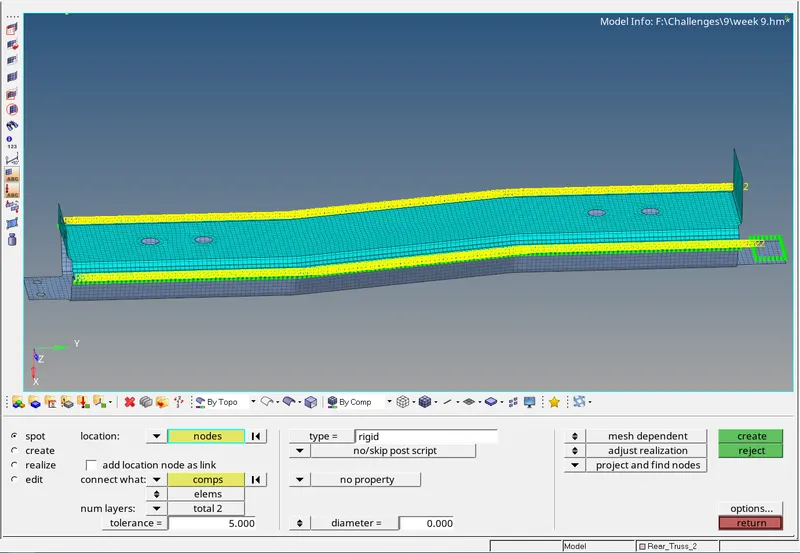
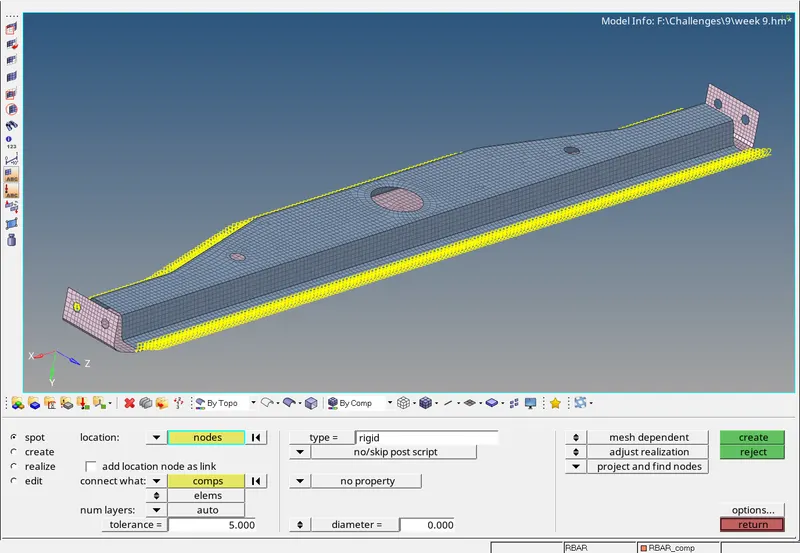
Right_Rail_1 & Right_Rail_2:- Spot-weld with Rigid Elements
- In the connectors tool in the 2D tab, the spot option is selected and in the type, rigid is selected.
- The nodes where the weld should be present are selected by using the by path option.
- Then the components to be connected are selected.
- The tolerance value is given.
- Then the connector is created.
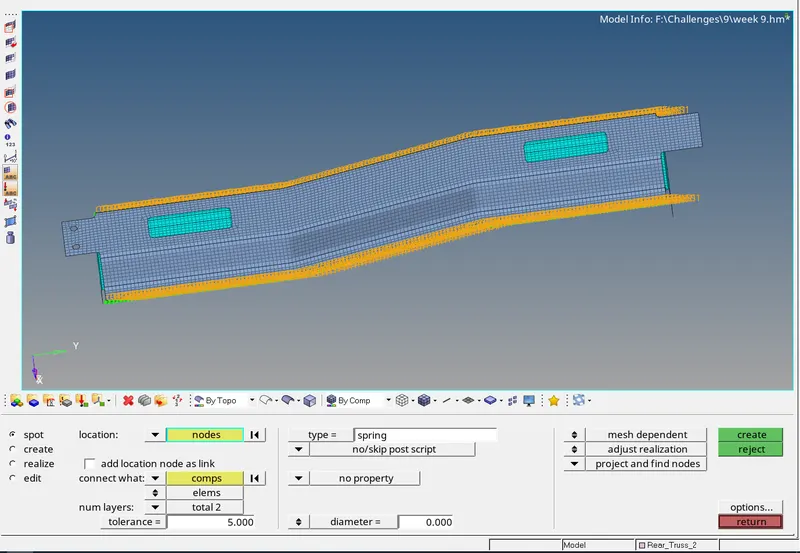
Left_Rail_1 & Left_Rail_2:- Spot-weld with Spring Elements
- In the connectors tool in the 2D tab, the spot option is selected and in the type, spring is selected.
- The nodes where the weld should be present are selected by using the by path option.
- Then the components to be connected are selected.
- The tolerance value is given.
- Then the connector is created.
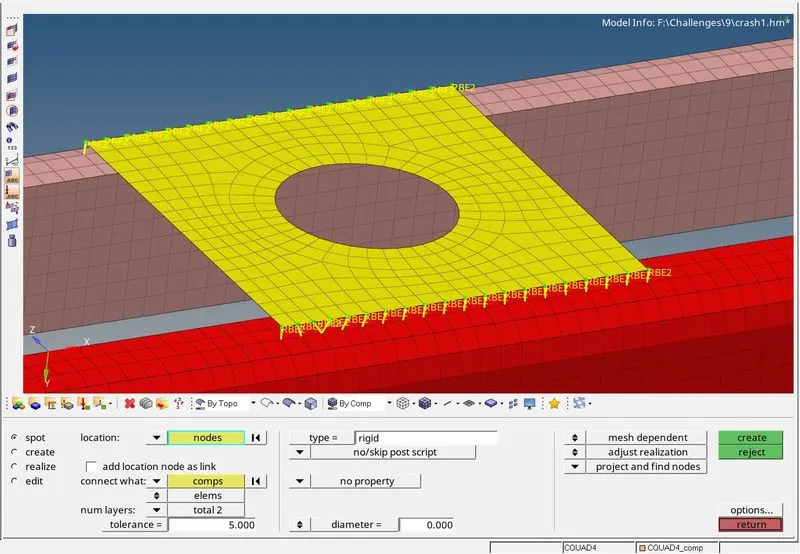
Front Truss 1 & Front Truss 2 & Reinf plate and Right_Rail_1 & Right_Rail_2 :- Spot-weld with Rigid Elements
- These elements are created using the same steps as mentioned above for the creation of spot weld with rigid elements.
- The images with the connector created is shown below.
Front Truss 2 & Left Rail_2 :- Quad Elements
- These elements are created using the same steps as mentioned above for the creation of quad elements.
- The image with the connector created is shown below.
Right_Rail_2 & Front_truss_2:- Seam-Quad(angled+capped+L)
- These elements are created using the same steps as mentioned above for the creation of seam-quad(angled+capped+L) elements.
- The image with the connector created is shown below.
Rear_truss_2 & Left_Rail_1 Rear_truss_2 & Right_Rail_1:- Bolt Connector
- These elements are created using the same steps as mentioned above for the creation of the Bolt connector
- The images with the connector created are shown below.
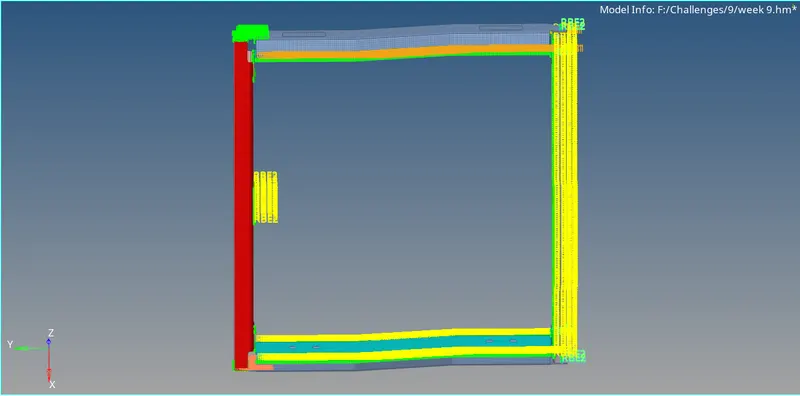
Final image with all the connectors created:
Result:
The components are created using connectors as per the given details.