Week 12:Project-1-Meshing of Door Inner Panel Challenge
OBJECTIVE:
To extract mid surface and mesh the given component satisfying the given quality criteria.
Quality Criteria:
Target Element Length = 4 Units
| S.N | Quality Criteria | Value |
| 1 | Aspect Ratio | 5 |
| 2 | Skewness | 45 |
| 3 | Warping | 15 |
| 4 | Taper | 0.5 |
| 5 | Min. Length | 2 Units |
| 6 | Max. Length | 6 Units |
| 7 | Min angle Quad | 45 |
| 8 | Max angle Quad | 135 |
| 9 | Min angle Tria | 20 |
| 10 | Max angle Tria | 120 |
| 10 | Tria % | 10 |
Procedure:
- The model is imported to hypermesh using the import geometry option.
TRIMMING THE SURFACE
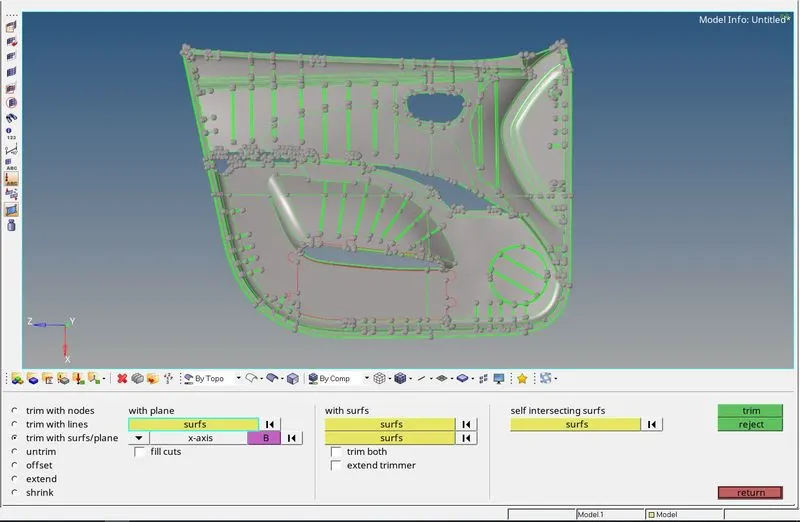
- Extracting midsurface in one go on a big component like this will be difficult so the component is divided into 4 parts and the midsurfaces are extracted separately.
- The surface is trimmed using the 'trim with surf/plane' option in the surface edit panel (Shift+F9).
- The surface to be trimmed is selected along with the axis and the base point for the cut.
- The surface after the cut is shown in the image below.
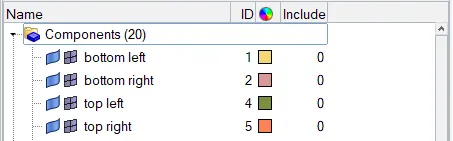
- After the surface is trimmed components are created for each section.
MIDSURFACE
- Since the component is not of uniform thickness auto midsurface feature does not give a proper midsurface.
- So, to create a midsurface we use manual midsurface extraction. The surface offset feature is used to create a midsurface by duplicating the surface and offsetting it so that it will be at the center of the two surfaces.
- To know the offset distance, the distance option (F4 key) is used to measure the thickness of the component.
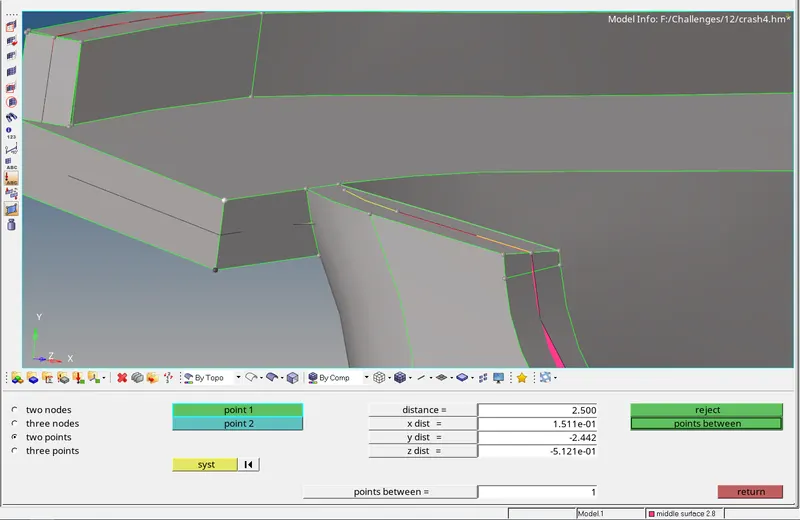
- Before offsetting the surface, the vector normal of the surface is checked to ensure the surface is offset in the direction we want.
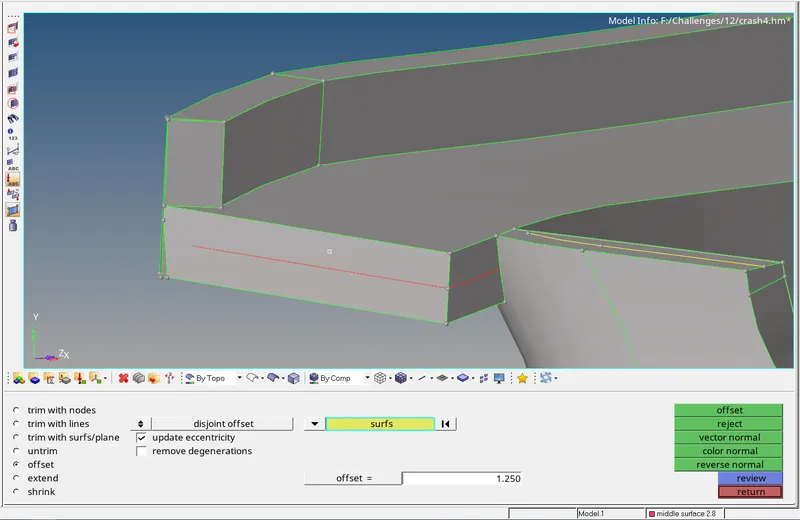
- When offsetting surfaces the midsurfaces will not have proper contact with each other. To rectify this the extend and trim with surf/plane tools are used.
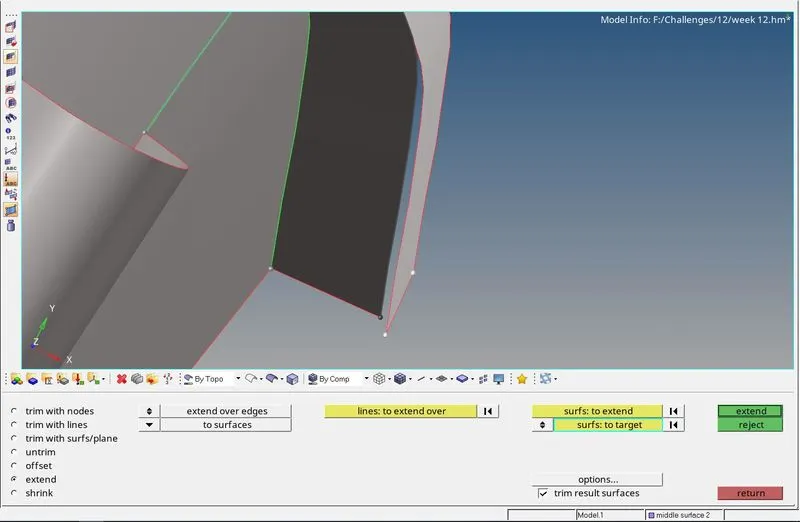
- The surfaces are not attached in the above image, so the extend option in the surface edit panel is used.
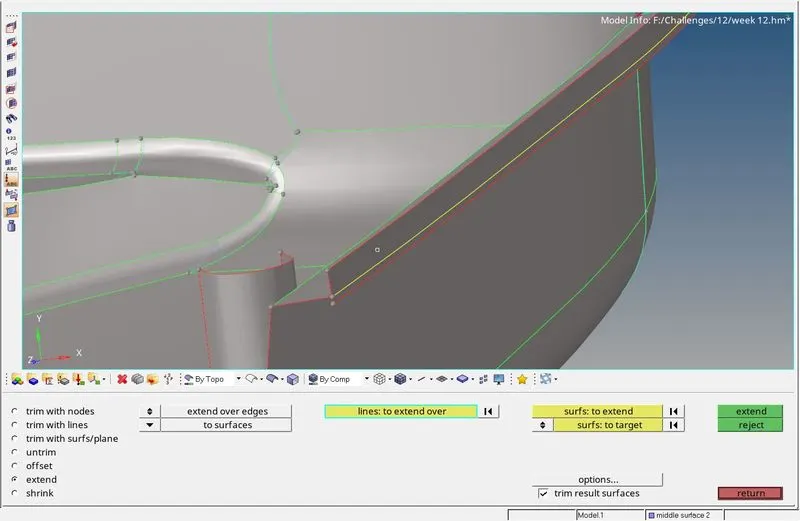
- The above image shows the surface after the extend option is used.
- In some cases, the surfaces intersect after surface offset and we have to trim the surfaces and delete the unwanted surface. For this, the self-intersecting surfs option under the trim with surf/plane is used.
- The surfaces that are intersecting are selected and trimmed.
- The midline option is used to extract the midsurface of the rib with varying thickness. The lines between which the midline is to be created are selected. The midline option is present in the line panel.
- The midline is used to trim the midsurface so that the ruled option can be used to create a surface between the midline and the trim line.
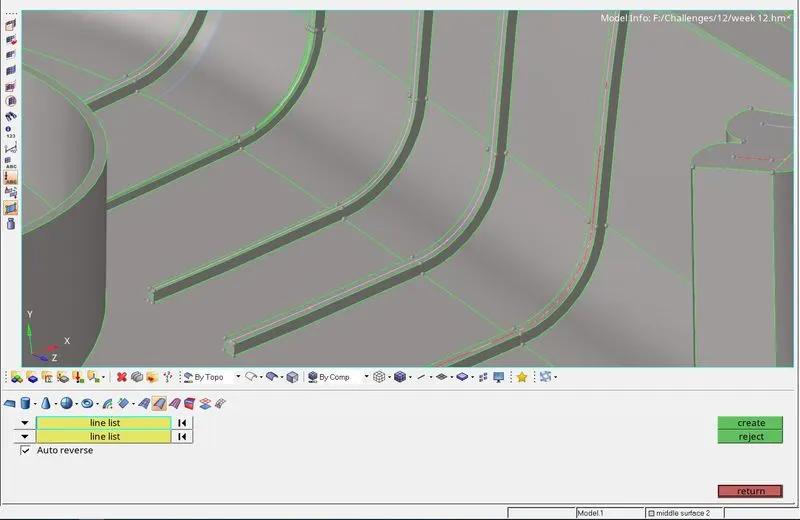
- The above line shows the midline created for the ribs.
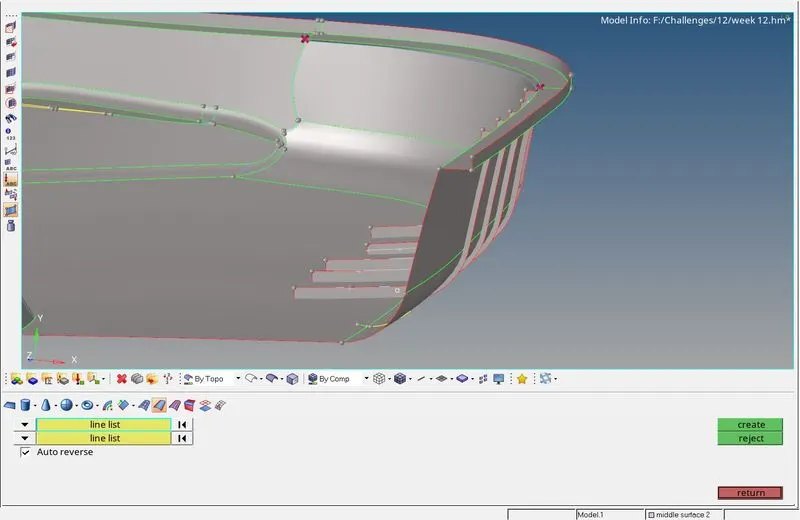
- In this case, instead of trimming the midsurface the outer surface of the component was trimmed, so after using the ruled option the surface created is intersecting with the midsurface. To rectify this the self intersecting surfs option in the trim with surf/plane option is used and the unwanted surface is deleted using the delete option (F2 key).
- The mounting piece of the component is represented as two self intersecting surfaces for the midsurface, as shown in the pictures shown below.
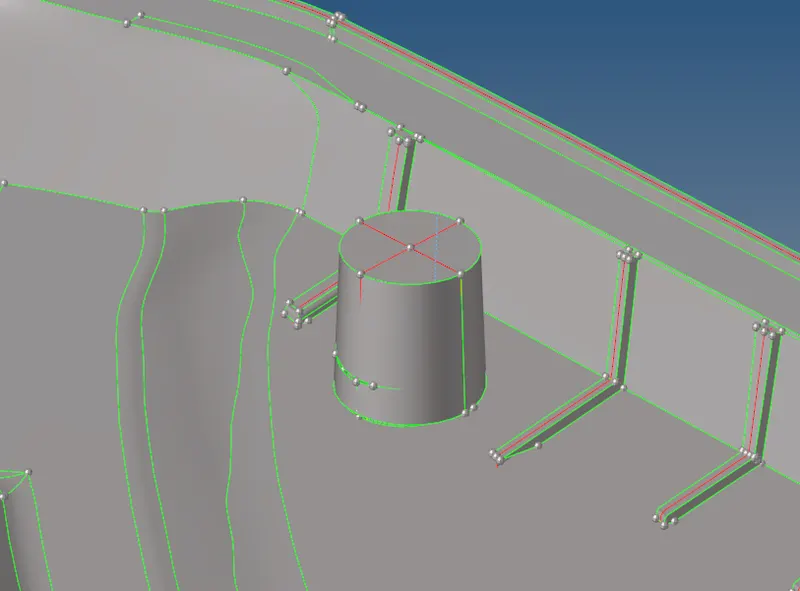
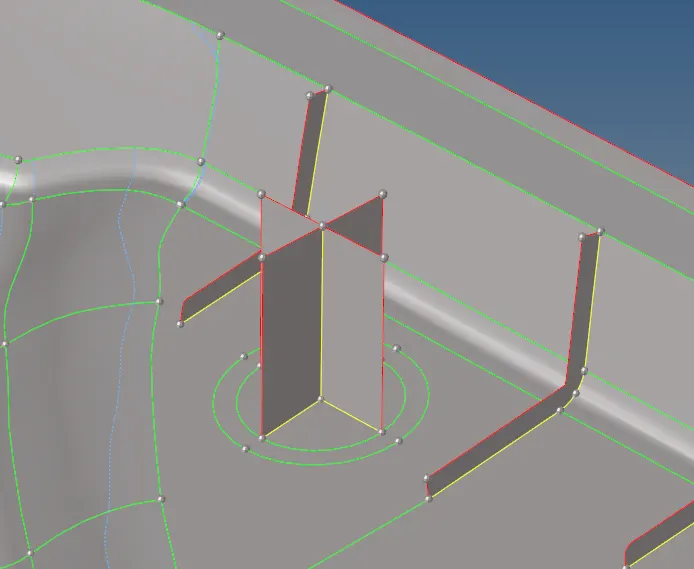
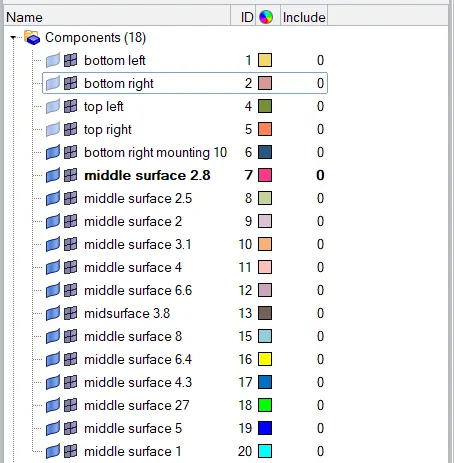
- New components for different thickness midsurfaces are created and the midsurfaces are created while having the corresponding component as current. This saves time in the later stages where we have to organize the elements into different components to assign property. Now when the component is meshed the elements are in the corresponding components and the property can be assigned easily.
MESHING
- To get a proper mesh flow with low tria concentration the surface is divided into manageable sizes.
- This allows us to have better control over the mesh by changing the number of nodes to get a proper mesh.
- Unwanted points are removed, sharp corners are avoided on the surfaces, washer spit is added where there is a hole.
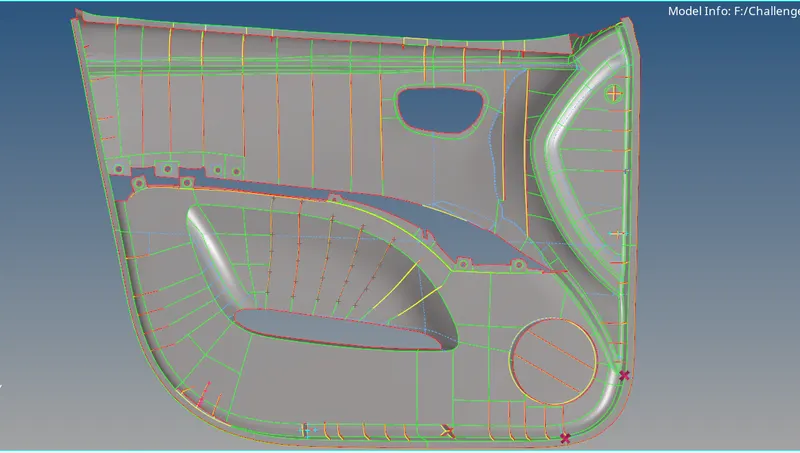
- The automesh panel in the 2D tab is used to create the mesh. The element size is given as 4 units and the mesh type is selected as mixed.

- After the elements are created the quality is checked using the check elems tool (F10 key).
- The surface is remeshed to remove trias and the cleanup tools in the qualityindex panel are also used to remove the trias (drag tria element).
- The translate option(Shift+F4) is used to remove the warpage failure by selecting the node and translating it.
- If the element is failing for minimum or maximum length the distance option (F4 Key) is used to change their length.
- The replace node option is used to connect element nodes when connectivity is not present. Another way is to use the edge tool to find the free edges between the elements and using the equivalence option to establish connectivity.
- To regain mesh flow after removing trias the smooth option is used. Sometimes while using the smooth option (Shift+F12) the nodes won't be aligned properly with the feature line. To rectify this the project option (Shift+F7) is used, the nodes that are not on the feature line are selected and the line to which they should be projected is selected.
ASSIGNING THICKNESS
- To assign thickness to elements we need to create a property. In the property, the card image is selected as P1_SHELL and in the thickness field, the thickness value is entered.
- Then this property has to be assigned to the corresponding components.
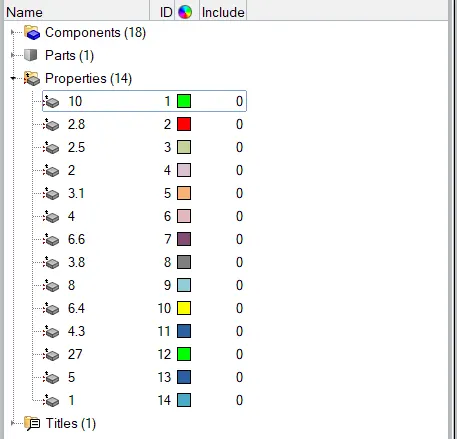
- The above image shows the properties created for the midsurfaces.
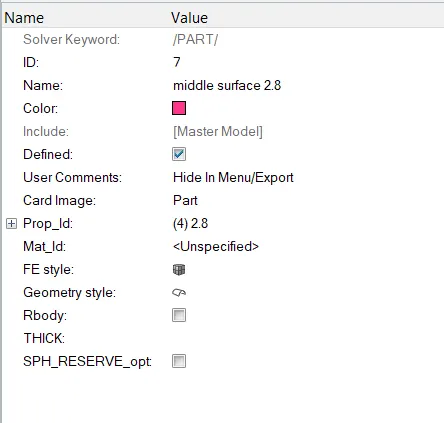
- The above image shows the component middle surface 2.8 assigned the property 2.8 to it.
QUALITY CRITERIA
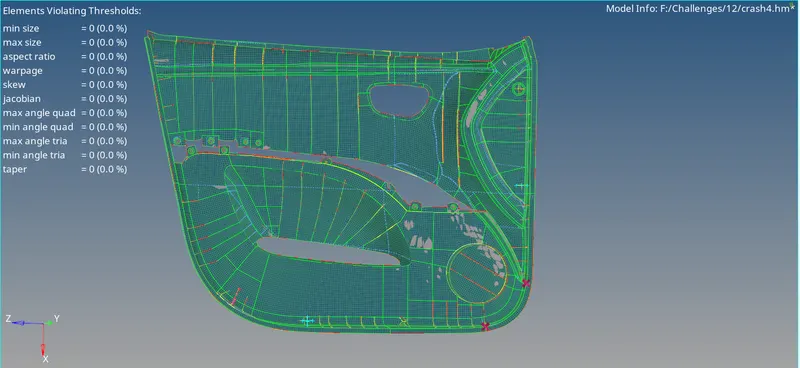
- The check elems tool is used to check for any duplicate elements and the connectivity of the elements.
FINAL IMAGE:
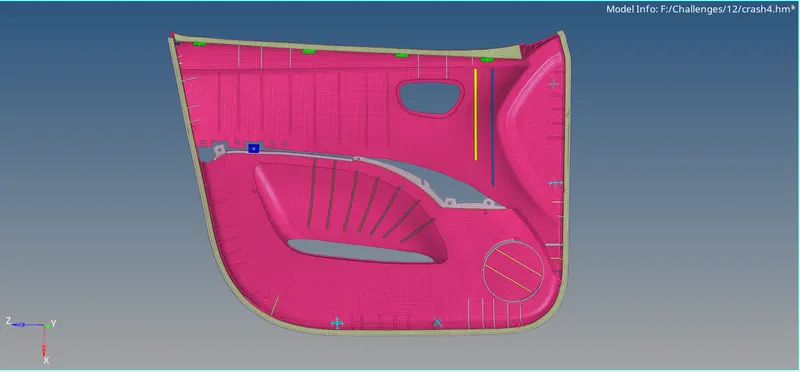
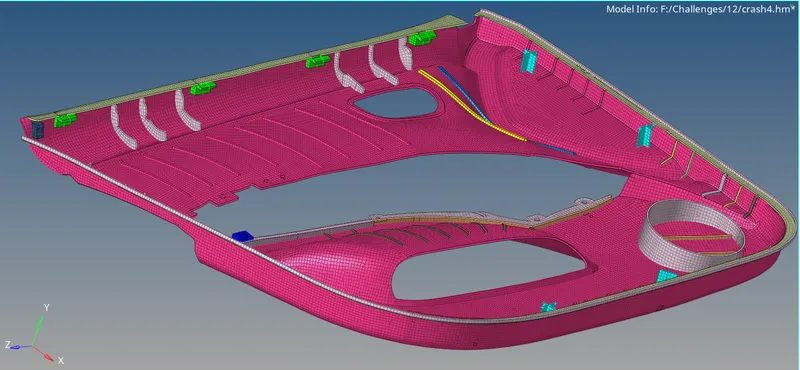
RESULT:
The midsurface has been extracted and meshed satisfying the given quality criteria and the property has been assigned to the components.