Week 9-Challenge
Objective:
To Mesh the given component with a target size of 5mm
Create a connector and attach the various parts of the given model
Procedure: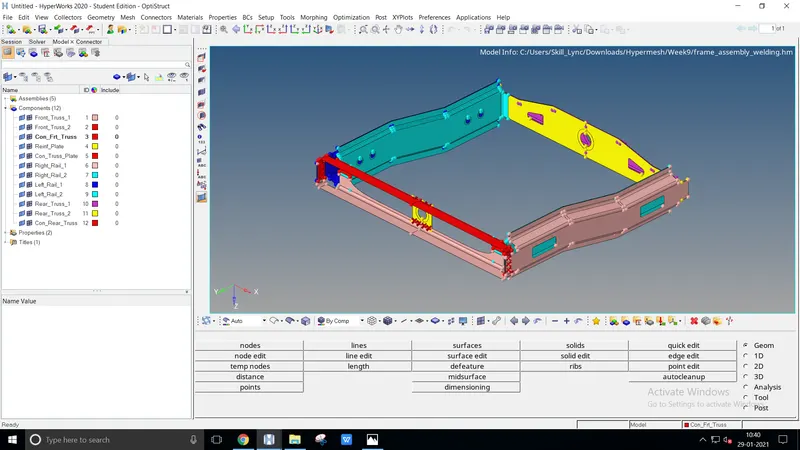
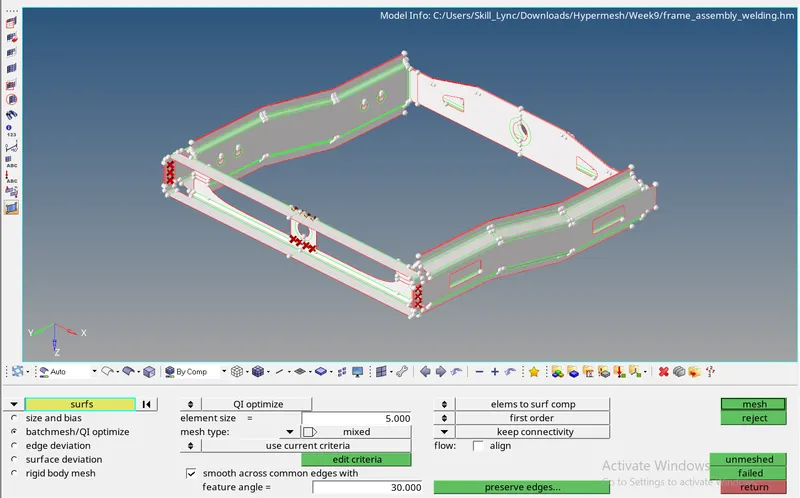
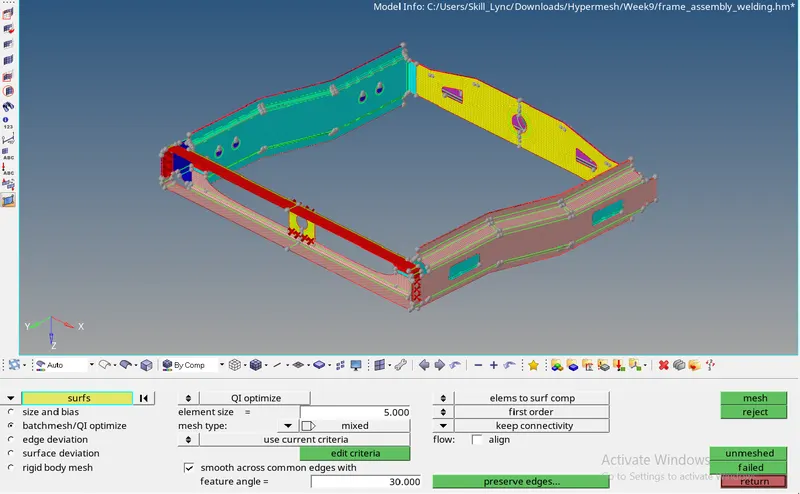
- Import the model from the existing location
- 2D meshing is performed on the entire model to provide the connectors
CONNECTORS
Seam-Quad(angled+capped+L)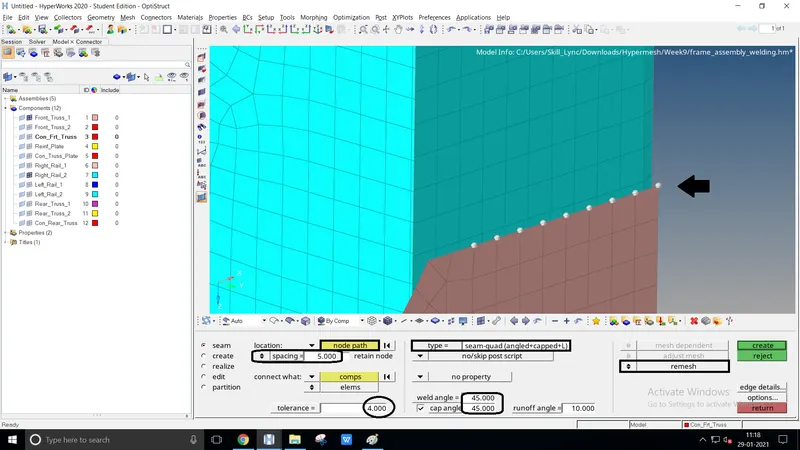
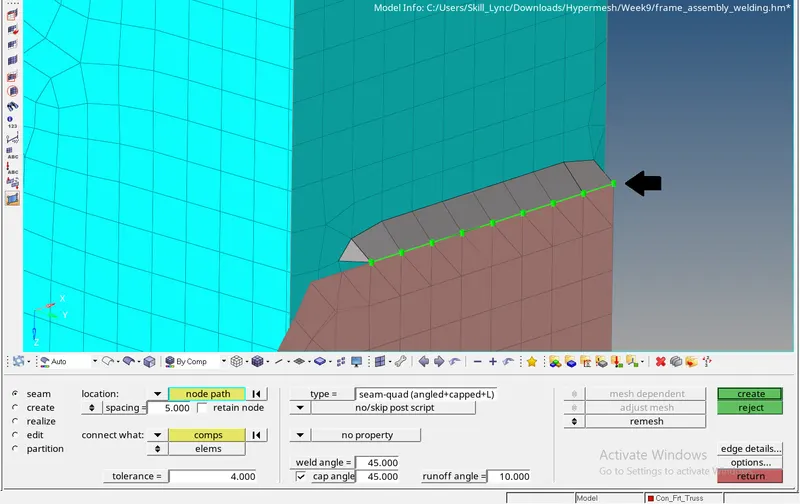
- Un-hide the required components to implement connectors, Select 1D/2D/3D → Connectors → Seam option. Now select the node list. Select the checkbox to retain nodes.
Enter a spacing value and select the comps, to create the weld between those two components. Define the tolerance value, based on the distance between the two components.
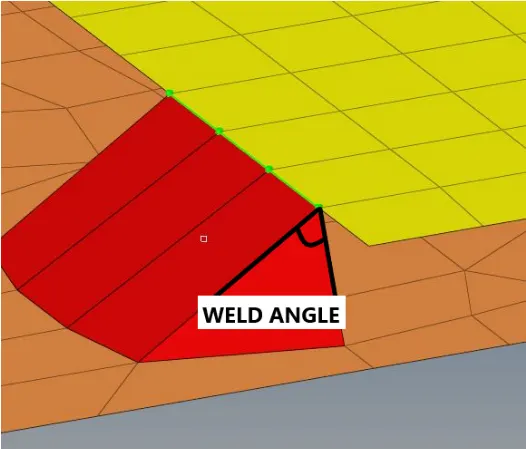
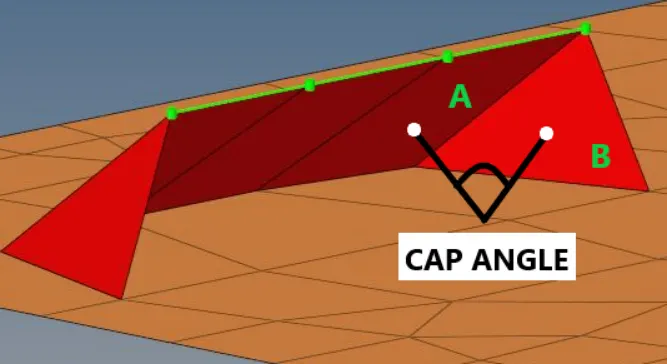
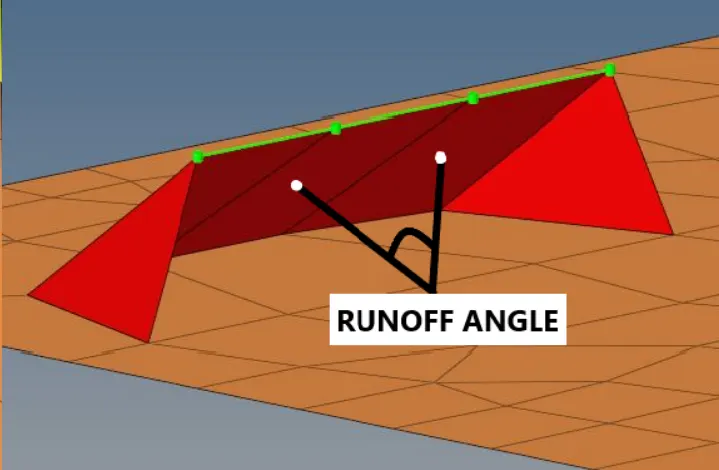
Select the type as seam-quad (angled+capped+L) - Seam weld is displayed at the required node list with required weld & cap angle as entered
- The above image displays seam weld angle, cap angle, runoff angle
Quad-elements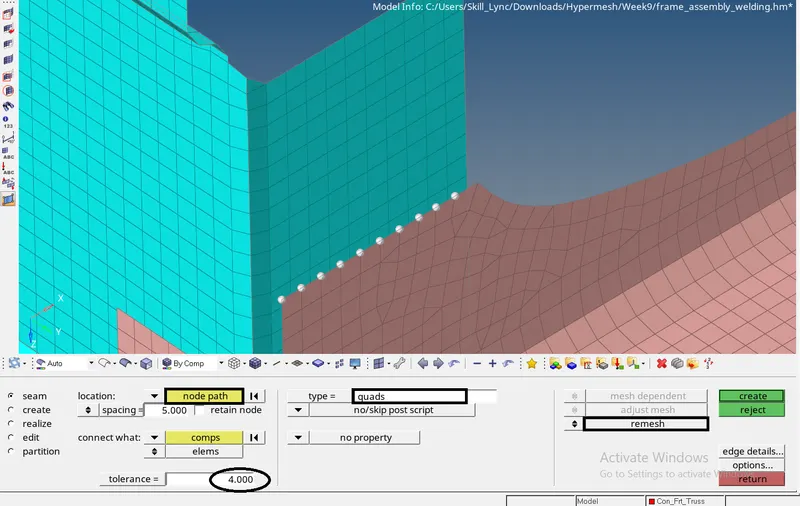
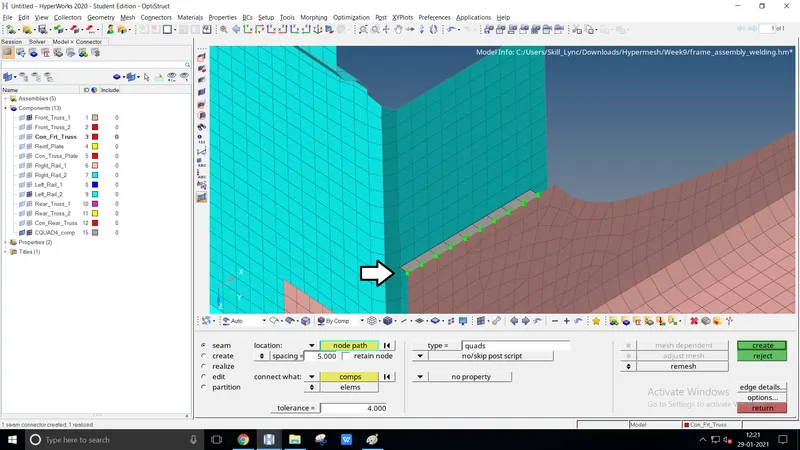
- Un-hide the required components to implement connectors, Select 1D/2D/3D → Connectors → Seam option. Now select the node list. Select the checkbox to retain nodes.
Enter a spacing value and select the comps, to create the weld between those two components. Define the tolerance value, based on the distance between the two components.
Select the type as Quad-elements - Seam weld is displayed at the required node list
Spot-weld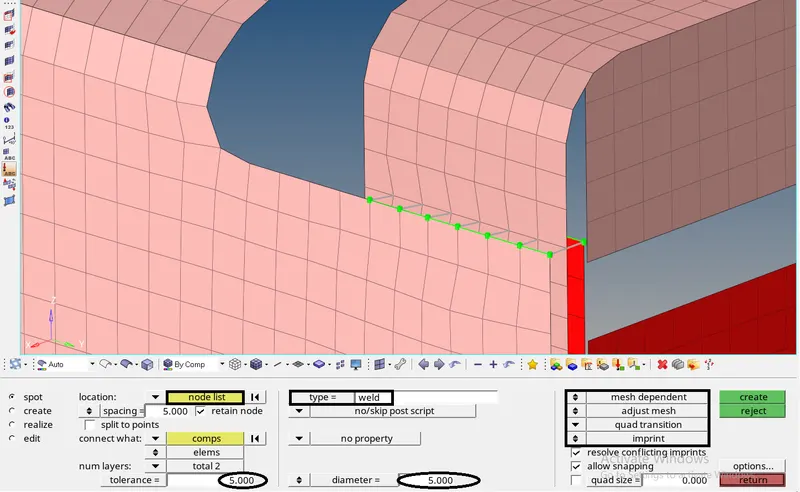
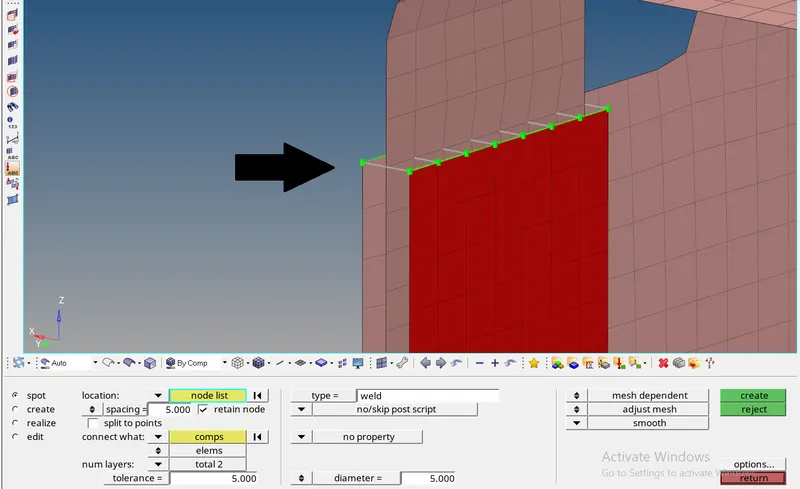
- Un-hide the required components to implement connectors, Select 1D/2D/3D → Connectors → Spot option. Now select the node list. Select the checkbox to retain nodes.
Enter a spacing value and select the comps, to create the weld between those two components. Define the tolerance value, based on the distance between the two components.
Change it to mesh dependent, adjust mesh and smoothening elems and select the type as Weld - Repeat the same process to cover three components parallelly
Hexa (Adhesive) 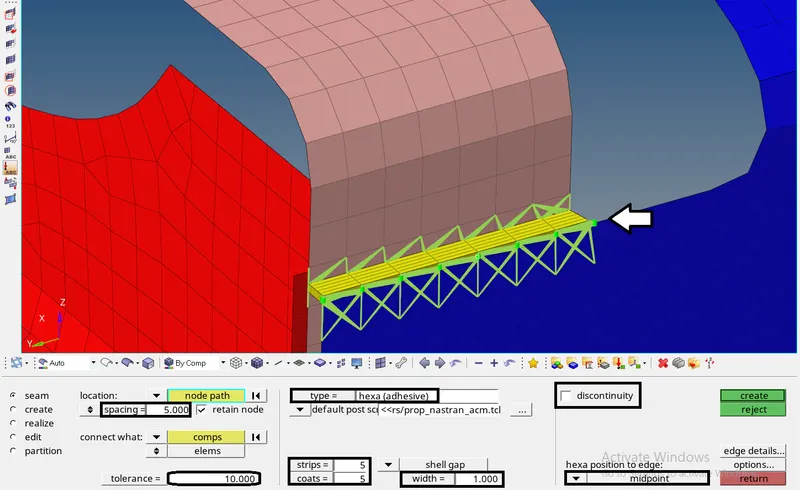
- Un-hide the required components to implement connectors, Select 1D/2D/3D → Connectors → Seam option. Now select the node list. Tick retain nodes, to retain the position of the nodes.
Enter the spacing value & select the comps, to create the weld between those two components. Define the tolerance value, based on the distance between the two components.
Untick discontinuity and select Hexa position as the midpoint. Select the type as Hexa (Adhesive)
Bolt-Connector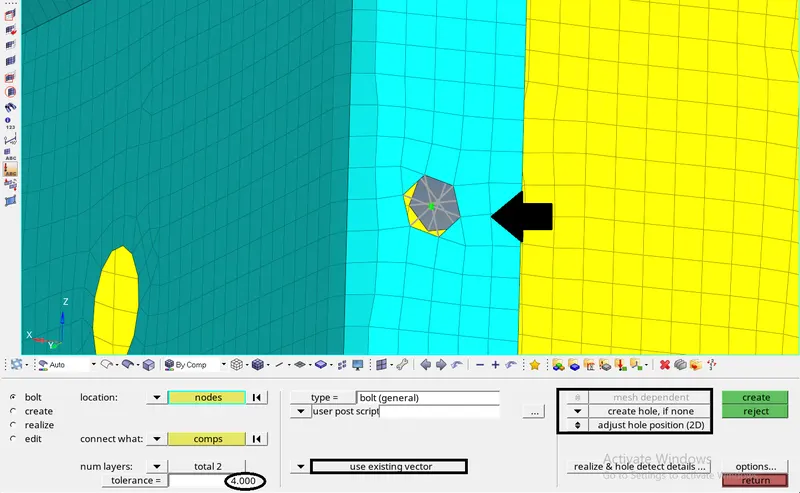
- Un-hide the required components to implement connectors, Select 1D/2D/3D → Connectors →Bolt option. Now select the node list. Tick retain nodes, to retain the position of the nodes.
Enter the spacing value & select the comps, to create the weld between those two components. Define the tolerance value, based on the distance between the two components.
Select create hole, if none and select adjust hole position. Select the type as Bolt (general)
Spot-weld with Rigid Elements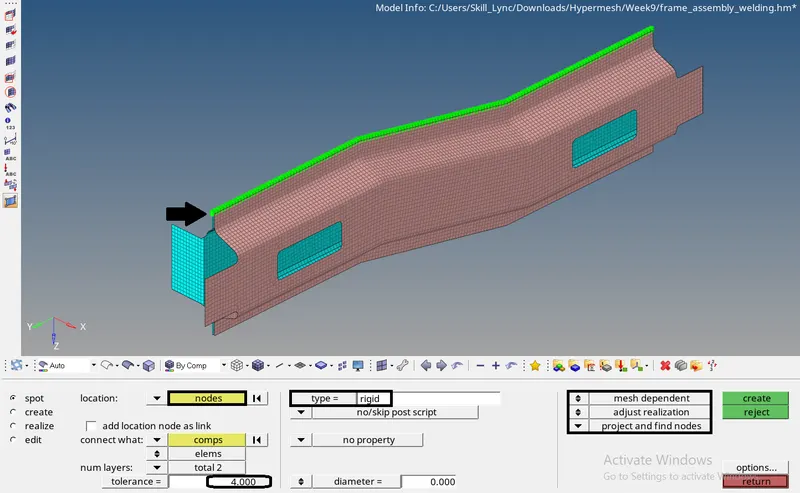
- Un-hide the required components to implement connectors, Select 1D/2D/3D → Connectors → Spot option. Now select the node list. Tick retain nodes, to retain the position of the nodes.
Enter the spacing value & select the comps, to create the weld between those two components. Define the tolerance value, based on the distance between the two components.
Select mesh dependent, adjust realization and project & find nodes. Select the type as rigid
Spot-weld with Spring Elements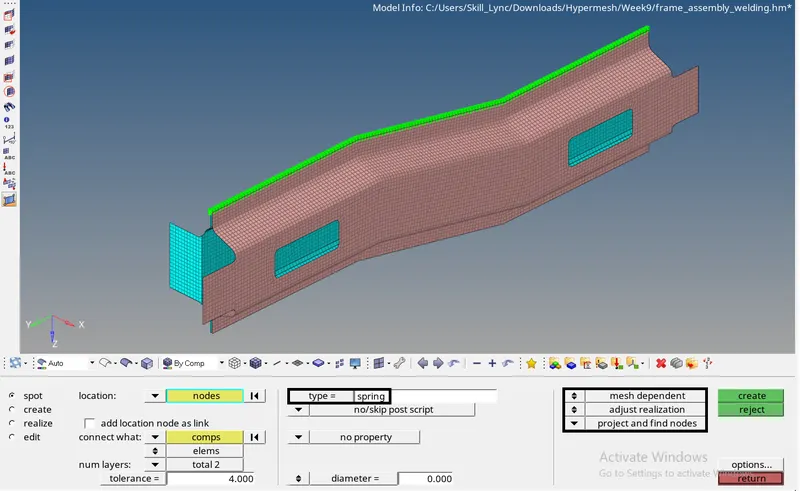
- Un-hide the required components to implement connectors, Select 1D/2D/3D → Connectors → Spot option. Now select the node list. Tick retain nodes, to retain the position of the nodes.
Enter the spacing value & select the comps, to create the weld between those two components. Define the tolerance value, based on the distance between the two components.
Select mesh dependent, adjust realization and project & find nodes. Select the type as spring
Before | After
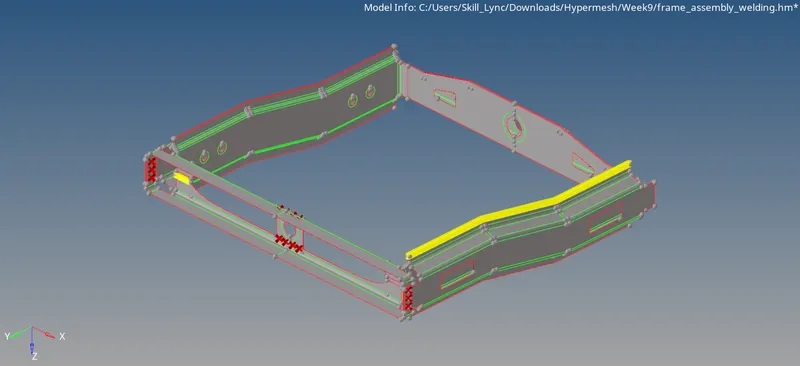
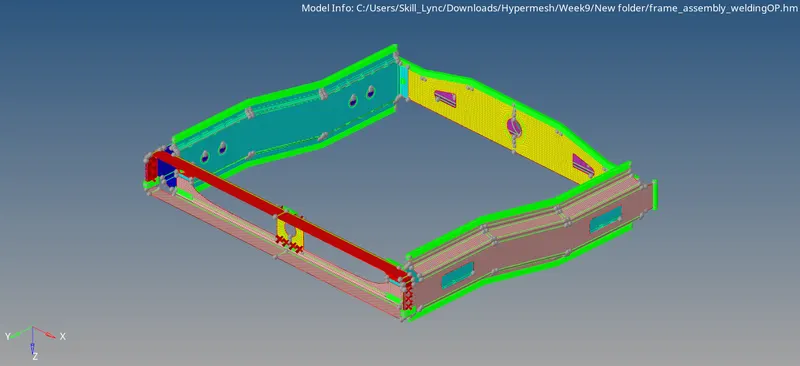
Conclusion
The given component has meshed with a target size of 5mm
Connectors are created and attach to the various components of the given model