CONNECTIONS REPRESENTATION OF FRAME ASSEMBLY USING HYPERMESH
CONNECTIONS REPRESENTATION OF FRAME ASSEMBLY
Objective :
To mesh the frame assembly and make connection representation at specific parts.
Connections :
a) Right_Rail_2 &Front_truss_1 :-Seam-Quad(angled+capped+L)
Left_Rail_2 & Front_truss_1:- Quad elements
c) Front_truss_2, Front_truss_1& Right_Rail_1: Spot weld with 3 layers and 5mm diameter
d) Front_truss_2, Front_truss_1& Left_Rail_1: Hexa (Adhesive)
e) Real_truss_2 & Right_Rail_2 : Bolt connector
f) Real_truss_2 & Left_Rail_2 : Bolt connector
g) Right_Rail_1 & Right_Rail_2 :Spot weld with Rigid elements
h) Left_Rail_1& Left_Rail_2 : Spot weld with Spring elements
i) Rest all the components left join them with suitable connectors
Procedure :
A. Meshing
1. Import the frame_assembly_welding.hm to hypermesh under opistruct profile.
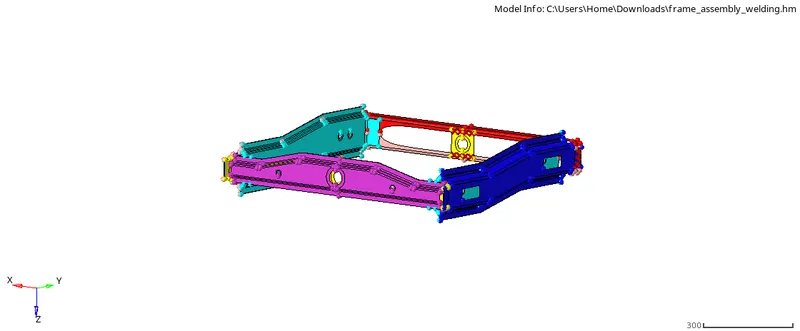
FIG 1.1 GIVEN FRAME ASSEMBLY MODEL.
2. 2D>Automesh the component with 5mm as target element size as the midsurface is available.
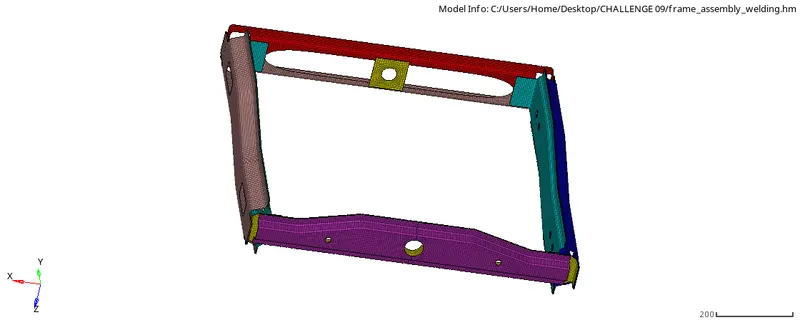
FIG 1.2 MESHED FRAME ASEEMBLY.
B.Connections:
1. Seam weld connection :
Hide all component except right rail 2 and front truss 1.
1D>connectors>seam type as seam-quad(angled+capped+L)
Select the note list on front truss and components to connect, with remesh option.
Increase tolerance value to 10 and Click create and remesh the area for proper mesh flow.
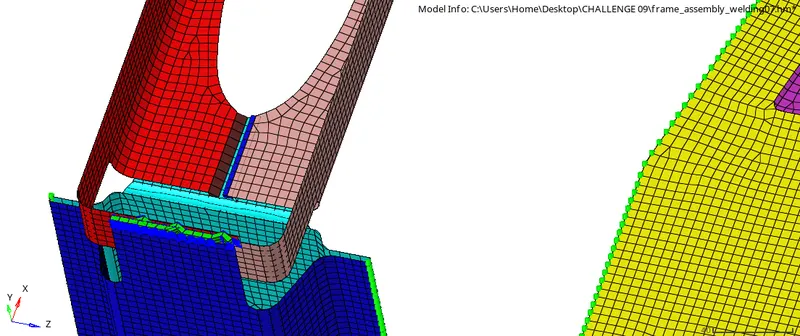
FIG1.3 Seam-Quad(angled+capped L).
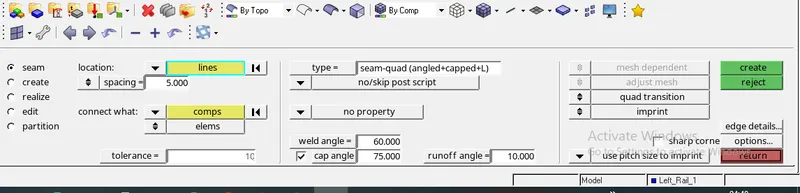
FIG1.3.1 Seam-Quad(angled capped L) TOOL BAR.
2. Quad Elements:
Hide all component except left rail 2 and front truss 1.
1D>connectors>seam type as quads.
Create a property for quad elements and assign.
Select the note list on front truss and components to connect, with remesh option.
Increase tolerance value to 10 and Click create and remesh the area for proper mesh flow.
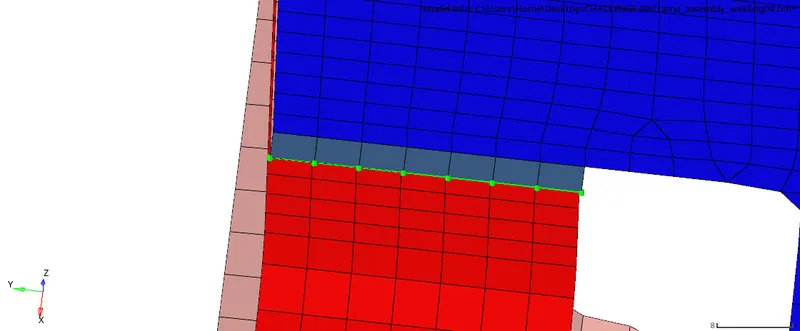
FIG1.4 Quad elements
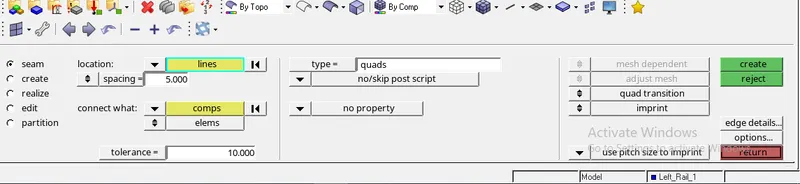
FIG1.4.1 Quad elements TOOL BAR
3.Spot Weld:
Hide all component except right rail 1,front truss 2 and front truss 1.
1D>connectors>spot type as weld,diameter as 5mm.
Select the node to spot weld and components to connect with 3layers.
Create a property for spot weld and assign.Click create with tolerance 20.
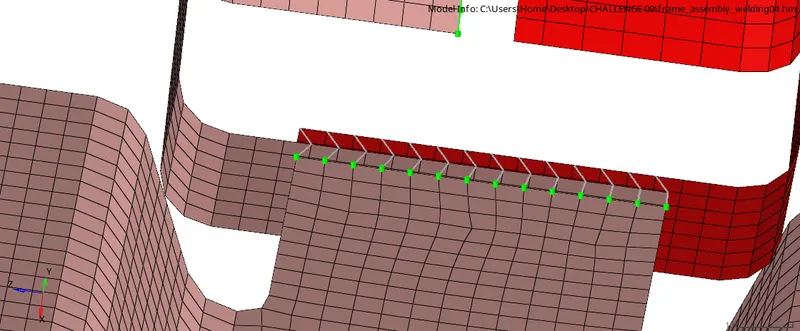
FIG1.5 Spot weld with 3 layers and 5mm diameter

FIG1.5.1 Spot weld with 3 layers and 5mm diameter TOOL BAR
4.HEXA ADHESIVE CONNECTOR.
Hide all component except front truss 2 , front truss 1, Left rail 1.
1D>connectors>spot type as (HEXA ADHESIVE).
Increase the tolerence upto 50. select the node on one component. and select the components to connect, create.
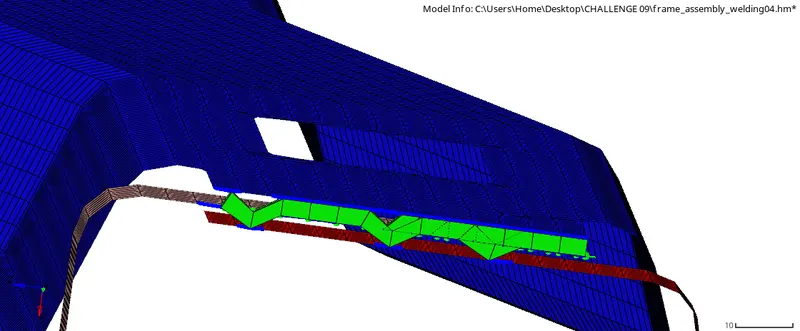
FIG 1.6 Hexa (Adhesive)
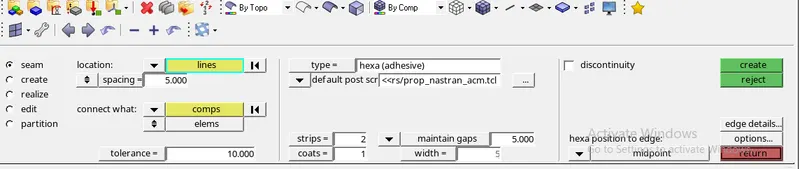
FIG 1.6.1 Hexa (Adhesive)TOOL BAR
5.BOLT CONNECTOR.
Hide all component except Rear truss 1,Right rail 2.
1D>connectors>Bolt type as (Bolt general).
select the nodes to connect and select the components
increase the tolerence upto 50. and create the Bolt if needed.
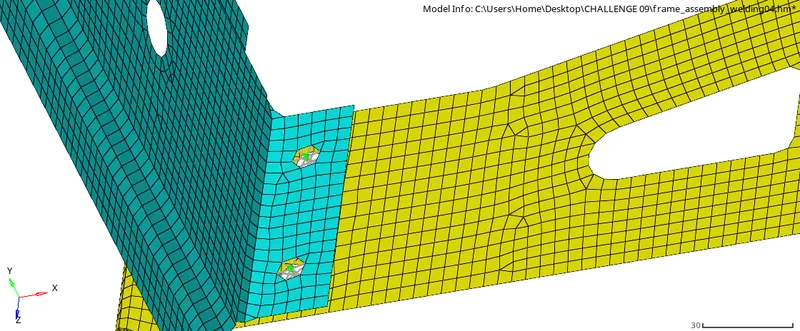
FIG1.7 Bolt connector
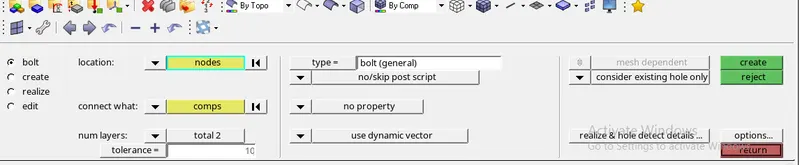
FIG1.7.1 Bolt connector TOOL BAR
6.Similar steps to Bolt connectors repeat for REAR TRUSS 2 & LEFT RAIL 2.
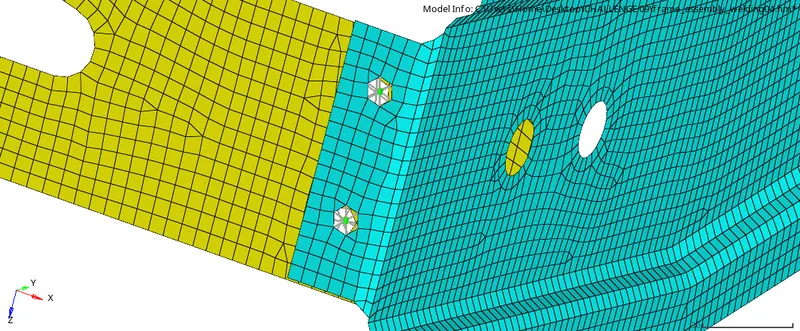
FIG1.8 Bolt connector
7. SPOT WELD WITH RIGIDS.
Hide all the components except Right rail 1 & Right rail 2.
1D>connectors>spot type as Rigids, select nodes to connect and assign the property.
select the components to connect after increasing the tollerence upto 50. and create.
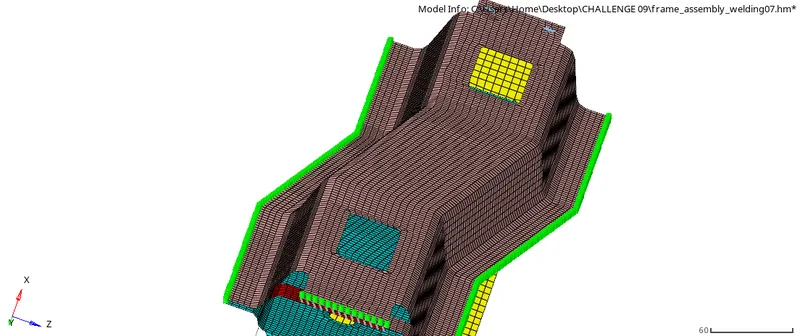
FIG 1.9 Spot weld with Rigid elements
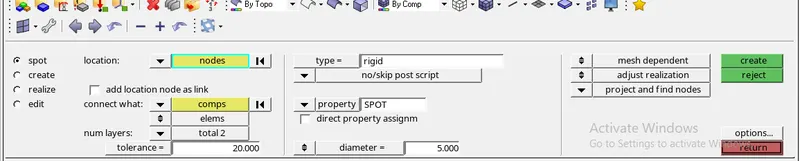
FIG 1.9.1 Spot weld with Rigid elements TOOL BAR
8. SPOT WELD WITH SPRINGS.
Hide all the components except Left rail1 & Left rail 2.
1D>connectors>spot type as springs, select nodes to connect and assign the property.
select the components to connect after increasing the tollerence upto 50. and create.
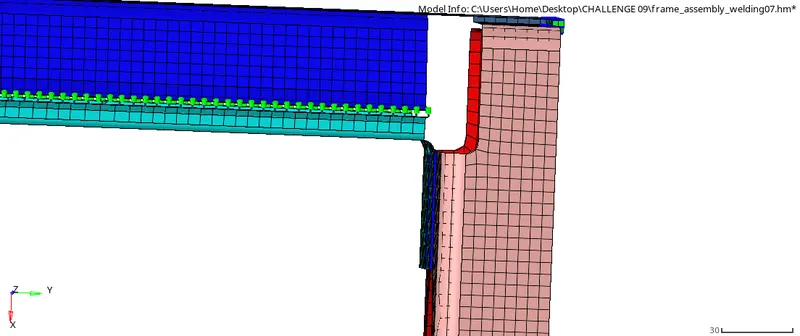
FIG 1.10 SPOT WELD WITH SPRINGS.
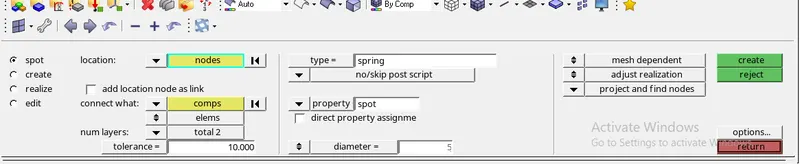
FIG1.10.1 SPOT WELD WITH SPRINGS. TOOL BAR
9. Remaining components are connected using Spot weld, Seam weld, by following above steps.
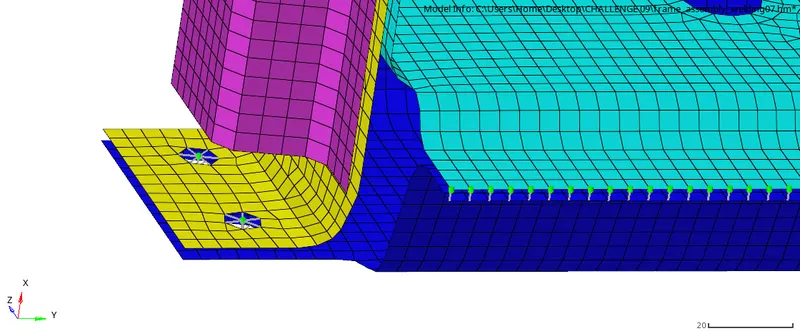
FIG 1.11.1 BOLT
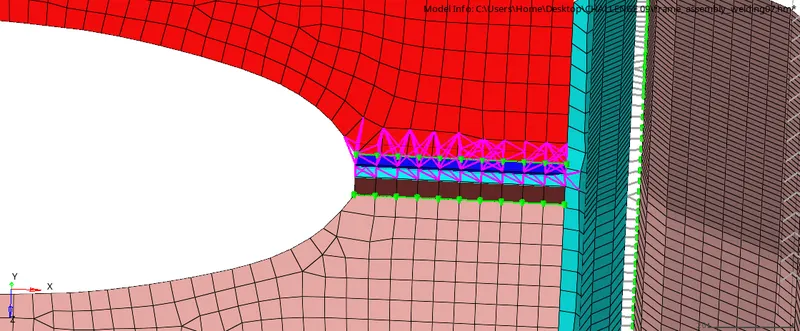
FIG 1.11.2 BOLT
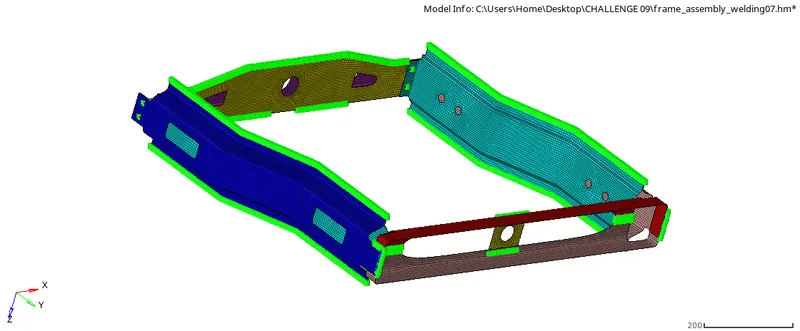
FIG 1.11.3 CONNECTED MODEL
CONCLUSION.
- FRAME ASSEMBLY MESHED USING 2D MESH WITH ELEMENT SIZE 5MM
- CONNECTORS ARE CREATED WITH GIVEN PARAMETERS SELECTION.
- REST OF COMPONENTS ARE CONNECTED WITH SEAM AND SPOT WELDS.
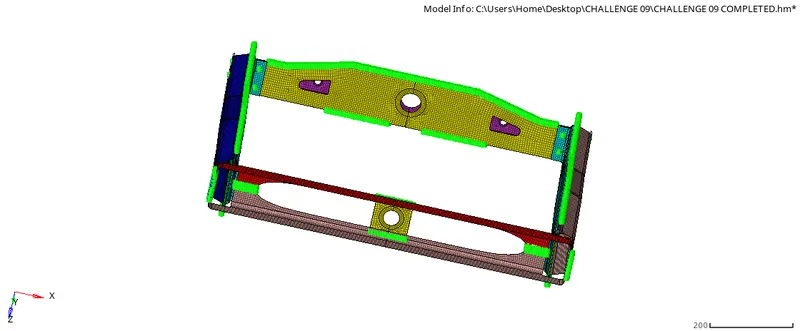
FIG 1.12 FINAL MODEL