AutoCad_Reinforcement Bar Shapes, Types of Doors, Creating symbols, legend and Creating Standard Template_Week 8
Shape Table Creation
Aim:
To Creating the table contains shape of the reinforcement using Autocad
Commands Used:
* Line
* Offset
* Trim
* Arc
* Circle
* Blend Curve
* Text
* Xline
* Block
Procedure:
Step 1:
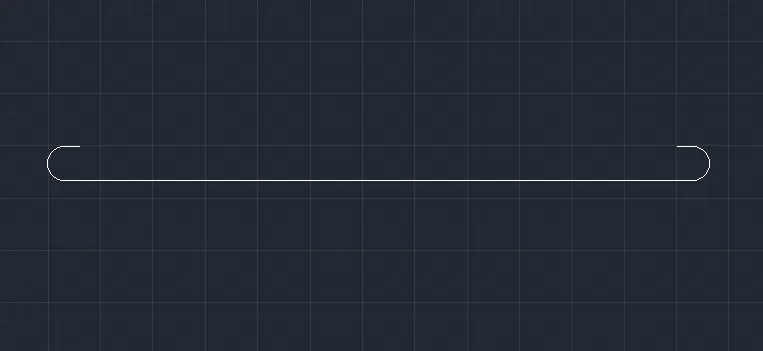
1) In the command prompt write L enter
2) In the command prompt specify distance as 750,0
3) In the command prompt write offset
4) In the command prompt specify distance from the line we created
5) In the command prompt write ARC
6) In the command prompt specify radius as 9 on either side of the line
7) In the command prompt write TRIM
8) In the command prompt trimming the unwanted object
Step 2:
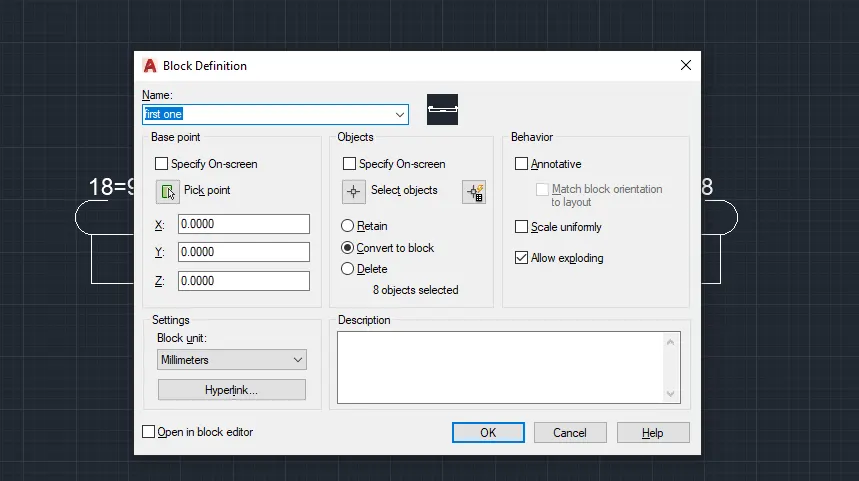
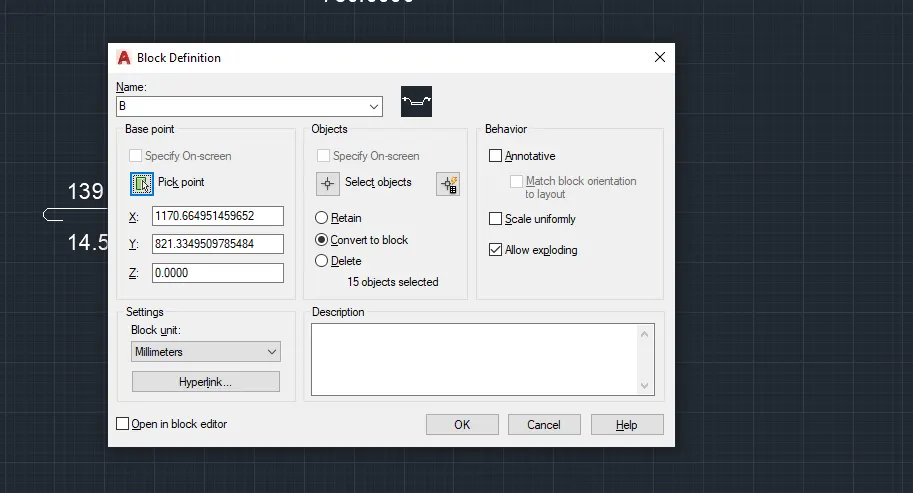
1) In the command prompt write Block
2) Type a suitable name of the object
3) Select a object and also pick a point
4) Then click OK
5) Similarly create each object and make it as BLOCK
Step 3:
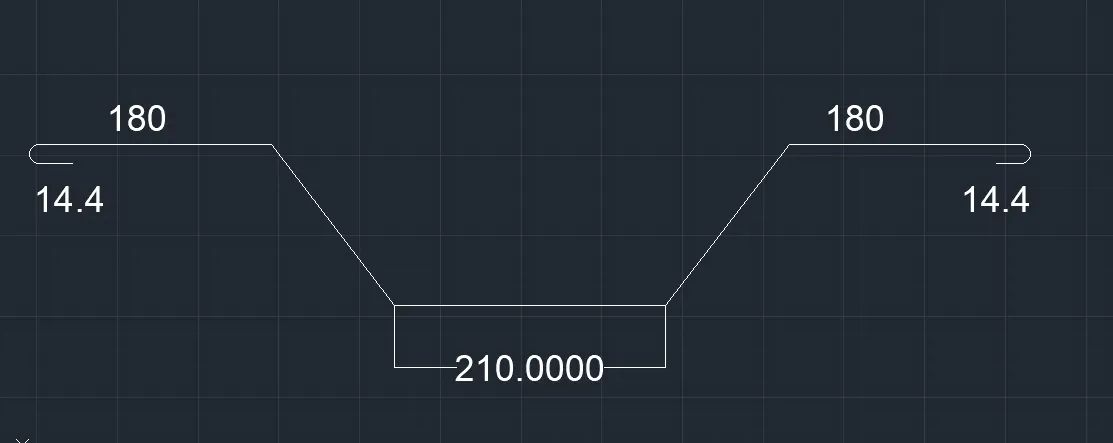
1) In the command prompt write L enter
2) In the command prompt specify distance as 210,0 and close the line
3) In the command prompt write L enter
4) In the command prompt specify distance as 0,41<45 on either side of the line
5) In the command prompt write L enter and specify distance as 180 both the sides of the line
6) In the command prompt ARC and create half arc of both the sides
Step 4
1) In the command prompt write Block
2) Type a suitable name of the object
3) Select a object and also pick a point
4) Then click OK
Step 5:
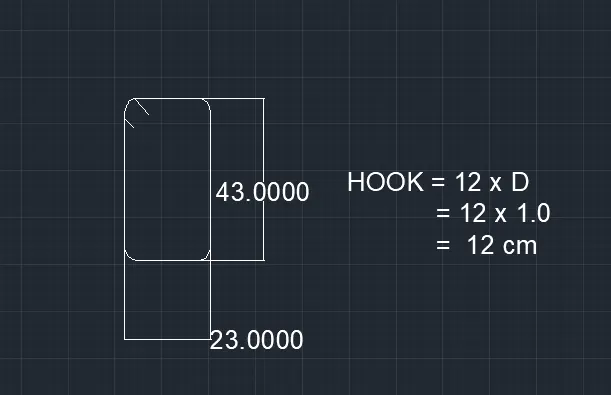
1) In the command prompt write REC
2) In the command prompt specify distance as 23,43
3) In the command prompt write Fillet
4) Make filleting at the edge of the box
5) In the command prompt write TEXT
6) Texting the shape details at the nearer of the object
7) In the command prompt write BLOCK and make it as a BLOCK
Step 6:
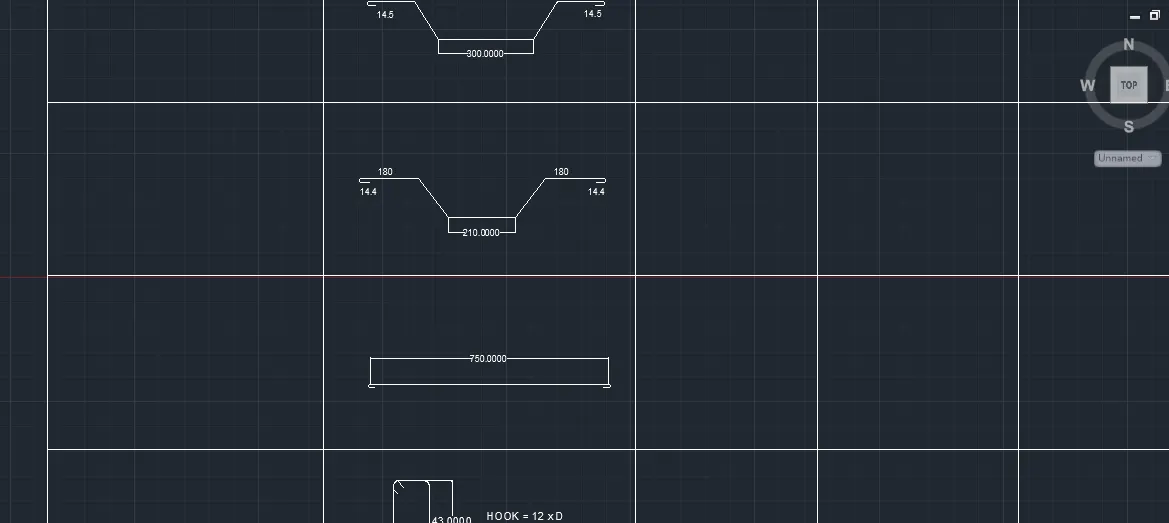
1) Create table either by using L or Table command
2) In the command prompt write INSERT or I
3) Select a suitable object
4) Insert it into the table wherever needs
Result:
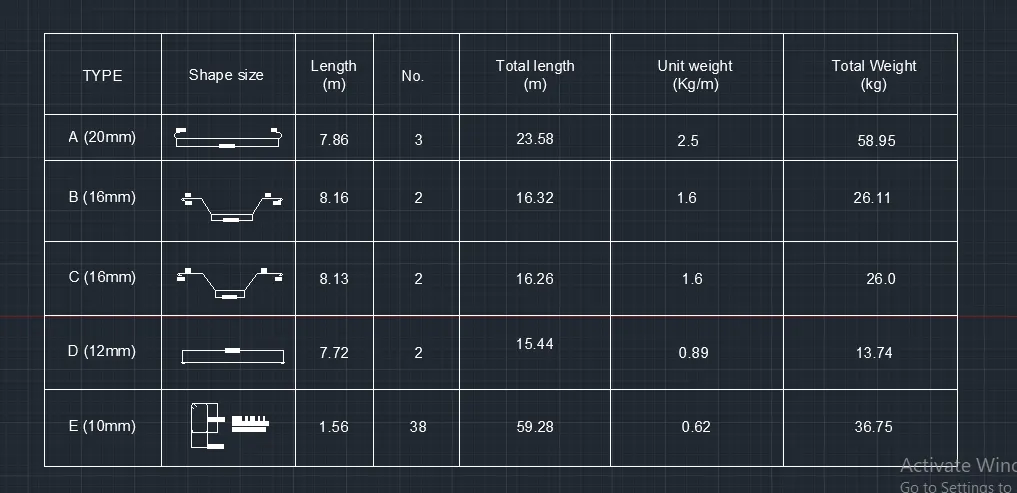
1) Complete the table by adding TEXT command
2) Text the detail of the shape in the suitable area and complete the drawing.
2 Door Types
Aim:
To create a different type of doors using Autocad
Commands Used:
* Line
* Offset
* Trim
* Arc
* Circle
* Blend Curve
* Text
* Xline
* Block
* Hatch
Procedure:
Step 1:
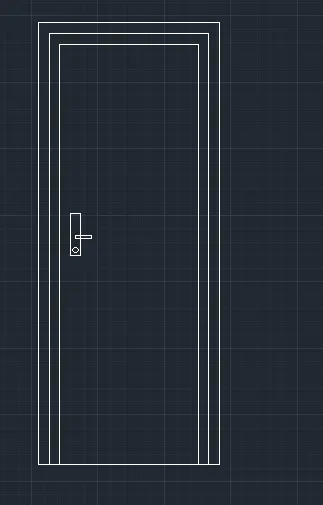
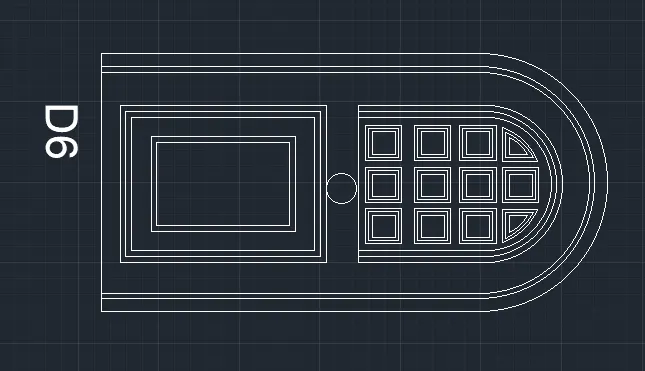
1) In the command prompt write REC
2) In the command prompt specify distance as 2;10",6'11"
3) In the command prompt write Offset
4) Specify offset distance as 0.9"
5) offsetting 2 times from the outline of the door
6) In the command prompt write REC
7) In the command prompt specify distance as 10",10"
8) In the command prompt write Circle
9) In the command prompt specify radius as 2" and make handle of the door
Step 2:
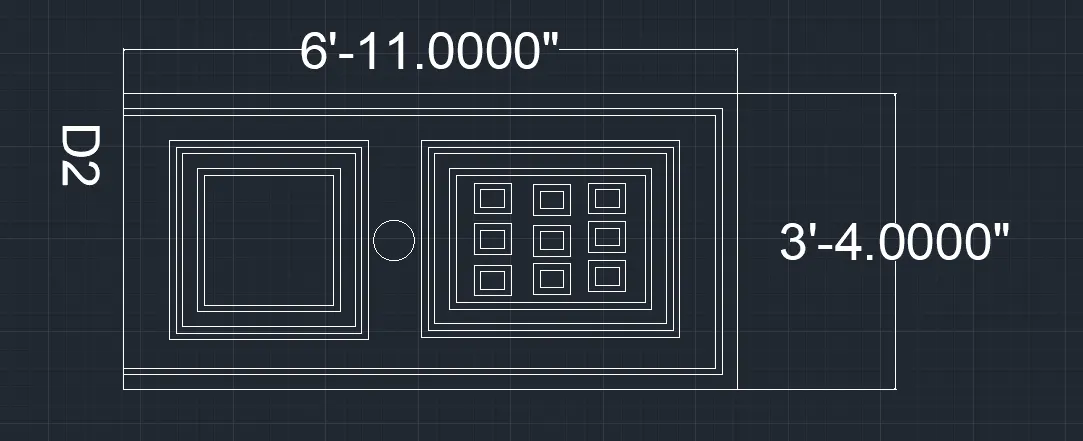
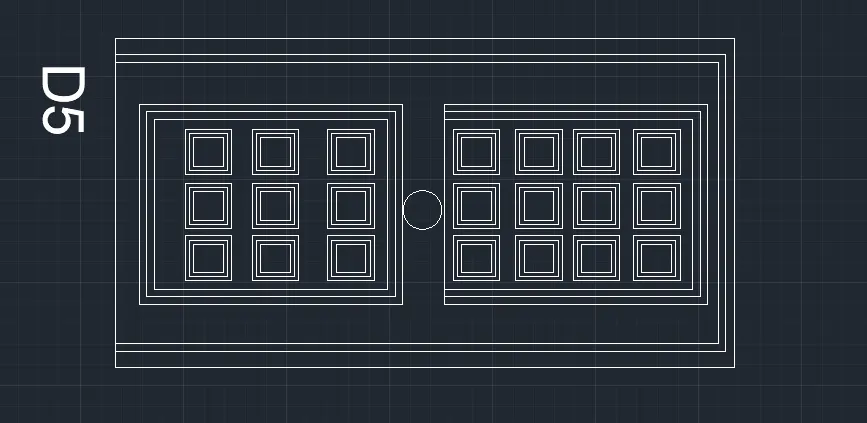
1) In the command prompt REC
2) In the command prompt specify distance as 6'11", 3'4"
3) In the command prompt write offset
4) In the command prompt specify distance as 0.9"
5) In the command prompt write REC
6) In the command prompt distance as 50",50"
7) In the command prompt write COPY
8) In the command prompt and select the smaller rectangle and paste it 2 times at the nearer of the object
9) In the command prompt write OFFSET and offseting the outer line
10) Similarly do this for bigger triangle
11) In the command prompt write TEXT and DIMLINEAR
12) Complete the drawingtex
Step 3:
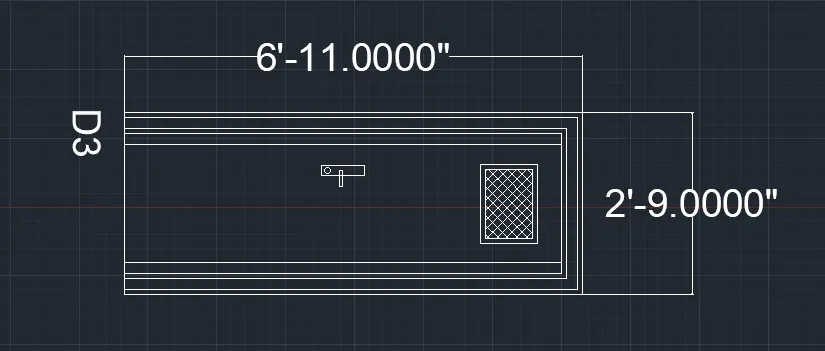
1) In the command prompt write REC
2) In the command prompt specify distance as 6'11",2'9"
3) In the command prompt write offset
4) In the command prompt specify distance as 0.9" and make offseting the outer line of the door
5) Use HATCH command for hatching the smaller rectangle of the door
6) Do the previous door handle procedure for the handle of this door
Step 4:
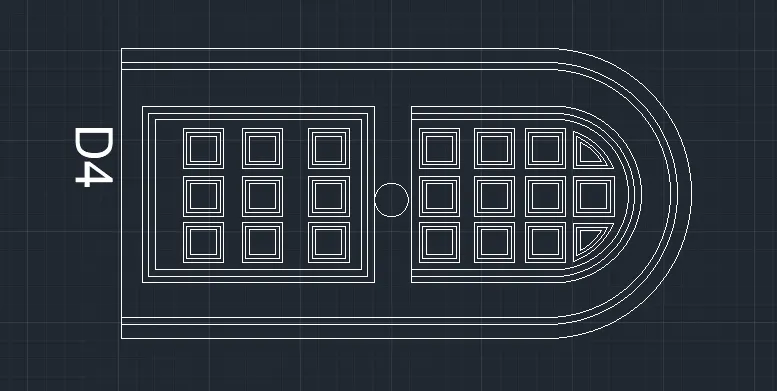
1) In the command prompt write REC
2) Make a rectangle of suitable sizes
3) In the command prompt write ARC for the inclined of top of the door
4) Do the smaller rectangle procedure for previous door
5) In the command prompt write Copy and select the object
6) Paste it to wherevr needed
7) In the command prompt write Circle
8) Specify radius as 20" and make it in the center of the door
Step 5:
1) Follow the procedure of 6th door type as done previous door
2) In the command prompt write BLOCK
3) Select each and every door type and name it as door type 1,2 etc..,
4) Save all door as a BLOCK and complete the drawing
3 Door type
Aim :
To creating the door type using Autocad
Commands Used:
* Line
* Offset
* Trim
* Blend Curve
* Text
* Dimlinear
* Block
Procedure:
Step 1:
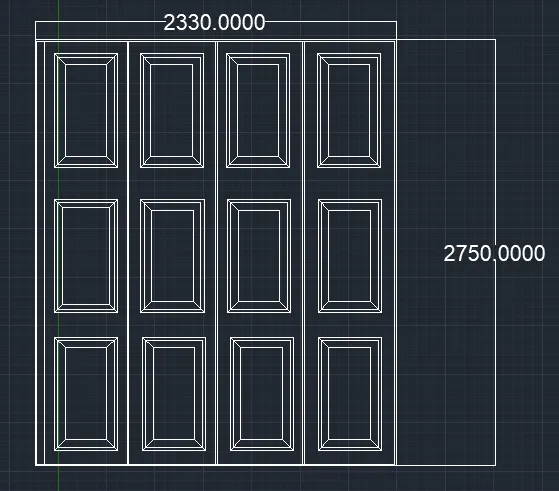
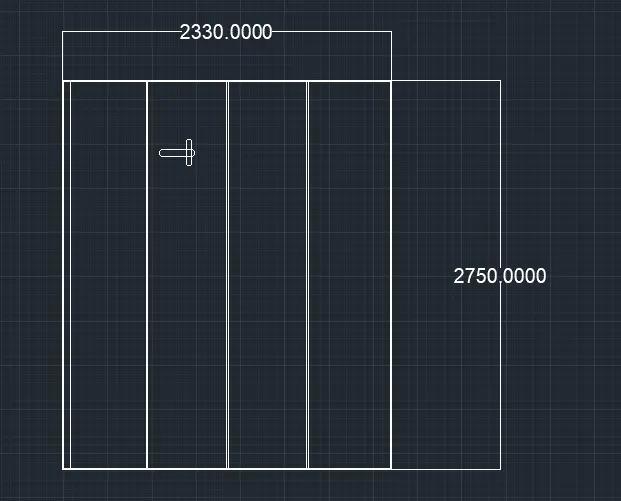
1) In the command prompt write REC
2) In the command prompt specify distance as 2330,2750
3) In the command prompt write offset
4) offseting the distance as 50
5) In the command prompt REC
6) In the command prompt specify distance as 250,250 for inner rectangle
7) Make offset and join the corner line
8) In the command prompt write COPY and paste it to 3 times at nearer of the object
Step 2:
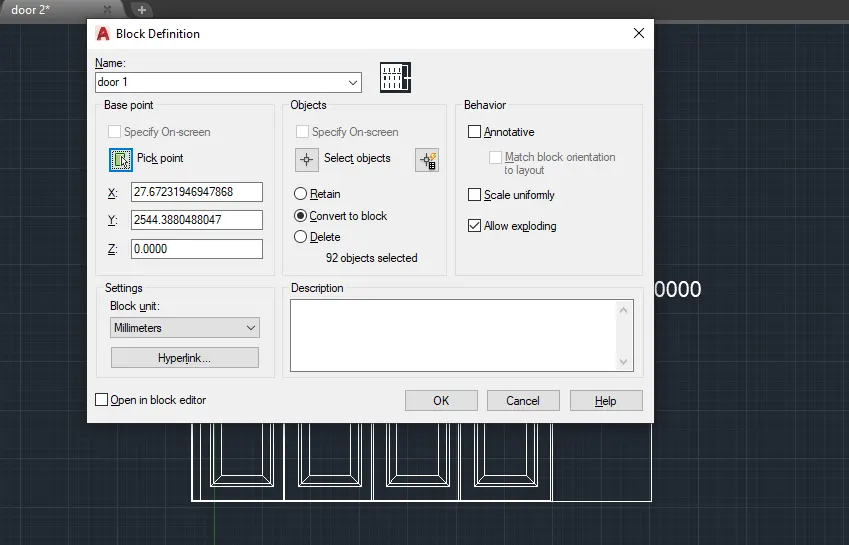
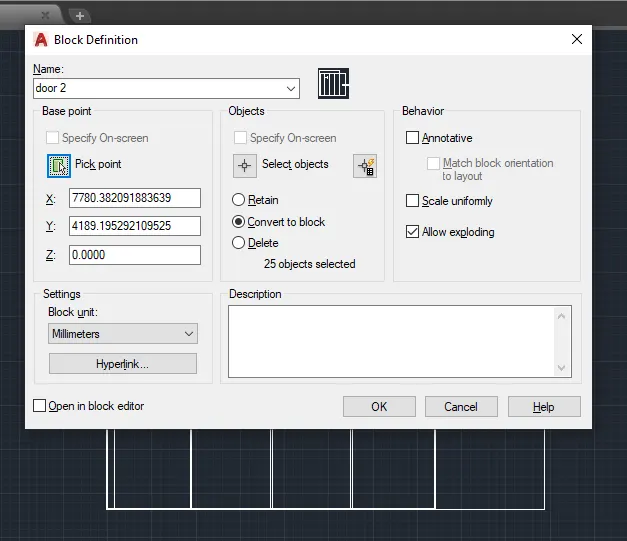
1) In the command prompt write BLOCK
2) Select the object and name as the type of the door
3) Select pick point of the object
4) Then click ok
Step 3:
1) Draw the outline of the door using REC command
2) Specify distance as 2330,2750
3) Make offseting the using OFFSET command
4) Draw the handle of the door using LIne and arc command
5) In the command prompt write TRIM
6) Trimming the unwanted object
Step 4:
1) In the command prompt write BLOCK
2) Select the object and name as the type of the door
3) Select pick point of the object
4) Then click ok
4 Electrical Components
Aim:
To create a Electrical Components Using Autocad
Commands Used:
* Line
* Offset
* Circle
*Trim
* Text
*Hatch
*Arc
Procedure:
Step 1:
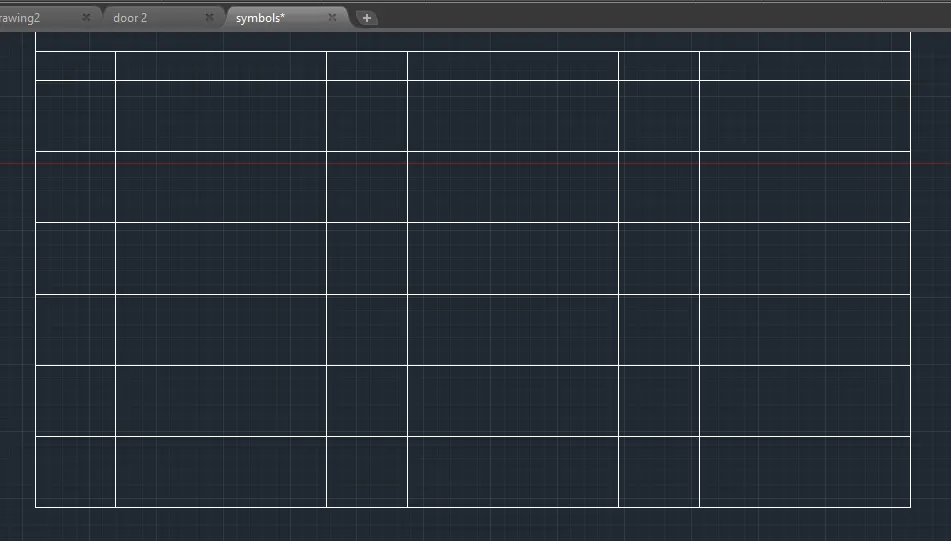
1) In the command prompt write Xline
2) In the command prompt choose horizontal and vertical line
3) Make the suitable table using Line command
4) In the command prompt write TRIM
5) Trimming the unwanted object
Step 2:
1) In the command prompt write Circle
2) Specify radius as 20
3) In the command prompt write L enter
4) In the command prompt specify first point as tangent of the circle
5) In the command prompt specify next point as 5 and close the line

Step 3:
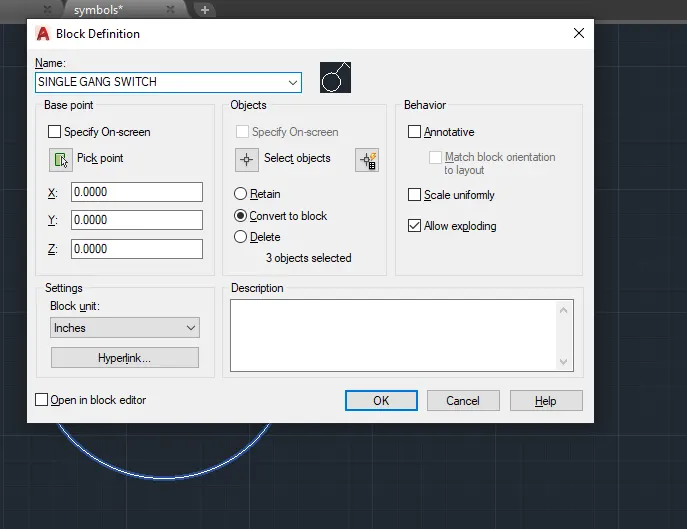
1) In the command prompt write Block
2) Type a suitable name of the object
3) Select a object and also pick a point
4) Then click OK
5) Similarly create each component and make it as a block
Step 4:
1) In the command prompt write INSERT or I
2) Select the suitable object and insert it into the table
3) similarly insert alll other blocks into the table
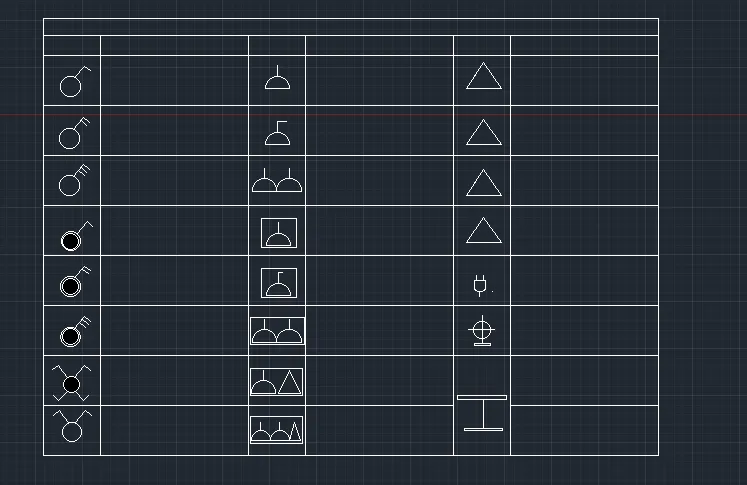
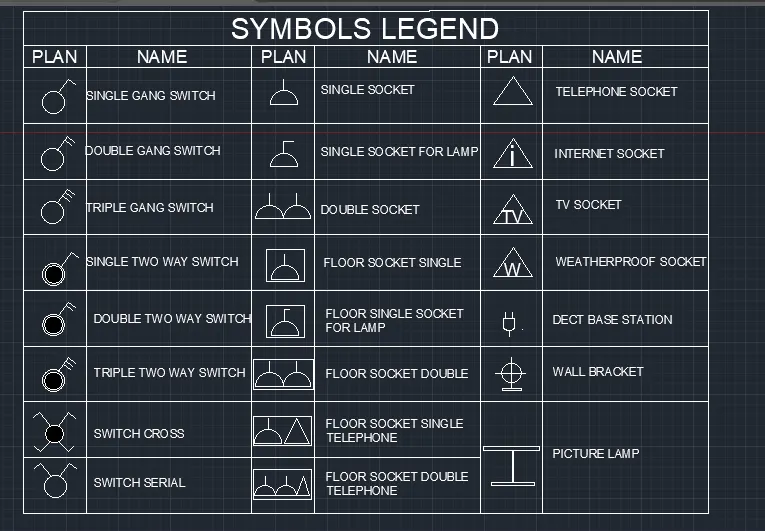
Result:
1) Complete the drawing by adding TEXT command
2) Write Text in the table wherever needed
5 Text Tempalate
Aim:
To creating the text tempalate using Autocad
Commands Used:
* Line
* Offset
* Trim
* Text
* Block
* Xline
* Trim
Procedure:
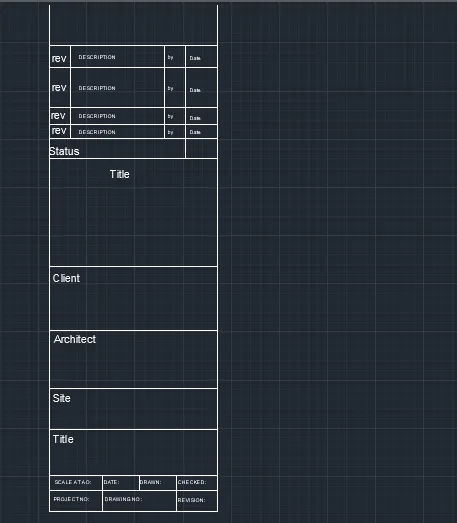
Step 1:
1) In the command prompt write XLINE
2) Select horizontal and vertical line
3) In the command prompt write OFFSET
4) Offseting the suitable distance and make it as a table form
5) In the command prompt write TRIM
6) Trimming the unwanted object
7) In the command prompt write TEXT
8) Write the text wherever necessary
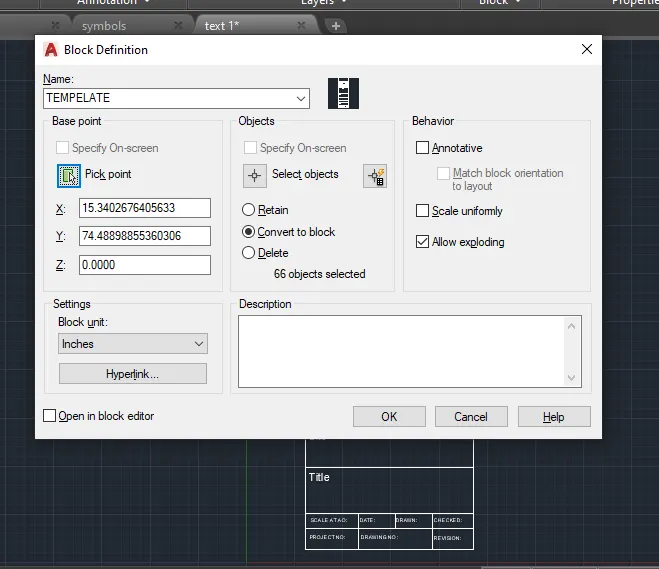
Step 2:
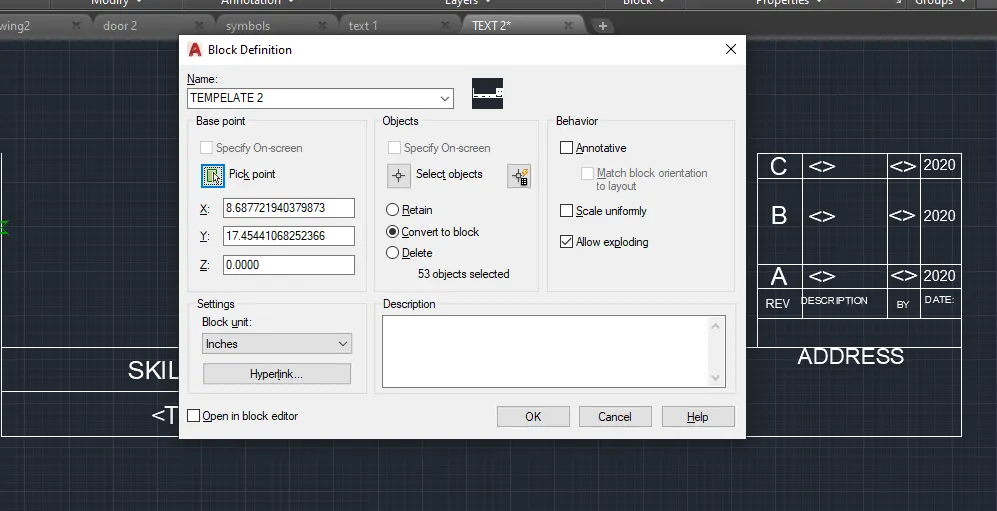
1) In the command prompt write Block
2) Type a suitable name of the object
3) Select a object and also pick a point
4) Then click OK
5) Save the block and complete the drawing tempalate.
6 Text Tempalate II
Aim:
To creating the text tempalate using Autocad
Commands Used:
* Line
* Offset
* Trim
* Text
* Block
* Xline
* Trim
Procedure:
Step 1:
1) In the command prompt write XLINE
2) Select horizontal and vertical line
3) In the command prompt write OFFSET
4) Offseting the suitable distance and make it as a table form
5) In the command prompt write TRIM
6) Trimming the unwanted object
7) In the command prompt write TEXT
8) Write the text wherever necessary
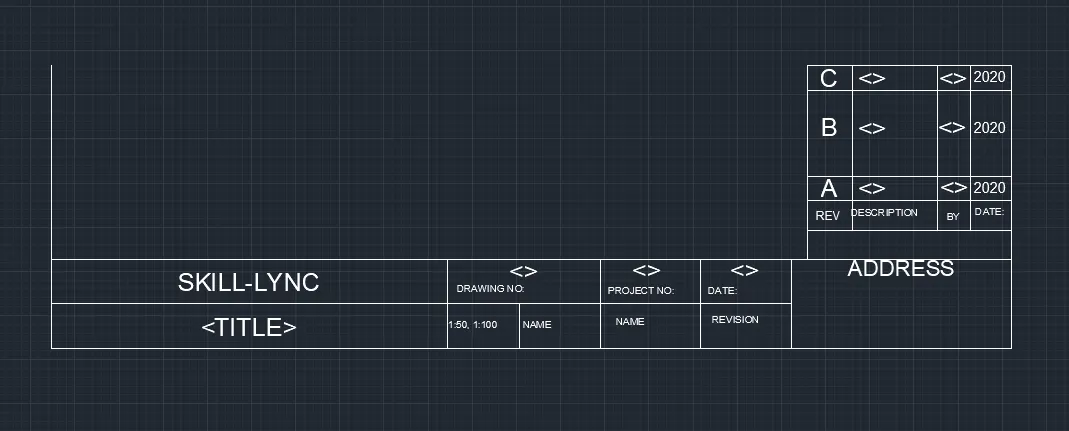
Step 2:
1) In the command prompt write Block
2) Type a suitable name of the object
3) Select a object and also pick a point
4) Then click OK
5) Save the block and complete the drawing tempalate.