Revit_usage of elements & properties_week3
1.Aim:to Use the project file created from Week 2. Use it for this assignment. Based on your layout from week 2, using floor tool under architecture tab and select the floor with appropriate material and thickness using the property browser create a layout in the Ground floor Level. Align the floor plan with grids created from week 2.
procedure:
A:Now open the layout created.
b:now sellect the floor tab in architectural tab in menu bar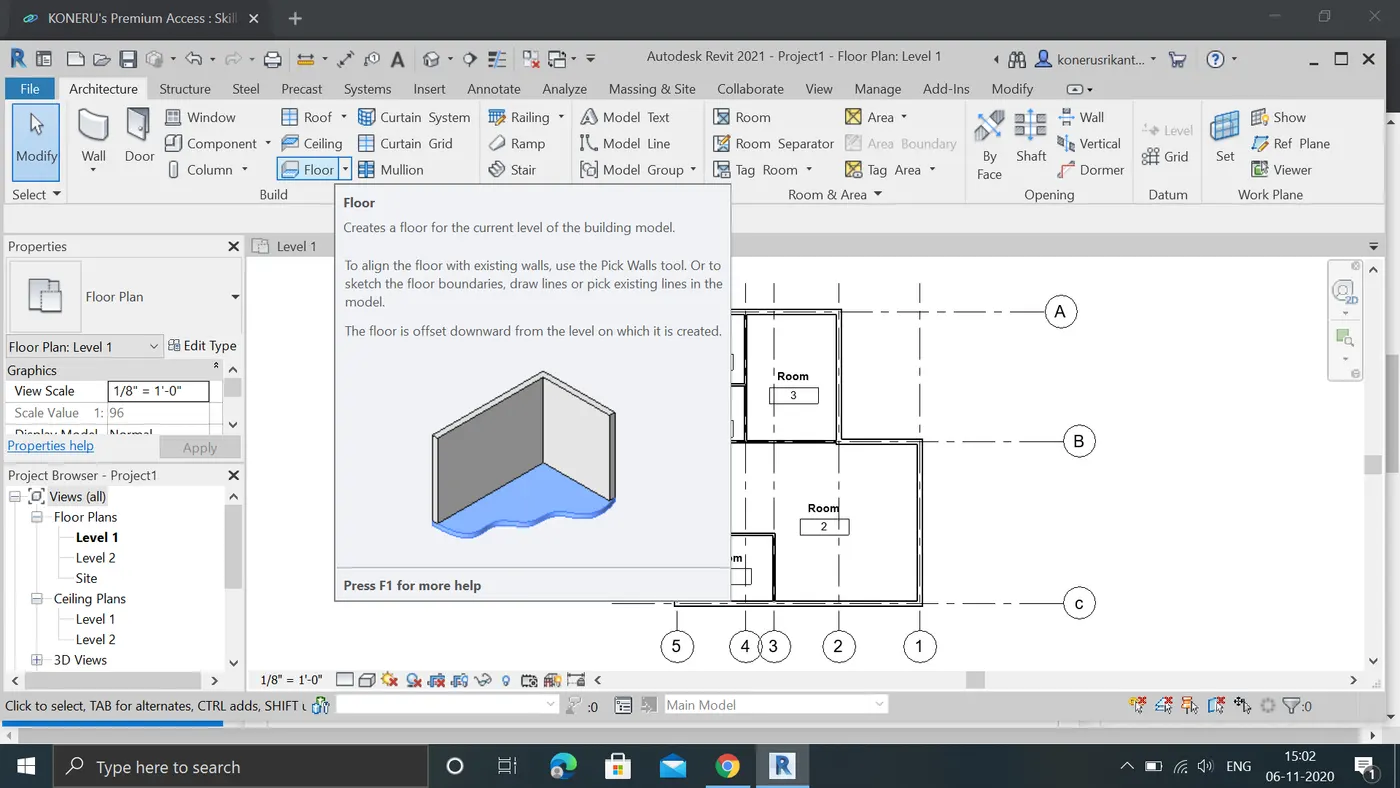
c:by selecting it we can find boundray line tab in draw box in right corner.select pic lines option.
d:now select the outer walls of layout to draw a floor for the lay out it turns in to pink colur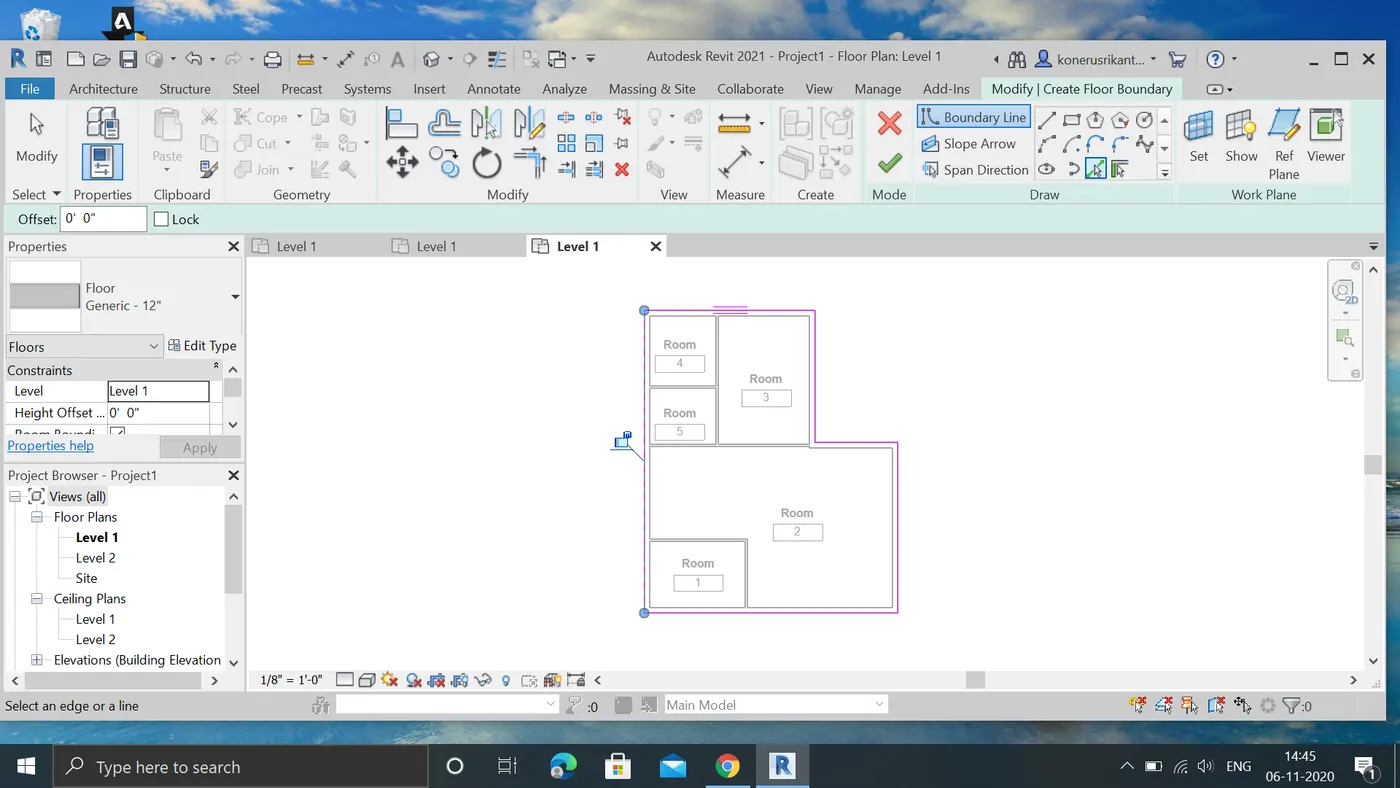
d:by selecting finish we can see that floor is created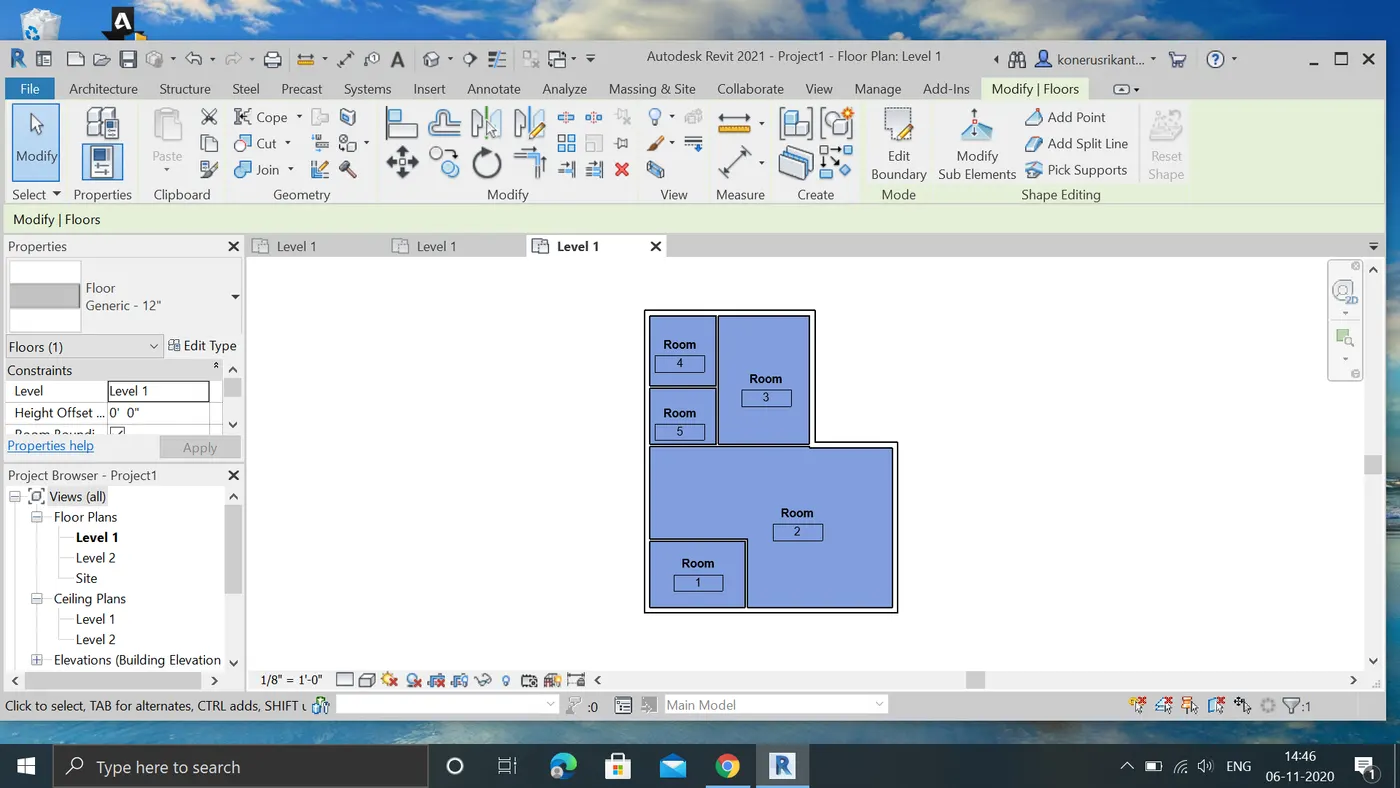
e:we can add grid lines in by grid option present in architecture tool in datum option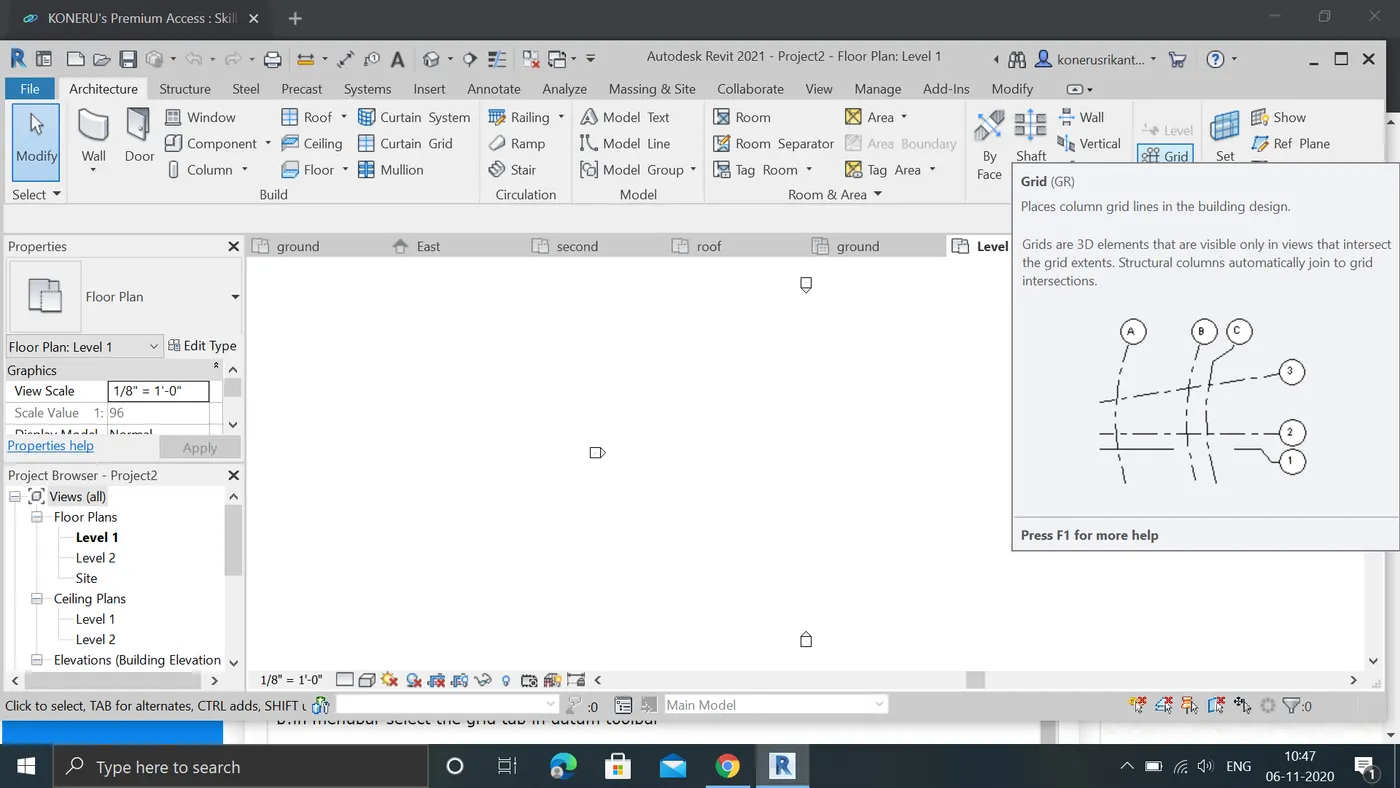
f:selecting the required walls for drawing the grid lines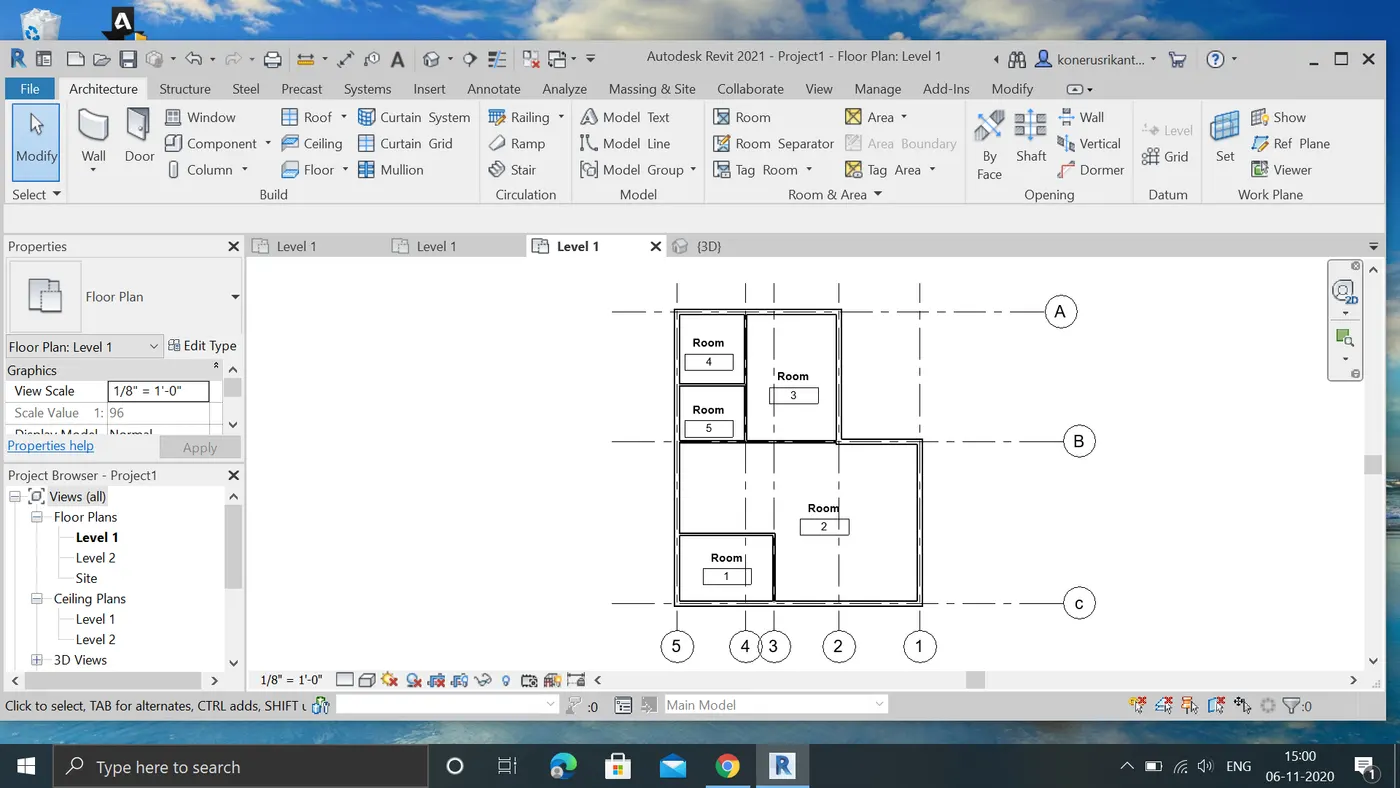
result:floor is created for the layout and aligned grid lines succesfully to it
2:AIM:to Add walls based on the floor layout. Pick lines or use the draw tool to modify the boundary of walls. Use the property browser to select appropriate material and thickness for walls. After creating the walls verify using the property browser to see if the top and bottom of the walls are constrained.
procedure:
a:now draw layout with walls in architecture tool by selecting wall tab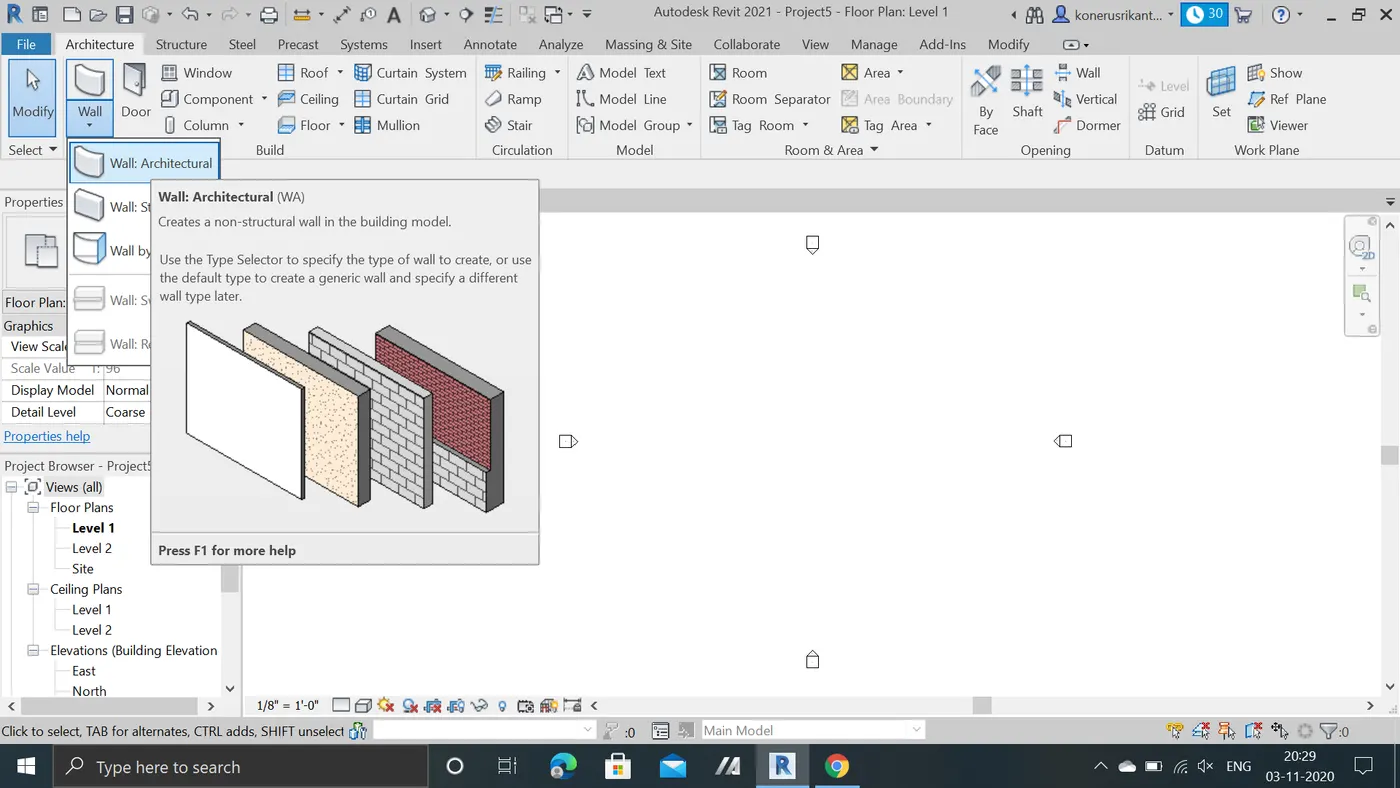
b:layout was drwan by selecting walls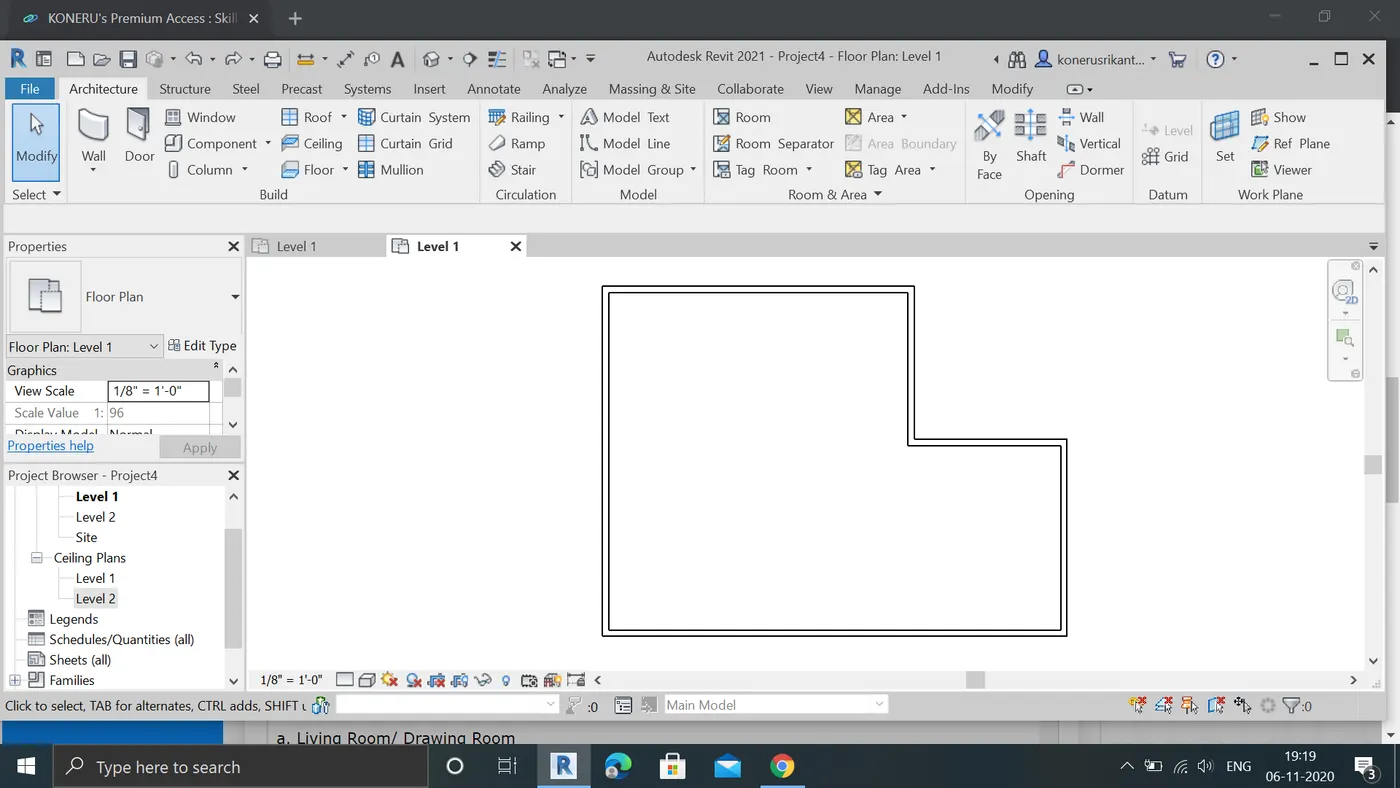
c:now draw the interiorwalls and doors to the project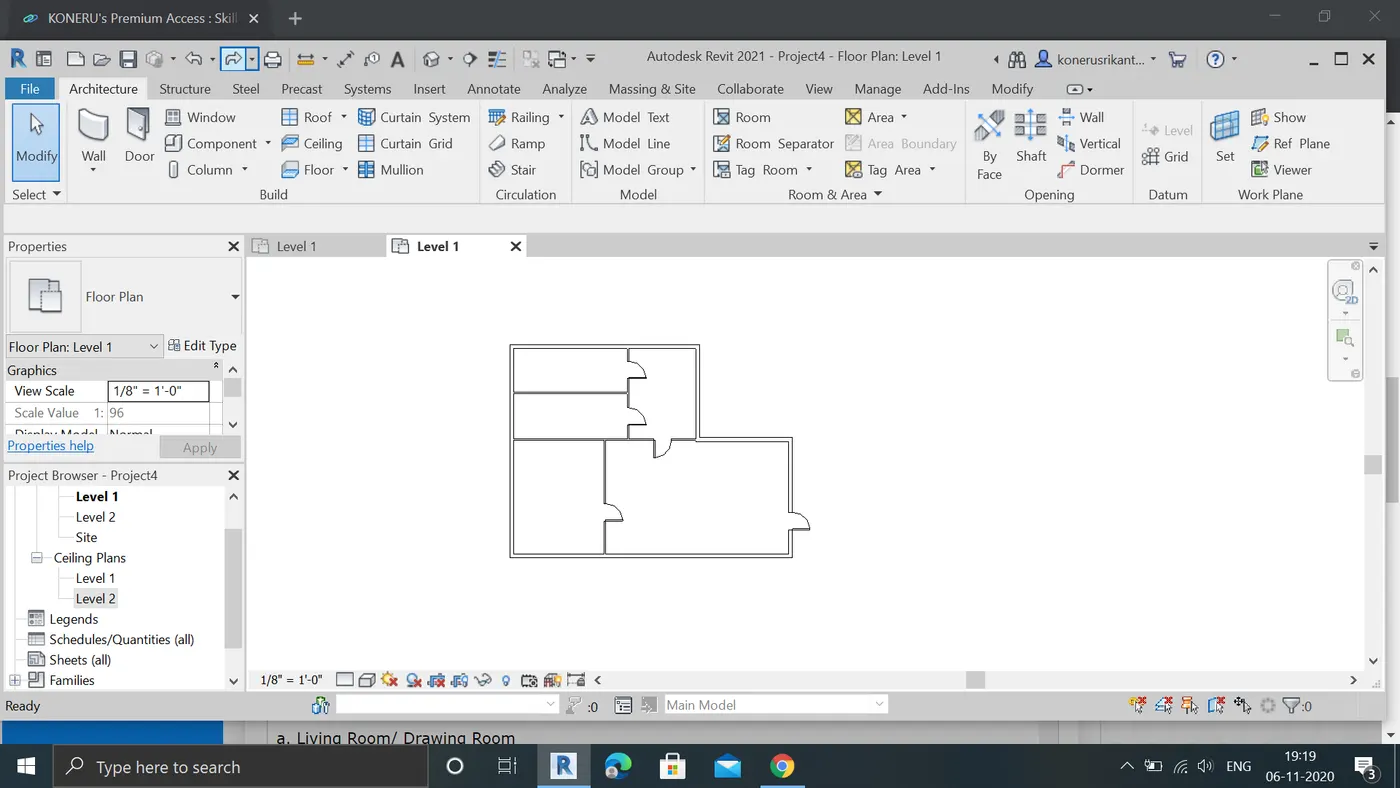
d:now select the exterior walls to add floor for the project from architecturetool by selecting floor option.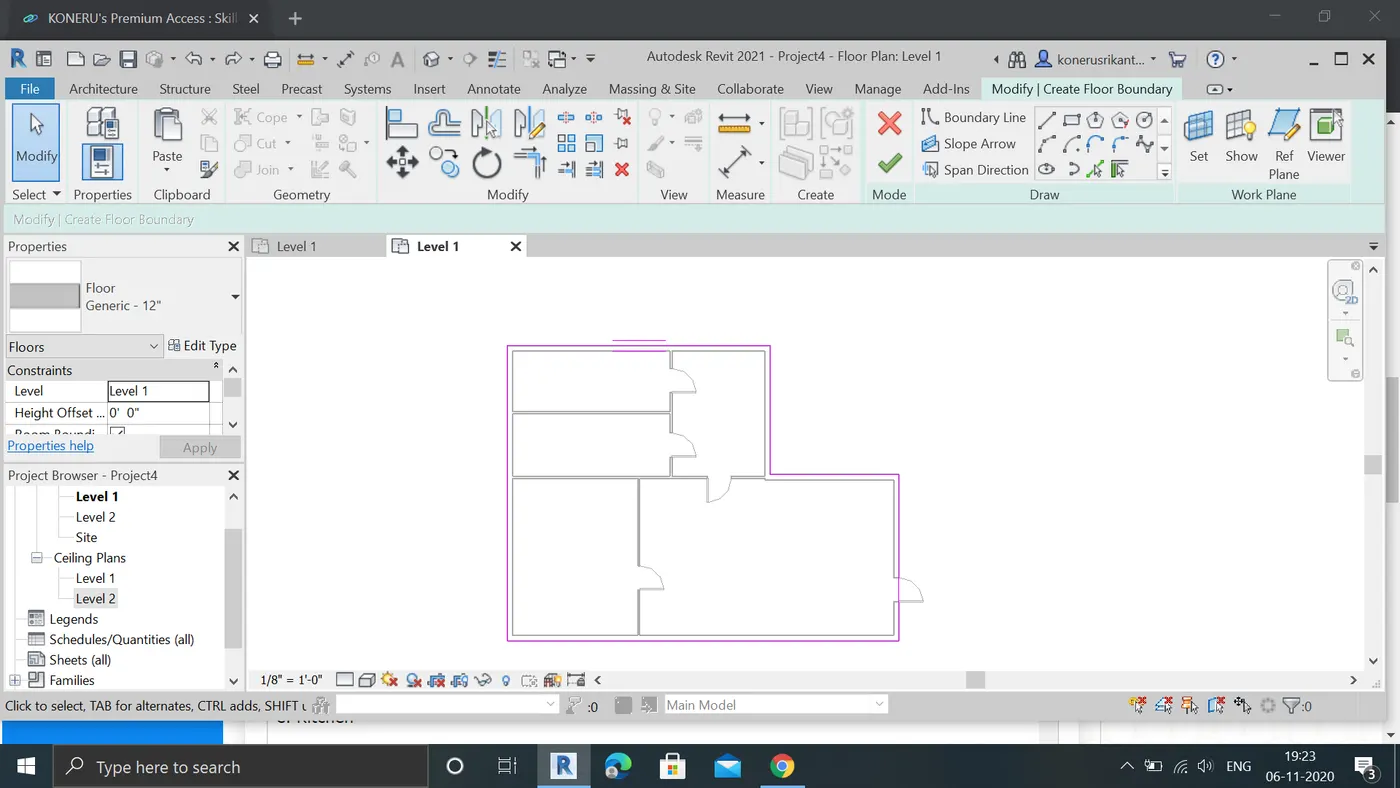
d:we can see that floor is added to layout in 3d view
e:now we can modify the wallthicknes by selecting required walls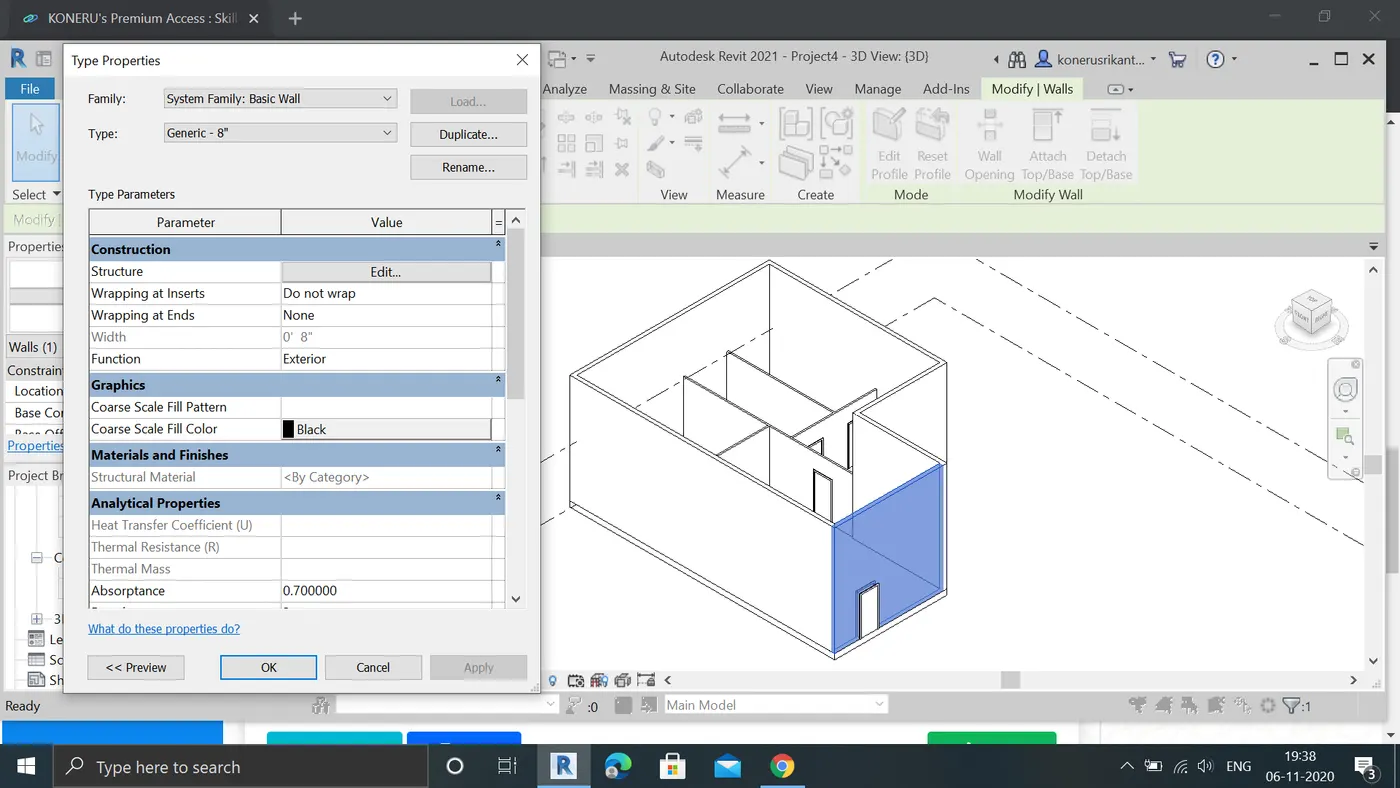
f:by selecting editbtype we can modify reqired walls
result:walls are added to floor layout and walls and wall thickness are modified with project browser succesfully.
2A:BY connecting the walls with levels we can make each wall to the same height so can add floors to it comfartablly
2B:height is the convenient for modelling the walls because.by rasing the height we see the clear views.
3:To Copy the model elements ( wall, floor ) modelled to Ground Floor Level and paste it aligned to First Floor Level . Use modify tab to utilize copy and paste options to align
elements to a different level.
Procedure:now open a new architectural layout.
b:create a layout with partion rooms in it.
c:now check the elivation view.
d:we see that walls are not adjusted with same heiht with respective levels.we adjust in properties.
e:we can set in elivaton veiw to equal height.
f:now select the whlole layout with floor and to clipboard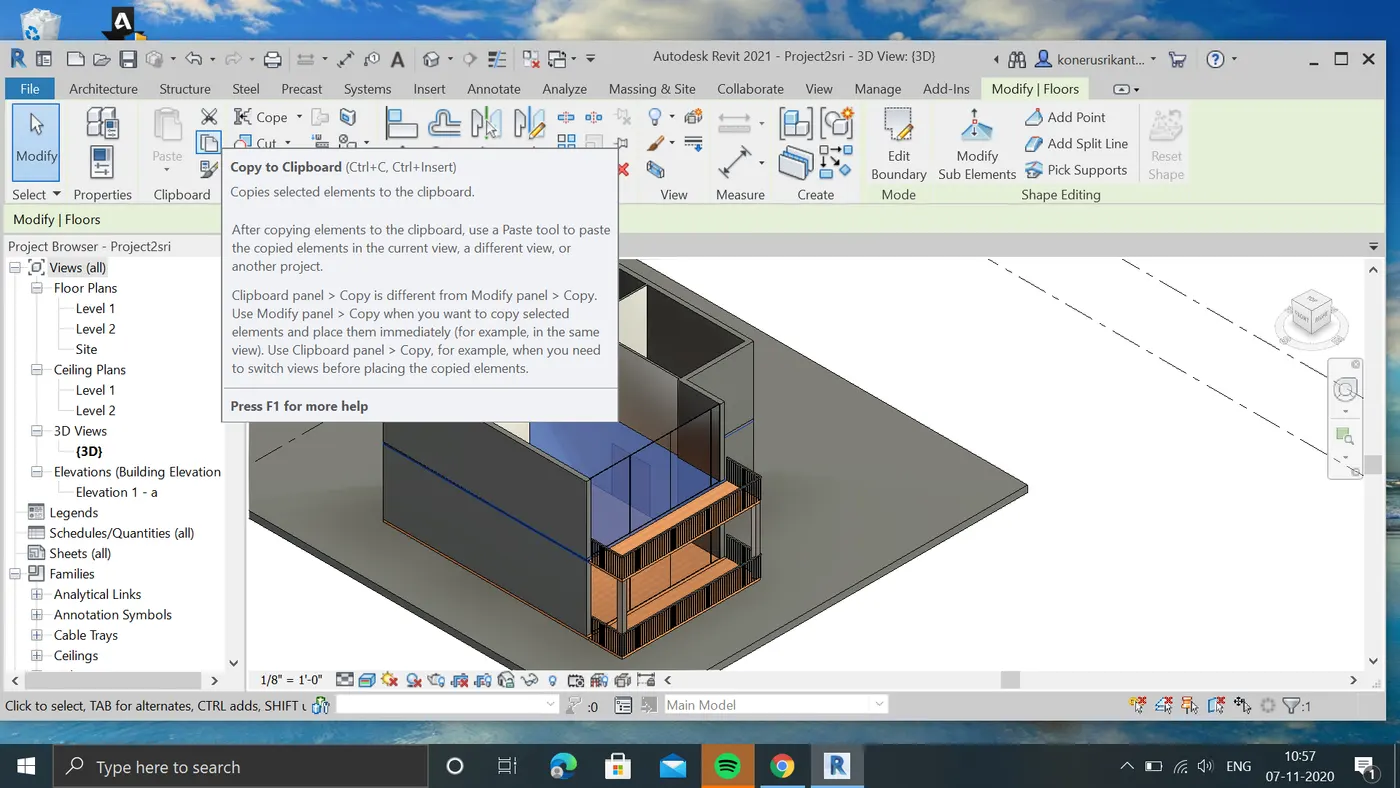 .
.
g:now we haveto select the past option in level 3 we created for 1st floor.pest the copied layout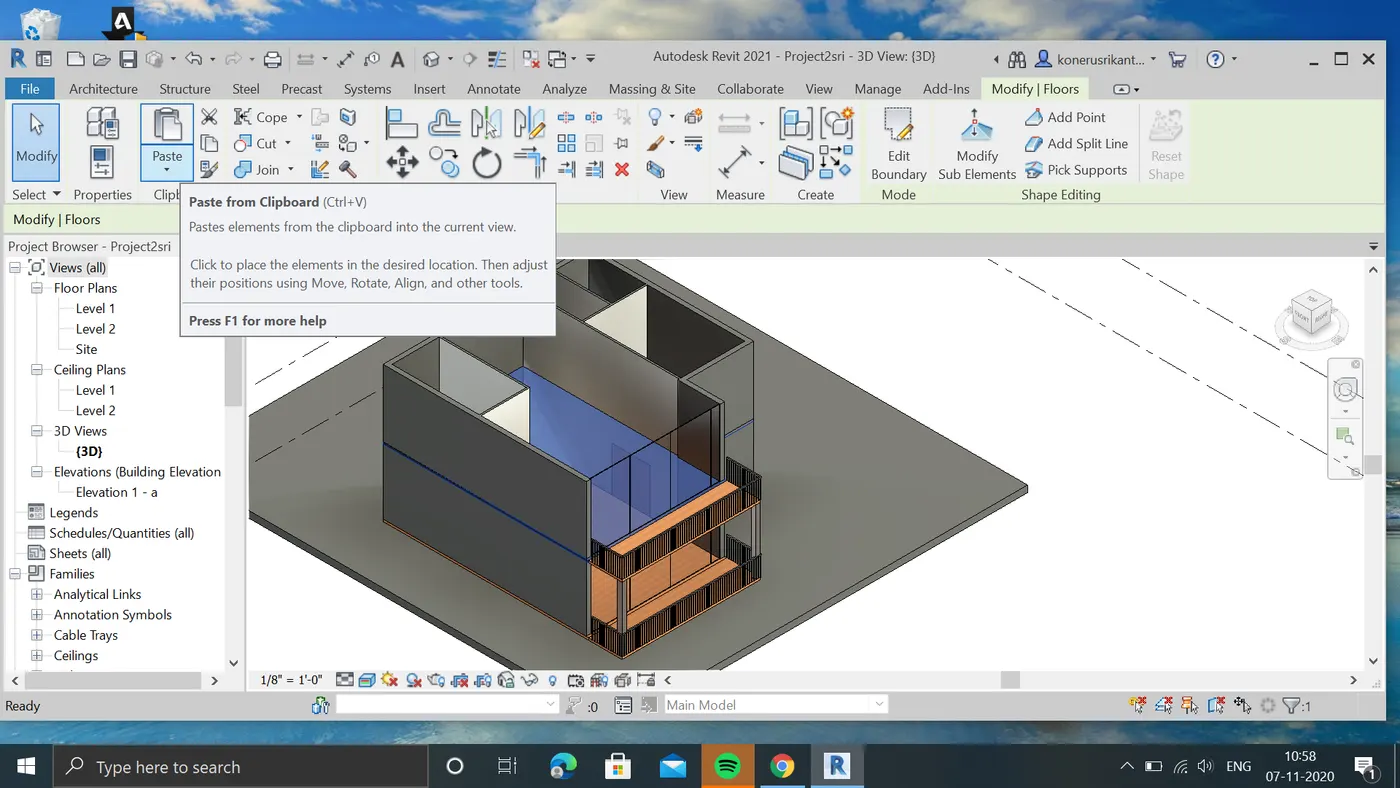
h:we can see that 1st floor is created in 3dview.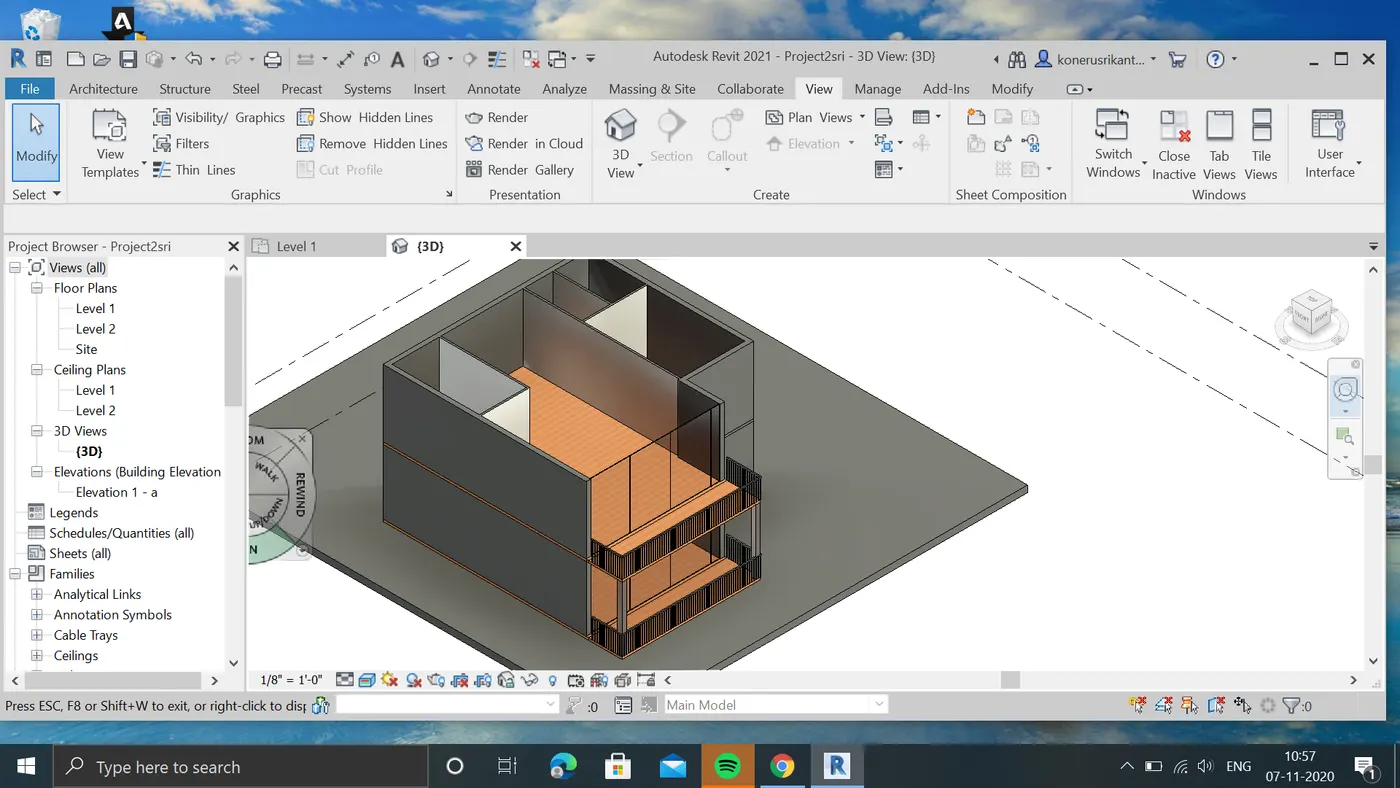
result:we have copied the all model elements to the 1st floor succesfully.
4:AIM:To Use interior partition walls to create separate rooms within your residential unit. The model must include the following rooms
a. Living Room/ Drawing Room
b. Dining Room
c. Bed Room
d. Rest Room
e. Kitchen
Procedure:
a:draw the walls layout with architecturaltemplate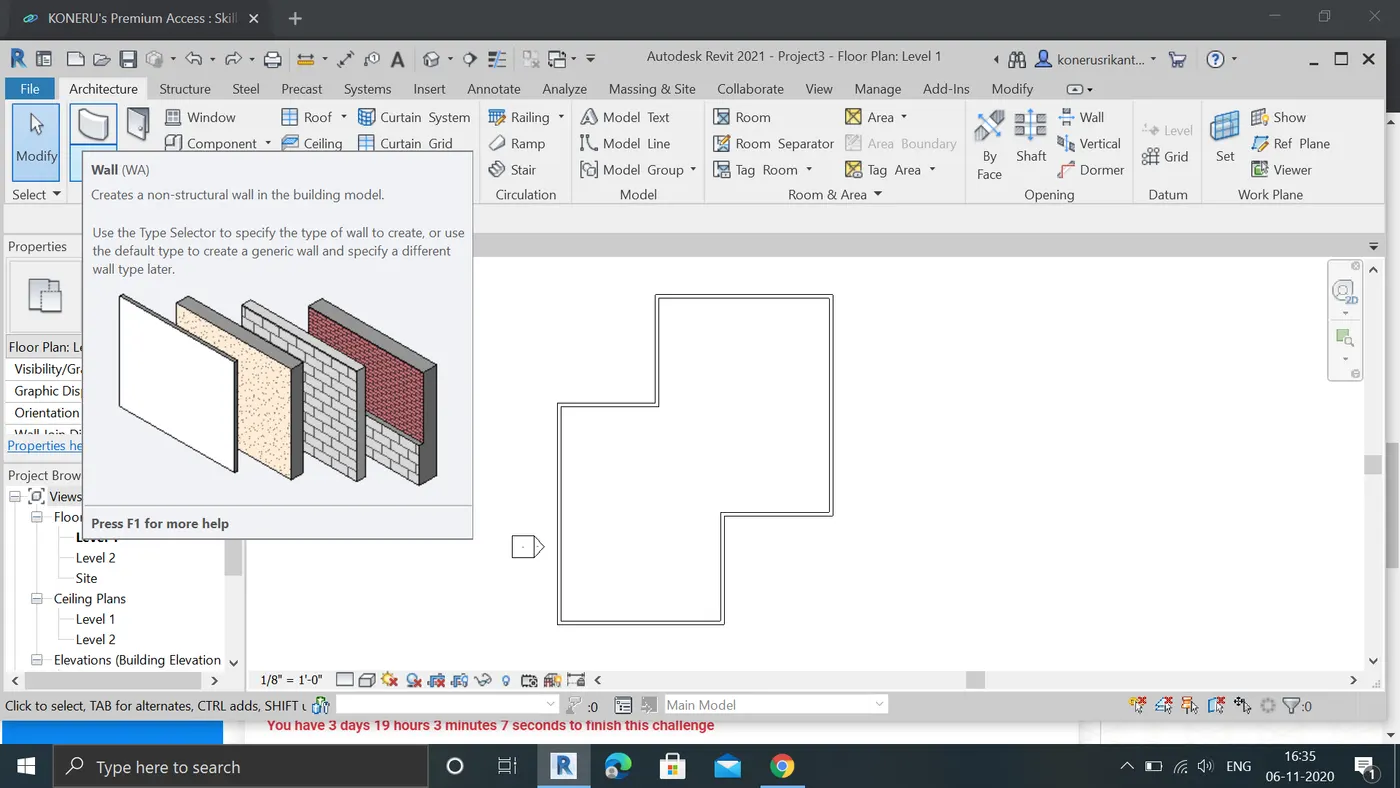
b:now draw the interior partion walls for creating the rooms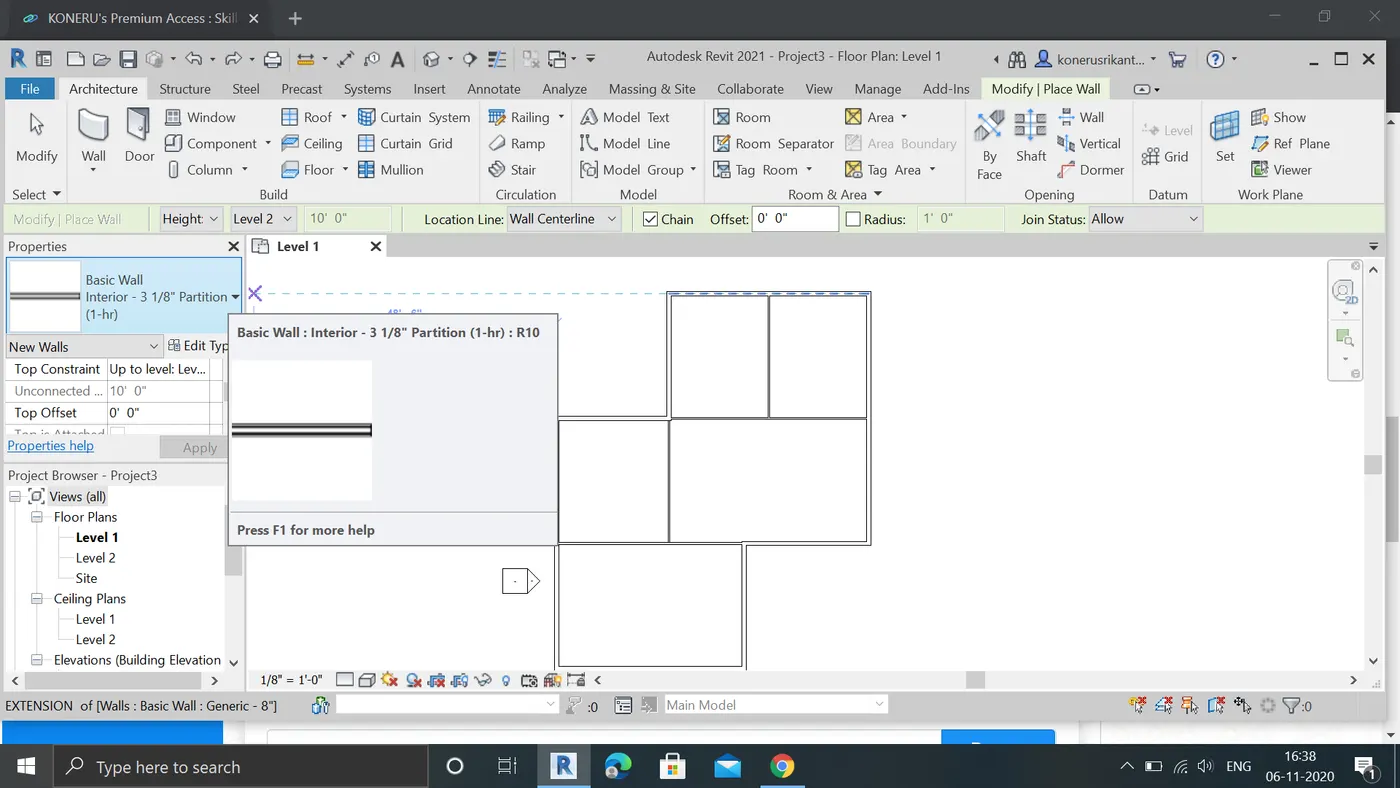
c:now adding rooms to it by room tab in architecture tool and renaming it to kitchen,bedroom,rest,leavingroom.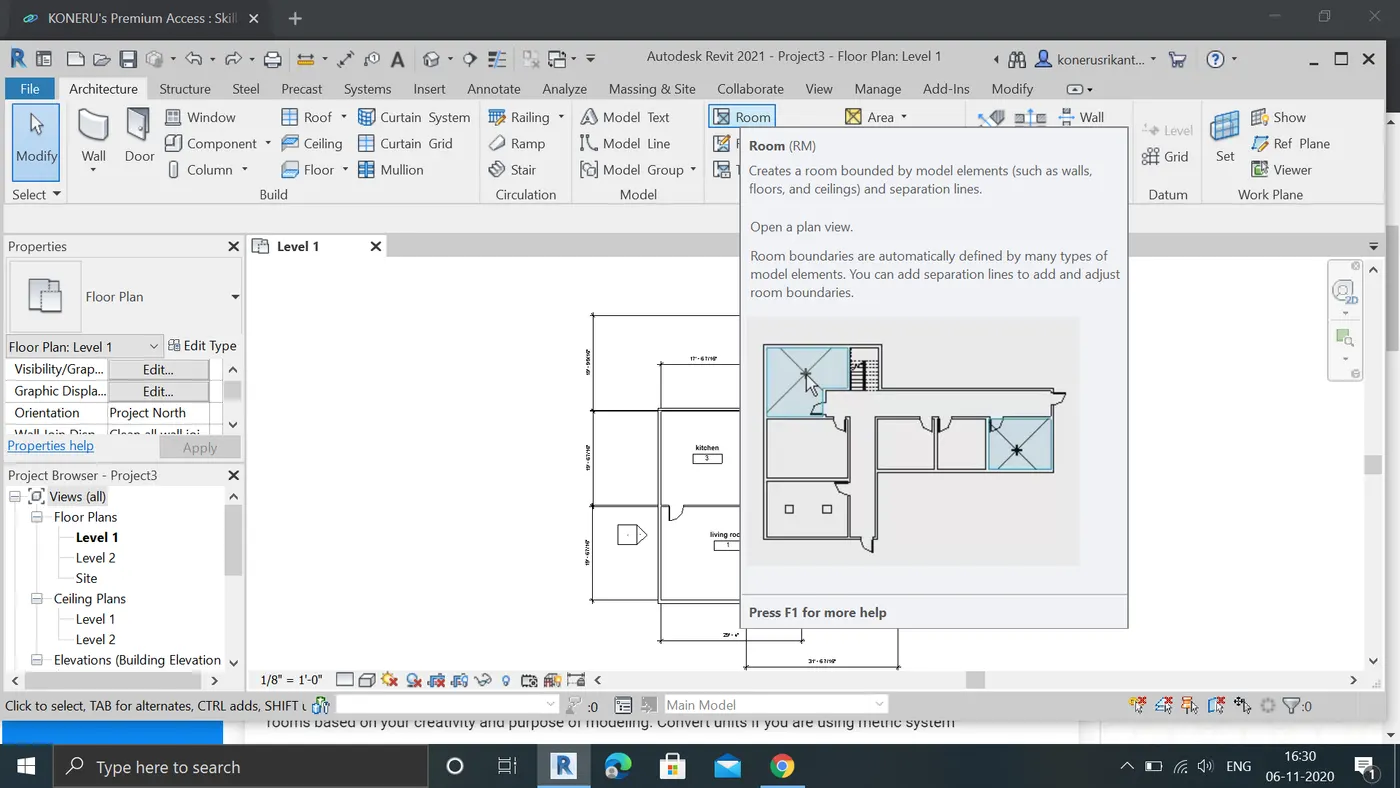
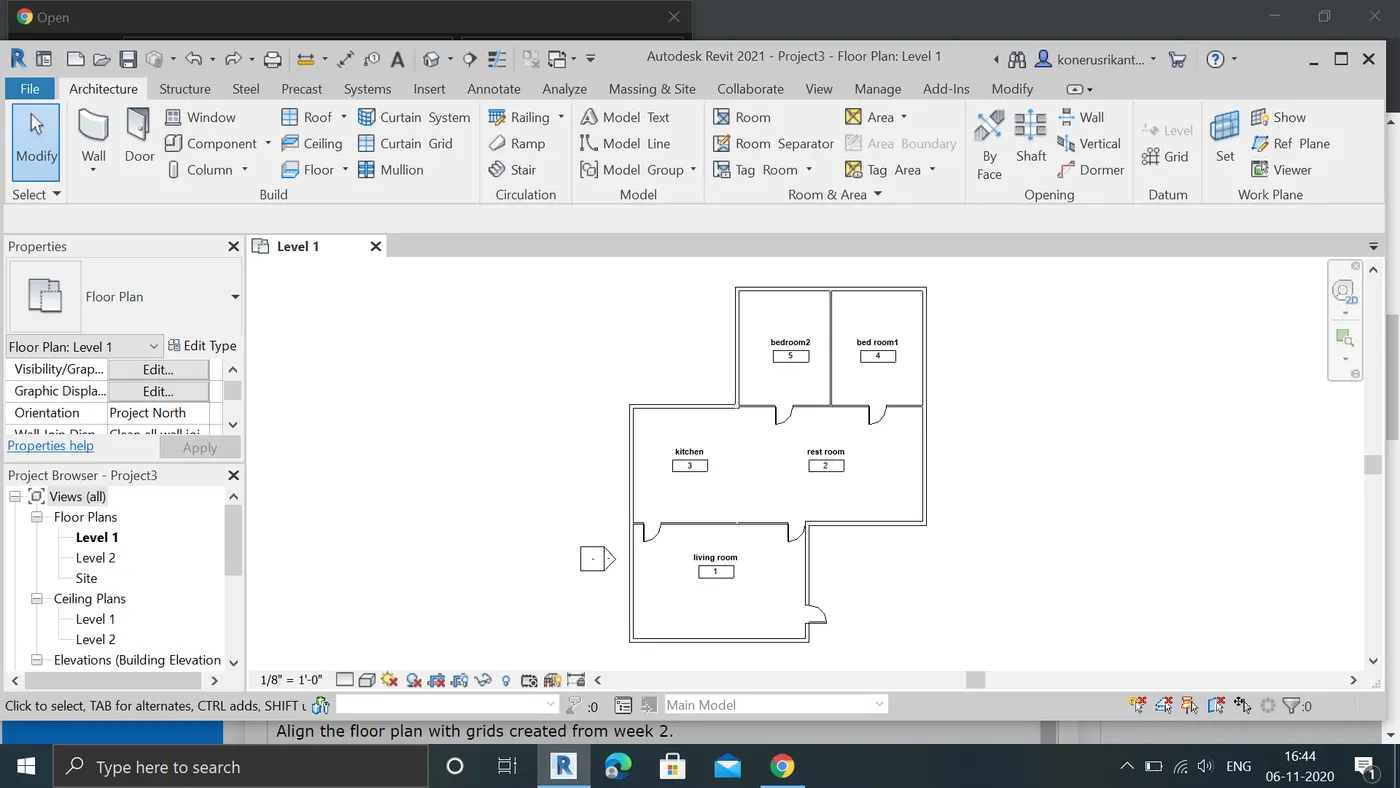
e:now adding dimensions to the project by selecting aligined selecting linear dimensions to it.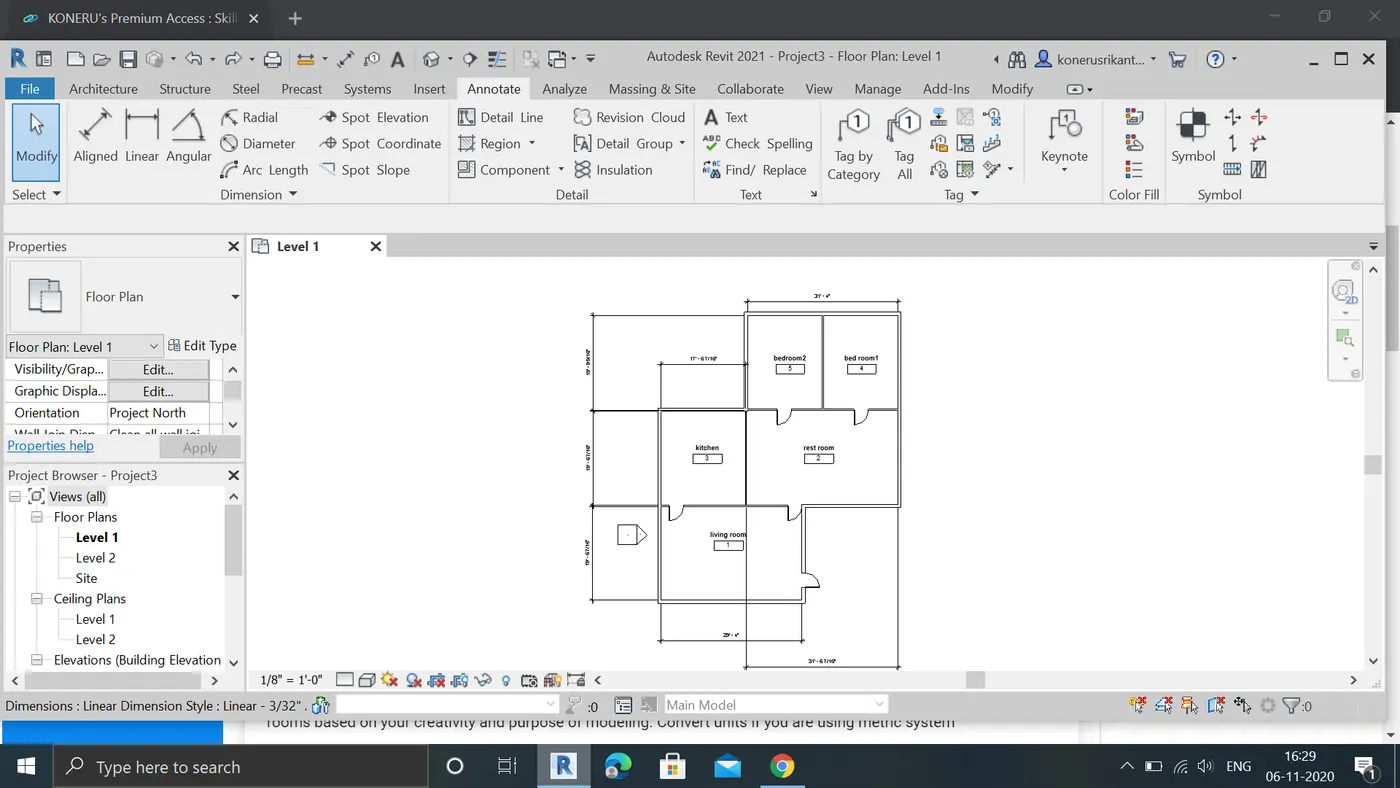
result:sucessfully created given rooms for given project.
5:
5) Based on week 2 assignment, the components to be included in a residential unit were inserted to the Revit file. Place these components in appropriate locations to add details to your residential model
a. Place Doors and windows in the wall at appropriate locations
b. The Living Room must include furniture set, couch table and TV desk and shelf cabinets
c. The Dining Room must include a table and chairs serving the purpose of eating
d. Bed Room must include a bed set, shelf, lighting and individual study desk and chair
e. Rest room should include bath tub and plumbing fixtures discussed in class
f. Kitchen should include countertops, gas stove cabinet and shelves to store food items
g. The wash/storage room can include washing machines and shelves to store clothes
procedure:
a:open the week 2project from file and loadit to add categories to it.
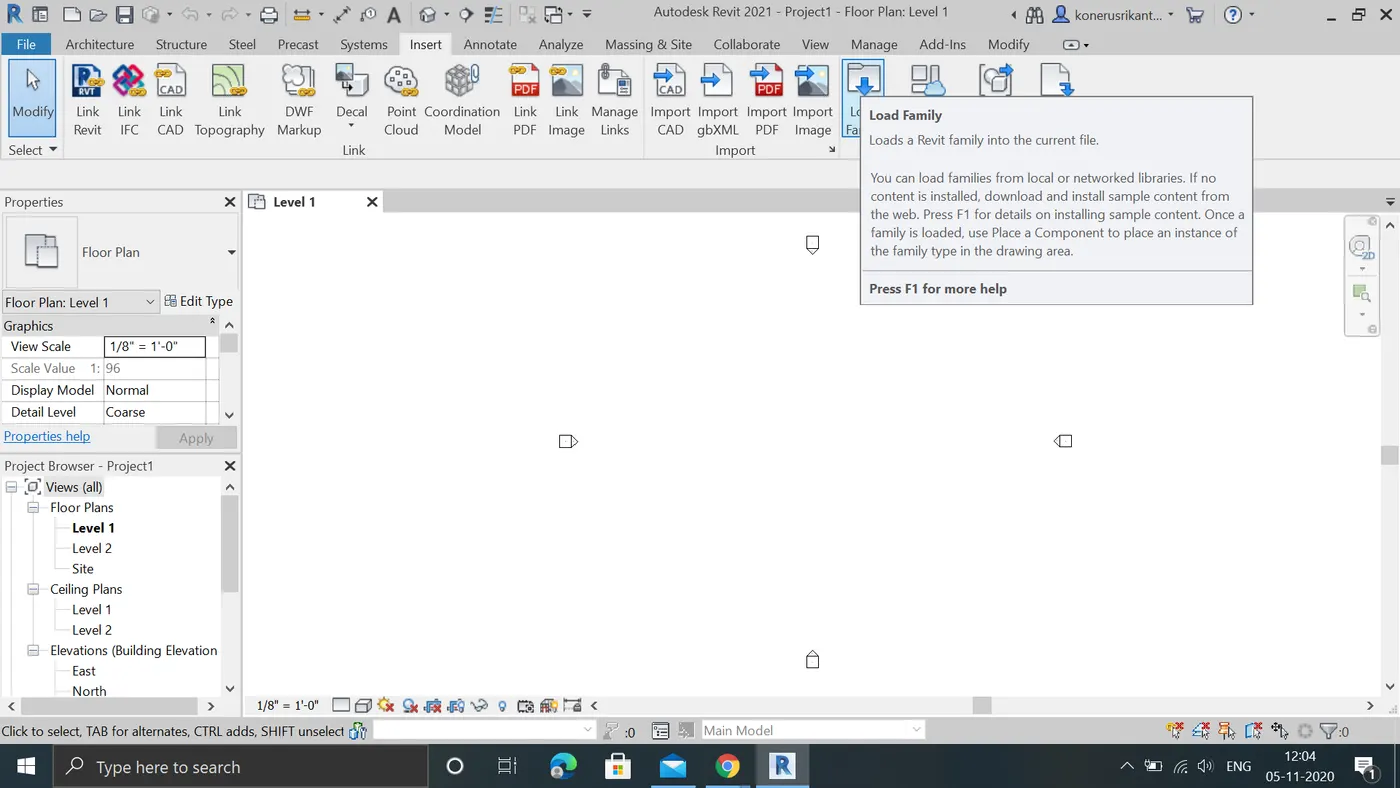
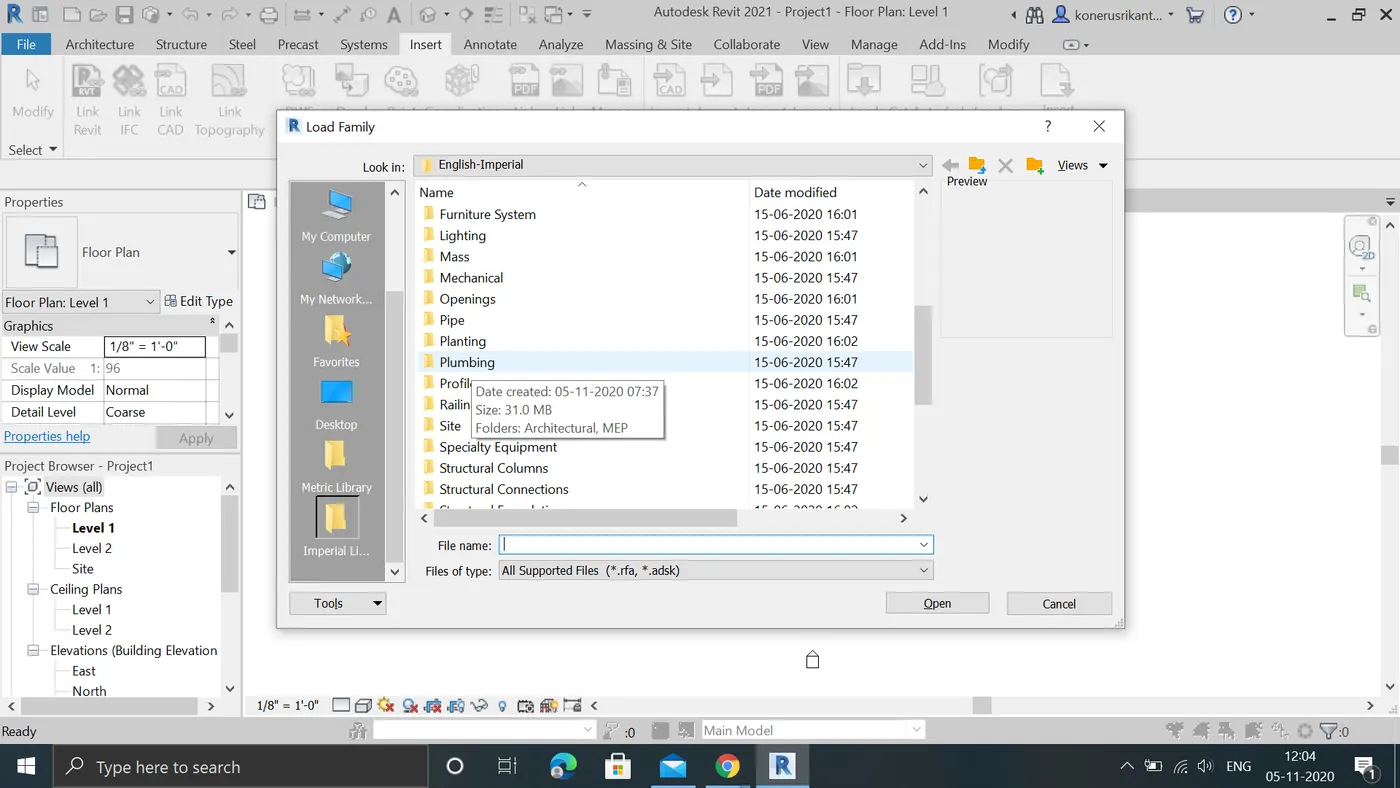
b:from insert toolbar select the load families and select the required category and select required familes and select elements .as follows....
c:doors and windows are plcaed at required positions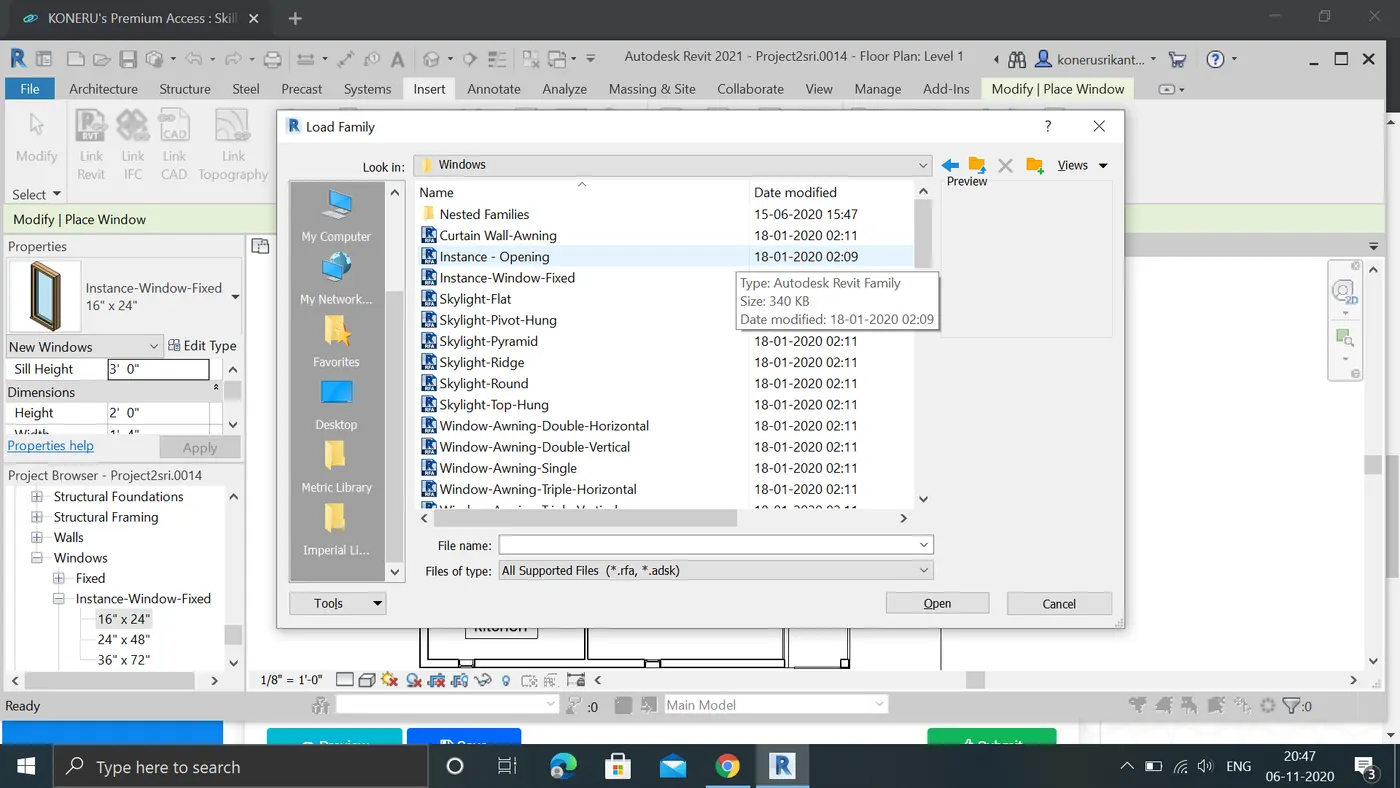
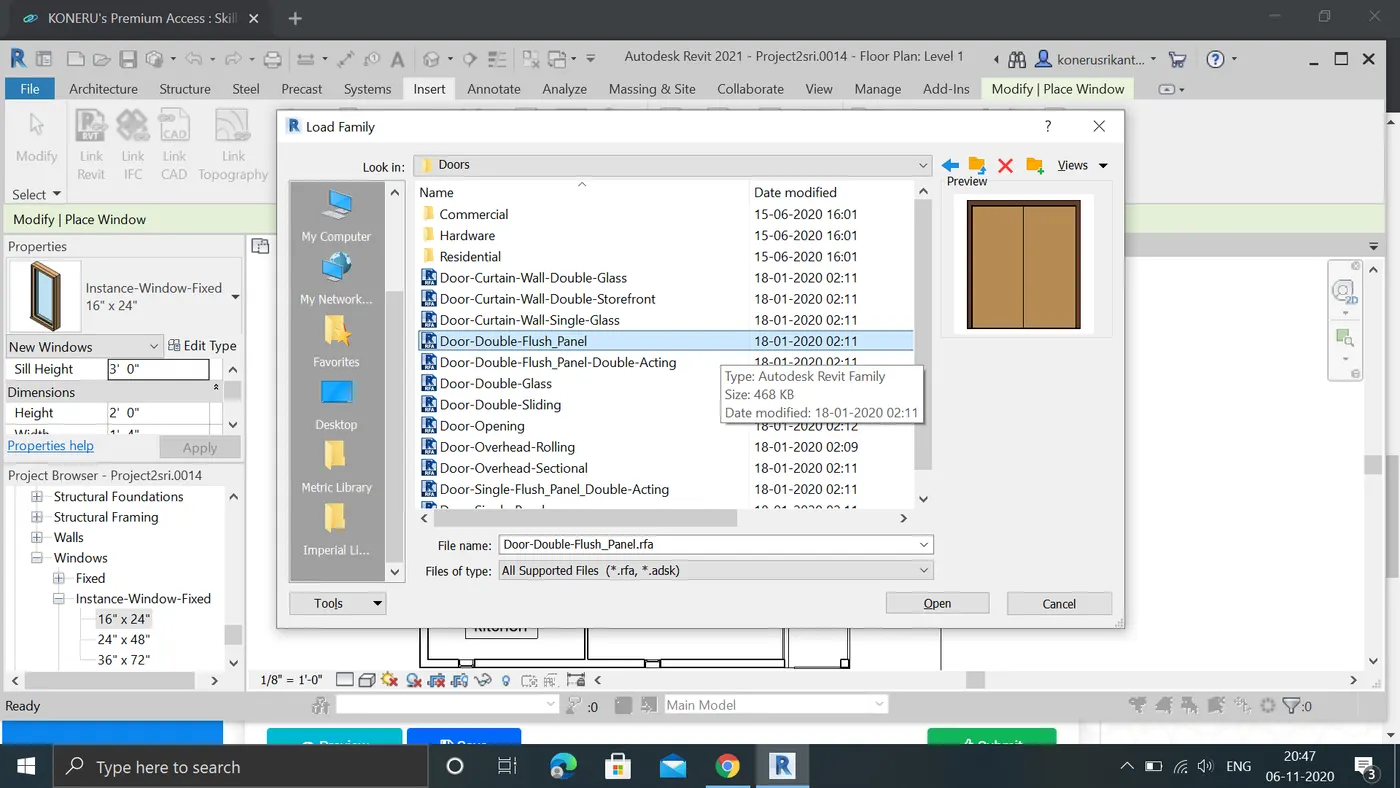
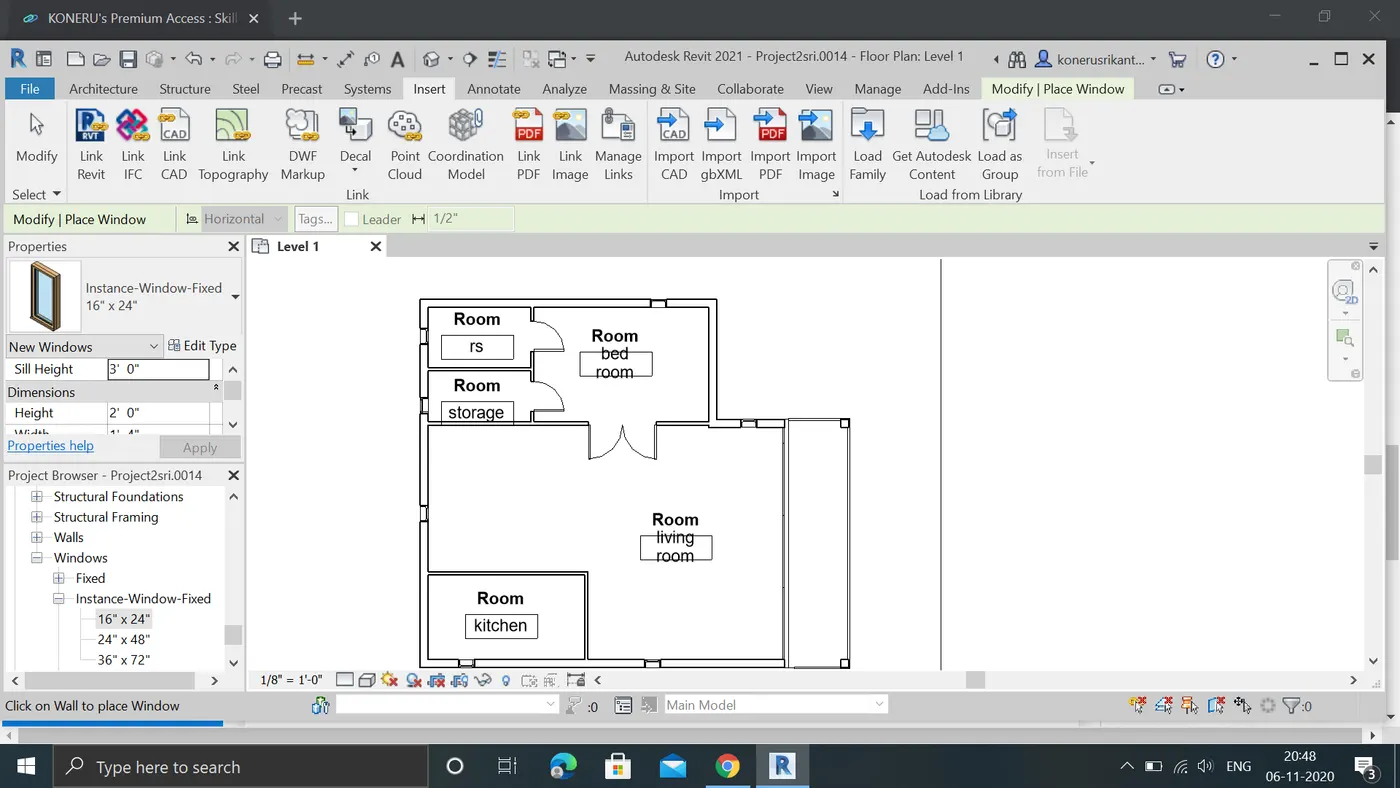
d:similarlly in living room tvdesk,shelf,furnitur set,couch table are added
e:simillarly in dinning room tables and chairs are added
f:similarly in restroom bathtub,and shower etc are added
g:similarly in kitchen stoves,counter roofs ,shelfs etc are added to it.
h:in storage room washing machine,dressstore etc are added to.
i:these is the final layout after adding all elements
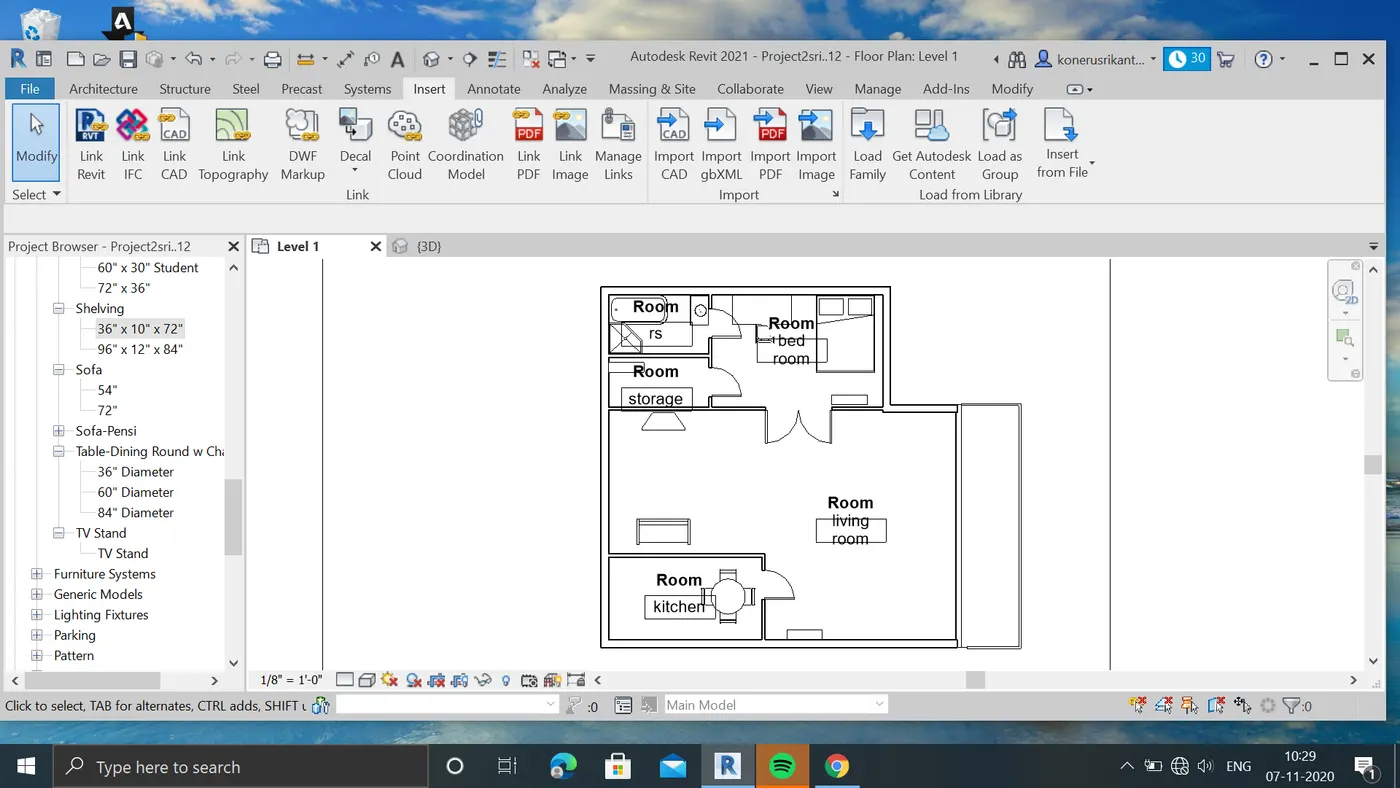
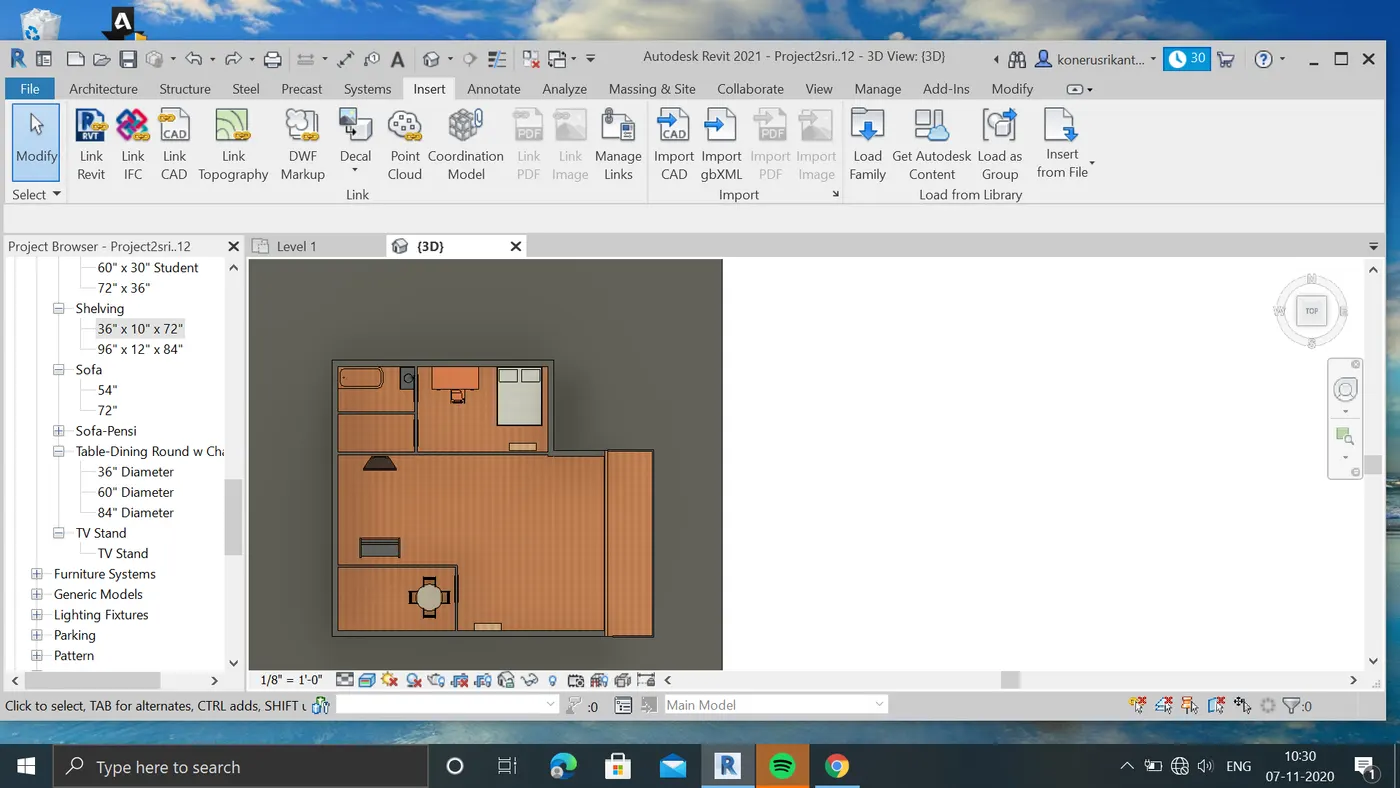
result:all the elements are added the project succesfully.