Week 3 - 2D meshing for sheet metal
2D Meshing for sheet metal components [Car Hood]
AIM-
- Preprocessing on car hood using ANSA as preprocessor software.
Objective-
- Clearing all geometrical glitch over the geometry for this hood component in which 4 sub-parts are there Oter Extract, Inner Exract, Hing Reinforcement Extract, Latch Reinforcement Extract.
- Then extracting the midsurface for each component seperately and give a PID for each.
- After extracting midsurface we will perform 2D meshig over the sheet metal surface of car hood.
- Assigning the thickness for the mesh to respective components.
ANSA as Preprocessor-
- ANSA is Automatic Net Generation for Structural Analysis software uses foe preprocessing in CAE domain.
- It can be used for both FEA and CFD.
- But mostely it used in CFD meshing.
- It is more user friendly than other preprocessing software.
What is CAE??
- Computer-Aided Engineering is a term used to describe the procedure of the entire product engineering process from design and virtual testing with sophisticated analytical algorithms for the whole product cycle.
- it allows to perform tests and simulations of the product’s physical properties where a physical prototype not requireed.
- The most commonly used simulation analysis types include,
Finite Element Analysis(FEA),
Computational Fluid Dynamics(CFD),
Thermal Analysis
Multibody Dynamics (MBD)
Optimizations
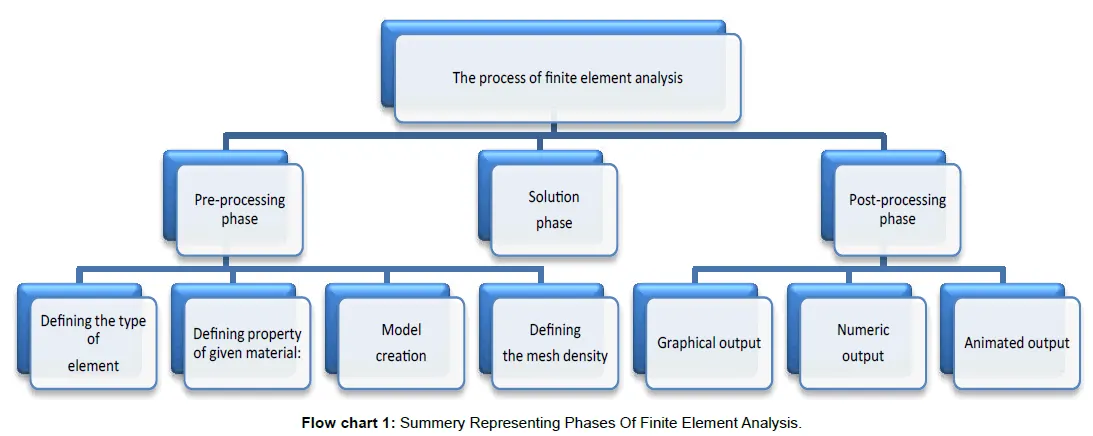
Phases in FEA-
CAR HOOD-
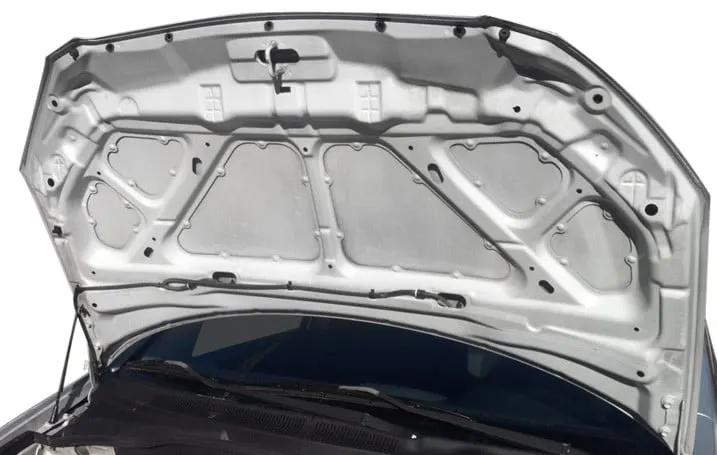
- Here we have to perform preprocessing on car hood.
- A car hood, also referred to as a bonnet is the hinged cover that rests over the engine of a front-engine vehicle. Its purpose is to provide access to the engine for repair and maintenance.
- Car hoods are typically constructed from steel and sometimes from aluminum.
Stage-1
Importing the model:
- Here we will ne importing the CAD file into ANSA.
- Here is many types of file format supported by ANSA for CAD model like IGES,STEP and somtimes Parasolid also depending upon the requirment of industries.
For importing the model we will go on pull down tab >> File >> open >> select the all format >> select the model from folder
Imported CAD model-
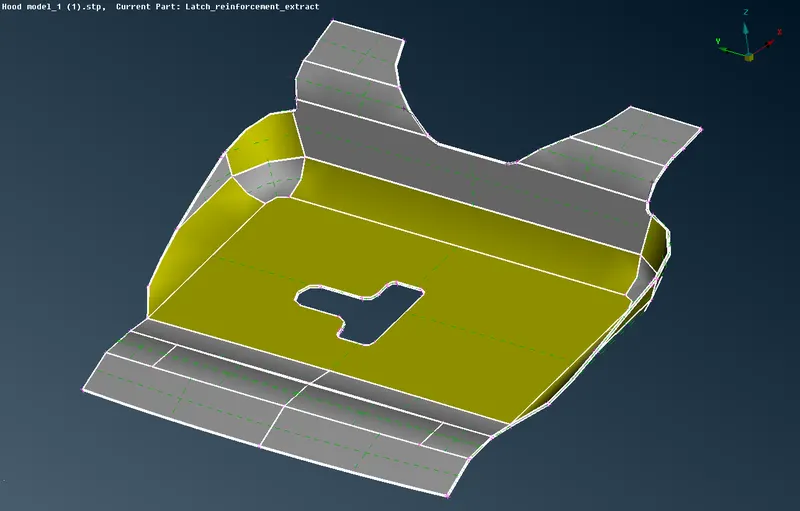
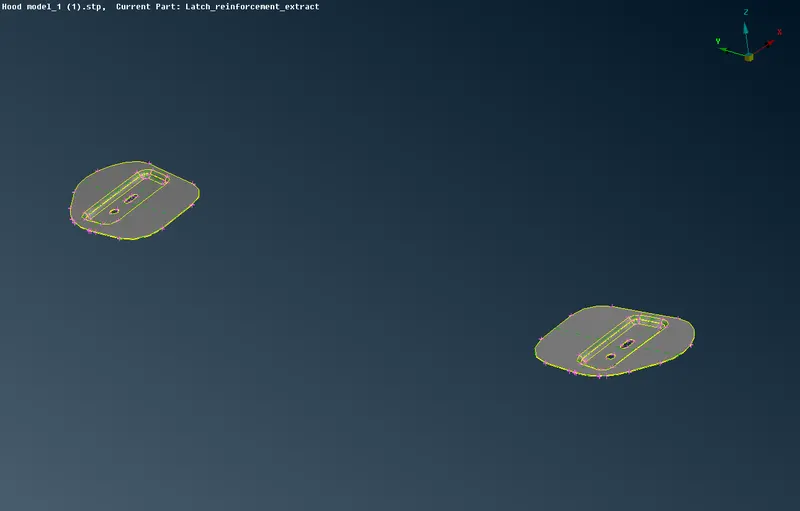
Before Geometry cleanup:
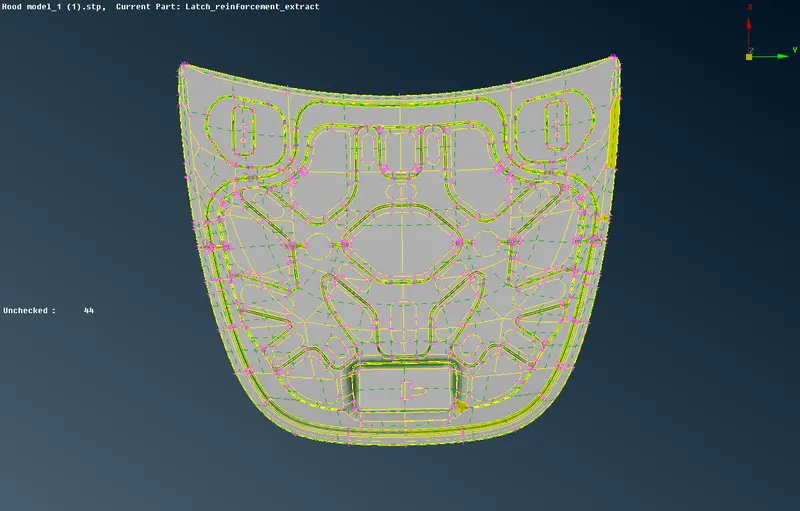
Outer Extract-
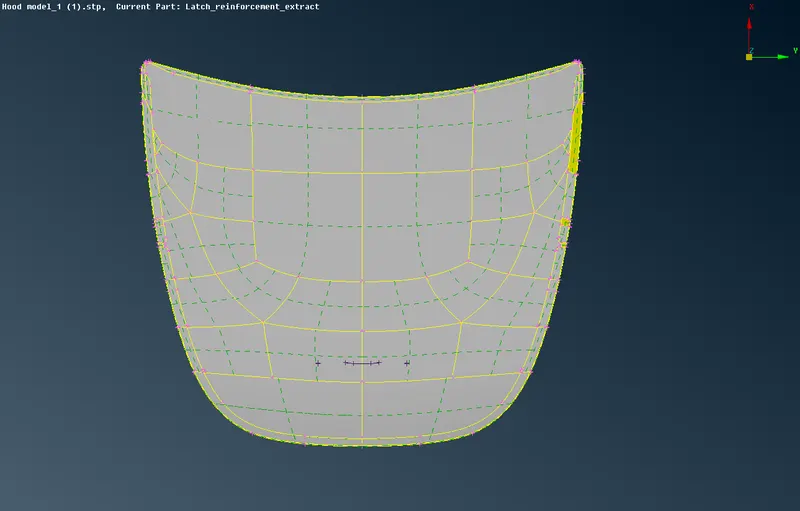
Inner extract-
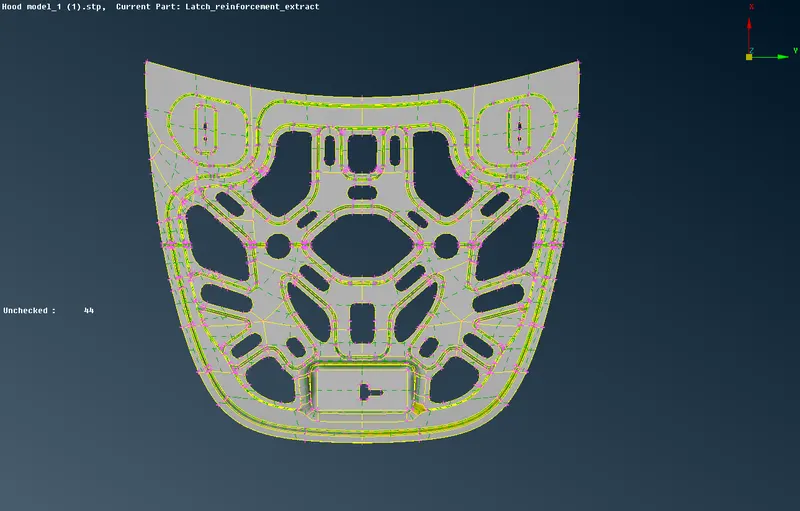
Latch Reinforcement Extract-
Hing Reinforcement Extract-
Stage-2: Geometry check
Visual check for model:
This will check the model visually that there should not be any,
- Damaged Geometry
- Free edges in unnecessary areas.
- Unnecessary points on the lines.
- Unnecessary connectivity and connection in model.
Stage-3: Geometry cleanup
This above model is with lot of geometrical glitches,
we will check it all in Check >> Geometry >> Execute
- It will show al the geometrical glitche over the model then we need to clear it.
- For that we will select all the errors in one time and right click and fix it all.
- If any of them is still remains then select on visible on on the errors, then for that particular region and fix it manually with Topo,release,project, insert, delete hot points etc.
Stage-4: Midsurface Extraction
- Before Midsurface extraction we need to give the perimeter and macros lenth on the component.
- It will refine the surface and edges so that component get into a proper shape.
- It will ease the midsurface extration and give a error less midsurface.
- For this Go to Mesh Module >> Perimeter >> Length.
- Perimeter >> select region >> Middle mouse button >> Length as 1 unit
- Macros >> select region >> Middle mouse button >> Length as 1 unit
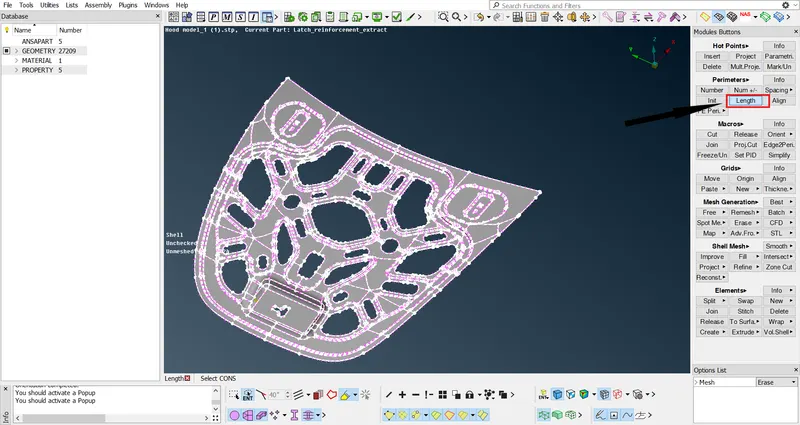
Components After changing peremeter length are Shown below:
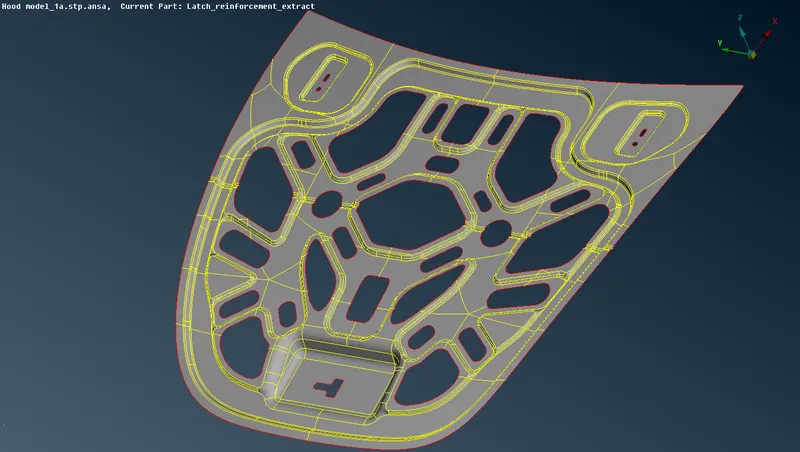
Fig :After perimeter length of 1unit
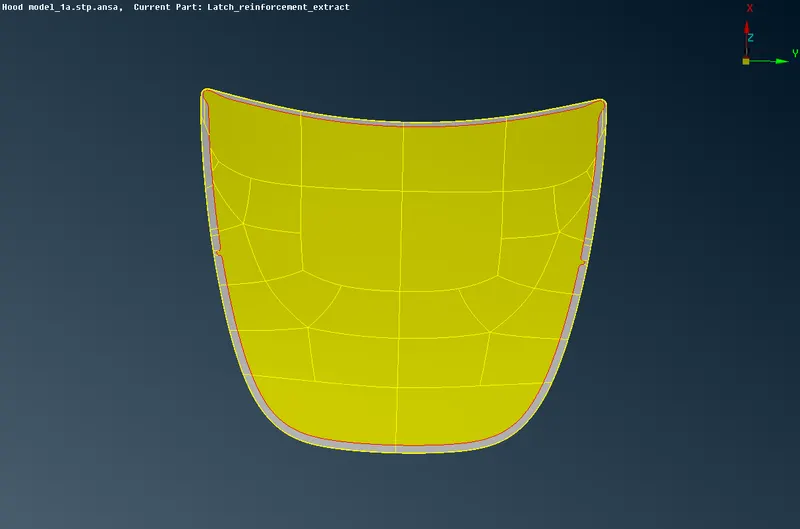
fig: After perimeter length of 1 unit
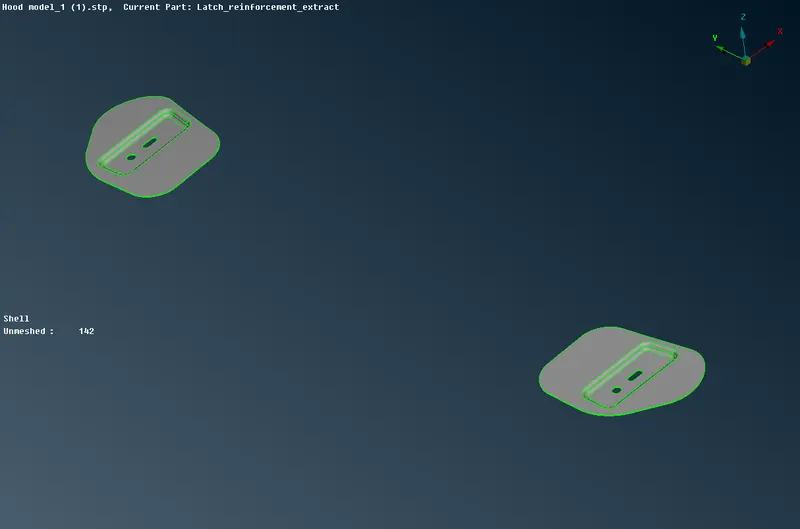
Fig: Hing Reinforcement after perimeter length of 1 unit
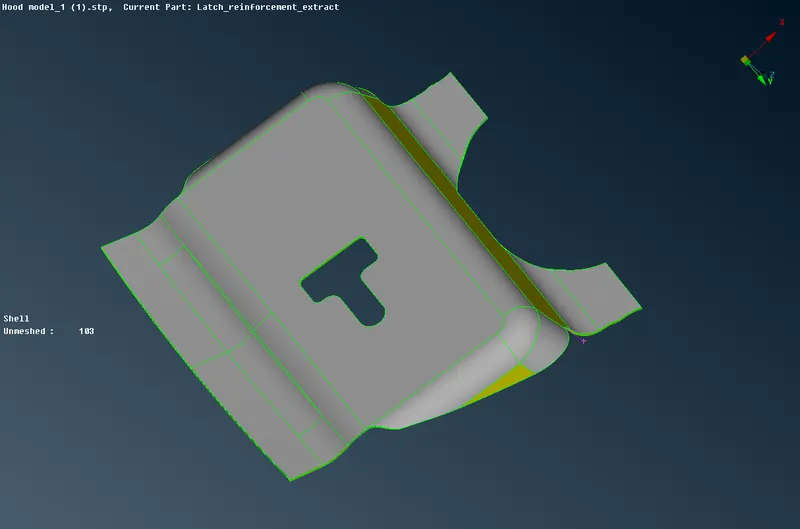
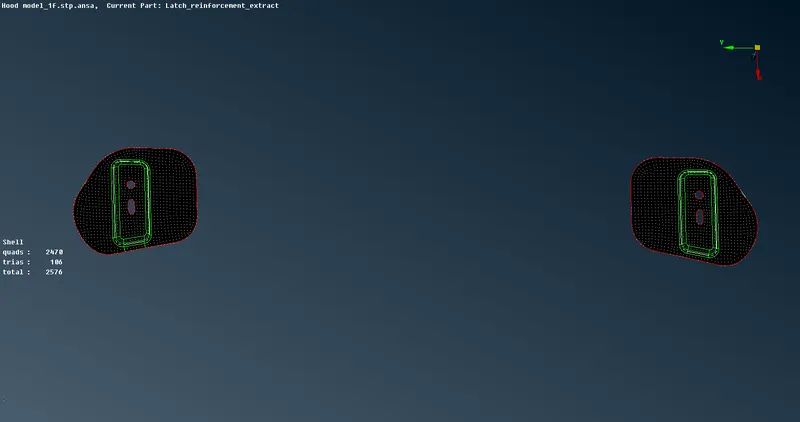
Fig: Latch Reinforcement after perimeter length of 1 unit
Midsurfacing:
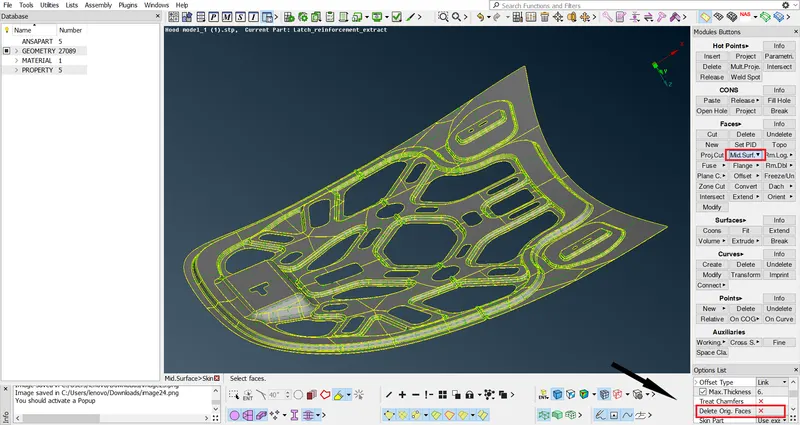
Go to Top Module >> Faces >> Mid.surf. >> select region >> Middle mouse click >> Again middle mouse and select faces >> Offset value >> middle click
Note : While midsurfacing uncheck on delete original surface in Mid.surf. tool
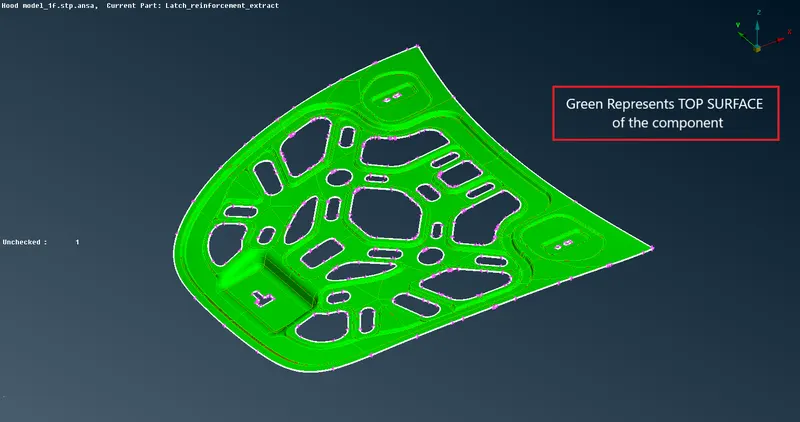
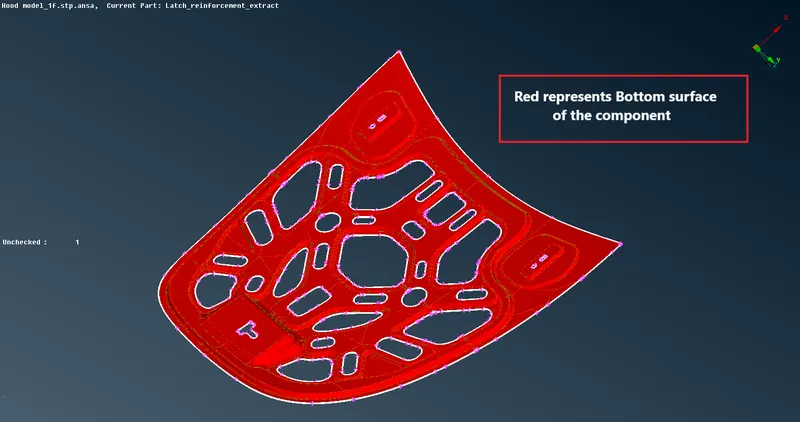
Midsurfaces of every component-
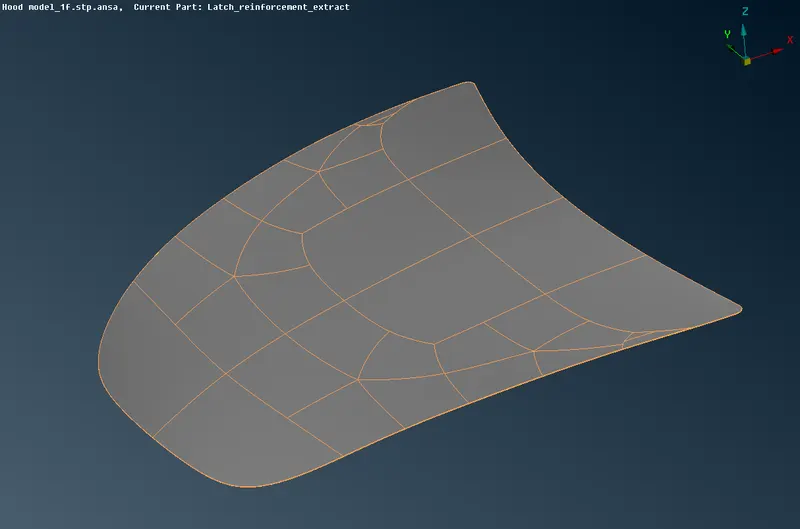
Fig-Outer extract midsurface
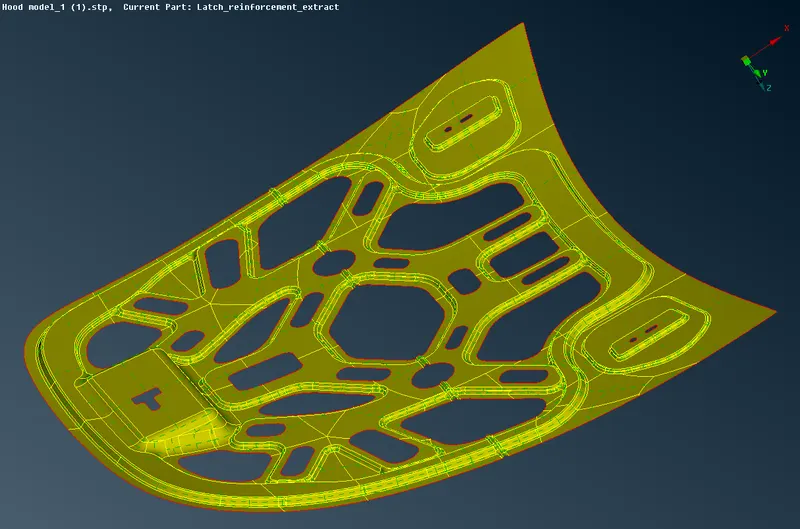
Fig- Inner Extract Midsurface
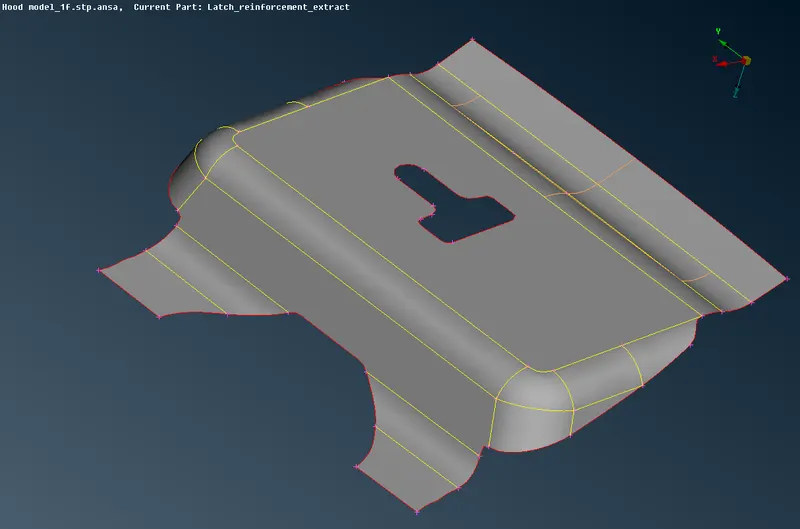
Fig- Latch Reinforcement Extract Midsurface
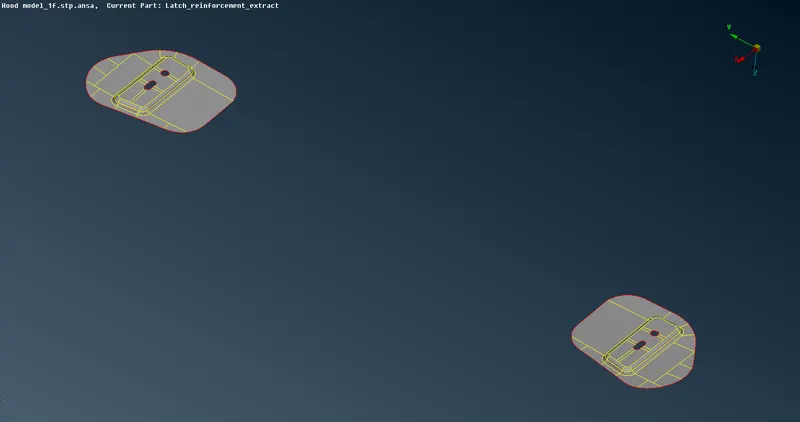
Fig- Hing Reinforcement Extract Midsurface
Stage-5
Meshing:
After all Midsurface extraction we will go for meshing of the surface.
NOTE: 1.Before mehing all we need to do is check for the geometry again if any error is found then fix it.
2.And one more thing we should do is change the perimeter length as according to the target element length for the project.
Start meshing with outer extract-
- This is the outer extract geometry with lot of cons which we dont have any requirment for meshing specially.
- So we will toggle these lines using cons>>cut option in topo bar.
- Now as we can see it has symmetry along an axis so we can delete symmetrical part and start working on one part.
- After deleting the symmetrical part we will split this into number of section for better mesh flow as shown in below pucture.
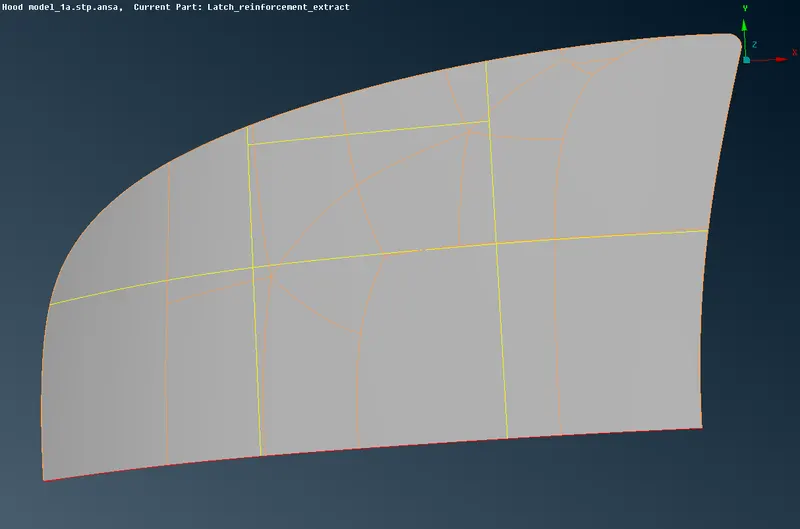
- Now we will perform 2D mesh on this surface
Mesh module >> Mesh generation >> Best >> select component and mesh
- In 2D meshing with ANSA preprocessor easiest way of meshing is by Best mesh option.
- After giving mesh to the surface usually we will be using Reconstruction (Recon.) from shell mesh for better mesh flow.
- Uses of some other tools also like smooth,split,swap,cut,join,projcut. etcfor better mesh flow
Given Quality criteria for this model:
Target Element Length = 5 Units
S.N. Quality criteria Functions Values
1 Aspect Ratio Ratio of max lenth/min legth 5
2 Skewness Deviation from ideal shape 45
3 jacobian Transformation of coordinate system 0.7
4 Warping Angle between the two planes of the same element(quad) 15
5 Min.Length shortest length of any given element 2
6 Max.Length largest length of any given element 7
7 Min. angle quad Minimum angle in any given quad element 45
8 Max. angle quad Maximum angle in any given quad element 135
9 Min. angle tria Minimum angle in any given tria element 30
10 Max. angle tria Maximun agnle in any given tria element 120
11 Tria % percentage of tria in meshef surface 15
- So before start meshing we will set all the quality criteria in ANSA using shortkey F11.
- Quality criteria tab open >> shell >> put all the values and apply >> ok, and set presentation parameters also in the same tab .
- In Graphics do check tick on the % Elements and All details arrow on left corner side.
Start meshing:
Outer extract-
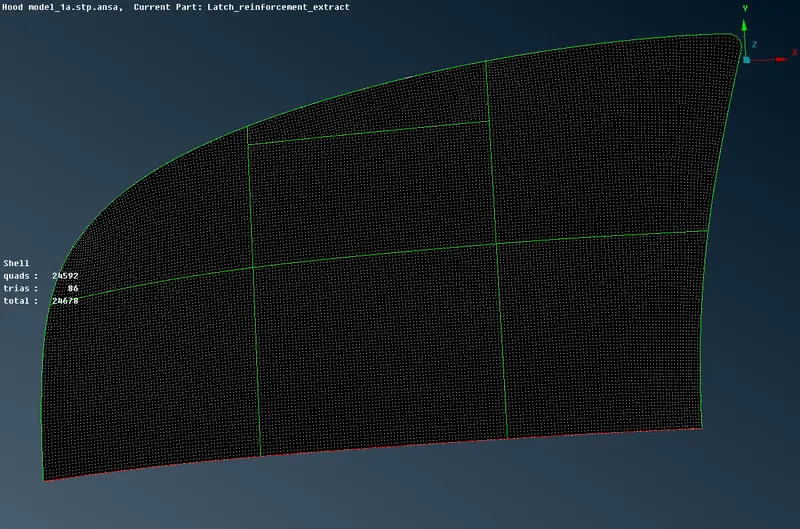
- After meshing one side now we will reflect this mesh on another side also.
- So here in ANSA we will transform this mesh using transform copy methode.
Utility >> Transform >> copy >> select Entities >> symmetry >> Apply >> Finish
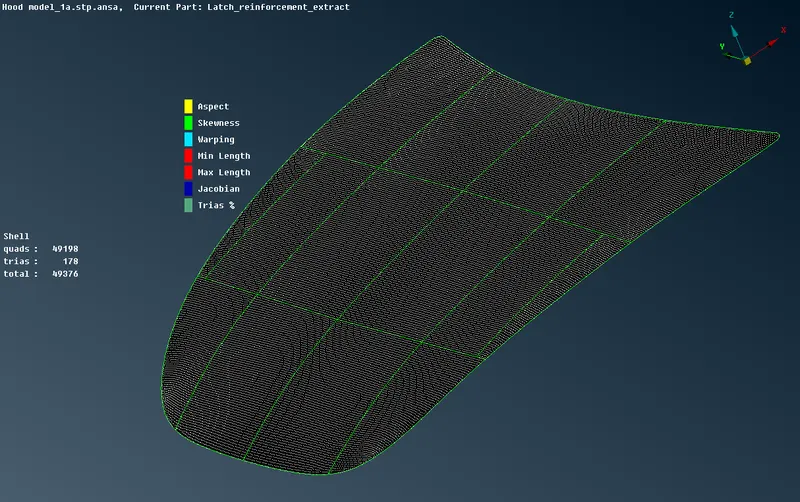
Inner extract-
We will do this in same way as we did for outer extract previously.
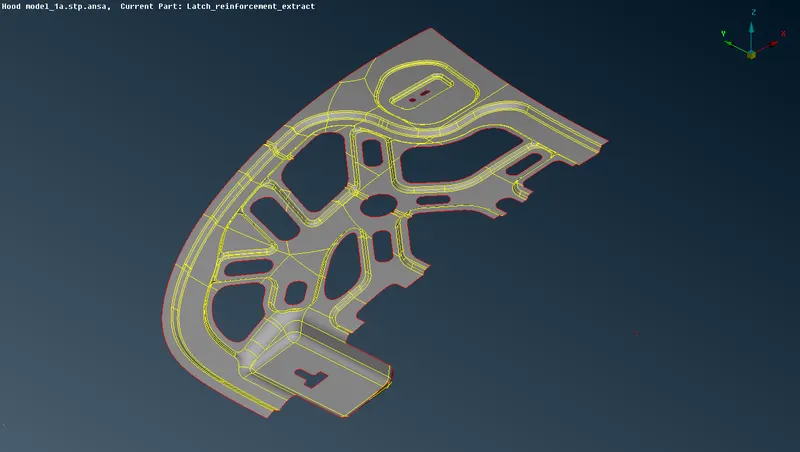
Fig- Splited the symmetric Geometry
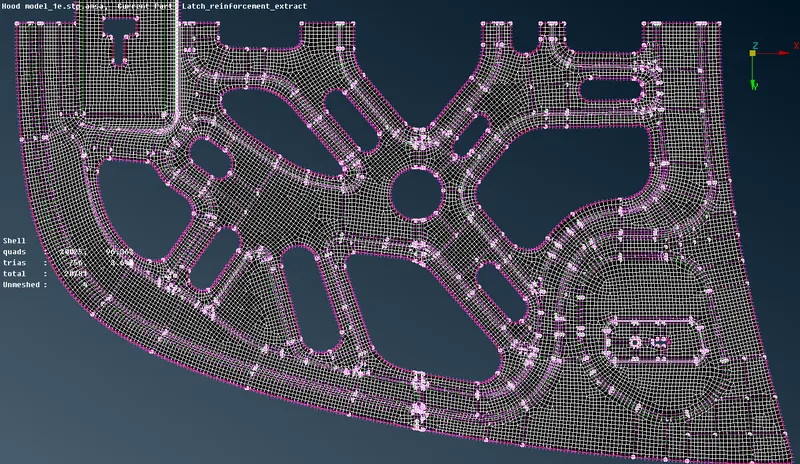
fig- started meshing for half symmetric geometry
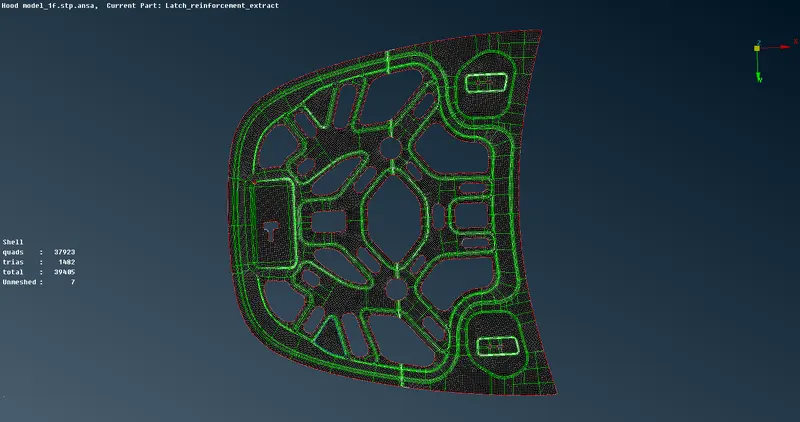
fig- Inner extract complete meshed
Some thumbrule while meshing for better mesh flow-
- Feature capturing is must while meshing it means all shared edges should have better nodes connectivity.
- Try to keep less number of trias.
- Avoid trias on feature line and edges should swap it.
- Avoid opposite trias, use split option and combine them.
- Try to keep less number of trias on fillets, use split or swap tool.
- Avoid rotational quads, Recons. or split into trias and move them.
- Use mixed type of elements on complex geometry means trais and quads for this 2D meshing.
Latch Reinforcement extract-
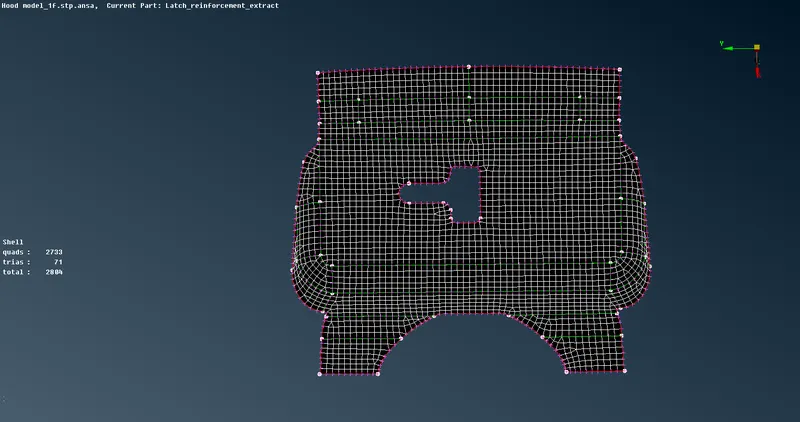
Hing Reinforcement Extract-
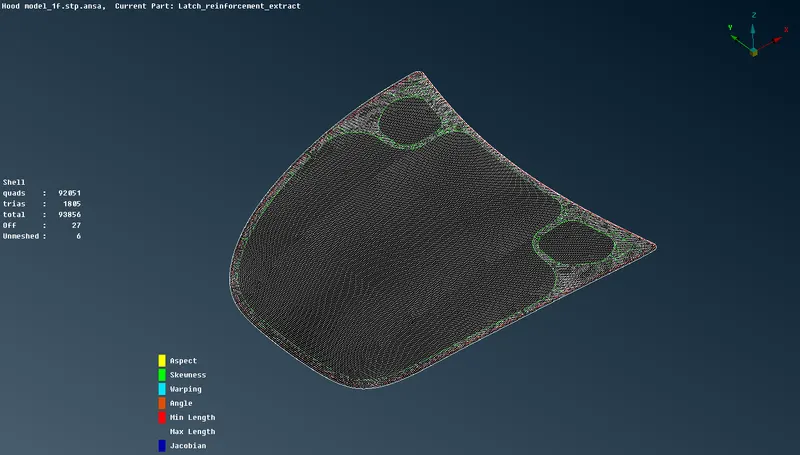
Final Hood Meshed Model-
Result-
- We have achive zero surface error in the model
- Succesfully extracted midsurface for each component.
- Feature line have connected properly and surfaces have good connectivity.
- A good mesh flow have been achived with zero elemental failure.
- We have achive minimum tria concentration below than 2%.
What we learned ??
- In this challenge we have perform all geometry cleanup for the hood component.
- Then we have extraced the midsurface using auto midsurface extraction.
- How to generate a good mesh flow.
- How to achive less tria concentration.
Car Hood Meshed Model-
https://drive.google.com/file/d/1IkEr2uBJkiYtKG8GbV0oKA6lsJgOE73H/view?usp=sharing