Week 2- 2R Robotic Arm Challenge
Objective:
To stimulate the Forward Kinematics of 2R Robotic arm using the MATLAB program.
Procedure:
First of all to write and execute the program, we have to understand the requirements of the objective. For the Forward Kinematics of 2R Robotic arm, we have to be very clear while taking the input values. The input value is like the Origin, Co-ordinates of the link, the angle in which the link is suspended and the length of the link. To find out these input value we have to use the Trigonometric function. By using that we can get a input value such as co-ordinate of the link with respect to its origin and the angle.
Plot 1: To plot the line of the Robotic Arm
%To write a program for forward kinematics of the robotic arm

clear all
close all
clc

%Inputs
l1 = 2; %Length of the arm 1 in m
l2 = 1.75; %length of the arm 2 in m
theta1 = 60; %anlge to the base and the arm 1 in degree
theta2 = 40; %angle to the arm 1 and arm 2 in degree

%Co-ordinates value of arm
x0 = 0;
y0 = 0;

x1 = l1*cosd(theta1);
y1 = l1*sind(theta1);

x2 = x1+l2*cosd(theta2);
y2 = y1+l2*sind(theta2);

%Plot the co-ordinates
line([x0 x1],[y0 y1],'linewidth',4,'color','r') %Command 1
line([x1 x2],[y1 y2],'linewidth',4,'color','b') %Command 2
grid on %Command 3
title('Plotting of Robotic arm','color','m') %Command 4
Code Explanation:
- First I given all the input parameters in the program.
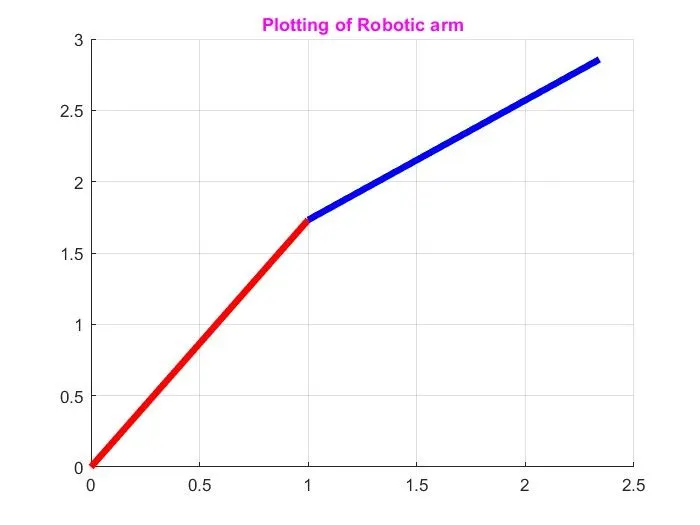
- By using the Command 1, I plot the line of the base of the robot to the arm 1 with respect to the angle in which it is suspended mentioned as theta 1. And also I give the linewidth of 4 for easy viewing and given the color Red.
- By using the Command 2, I plot the line to the arm 1 and the arm 2 with respect to the angle in which it is suspended mentioned as theta2. And also I give the linewidth of 4 for easy viewing and given the color blue.
- By using the command 3, I turn on the grid in the plot for easy viewing of the arm position.
- By using the command 4, I given the title to the plot. So that it will not be confusing to refer the plot .
Error:
Error Solution:
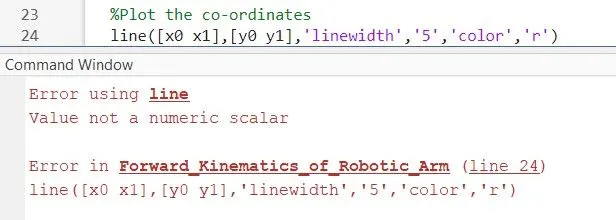
During programming, I am getting this error. It shows the value not a numeric scalar, which makes me bit confusing. But later on I got that error. It is for providing line width number, I used a Open paranthese symbol ' and close parantheses symbol'. By doing that the error occur. After that i removed the Open and Close Paranthese for the line width number. So the error disappears.
Plot:
Plot 2: To plot the animation of Robotic arm
%To create animation of Robotic arm

clear all
close all
clc

%Inputs
l1 = 2; %length of the arm 1 in m
l2 = 1.75; %length of the arm 2 in m
theta1 = linspace(0,90,10);
theta2 = linspace(0,90,10);
ct=1;
for i = 1:length(theta1)
    THETA1 = theta1(i);
    for j = 1:length(theta2)
        THETA2 = theta2(j);
        x0 = 0;
        y0 = 0;

        x1 = l1*cosd(THETA1);
        y1 = l1*sind(THETA1);

        x2 = x1+l2*cosd(THETA2);
        y2 = y1+l2*sind(THETA2);

        %Plot the co-ordinates

        plot([x0 x1],[y0 y1],[x1 x2],[y1 y2],'linewidth',4) %Command 1
        axis([-0.1 4 -0.1 4]) %Command 2
        grid on %Command 3
        title('Animation of Robotic arm','color','m') %Command 4
        M(ct) = getframe(gcf) %Command 5
        ct=ct+1; %Command 6

    end
end
movie(M)
videofile = VideoWriter('Animation_of_Robotic_Arm.avi','Uncompressed AVI'); %Command 7
open(videofile) %Command 8
writeVideo(videofile,M) %Command 9
close(videofile) %Command 10
Code Explanation:
- For doing the animation, the change of arm co-ordinates is required. For that the change in angle of each arm is required. So I use linspace () command, to vary the angle from 0 to 90 degrees with the increment of 10 degrees each.
- Then for execution of animation, we required the variation of angle to be achieved multiple times in a single command. For instance if we are using other command then it executes by one time. So for that here I used FOR loop command, where the variation of angle can be achieved by loop until the final angle is obtained.
- Then in for loop, I used length() command, where it is used to execute the value for the next command as per the length of the value inside it.
- Then I gave the input value.
- By using command 1, I plot the co-ordinated obtained by using the formulas.
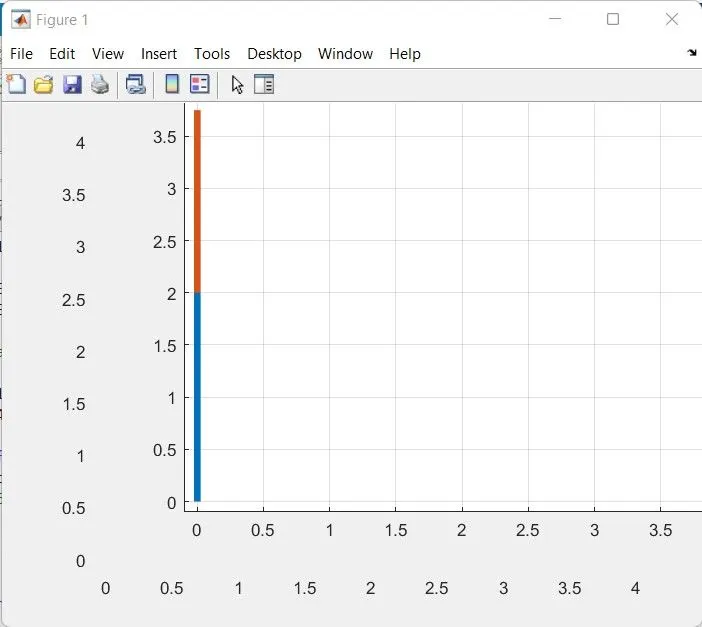
- Then by using command 2, I defined the Co-ordinate of the plot. In the plot it shows the range upto -4 to 4. So i reduced it to -0.1 to 4.
- Then by using command 3, I turn on the grid for easy viewing.
- By command 4, I gave the title of the plot as Animation of Robotic Arm with magneta color.
- By command 5, I am able to get the various frame rates in a single plot. If it is not used, at that time i get the various plots that shown the various position of robotic arm. To make it in the single plot this command is used.
- For the FOR loop further execution, with increment value the counter command is used.
- Then I closed the FOR loop.
- Then for creation of movie, I added the further command.
- The command 7 is used to provide the name and type of the video file.
- Command 8 is used to open that video file while execution.
- Command 9 is used to write the video file along with the motion of the arm, where we actually get the animation.
- Command 10 is used to close the video file after execution.
Plot Obtained:
Result:
Hereby I attached the link of the video that I got in the animation. https://youtu.be/2v0r5kkGr00