Week 2- 2R Robotic Arm Challenge
AIM:
To simulate the forward kinematics of a 2R Robotic Arm.
OBJECTIVE:
- To understand and trace the movement of the robotic arm with the help of Matlab by animation.
PROGRAMME:
% Forward Kinematics of robotic arm
close all
clear all
clc

% Inputs
theata1 = linspace(0,90,10);
theata2 = linspace(0,90,10);

l1 = 1;
l2 = 0.5;

% Coordinates
x0 = 0;
y0 = 0;

ct =1;
for i =  1:length(theata1)
    THEATA1 = theata1(i);
    for j = 1:length(theata2)
        THEATA2 = theata2(j);

        x1 = l1*cosd(THEATA1);
        y1 = l1*sind(THEATA1);

        x2 = x1 + l2*cosd(THEATA2);
        y2 = y1 + l2*sind(THEATA2);

        % Plotting
        plot([x0 x1],[y0 y1],[x1 x2],[y1 y2], 'linewidth',1.5)
        axis([-0.1 1.5, 0 1.5]);
        M(ct) = getframe(gcf);
        ct=ct+1;

    end
end

 movie(M)
 videofile = VideoWriter('forward_kinematics.avi','Uncompressed AVI');
 open(videofile)
 writeVideo(videofile,M)
 close(videofile)
EXPLANATION:
- Firstly the inputs have been assigned, whereas the values for theata1 and theata2 are given between (0 - 90) degrees, so we used (Linspace) command to assign the values.
- Other input values can be assigned accordingly, and starting co-ordinates can also be mentioned.
- Further, to find the value of x1,x2,y1 and y2 the genral formula is
X = L*cosd(theata) Y = L*sind(theata)
- Whereas theata1 and theata2 has values between 0 to 90 deg, (FOR loop) is used, so that we can collect each values of the theata1 and theata2, by basic understanding we know that for each and every angle of arm one , arm two has different values, so that (range operator) is used.
- With the help of range operator we can assign each angles of theata1 to a different variable THEATA1, same procedure is followed for theata2 to assign values in THEATA2.
- To plot the graph of a 2R Robotic Arm, plot command is used, values of X coordinates should be enetered first then followed by Y coordinates, X coordinates and Y coordinates are to be seaparated by comma and then if required linewidth can also be mentioned.
- Axis points can be assigned by mentioning the X and Y coordinates respectively.
- To create animaton of robotic arm lets store every frame in an array called M, where ct represetns each frame.
- (getframe) command is used to get the frames of the figure window and store the data in an array called M. Then the frame is incremented by one.
- Further (end) command is used to end the for loop and then to create a movie using the frames we collected movie(M) is used, then (videofile) command is used to genrate the name of the video file in .avi format.
- Then to proceed it by open the video file and write the movie we created in the video file and close the video file.
ATTACHMENTS:
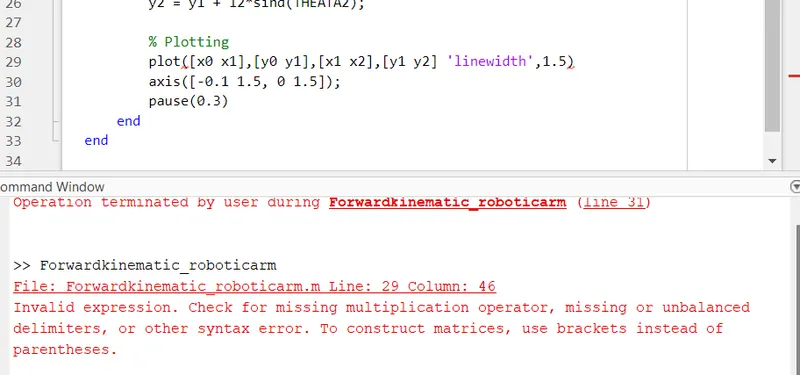
1). 
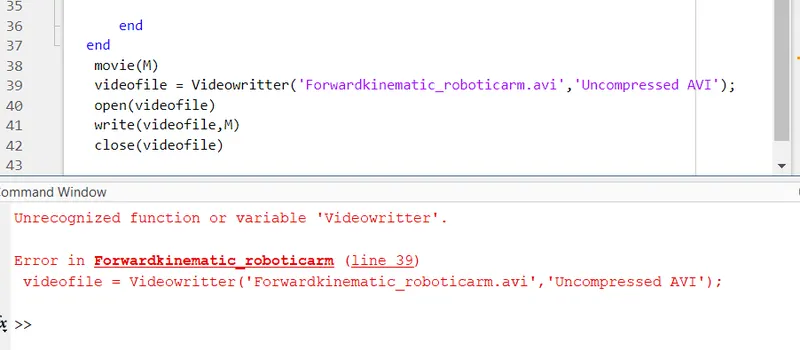
2). 
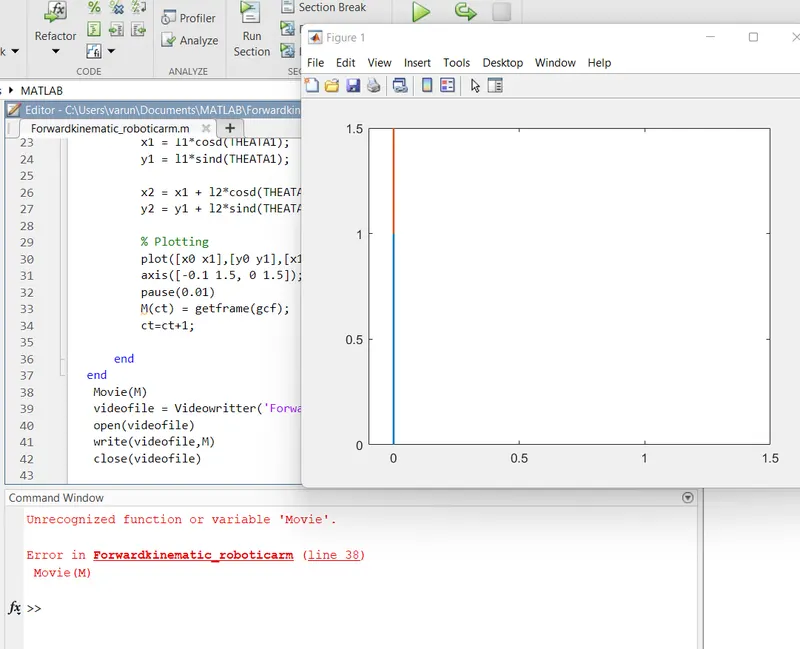
3). 
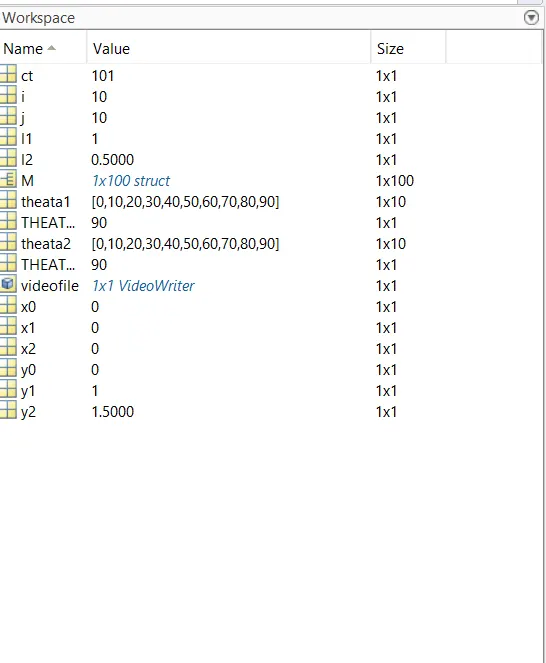
4). 
5). Animation of 2R robotic Arm
ERRORS OCCURED:
- On attachement 1 error occured while plotting, where as i missed a comma after entering the y coordinate, which later is rectified.
- On attachement 2 error occured as unrecogonized function whereas, typo error has been made and rectified later.
- On attachement 3 error occured as unrecogonized function whereas, Matlab is case sensitive Movie is typed insted of movie.
Result:
From the above programming of a 2R Robotic arm, we learnt how to simulate and trace the arms of the robot which can be very usefull in determining the workspace required.