Week 12- Final project
FINAL PROJECT REPORT
PROJECT TITLE: DEVELOPMENT OF A DOOR TRIM PANEL.
Aim - Using CATIA (CAD) software, to Develop a Door Trim panel, by considering the following inputs from class-A, & adding engineering features like a Dog house, Heat stakes, and Fourway locators. Also by considering engineering standards.
The following given class-A surfaces are,
- Lower Substrate,
- Door Armrest,
- Map Pocket,
- Bottle Holder.
Objective:
The main objectives are,
- Creation of CAD product files and supports CAD part files.
- Creation of a Tooling Axis for all the parts.
- Taking Nominal thickness from the master section.
- To create class-B, class-C, class-A+C, and Final Trim surfaces from the class-A surface.
- Creation of Thicken solid of a closed surface by using a close surface option.
- Doing Draft Analysis for each solid component by giving material options.
- Creation of B-side engineering features by taking the master section as a reference.
- To understand the mathematical calculations, behind engineering feature designs for a plastic component, and attach engineering features like a dog house, heat stakes, and locators to the part body.
- To Learn about the side core axis & its importance.
- To know how the master section is used to create engineering features.
- Giving proper draft angle to B side features & doing proper draft analysis for engineering features.
- Assembling all the part bodies by using Gomentrical constraints.
Introduction: In this project, create a final thickened component from the closed surface & adding engineering features like Heat stakes, Dog houses, Locators, etc.
By taking OEM and Tier1 company's standards for manufacturing feasibility, and assembly possibility through the given class-A surface, & the Master section as a reference.
Giving a proper tooling direction for the Draft analysis of a component and Analysis of a class A surface. Constructing step-by-step geometry to classes A, B, C, and Final components. Then the draft analysis is done for the final product.
Hence it is a complicated surface we use the direct offset method to create a class C surface, if there are any empty patches left while offsetting the surface, we need to fill that patches and make it a single body.
Procedure:
Firstly we need to check whether the given class-A surfaces have any open boundaries or patches. If it has a small modification we can do it, but in case large modifications are needed report to the class-A team.
After class-A, we need to create a class B surface by offsetting class-A to a given thickness by taking the master section as a reference. After creating the offset we need to check if there are any patches left, if it has patches we need to fill the patches by using surface fill operations to create the complete class-B.
After class B, we have to create class-C surfaces by extracting the boundary from class-A & giving a swept surface with draft direction if the surface is parallel to the tooling axis & concerning the surface when it is perpendicular to the tooling axis by concerning the guide curve. The sweep direction should be done along the b-side surface.
Consequently, create a class A+B surface by joining both class A & class B using the joining operation.
After completing all the surface creations we need to trim the class A+C & class B surfaces by using trim operations to make the complete closed surface.
Forever after creating closed surfaces for all the given class A surfaces, we need to convert them into a close body's features in a part modeling and do Feature draft analysis up to 3 degrees to check whether it is suitable to eject easily from the mold.
After clearing the draft analysis, create the B-side engineering features like Heat stakes, Dog houses, & Locators, etc., and then do draft analysis for engineering features also up to 1.5 degrees draft.
Then add all the parte files into the cad product file and assemble them all together using the assembly constrain toolbar to create a final Assembly.
A) CONSTRUCTIONAL IMAGES of DOOR ARMREST
- CLASS A SURFACE DRAFT ANALYSIS
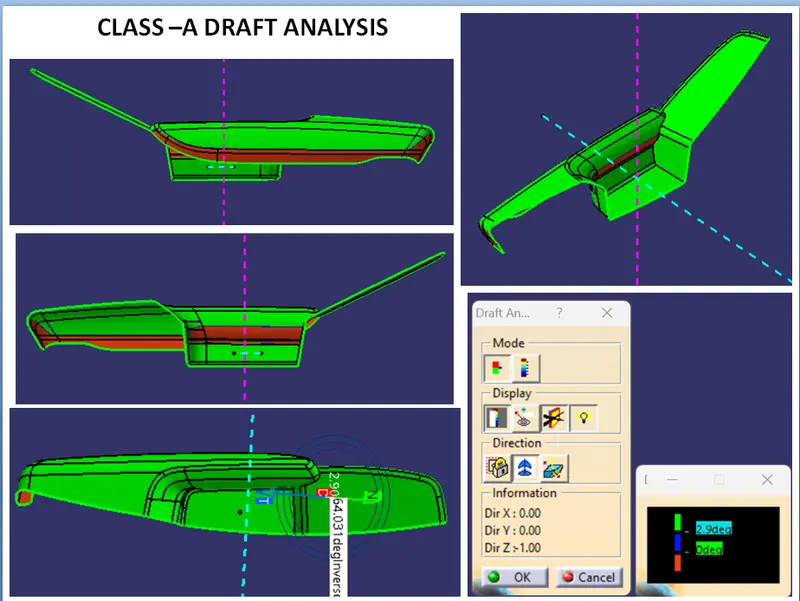
FIG(1)
- FINAL THICKEN BODY
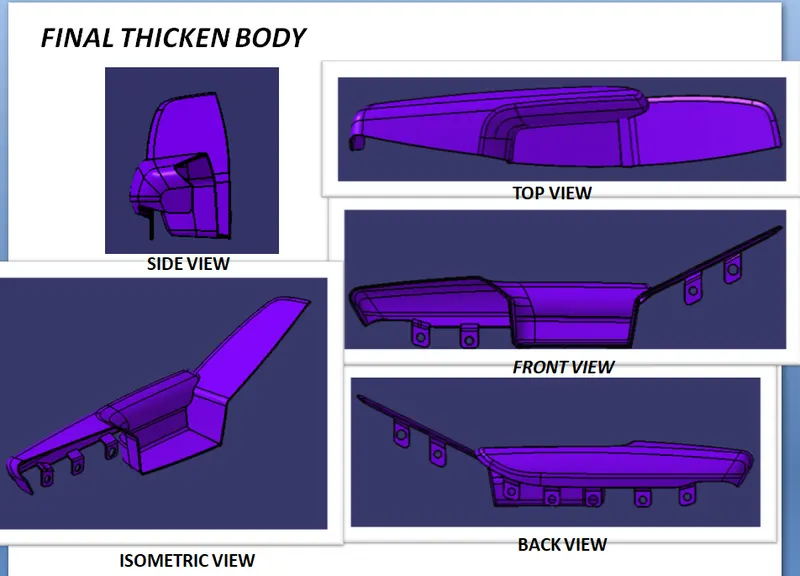
FIG(2)
- FINAL THICKEN BODY DRAFT ANALYSIS
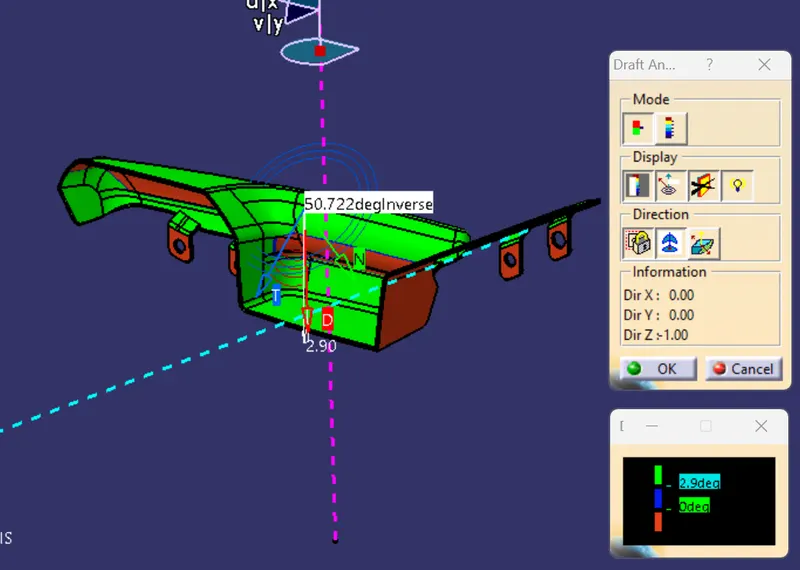
FIG(3)
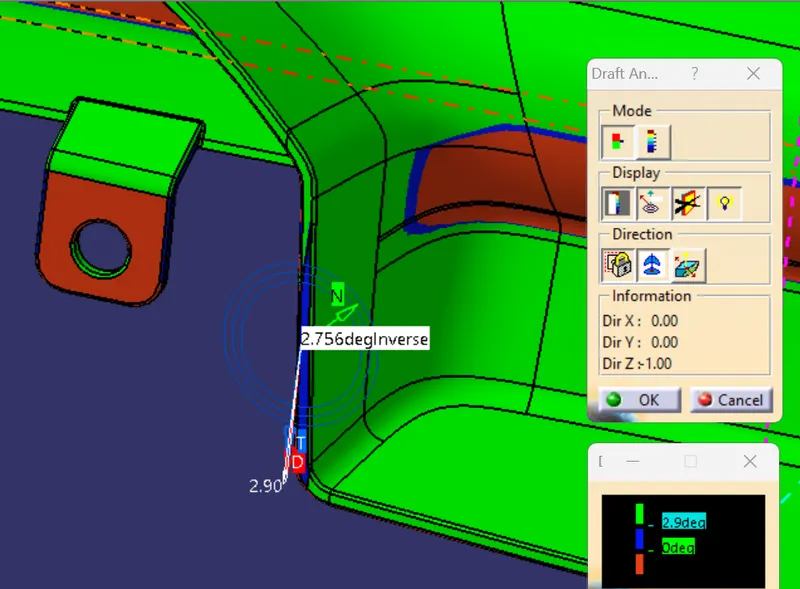
- DRAFT ANALYSIS FOR FLANGES
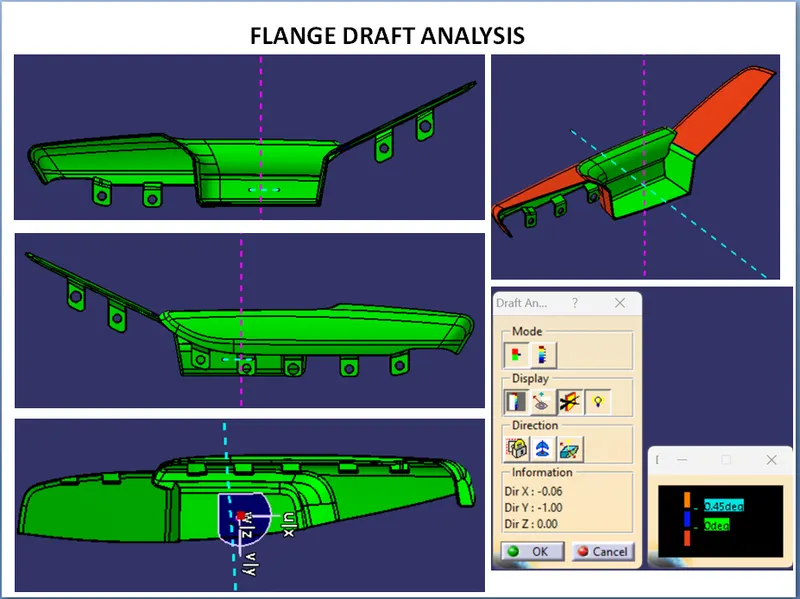
FIG(4)
B) CONSTRUCTIONAL IMAGES of LOWER SUBSTRATE
- LOWER SUBSTRATE CLASS A ANALYSIS
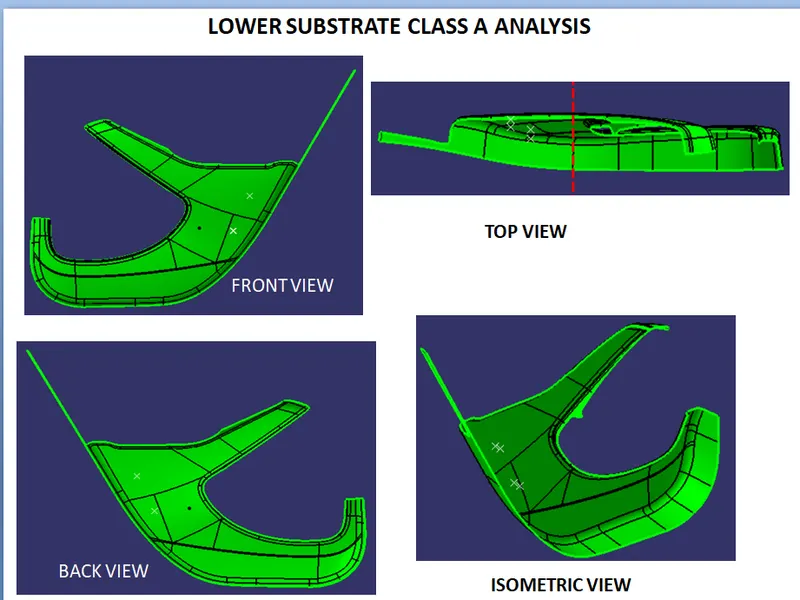
FIG(5)
- FINAL THICKEN SOLID
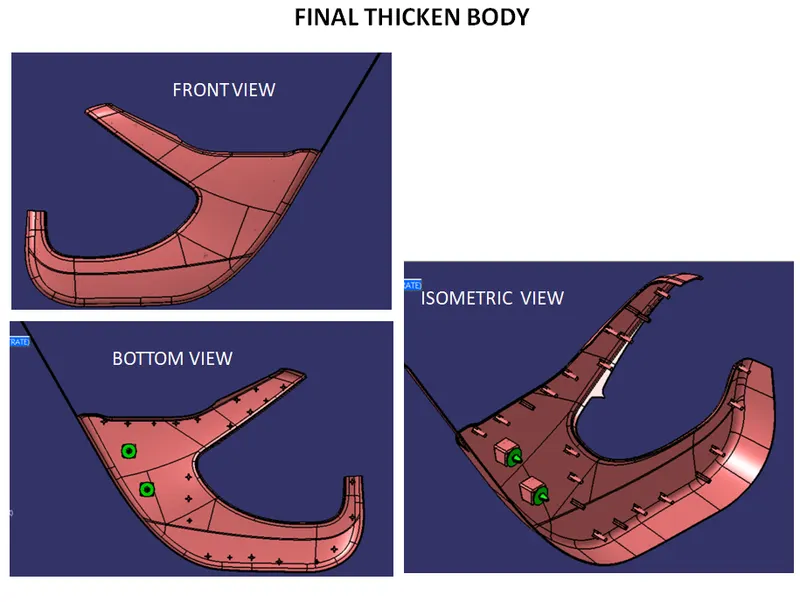
FIG(6)
- FINAL THICKEN BODY DRAFT ANALYSIS
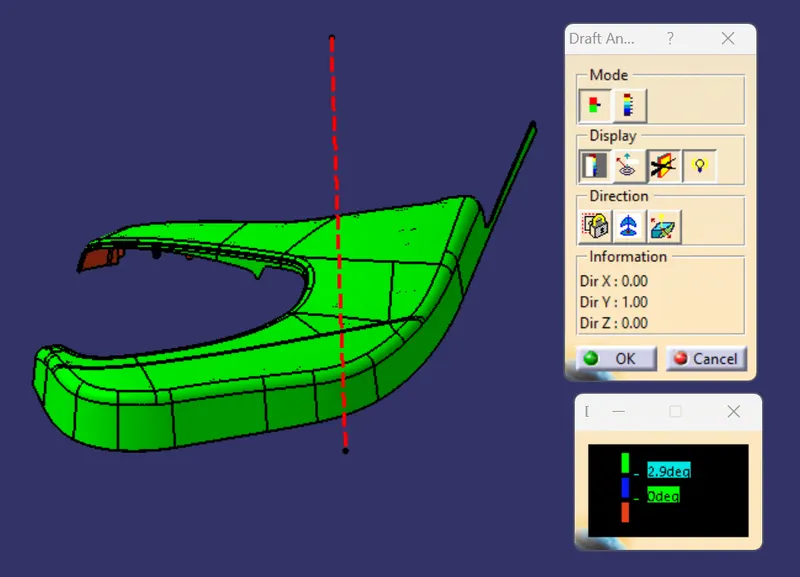
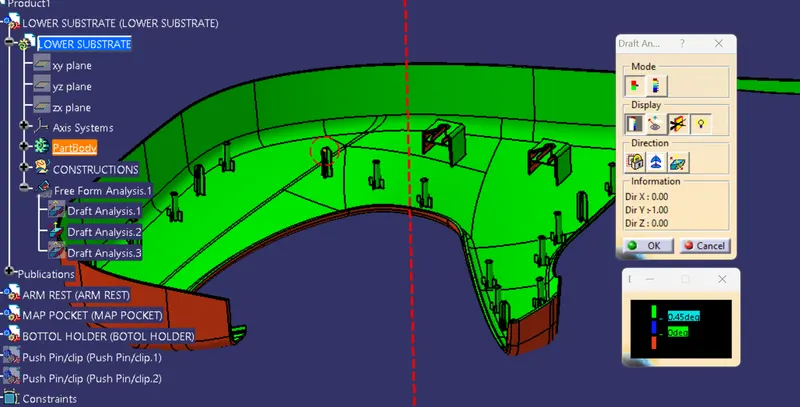
FIG(7)
- CONSTRUCTION OF HEAT STAKE
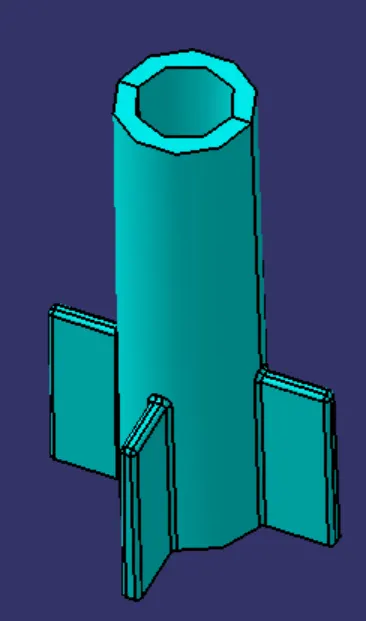
Design rules to be followed to create screw boss and heat stakes
- Draft angle inside & outside of the rib 0.5mm maximum
- Screw Wall Thickness - W = (0.6* x T)
- Hight of the rib - (5 x t) 5 times the wall thickness
- Fillet Radius - 0.25mm maximum
- Distance between two ribs 50mm minimum
FIG(8)
- DRAFT ANALYSIS FOR HEAT STAKE
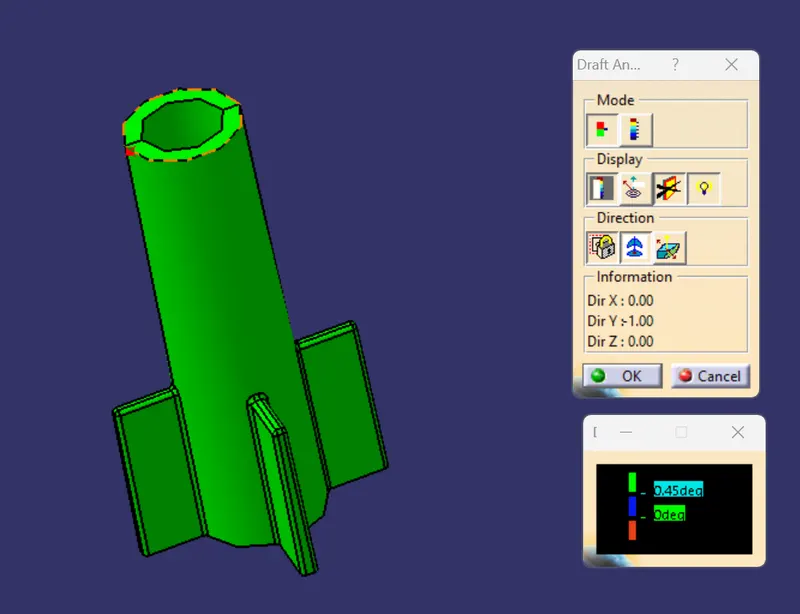
FIG(9)
- CONSTRUCTION OF FOREWAY LOCATORS
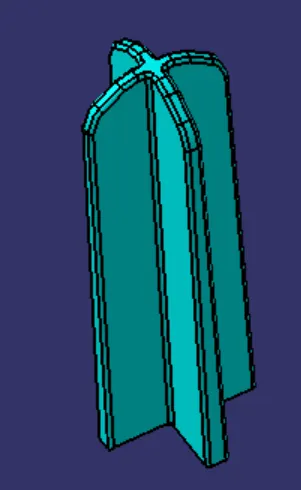
FIG(10)
- DRAFT ANALYSIS FOR FOUR-WAY LOCATOR
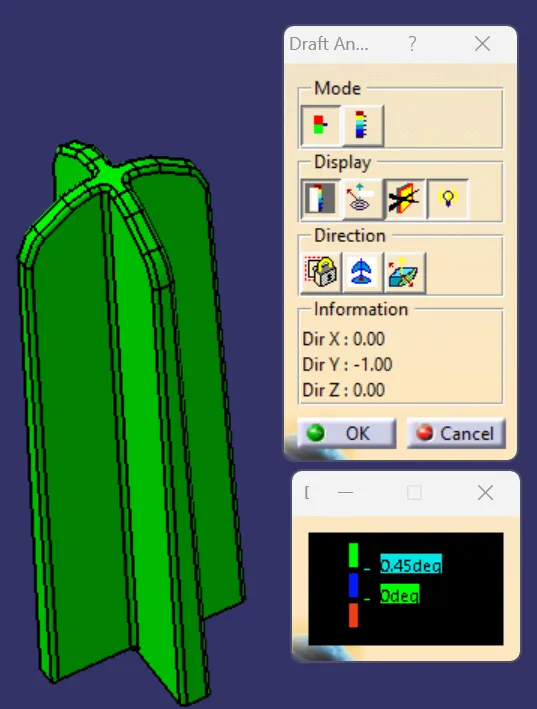
FIG(11)
- DOGHOUSE CREATION
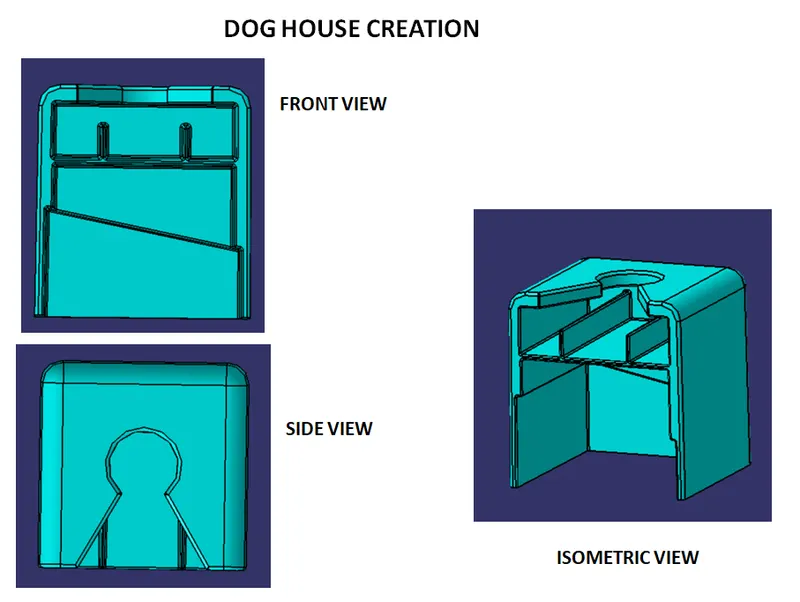
FIG(12)
- DRAFT ANALYSIS FOR DOG HOUSE
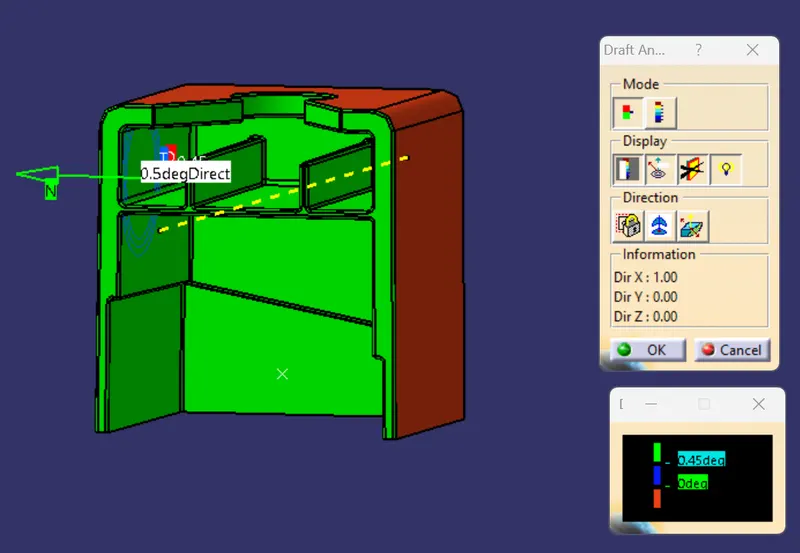
FIG(13)
- DOG HOUSE FIXING STRATEGY WITH PUSH PIN
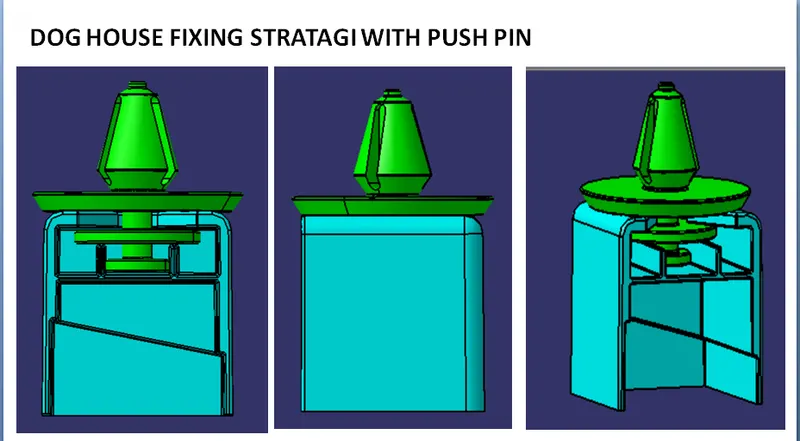
FIG(14)
C) CONSTRUCTIONAL IMAGES of MAP POCKET
- CLASS A SURFACE DRAFT ANALYSIS
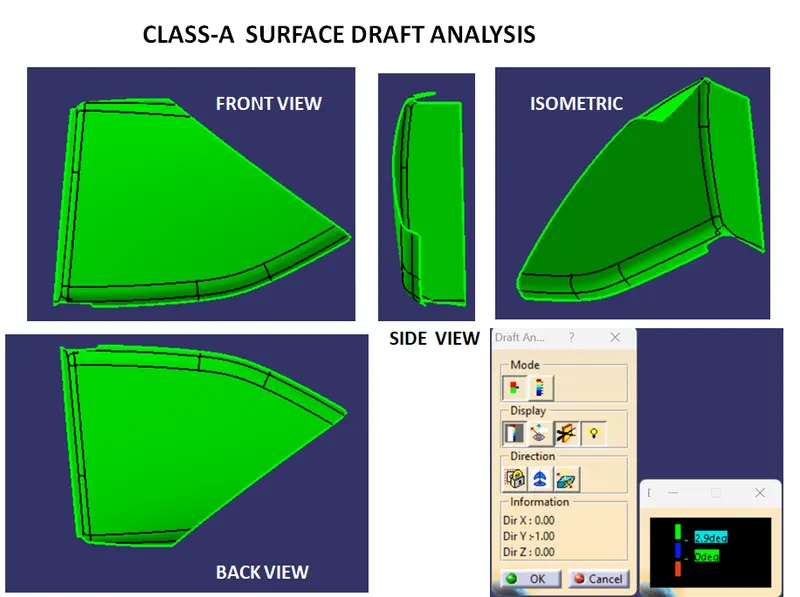
FIG(15)
- FINAL THICKEN SOLID
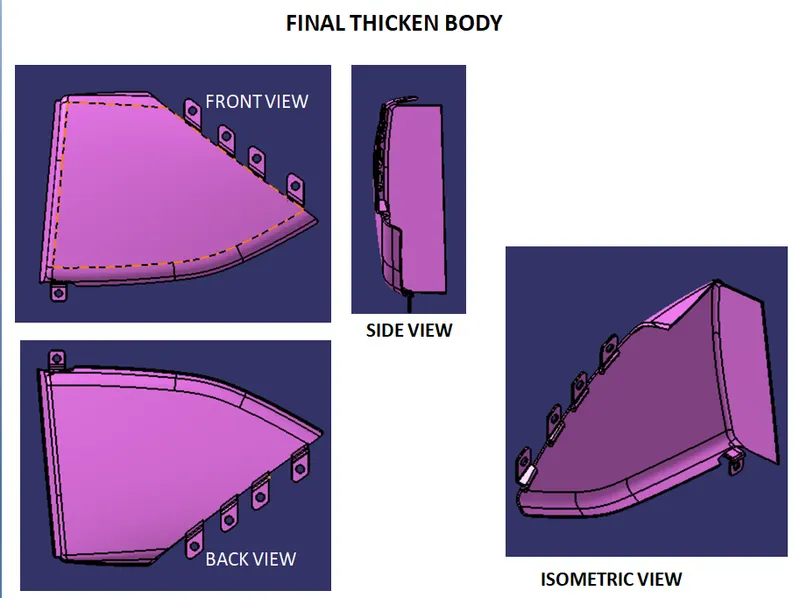
FIG(16)
- FINAL THICKEN BODY DRAFT ANALYSIS
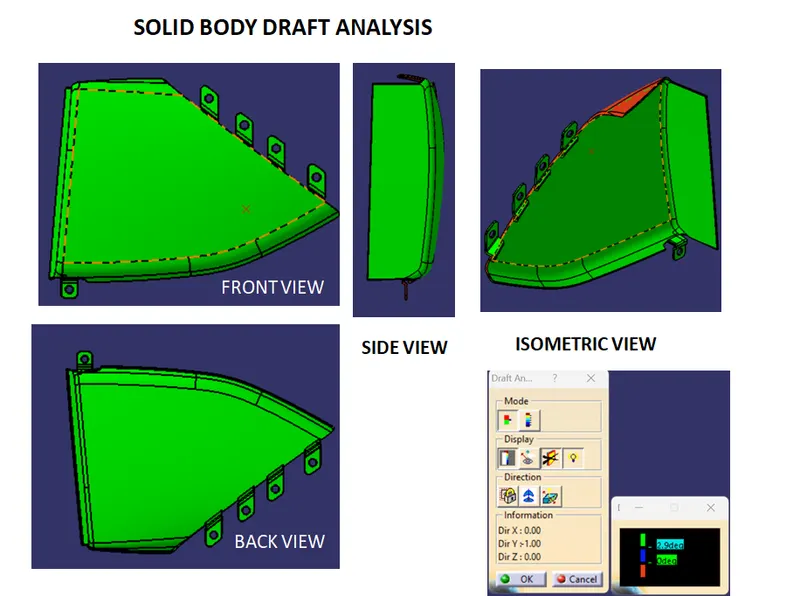
FIG(17)
D) CONSTRUCTIONAL IMAGES of MAPPOCKET BOTTLE HOLDER
- CLASS A SURFACE DRAFT ANALYSIS
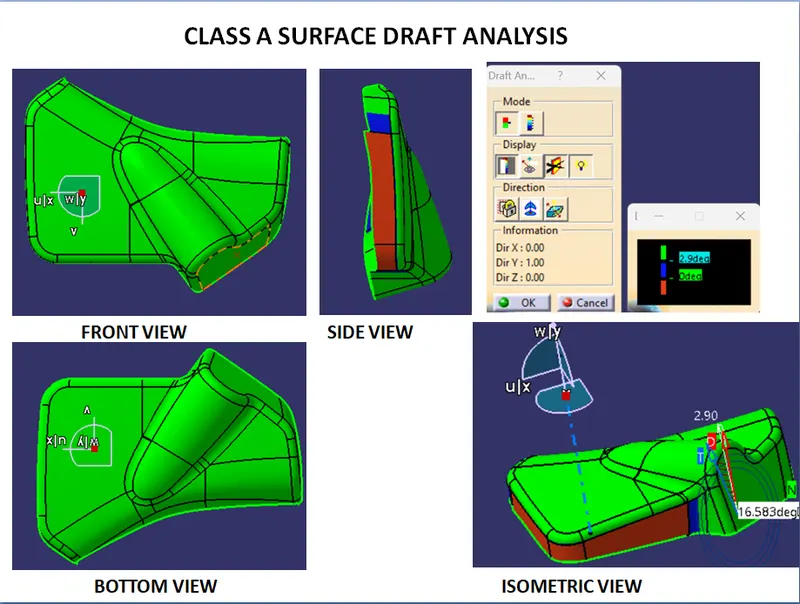
FIG(18)
- FINAL THICKEN SOLID
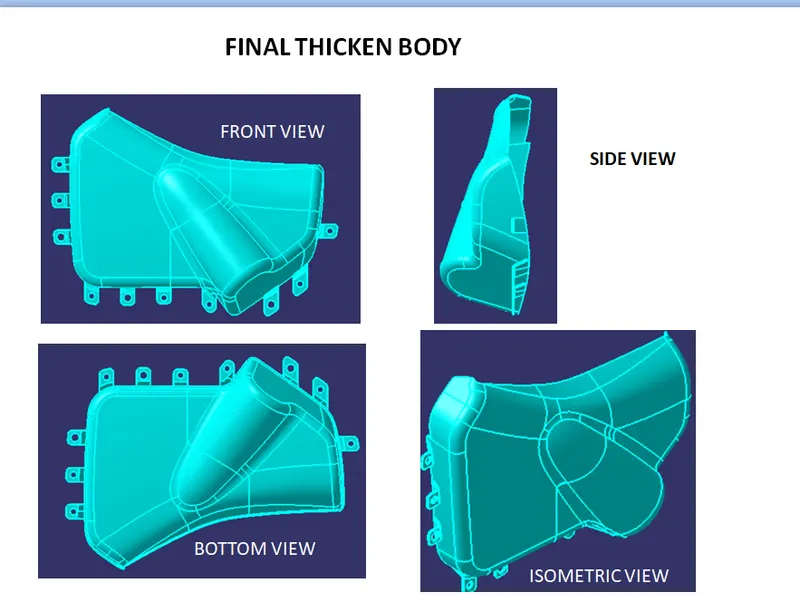
FIG(19)
- FINAL THICKEN BODY DRAFT ANALYSIS
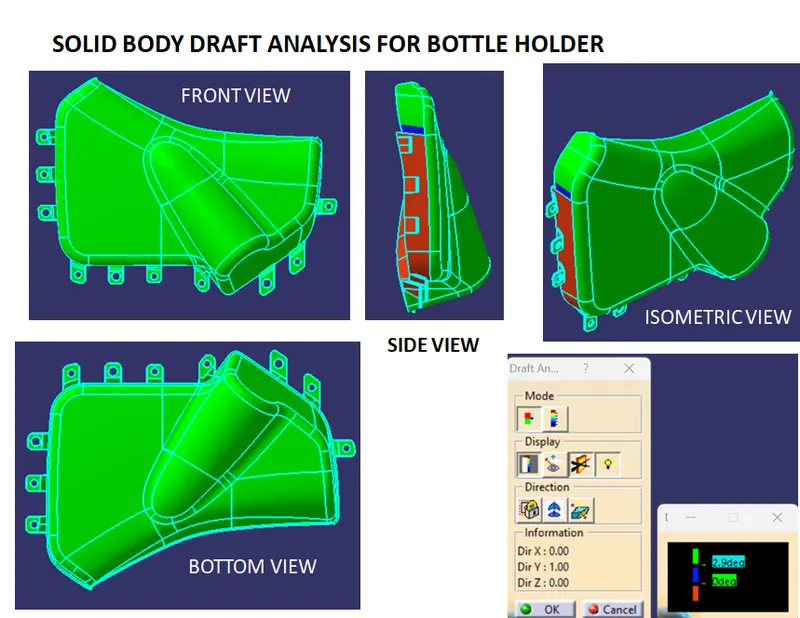
FIG(20)
E) FINAL ASSEMBLY CONSTRUCTIONAL IMAGES
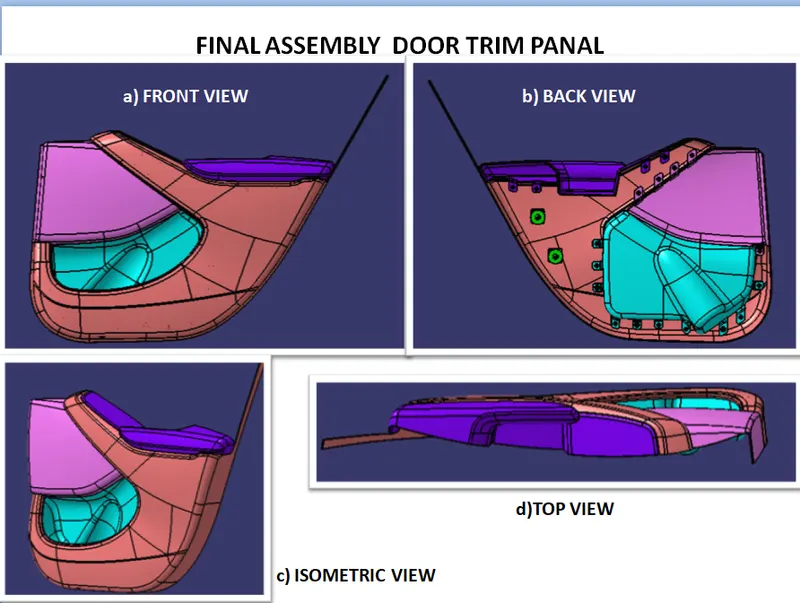
FIG(21)
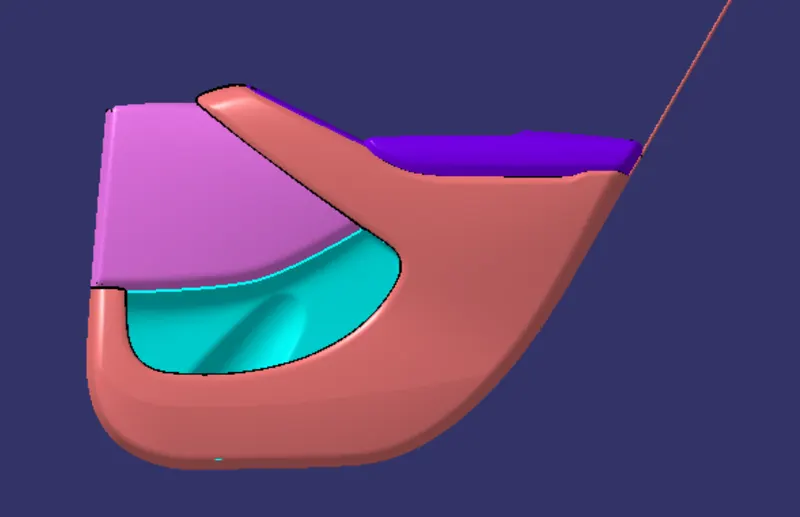
FIG(22)
1. FRONT VIEW
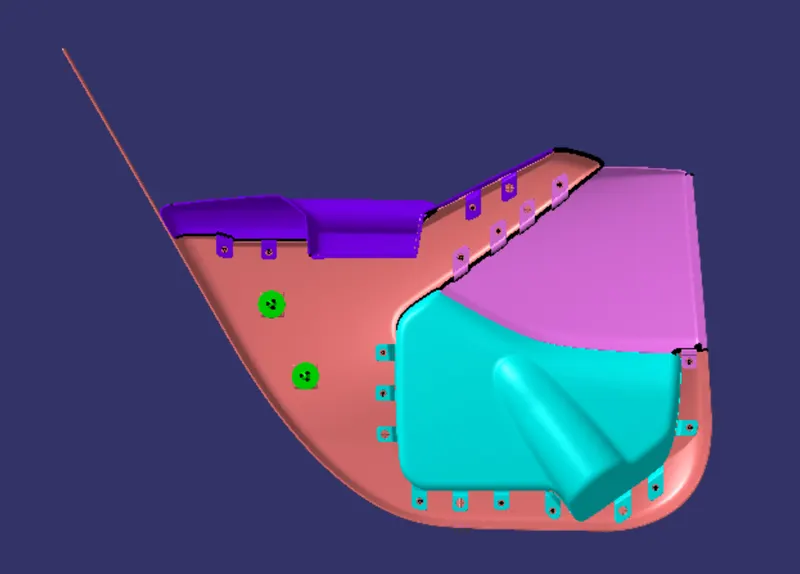
FIG(23)
2. BACK VIEW
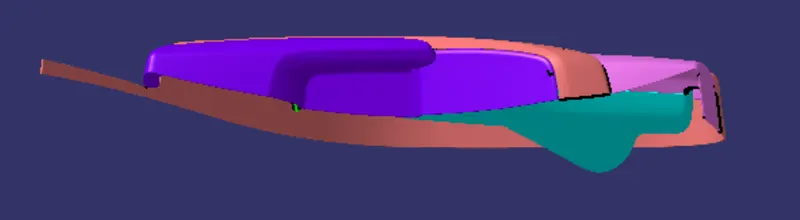
FIG(24)
4. TOP VIEW
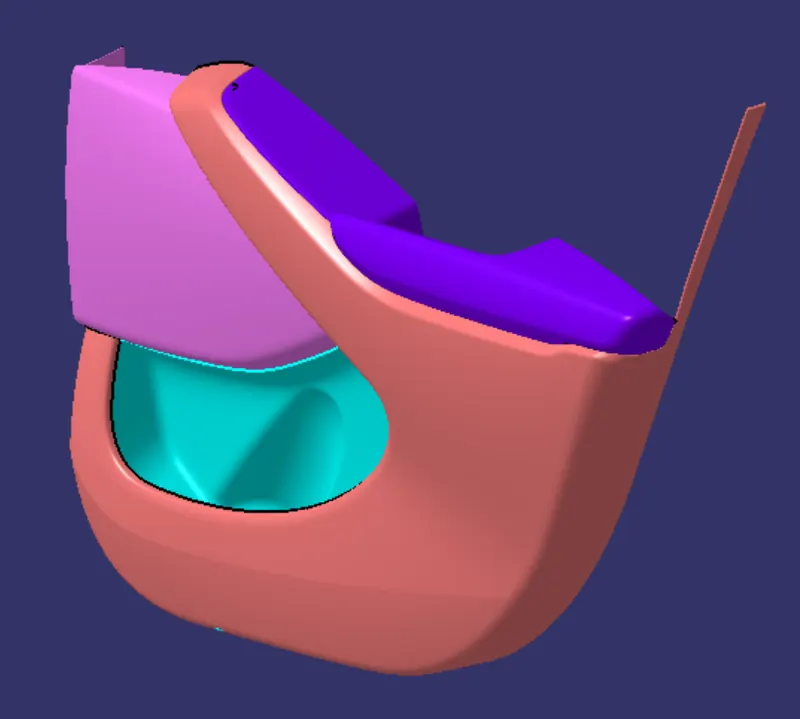
FIG(25)
5. ISOMETRIC VIEW
CONCLUSION: Hence Creation of the CAD model by considering the following inputs in OEM and tier1 companies' standards & attachment strategies are followed, also created engineering features by taking the master section as a reference and created a Dog house by reference from push pin for Lower substrate & heat stakes for the part to part attachment has been designed successfully.