DOOR TRIM PANEL
TOPIC:- DOOR TRIM PANEL
OBJECTIVE:- To create different part of door trim and attachment feature.
INTRODUCTION:- Car doors are designed to facilitate ingress and egress by car passengers. Door are mainly made of two component one is BIW which is extrior part and another is trim which is interior part which is made of plastic.After designing BIW component and trim componet, we join them by using attachment feature.
In this project I have developed door trim panel.This door trim is mainly divided into four components which are
- Door Arm Rest
- Lower Substrate
- Map Pocket 1
- Map Pocket 2
All the attachment feature like,
- Flanges
- Heat steak
- Dog house
- Push Pin had been added.
EXPLANATION:- A brief explanation of all the modeling of CAD and their attachment feature.
- DOOR ARM REST:-
CREATION OF CLASS A SURFACE:-
- As we are going to use top to bottom approach, so first we open the input in assembly workbench.
- Hide all the other surface other than arm rest.
- Now insert new part in the assembly workbench and extract the given input in the new part as class A surface.
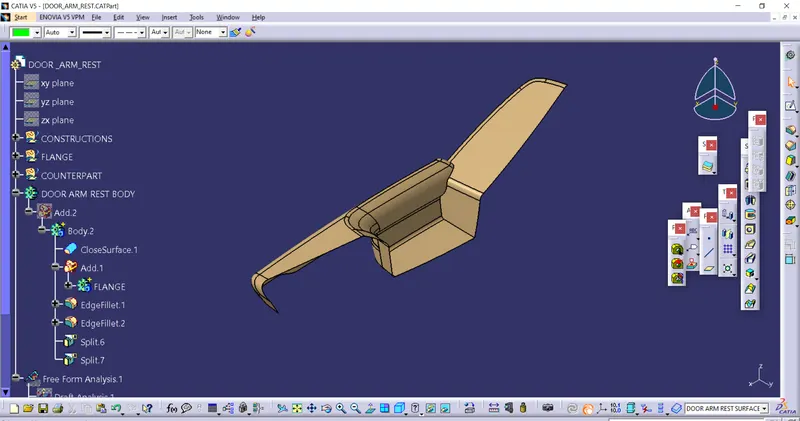
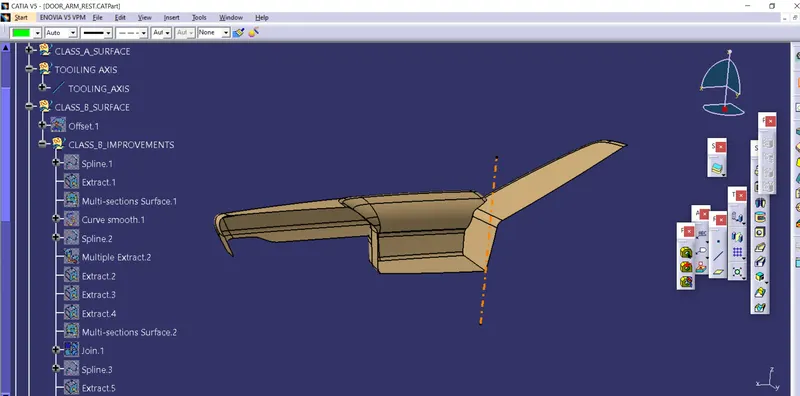
TOOLING AXIS:-
- Tooling axis is created along which core and cavity will open. In this case we have taken z-component as tooling axis which is also called natrual tooling axis.
CREATION OF CLASS B SURFACE:-
- For creation of class B surface we directly offseted the class A surface to 2.5mm which is nominal thickness of component according to given mater-section.
- Some surface is not directly. So for that surface we will make improvement and make them look same as class A surface.
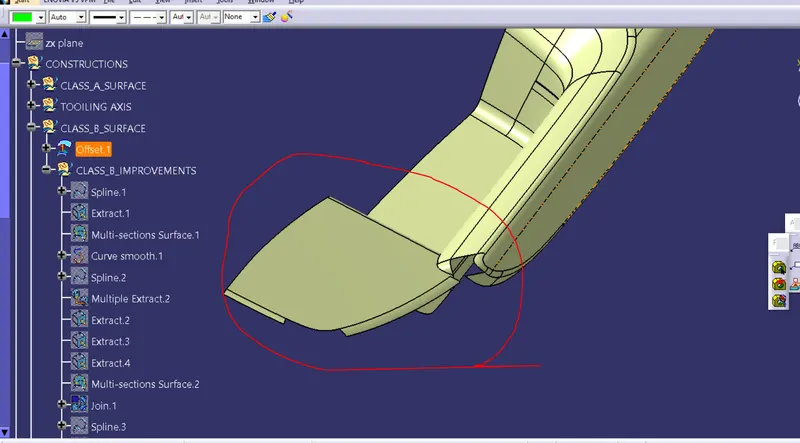
- Using spline and multi-section we improve the class B surface
-
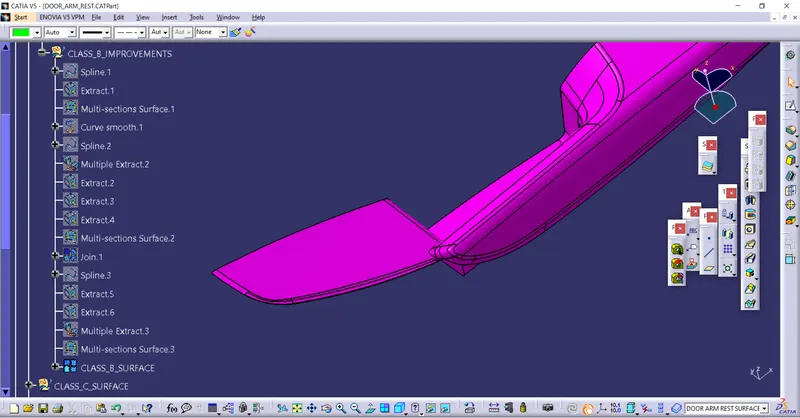
CREATION OF CLASS C SURFACE:-
- Using sweep with referance surface we will create class c surface.
- As surface is complex so we will sweep small area and join them with class A.
- Trim join with class B surface to get the closed surface.
- Some reason is difficult to create with sweep so fill is done.
- Like this we get close body for door arm rest.
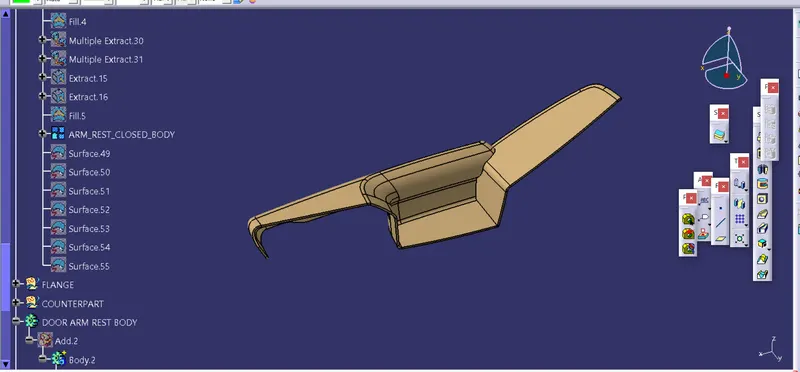
CREATION OF SOLIDBODY:-
- Insert new body.
- Now go to close-body tool in part workbench and make it solid.
FEATURE TREE:-
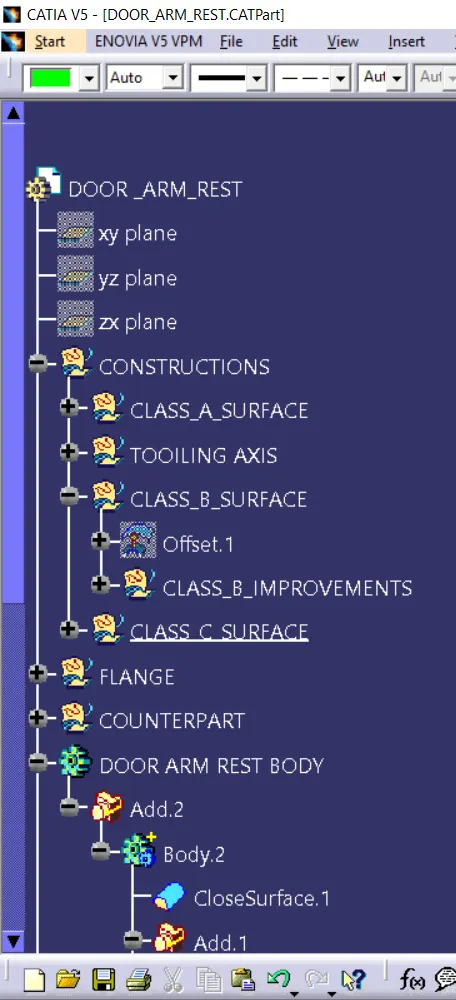
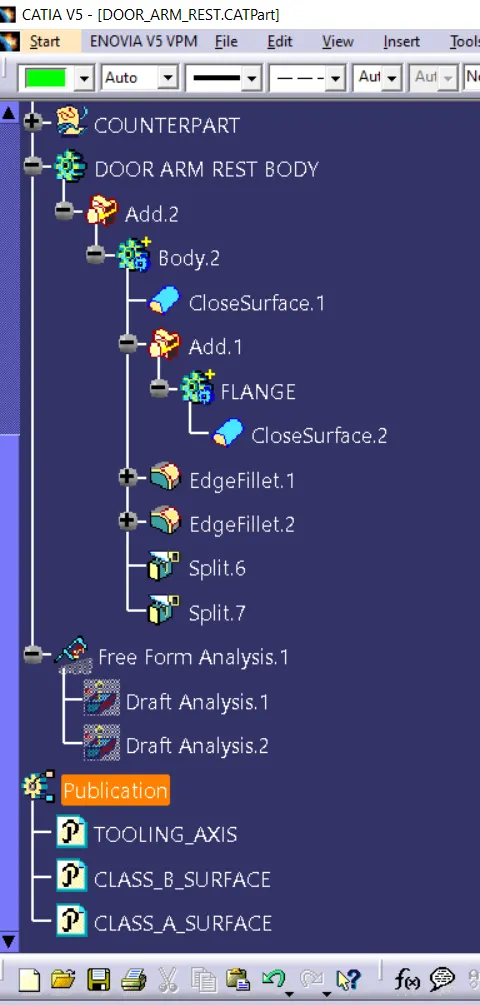
DIFFERENT ORIENTATION OF DOOR ARM REST:-
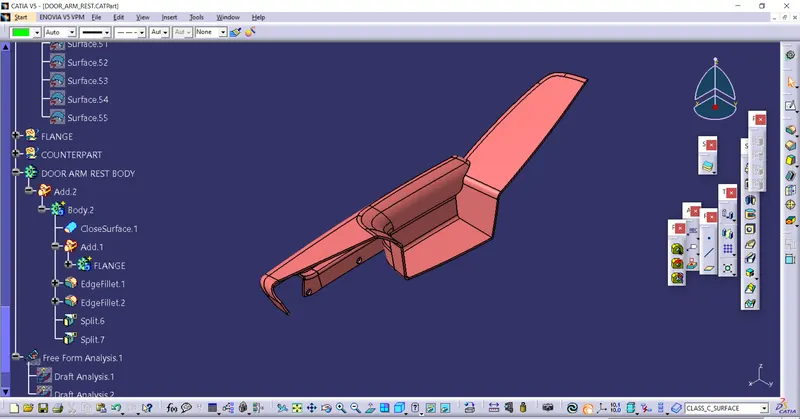
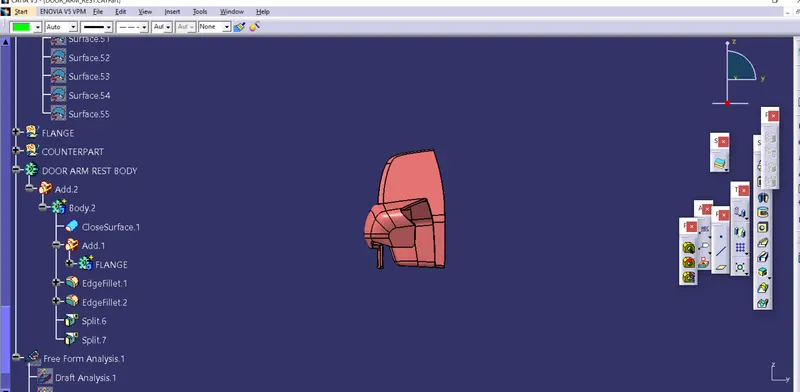
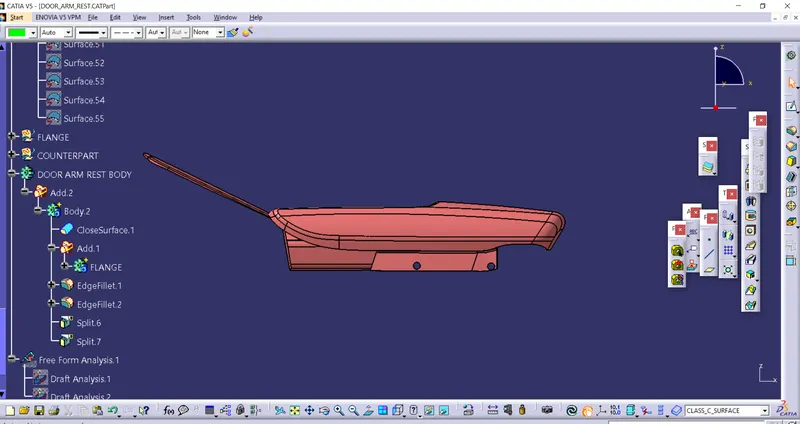
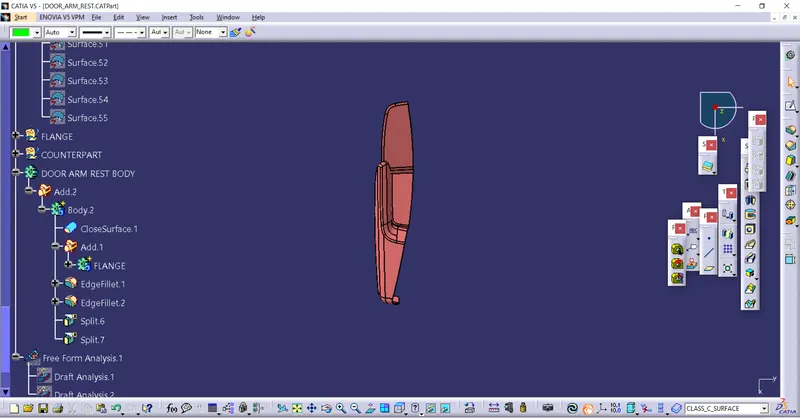
DRAFT ANALYSIS OF ARM REST:-
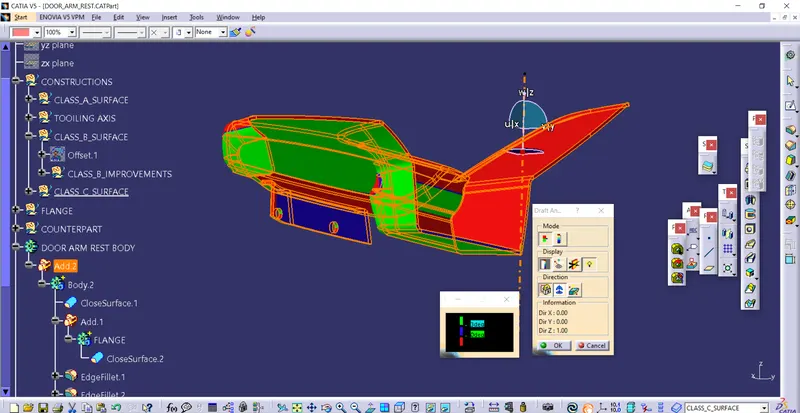
NOTE:- TO CREATE ALL OTHER PART WE HAVE FOLLOWED SAME PROCESS AS WE DID FOR THE DOOR ARM REST.
2.MAP POCKET 1:-
FEATURE TREE
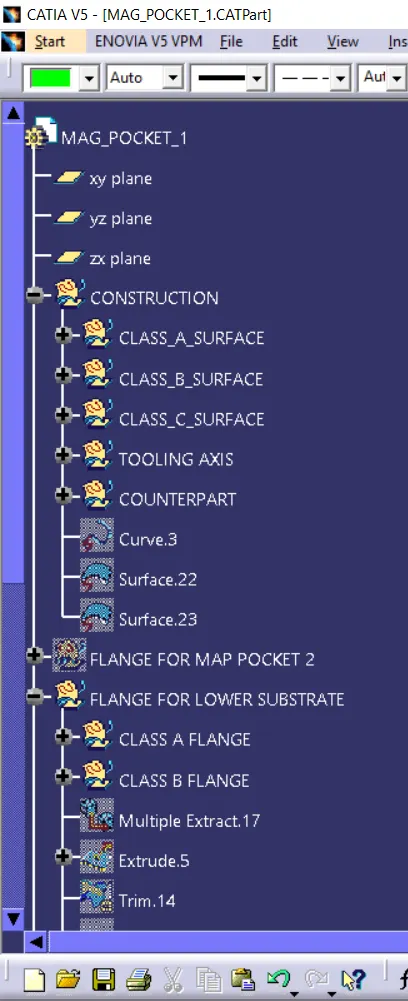
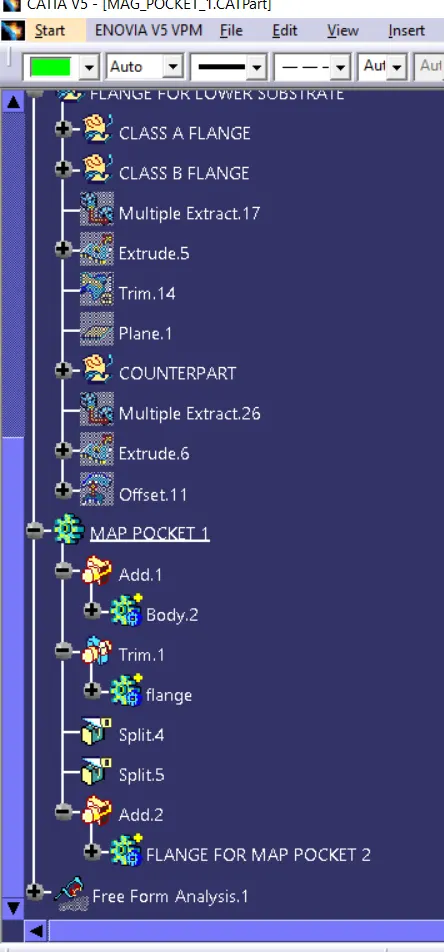
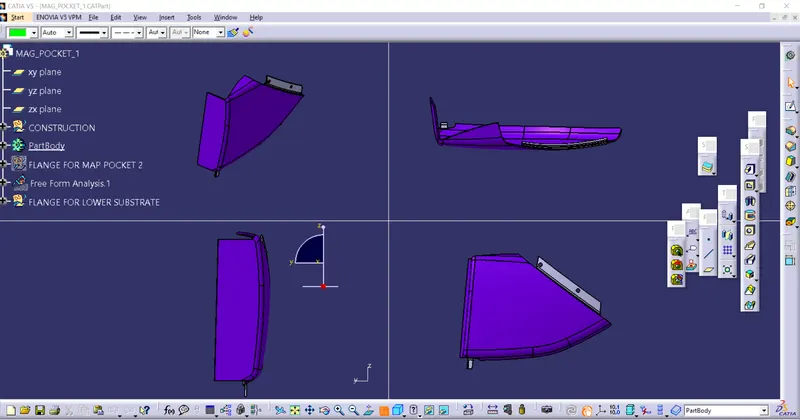
ORIENTATIONS:-
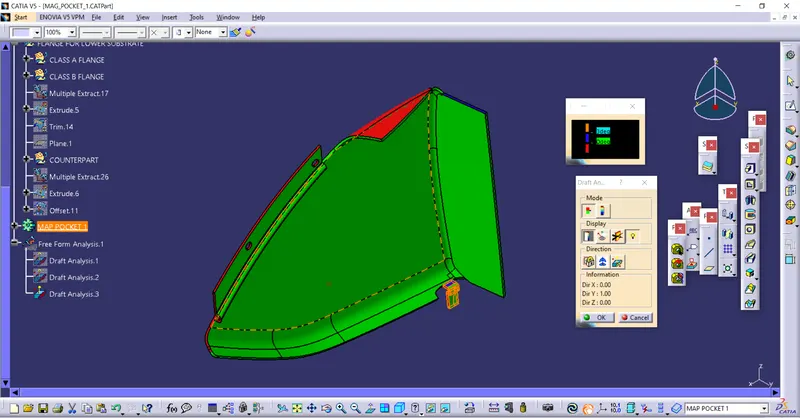
DRAFT ANALYSIS:-
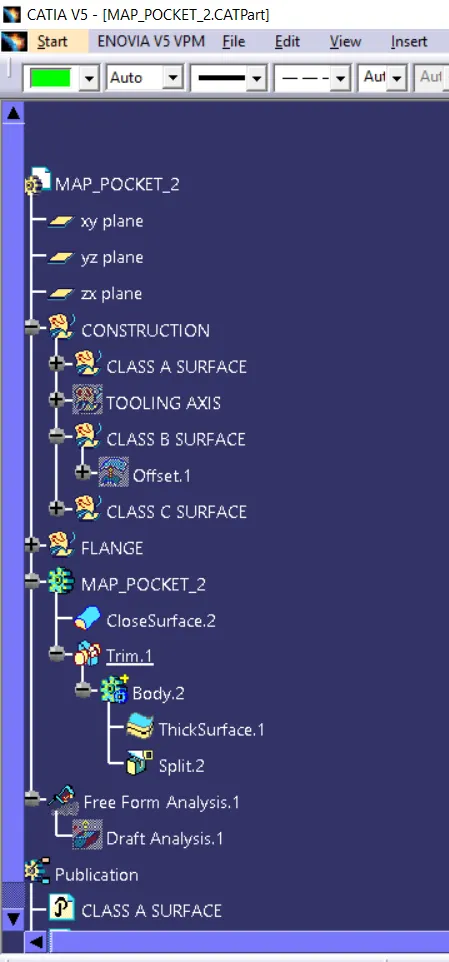
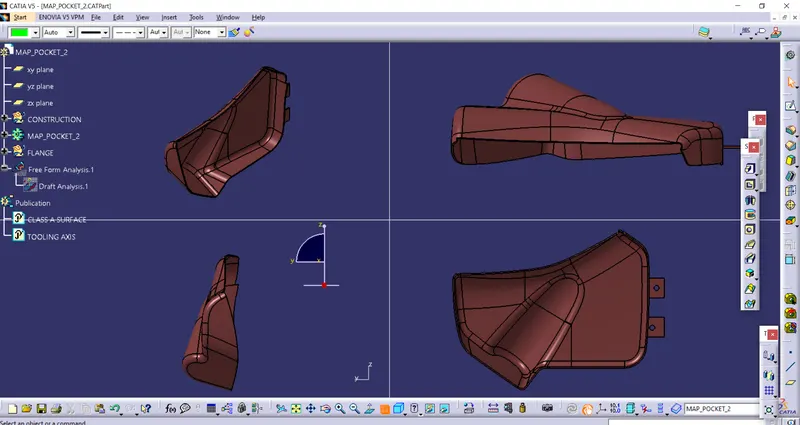
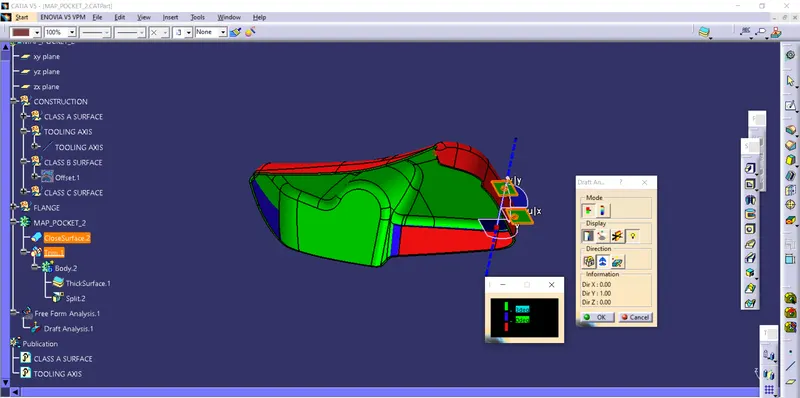
3. MAP POCKET 2:-
FEATURE TREE
ORIENTATION:-
DRAFT ANALYSIS:-
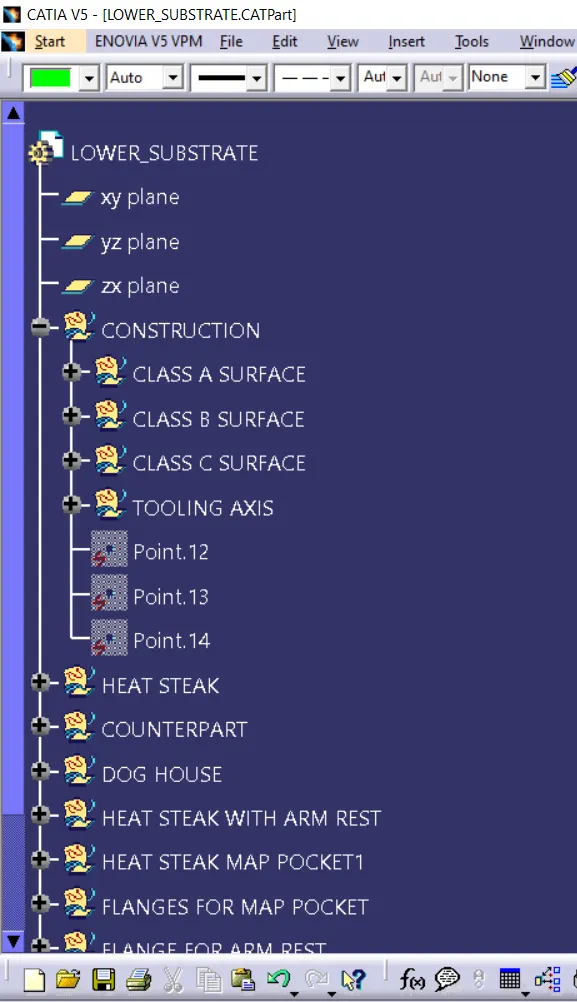
LOWER SUBSTRATE:-
FEATURE TREE
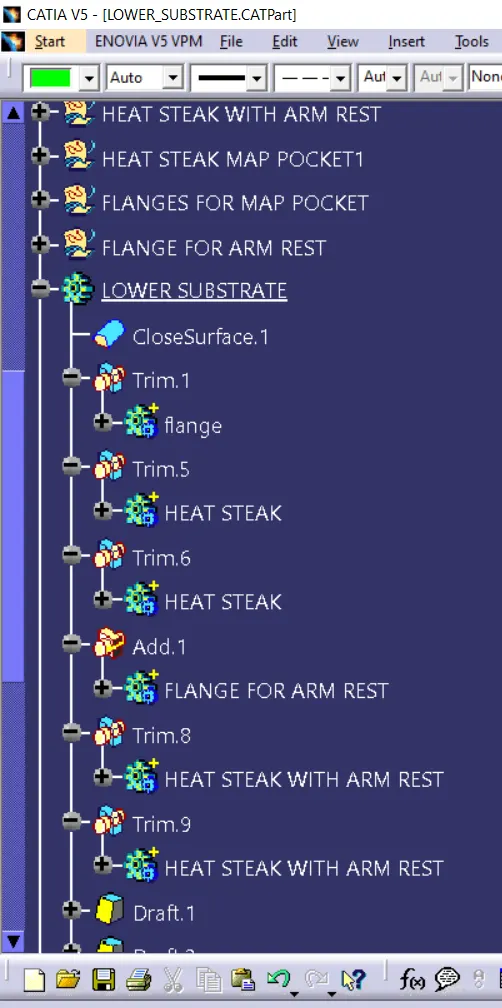
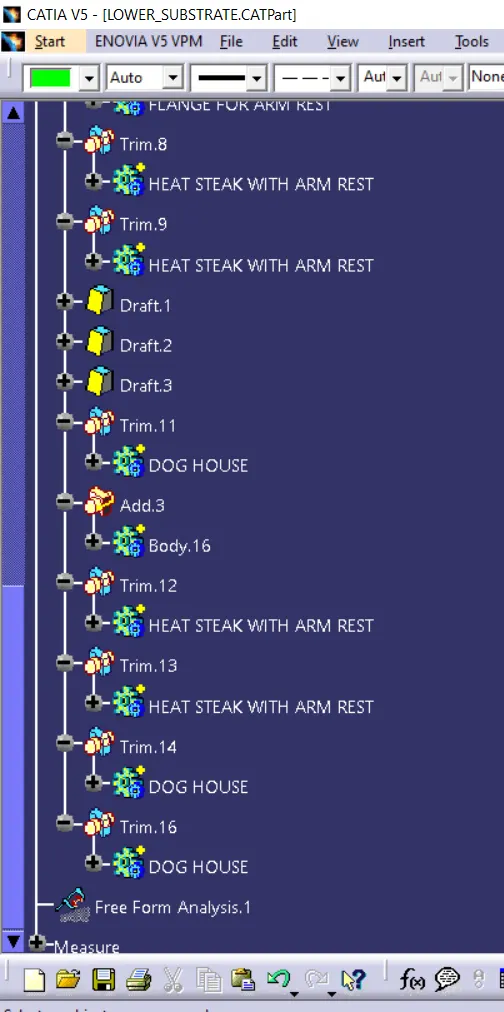
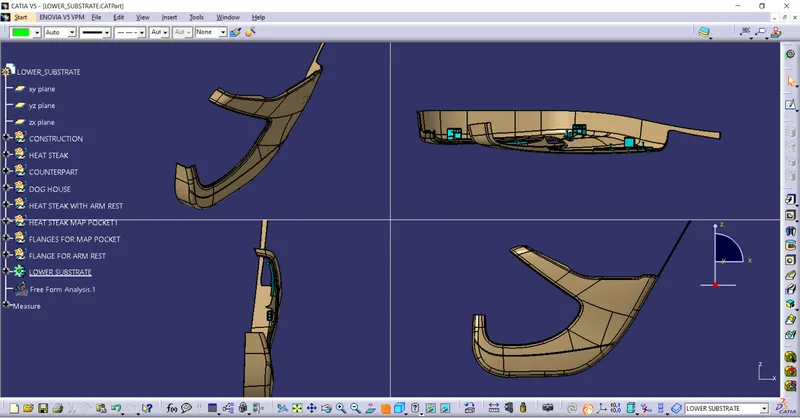
ORIENTATION FOR LOWER SUBSTRATE:-
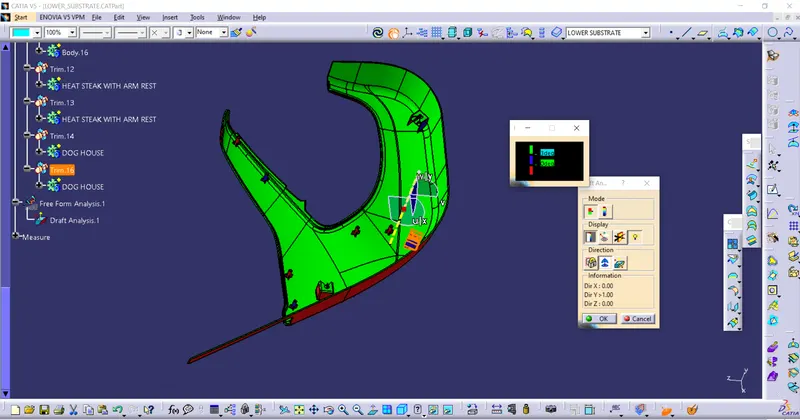
DRAFT ANALYSIS :-
CREATION OF ATTACHMENT FEATURE:-
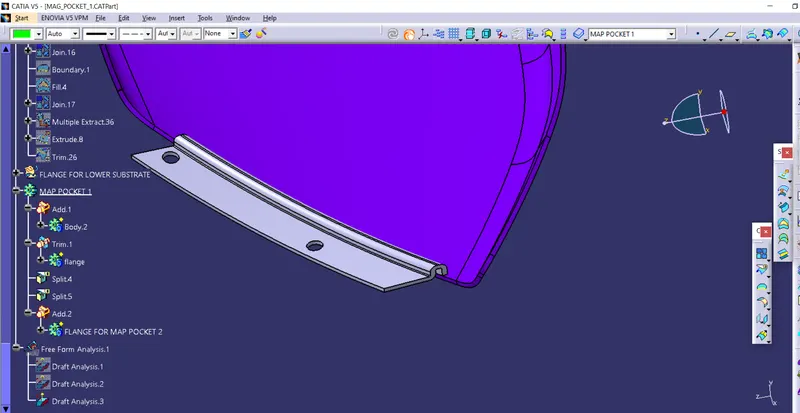
1.FLANGES:-
- Flanges are created using master-sections.
- Line are created using points of master-section and then surface extrude them.
- Trim all the surface together to get the desired shape of flange.
- Now thicken them to 2.5mm thickness to get the flange.
- Similarly all the flanges were created.
- Closed body is used to convert surface into solid.
- Using boolean operation flanges are add to their respective part body.
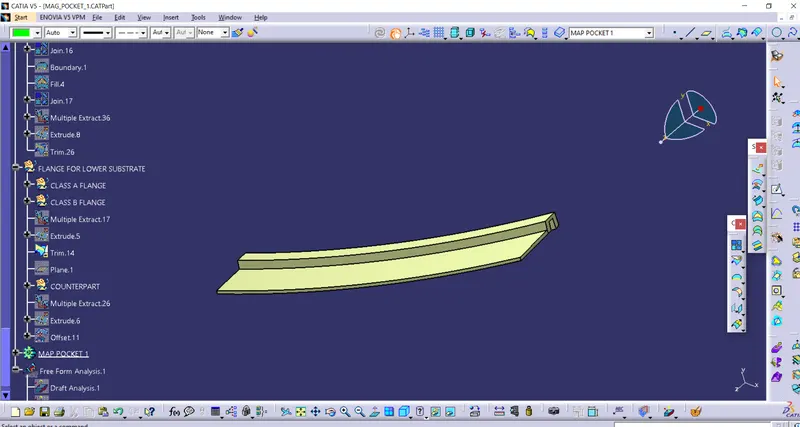
FLANGE ADDED TO PART BODY:-
HEAT STEAK AND COUNTERPART:-
- Heat steak are mainly created on lower substrate to join with the flange of other part of door trim.
- For heat steak we create sketch and for that we create a point and plane.
- Inside the sketch two circle of dia 5mm and 7mm is created.
- Pad the sketch and it should go below the surface of lower substrate.
- Pad it in the direction of tooling axis.
- Give a draft of 0.5deg in tooling direction.
- As our heat steak are long so we provide ribs as a support.
- Now copy and paste special with link and translate them whereever we want it.
- To add it to lower substrate union trim them.
- We also create counterpart for the heat steak.
- For counterpart surface extract the heat steak outer surface.
- And offset them by 1mm as we need clearance of 1mm.
- Now split the offseted surface with flange to get the counterpart.
HEAT STEAK
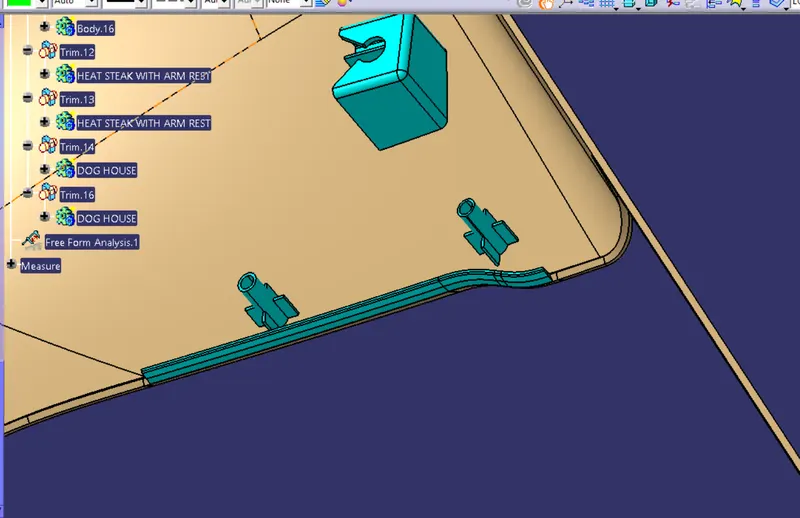
COUNTERPART:-
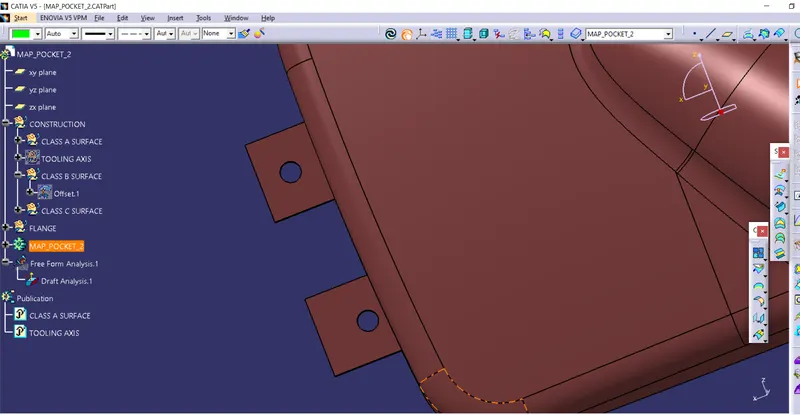
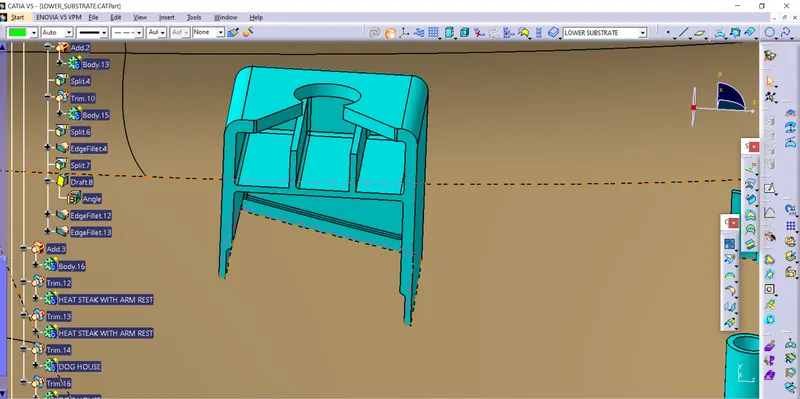
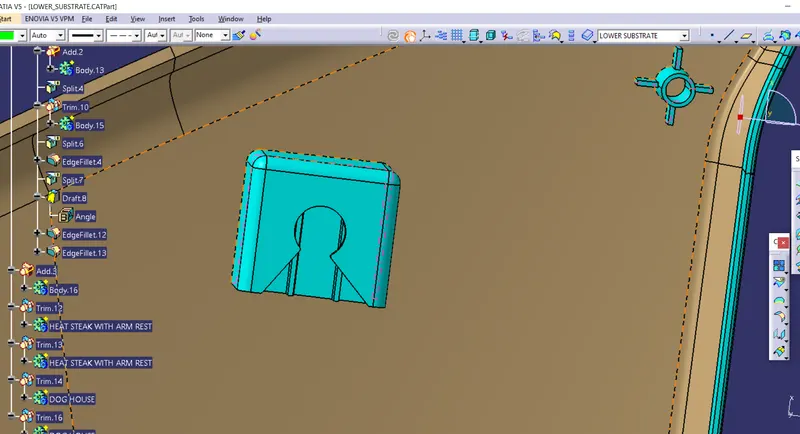
CREATION OF DOG HOUSE:-
- For dog house we need to create sketch.
- Rectangle is drawen and one of its side is made into construction.
- Surface extrude them and thicken them.
- Give a draft of 1.25deg along tooling axis.
- To avoid sink mark some material is to be removed.
- For this extract inner surface of dog house and offset them to 0.8mm outward.
- Now multi-extract the surface and offset it to 5mm and trim them.
- Now split the dog house with the trim.
- Give a draft of 0.5deg along the lifter axis.
- As we have to create some hole like structure at the top face so that our push-pin can come and sit.
- For that we create sketch and extrude them and split them with the body to get the required surface.
- For creating ribs inside the dog house we simply draw the sketch and pad them and union trim them to the dog house.
- These ribs are created to give support and make push-pin to sit on them.
- Edge fillets are added to dog house according to the design rule.
- Total 3 dog house has to be made for this model.
- So we translate them whereever we want and make them rotate so that they can be in the right postion.
ORIENTATION OF DOG HOUSE
ASSEMBLY:-
As we have used top to bottom approach so we don't need to apply constrains. All parts will fall into thier respective places.And we fix the componets.
For push-pin we have to apply two constrain which are coincidence with the axis of push-pin and dog house and another is contact surface with ribs of dog house and lower surface of push-pin.
FEATURE TREE:-
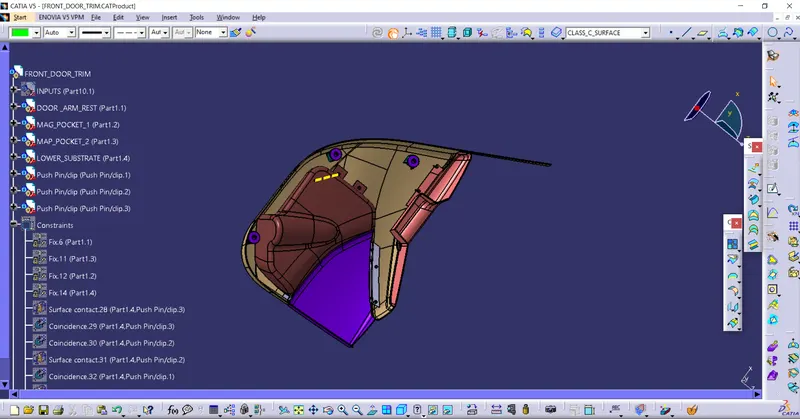
ORIENTATION OF DOOR TRIM
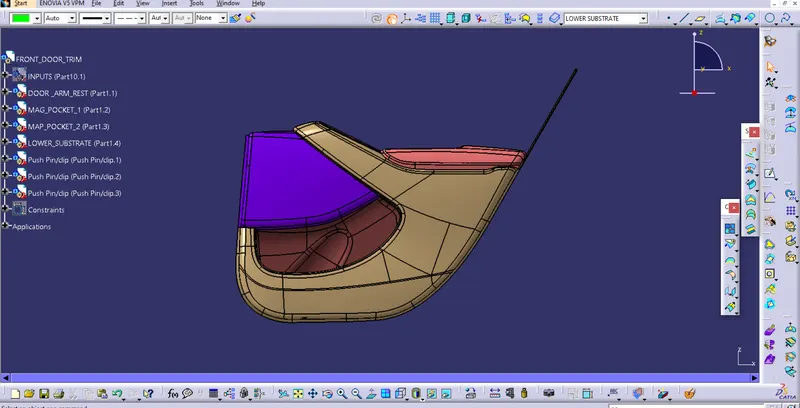
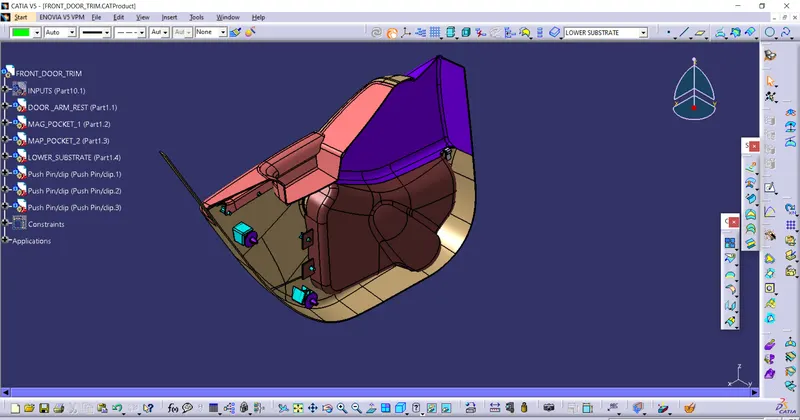
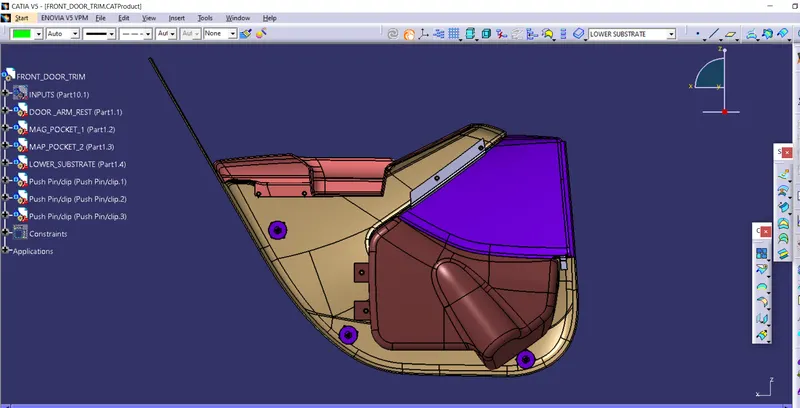
WIREFRAME VIEW
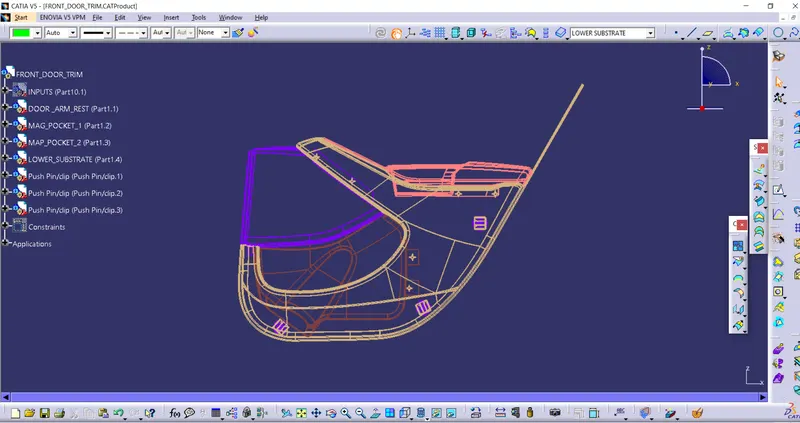
FUTURE SCOPE OF THE PROJECT
- Speaker grill will be added to this door trim.
- Stopper at dog house for push-pin will be made.
- Ribs will be added to lower substrate for providing strength.
CONCLUSION:-
- This project provide a great insight how an OEMs and teir 1 company work to make any automotive component specially door trim.
- Also provide a great practice of making attachment feature of any component using design rule and standards.
REFERANCE:-
LINK TO VIEW CAD
https://drive.google.com/drive/folders/1fxJU5n4X2i6woccf5WAPOD4Ew4NHW1_A?usp=sharing
THANKYOU