Week 10 - Challenge 1- Attachment Feature Creation (Ribs & Screw Boss)
AIM:
To Create the RIB & Screw Boss for the Drill Handle and also follow the Design rule.
STEPS FOR CREATION OF DRILL HANDLE:
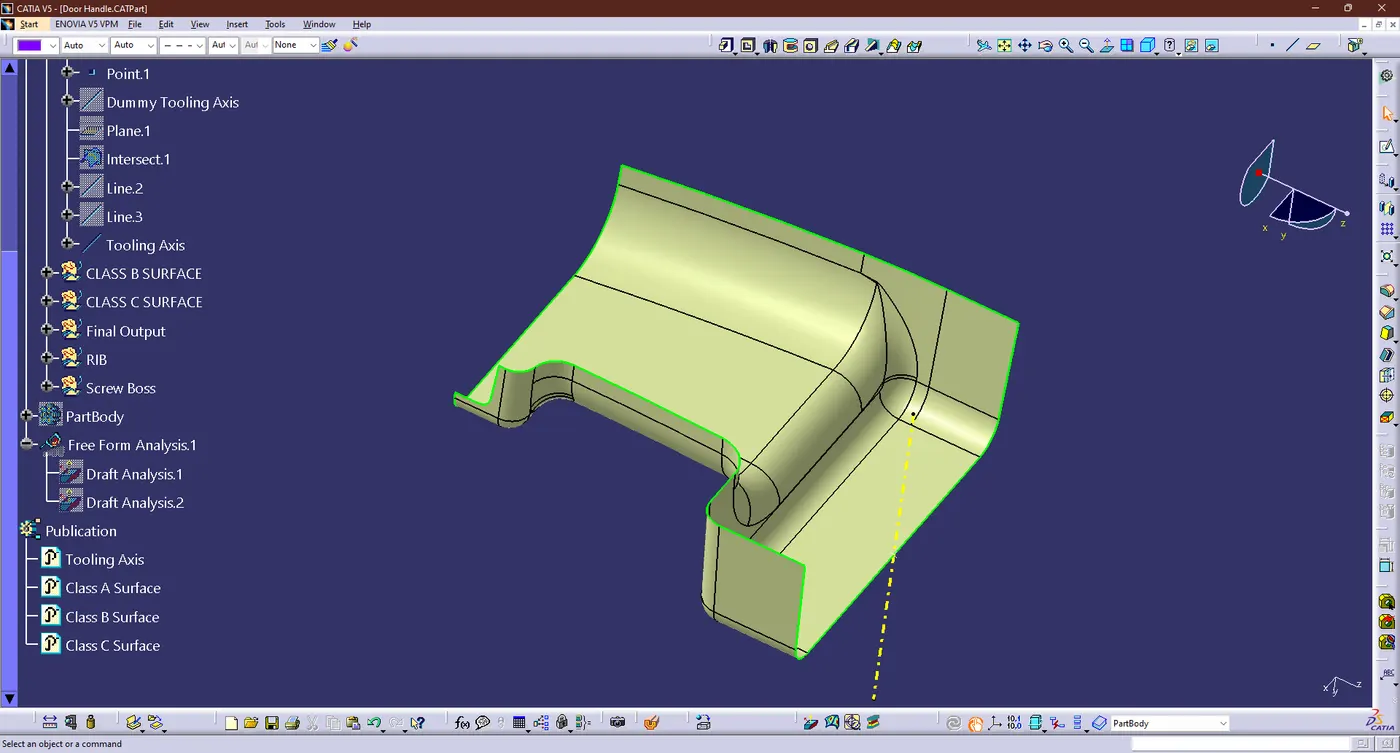
- Tooling Axis:
- Manually arrange the view to choose the ideal tooling direction that covers the majority of the surfaces.
- First Extract the boundary and create the dummy tooling axis
- Now create the another two lines in the both side
- Then create the another line by using bisecting option and given name has Tooling Axis
- DRAFT ANALYSIS:
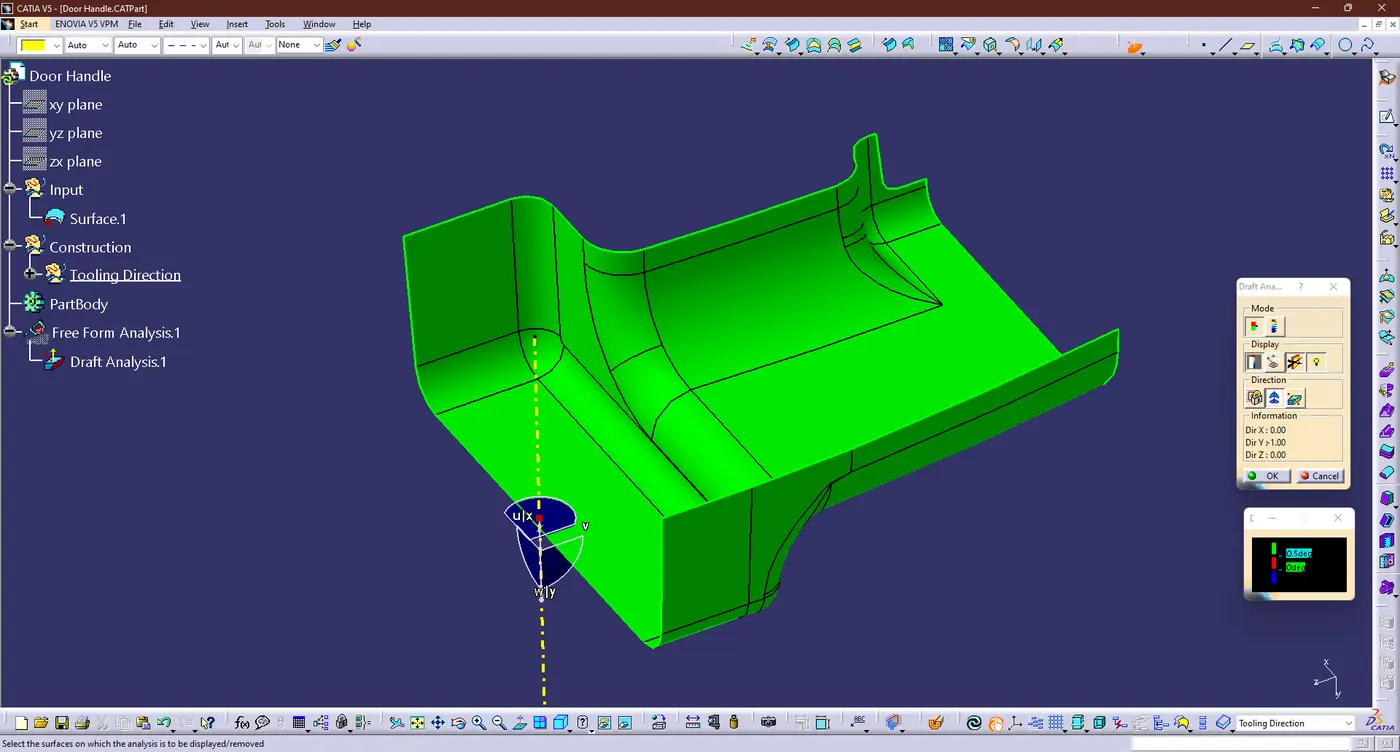
You can determine whether the part you drafted will be simple to remove using the Draft Analysis tool. In this kind of analysis, zones on the investigated element are identified by color ranges where the deviation from the draft direction at any given place corresponds to predetermined values.
- Go to customized view parameter, under mesh, check material, and then click ok before moving on to draFt analysis.
- Now for draft analyses go to insert » analysis » feature draft analysis.
- Set the draft direction using the compass.
- Change the draft angle on the color scale to 3 degrees.
- As a passing draft angle is indicated, the component turns green.
- Check the component's angle using running points.
STEPS FOR CREATING THE B & C SURFACES:
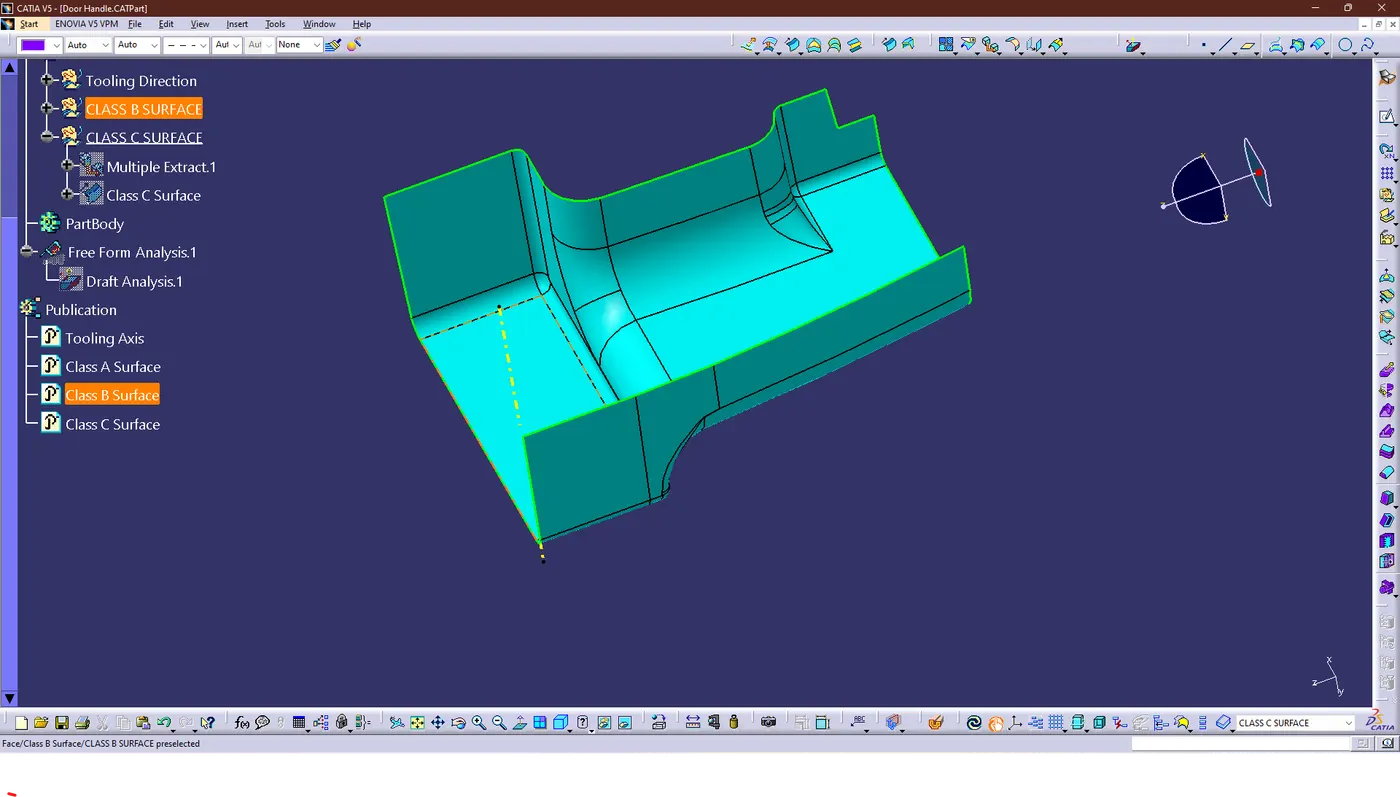
- CLASS B SURFACES:
- Extract the surfaces from the class A using multiple extract and untrim them.
- Now OFFSET the extract with the value of 2.5 mm and extrapolate the surface using the extractpolate option on the toolbar
- Then trim the extra surfaces using the TRIM command on the same toolbar and also apply the fillet values as per given dimention
- If the edges are inside, the fillet value is deducted from the component's thickness, and if the edges are outside, the fillet value is added to the component's thickness.
- CLASS C SURFACE:
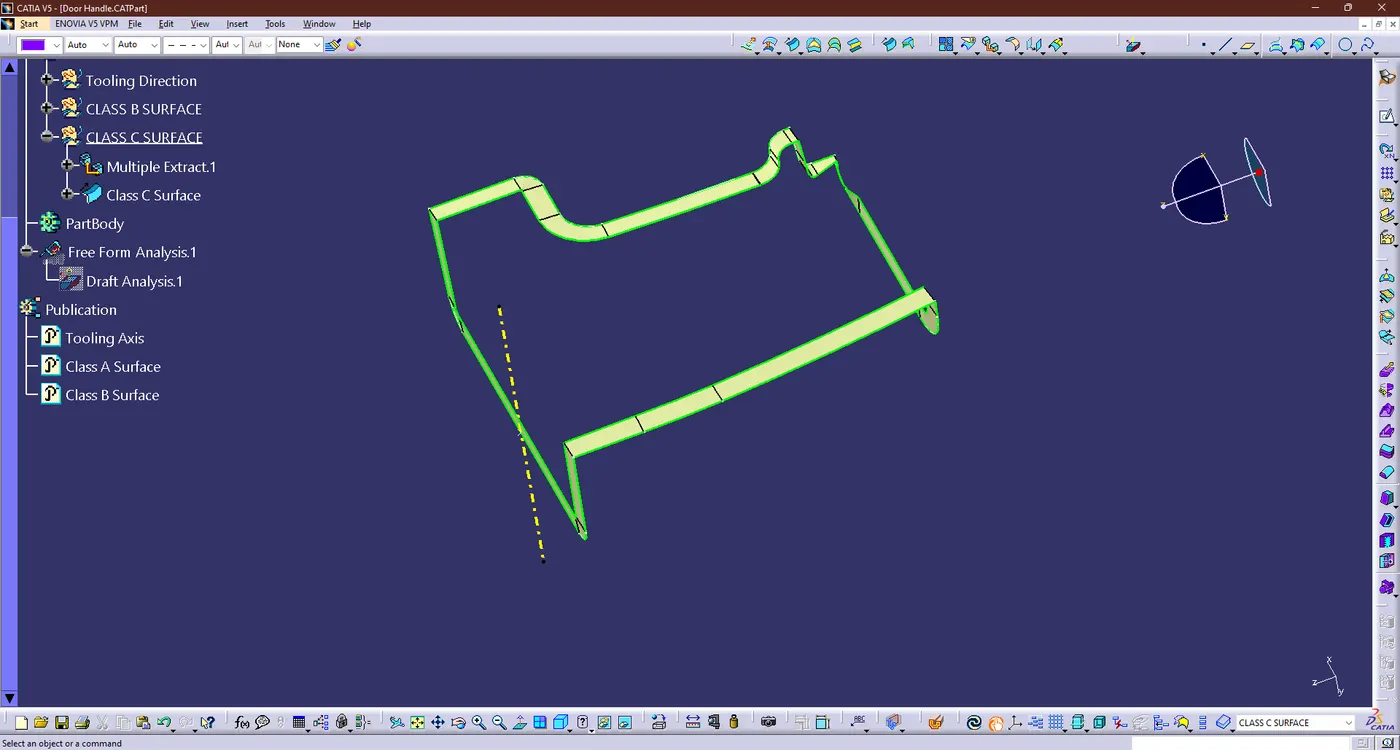
- Now Extract the Boundary from the CLASS A surface by using the Boundary Command
- Then create the surface for the boundary line by using the sweep command it should lies on the toolbar
- An extrapolate the full surface using the Extrapolate command due to it will merge the both CLASS A & B Surfaces
- JOINING SURFACES:
- Now join the surfaces like CLASS A & C surface
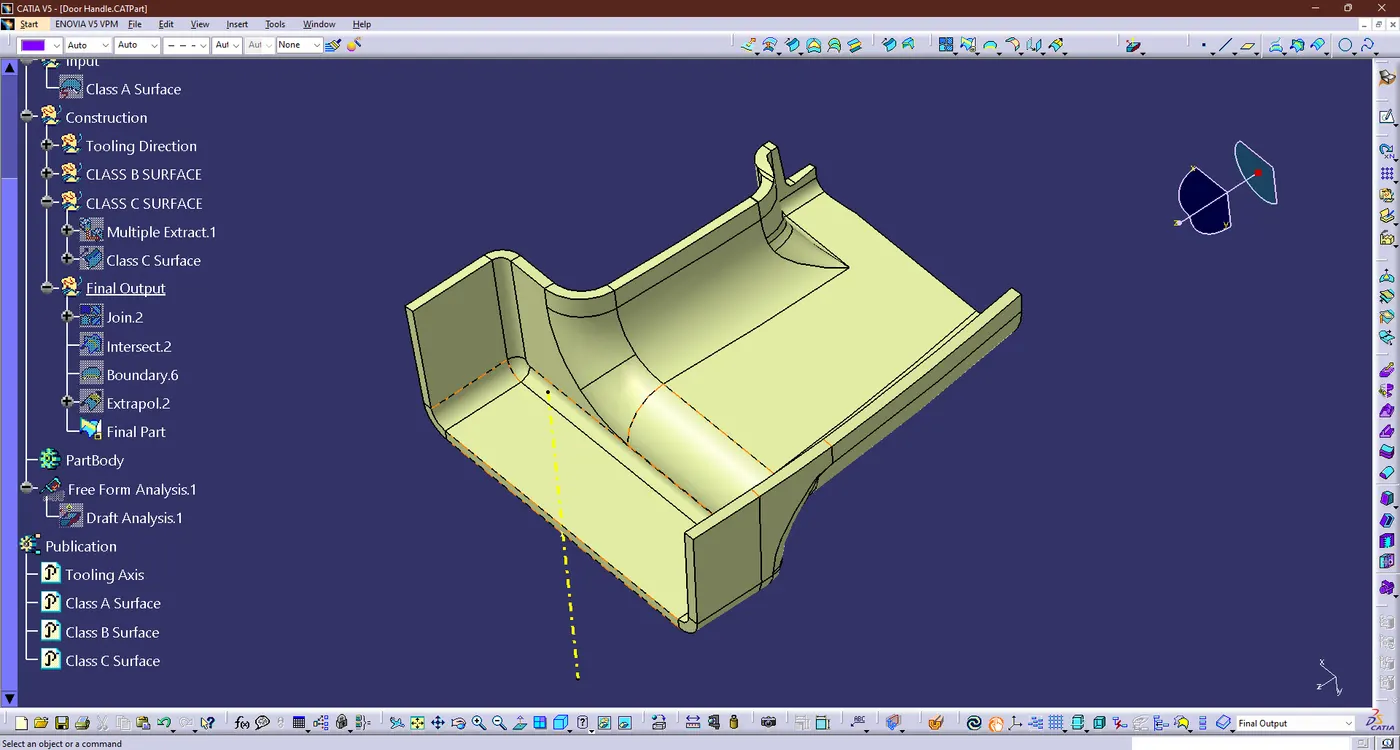
- Then do Final tirm CLASS B & A,C and the output will be like this,
- SOLIDBODY:
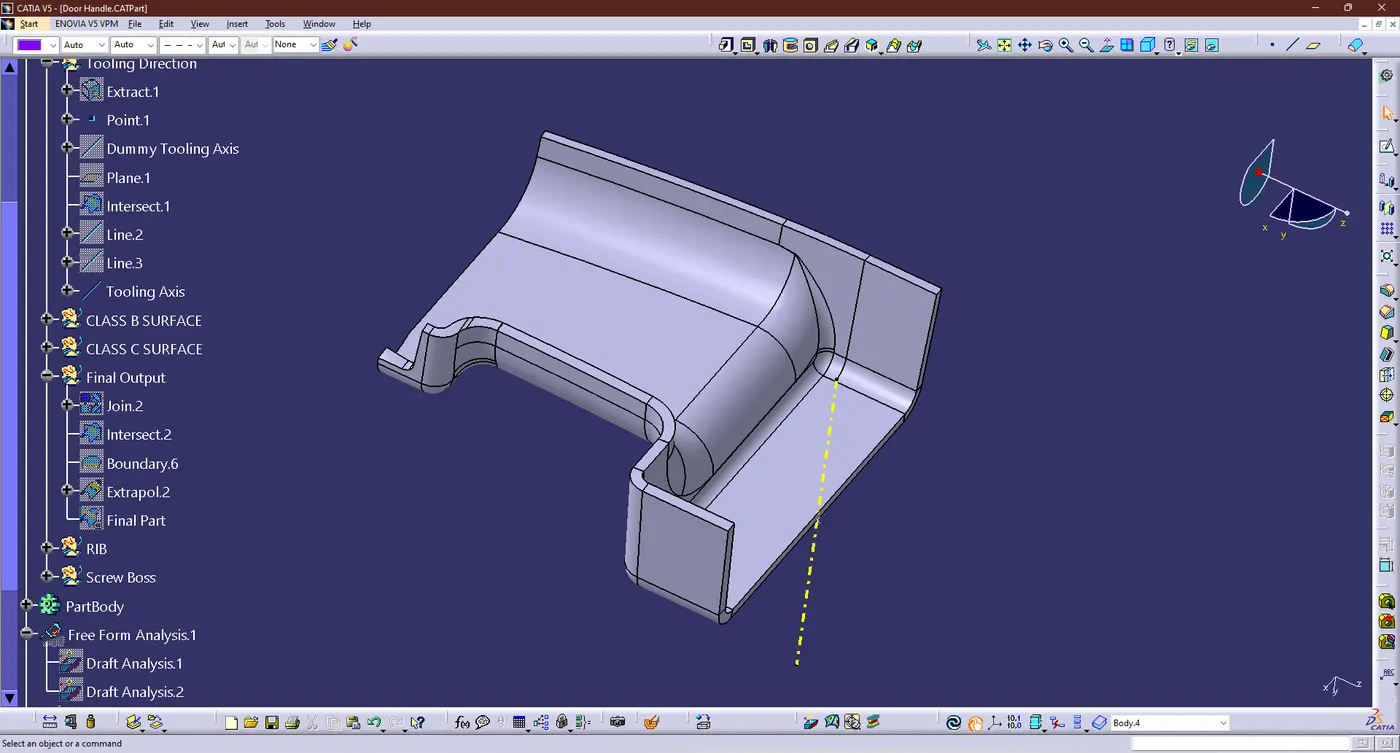
- The hollow is then created as a solid by selecting the Body option and then selecting the Close body surface and hence we got the final output were mention below
- CREATING THE ATTACHEMENT FEATURES (RIB & SCREW BOSS):
- RIB CREATION:
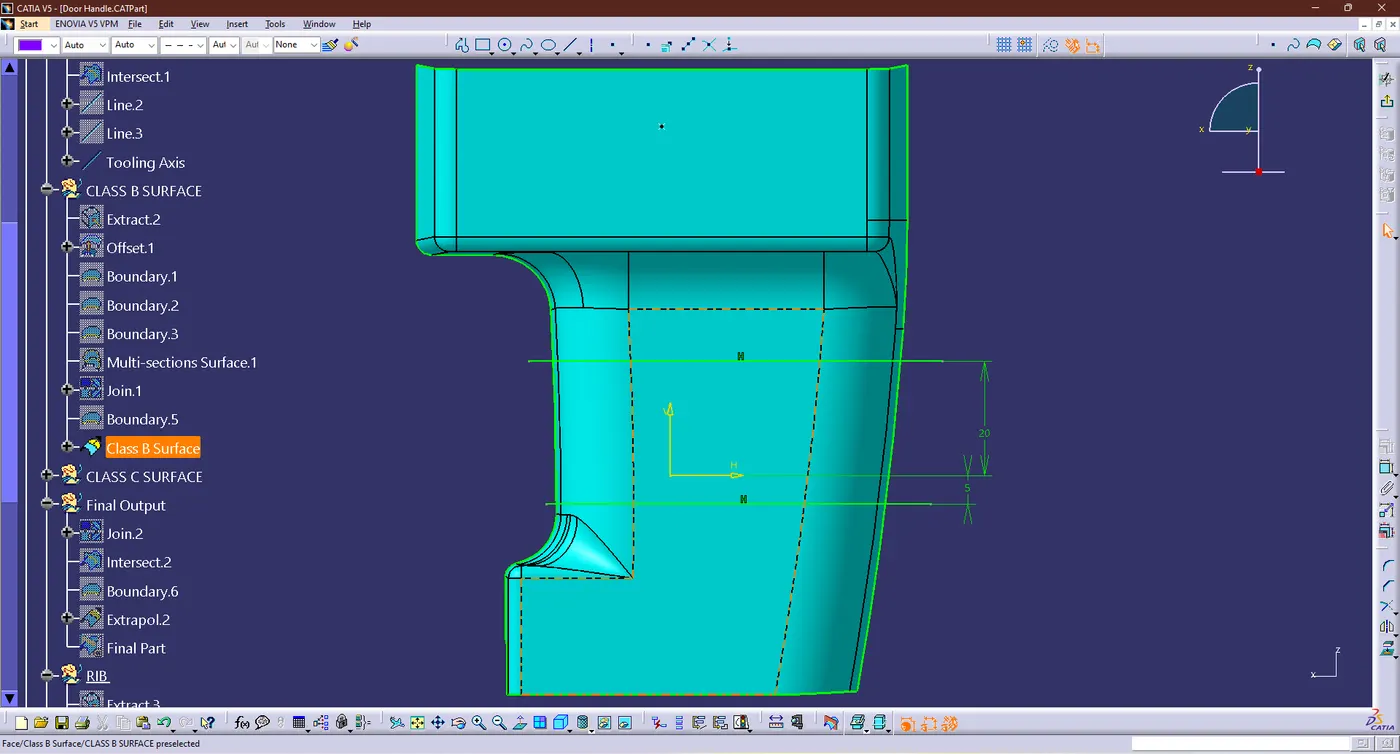
- Draft: 0.5 Degree per side (minimum)
- Thickness of ribs: 40% of wall thickness
- Height: ≤ 5 times the wall thickness
- Spacing (for more than 1 rib): 3:1- steel height/width ratio (maximum). h/w =3 or2(preferred) where h is the height of the rib and w is the space between two ribs.
- Minimum thickness at the tip: 0.75
- Radius: 0.25mm max
- Rib root thickness should not be more than 30% of the wall thickness.
- Create a sketch that is positioned for the ribs and extrude it in accordance with the tooling axis another method is to create a thicken pad in accordacne with the tooling axis.
- Perform union of ribs with the drill handle part body
- SCREW BOSS:
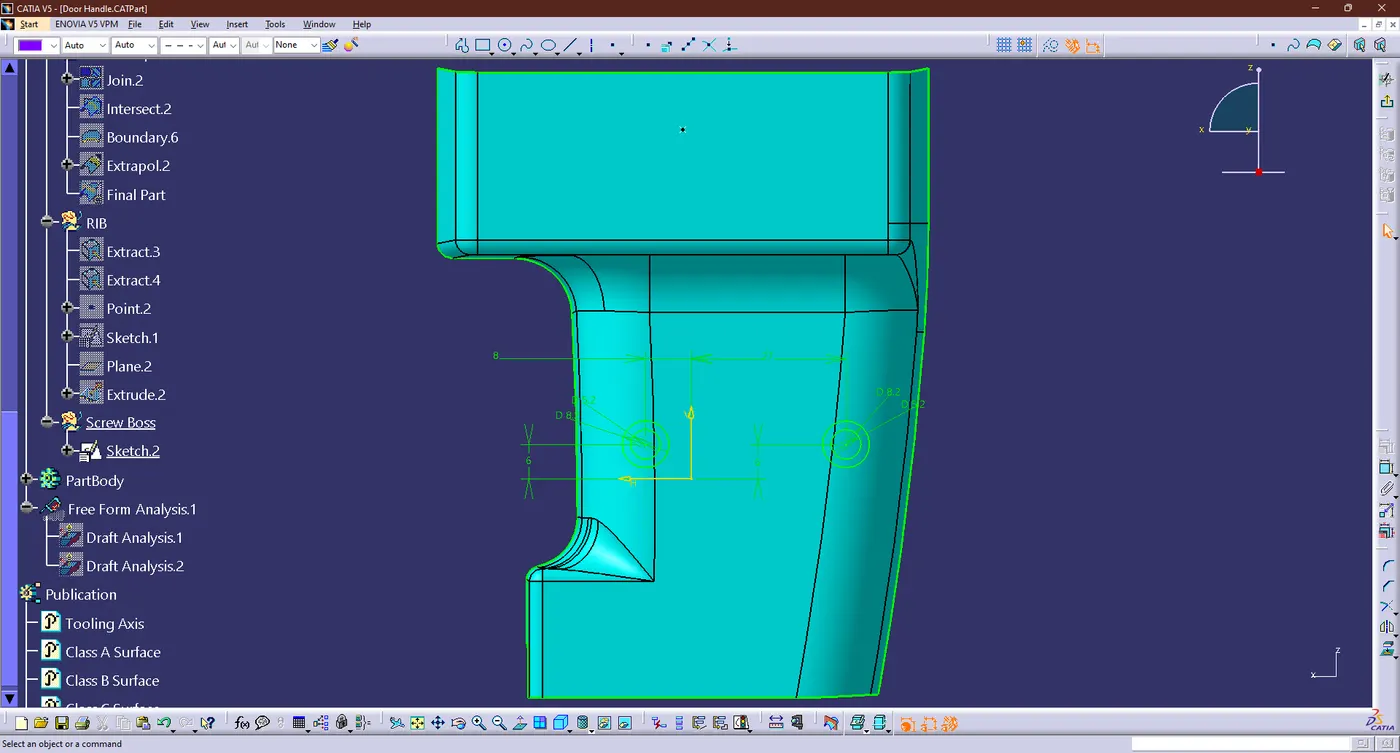
- W= 0.6*T
- Draft 0.5 Degree on both inside and outside walls of the screw boss.
- Height to diameter ratio – 3:1
- Radii(fillet) – 0.25mm(maximum)
- Boss Gussets must meet rib guidelines
- Create sketch of screw boss and extrude it with reference to the tooling axis.
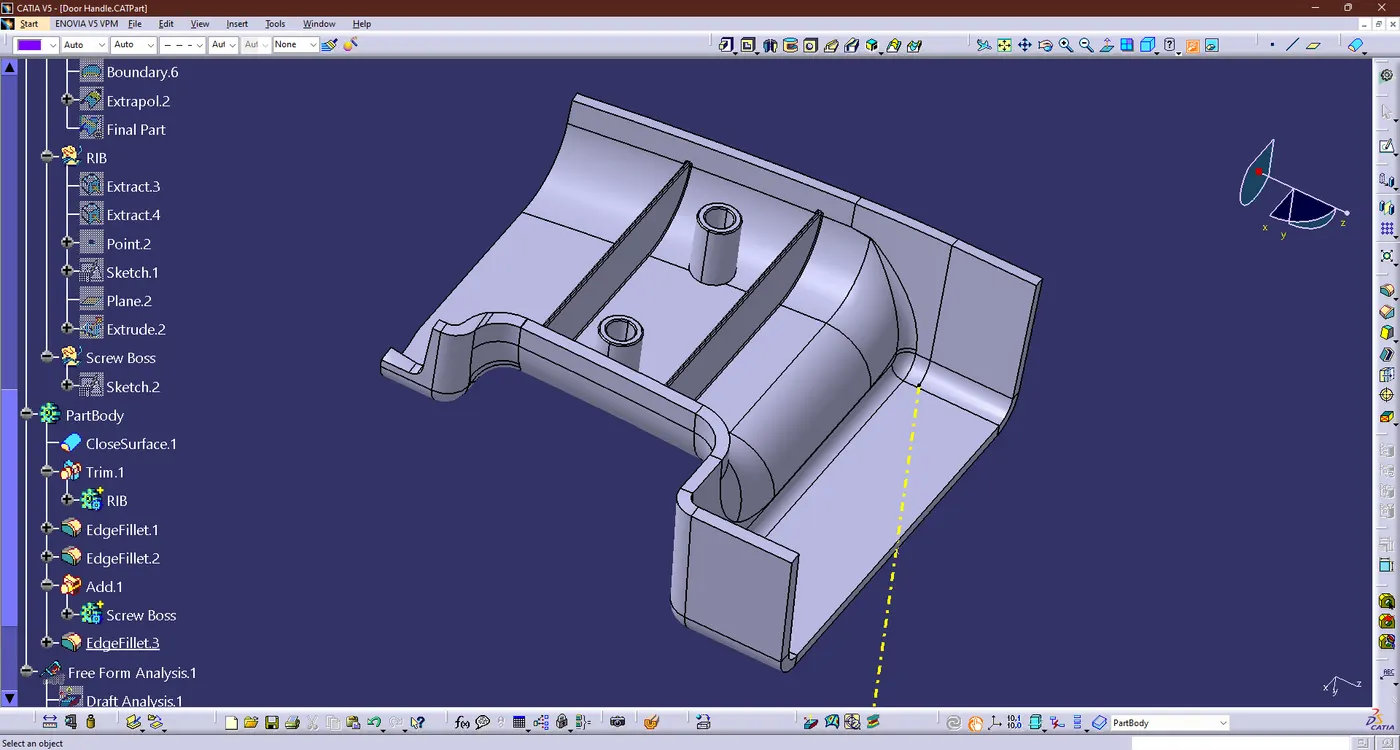
- FINAL PART AFTER CREATION OF RIB & SCREW BOSS:
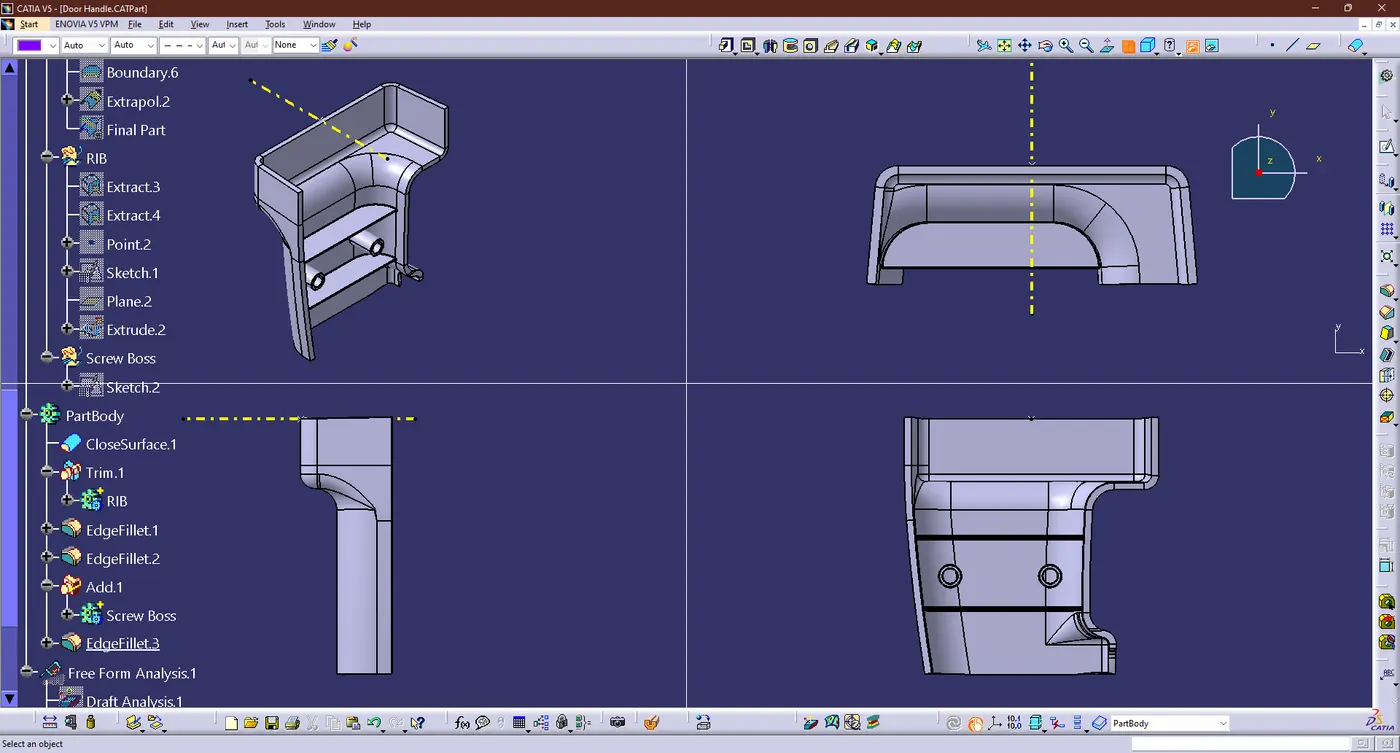
- ORIENTATION:
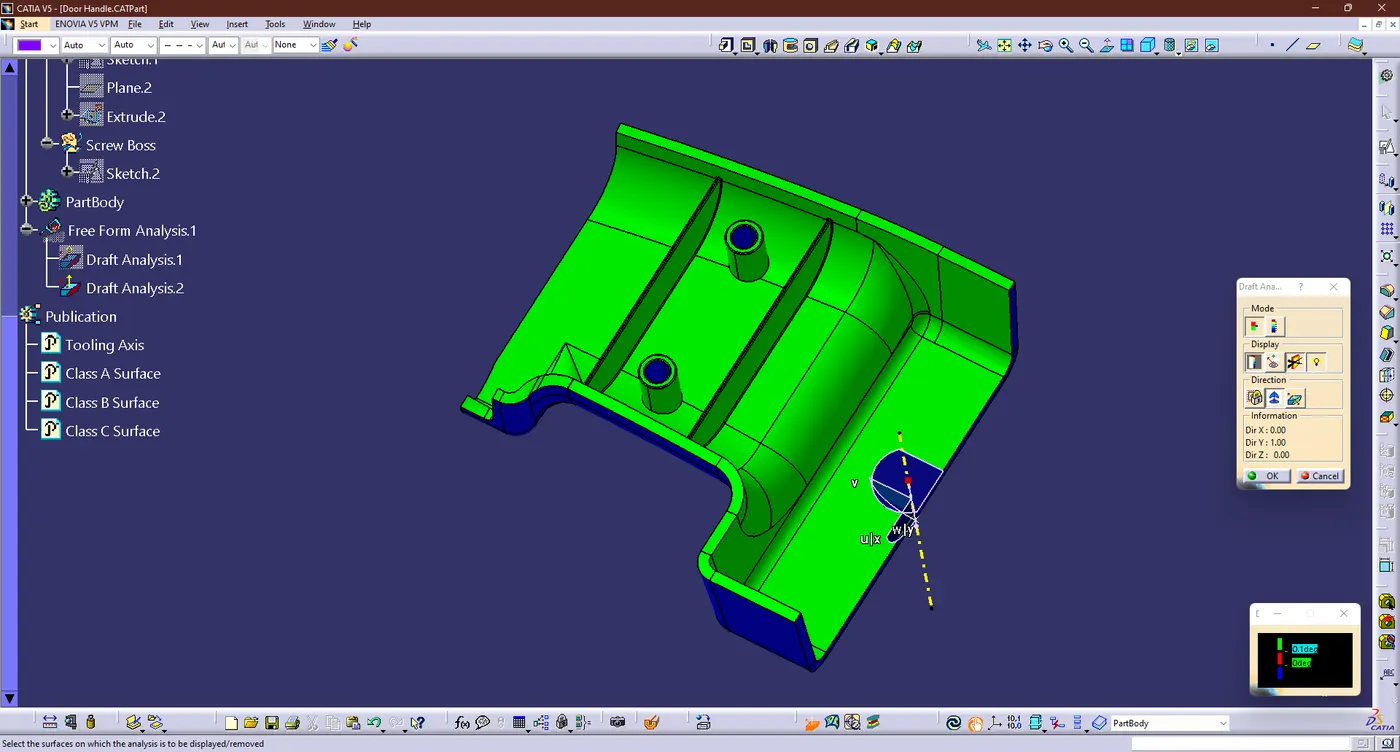
- DRAFT ANALYSIS:
- In Plastic Design, the draft analysis or angle that is considered in the OEMs is 3 degree.
- Same thing were do follow for the draft analysis on earlier and output mention below
- Then we got degree has 0.1 deg
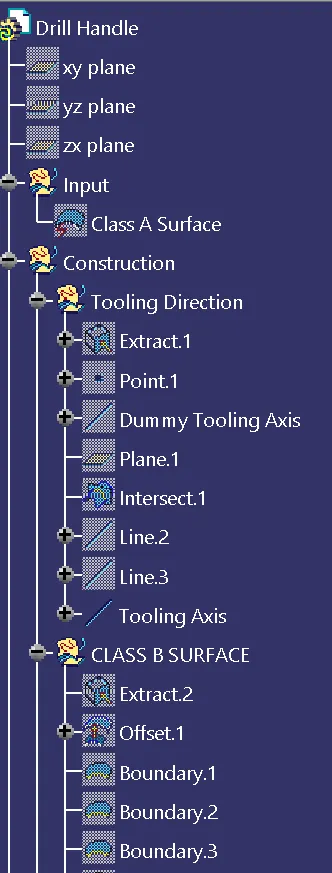
- TREE STRUCTURE:
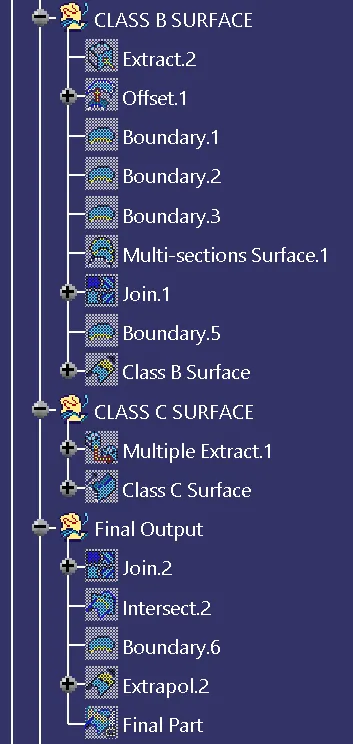
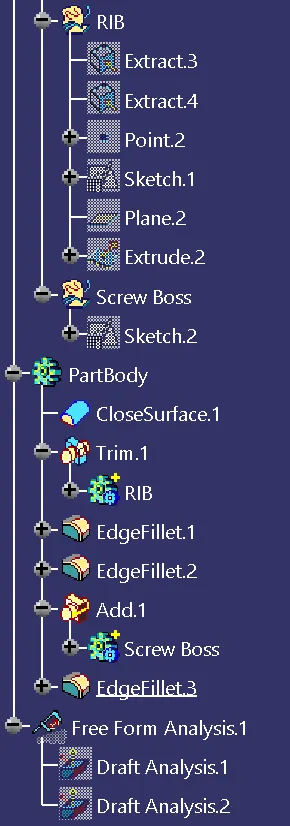
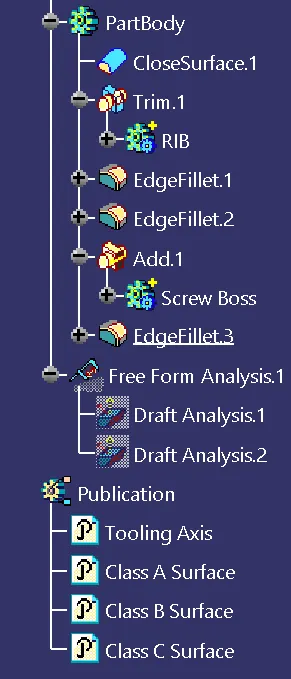
- FILES:
- The output file were mention pn browse option in the name of the "Week 10 challenges (Rib & Screw Boss).zip" and also output images were uploaded in the same folder.