Usage of Navigation tool , Timeliner and Clash Detection test using Naviswork
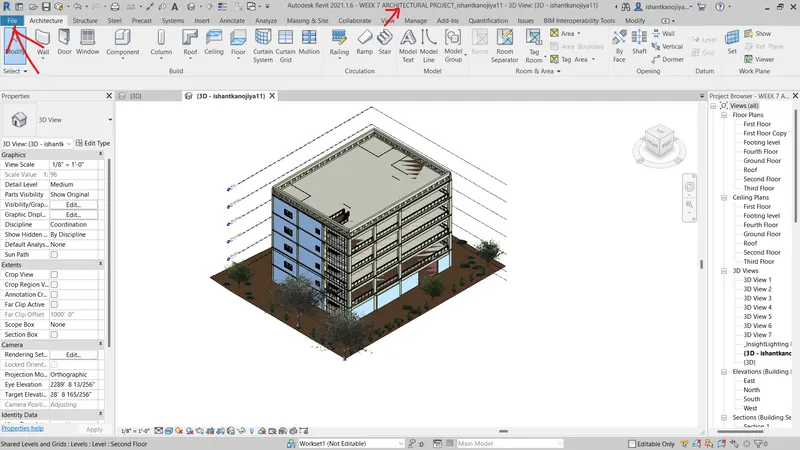
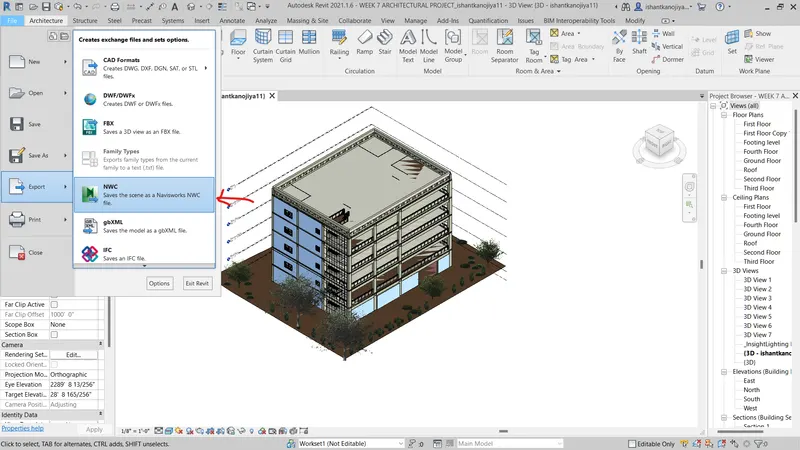
1. Use the Architecture/ Structure Project file developed by you in Week 6 to 8. Export the Revit architecture and structure model to Navisworks Cache file following the export settings discussed in class
Aim:- To export the Revit file into the Naviswork file.
INTRODUCTION:
Export the Revit architectural and structural model to the Navisworks cache file which has been created in weeks 6 to 8, and following the export settings
Procedure:-
- First, install the Navsiworks Exporter same as Revit version
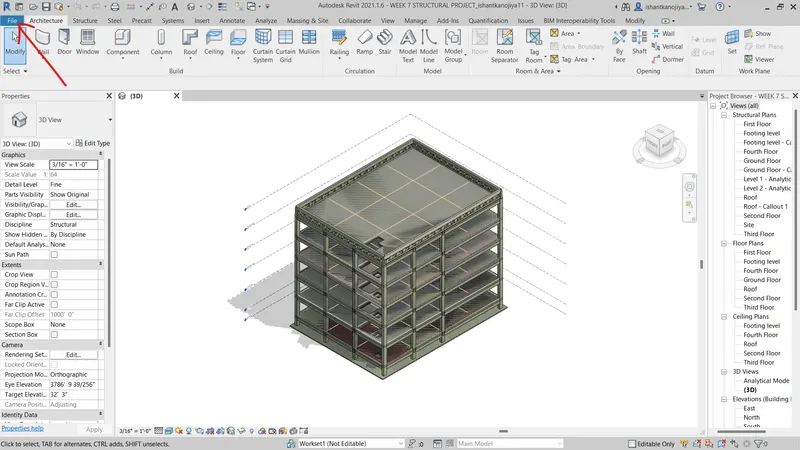
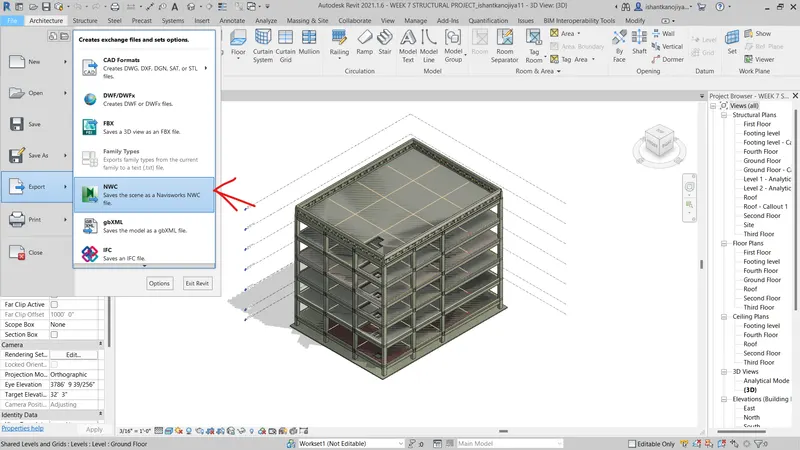
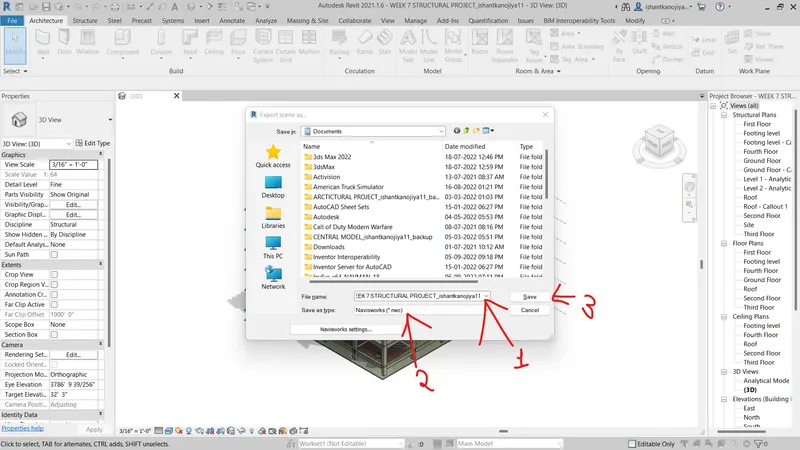
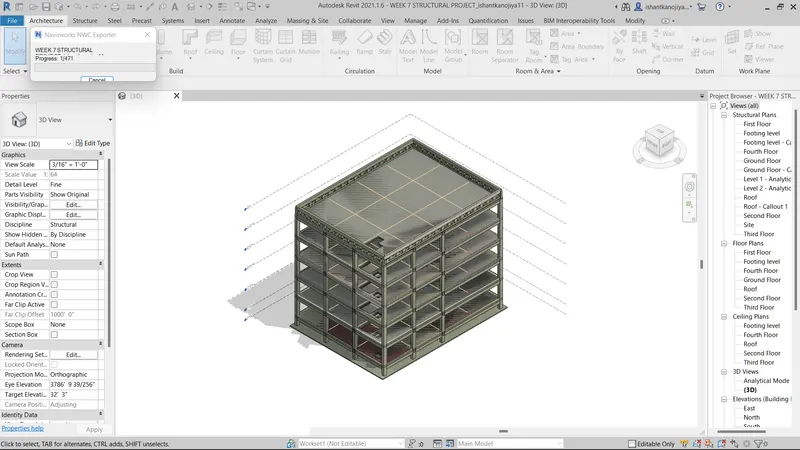
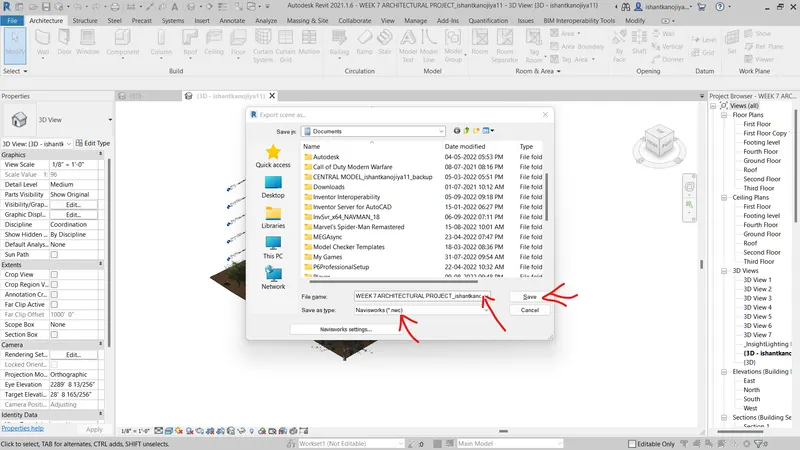
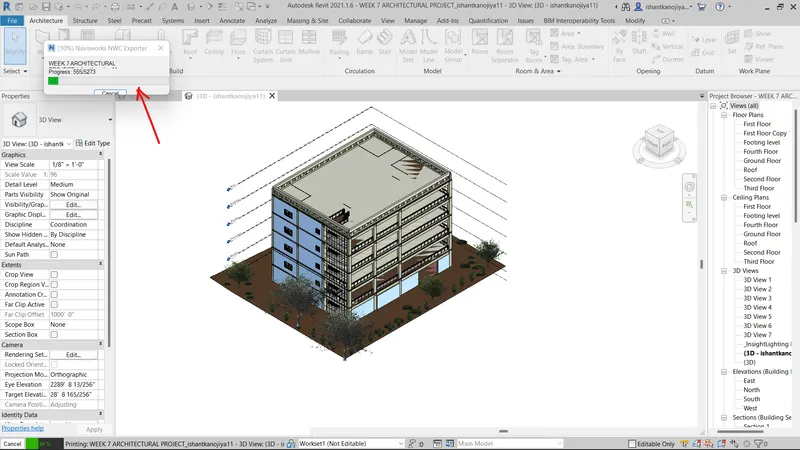
- Goto structural File of week 7 > open it > export to NWC. file
- then save it as NWC file
- Architectural file
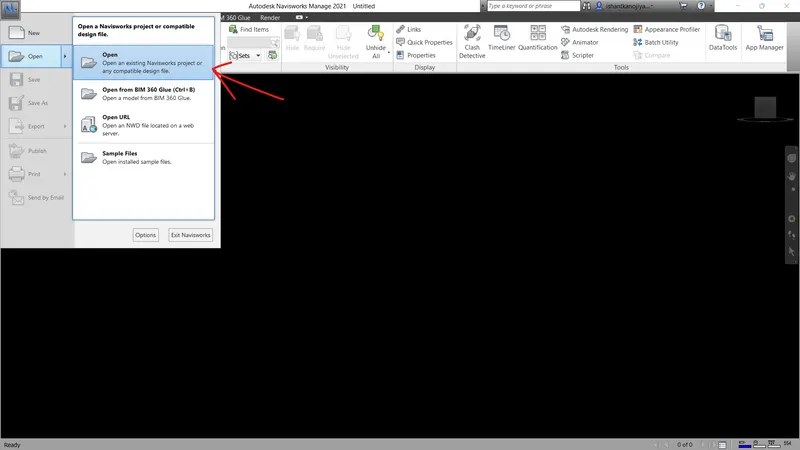
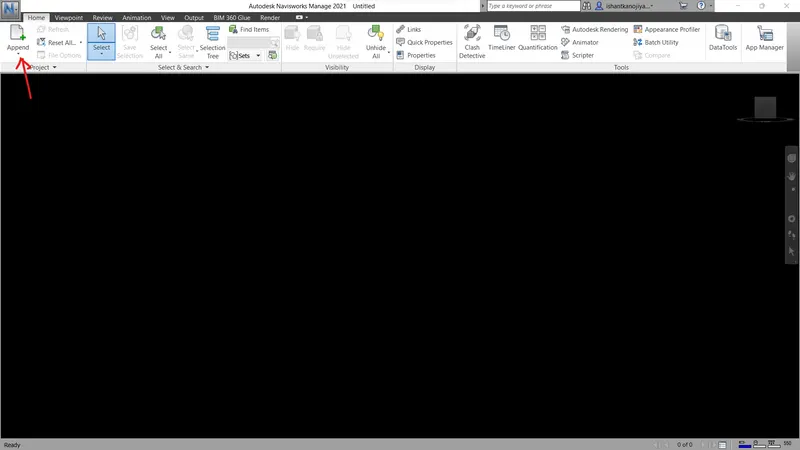
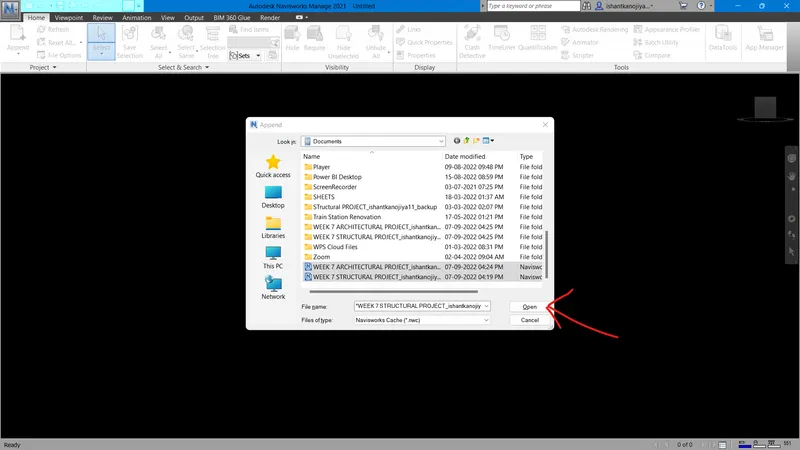
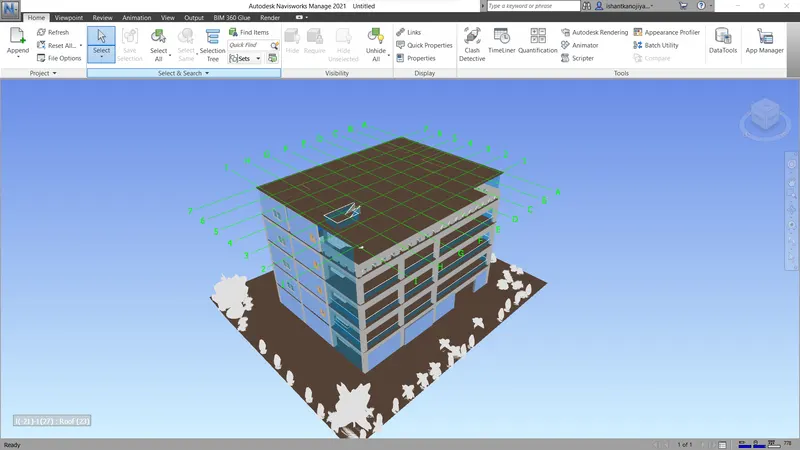
- Add file both structural and Architectural in naviswork
- go to menu / appendix > select architectural and then architectural file which is saved as nwc formate
Result:
After following above steps, we have successfully exported architectural and structural model in Navisworks
2) Use Navigate Tool to walk around the model and walk through the rooms created and record your moving as animation in your Navisworks file
Aim:- Use Navigate Tool to walk around the model and walk through the rooms created and record your moving as animation in your Navisworks file
INTRODUCTION:
By using a navigation tool to walk around the model, and walk through the room, recorded and saved the moving as administrator in Navisworks
Procedure:-
- Goto viewpoint tool bar > select Walk option > adjust the camera and Take picture of view and record your walk as your requirement
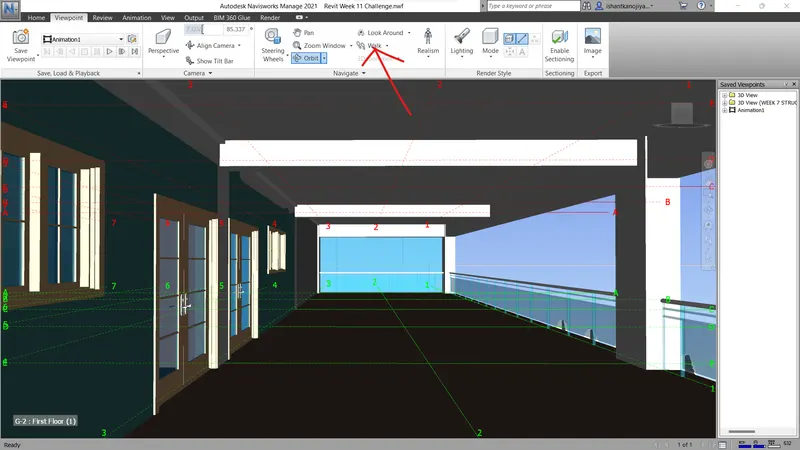
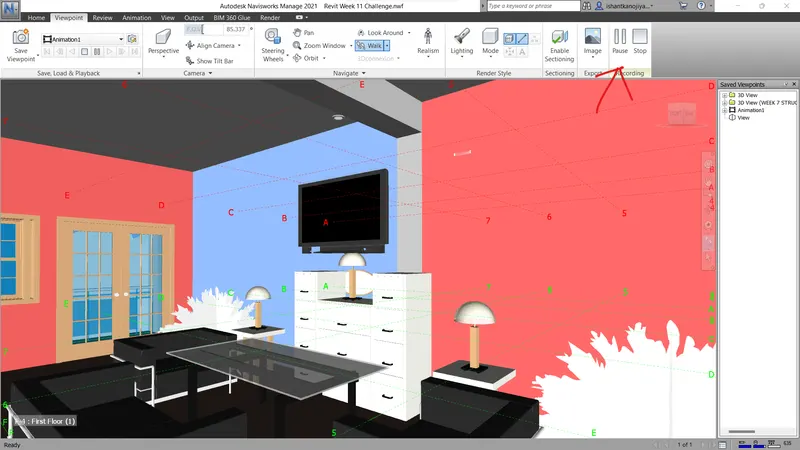
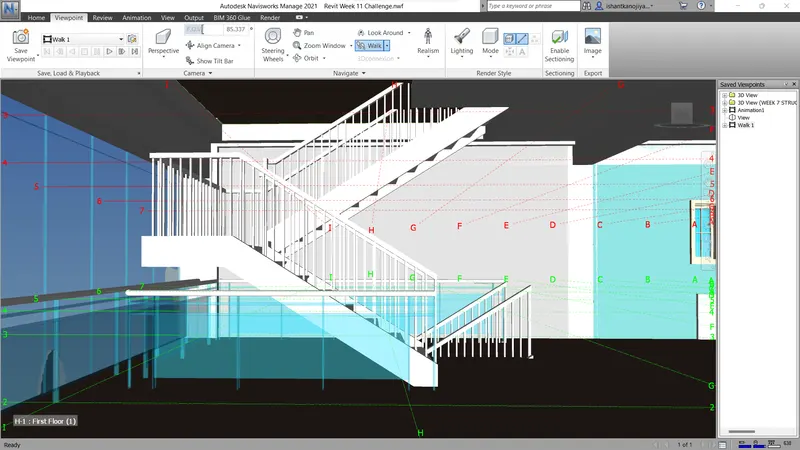
- Goto Animation tool bar> select Animation Recording > Select Export Animation option
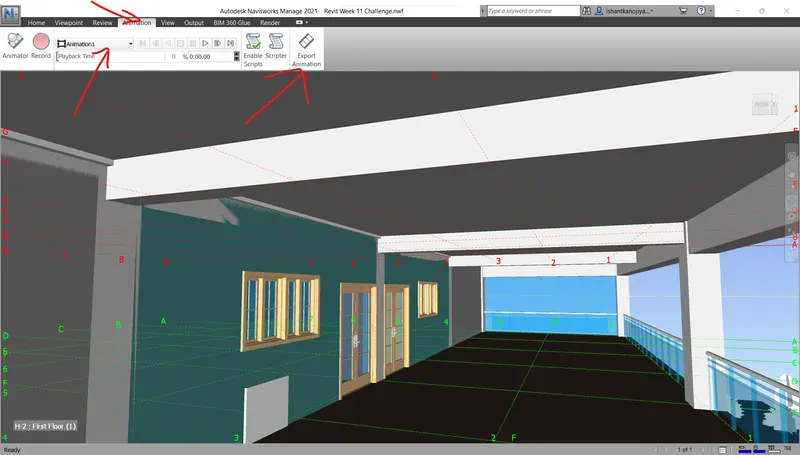
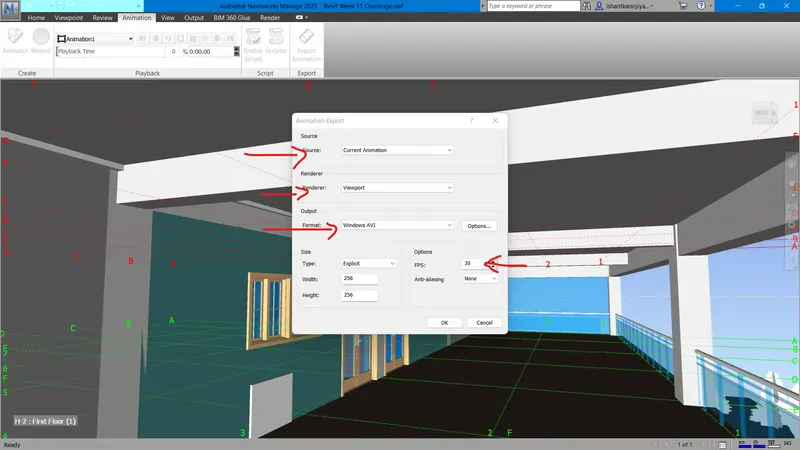
- Save it in local disk
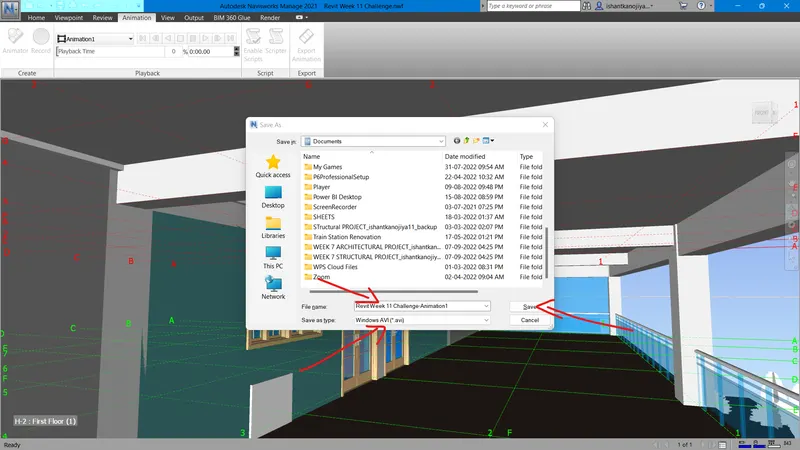
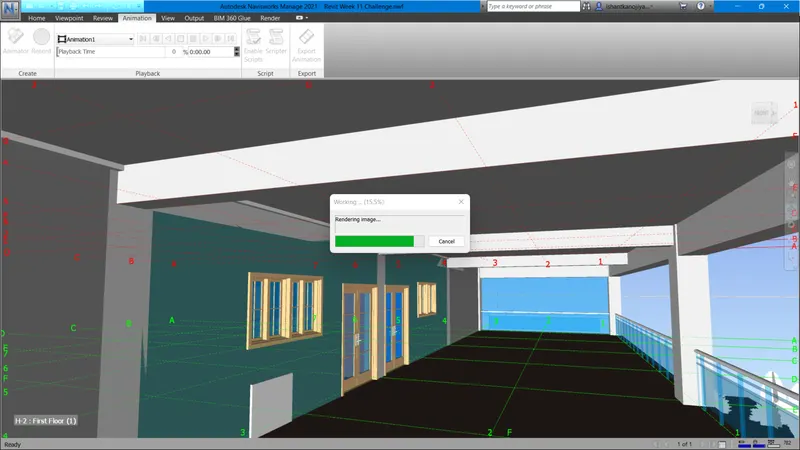
RESULT:
After following the above steps, we successfully created a walk around and walk through the room with the help of the navigation tool in Navisworks.
3) Use Navigate tool to use the Realism feature to walk through the model and record your moving as animation in the Navisworks file
Aim:- Using the Realism feature in Navigate tool to analyze and create moving animation of how the room looks after completion
Procedure:-
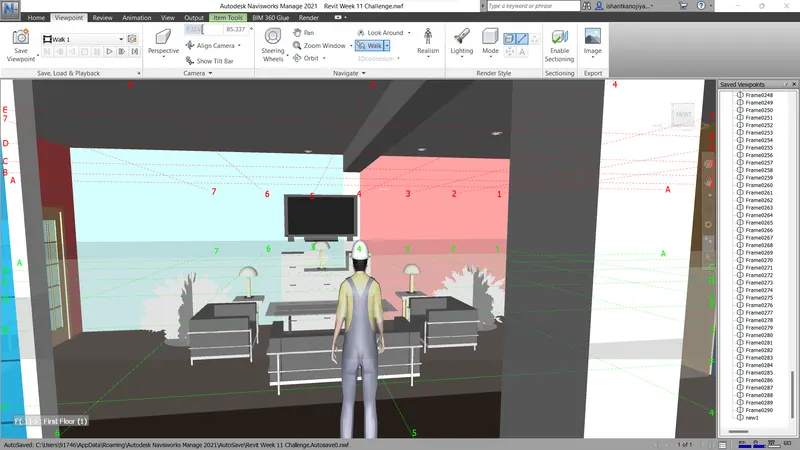
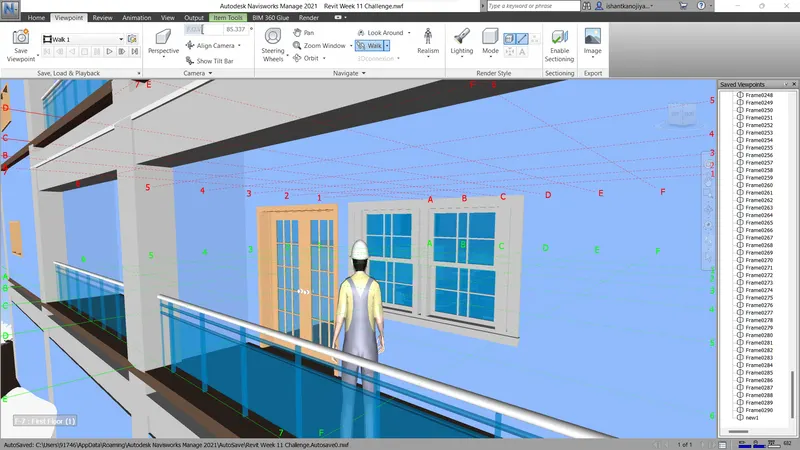
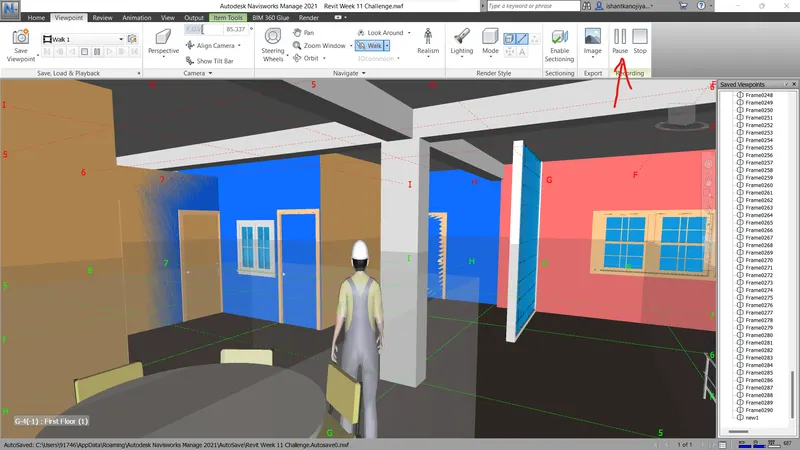
- Goto to viewpoint toolbar > select Realism option and adjust the camera > record it or save viewpoint options
- Select third person option
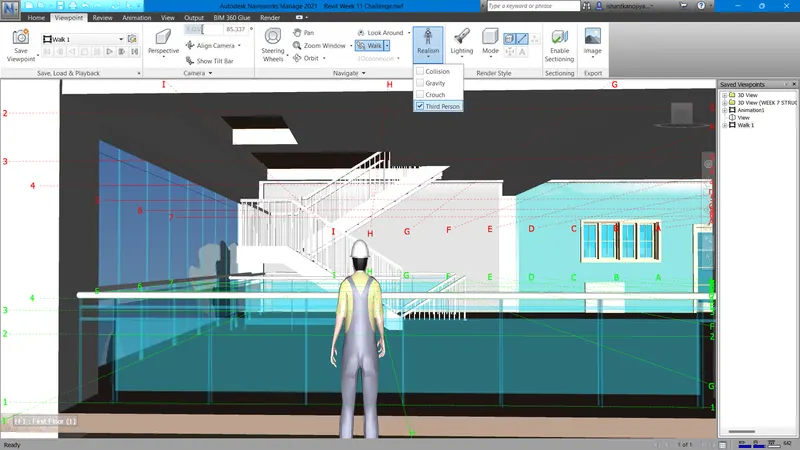
RESULT:
After following the above steps, we have successfully created a walk around with Realism with the help of the navigation tool in Navisworks.
4) Embed both architecture and structure *.nwc file to your Navisworks file. Create a clash detection test between the two models
a. Run the Clash Detection Test
b. Study the clashes between the two models
c. List which of the clashes could be approved
d. List which of the clashes could be neglected ( will be taken care of later)
e. List which of the clashes can be resolved
f. Save the results after color coding the clashes to the Navisworks file
g. In case of resolution annotate the clash and save the view to defined views in Navisworks
Aim: Using Naviswork Identify Architectural and Structural Model Clash detection test
Introduction:- Clash detection aids in effectively identifying, inspecting, and reporting interference in a construction project model. It is useful in checking work status and wanes down human errors during model inspections.
Procedure:-
- Goto structural File of week 7 > open it > export to NWC. file
- then save it as NWC file
- Architectural file
- Add file both structural and Architectural in naviswork
- go to menu / appendix > select architectural and then architectural file which is saved as nwc formate
- Then goto home to tool bar> select Clash section test
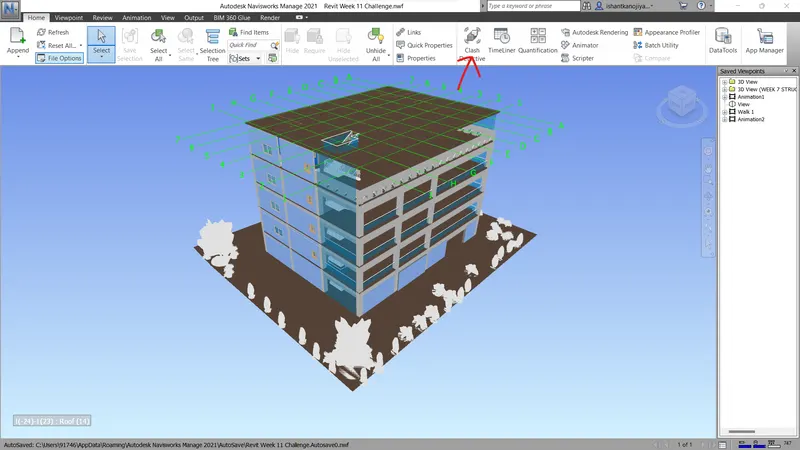
- Then goto Add test
- Select one side Architectural and Structural file > press Run test
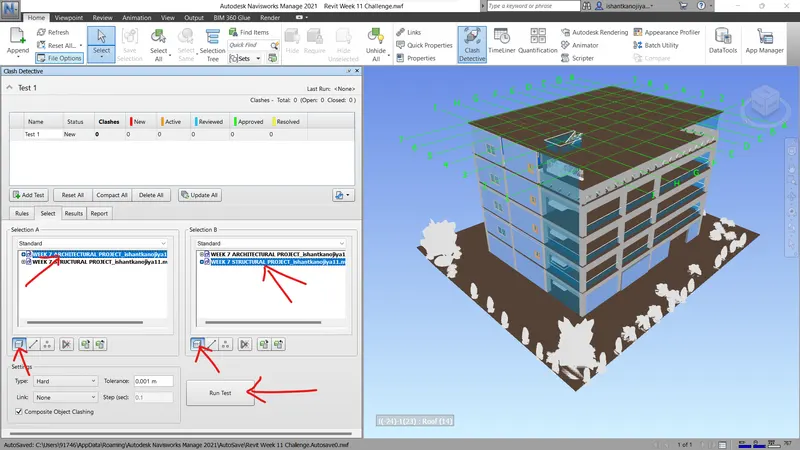 S
S- Select both side Surface
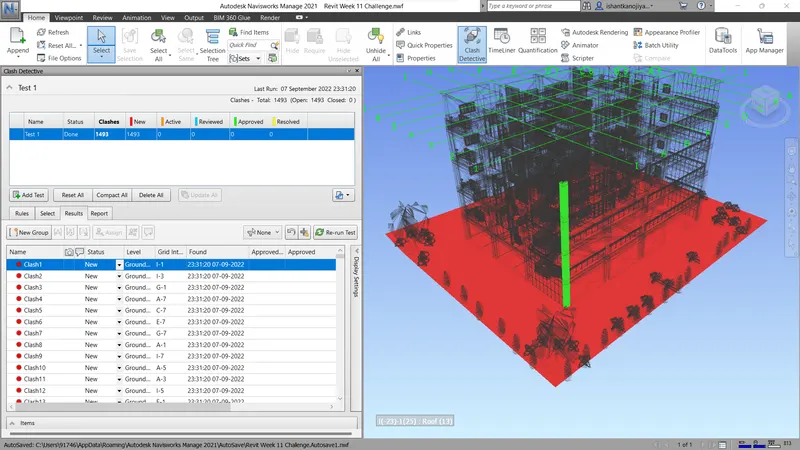
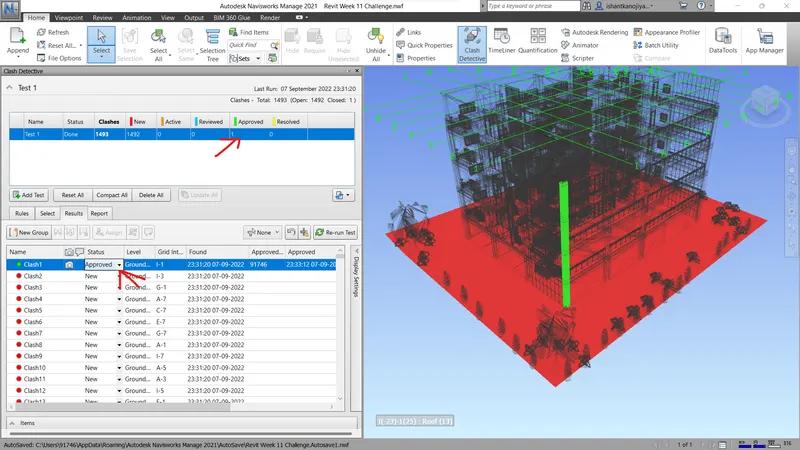
- Approved clashes
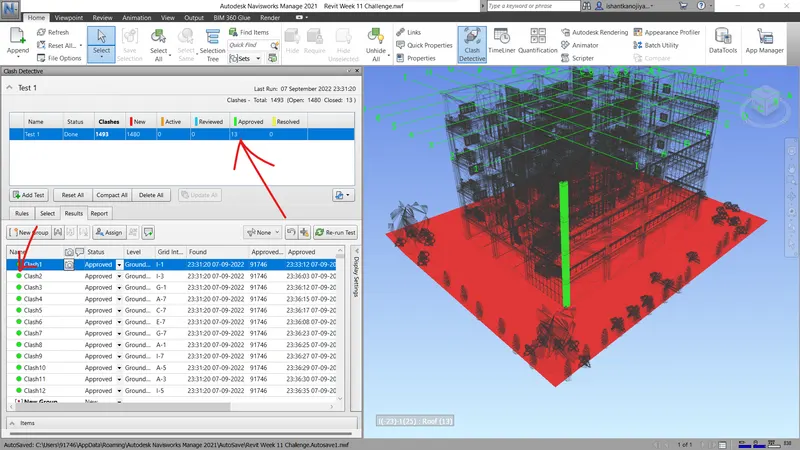
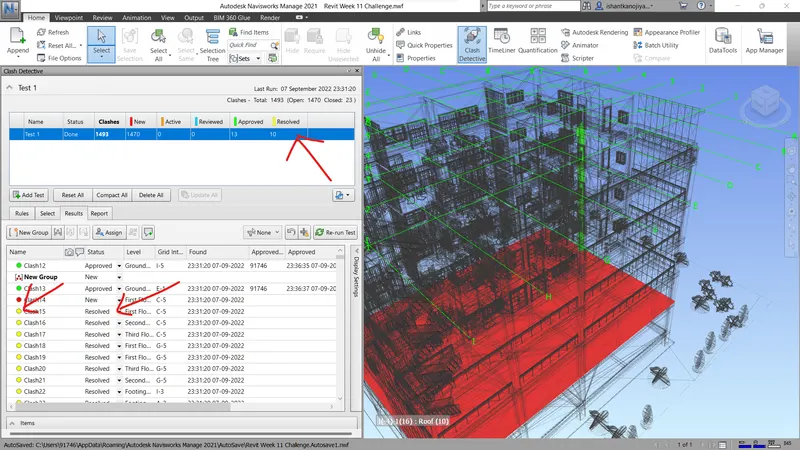
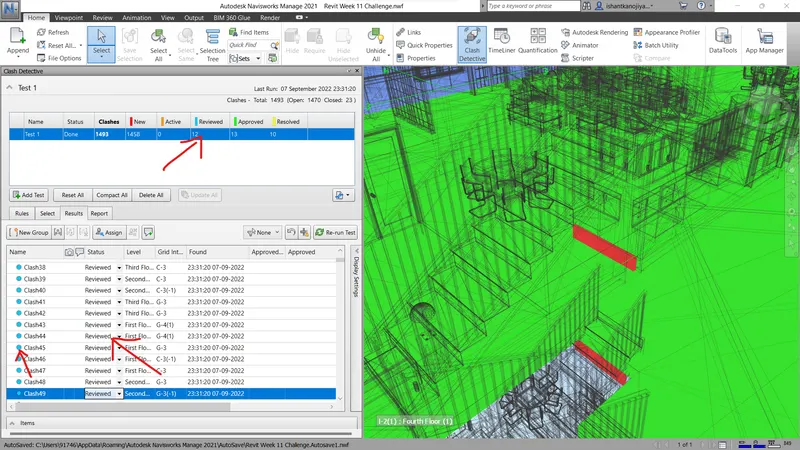
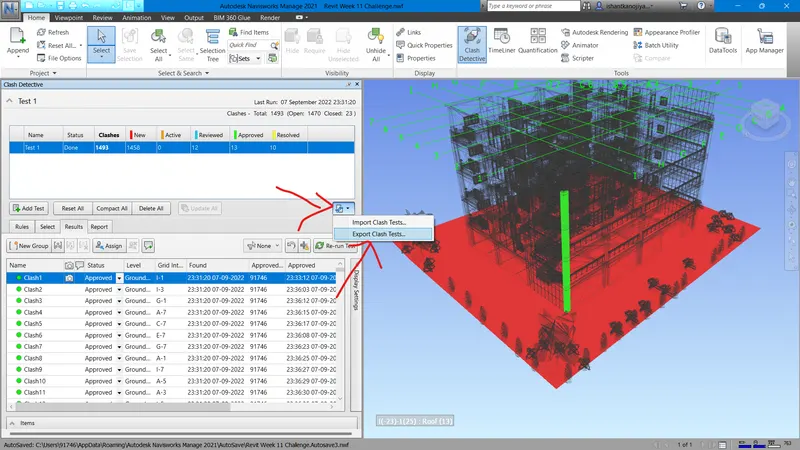
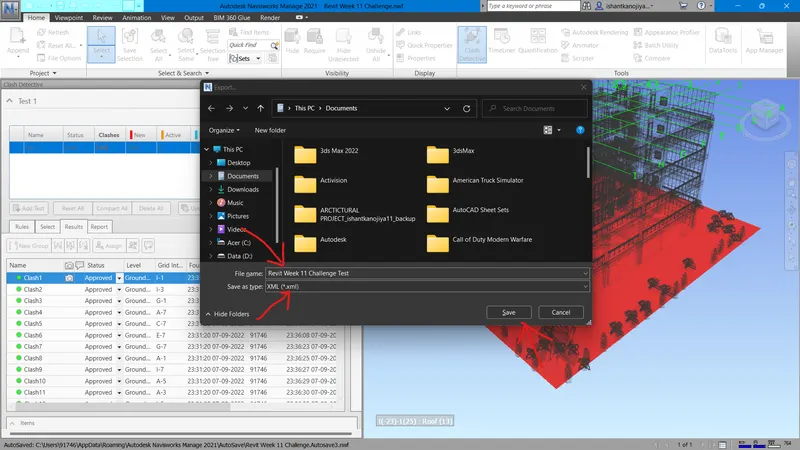
- Export Clash Detection Test
- Remove Resolve Clash detection test
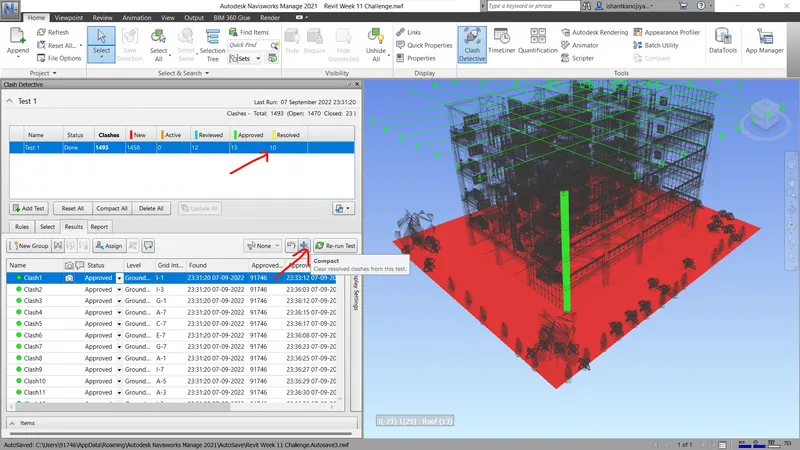
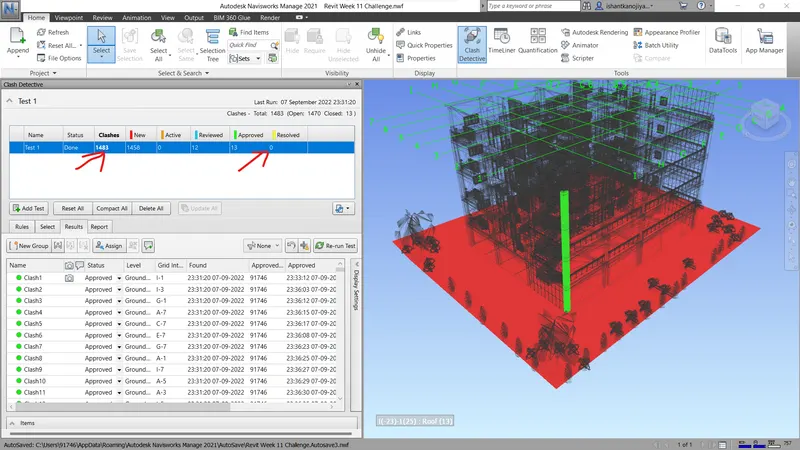
RESULT:
After following the above steps, we got the list of clashes from the architectural and structural models. We have studied and checked which all clashes can be approved, resolved or reviewed accordingly and finally export the clashes in .xml format
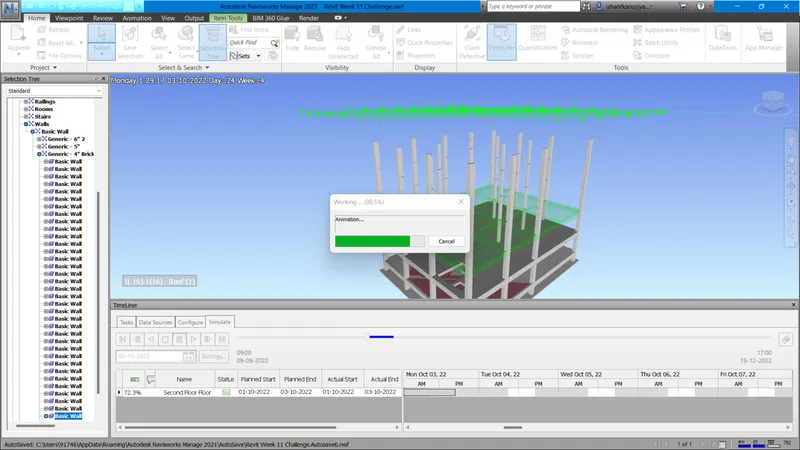
5) Using the Timeliner feature in Navisworks prepare a schedule for the project developed in weeks 6 to 8 by adding reasonable assumptions for task start date and end date and simulate the task completion as a visual simulation. Record it and save the timeline simulation to the Navisworks file
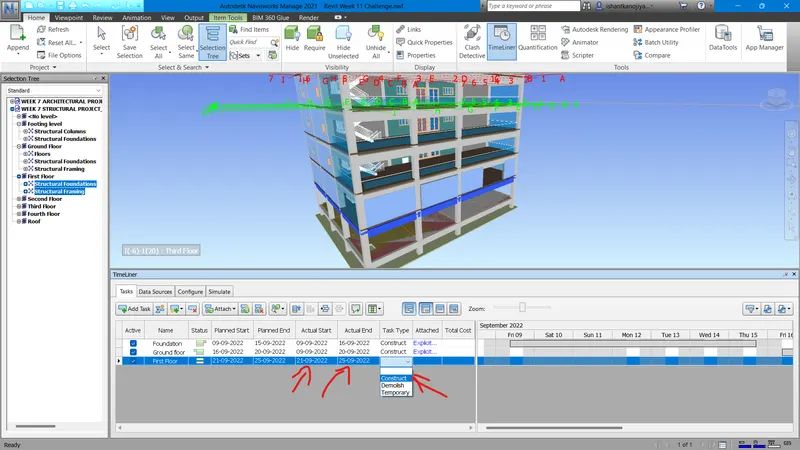
Aim:- Prepared a schedule by using timeline feature in Navisworks and adding reasonable assumption of task start date and end date
Introduction:- By using the Timeliner feature in Navisworks, added a schedule which is having the assumption of the task start date and end date, recorded and saved the timeline simulation in the Navisworks file
Procedure:-
- Goto to home Toolbar > Select Timeliner option
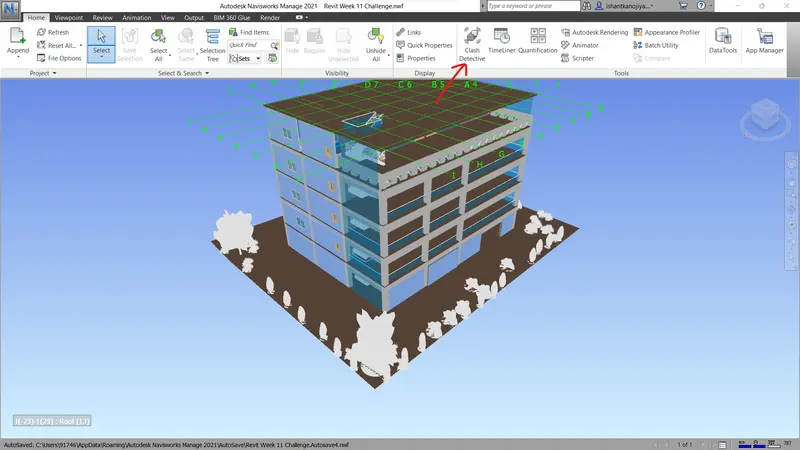
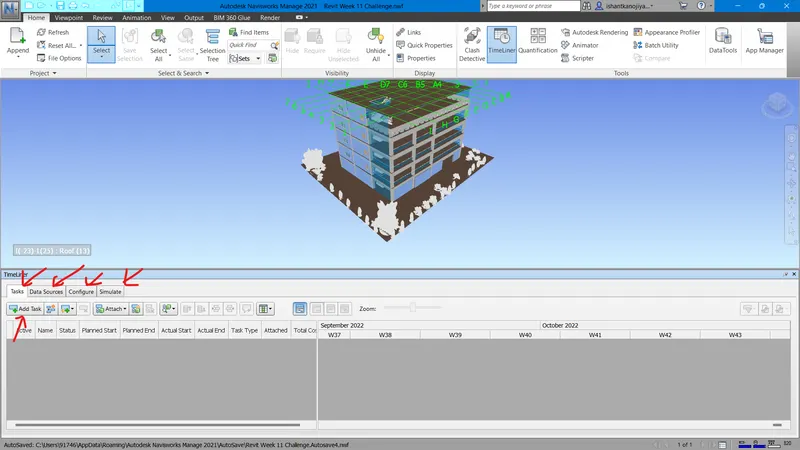
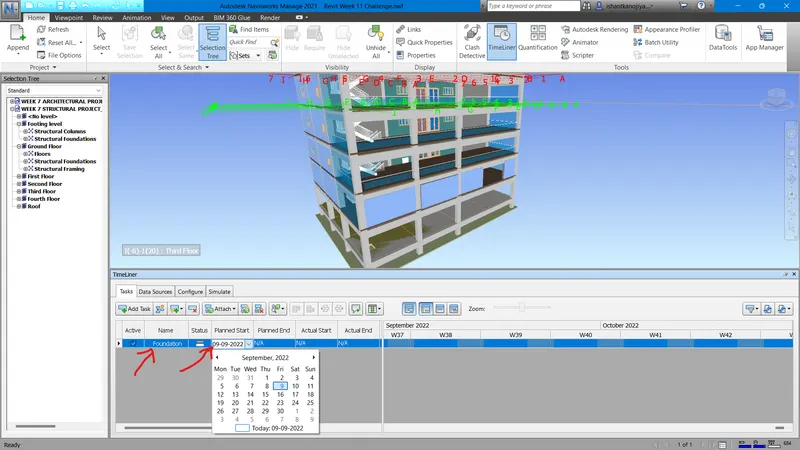
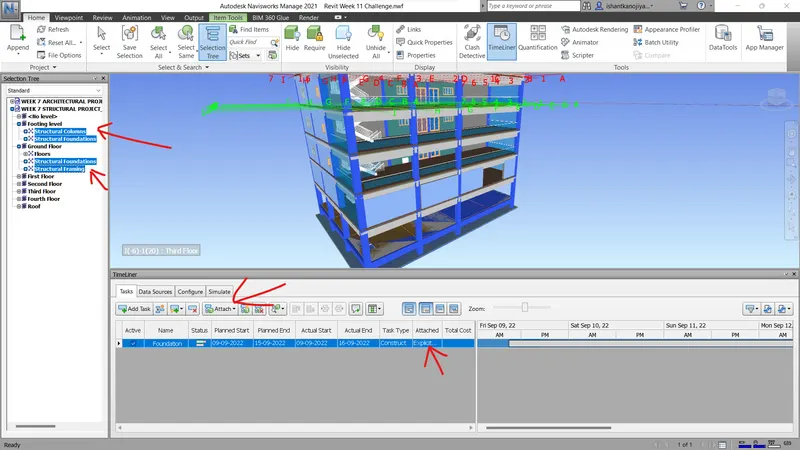
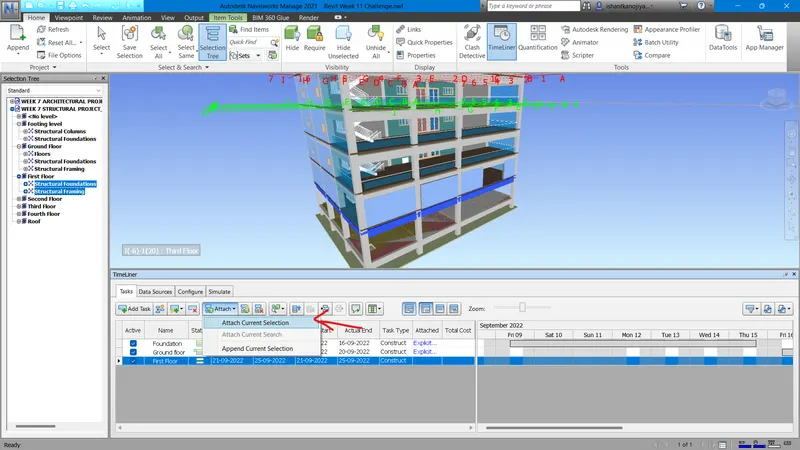
- Goto Attach option > Select Current Selection > Press ok
- Select Trace Type is Construction
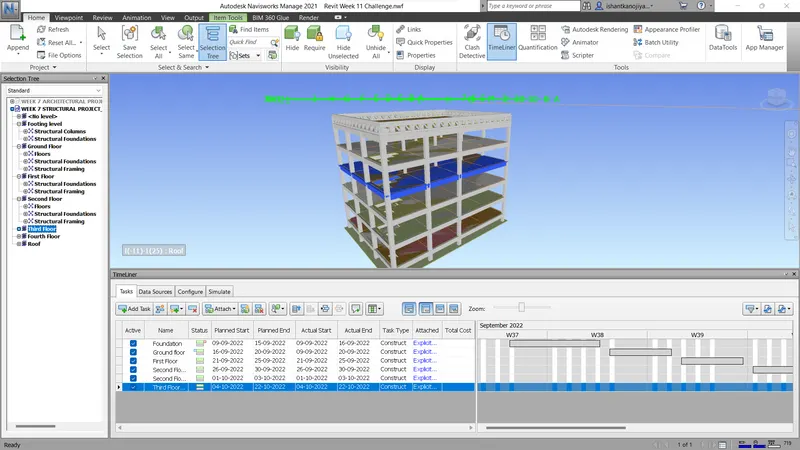
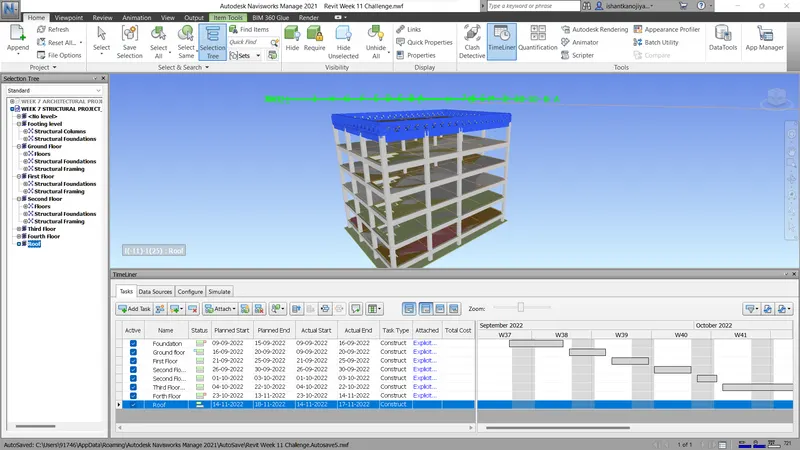
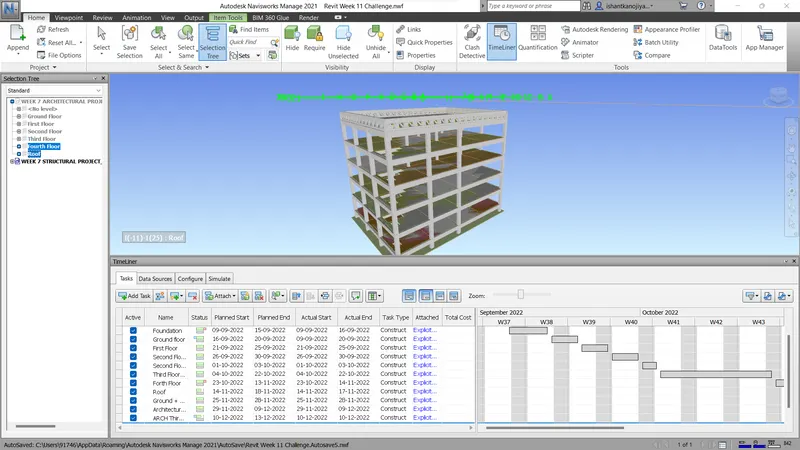
- Goto Simulation Option Select Export Animation
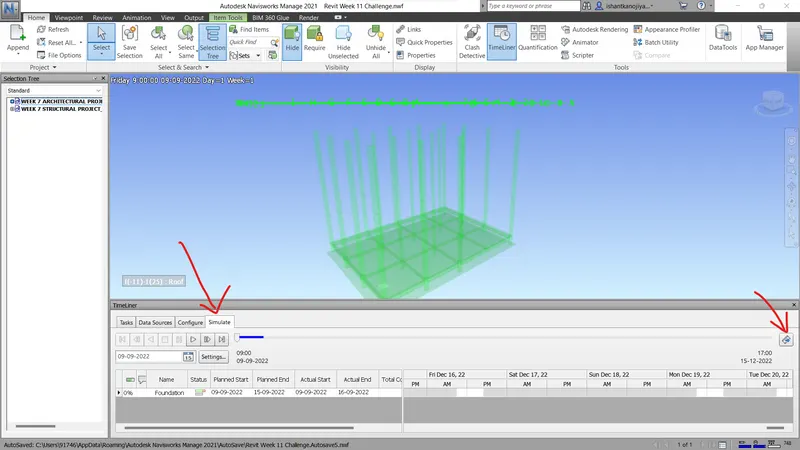
- Adjust the animation Setting as per request
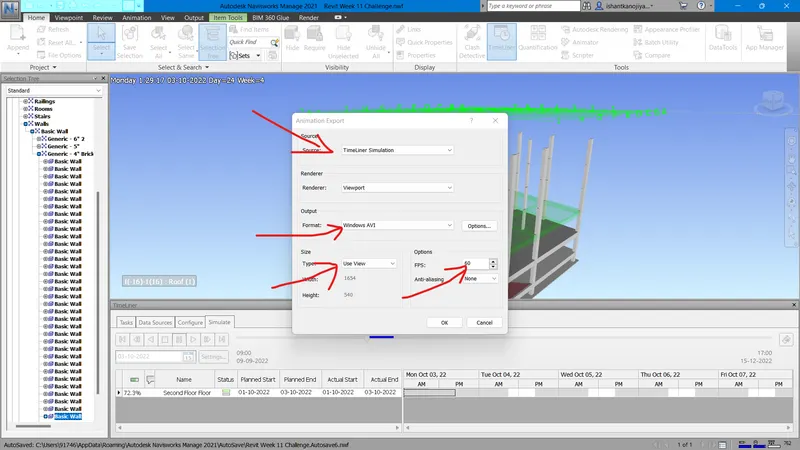
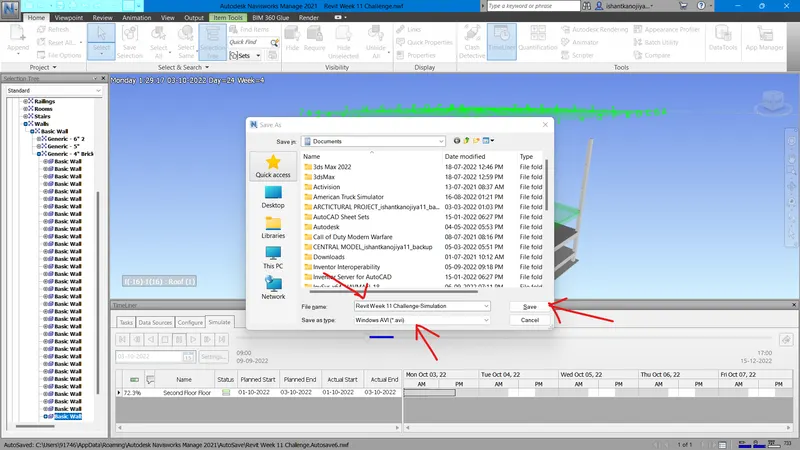
- Save the Animation in local disk
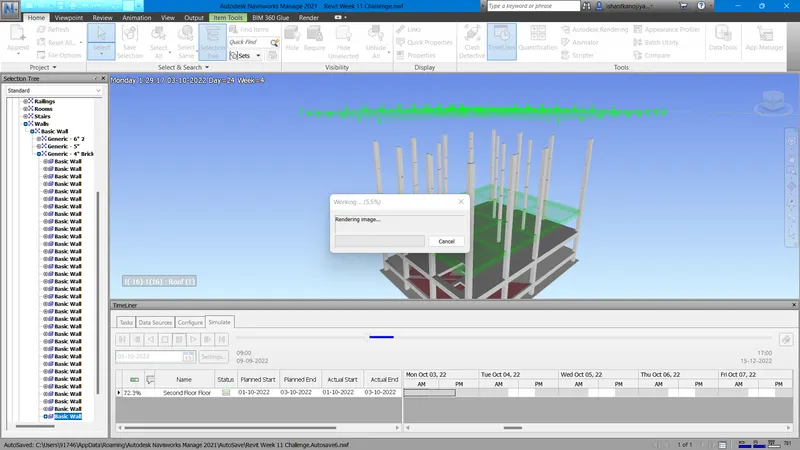
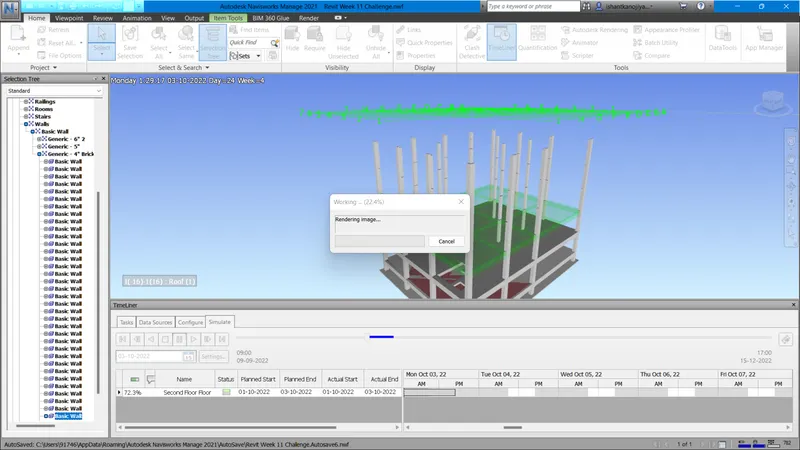
RESULT:
After following the above steps, we have created the timeline schedule for the project which is including planned start date and end date of the project as well as the actual planned date and end date by using the Timeliner feature in Navisworks and saving the timeliner animation is Navisworks file