Usage of Collaborate tool in REVIT
1. Open an architectural template. Using the Manage tab set project base point and project shared coordinates for the project
AIM:- TO CREATE BASE POINT AND SHARED COORDINATES FOR ARCHITECTURAL TEMPLATE.
INTRODUCTION:- The project base point can be used to establish a reference for measuring distances and positioning objects in relation to the model. The project base point can be used to establish a reference for measuring distances and positioning objects in relation to the model.
PROCEDURE:-
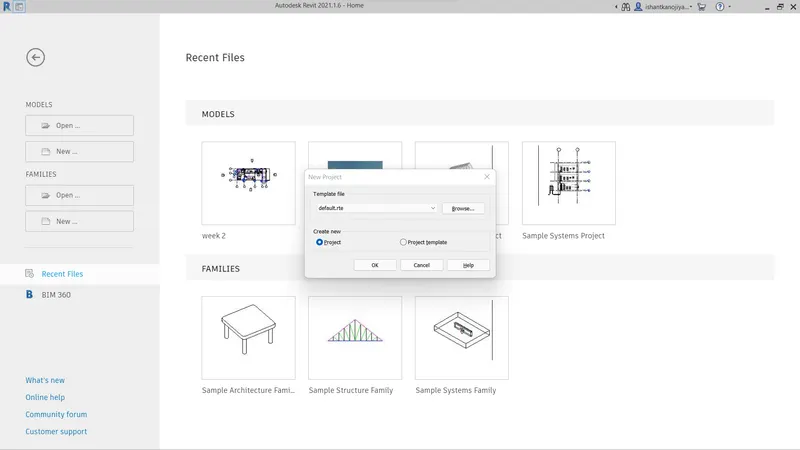
- OPEN NEW TEMPLATE > SELECT IMPERIAL ARCHITECTURAL TEMPLATE> PRESS OK (IN MY IMPERIAL ARCHITECTURAL TEMPLATE AS DEFAULT NAME)
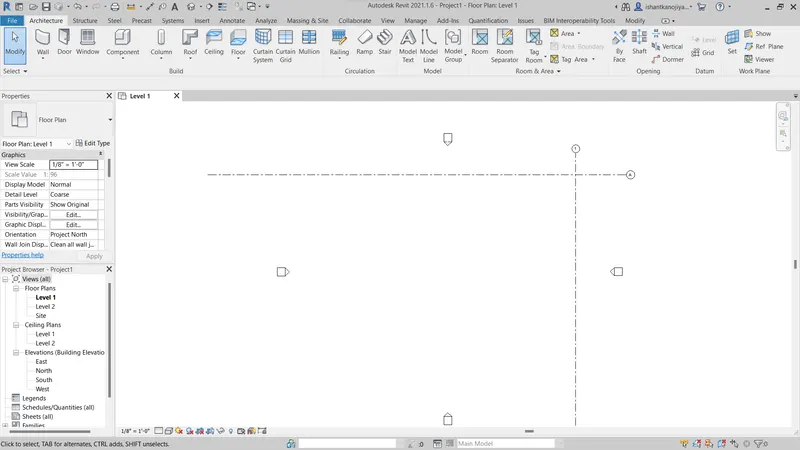
- SELECT GRID COMMAND > DRAG LEFT TO RIGHT AND GIVE NAME (A) >AGAIN DRAG CURSOR BOTTOM TO TOP AND GIVE NAME (1)> EXIT THE COMMAND
- GO TO MANAGE TTOL BAR >SELECT COORDINATE> SELECT SPECIFY COORDINATES AT POINT> SELECT GRID NAME A >GIVE COORDINATES 0'00" PRESS OK
- AGAIN SELECT GIRD NAME 1> GIVE COORDINATES 0'0" PRESS OK
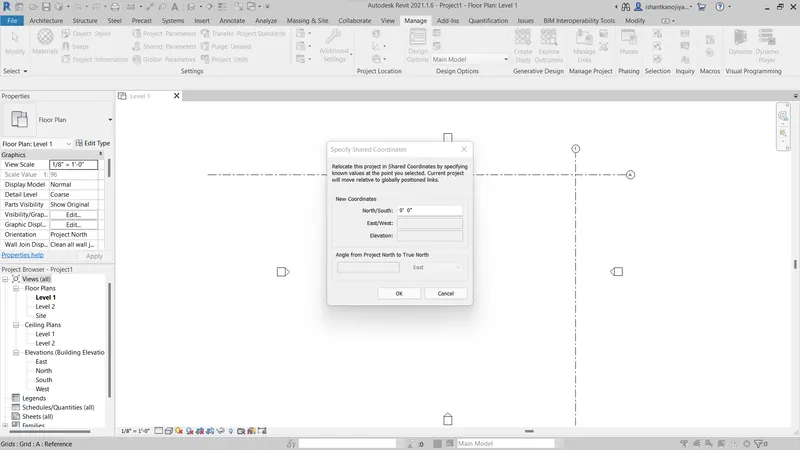
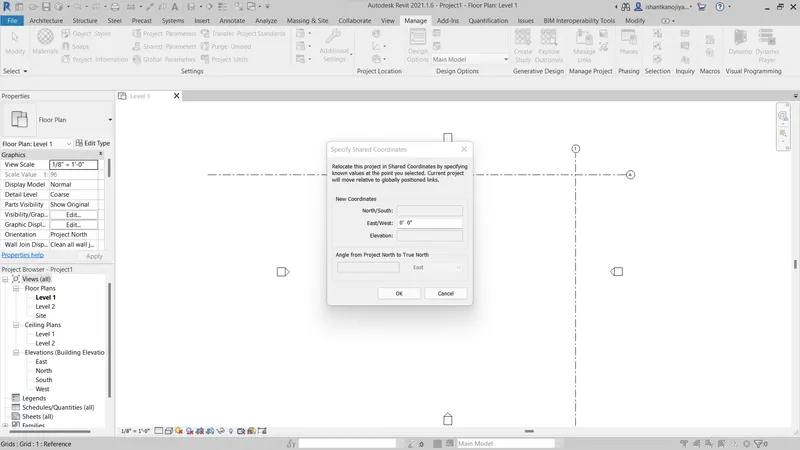
2) Open another new file but with a structural template. Using the manage tab set project parameters the same as the architectural model. Copy the parameters from the architectural model to the structural template or enter the parameters manually into the structural model
AIM:- TO CREATE A STRUCTURAL PROJECT SAME PARAMETER AS AN ARCHITECTURAL PROJECT.
PROCEDURE:-
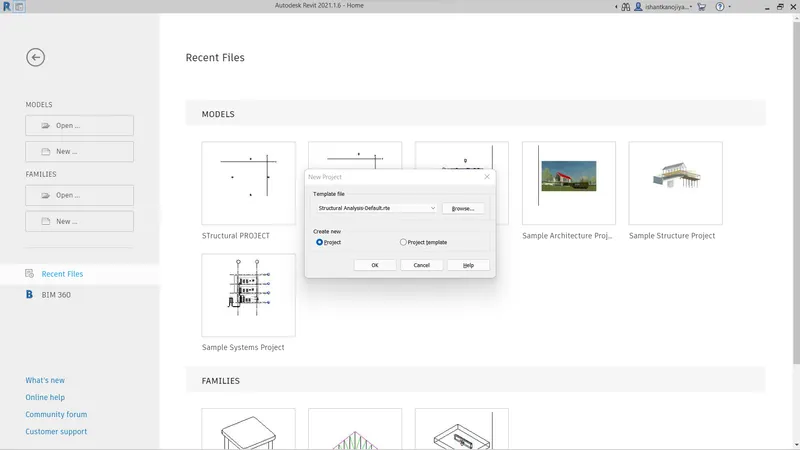
- SELECT NEW> SELECT IMPERIAL STRUCTURAL TEMPLATE >PRESS OK
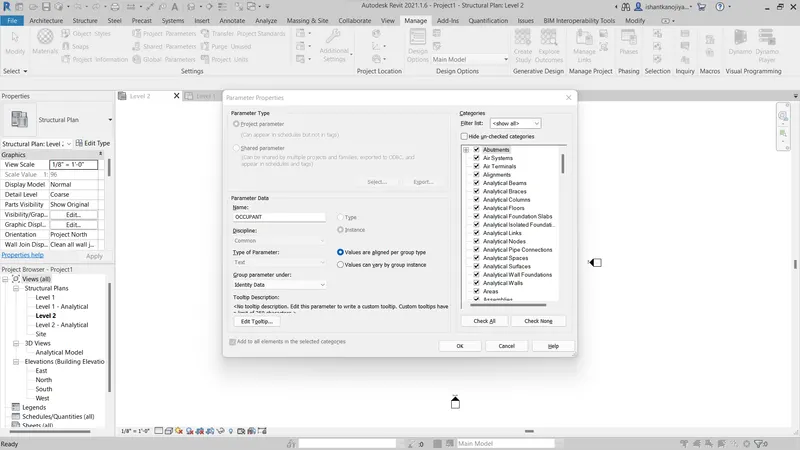
- SELECT THE SAME PARAMETERS AS THE ARCHITECTURAL PROJECT.
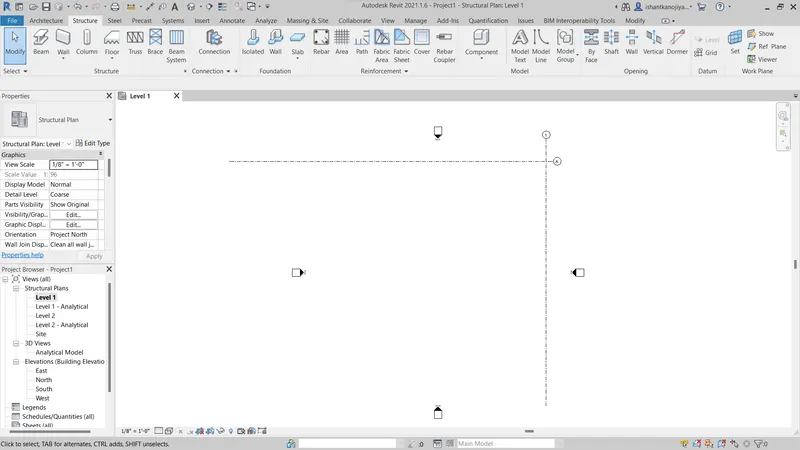
- SELECT STRUCTURAL GRID > DRAG LEFT TO RIGHT RENAME IT (A) > DRAG BOTTOM TO TOP RENAME IT (1)
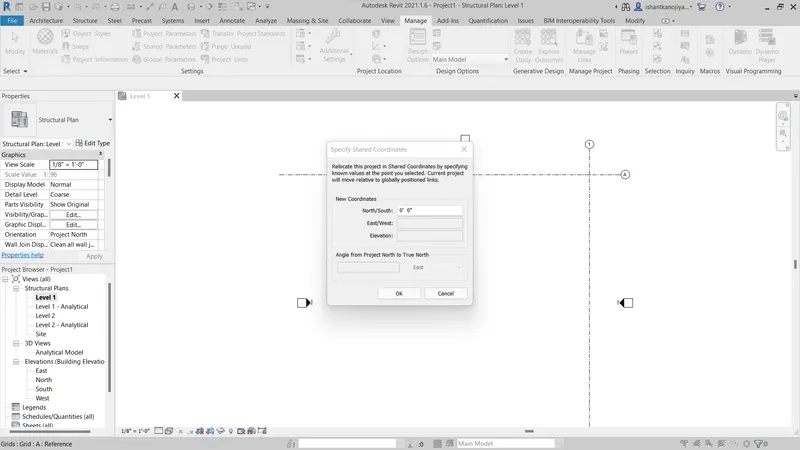
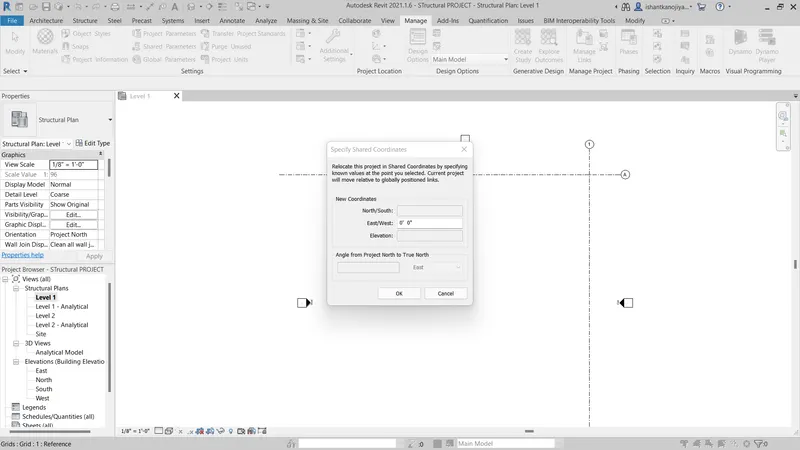
- GOTO MANAGE TOOLBAR >SELECT COORDINATES COMMAND>SELECT SPECIFY COORDINATES AT POINT >SELECT GRID LINES AND GIVE COORDINATES 0'0"
3) Re-open the architectural model. Using the tools under the Collaborate tab make the architectural model a central model (enabling simultaneous working on the model)
AIM:- TO CREATE AN ARCHITECTURAL MODEL AS A CENTRAL MODEL.
PROCEDURE:-
- OPEN ARCHITECTURAL PROJECT
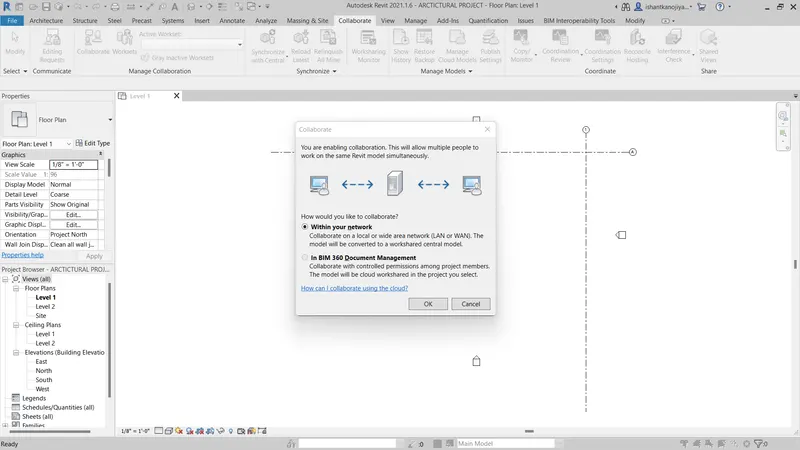
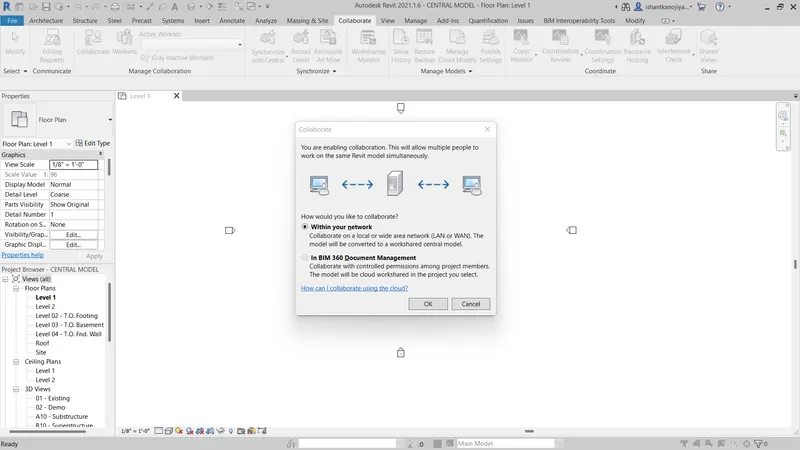
- GOTO COLLABORATE TAB > SELECT COLLABORATE> SELECT WITHIN YOUR NETWORK > PRESS OK
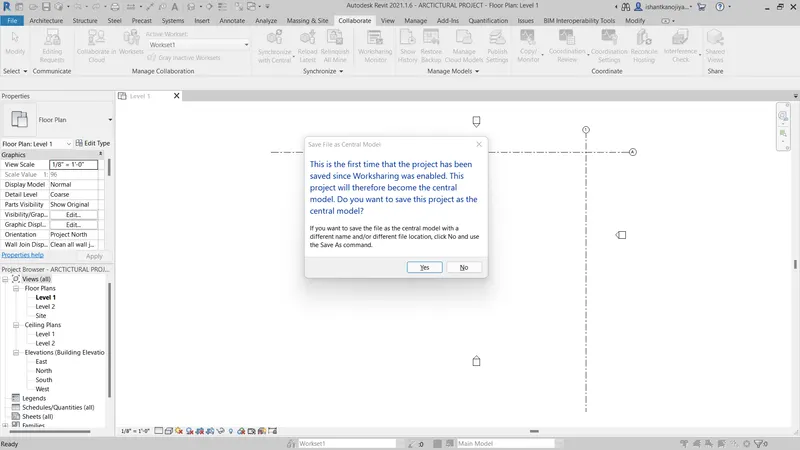
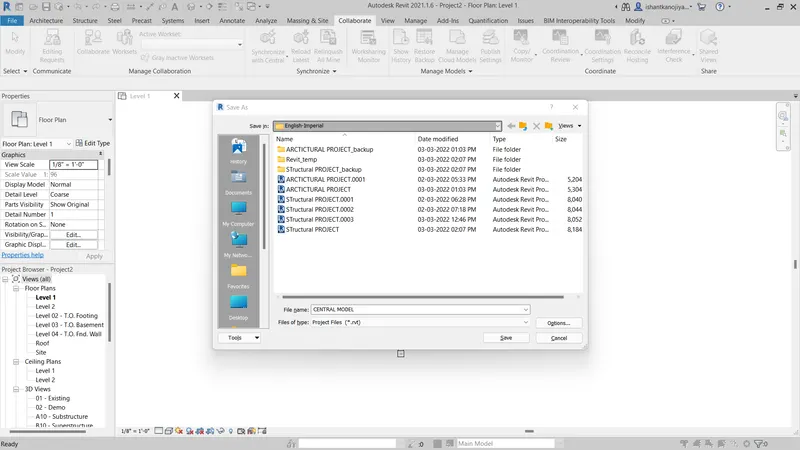
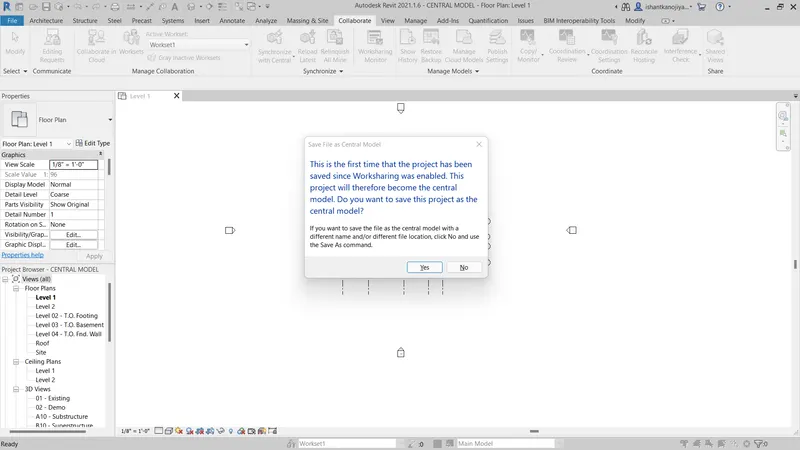
- SAVE AS CENTRAL MODEL BY SELECTING YES
4) Create the Grids Longitudinal and Transverse pattern for the project similar to the task done in Week 2.
AIM:- TO CREATE GRIDS LONGITUDINAL AND TRANSVERSE PATTER FOR PROJECT.
PROCEDURE:-
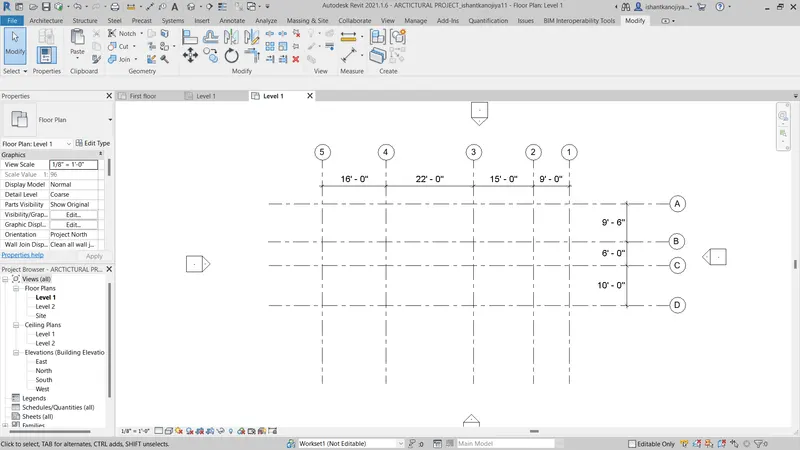
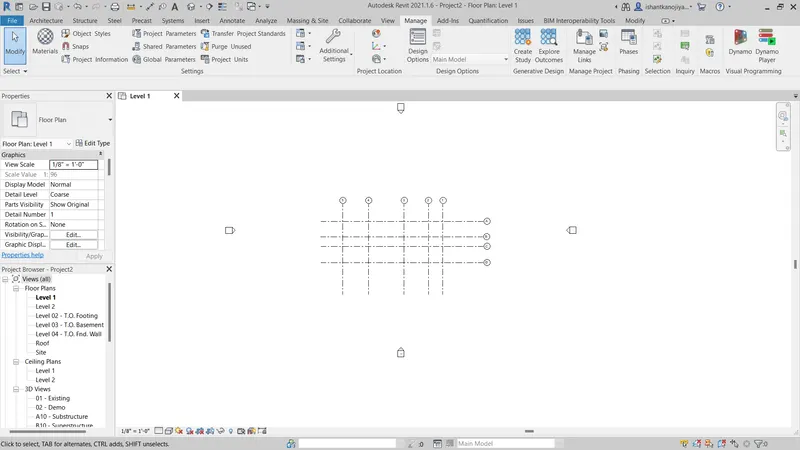
- GOTO ARCHITECTURAL PROJECT> GOTO ARCHITECTURAL GRIDS > DRAG THE CURSOR LEFT TO RIGHT AND RENAME (A,B,C,D)
- AGAIN DRAG CURSOR BOTTOM TO TOP AND RENAME (1,2,3,4,5)
- DISTANCE IS GIVEN IN THE PICTURE
RESULT
GRIDS HAVE BEEN CREATED AS PER THE WEEK 2 PROJECT.
5) Synchronize the changes from the local copy to the central file of the architectural model.
AIM:- TO SAVE THE CHANGES IN THE PROJECT AS A CENTRAL FILE.
INTRODUCTION:- IT IS VERY IMPORTANT TO SAVE CHANGE AS A CENTRAL PROJECT BECAUSE YOU DO NOT SAVE THE CENTRAL MODEL THE CHANGES IS NOT SHOWN TO OTHER TEAM MEMBER.
PROCEDURE:-
- GOTO COLLABORATE TOOL BAR> SELECT SYNCHRONIZE WITH CENTRAL >SELECT SYNCHRONIZE NOW
6) Open the structural model and use the collaboration tools to save the model as a central file.
AIM:- TO SAVE STRUCTURAL PROJECT AS CENTRAL FILE.
PROCEDURE:-
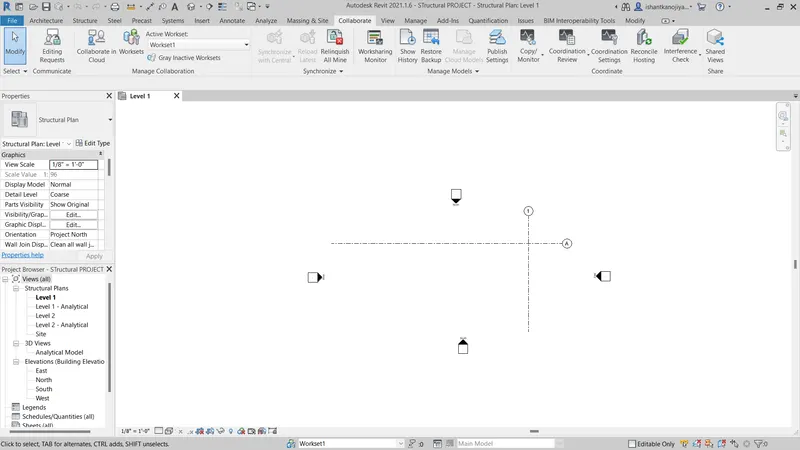
- GOTO STRUCTURAL PROJECT > GOTO COLLABORATE TOOLBAR >SELECT COLLABORATE TOOL >SELECT SAVE THE MODEL AND CONTINUE >SELECT WITHIN YOUR NETWORK >PRESS OK
7) Under the Collaborate tab, select the grids and levels from the architectural model, and using Copy Monitor try to copy the grids to the structural model. See what happens when the copy monitored grid is moved around in the structural model
AIM:- USING COPY MONITORED TOOL TO COPY GRIDS ONE MODEL ANOTHER MODEL.
PROCEDURE:-
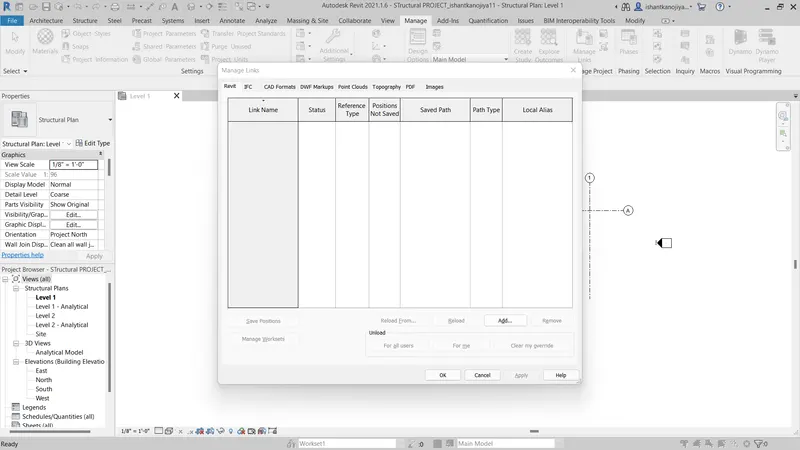
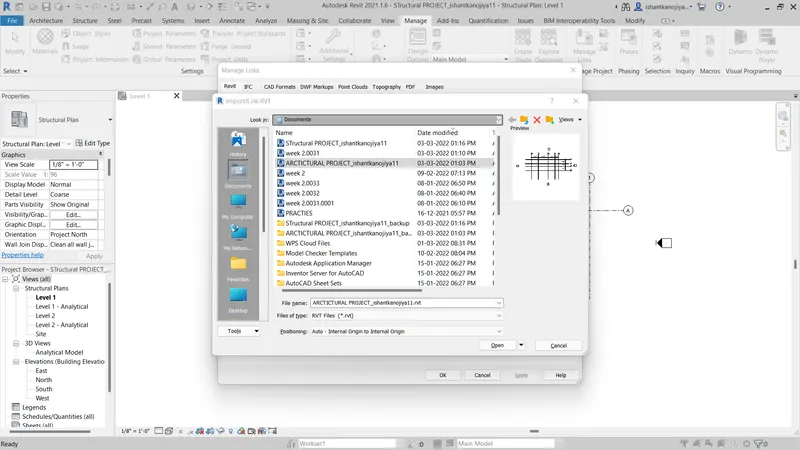
- GOTO MANAGER TOOL BAR> SELECT MANAGE LINKS > SELECT ADD LINK> SELECT ARCHITECTURAL PROJECT FILE> SELECT OPEN > PRESS OK
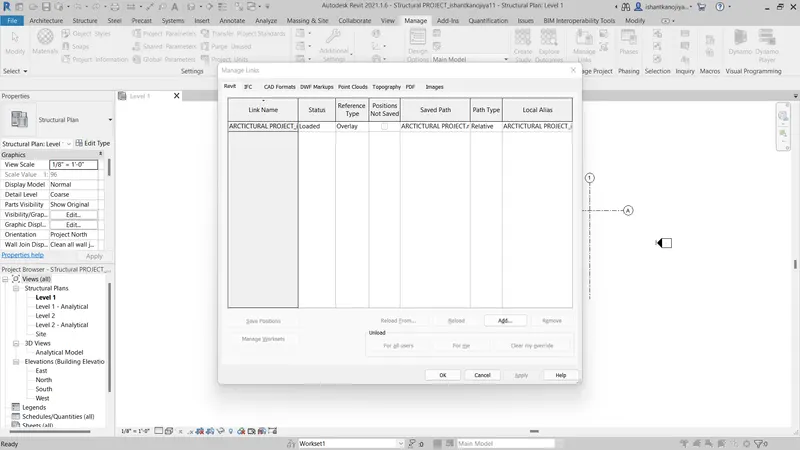
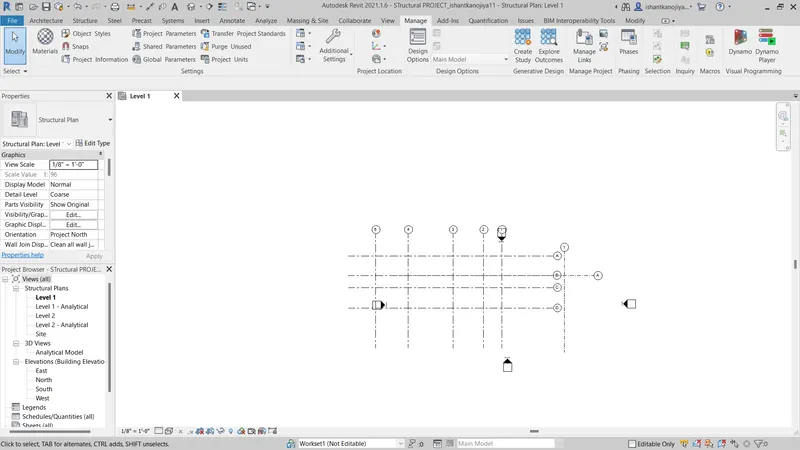
- SELECT COPY MONITOR TOOL> SELECT LEVEL AND GRIDS >PRESS OK
- ALL GRIDS AND LEVELS ARE COPIED IN THE STRUCTURAL MODEL.
- IN SELECTING TO COPY THE GRIDS ITS CONOR POINT OF ARCHITECTURAL AND STRUCTURAL MODEL TAKE SAME CONER POINT / SAME ORIGIN (AUTOMATIC I DO NOTHING)
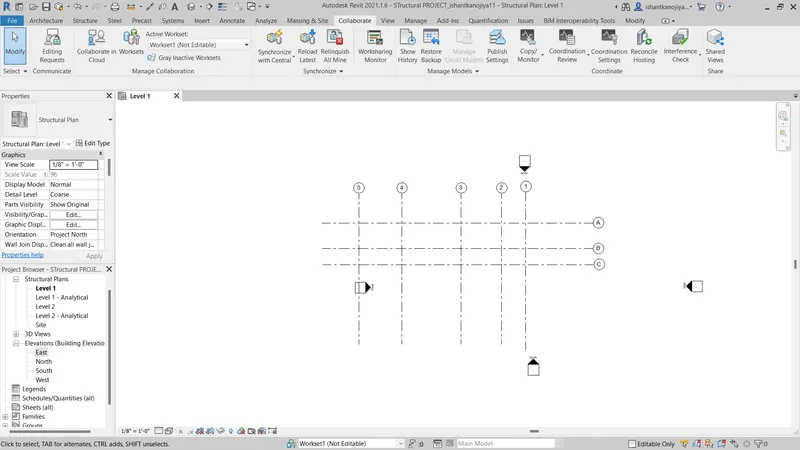
RESULT:-
IN COPYING DIRECTLY INTO STRUCTURAL MODEL CORNER POINT TAKE PLACE SAME POINT. IT SAVE TIME AND IS EASY I THINK.
8) Create another new file with a construction template. Save the new file as a central model. This file will include both architectural and structural models. Under the manage tab, Click manage links to link both architectural and structural files. Save the file and close all the files.
AIM:- TO CREATE A CENTRAL MODEL AS THE MAIN MODEL.
INTRODUCTION:- IN THIS CENTRAL MODEL BOTH ARCHITECTURAL AND STRUCTURAL MODELS COMBINE THEIR COMPONENTS. IF ONLY ONE MODEL IS CREATED AND SKETCHING BOTH ARCHITECTURAL AND STRUCTURAL COMPONENTS. THAT'S WHY WE CREATED A STRUCTURAL MODEL FOR THE STRUCTURAL COMPONENT AND AN ARCHITECTURAL MODEL FOR THE ARCHITECTURAL COMPONENTS AND COMBINED IT WITH A CENTRAL MODEL TO SHOW THE SKETCHING AND CHANGING IN THE PROJECT ( IT IS ALSO CALLED PRESENTATION MODEL)
PROCEDURE:-
- GOTO NEW MODEL> SELECT IMPERIAL CONSTRUCTION TEMPLATE> PRESS OK
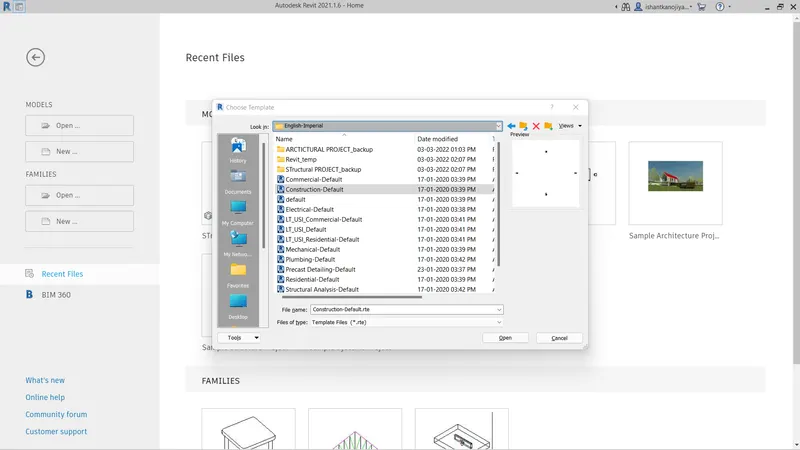
- GOTO MANAGE TOOL BAR> SELECT MANAGE LINKS> SELECT ADD> SELECT ARCHITECTURAL AND STRUCTURAL MODEL ONE BY ONE > PRESS O
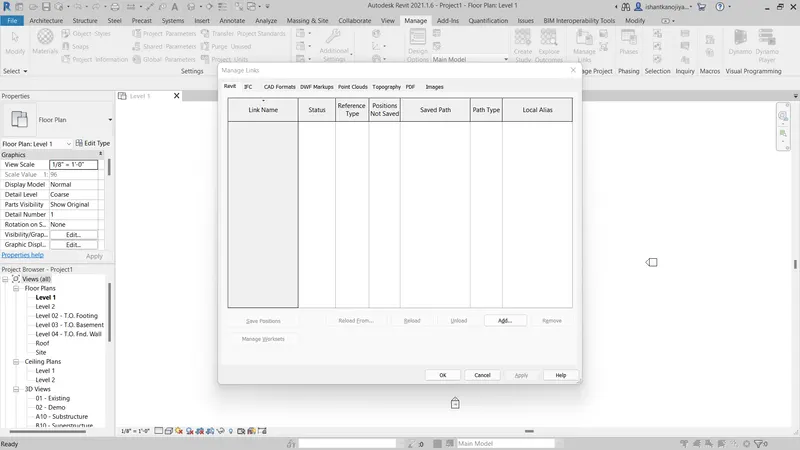
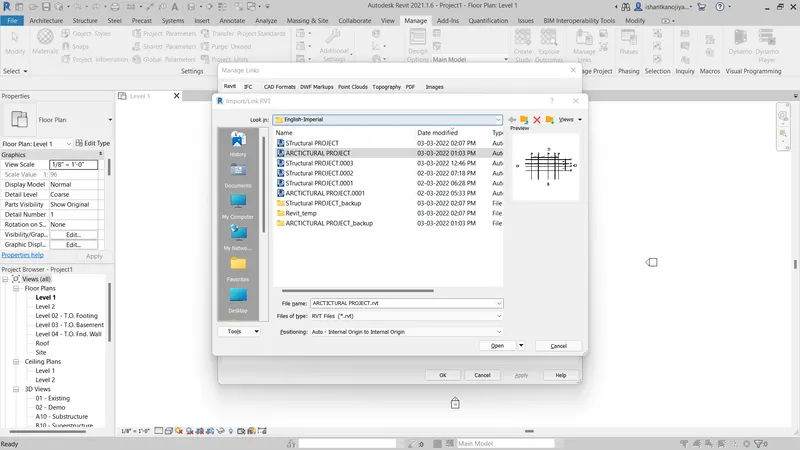
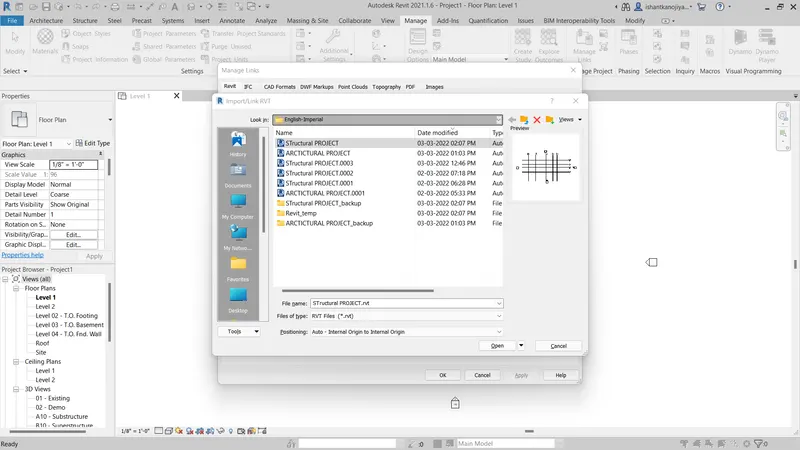
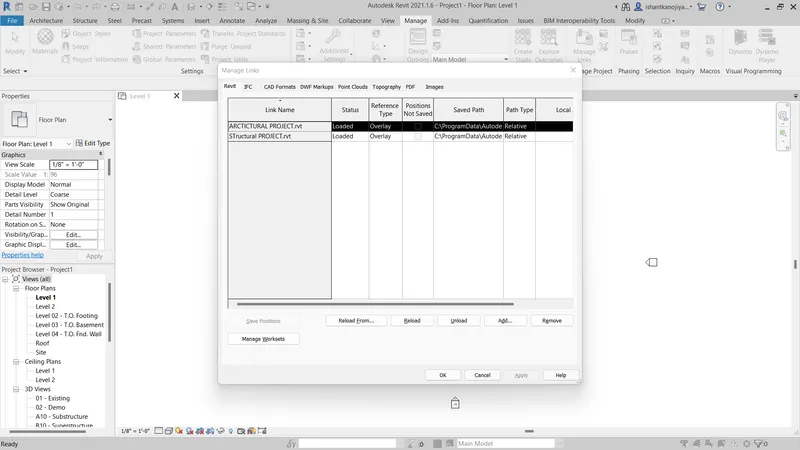
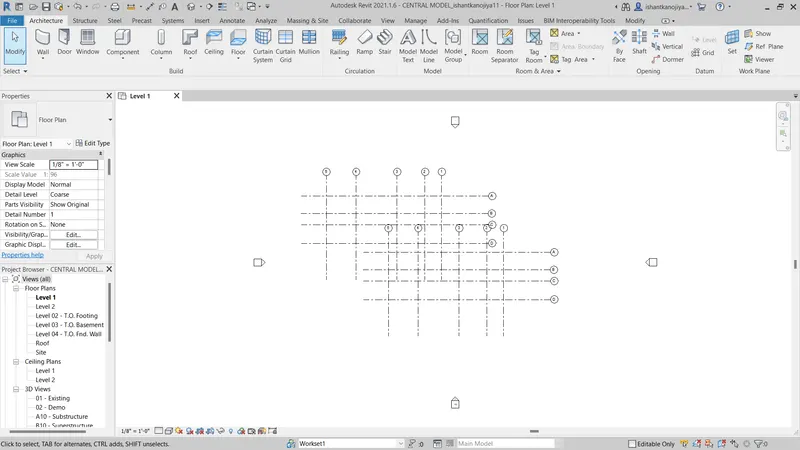
9) Are the grids from structural and architectural models matching in the construction template created? If yes the model is set up for project 2. If not work on the shared parameters and linking options under Manage links
( Hint: origin to origin, by shared coordinates or by project base point to base point ) to link the models in an appropriate manner
- NO STRUCTURAL AND ARCHITECTURAL GRIDS IS NOT IS SAME ORIGIN
- LINKED BY SHARED COORDINATES TOOL ORIGIN TO ORIGIN
RESULT:-
A CENTRAL MODEL IS CREATED
10) List a flow chart of a project tree set up in terms of Construction model, Architecture & Structure model, in this exercise and understand how many people can work on the same project using Revit simultaneously
FLOW CHART
| PROJECT | ||
| 1. ARCHITECTURAL MODEL | 2. STRUCTURAL MODEL | |
|
1.1 CREATING DOORS 1.2 CREATING WINDOWS 1.3 CREATING WALLS 1.4 CREATING STAIRCASE 1.5 ASSIGNING MATERIAL 1.6 CREATING OPENING |
2.1 CREATING 2.2 FOUNDATION 2.3 CREATING BEAMS 2.4 CREATING COLUMNS 2.5 CREATING PLINTH 2.6 BEAM 2.7 CREATE FLOORS 2.8 CREATE CEILINGS 2.9 CREATING STARICASE |
|
| CONSTRUCTION |
Use work-sharing to allow multiple users to work on different parts of one Revit project. Worksharing allows simultaneous access to a shared model through the use of a central model. Use work-sharing when you are working with a single model (one RVT file) that will have multiple team members working on it.