To mesh the sheet metal model using Mannual, Automatic mid mesh generation (Mid.Surf. Casting function) and Batch meshing in ANSA.
Aim:
To Mesh the given CAD Model using Mannual, Automatic mid-mesh generation (Mid.Surf. Casting function) and Batch meshing function in ANSA.
Objective:
Check for the Geometry clean-up (if required).
Take the mid surface for all the components after checking the geometrical errors.
The features in the model have to be captured properly with good mesh flow.
Assign the PID and thickness to the model surface.
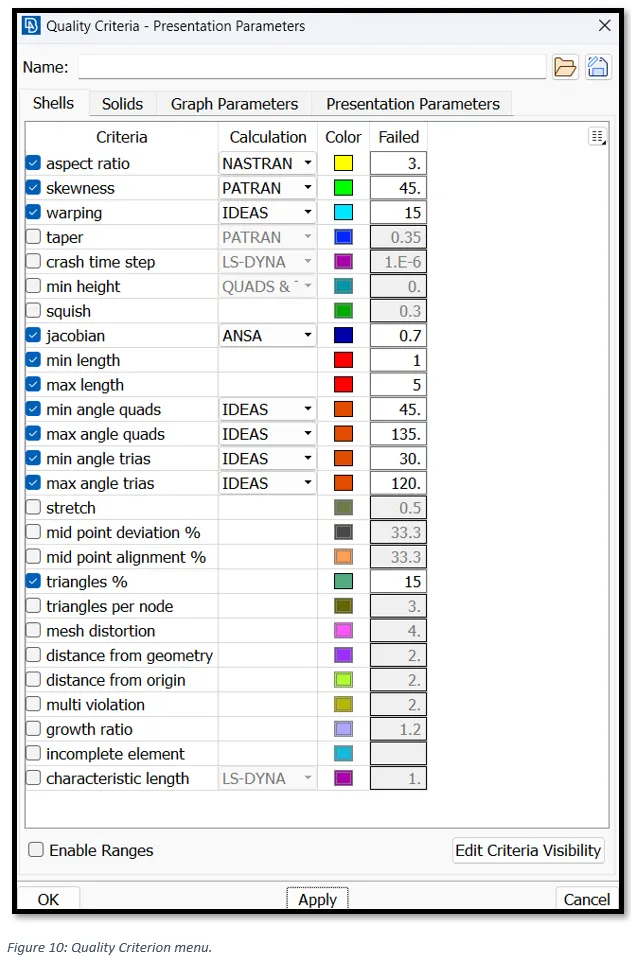
Mesh the mid surface with the given 2D element Quality criteria. (Refer the table Below for the Quality criteria).
|
S.No |
Quality Criteria |
Value |
|
1 |
Target/Average length |
3 |
|
2 |
Minimum Length |
1 |
|
3 |
Maximum Length |
5 |
|
4 |
Aspect |
3 |
|
5 |
Warpage |
15 |
|
6 |
Skewness |
45 |
|
7 |
Jacobian |
0.7 |
|
8 |
Minimum Quad Angle |
45 |
|
9 |
Maximum Quad Angle |
135 |
|
10 |
Minimum Tria Angle |
30 |
|
11 |
Maximum Tria Angle |
120 |
|
10 |
Tria Percentage |
15 |
There will be three cases to be done in this challenge.
Case 1:
Use Manual approach to take Mid surface, Use Manual meshing approach for 2D meshing
Case 2:
Use Automatic mid mesh generation (Mid.Surf. Casting function) for 2D Meshing.
Case 3:
Use Skin method for taking Mid surface and Batch meshing for 2D meshing
Note:
1. In all three cases. use the same model.
2. Make sure mesh flow should be proper, No OFF elements should be present and features should be captured properly.
3. Note down the time taken to finish each case. Compare and conclude which case is more effective to get proper mesh flow and feature capturing.
Introduction:
Meshing
Meshing (nodes and elements) is nothing but the discretization of a continuous system (a model or a geometrical shape) with infinite degrees of freedom to a finite degree of freedom.
A mesh is made up of nodes and elements. A Nodes are limited number of points where calculations are made. The entity joining nodes and forming a specific shape such as quadrilateral or triangular is known as an Element.
Manual Meshing
Manual meshing is a method of meshing any model (complicated/ simple). Its steps include Geometric clean-up of the model, extraction of the mid surface followed by clean-up of the mid surface and lastly meshing of the mid surface. We also need to ensure proper feature capturing, mesh flow and the mesh elements follow all the quality criterion.
Automatic Middle surface Mesh generation. The “MID.SURF.CASTING” function
This function generates FE surface mesh in the middle position of any model (even for the most complicated models with a lot of ribs and thickness variation). The resulting mesh consists of FE mesh only, while the initial geometry is kept.
Some of the advantages are:
- Fully automated process
- Function can be applied by specifying only a minimum thickness value
- Although it is recommended to use the function on clean geometry, it can be used in geometry with problems as well.
- Generated surface mesh id of a very good quality with user specified target element length and type.
- Thickness value is automatically applied on each element
- Time needed to improve areas is much less than to extract the middle surface and fix it manually.
Batch Meshing
Batch Mesh is a fully GUI driven tool available within ANSA, which performs automatic mesh generation on Geometry or FE through customizable meshing sessions.
The Batch Mesh Tool uses the terms, Scenario and Session.
A Batch Meshing Scenario is created in order to mesh one or more entities using a combination of mesh requirements and quality criteria. These entities are distributed in one or more Sessions.
The Sessions are pairs of Mesh Parameters and Quality Criteria specified by the user so that the generated mesh will comply with the desired mesh requirements.
For each separate Batch Meshing Session, the user has only to define (input/read) the following parameters:
Mesh Parameters: Includes mesh requirements rules (type of mesh, order etc.), perimeters handling settings, feature treatment (flanges, holes etc.) and quality improvement settings.
Quality Criteria: It contains all the quality requirements that the created mesh has to respect. It also provides the capability to define threshold ranges.
Basic Terminology:
In the TOPO menu the following entities appear:
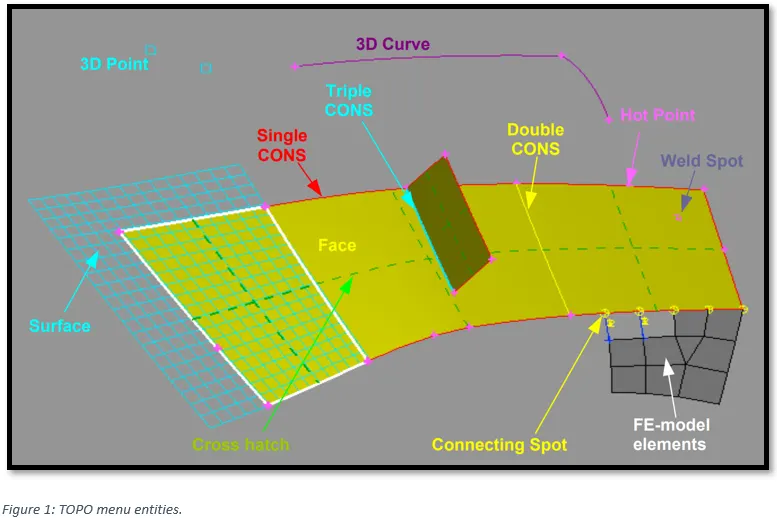
The Surface is the underlying mathematical CAD description of the Face where the actual mesh takes place. The CONS (Curves ON Surfaces) are the boundaries of the Faces. According to their connectivity, they are coloured in Red (single edge), Yellow (double connectivity) or Cyan (triple -or more- connectivity). The Hot Points are the end points of CONS. 3D Curves are curves in space that are used for CAD constructions, but they are not connected to the Faces. 3D Points are also used for geometrical constructions.
Correspondingly, in the MESH and DECK menus:
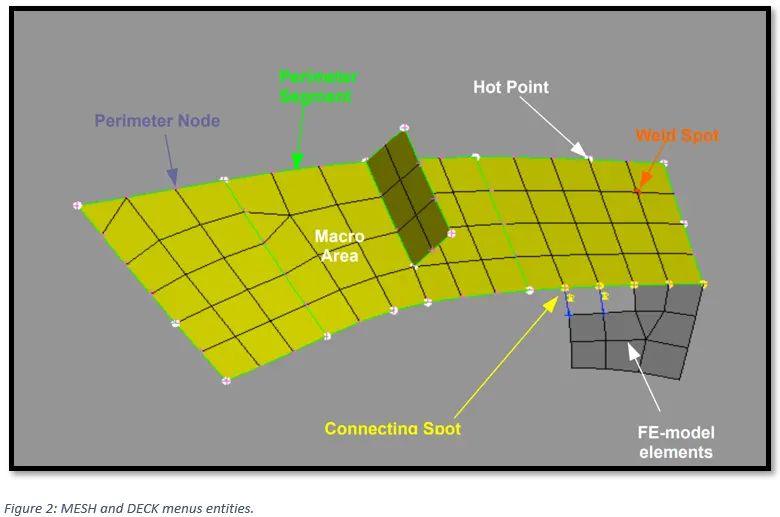
A Macro Area may consist of one or more joined Faces. The Perimeters are the boundaries of the Macro Areas. The Hot Points are the end points of the Perimeters. FE-model mesh is a mesh that is not associated to geometry (dead-mesh). Finally, a yellow Connecting Spot indicates connectivity of a Macro area with FE-model mesh.
Procedure:
1) Importing the CAD model.
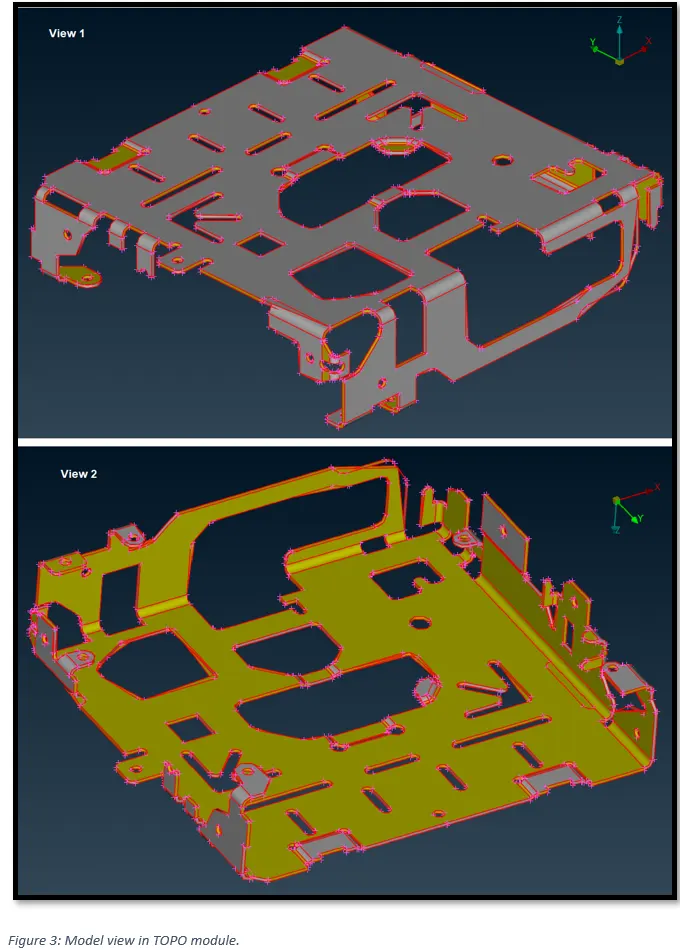
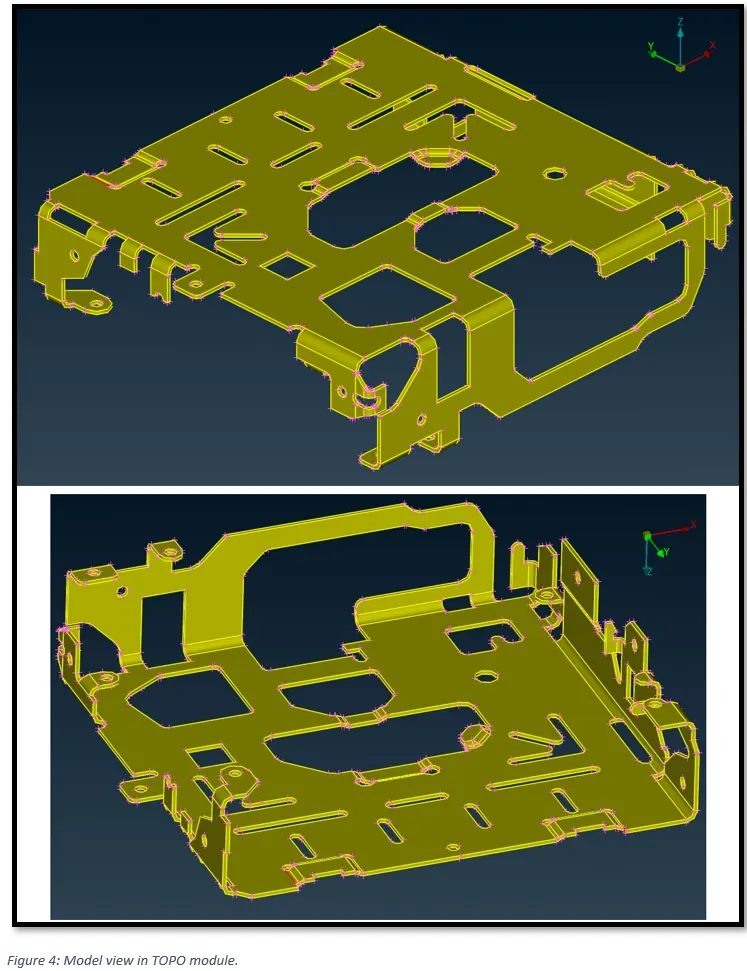
From Figure 3, it can be observed that there are, Single cones (Red Lines) i.e., edges shared with only single surface. OR, the models’ surfaces are not connected. The edges are connected by performing Topo action. As shown in Figure 4.
2) Geometric Clean Up of the CAD Model.
2.1) CONES in the geometry
From figure 4, it can be observed that there are Double cones (Yellow Lines) i.e., edges shared with two surfaces.
2.2) Checking the Geometry.
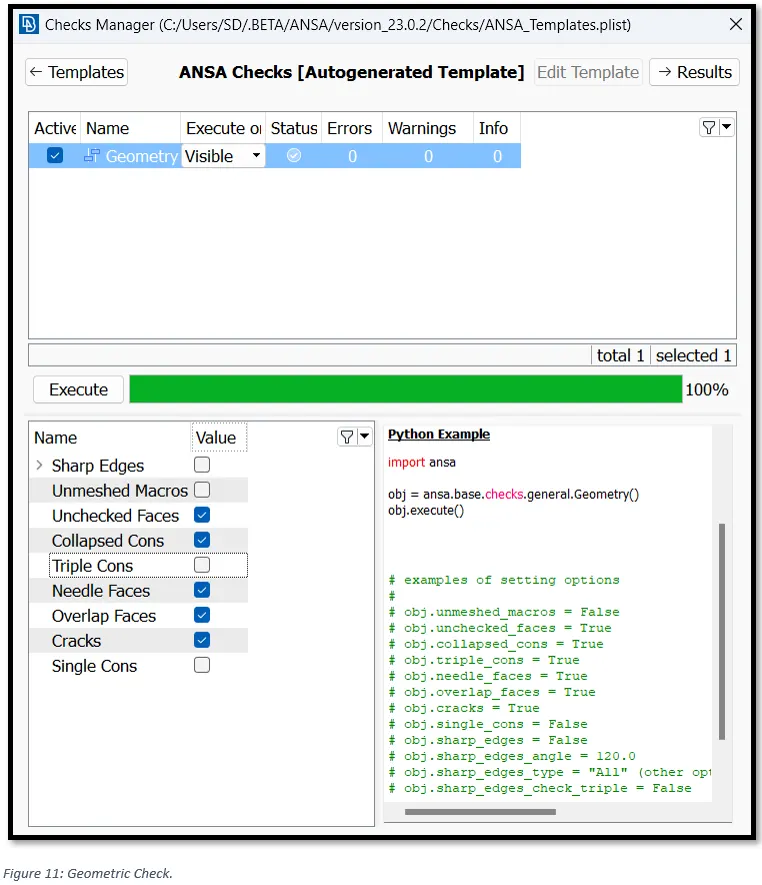
To identify and isolate on the screen the problematic areas that require the user’s attention, checks manager is used.
In the toolbar on the top of the screen, go to, Checks -> Geometry.
This will open ‘Checks Manager’ window.
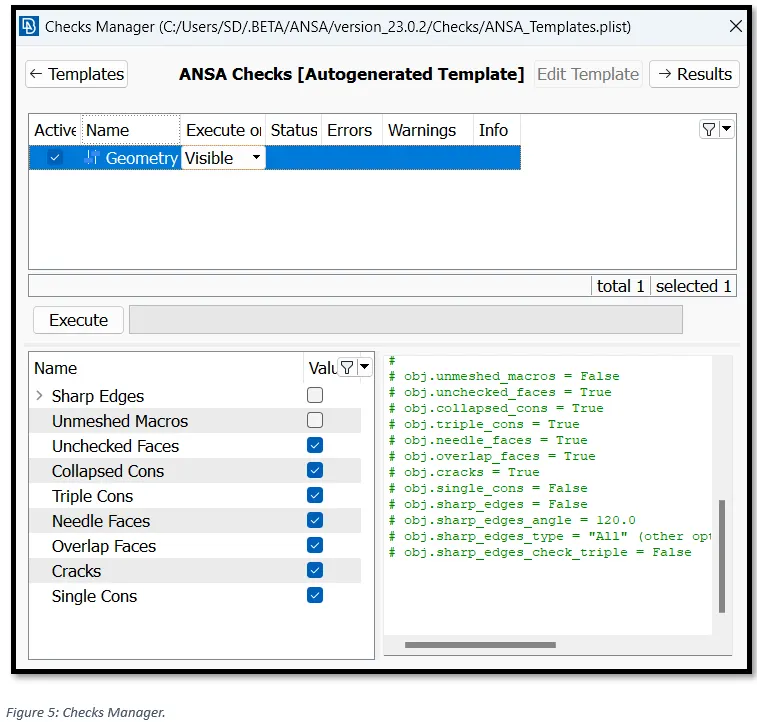
Here we can select the type of problems that may exist in the geometry of the model to be investigated by activating the corresponding flag in the lower part of the window. Keep the default options and click Execute.
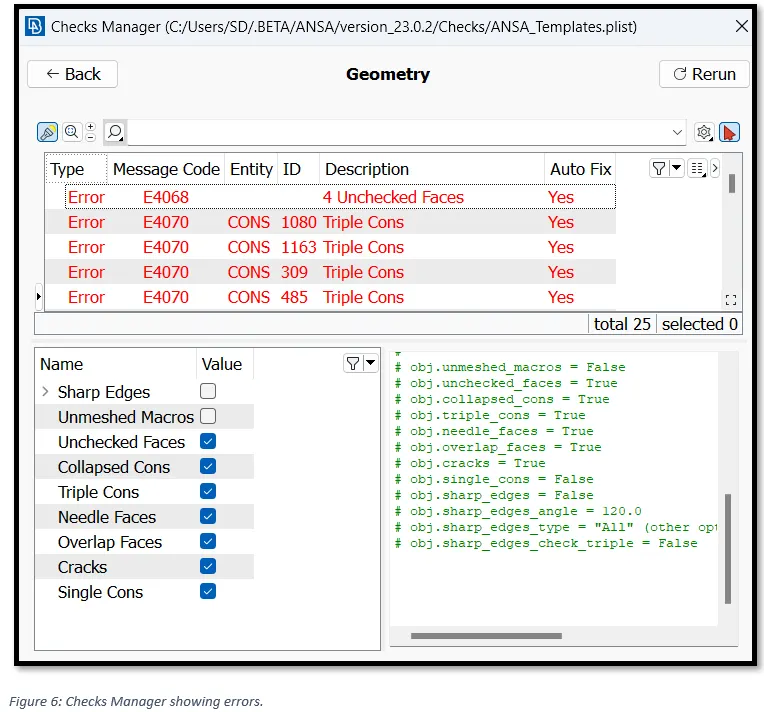
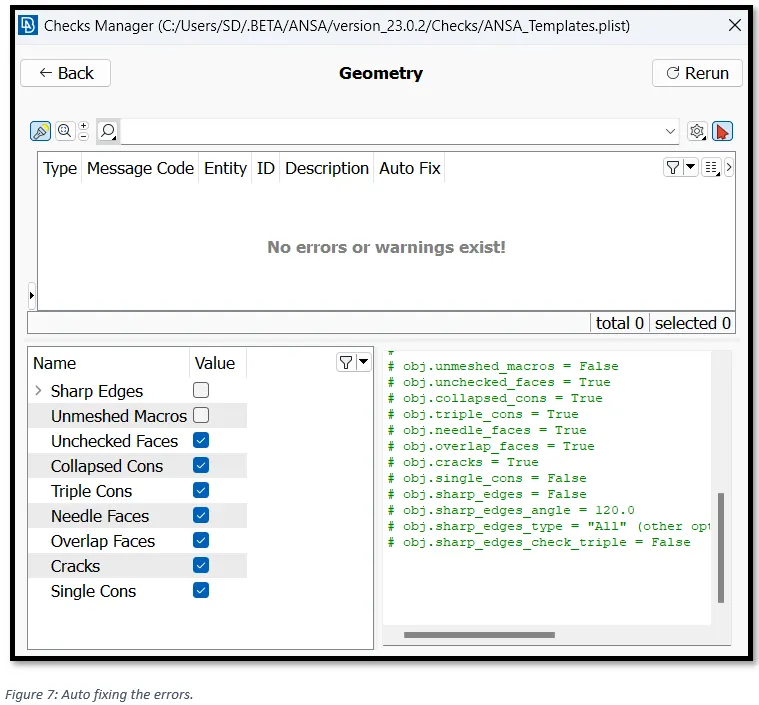
ANSA identifies 25 errors in the geometry of the model. To auto fix the errors select all the errors, right click and click on fix. This will resolve some or all of the errors.
3) Case:1; Use Manual approach to take Mid surface, Use Manual meshing approach for 2D meshing.
3.1) Extracting mid surface.
To extract mid surface manually, we will use off-set command.
Go to, Faces -> off-set, in Topo module. Select the inner surface, put the off-set value as 0.5 and click on ok.
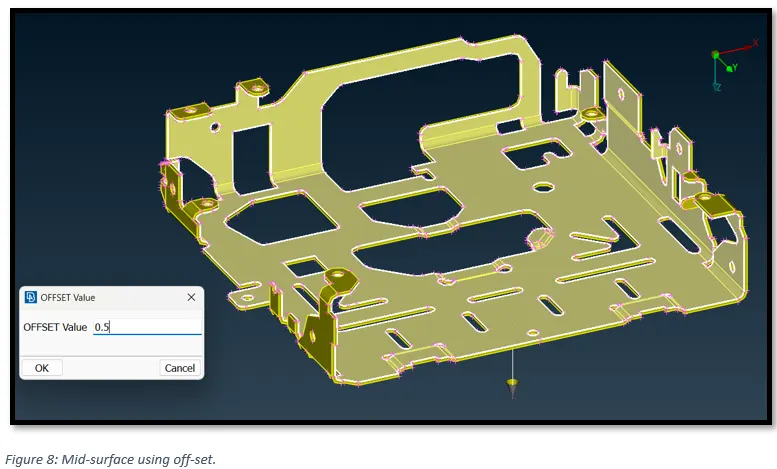
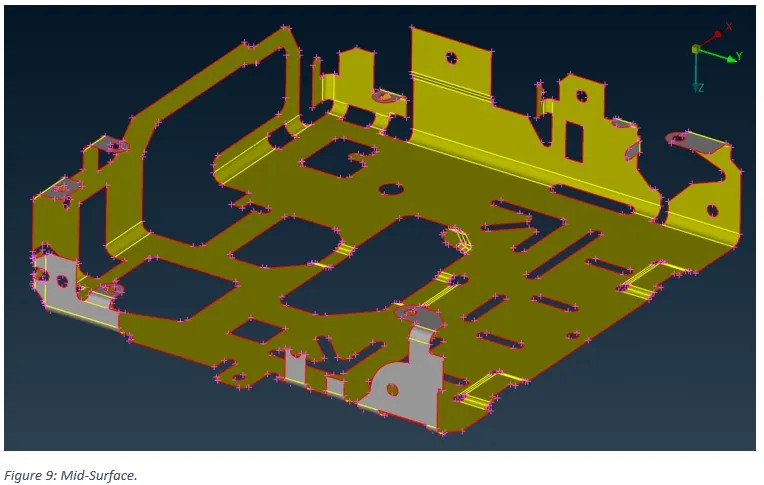
Figure 9, it can be observed that there are, Single cones (Red Lines) i.e., edges shared with only single surface.
3.2) Geometric Clean Up of the Mid-Surface.
Now, again checking the problematic areas in the geometry using Checks manager. As shown in Figure: 11, there are no geometrical issues.
3.3) Setting up Quality Criterion.
In order to avoid deviation from the quality after meshing, we need set up quality ranges. In Utilities tab, select ‘Quality criterion’.
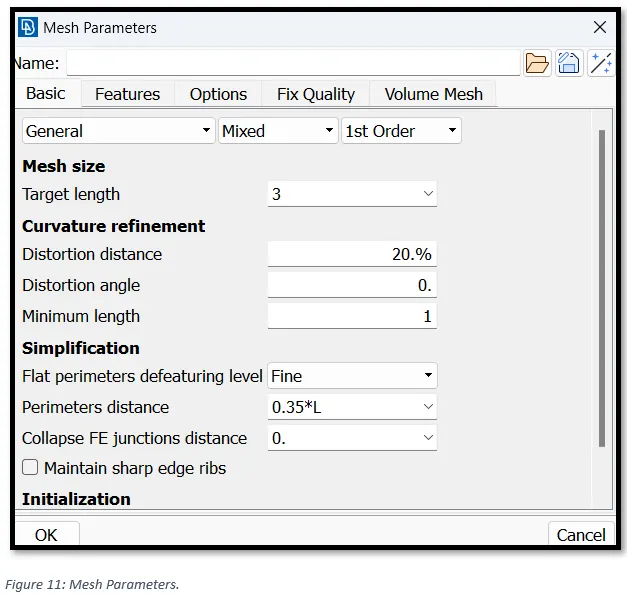
Setting up mesh parameters. In Utilities tab, select ‘Mesh parameters.
3.4) Assigning mesh element length.
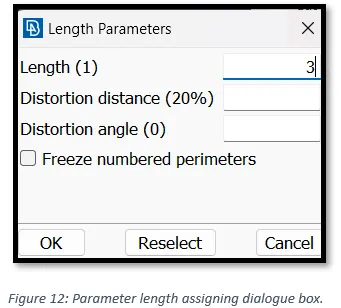
In the Mesh menu, go to, Perimeters -> Length -> Box select the model -> set Perimeter length as 3.
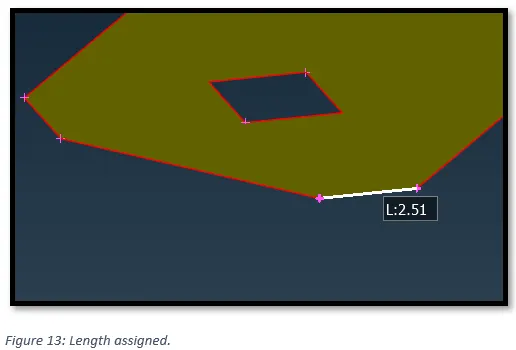
Inspecting the model area by area, to check if the perimeter length is matching our mesh length requirement.
3.5) Meshing.
To mesh the Model area by area, switch to the mesh module, then go to, Mesh Generation -> Best. In the ‘Feature section, select “Macro Area”. Now one by one click on the areas to mesh.
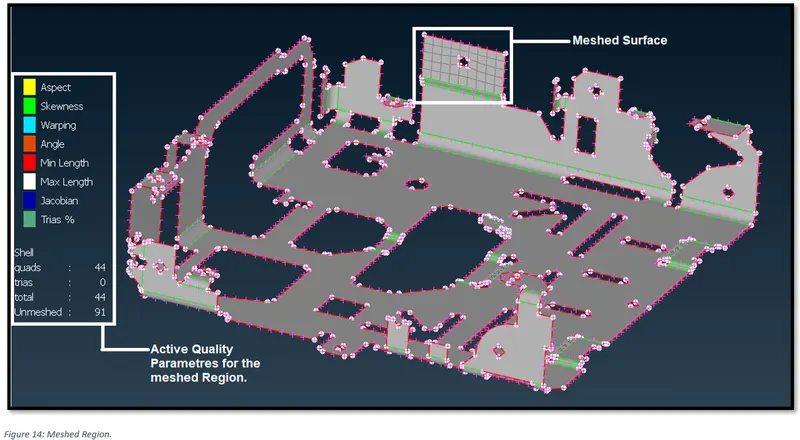
Following rules for should be kept in mind to obtain a good mesh:
- Features should be captured properly.
- Proper Tria Management, i.e., Tria should no touch each other, There should be no opposite trias, Trias near edges and free edges should be avoided.
- Proper Mesh Flow.
- Check if there is any dysconnectivity in the mesh.
- Quality Criteria should be satisfied.
3.6) Ensuring Quality criteria and Mesh flow.
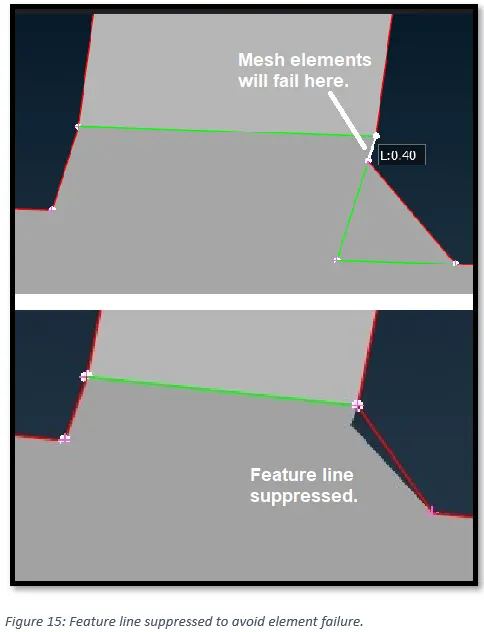
In some areas we may encounter that the feature lines are very close to each other. Since our min length quality criteria is 1, elements forming in between feature line separated by a distance less than 1 will fail. To avoid this, we may suppress one of the feature lines, keeping in mind there is no major change in the geometry. Or we may also move the nodes by a small fraction to increase the edge length of the element.
To suppress the feature lines, Activate, Mesh -> Macros -> cut -> Right click a feature line to supress.
To move the node, Activate, Mesh -> Grids -> Move -> Free -> Right click on the node to be moved to show axis then left click to reselect and move.
To keep the mesh flow, we can always rearrange the mesh by using:
- “Reconstruct” command from the mesh module.
- “Split” or “Collapse” command or the combination of both to join two opposite trias or drag the trias to the edge to eliminate it.
- By making cut lines and meshing area by area.
- Rearranging feature lines.
The final meshed model is as shown below:
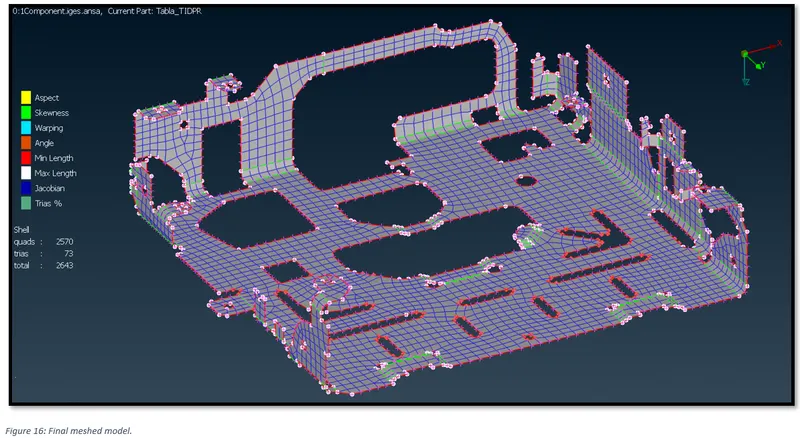
3.7) Assigning thickness.
To assign thickness, put T = 1 in the property card.
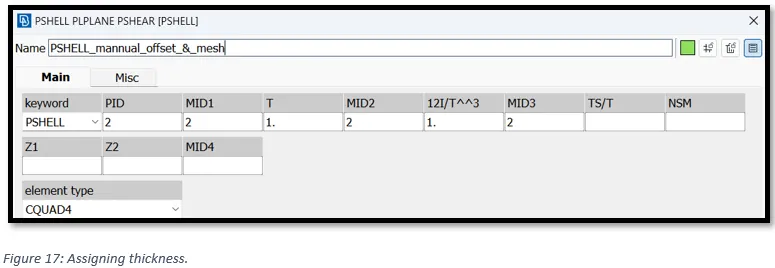
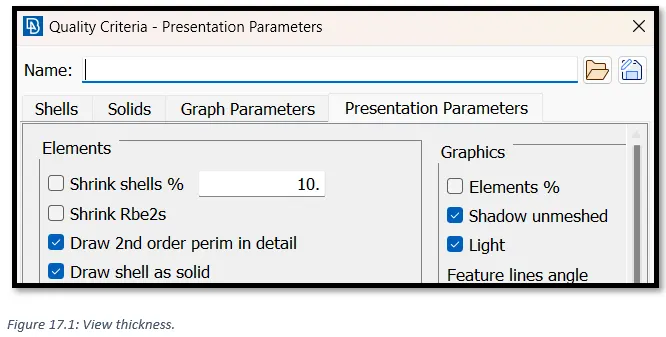
Now, to view the thickness, go to, -> Quality criteria -> Presentation parameters -> check ‘Draw shell as solid’.
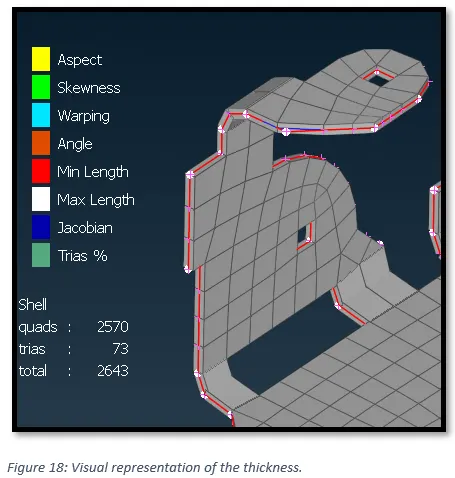
After ensuring no elemental failure as per our quality criteria, the final mesh is as shown below.
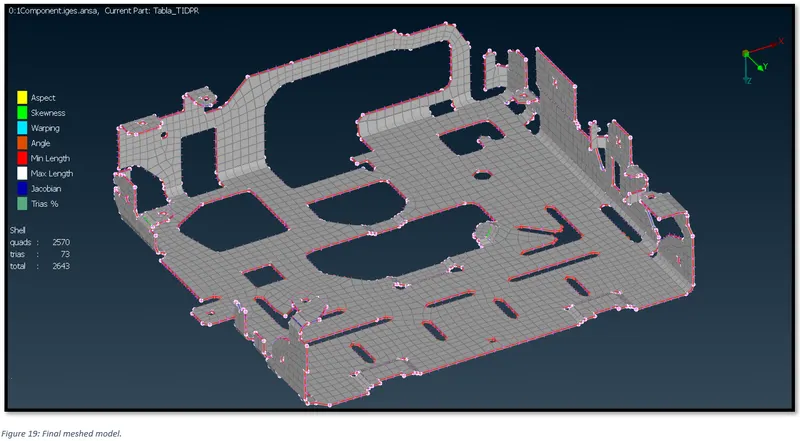
Time taken to complete the mesh = 4 hrs.
4) Case:2; Use Automatic mid mesh generation (Mid.Surf. Casting function) to take Mid surface and 2D Meshing.
4.1) Setting up Quality Criterion.
The Quality criterion could be organised in the same way as Case 1.
4.2) Generating mid mesh using “Casting”.
Casting option in ANSA is used to generate a middle-mesh directly from the parent geometry.
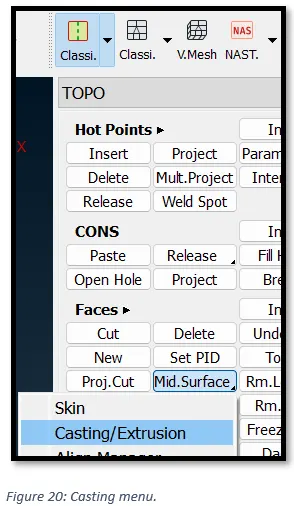
To use casting, go to, Topo -> Faces -> Mid surface -> Casting. This will open “Automatic middle mesh generator” as shown in Figure 21.
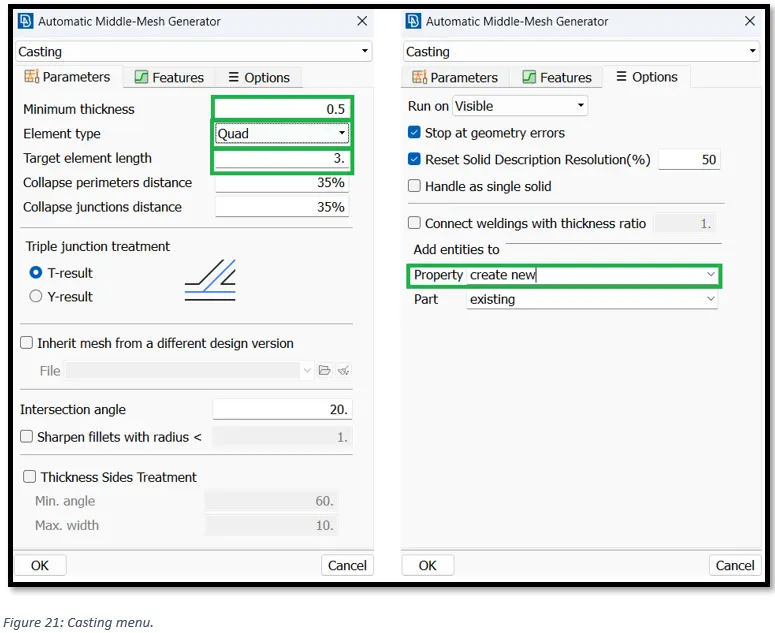
After inputting appropreiate values in the “Automatic middle mesh generator” as shown in figure 21, click on ok.
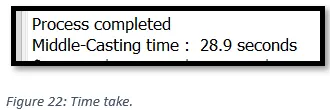
The time taken to generate the midmesh is 28.9sec
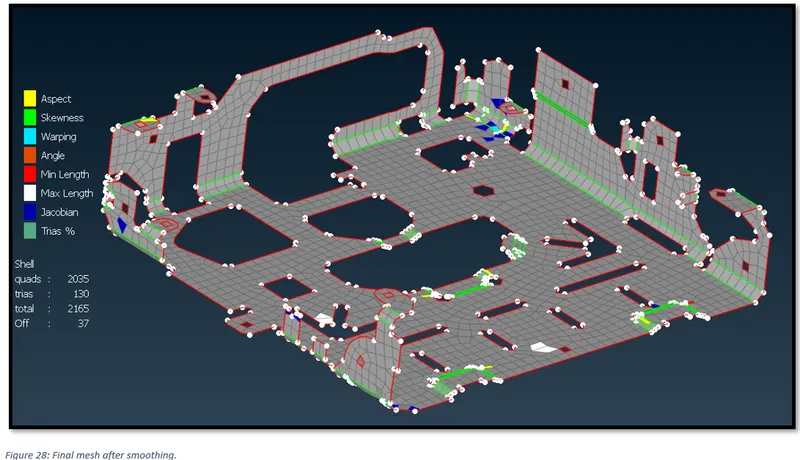
The middle mesh generated is as shown below.
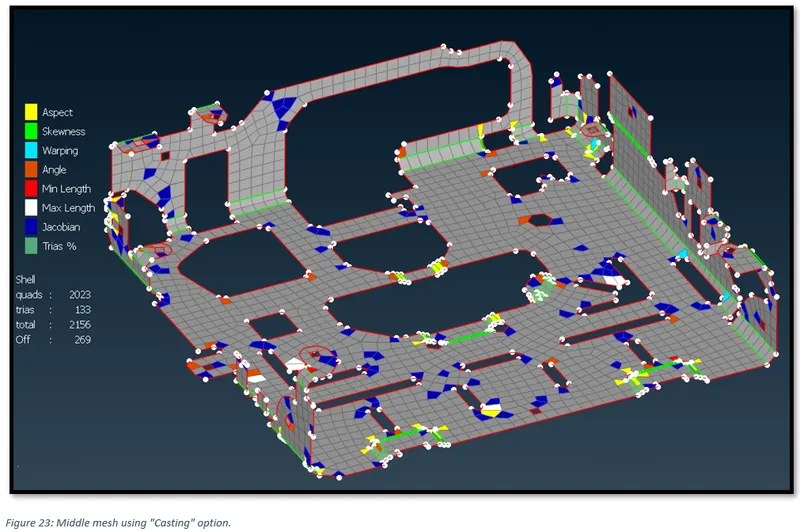
Not only the middle mesh has a lot of failed elements (269 in this case) but there are also some glitches in the mid mesh itself which are shown below.
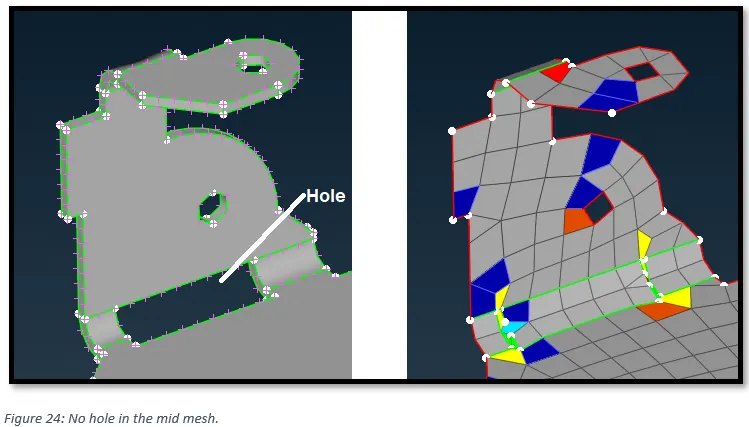
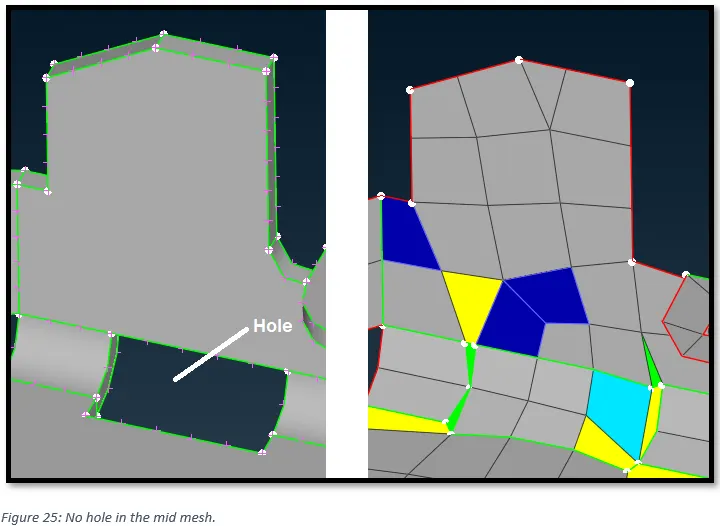
Figure 23 and 24, shows that the “Automatic middle mesh generator “did not account for the hole in the geometry.
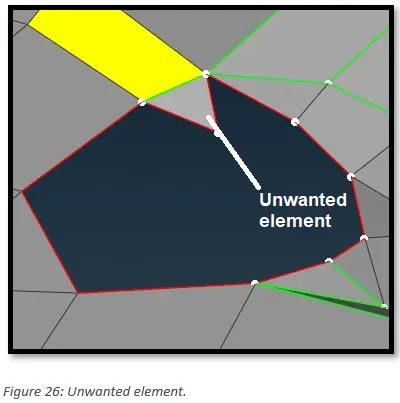
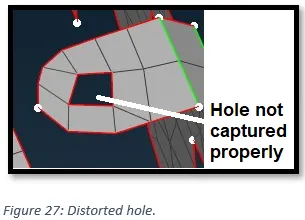
Figure 26, shows that the “Automatic middle mesh generator “also created an extra element and Figure 27, shows distorted hole, resulting in poor feature capturing.
5) Case:3; Use Skin method for taking Mid surface and Batch meshing for 2D meshing.
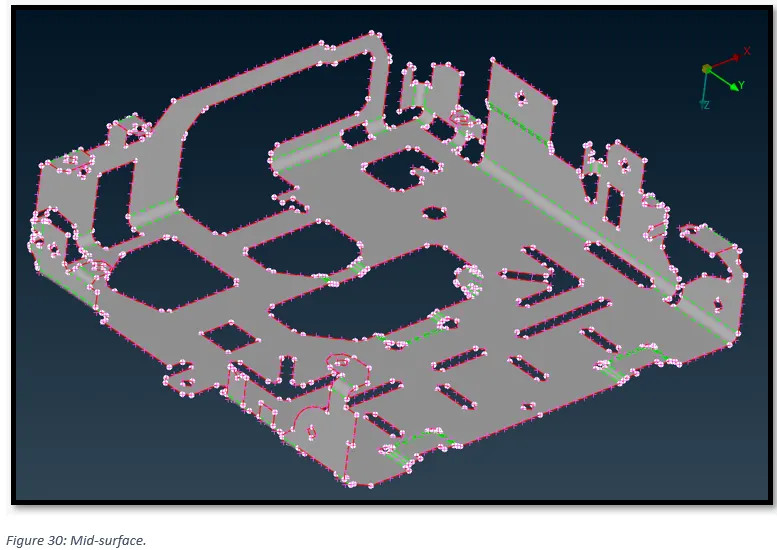
5.1) Extracting mid-surface.
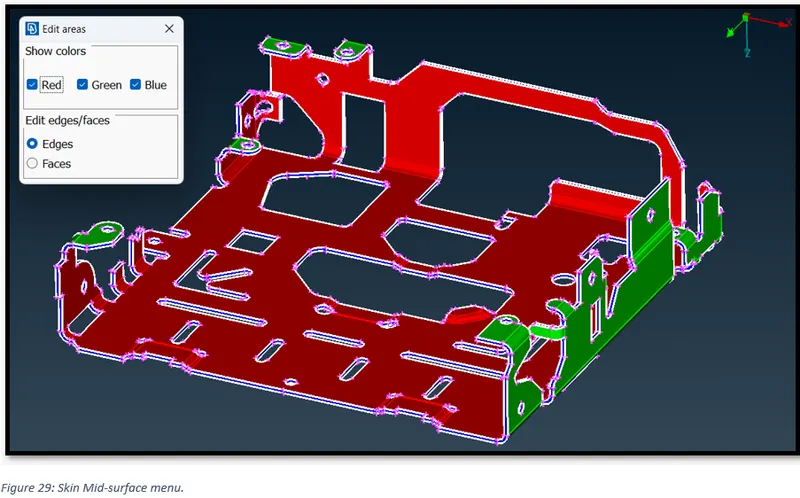
To extract the mid-surface using “Skin” method, go to, Topo -> Faces -> Mid surface -> skin. The select the red/green/blue faces and click accept the input details.
5.2) Setting up Quality Criterion.
The Quality criterion could be organised in the same way as Case 1.
5.3) Set up of Batch Meshing scenario.
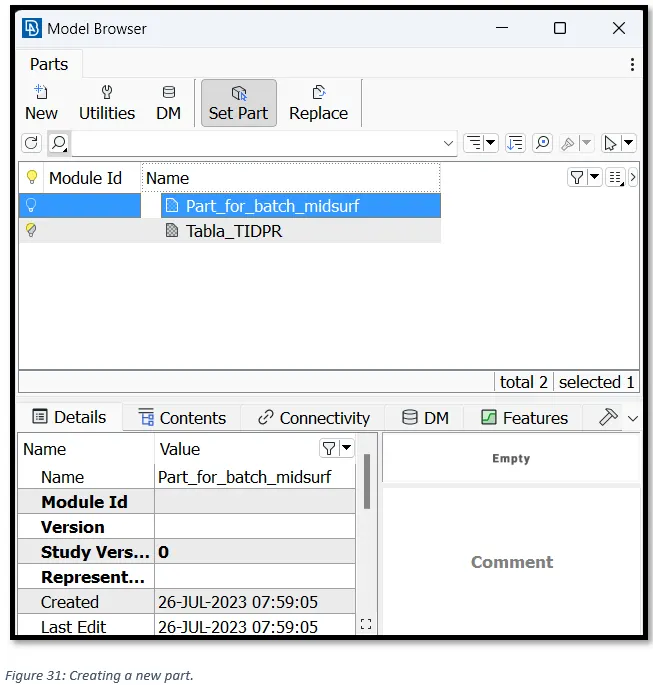
Go to the model browser to create a new part, by right clicking on the screen -> new -> part. Then select the mid surface created via mid surface skin option. Rename the part as “Part_for_batch_midsurf”.
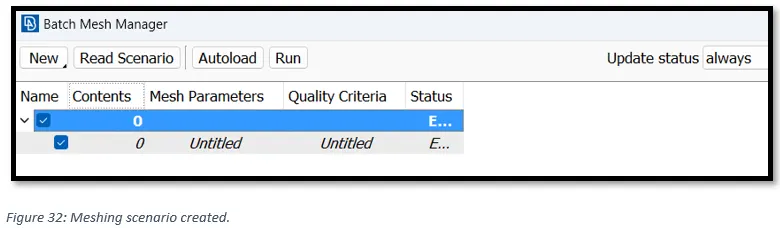
From the “Tools” menu open “Batch Mesh Manager”. Then click on New -> meshing scenario.
Meshing scenario is a general scenario to create surface mesh for all analysis types.
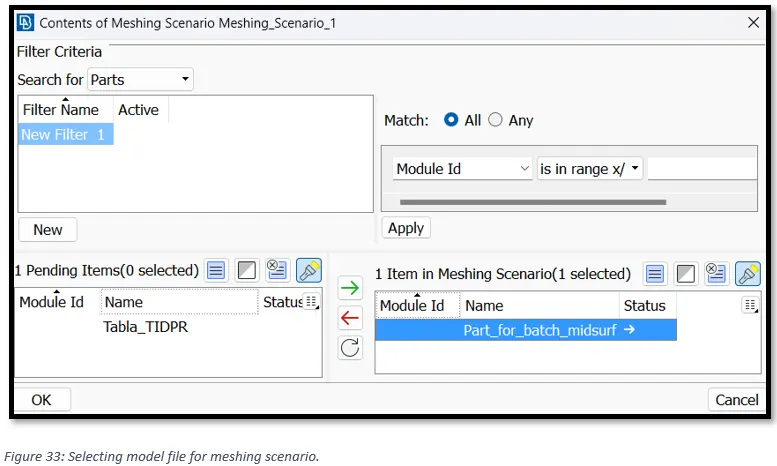
Select the content of the Meshing scenario. Select required the part or property and add them to the Meshing scenario (Select newly created modal file “Part_for_batch_midsurf”).
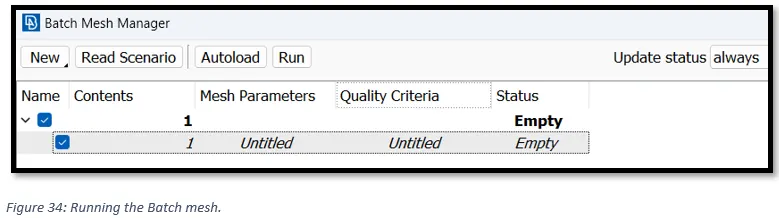
We can click on “Mesh Parameters” and “Quality Criterion” to check input “Mesh Parameters” and “Quality Criterion”.
Click on run. This will run the Batch mesh as per our quality criterion and target element size.
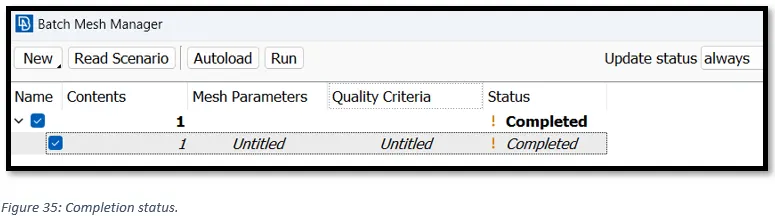
In order to see the statistics, after Batch Mesh is over, double click on the term (Completed) that appears in the Status column of the Batch Mesh Manager. The report of the Scenario appears showing the status of each part.
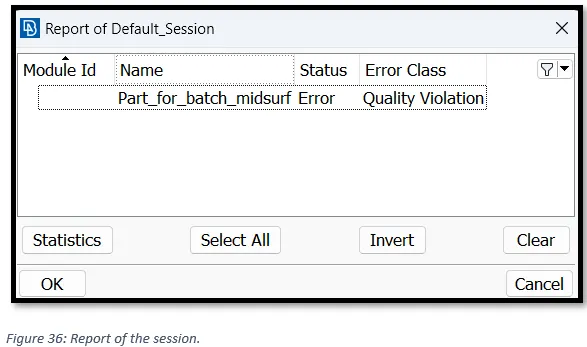
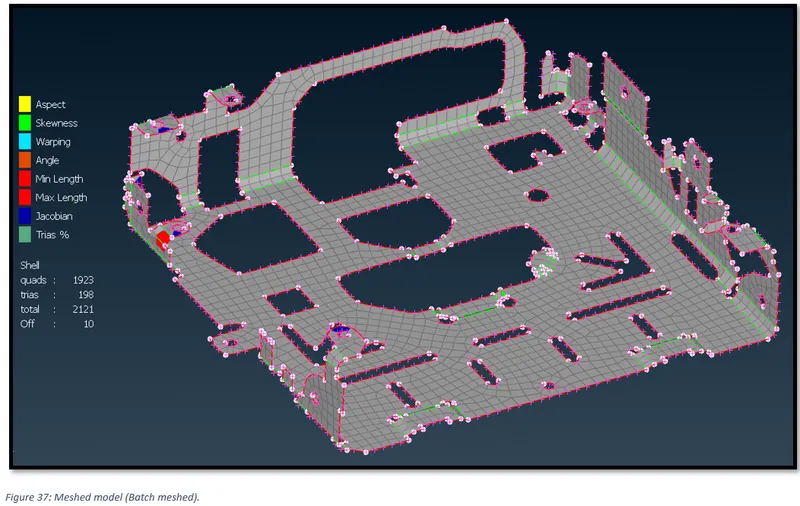
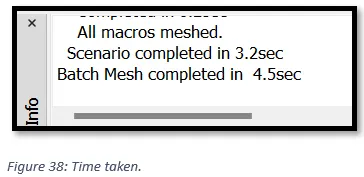
The time take to run the batch mesh is 4.5sec and there are also some failed elements in the mesh. The meshed model is as shown below.
Comparison:
|
Sl. No. |
Criterion |
Manual Meshing |
Casting Method |
Batch Meshing |
|
|
1 |
Mesh Flow (overall) |
Rating: Best |
Rating: Not Recommended |
Rating: Good |
|
|
2 |
Mesh Flow around Holes |
Mesh flow around the holes and circular region like fillets are proper. Rating: Best |
Meh flow around the holes could be further improved with manual intervention. Rating: Good |
Mesh flow around the holes is not good. Rating: Not Recommended |
|
|
3 |
Feature Capturing around protrusion |
Feature are captured well. Rating: Best |
Rating: Not Recommended |
Rating: Good |
|
|
4 |
Feature Capturing around fillet |
Rating: Best |
Rating: Not Recommended |
Rating: Good |
|
|
5 |
Feature Capturing around slots |
Rating: Best |
Rating: Not Recommended |
Rating: Best |
|
|
6 |
Time Taken |
Meshing was completed in 4hrs. Rating: Not Recommended |
Meshing took 28.9sec. Rating: Good |
Meshing was completed in just 4.5sec. Rating: Best |
|
|
7 |
Total elements and Failed elements |
This meshing process generated largest number of elements (2669) with least number of tria elements (67). More elements mean more time during analysis. Further, there are Zero (0) failed elements since the mesh conforms to all the quality criterion. Rating: Best |
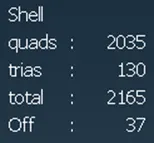
This process generated 2165 elements with 130 tria elements. Initially there were 269 failed elements. After smoothing operation on the mesh, the no. fell to 37. Rating: Not Recommended |
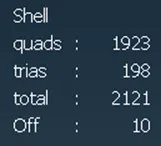
This process generated elements 2121 elements with largest number of tria elements (198). There are only 10 failed elements which could easily be resolve with manual intervention. Rating: Good |
|
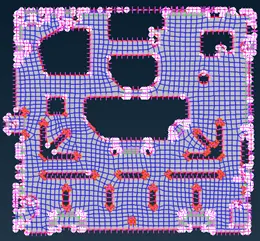 Mesh flow on large faces is uniform, with no pattern formation and least trais elements.
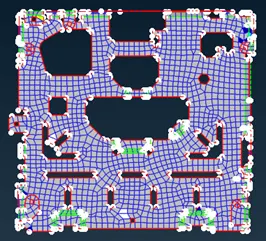 Mesh flow on most areas is absent. Pattern like circular quads and trai elements can be seen frequently.
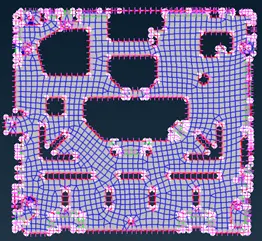 Mesh flow is largely present. But some trai concentration could be observed.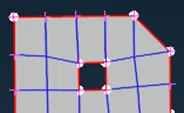
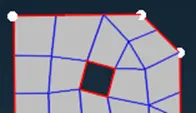
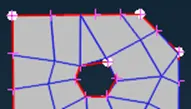
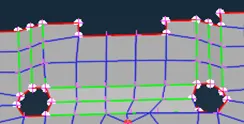
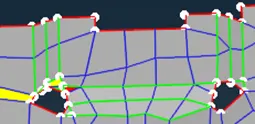 Feature capturing is Not Recommended, failed elements and distorted feature lines and holes could be observed.
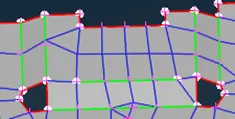 Features are preserved well but some tria elements could be seen.
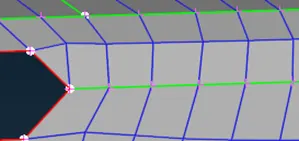 Fillet regions are captured well.
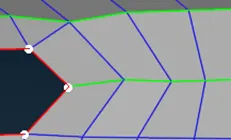 Feature lines are not maintained and mesh lines are skewed around the fillet regions.
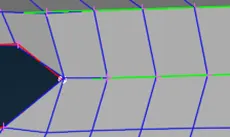 Fillet regions are captured well but mesh lines are not aligned to the feature lines in some areas.
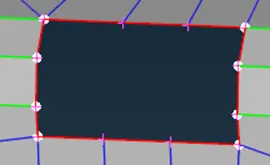 Slots are captured well.
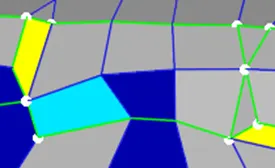 Slots are not captured at all.
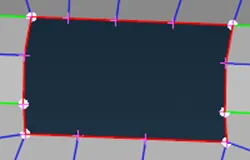 Slots are captured well.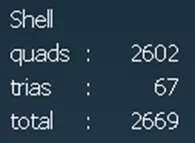
Conclusion:
The Manual method of meshing could give the best mesh with proper feature capturing and a good mesh flow but the time taken to do manual meshing is more when compared with casting (automatic mesh generation) and Batch meshing method.
The mid.surf.casting (automatic mesh generation) function’s feature capturing capability is poor and mesh flow is also irregular.
Hence, Batch meshing is a good alternative to go for if there are strict time contains and the quality criterion is not a big concern.