Radar Mast & Final Assembly of Yacht
INTRODUCTION
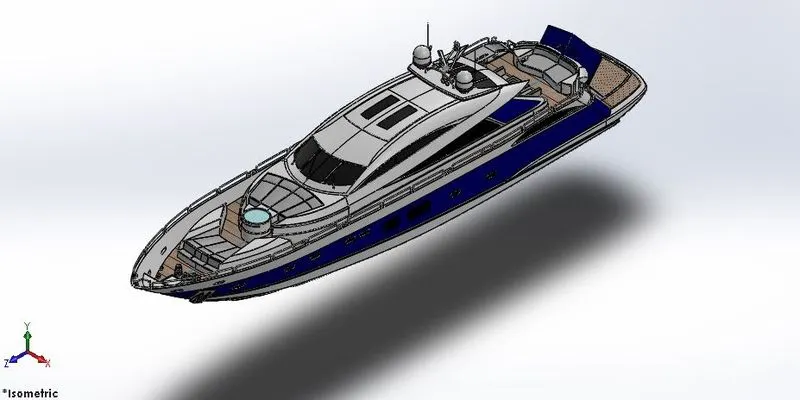
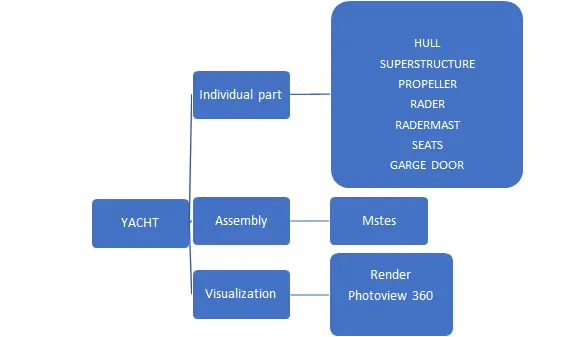
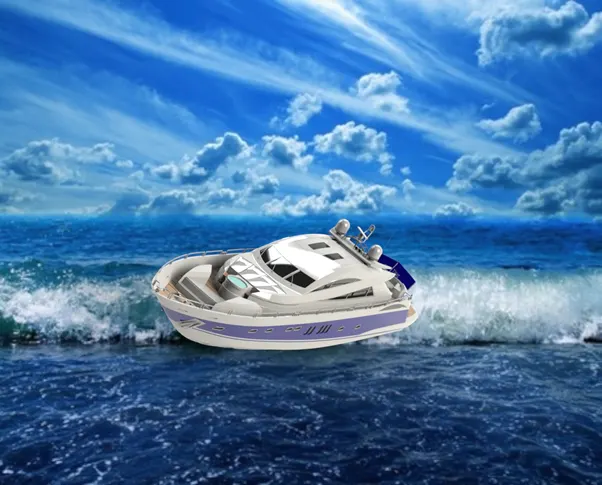
We are going to model a Sunseeker Predator Yacht by using “ The SOLIDWORK ‘’ CAD software. Firstly here we are going to model different parts of yacht like “ Hull “ ‘Rader” ”Super structure “ “ Propeller” etc. Then we are going to assemble them with the reference.
So a Yacht is a sea vessel that is used strictly for recreational or pleasure purposes like cruising, entertaining, water sports, fishing, or year-round accommodations. Yachts are usually large enough to have some form of sleeping quarters (cabin) on board for overnight trips as well as a kitchen and a bathroom . They are also large enough that they require more than human inputs (i.e rowing) to propel forward.
OBJECTIVE
The main objective to do this model is to know how to use different tools in solidwork software and in which process we are going to follow to build the object and also we are going to use part assembly in solidwork and at last we are going to to give our object a proper view and natural effect by using some tools .
DESIGN METHODOLGY
Propeller
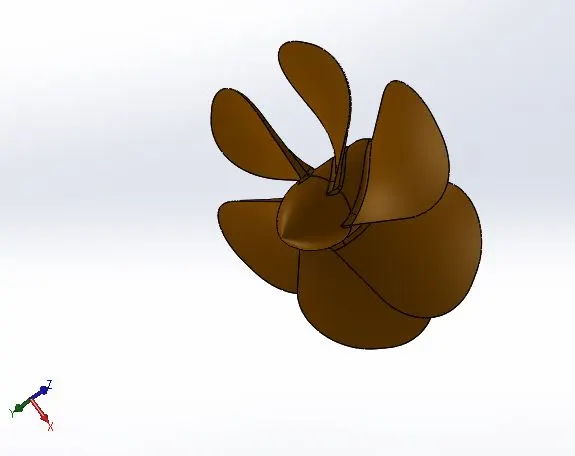
A mechanical device for propelling a boat or aircraft, consisting of a revolving shaft with two or more broad, angled blades attached to it.
Features used to Create
- Revolve
- Extrude Cut
- Lofted boss
- Circular pattern
- Fillet
Revolve
It creates a solid feature around an axis of selected sketch.
Extrude Cut
It cuts a solid model by extruding a sketched profile in one or two direction.it usually used to create holes, slots etc.
Lofted boss
It created a lofted solid body between two or more profiles.
Circular pattern
It patterns selected faces or bodies in circular direction.
Fillet
It creates a rounded internal or external face on the part.
Open Solidwork crate a new part by choosing ”PART” options.
Procedure to Model Propeller
- Select the three planes and make them visible.
- Select the right plane click on 2D sketch and draw 3 lines two horizontal and one vertical and give proper dimensions and fully defined it.
- Now crate revolve by clicking revolve icon.
- Select Top plane and crate a new sketch and draw 3 point corner rectangle and fully defined it by giving dimensions and relations.
- Crate a new plane by giving offset it some distance and select the Top plane as first reference draw a 3 point rectangle sketch on that plane and fully defined it and close the sketch.
- Crate a Boss loft by selecting the two sketches.
- Create a cut extrude to inward direction on revolve part.
- Crate a circular pattern of lofted features and give 6 number of instance with equal spacing and give the appearance.
RADER
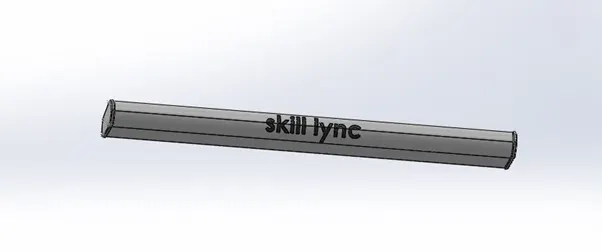
It detects the presence, direction, distance, and speed of aircraft, ships, and other objects, by sending out pulses of radio waves which are reflected off the object back to the source.
Features used to Create
- Extrude Boss
- Extrude Cut
- Split Line
- Fillet
- Sketch pattern
- Mirror
Split Line
By using this feature you can create separate part files from the new part. To split a surface the trimming surface must extended past the boundaries of the surface to split.
Sketch pattern
Create a sketch patterns on a plane or on a model using sketch entities or model edges to define the pattern.
Mirror
It mirror pre-existing 2D sketch about a face or a plane. Here in the fork one part is created and other part is mirrored. Then we combine both the part as a whole body.
Procedure to Model Radar
- Crate a new part and select the right plane and click on 2D sketch.
- Draw four lines and fully defined it and crate a boss extrude ang give fillet to the edges.
- Crate a another boss extrude on the side faces by giving offset to the edges.
- Draw a circle on the corner of that face and give the dimensions and crate a boss extrude.
- Draw a polygon on that circle and do a extrude cut.
- Draw three points and give dimensions and select sketch driven pattern and pattern the boss extrude ,cut extrude and fillet.
- Now select the right plane and Mirror it.
HULL
The hull is the most notable structural entity of the ship. To define the hull, it can be said that it is the watertight enclosure of the ship, which protects the cargo, machinery, and accommodation spaces of the ship from the weather, flooding, and structural damage.
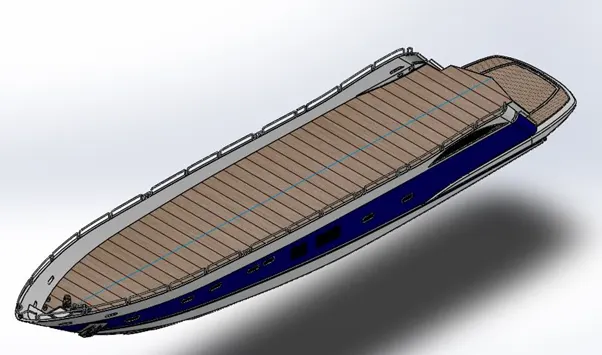
Features used to Create
- Surface Trim
- Surface loft
- Surface extrude
- Surface knit
- Extrude Boss
- Extrude Cut
- Fillet
- Shell
- Sweep
- Projected curve
- Dome
- Helix /spiral
- Linear pattern
- Mirror
Surface loft
It created a lofted surface between two or more profiles.
Surface extrude
Like extrude boss it creates a solid surface and gives a 3D view.
Surface knit
It combines two or more surfaces together.
Surface Trim
It trim a surface where one surface intersect with another . Surface sweep
It creates a surface feature by sweeping an open or closed profile along the selected path.
Composite curve
It is used to make a single curve by joining two curves.
Linear Pattern
It patterns selected faces or bodies in linear direction.
Shell
It removes material from a solid body to create a thin walled feature
Dome
It creates a cylindrical or conical face by calculating the distance using the radius of the arc.
Helix /spiral
It adds a helix or spiral curve to a sketched circle profile.
Procedure to Model Hull
Blueprint Setup
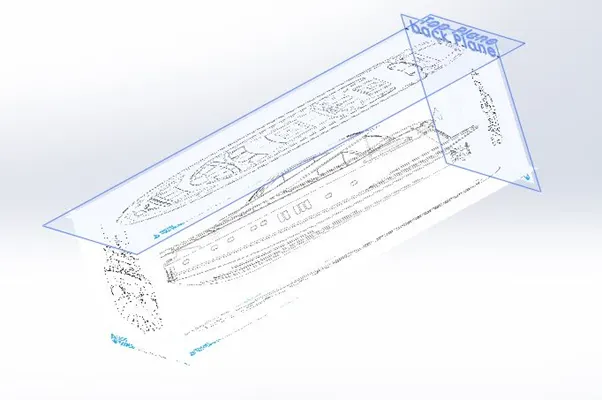
- Open new part in solid work.
- Select all the plane one by one create sketch mode in all different plane and by going to sketch tools and selecting sketch picture insert all the views according to each respective plane.
- Now we have all the views of yacht.
- Select bottom plane draw horizontal line and spline and fully defined it close the sketch
- Crate a new sketch on Mid plane draw a horizontal inclined line, a vertical centre line and spline and crate a projected curve by using two sketches and make sure the spline match blueprint.
- Crate another projected curve using mid and bottom plane using spline and line.
- Crate a new sketch on back plane draw a spline and crate a pierce relation with the combined curve.
- Crate a new sketch on mid plane draw one more spline give it pierce relation and crate a surface loft using the two sketches.
- Similarly crate one more surface loft using same methodology.
- Trim the extra surface and knit it make sure knitting edges turnout to black colour indicates there is no gap between the edges .if there use surface fill to fill the surfaces.
- Close the all open counters and crate a shell.
- Apply fillet to all the edges.
- Now to crate the side windows draw a rectangle and do a linear pattern and crate a cut extrude.
- Draw straight slot for port holes and copy it by using copy feature and position it as per the blue prints now draw another circle crate a sweep and repeat it for all the others.
- For lower deck crate a sketch on top plane use lines and splines do surface extrude.
- For staircase crate a sketch on top plane do a rectangle and do a extrude cut . For stairs draw lines form like stair and extrude it up to surface.
- For lower portion of hall crate a plane give a distance offset from bottom plane and crate a sketch on it, draw splines and drag it as per the blueprint and close it by using another spline and line and extrude it.
- For anchor house draw a sketch on top face of hull and draw circles and connect them with lines and trim it which is not required and crate lower surface. Draw lines and revolve it.
- For rope draw helix crate a plane using helix as a reference. Draw a circle at the end of helix and do a sweep.
- For propeller shaft crate a sketch on back plane and draw lines as per blueprints and revolve it and pattern it to other position.
- For garage door draw a rectangle by crate a sketch on mid plane and do a cut extrude. Now split it and save it as Garage door.
- Now give the appearance and mirror it with the reference to mid plane.
SUPERSTRUCTURE
It is an upward extension of an existing structure above a baseline. On water craft, the superstructure consists of the parts of the ship or a boat, including sailboats, fishing boats, passenger ships, and submarines, that project above her main deck.
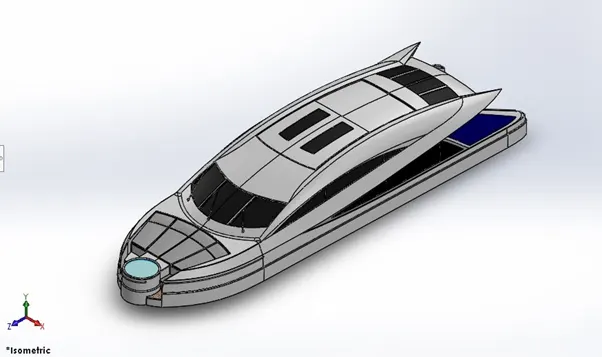
Features used to Create
- Surface Trim
- Surface loft
- Surface extrude
- Surface knit
- Extrude Boss
- Extrude Cut
- Fillet
- chamfer
- Ruled surface
- Sweep
- Projected curve
- Dome
- Surface fill
Procedure to Model SUPERSTRUCTURE
Take the reference of blueprint setup and insert the hull part by selecting surface bodies.
Crate a sketch on deck surface by drawing two splines and a line as per blueprint and extrude it.
Crate a plane at the end of surface extrude.
Draw lines on that plane and make a pierce relation with the extruded sketch by converting its outer edges into entities and sweep it. Extend the outer edges by applying ruled surface and trim the extra surface and knit it.
Crate projected curve by drawing two sketches on respective planes using spline and lines and crate a surface loft.
Crate another surface sweep by applying pierce relation with extrude surface
Crate a swept surface by using sketches and trim extra surface.
Similarly for top surfaces crate projected curve and crate a surface loft as per blueprints.
For side windows select the outer surface use ruled surface for extension.
Select the deck face do a sketch and extrude it and knit it.
For front portion draw a sketch on mid plane and do a surface extrude by converting the respective edges. Trim the extra surface and knit all.
For steps draw horizontal and vertical line and extrude them.
Now knit all the surfaces and crate a solid.
To crate mattress crate a surface offset at front end and trim extra part, thicken the surface and apply dome.
For railing crate a sweep using circle and splines in respective planes.
For a crate a door do a cut extrude by offset rear face inward.
For front glass do a cut extrude 0n top plane by giving offset entities.
Now mirror the bodies across the mid plane and give appearance.
For radar mast crate a reference surface by giving zero distance offset to rear portion of top face and rename it.
Radar mast
They are electronic navigation instruments that use a rotating antenna to sweep a narrow beam of microwaves around the water surface surrounding the ship to the horizon, detecting targets by microwaves reflected from them, generating a picture of the ship's surroundings on a display screen.
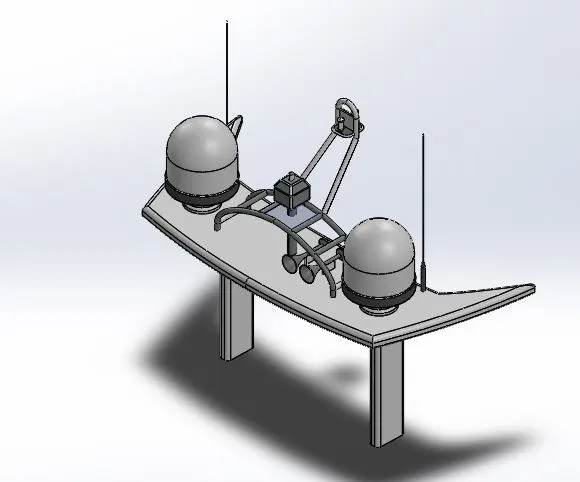
Features used to Create
- Extrude Boss
- Extrude Cut
- Fillet
- Sweep
- Projected curve
- Dome
- Mirror
- Revolve
- Shell
Procedure to Model radar mast
- By selecting new part in solid work insert the blueprint setup for reference.
- Insert the superstructure part by selecting surface bodies
- Crate a sketch on surface draw lines and spline and extrude it.
- For radar indicator draw a sketch on top face of previous extrude part use line and 3 point arc and revolve it.
- For antedate crate sketch on extrude face, draw a circle and extrude it and repeat it 2 more times.
- Crate a sweep by drawing 3D sketch circle and mirror it.
- For horn draw lines and spline and revolve it and apply dome at one end and shell at other end.
- Mirror all parts except horn across mid plane.
- For ham support draw a straight slot and extrude it.
- Give appropriate appearance to all parts.
Rear seat
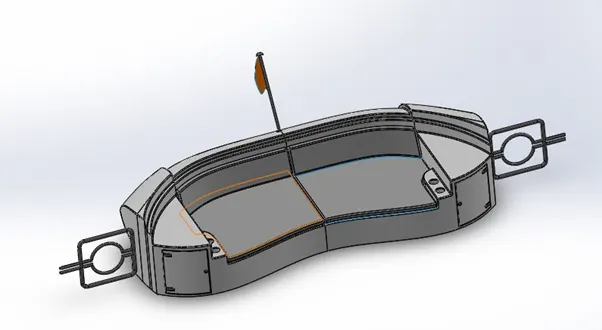
Features used to Create
- Surface Trim
- Surface loft
- Surface extrude
- Surface knit
- Extrude Boss
- Extrude Cut
- Fillet
- chamfer
- Ruled surface
- Sweep
- Projected curve
- Mirror
- Revolve
Procedure to Model
- Insert blue print setup and surface bodies in new part of solid work.
- Draw 2 spiles on mid plane and fully define it.
- Crate one more sketch by creating a new plane and crate a surface sweep
- Crate surface offset by selecting the respective faces and by using ruled surface fill the surfaces.
- Crate few 3D sketch and do surface loft.
- For door and drawers crate cut extrude by drawing lines on front plane.
- Mirror the bodies across the mid plane.
- For flag stand crate a sketch on mid plane by drawing lines and revolve it.
- For flag crate a 3D sketch and do a surface loft.
- Give the appearance to all parts.
Middle seat
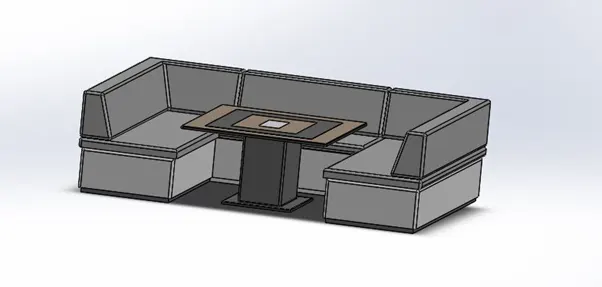
Features used to Create
- Extrude Boss
- Extrude Cut
- Fillet
- Chamfer
- Mirror
Procedure to Model
- Crate a new part and insert blueprint setup.
- Draw lines on face of deck and extrude it for lower portion of seat.
- Give the offset to extrude face and do another extrude.
- Mirror the bodies across the mid plane
- Crate a table by doing boss extrude and cut extude
- Apply fillets and give proper appearance.
Front seat
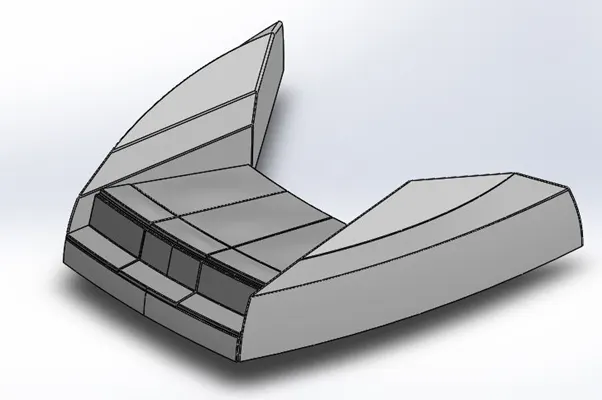
Features used to Create
- Surface Trim
- Surface loft
- Surface extrude
- Surface knit
- Extrude Boss
- Extrude Cut
- Fillet
- chamfer
- Ruled surface
- Sweep
- Projected curve
- Mirror
- Revolve
Procedure to Model
- Crate a new part in solid work and insert the blueprint setup as reference
- Crate a sketch on deck face and do a surface sweep. Crate another surface sweep.
- Trim the extra part and fill the gap with surface fill option.
- Crate another surface loft and trim the extra part and knit it.
- Mirror the bodied across mid plane .
- Apply fillet and apply dome to seats and give appearance.
Garage door
Garage door is a large door use to open or close the garage.
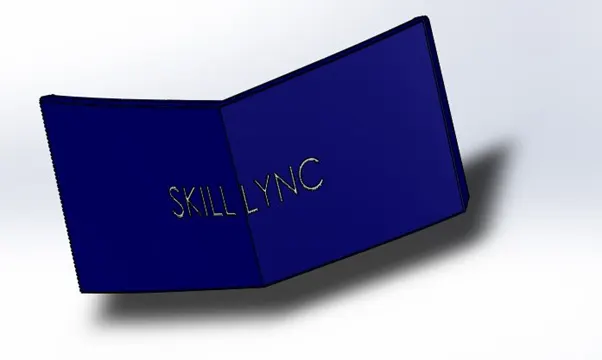
Features used to Create
- Cut extrude
- Mirror
- Text
- Plane
- shell
Procedure to Model
- Open the garage door which we are save in hull part
- Crate a sketch on right face draw lines and do cut extrude
- Apply shell by selecting the faces
- Do a circle on side face and do a cut extrude to crate a hole
- Apply fillet and mirror across the right plane.
- Crate a plane using front plane by offsetting it
- Crate a sketch on new plane and draw a horizontal center line and insert the text by using text option and do a cut extrude.
- Give appearance to door and text.
Assembly
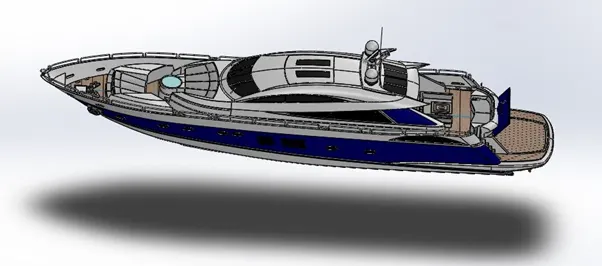
So it is simple as we have base deck surface reference for most part ,it will be get mated automatically and some part we have to do it manually.
Procedure to Model
- Open solidwork select assemble and insert all parts.
- First insert hull part then insert superstructure then radar mast ,all are positiond automatically to the respective part.
- All other parts mate manually by applying mate relation like coincident and concentric
Rendering
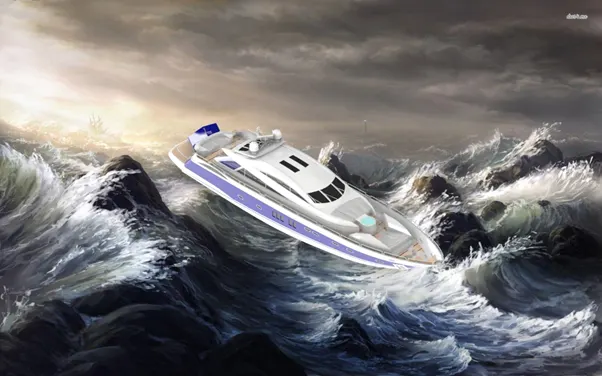
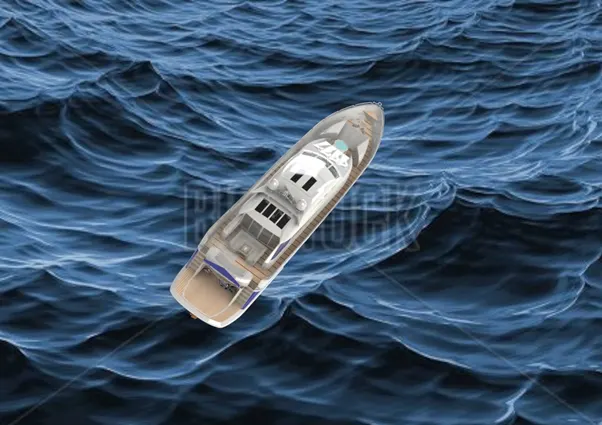
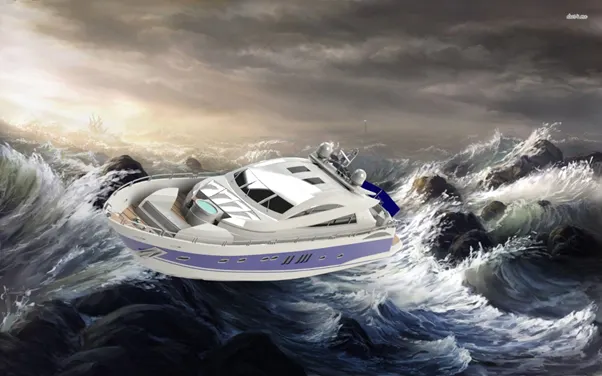
For giving more realistic image to our yacht we are going to render it by solidwork visualisation process.
Conclusion
Finally we crate yacht by using different tools and we give it a photo realistic effect .