PERFORMING MESH ON THE SPARE WHEEL FLOOR PANEL ON HYPERMESH
OBJECTIVE: To extract a mid-surface of the sheet metal component and to perform 2D meshing on the extracted Mid-surface wit given quality criteria.
PROCEDURE: To mesh the given component with quality criteria the below steps should be followed.
1.Import the given geometry in to hypermesh.
2.Extract the midsurface of the given component.
3.Geometry cleanup to the given component.
4. Perform 2D mesh on the Mid-surface component.
5. Cleanup the failing elements for quality criteria.
STEP1: Import the given geometry into hypermesh.
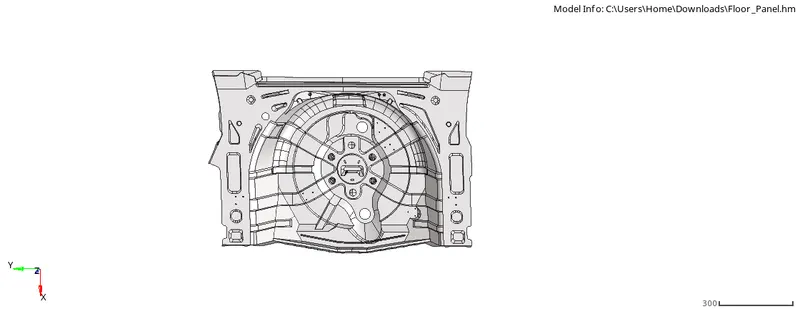
FIG1. IMPORTED SHEEL METAL COMPONENT OF THE FLOOR PANEL
check up for free edges on the geometry and cleanup using geo cleanup Tools.
STEP 2: Extract the midsurface of the given component.
To extract a Mid-surface of the component we need to go for Auto midsurface first.
COMMAND: GEO-MIDSURFACE-AUTO MID-SURFACE By using extract option offsets+sweeps+planes.

FIG2.1 MIDSURFACE TOOL BAR

FIG2.2 EXTRACTION OPTIONS
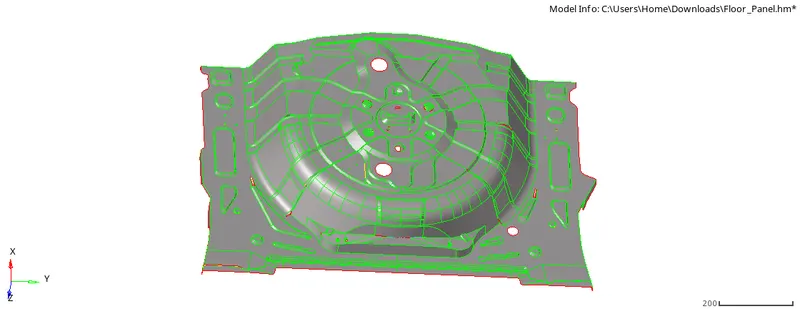
FIG2.3 AUTO MIDSURFACE (IMPROPER)
Due to some geometical error the auto midsurface was not proper. rather we can fix it manually by offsetting method. or we can go with midsurface manuallu for the whole component.
COMMAND: GEO-SURFACEEDIT-OFFSET


FIG2.4 TOOL BAR FOR OFFSET SURFACE
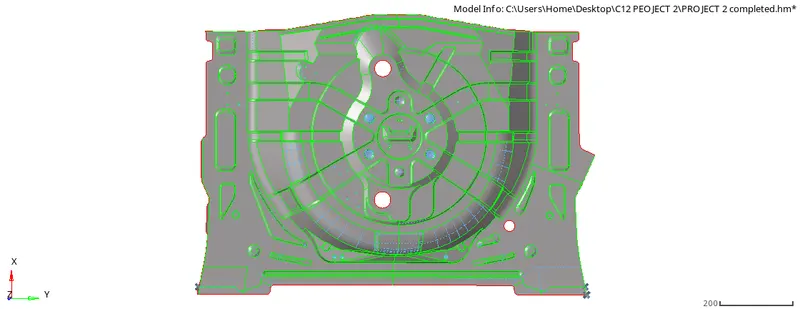
FIG2.5 MANUAL MID-SURFACE EXTRACTED
STEP 3:Geometry cleanup to the given component.
After extraction of mid-surface do geometry cleanup using quick edit tool.
COMMAND: GEO-QUICK EDIT

FIG 3.1 QUICK EDIT OPTION

FIG 3.2 TOOLS ON QUICK EDIT PANEL
Some surfece lines are need to be suppress for the proper mesh flow anf to avoid mesh quality.
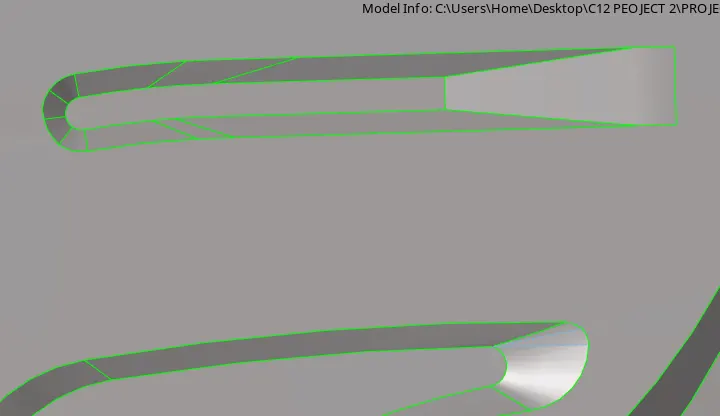
FIG 3.3 BEFORE SUPPRESS
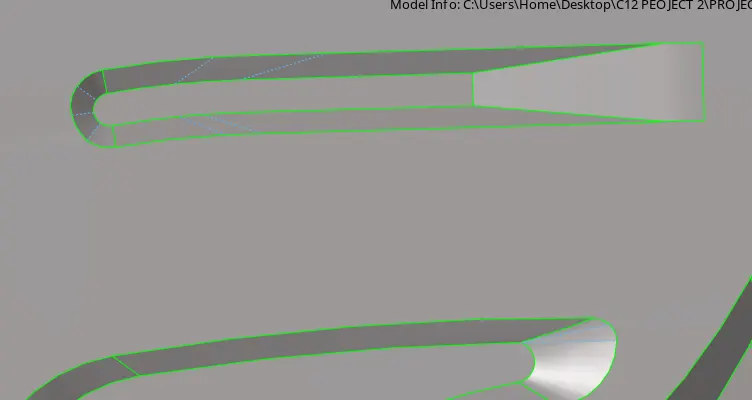
FIG 3.4 AFTER SUPPRESS
In some surfaces there are some free edges due to geo error, so we can stitched the edges manually, by creating surface using RULED, SPLINE options or using Replace points option.

FIG 3.5 SURFACE OPTION

FIG 3.6 SURFACE TOOLS
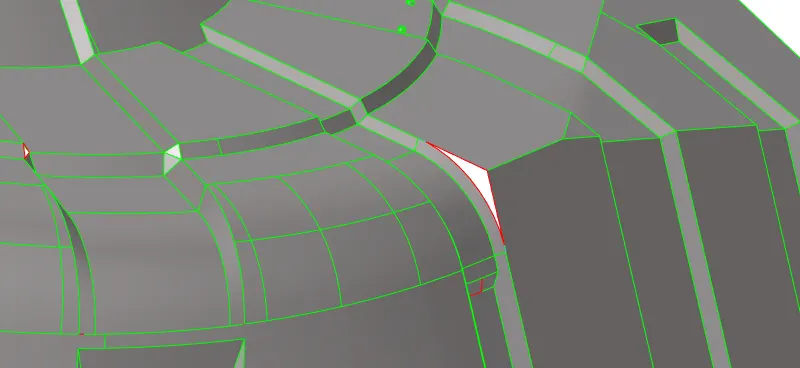
FIG3.7 WITH FREE EDGES
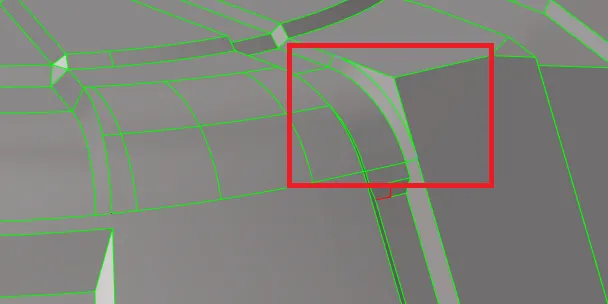
FIG3.8 AFTER CREATING SURFACE
STEP4: Perform 2D mesh on the Mid-surfaceExtracted
COMMAND: 2D-AUTOMESH-ELEMENT SIZE- SELECT SURFACE

FIG4.1 TOOL BAR TO AUTO MESH OPTIO

FIG4.2 TOOL BAR TO AUTO MESH
The Mid-surface is meshed patch by patch instead of meshing whole in a single shot, to ensure the proper mesh flow.
by doing mesh we need to keep the mesh in ADVANCE REMESH option for that, press O on keyboard.
while meshing do smooth option for proper mesh flow.

FIG4.3 TOOL BAR TO ADVANCE REMESH OPTION
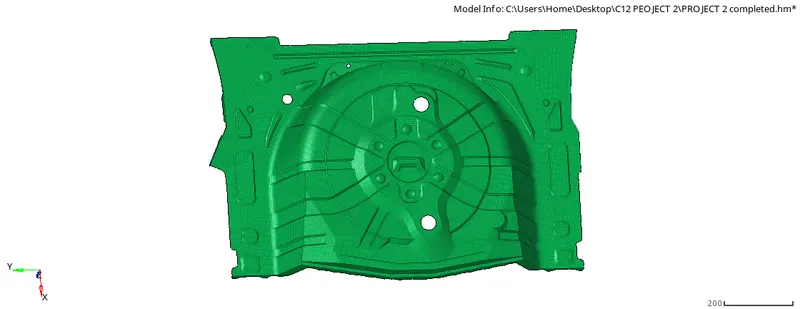
FIG4.3 MESH OF THE SHEET METAL PANEL
STEP 5:Cleanup the failing elements for quality criteria.
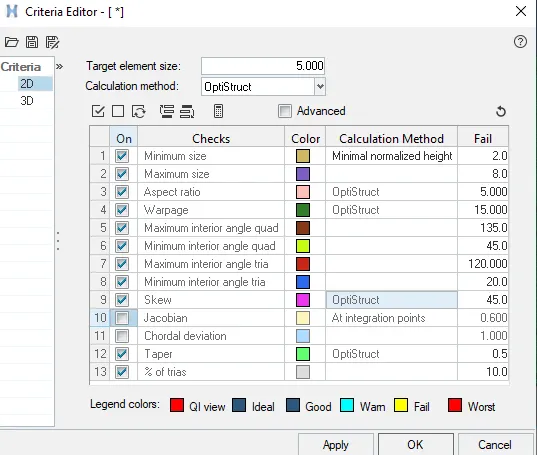
FIG5.1GIVEN QUALITY PARAMETER
we can remove the quality errors by different methods, now going with element cleanup tool for cleaning the failing elements.

FIG 5.2 TOOL BAR FOR ELEMENT CLEANUP OPTION
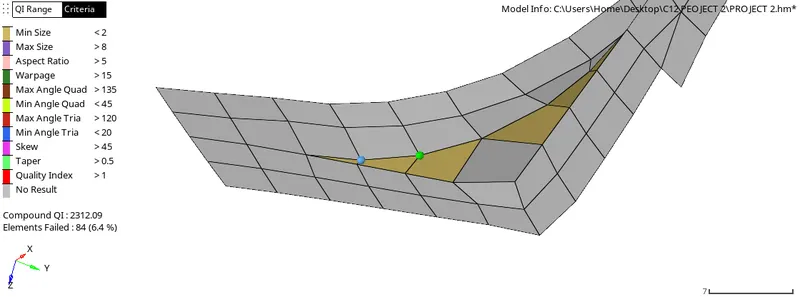
FIG 5.3 THE ABOVE ARE FAILING FOR MINIMUM LENGTHS
the figure which indicates yellow are failing for minimum lengths, here we can do remesh or we can change the distance between two points.
COMMAND: GEO-DISTANCE (F4 )

FIG5.4 TOOL BAR FOR DISTANCE OPTION
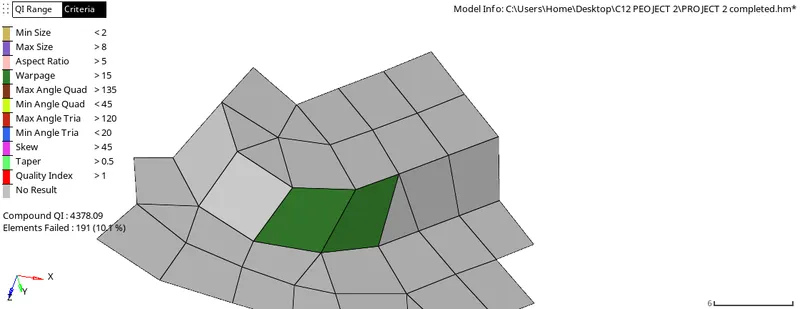
FIG 5.5 THE ABOVE ARE FAILING FOR WARPAGE
here we can use translate option.
COMMAND:TOOL-TRANSLATE

FIG5.4 TOOL BAR FOR TRANSLATE OPTION
All are eleminated from the model.
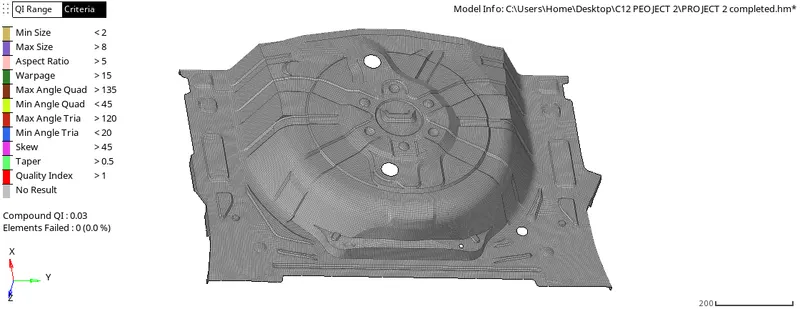
FIG 5.5 ELEMENT CLEANUP PANEL
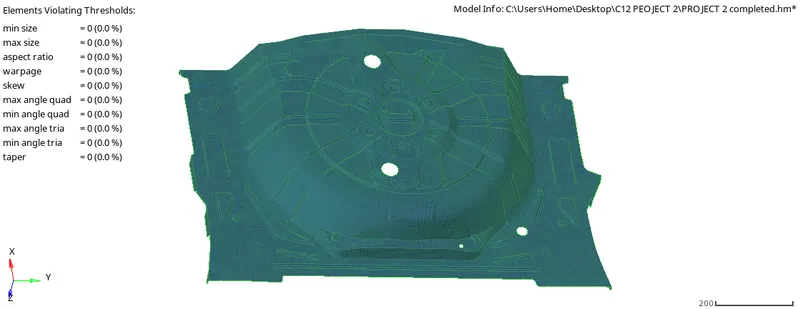
FIG 5.5 QUALITY INDEX PANEL
CONCLUSION:
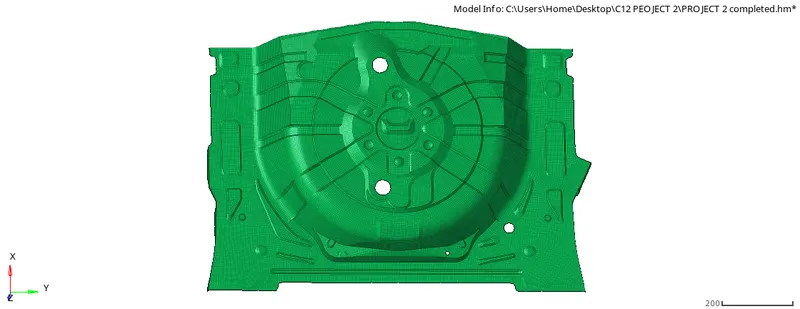
FINAL MESH