Project 2
WIRE HARNESS IN BACK DOOR CAR
CAR BACK DOOR WIRING HARNESS DESIGN- PROJECT 2
AIM
To route the Wiring harness on given car body back door and prepare flatten view drawing in CATIA V5.
INTRODUCTION
A wire harness, also commonly referred to as a wiring harness, is an exterior sheath used to cover some types of electronic wires. Generally, wiring harnesses are made of thermoplastic or thermoset materials that can help protect the cables from the environment.
Automobiles today come with some great features. Their design, though, calls for deft wiring considerations. An automotive wiring harness is an assembly of wires, connectors, and other electrical parts. You use it in a vehicle for the transmission of signals.
Design of Wire Harness
The design of the harness comprising of the interconnected mesh of wires is crucial. Select the important components like connectors, fuses, and sensors. Ensure their reliability.
Study the schematic circuit diagram. Divide the entire vehicle into detachable parts like chassis, body, and engine. Then design the wiring harness that suits the requirements. Ensure that it fits the customer requirements, shape, and size of the vehicle. Chalk out electrical routing in a way that reduces complexity and uses minimal space.
There are three types of engine wire harnesses based on the vehicle part you are looking at. The engine wire harness is a set of wires, connectors, and terminals to relay the signal to and from the engine. It also communicates messages from all sensors within the engine.
The body wiring harness routes electrical and electronic bits of information. It’s what keeps the major components of the automobile working. The body wiring takes care of power windows, lighting, and other accessories. And then, you need a chassis wiring harness for connecting the components.
OBJECTIVE
- Define all the mechanical connectors electrically and save it in the Catalogue.
- Place required Connecters on the Back door CAD data.
- Place Fir Tree clips at the required position by following the packaging rules.
- Create the Wiring Harness Routing with all the electrically defined connectors and mounting equipments.
- Create branching points at required locations to create sub branches and connect to various connectors in the geometrical bundle.
- Apply Protection coverings as required.
- Create Wiring harness flattening for the final geometrical bundle.
- Using the drafting workbench, create a drawing sheet with the flattened wiring harness.
BENEFITS OF AUTOMOTIVE WIRING HARNESS
- Reduced installation time
Consider adding numerous wires to your system. Then, think of installing a single device that connects several wires. It goes without saying that installing a single unit is far quicker than installing many units. Additionally, this lessens the possibility of faulty wiring.
- Reduced risk of shorting
The use of wire harnesses reduces the chance of electrical circuit shorts by combining many wires into rigid bundles, making them safer than loose wires.
- Great performance in harsh conditions
The materials used to make automotive wiring harnesses are strong, making the harness strong as well. These bundles are made to function remarkably well in challenging environments and to carry large power loads.
- Improved fuel efficiency
Every vehicle's ability to increase fuel efficiency is greatly helped by wiring harnesses.
- Performance in hybrid cars
Automotive wire harnesses are the ideal choices for hybrid cars since they offer exceptional performance in challenging settings as well. This indicates that these harnesses can handle electrical loads, withstand high heat, and electromagnetic noise while still transmitting large currents under challenging circumstances.
APPLICATIONS OF AUTOMOTIVE WIRING HARNESS
- Two wheelers, three wheelers, cars, utility vehicles, and commercial vehicles.
- Electrical and geometrical requirements of automobiles, and are embedded in the body, engine, and chassis of vehicles.
- Body wiring harnesses are embedded into dashboards, door locks, power windows, and interior electrical components.
- Engine wiring harnesses embed into speed sensors, lock breaking systems, cruise control systems, and fuel injection systems.
- Chassis wiring comprise of the front, rear and main harnesses.
DESIGN METHODOLOGY
Some important packaging rules and best practices to be considered during wire harness routing and placing of the clips and clamps are as follows –
- Distance between two clamps on a straight branch should be maximum of 200mm.
- The minimum branch length should be 50mm.
- Minimum distance between clip and nearest branching point should be 25mm.
- The minimum distance between two straight connection points should be 200mm.
- The minimum distance between two breakout points should be 50mm.
- To limit the number of branches from a single branch point to 4.
- Enough clips clamps shall be provided to ensure positive clearance with surroundings and safety of wiring harness.
- Fir tree clips and other clips can be added to the Geometric bundle as they are electrically defined and are part of the Wire harness routing and should be provided with the Wire bundle package.
- Enough slack should be provided to the wiring harness which help not to get damaged during the opening and closing of Back Door.
- Easy manufacturing, installation, removal and maintenance have to be considered while designing the wire harness.
- The wire routing should be done keeping in mind the cost effectiveness of the bundle package.
- To avoid the harness routing and clipping in blind zones of the operator during the assembly and the service.
- To provide proper slack at end connectors so that there will be no tension on the wire bundle.
- To avoid sharp edges on the sheet metal parts and if it is not possible then provide protection parts to prevent damage of the wire bundle.
- Routing through small structural holes and openings shall be avoided. To minimize chaffing and handling of the wiring harness during installation.
- To provide separate branch points for separate connectors to ensure Poka-Yoke.
- The bend ratio for all the bundle segment is considered to be 1.4
Step 1- download the Back Door CAD data from the given source.
ELECTRICAL DEFINE 4 PIN
CONNECTOR
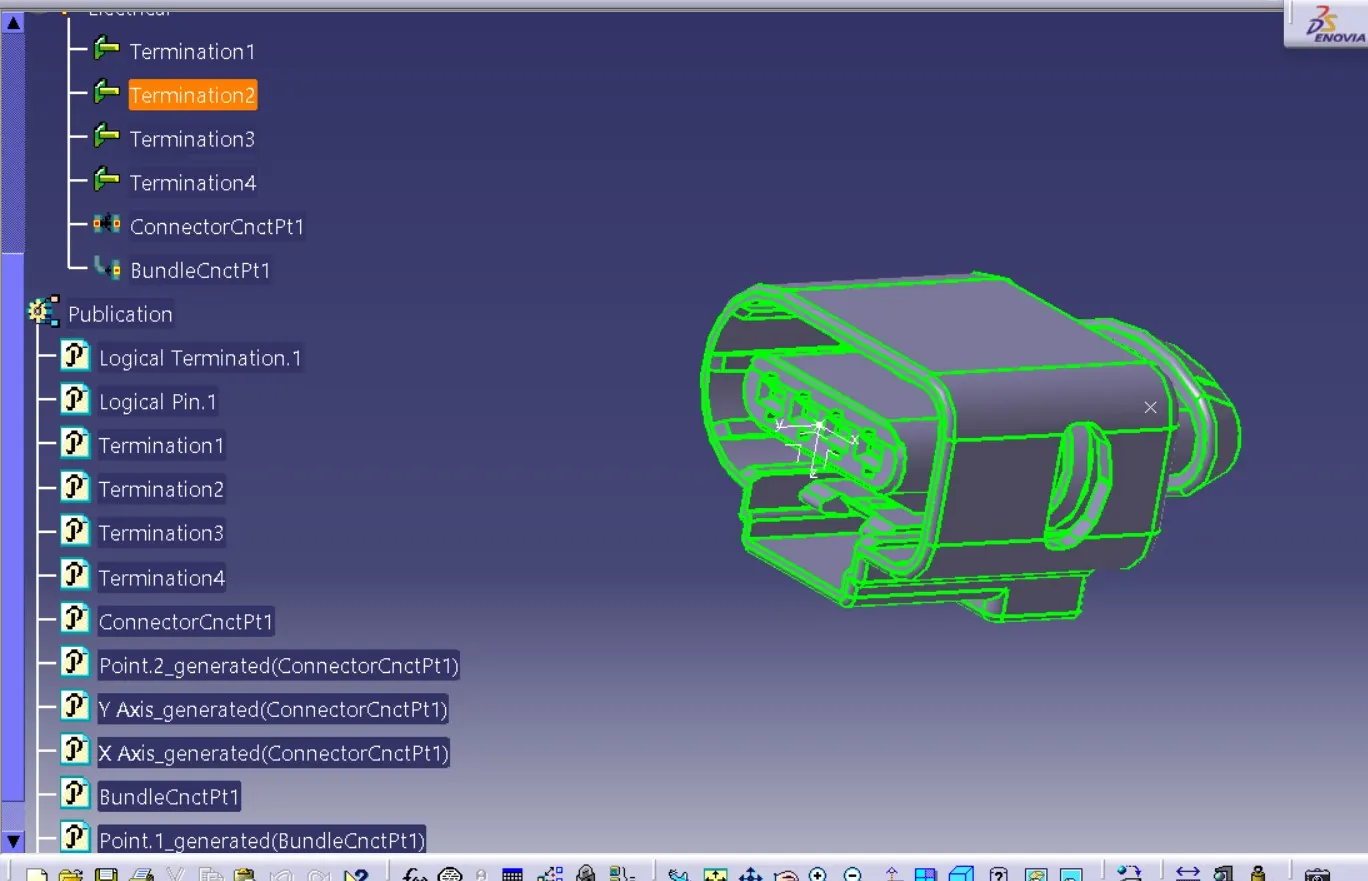
ELECTRICAL DEFINE PIN CONNECTOR
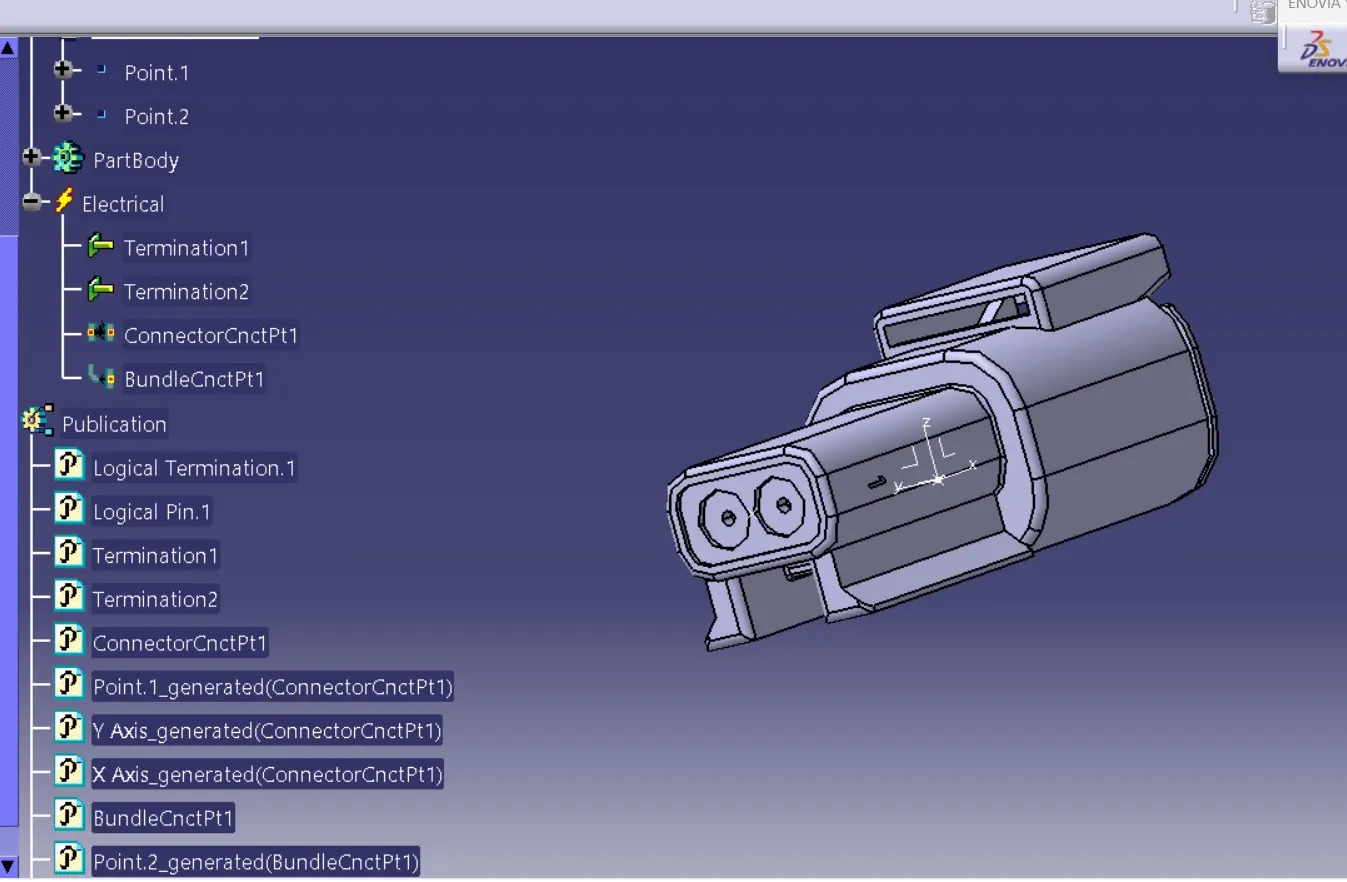
ELECTRICAL DEFINE FLUR CLIP
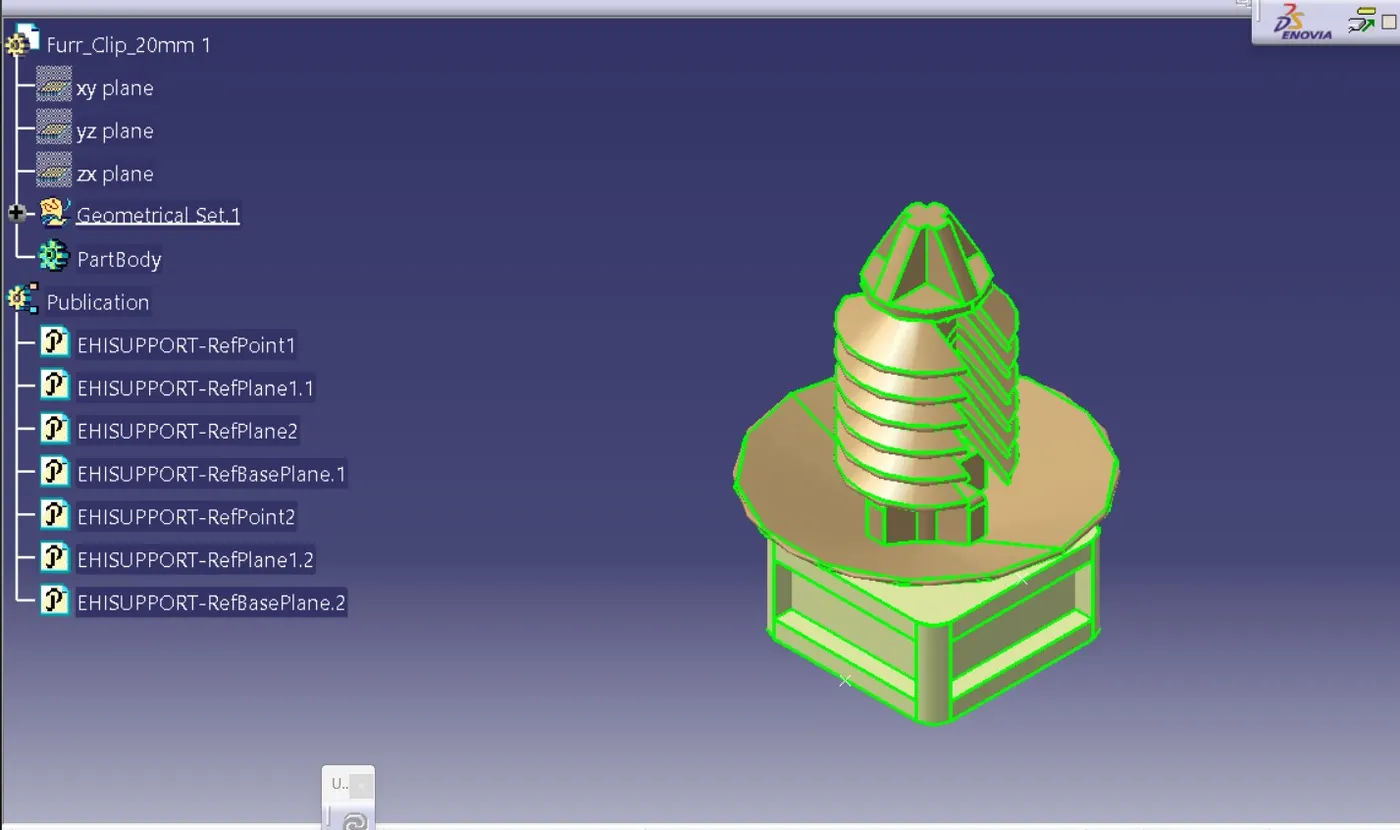
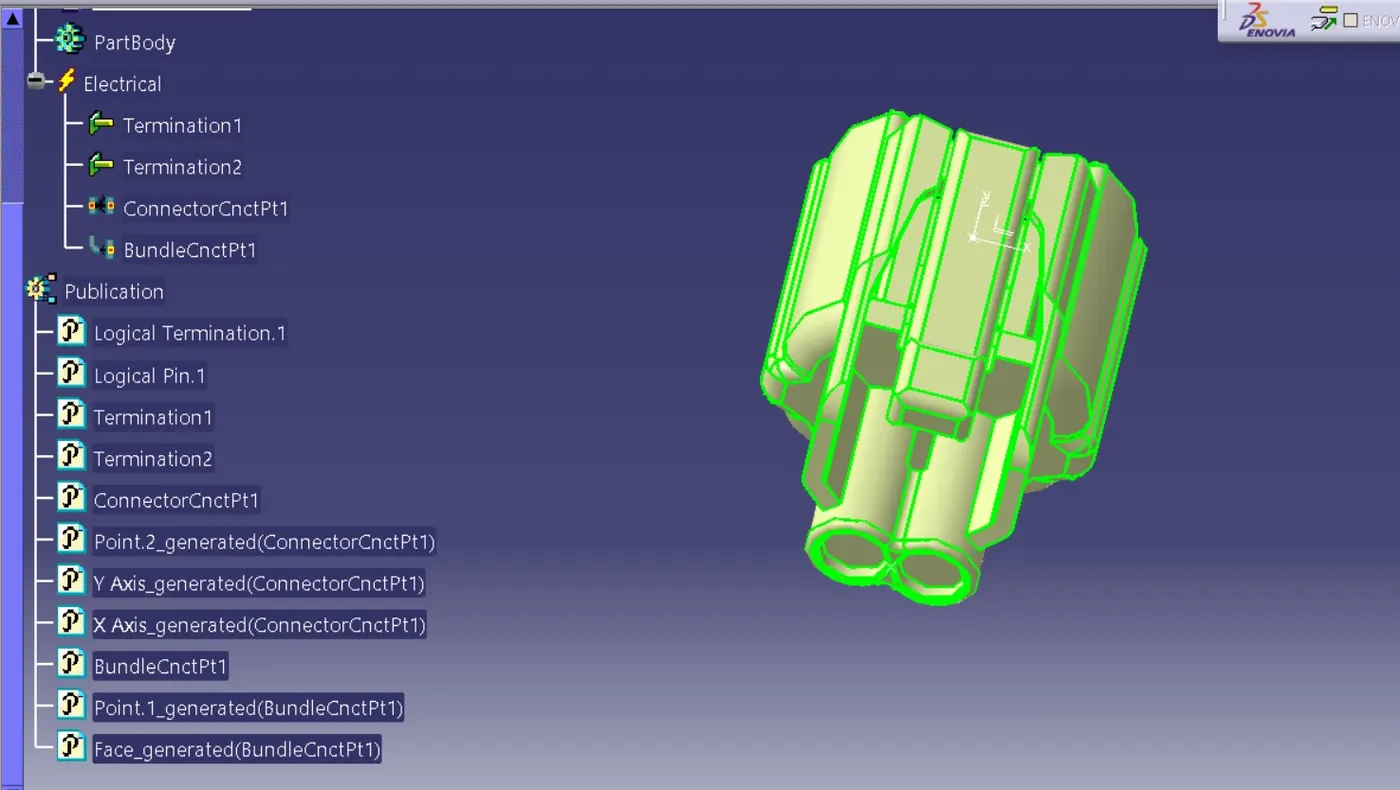
ELECTRICAL DEFINE 2 PIN CONNECTOR
Assembly harness geometrical bundle segment
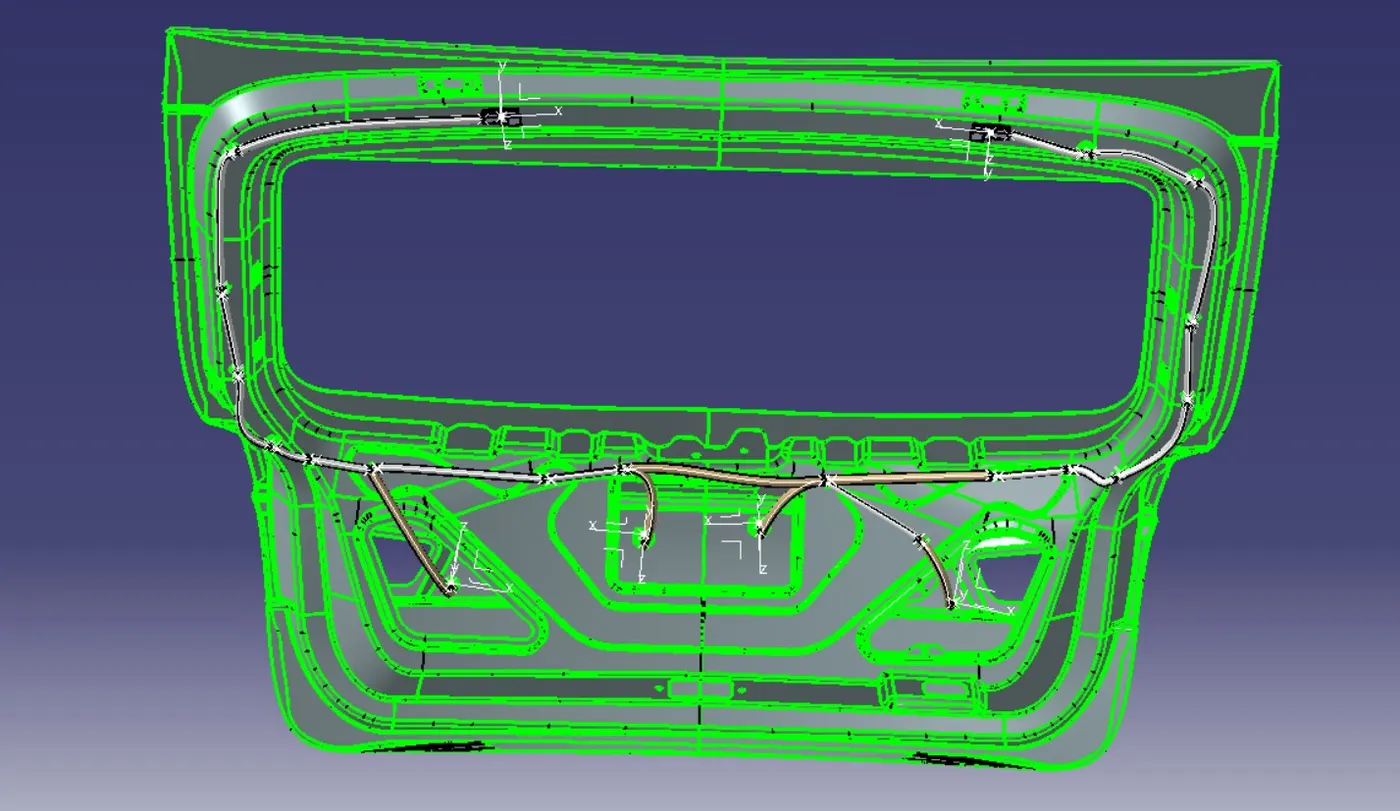
FINAL WIRE HARNESS IN BACK DOOR ASSEMBLY'
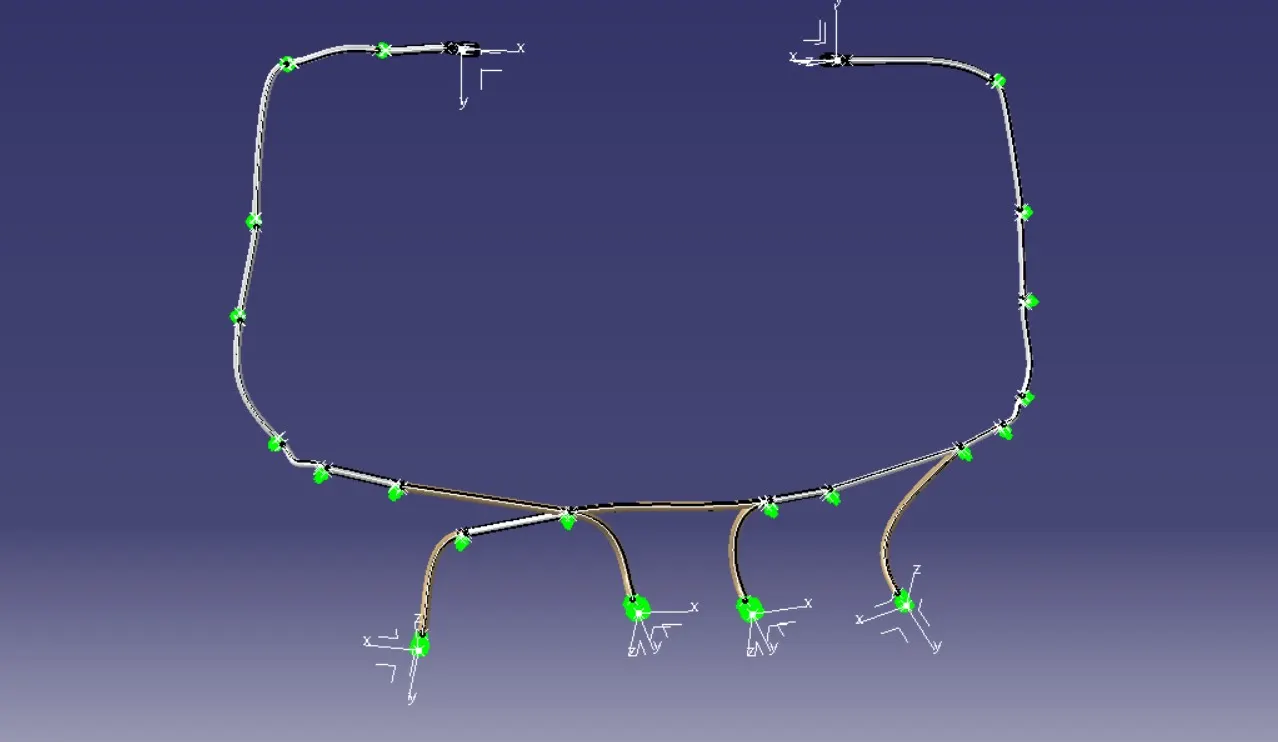
– Applying Protective Cover
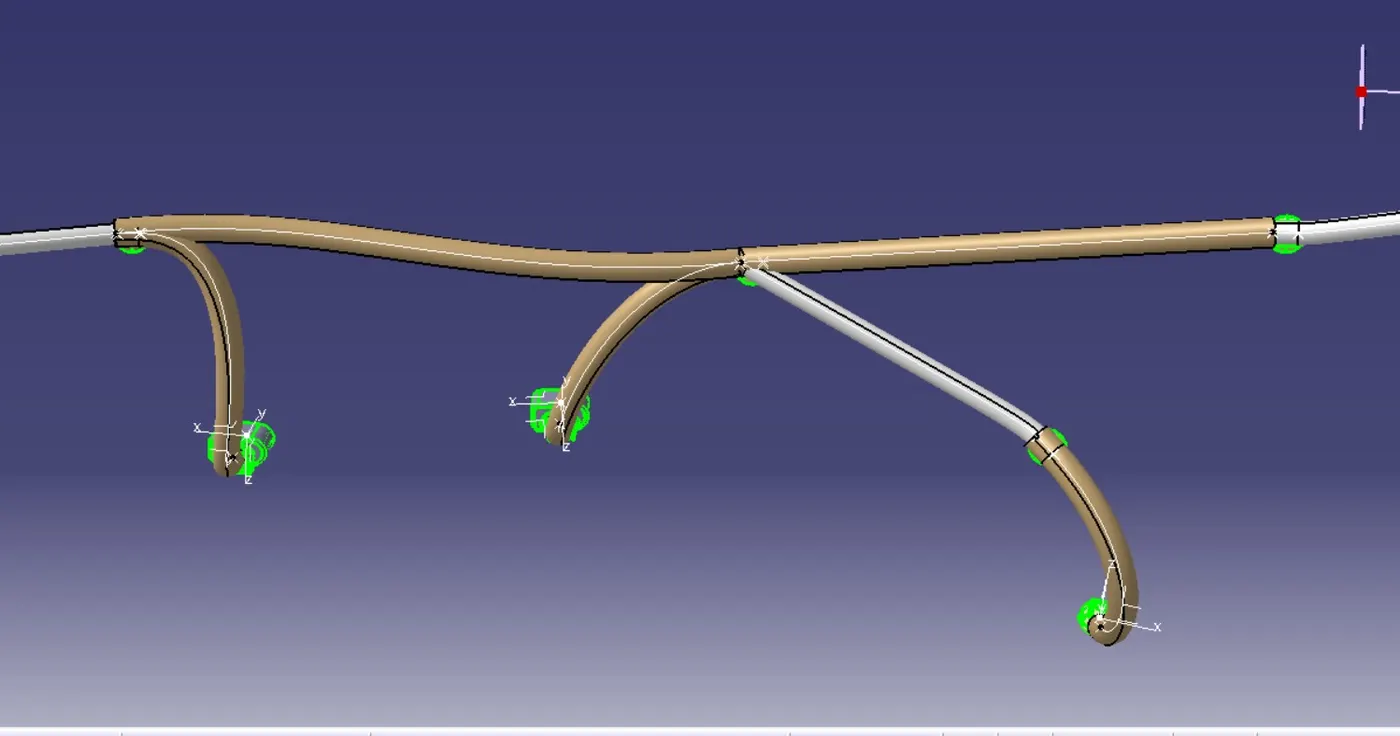
After bundle routing, we have to add protective covering to the harness bundle so that it will get protected from the damage.
- Harness bundle should be protected with flexible rubber cover at the interconnection region where it is a critical place and subjected to opening and closing of door. There are more possibilities to damage the wiring harness if no proper protection covering is provided.
- Corrugated conduits and protective hoses with various properties, from heat resistance through abrasion protection and impact strength to noise reduction, protect valuable cables against all unfavourable external influences.
- Slit COT tubes are provided for protecting the harness from physical and other environmental damages that can occur in the long run.
- Start or End Extrimities at the Connector bundle entry side should be given a gap of 30mm
- Selection of corrugated tubes are mainly driven by the wiring harness bundle diameter and temperature resistance requirements.
- ELECTRICAL CONTINUITY CHECK
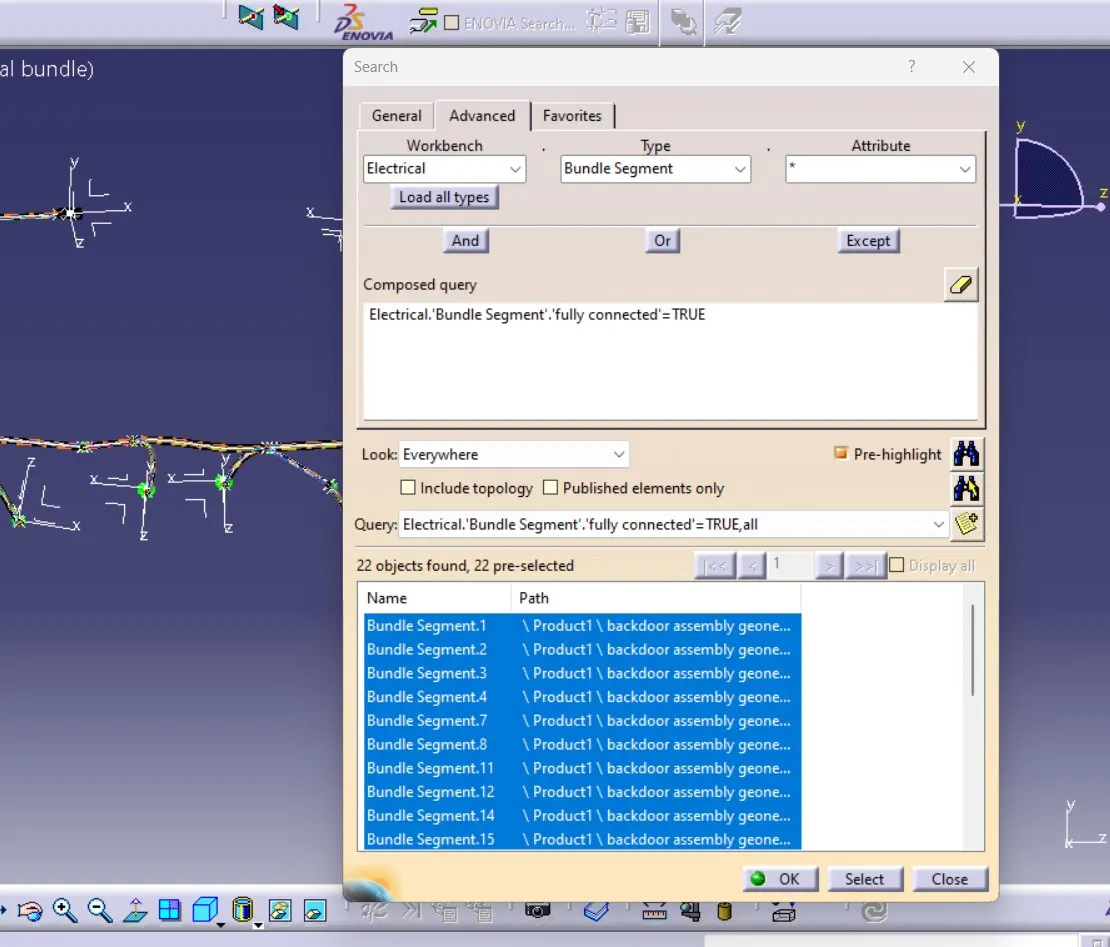
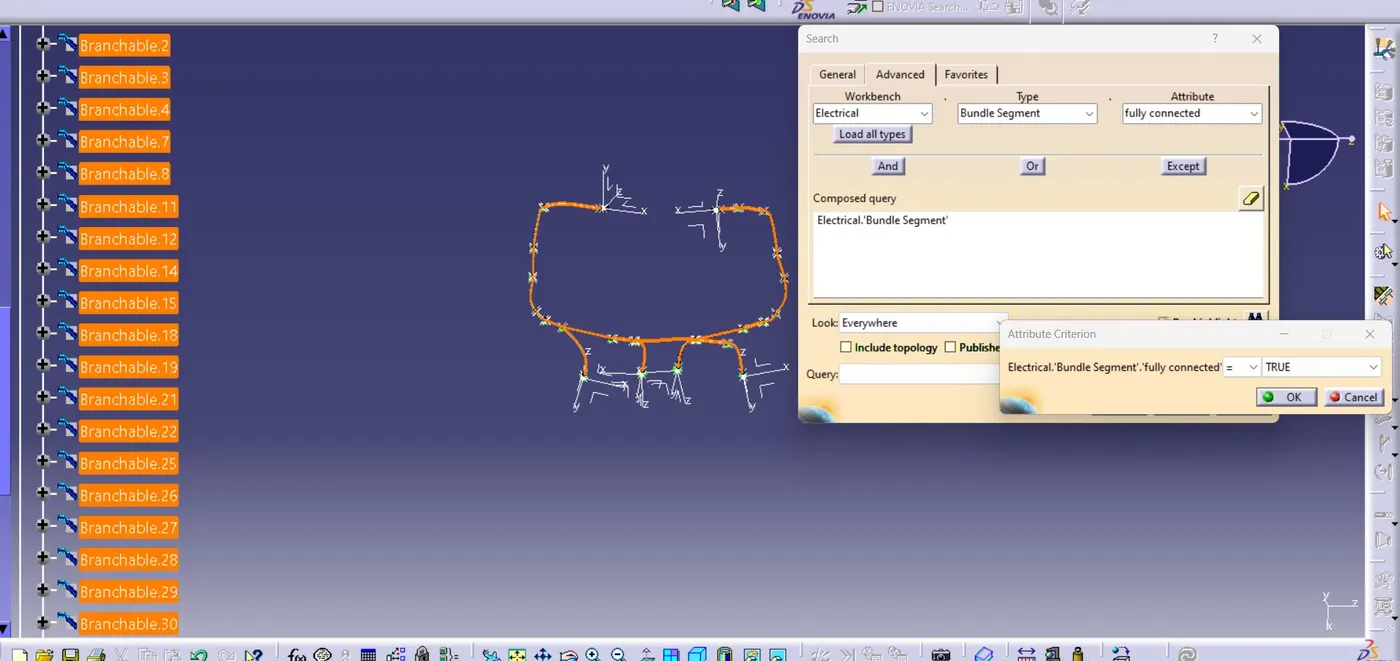
We need to ensure that the entire bundle is fully connected.
- Go to edit and then click on search command.
- Go to advanced
- Select workbench as electrical, type as bundle segment and attribute as Fully connected
- The select result should be as TRUE or FALSE and the click search to see the connectivity analysis result
WIRING HARNESS FLATTENING
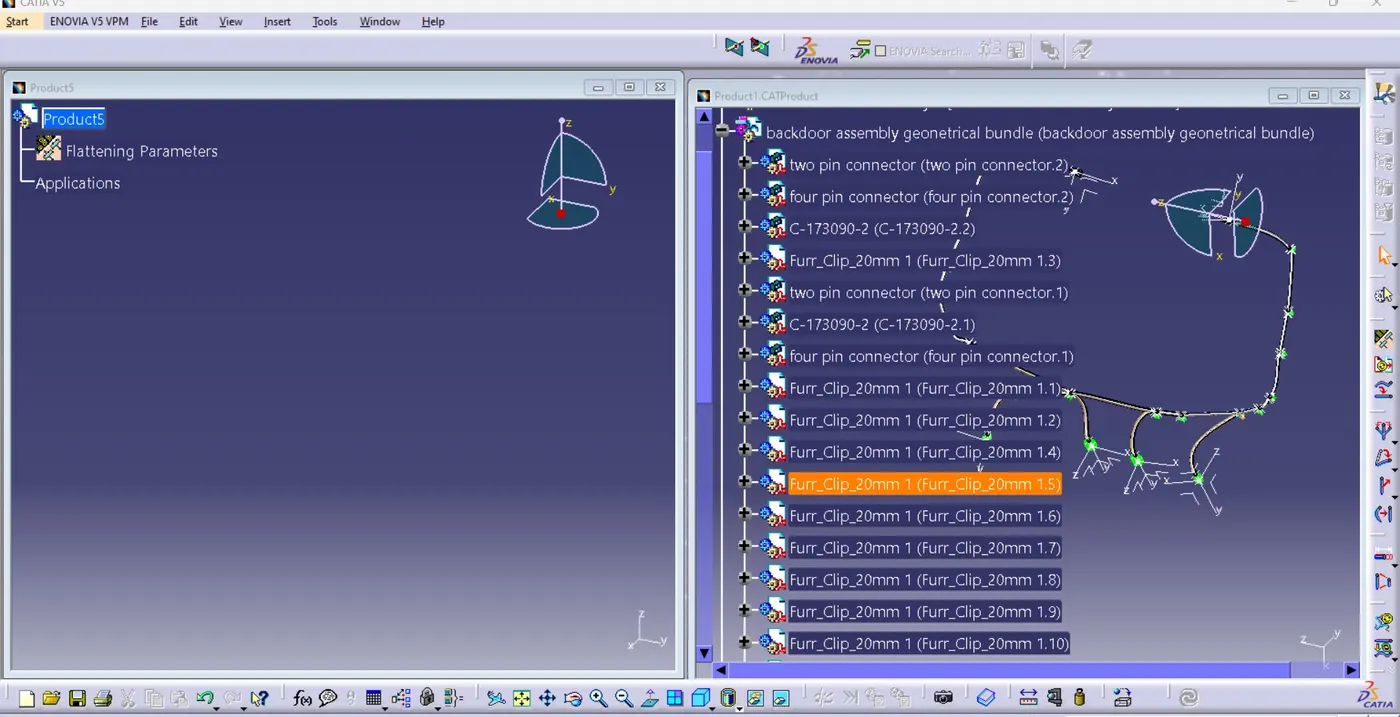
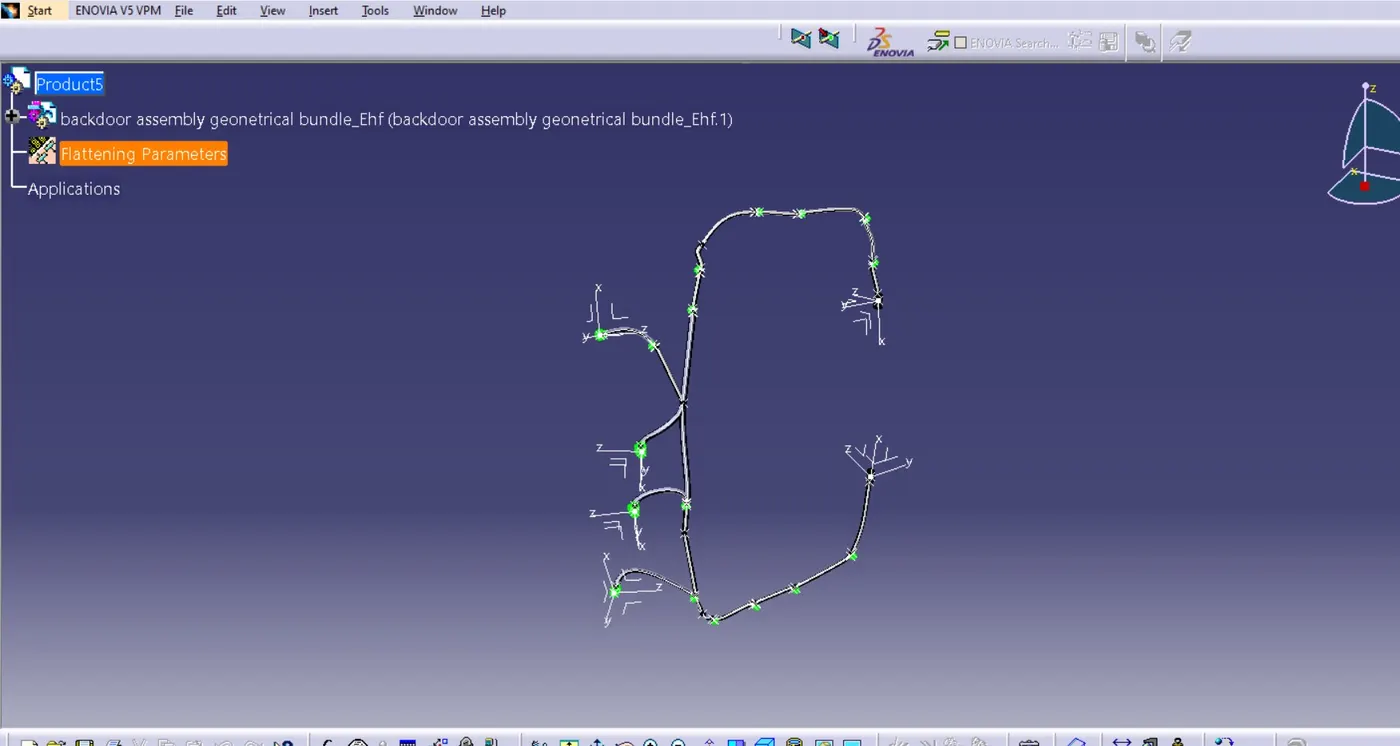
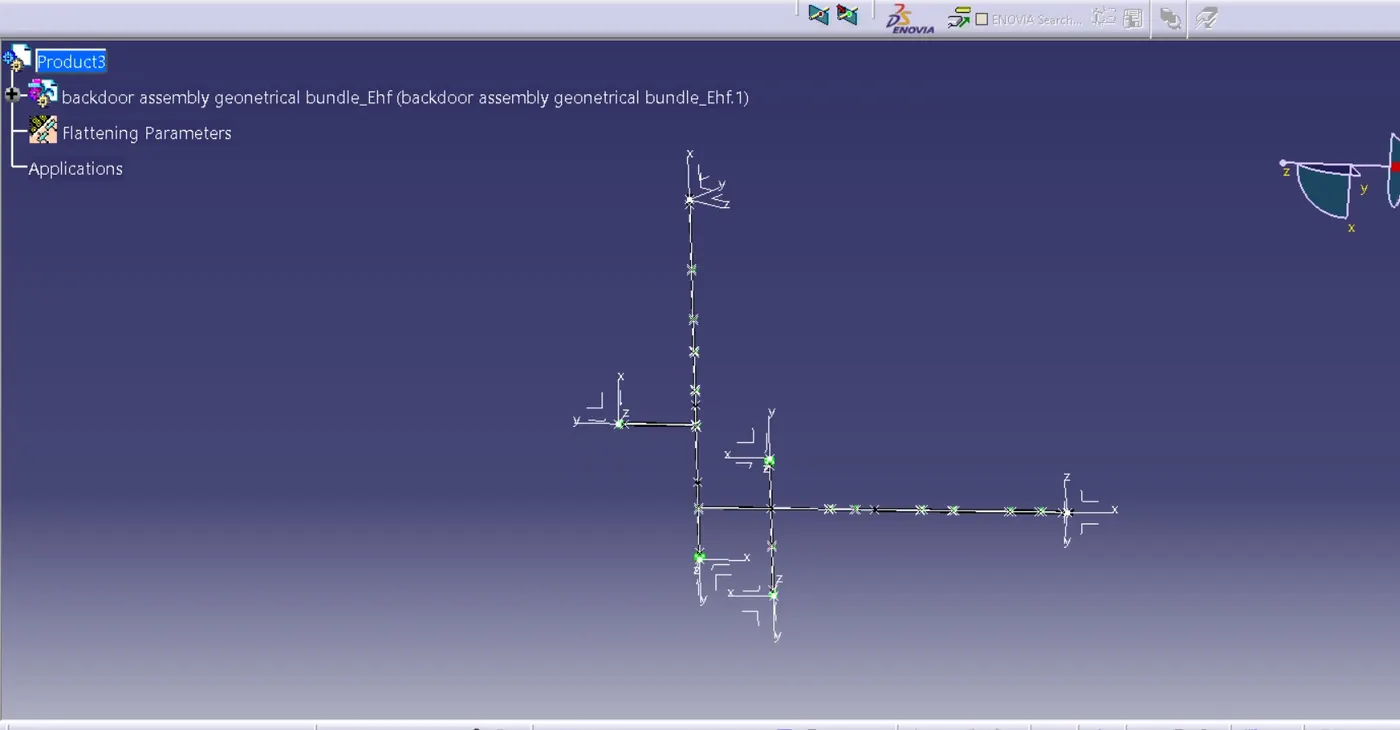
Wiring harness Bundle packaging process is done. Now we need to convert the geometrical bundle into a flattened wiring harness in the Electrical Harness Flattening Workbench.
- To create the Flattened Harness, we need to create a new product file and switch into the electrical harness flattening workbench.
- Now we need to define the Harness Flattening Parameters, save it in the same folder with all other files of back door harness project and then Extract the geometric bundle from the wiring harness context product file.
/ FLATTENED HARNESS VIEW IN THE DRAWING SHEET
Create a Drawing File for the flattened harness product.
First, we need to make sure that in the flatten parameter settings bundles and protective coverings have different graphical representation which are
Bundle Segments – Single line representation
Protective coverings – Double line representation.
- Create a new drawing file in the drafting workbench
APPLICATIONS OF AUTOMOTIVE WIRING HARNESS
- Two wheelers, three wheelers, cars, utility vehicles, and commercial vehicles.
- Electrical and geometrical requirements of automobiles, and are embedded in the body, engine, and chassis of vehicles.
- Body wiring harnesses are embedded into dashboards, door locks, power windows, and interior electrical components.
- Engine wiring harnesses embed into speed sensors, lock breaking systems, cruise control systems, and fuel injection systems.
- Chassis wiring comprise of the front, rear and main harnesses.
Conclusion
CAR back door wiring harness assembly has been successfully completed considering all the packaging rules and industry standards, Wiring harness flattening and Flattened view drawing preparations are also done using CATIA v5 software.