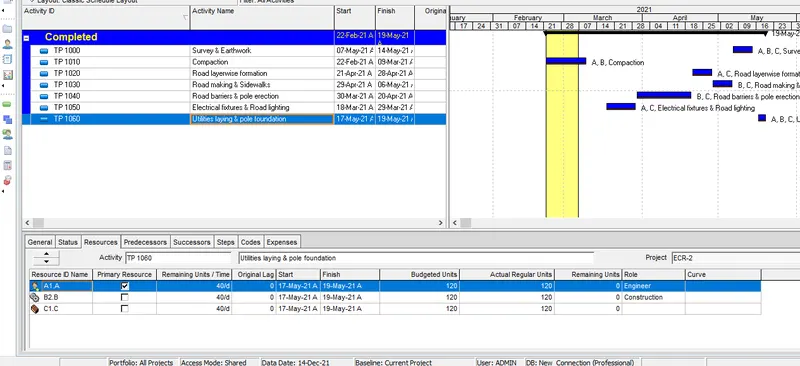
Project 2
Aim:
To Create the project as per the given question using Primavera P6
Procedure:
Step 1:
1) Open Primavera P6 and click report option
2) Click + button on top of the right screen
3) Choose the EPS as Skill lync education which created on project 1
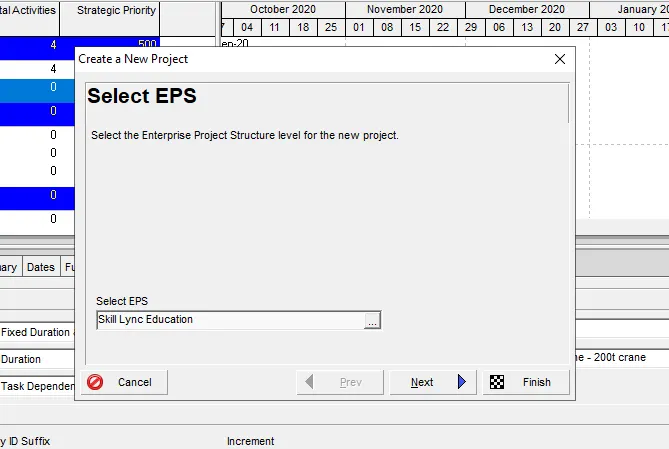
Step 2:
1) Rename the project as Education Centre Road
2) Click next
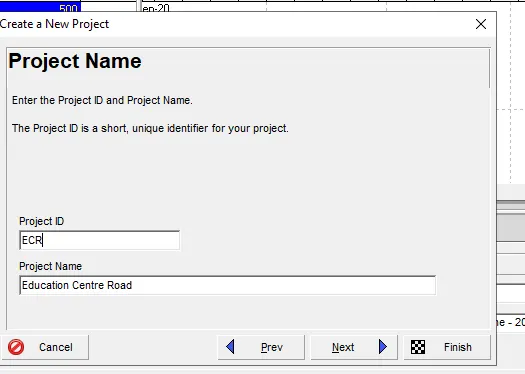
Step 3:
1) Edit the project start date as 22nd febrauary 21
2) Click next
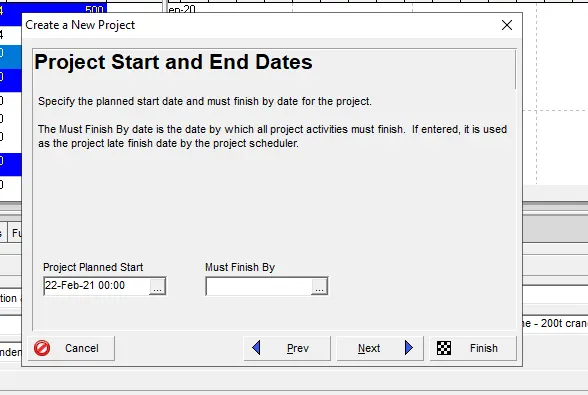
Step 4:
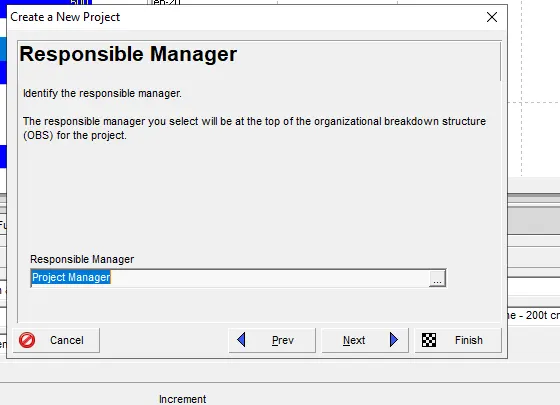
1) Choose the responsible manager
2) Click next
Step 5:
Adding Resource:
1) Click Enterprise and choose resource option
2) Click + button on top of the right screen
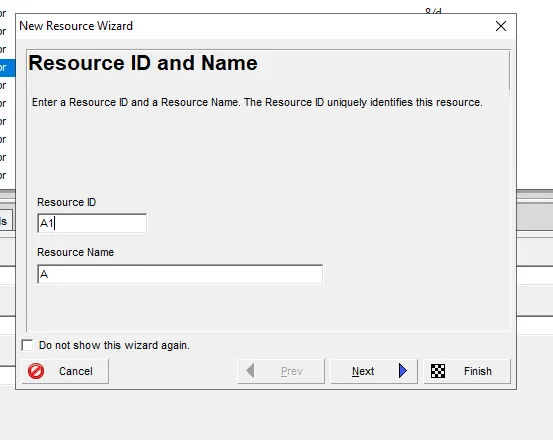
3) Edit the resource name as A
4) click next
Step 6:
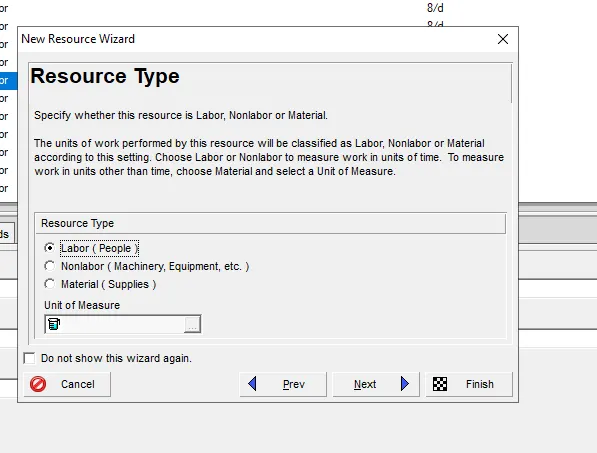
1) Choose the type as labour for resource A
Step 7:
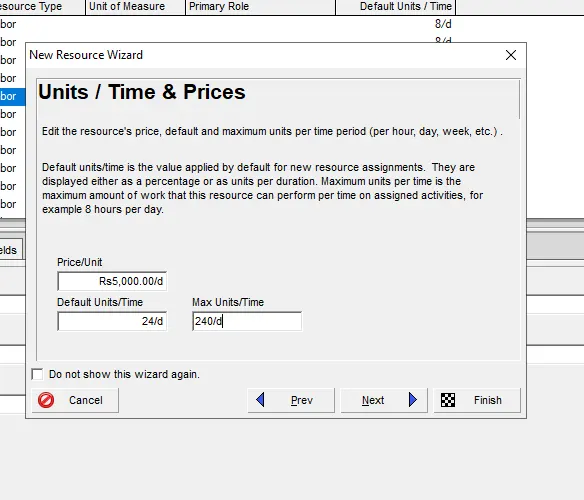
1) Edit the units/time for each resource
2) Click next
Step 8:
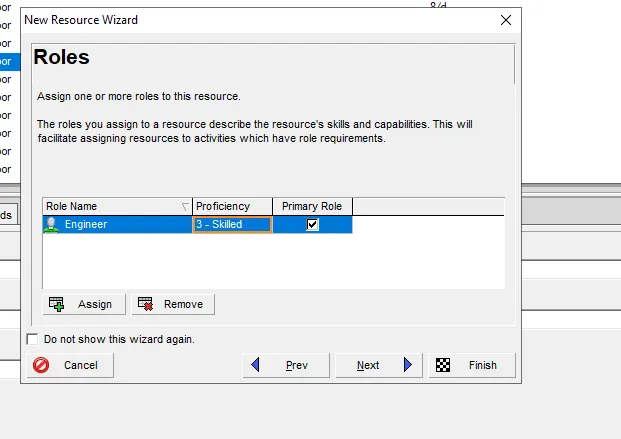
1) Assign the role as Engineer
2) Click next
Step 9:
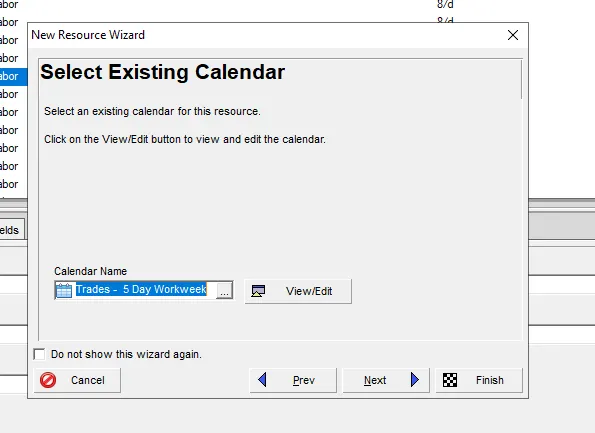
1) Choose the existing calender as 5 days workweek
2) Click next
Step 10:
1) Therefore A resource has been added successfully
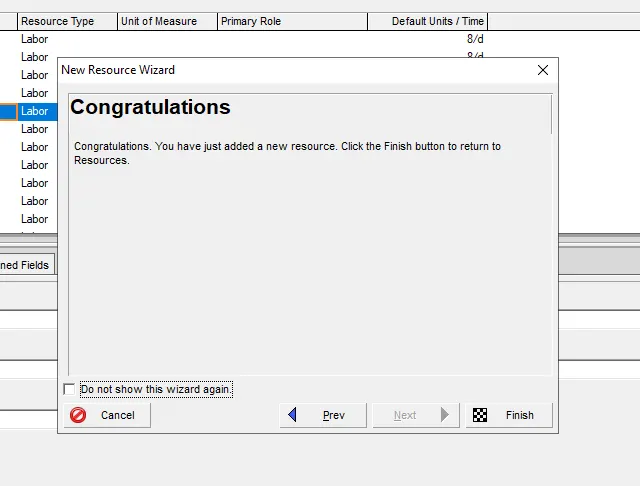
Similarly need to repeat this process for B and C resource
Adding Activities:
1. Develop the project schedule as per the given question:
Step 11:
1) Click activity tab
2) Click + button on top right of the screen
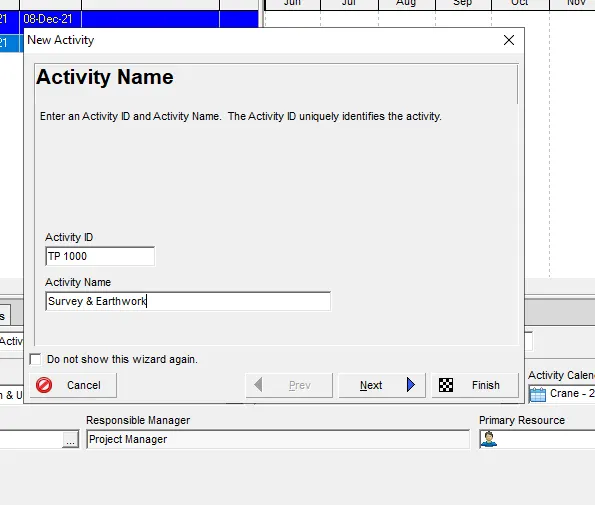
3) Edit activity name and code
4) Click next
Step 12:
1) Choose WBS as Education centre road
2) Click next
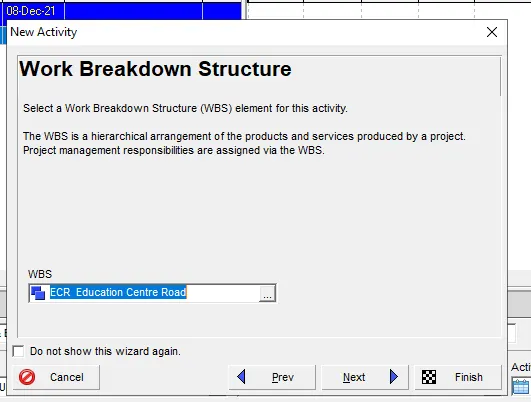
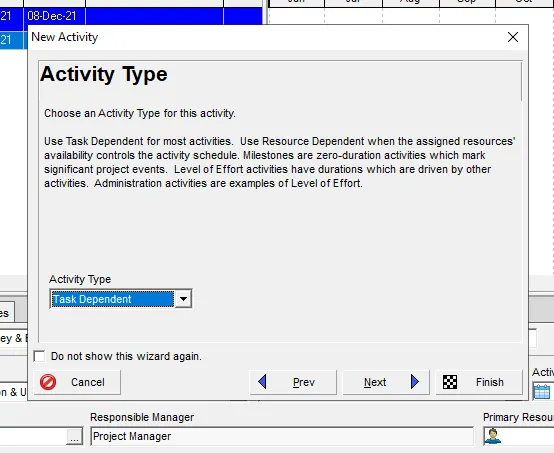
Step 13:
1) Choose task type as task dependent
2) Click next
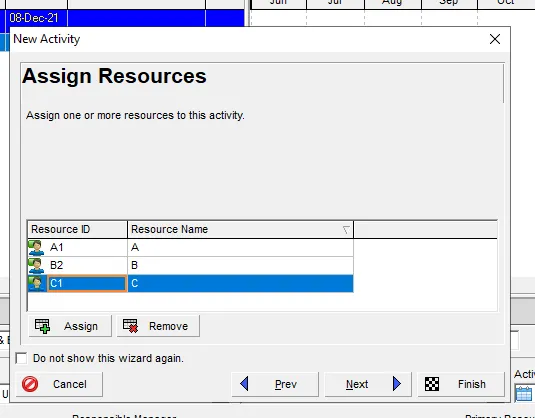
Step 14:
1) Assign the resoruce of A,B and C
2) Click next
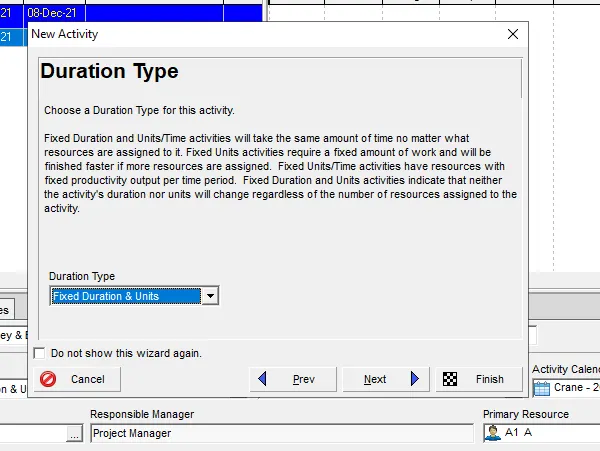
Step 15:
1) Choose duration type as fixed duration and units
2) click next
Step 16:
There fore 1st activity has been added successfully
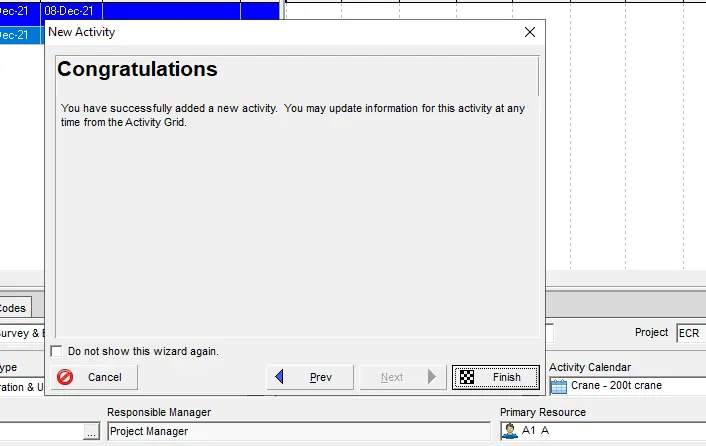
Similarly repeat this process for all other activities
Step 17:
1) Provide the predecessors for each activity
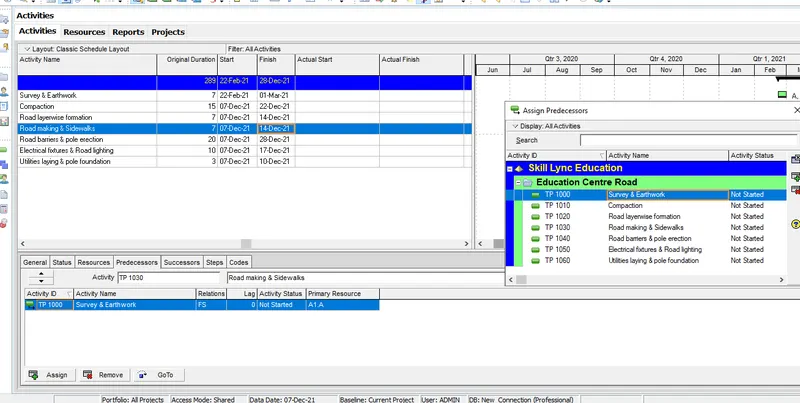
Step 18:
1) All the activities has been updated successfully
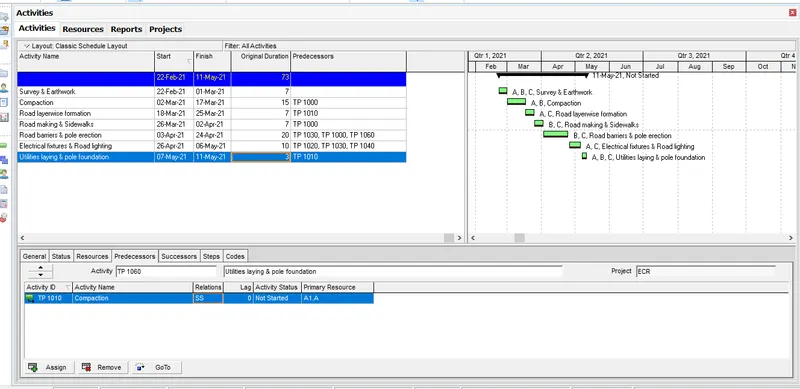
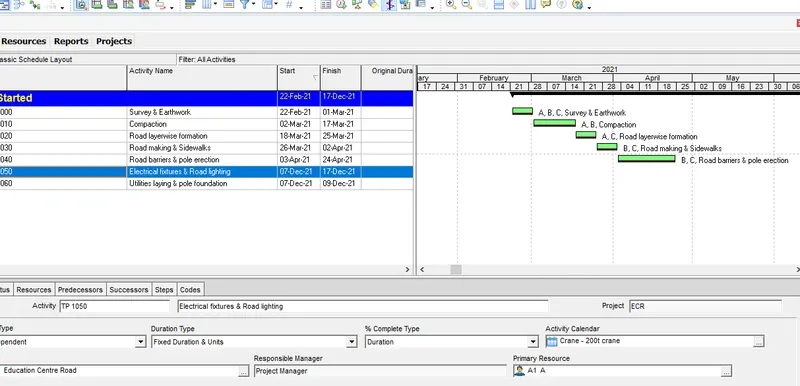
2. Use 3-Tier timescale with Year / Month / Weeks
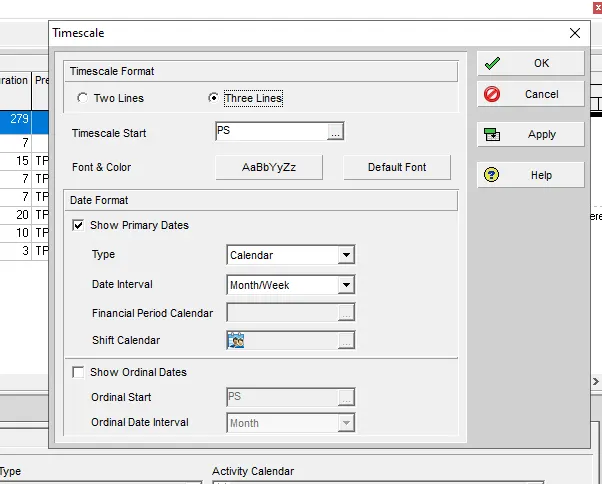
Step 19:
1) Right click the gantt chart and choose timescale
2) Select 3 line option
3) Choose month/week option
4) Click apply
Step 20:
1) Therefore timescale has been updated year/month/week wise
4. Add a budget to your project - INR 6 cr.
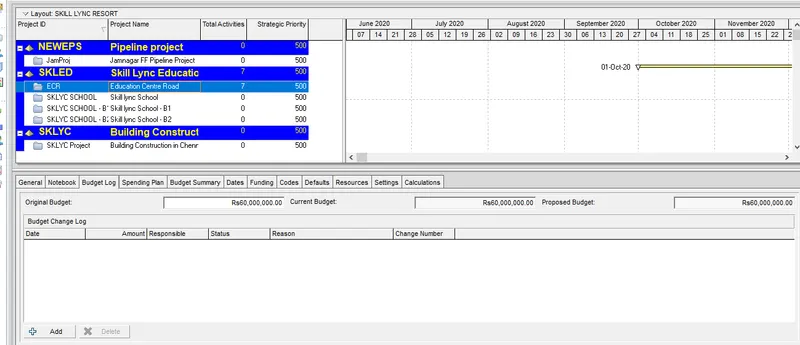
Step 21:
1) Open report page and click the education centre road report
2) Go to budget log on bottom tool
3) Edit the original budget as 6 Cr.
5. Assign a baseline to the project:
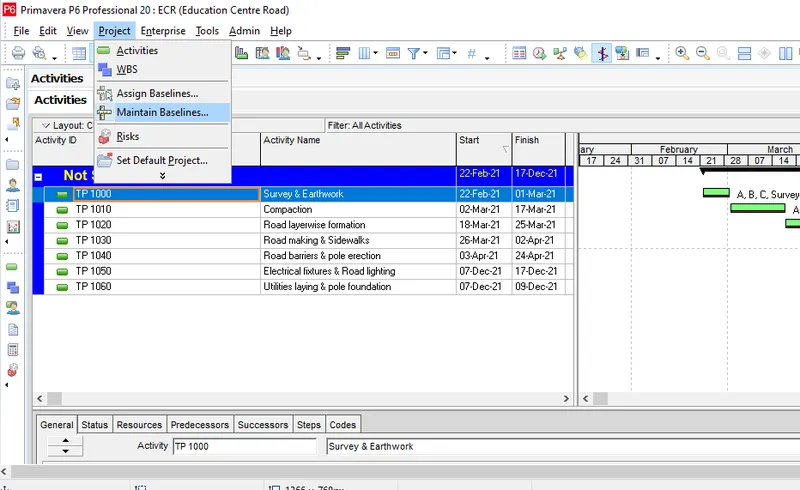
Creating Baseline:
Step 22:
1) Click project tab and choose maintain baseline option
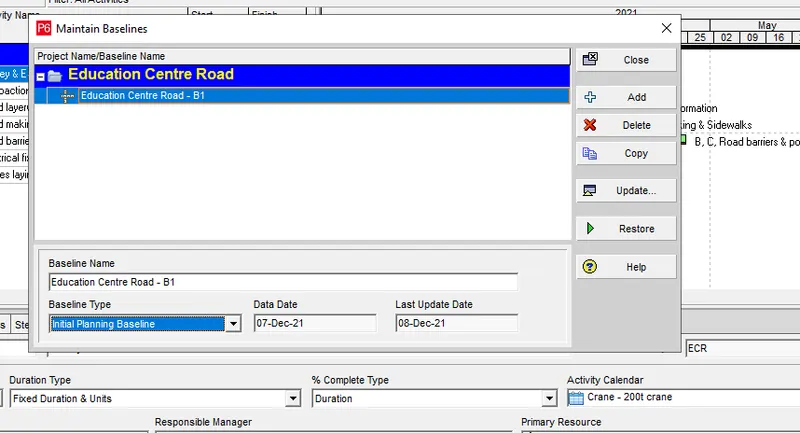
Step 23:
1) Provide the baseline name
2) On the bottom, choose the baseline type and clik ok
Step 24:
1) Click update option
2) Choose all activity option
3) Click update and close
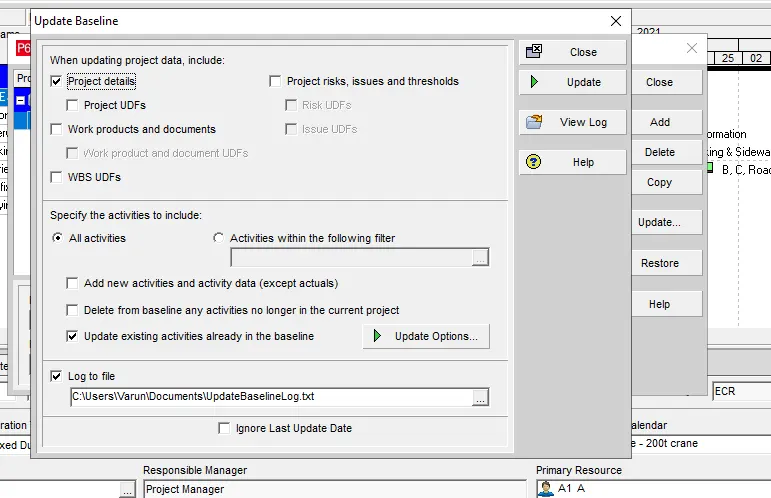
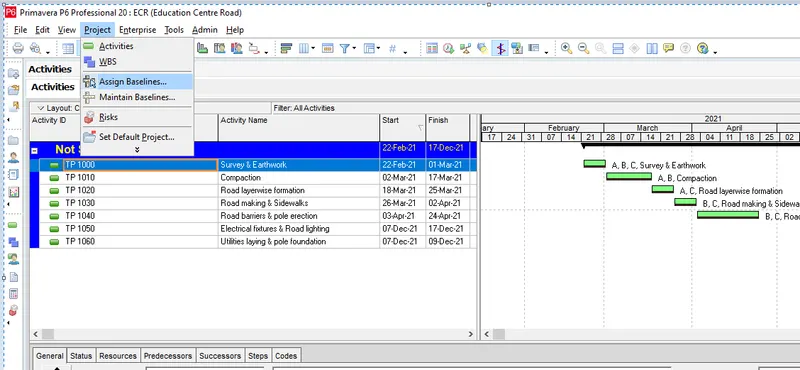
Step 25:
1) Click project tab and choose assign baseline option
Step 26:
1) Choose the primary, secondary and tertiary baseline as Education centre road
2) Click Ok
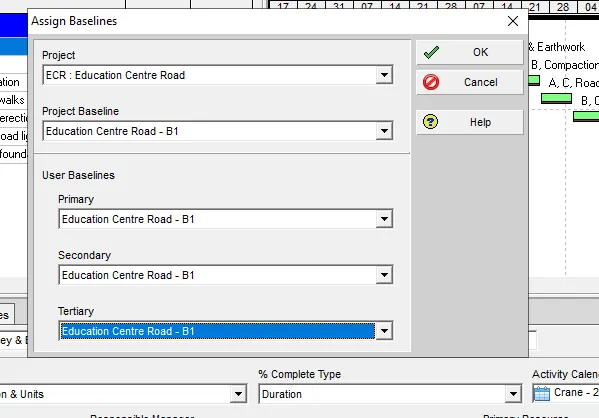
Therefore baseline has been assigned successfully
6. Add following expense:
Task - 1 - Rs 20,000/- (Item - Fuel)
Task - 2 - Rs 30,000 /- (Item - Maintenance)
Step 27:
1) Go to Project tab and choose expense option
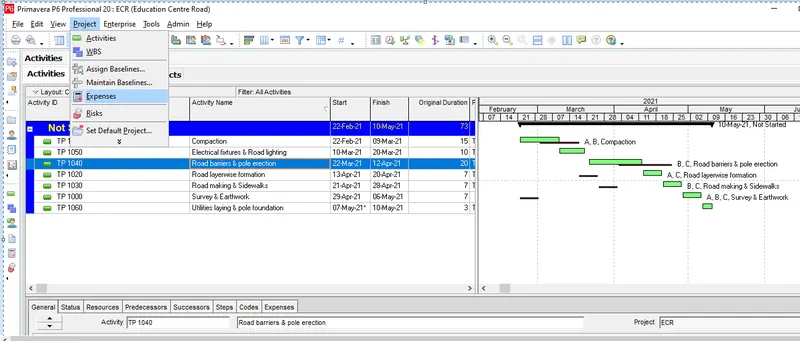
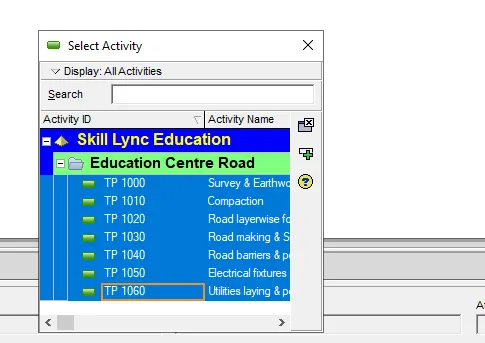
Step 28:
1) Click + button on top right of the screen
2) choose the activities
Step 29:
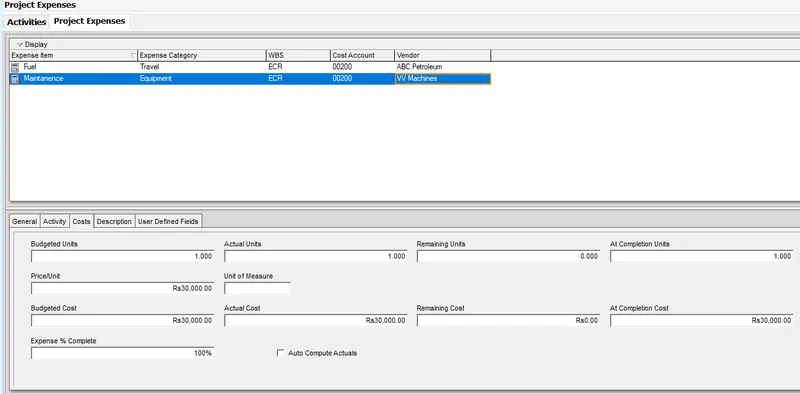
1) Edit the expense name, cost and its vendor name
2) Input the expense cost at the bottom of the screen
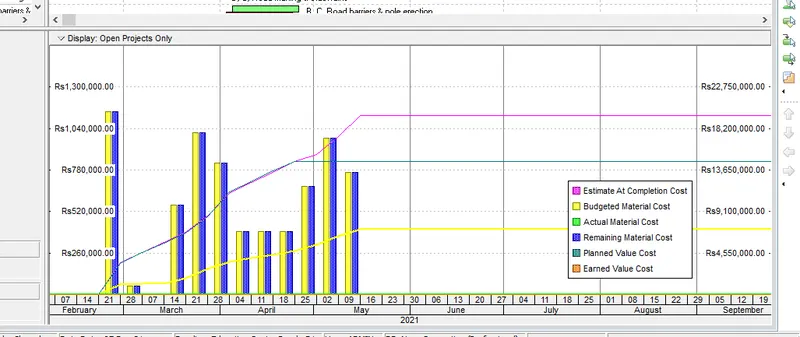
7. Generate material resource costs curve
Step 30:
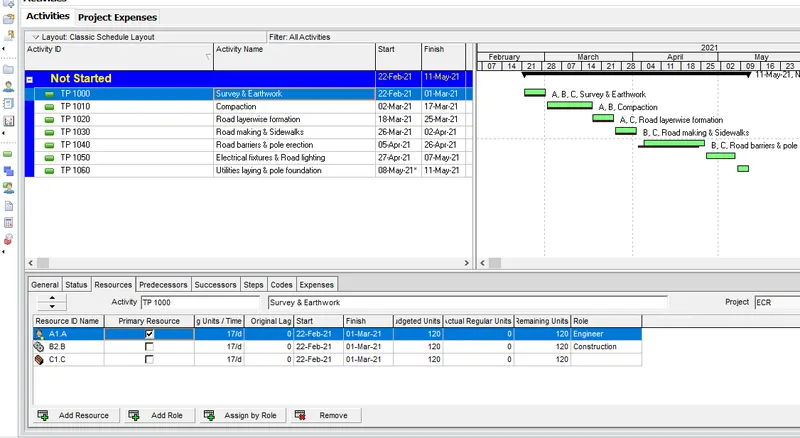
1) Click the activity which are belongs to material resource
2) Select the resource tab on below of the control bar
Step 31:
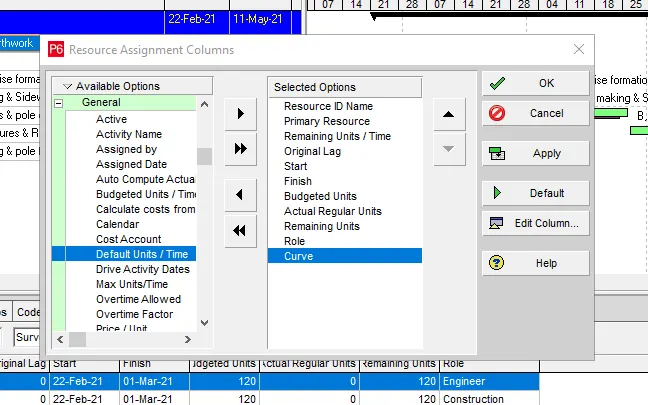
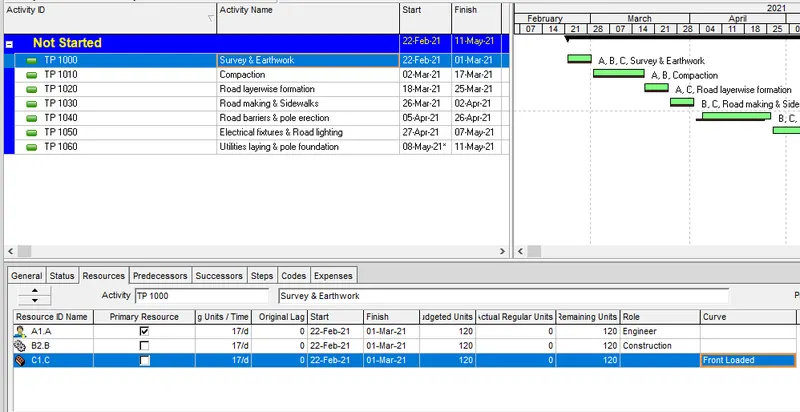
1) Click the resource tab and select customize option
2) Choose curve from general option
Step 32:
1) choose the curve option from the curve
2) Click ok
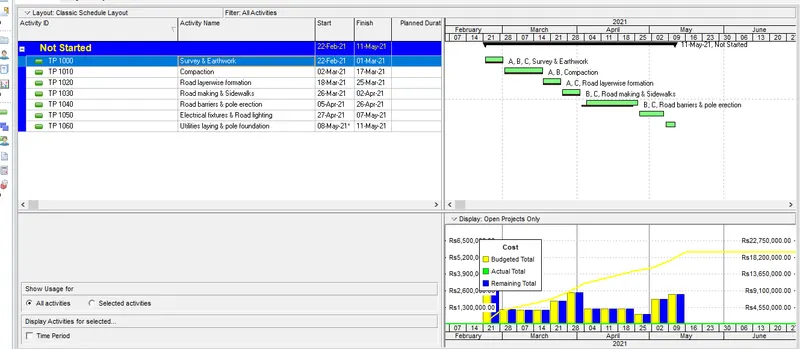
Step 33:
1) Click activity resource usage option from top of the screen
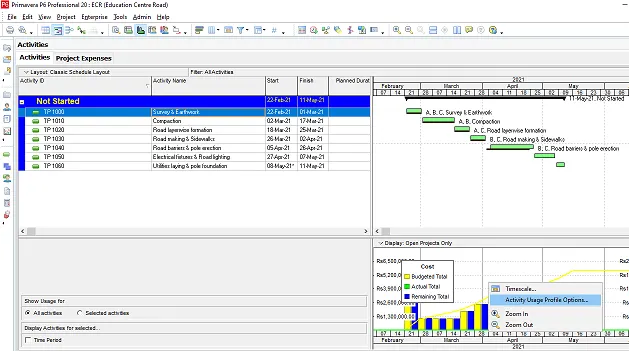
Step 34:
1) Right click the curve and choose activity usage profile option
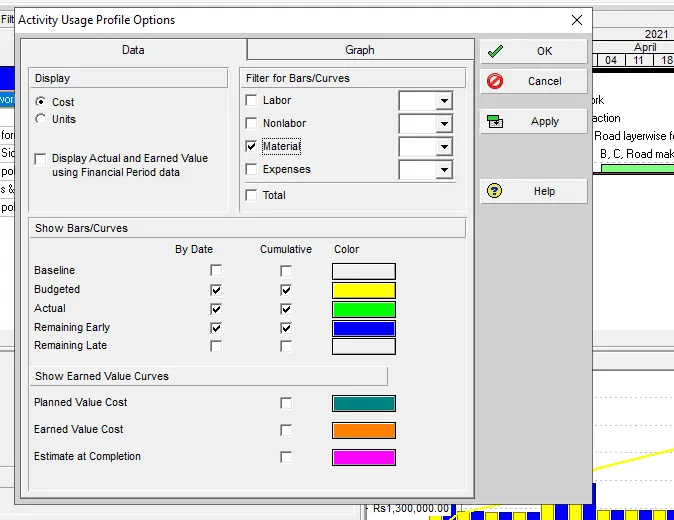
Step 35:
1) Click material option under the filter
2) click ok
Step 36:
Therefore the material resource cost curve has been generated.
8. Generate an activity wise cost report
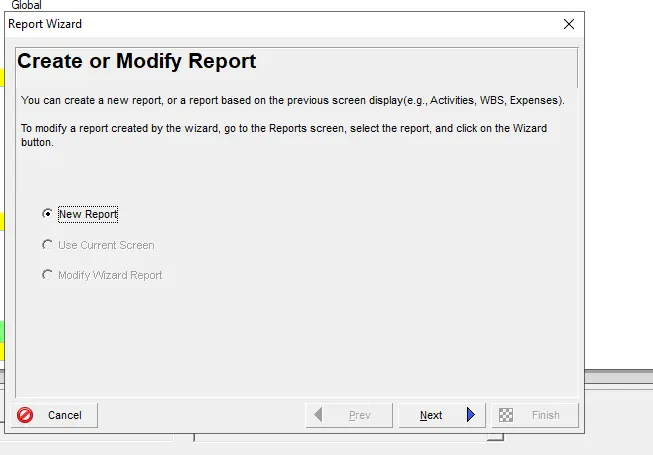
Step 37:
1) Click report on leftside of the screen
2) Click + button on top of the right screen
3) Click next
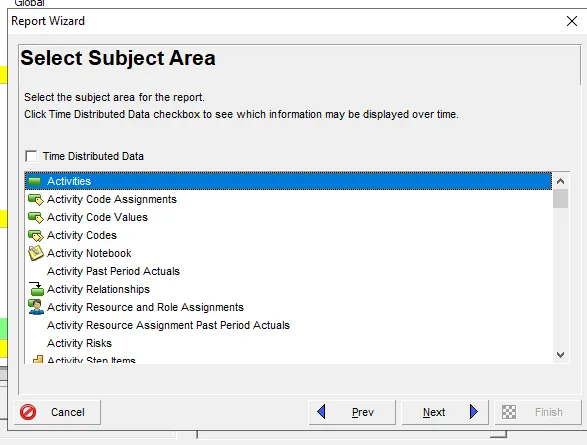
Step 38:
1) Choose subject area as activities
2) Click next
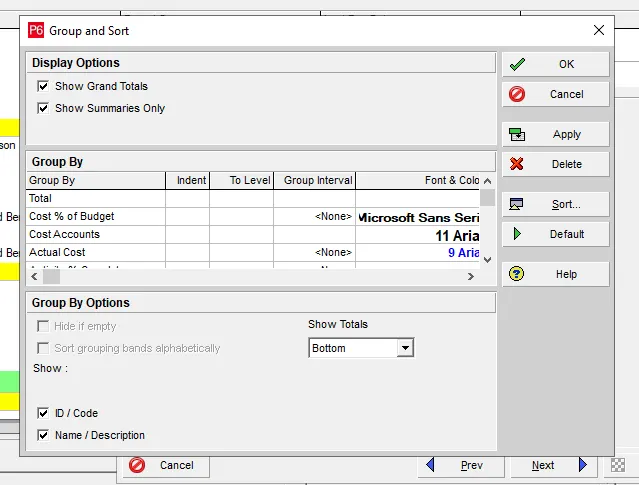
Step 39:
1) click group and sort option
2) Choose the costs and activity related options
3) Click ok
Step 40:
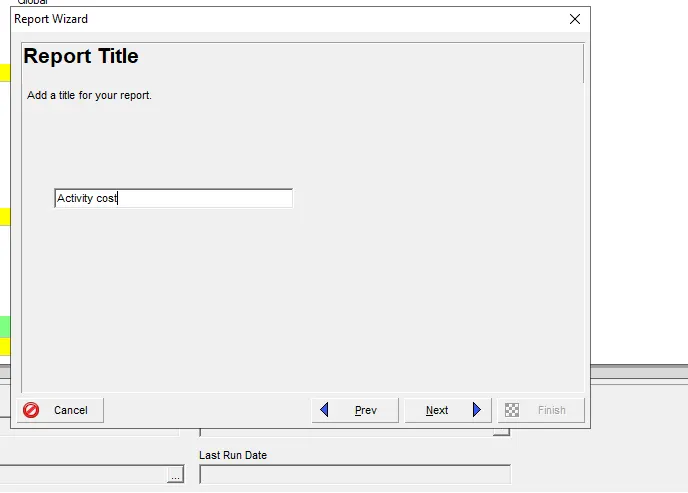
1) Rename the report title as Activity cost
2) Click ok
Step 41:
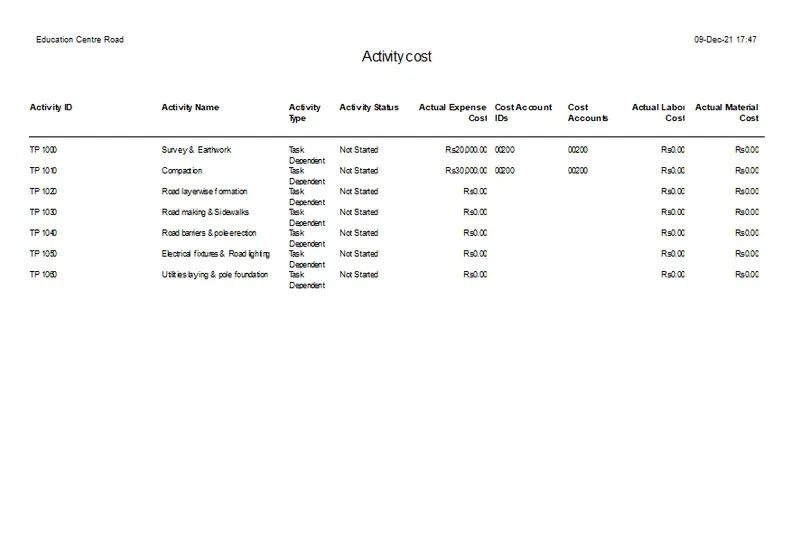
1) Therefore activity wise cost report has been generated
9. Create a reflection
Step 42:
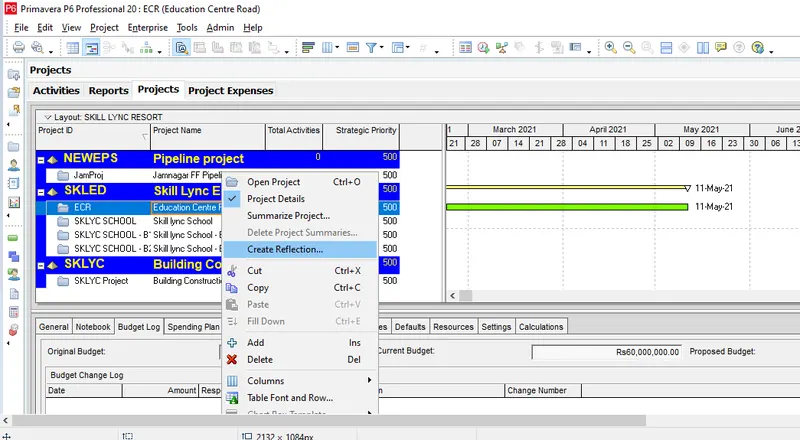
1) Click project on leftside of the screen
2) Select the project of education centre road
3) Right click and choose create reflection option
Step 43:
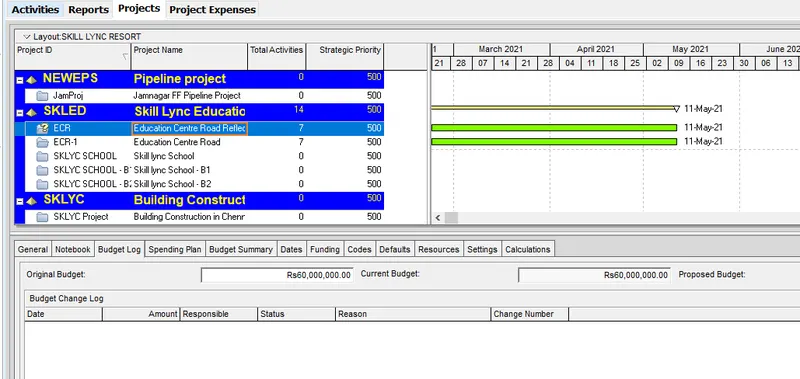
Therefore reflection of the project has been created successfully
10. In the reflection, auto update the project at 15 days from start
Step 44:
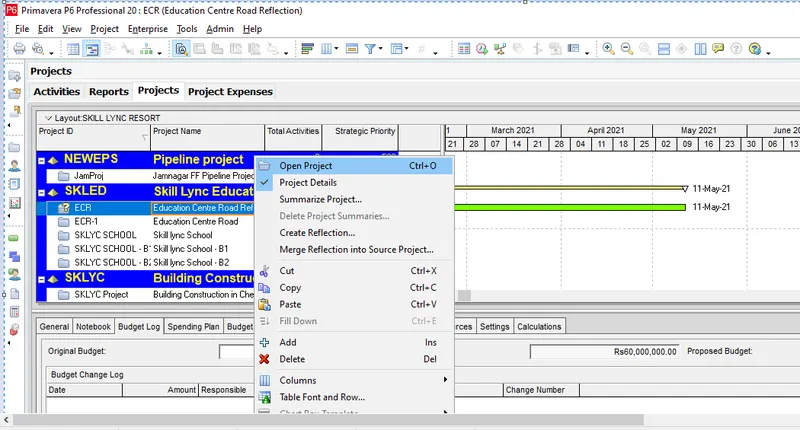
1) Right click the reflected project
2) Choose open project option
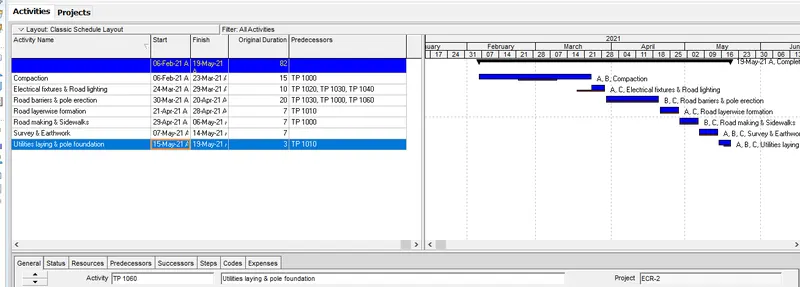
Step 45:
1) Change the date of 15 days prior to the current project
Step 46:
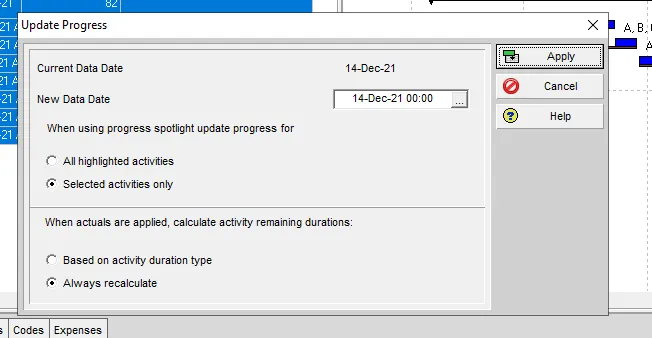
1) Click tools tab and select update progress option
2) click ok
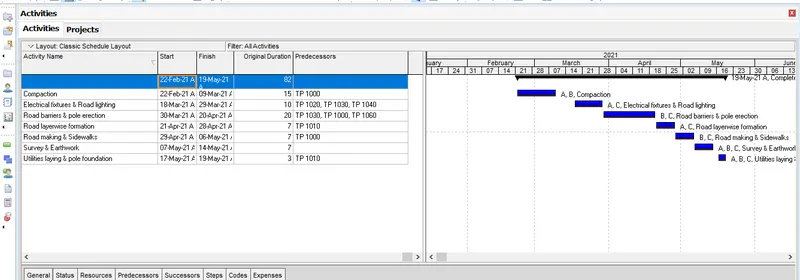
Step 47:
1) Therefore the schedule has been auto updated successfully
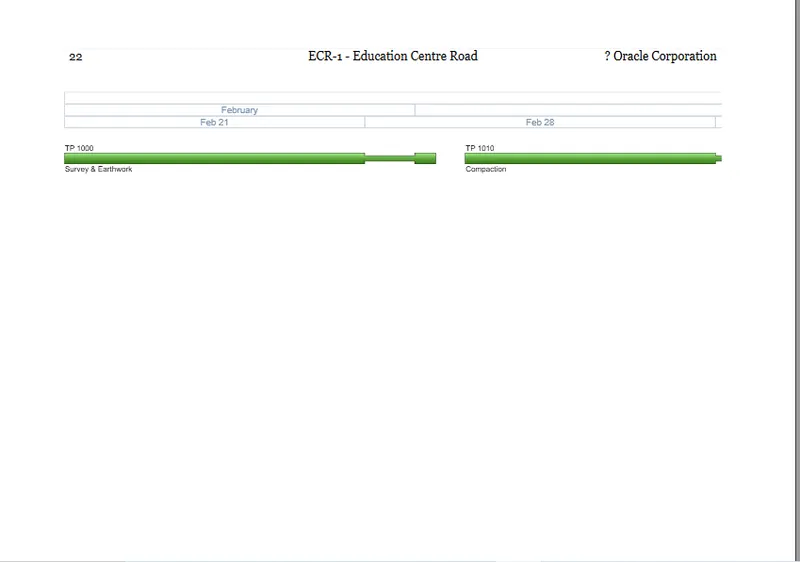
11. Open a TSLD view of the project in Visualizer
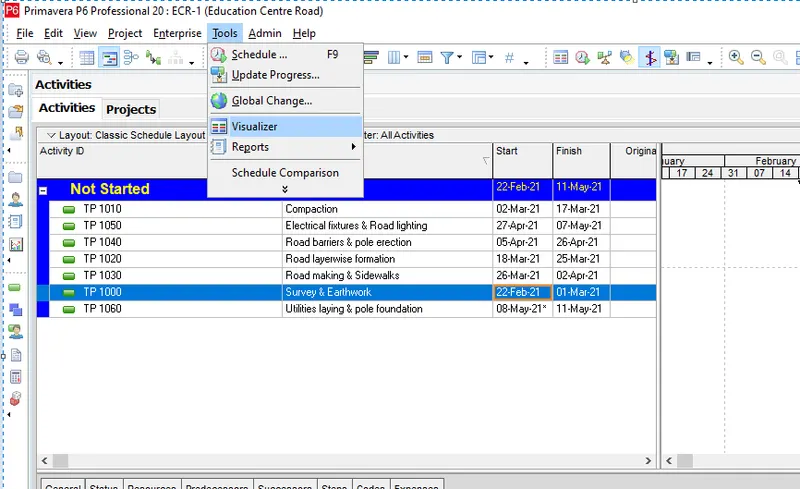
Step 48:
1) Go to tools tab and select visualizeer option
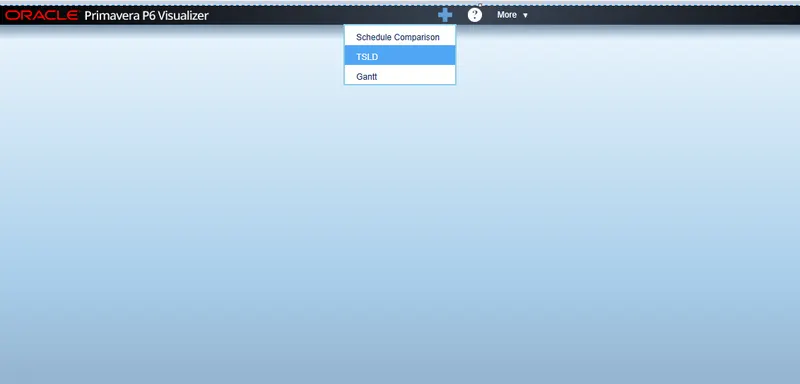
Step 49:
1) Click + button on top of the screen
2) Choose TSLD option
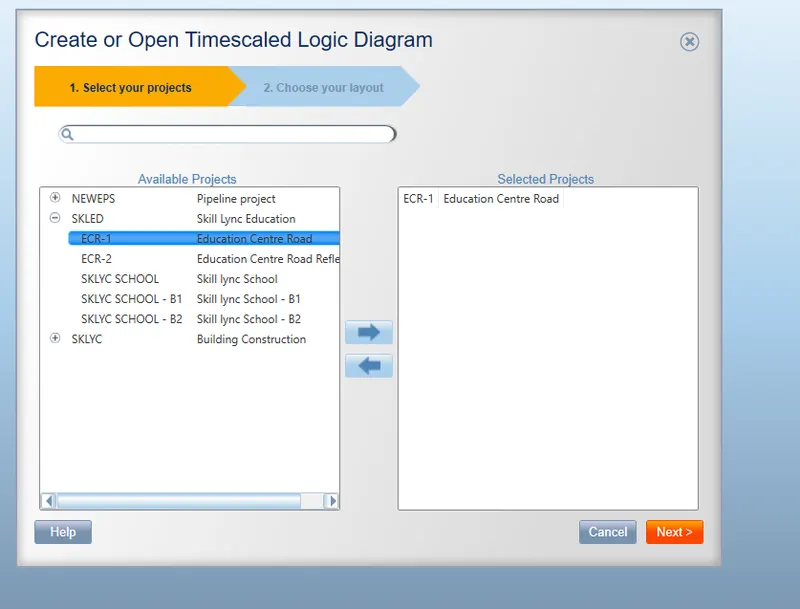
Step 50:
1) Choose the education centre road project
2) Click ok
Step 51:
1) Rename the tsld
2) Choose TSLD type
3) Click draw
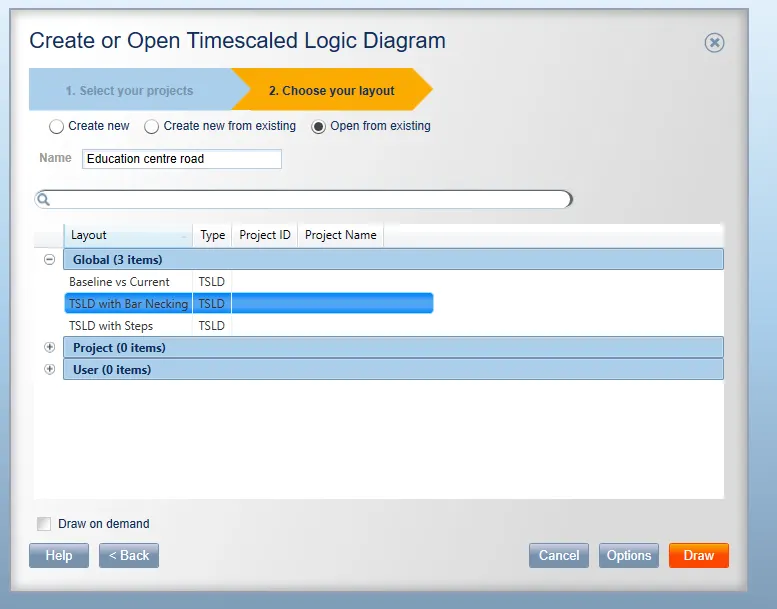
Step 52:
Therefore project has been created in P6 Visualization
12. Add curtains up-to first 15 days of the project.
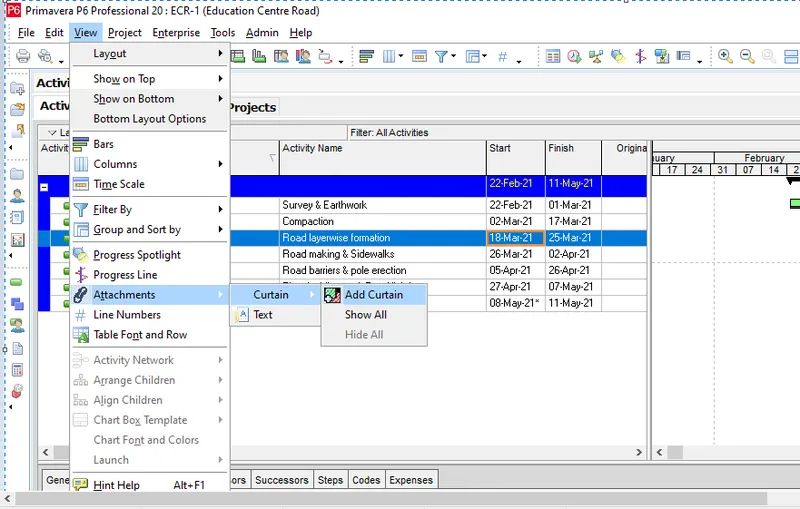
Step 53:
1) Go to View tab and choose attachment option
2) Select curtain and choose add curtain
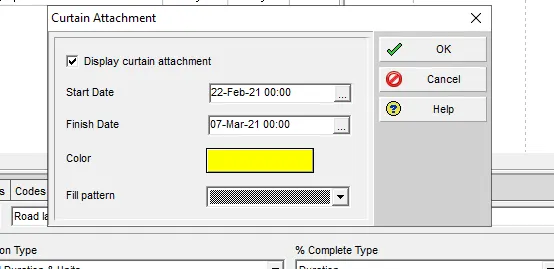
Step 54:
1) Edit the start and finish date of the project
2) click ok
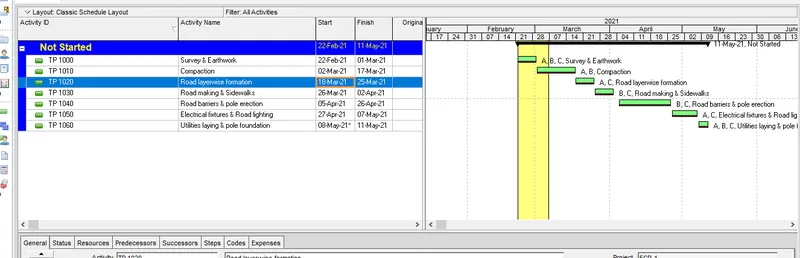
Step 55:
Therefore the curtain has been added successfully
13. Find out the actual cost for labour, non-labour and material cost of the updated schedule
Step 56:
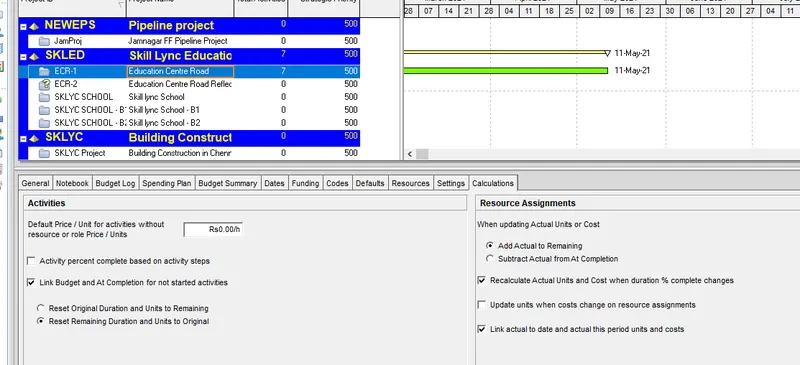
1) Go to project page and click calculation tab
2) Select add actual option
Step 57:
1) Click anyone of the project and choose resource option on bottom of the project
2) There we can find the actual and budgeted costs for each resource