Project 2
Qusn:Route the Wiring harness on Given car body and Prepare flatten view drawing in CATIA V5. Application of all Packaging rules, Industry best practices studied in this course shall be demonstrated in design. Apply Protection coverings as required.
Solution:
From the given link in the question, Backdoor 3D file is downloaded..
- Generally on the back door of any car we find very important application like rear tail lamps( including parking lights, brake lamps), Wiper motor connections, Number plate lights.
- So to provide supply to these applications on the car, we must route the wiring harness on the given backdoor body.
- White routing the harness we must consider wiring harness safety and leaving connectors at their appropriate positions.
- Here safety of the wiring harness and connectors means avoiding: sharp edges, sagging of the harness & rotating parts), and also taking care of asthetics .
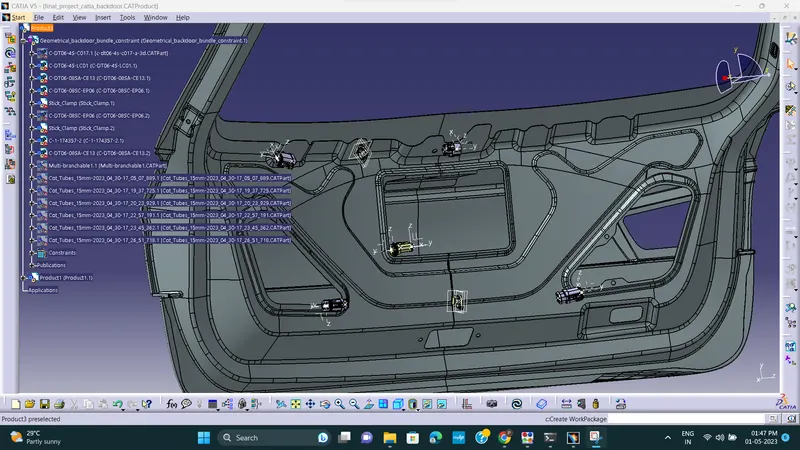
- For interconnection of the all the 3 application of wiper motor, Number plate lamp and tail lamps I have used 4 connectors and 2 supporting clamps are used. and placed them accordingly wrt the proper positions on the car body.
- 1 , 8 pole interconnector is used, which makes further connection with main roof harness.
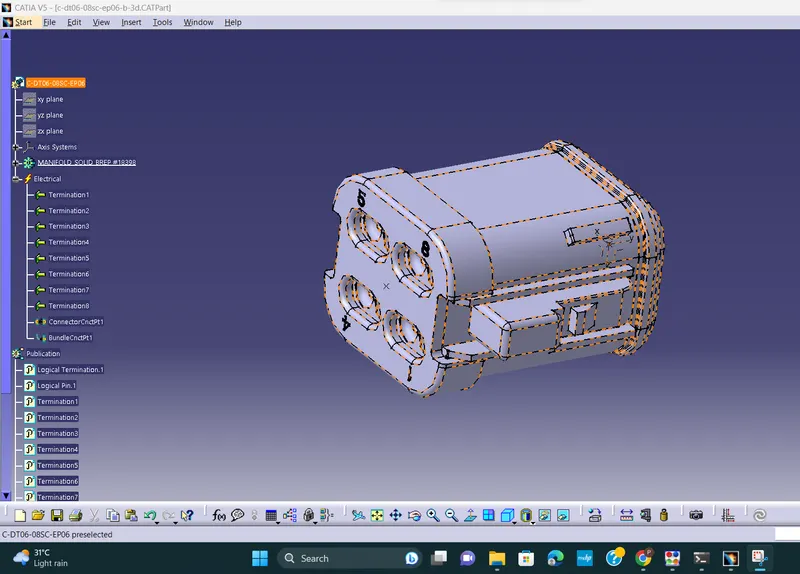
- The image below shows a connector which is defined electrically using Electrical part design workbench before using it for assemblying on the back door.
- Like wise we have to define Bundle connection and connector connection of all the connectors & Harness entry , exit planes and points for supporting clamps before using it on Electrical assembly.
-
Create product file (here product file name is product 3) within that create one more file name it as Geometrical_Backdoor_bundle_constraint. Copy all the connectors and clamps required for assembly on the Geometrical_Backdoor_bundle_constraint file. and paste Back door assembly file seperately on Product 3 file. So , now under Product 3 file there are saperate 2 main prodcut files are existing as shown below.
Now go to Electrical assembly workbench place all the connectors on the backdoor as shown in below image. Use Mechanical assembly work bench to rotate , snap move or creating constraints to position the connectors and clamps right on the back door surface.
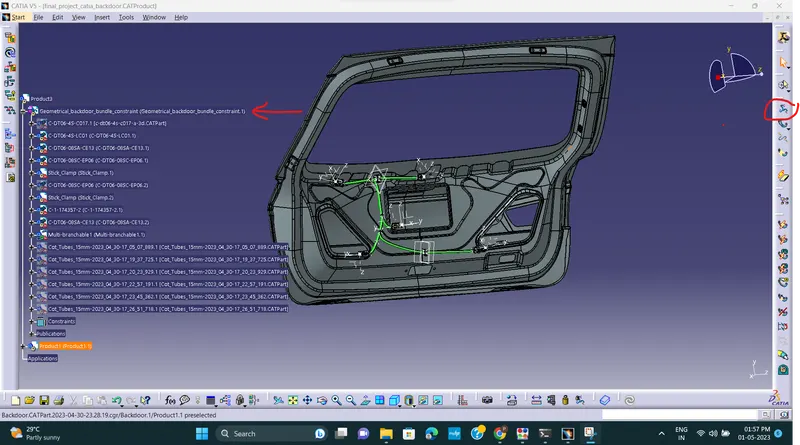
1)Now Go to the The Electrical harness assembly work bench
2) Select Geometrical bundle icon (marked in red) , click on the file Geometrical_Backdoor_bundle_constraint. This is the fisrt step to create multibranchables. A file with name multibranchables is generated on the tree.
Use multibranchable command to route the harness. There is option for branch definition , when we click on that we will have a route definition box
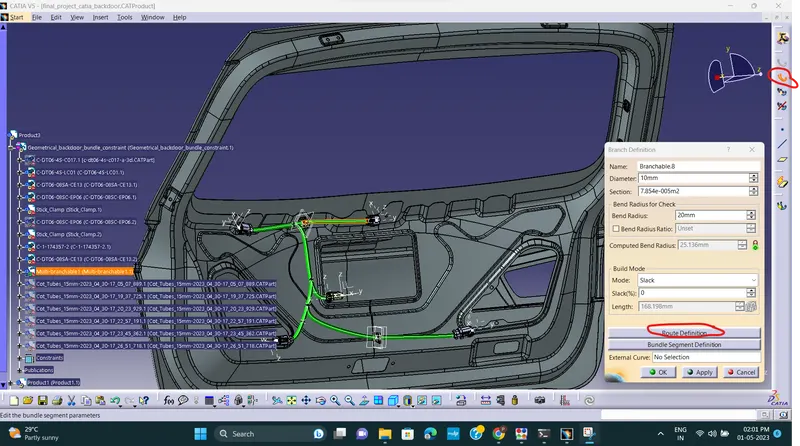
Clicking on route definition, we have to select the components in between which we have to route the harness as shown in below image
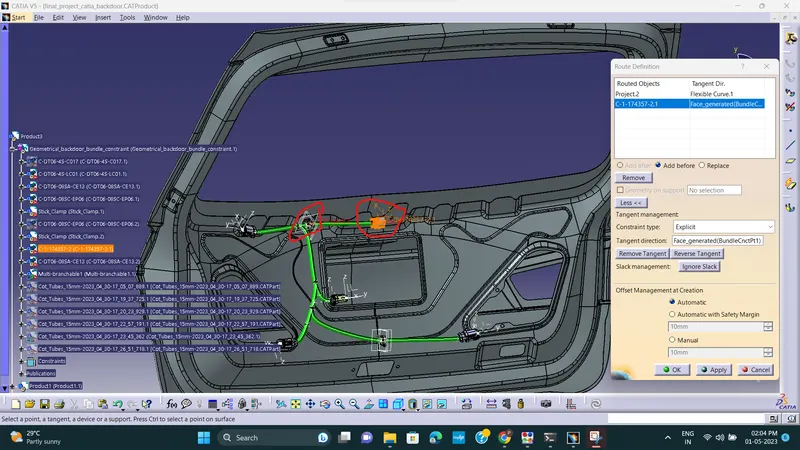
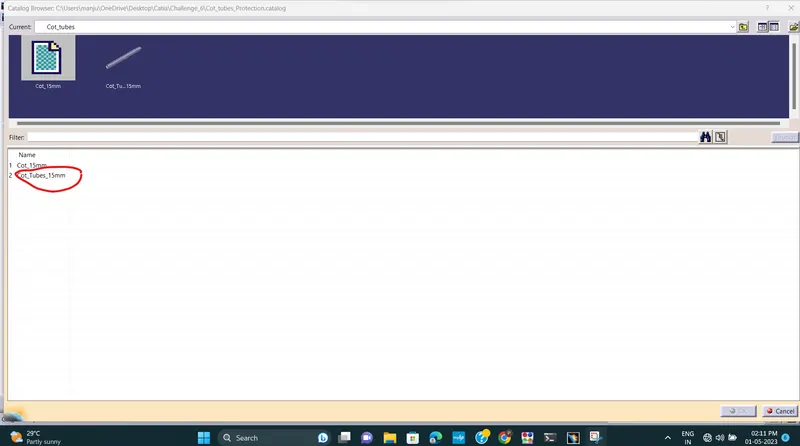
Now create a protective covering file to protect the wiring harness. Here i have used 15 mm cot tube b coz the wiring harness thickness considered is 10mm. We have to always consider the protective covering diameter should be greater than wiring harness bundle thickness.
I have created a catalogue with name Cot_tubes_Protection. Add this cot_tube_15mm on the mentioned catalogue
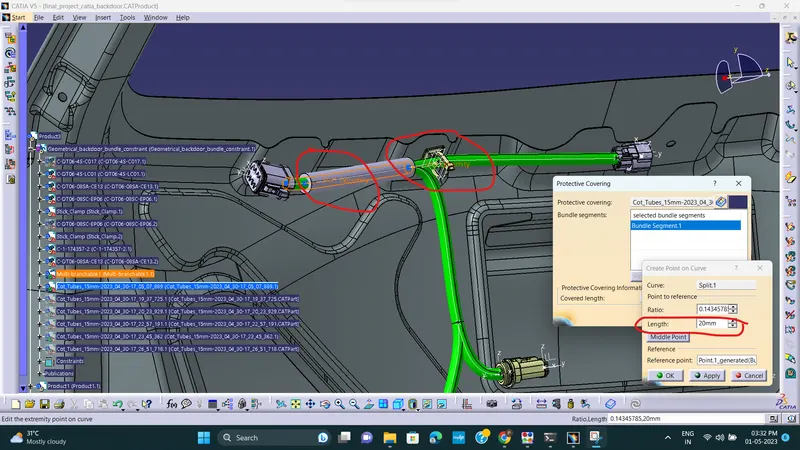
Select the branches to apply cot tube. Cot tube will be added on the select branch.
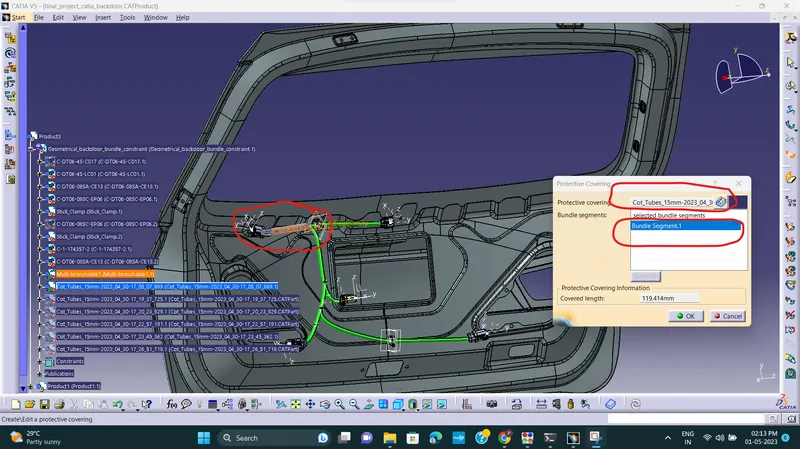
Click on start extremity , give length of 20mm and click on OK. Select End extremity And give a length of 20mm as shown and marked below.
After adding all protective coverings will have assembly as shown below.
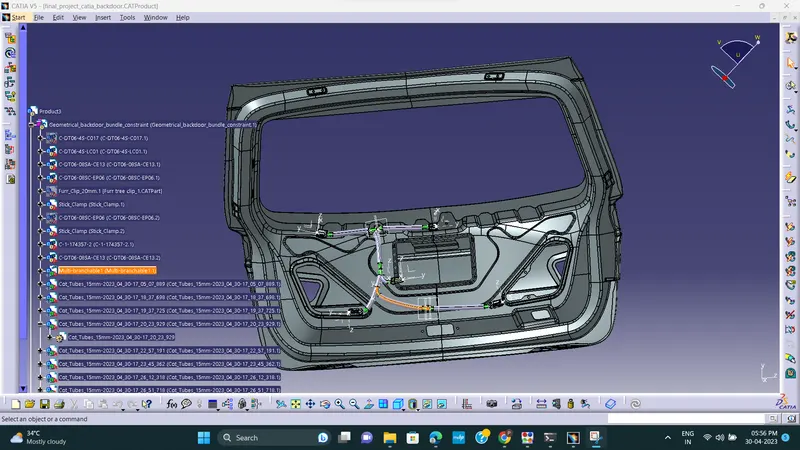
Go to File-> Save management command and save the file.
To flatten the wiring harness following steps to be followed.
Go to the Harness Flattening Workbench.
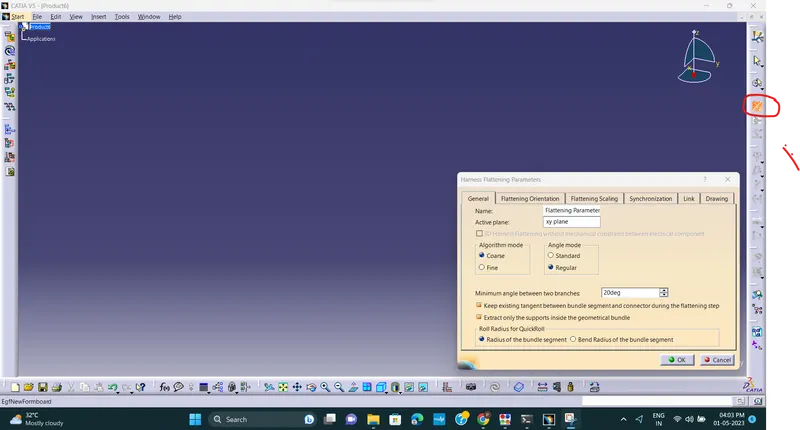
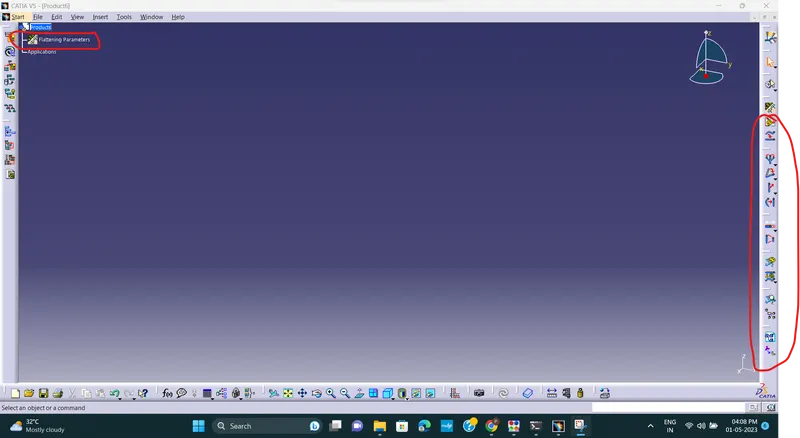
New->product -> Click on Harness flattening parameters as shown and marked in below image.
Keep General setting as shown below.
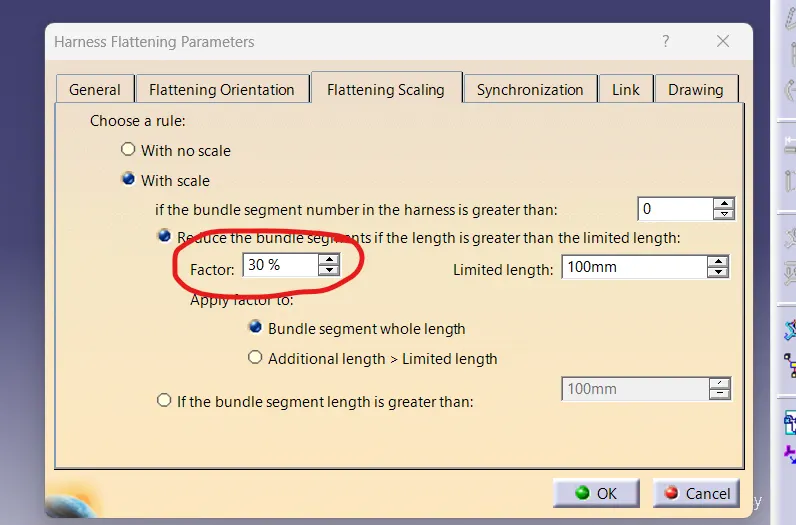
Flattening scaling parametres as shown below.
Harness Flattening parametres as below. Change as per the requirement.
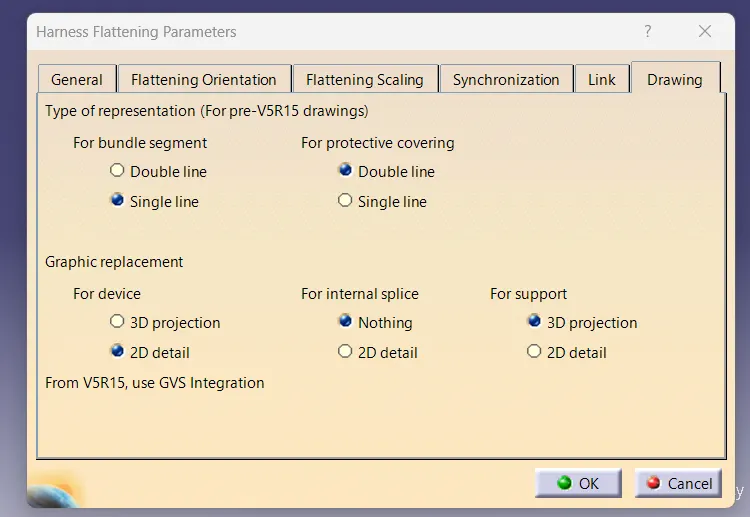
After clicking on OK, Flattening parametres file is added on the tree. and rest other functional commands like rotate, quick roll etc are activated as shown below.
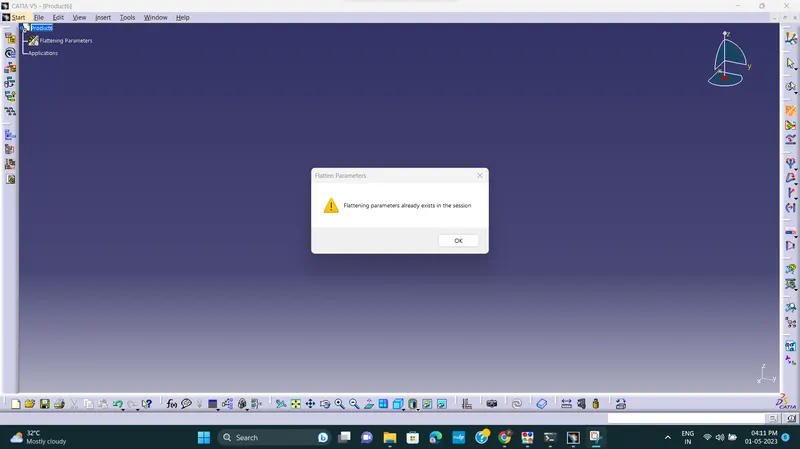
This Flattening parametres can be defined only once for one assembly. We cannot do it again as shown below.
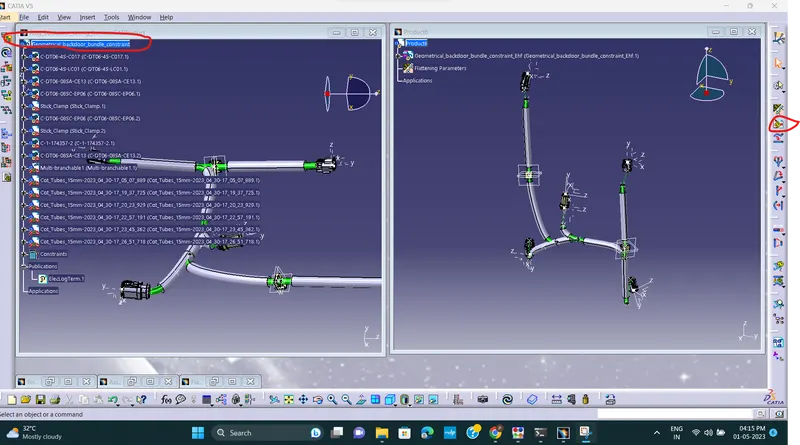
Now Vertically tile both Geometrical backdoor aseembly constraint file and flattening product file.
Then use extract command marked below. Select Geometrical_backdoor_bundle_constraint file. Then The file will be extracted to flattening product file.
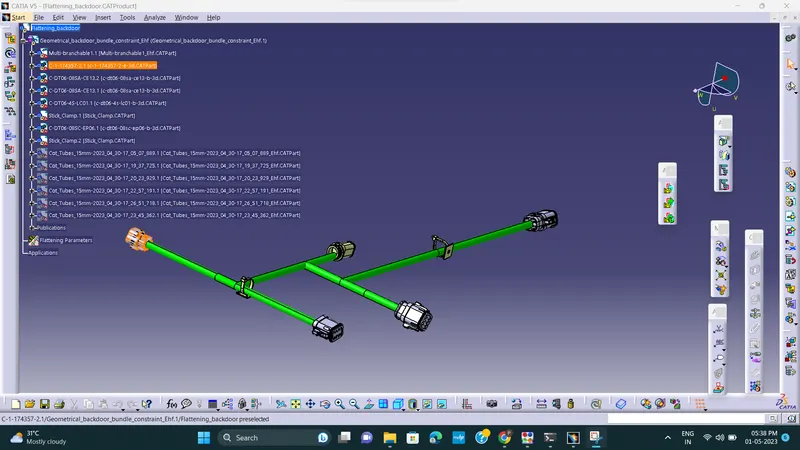
We can observe now Geometrical_backdoor_bundle_constraint file changed and converted to extension ie Geometrical_backdoor_bundle_constraint_Ehf. EHF means Electrical harness flattening.
Hide the Backdoor assembly file file. Only Geometrical_backdoor_assembly_constraint file will remain visible.
Flattening of the wiring harness is possible only when The harness bundle continuity is existing.
To check the continuity of the wiring harness Press Control+h, then in advanced, Select Workbench :electrical Type: Bundle segment, Attribute:Fully connected. Select: False , then click on search button
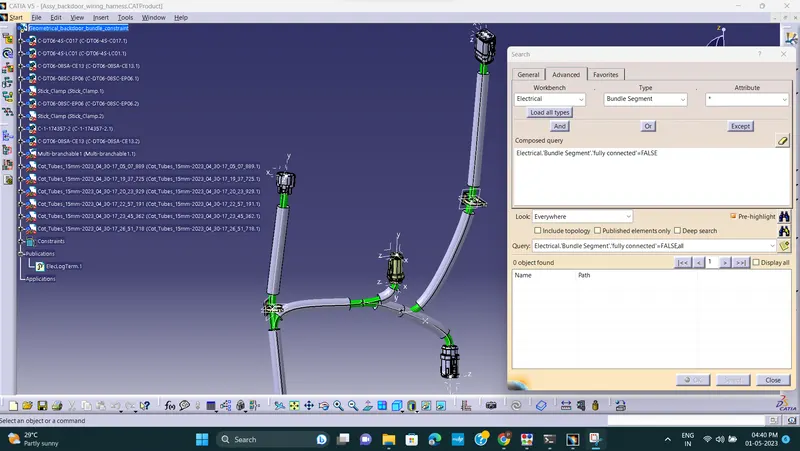
Bundle continuity is exist. There is no discontinuity in the bundle segments. If any issue, then it will be highlighted on the Name and path section.
To flatten the wiring harness, click on flatten command as marked below. And click on any plane of any connector(considering as reference) , Its selected as an active plane. Click on any one branch, then select all branches icon will be activated. Click on that , Click on OK.
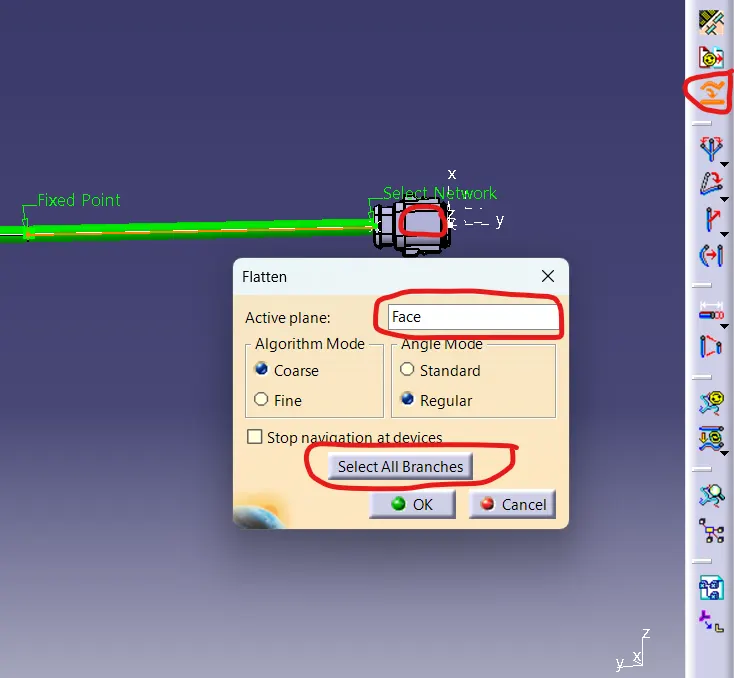
The harness will be flattened as shown below.