Project 1
Aim: -
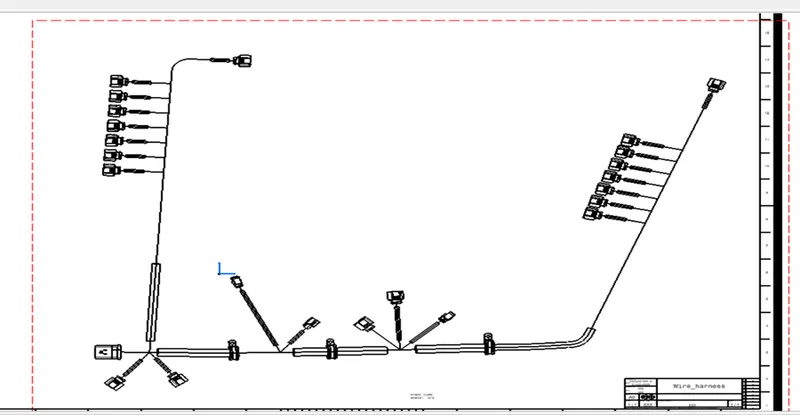
To route the wiring harness on given Engine and flatten view drawing in CATIA V5.
Objective: -
The objective of the project is to route the wiring harness on given V16 Engine and prepare flatten view drawing in CATIA V5. All types of packaging rules have to be considered while routing the harness. Also, Industry best practices should be demonstrated in design. All the necessary details like clearance, clipping/clamping selection, harness fixing requirements, harness continuity should be provided in order to design wiring harness.
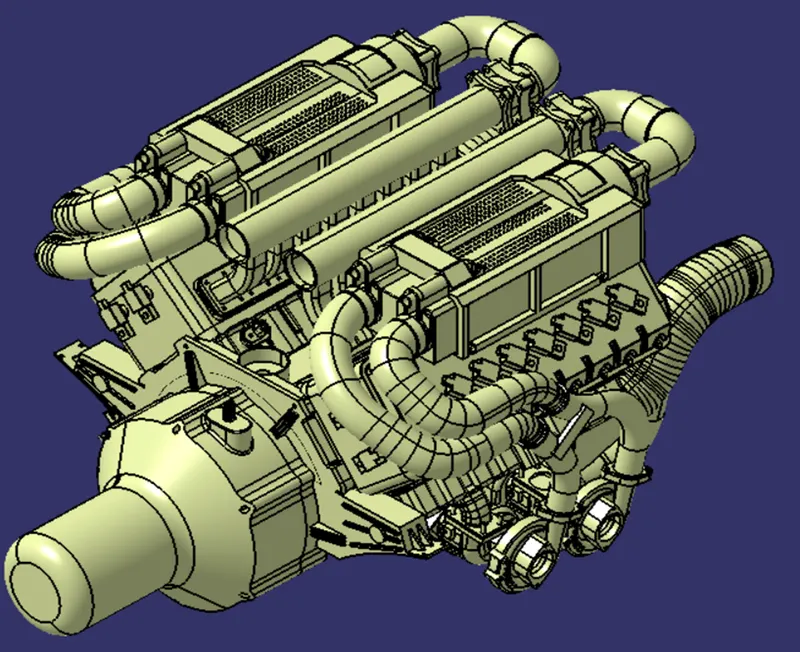
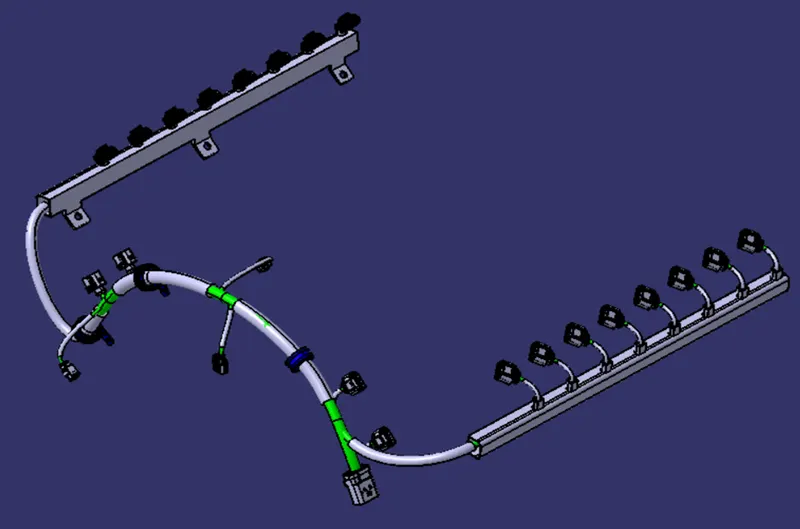
An engine wiring harness is constricted wires, cables, terminals, and connectors controlling a vehicle’s electrical system. It relays electrical power and control information to components such as batteries, alternators, fuel injectors, fuses, audio systems, blower motors, fuel injectors, and computers. Wire harness companies customize it for every location, application, and design it interconnects. Also known as a cable harness, it is more than just a collection of multiple wires put together. It manages the key functions around the engine including engine controller, oil controller gate, transmission plug housing, air pipe sensors, pressure sensors, and water temperature sensors.
OBJECTIVE: -
Define all the mechanical connectors electrically and save it in the Catalogue Place all the connectors to the required positions on the given engine 3D CAD model Place P-Clamps and Fir Tree clips at the required position by following the packaging rules. Create the Wiring Harness Routing with all the electrically defined connectors and mounting equipment’s. Create branching points at required locations to create sub branches and connect to various connectors in the geometrical bundle. Apply Protection coverings as required. Create Wiring harness flattening for the final geometrical bundle. Using the drafting workbench, create a drawing sheet with the flattened wiring harness.
Procedure:
Create context assembly product file V16 Engine
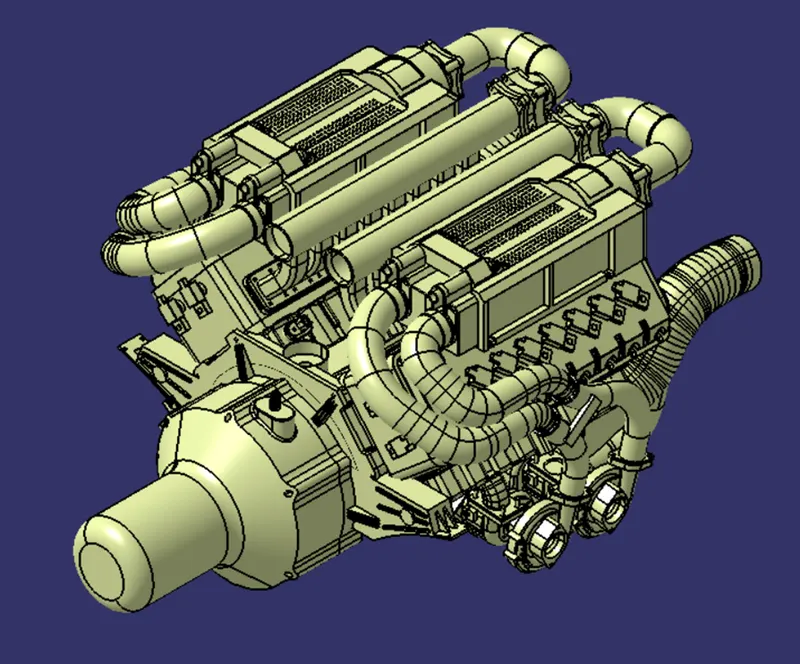
Create context assembly as shown in the image above. The context assembly will contain 3D CAD data for the engine and engine harness geometrical bundle assembly. Any sheet metal component such as L-clip required will be added into the context assembly.
Define the connectors electrically
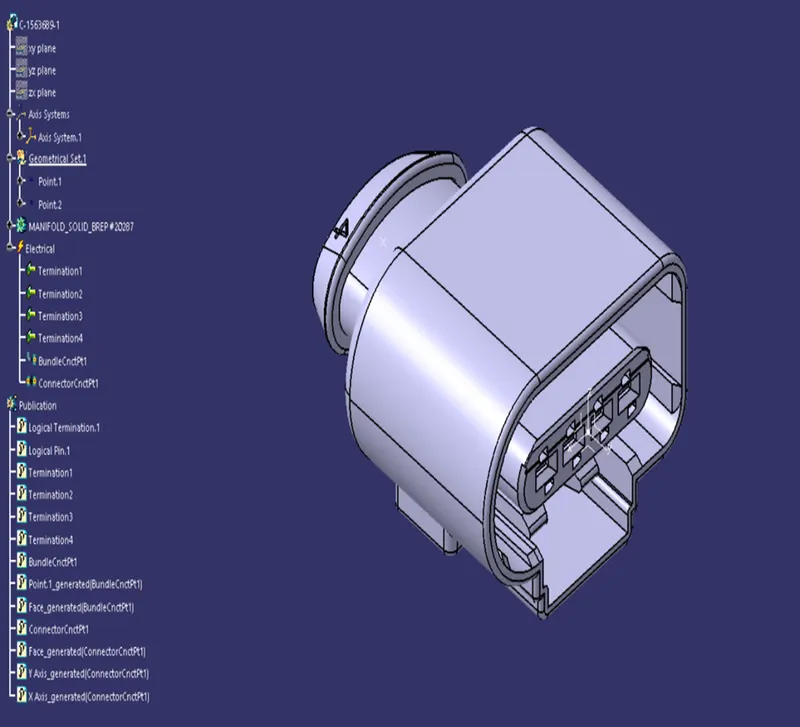
C-1563689-1:
Bundle connection point:
To open the part design and create the midpoint on bundle connection wire.
Connector connection point:
To create the midpoint on connector connection face and Axis system to refer the connector connection point create and change axis direction connector connection face to same direction on Y-axis mounting direction, change direction on X-axis on locking mechanism and X-axis perpendicular to the Z-axis.
Switch to Electric Part Design:
To select the define part as connector tool, to choose on single insert connector and give no. of termination as 4 because we have 4 entry points for wire.
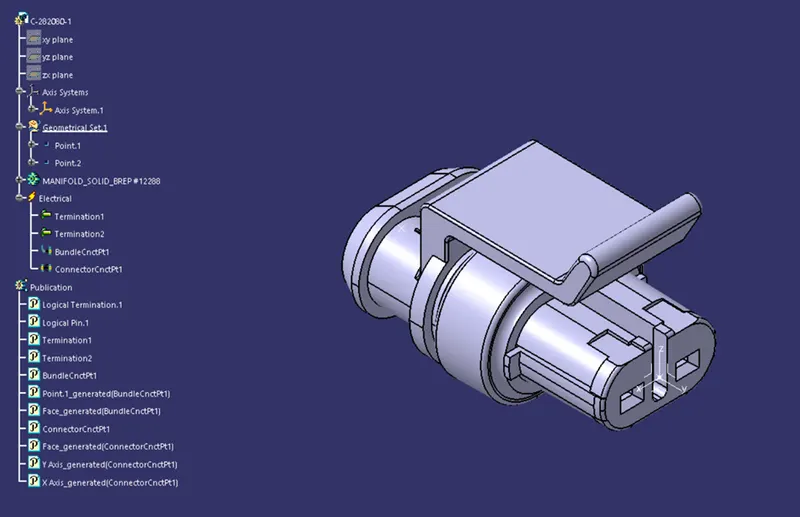
C-282080-1:
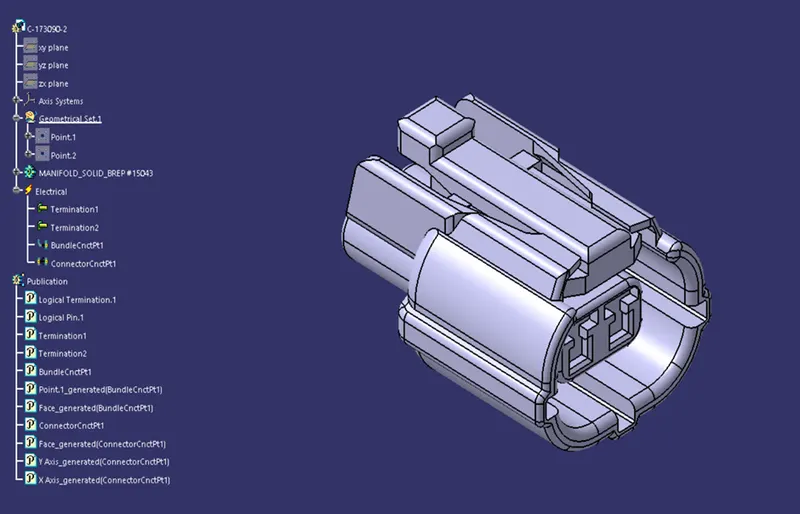
C-173090-2:
C-776438-4:
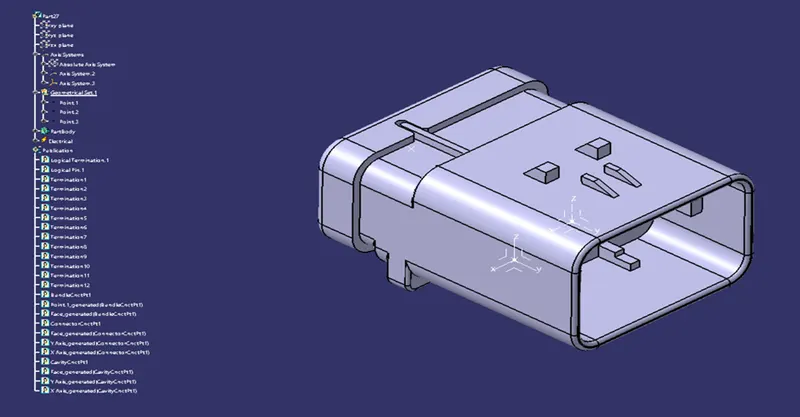
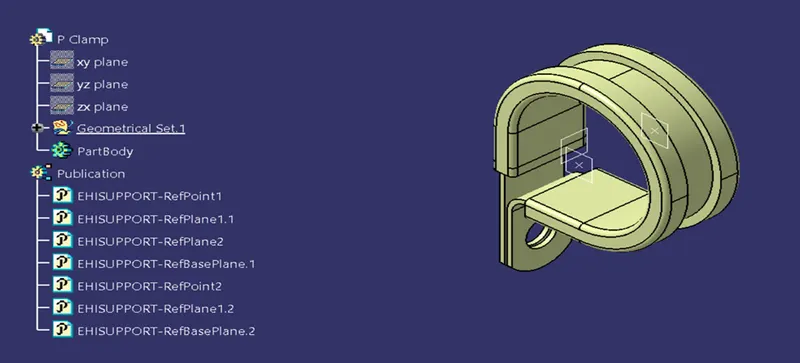
P-Clamp:
- To open on electrical part design and open it the file of P CLAMP.
- There is two entry points & plane at centre, two exit points & plane at centre and base refer to create base plane bottom surface.
- To selected support definition tool and open it one dialogues first plane definition to select on entry point & plane, second plane definition to select on exit plane and base plane definition to select on base plane.
- To check it on publication and again to selected support definition tool refer to entry side on point & plane, exit side refer on plane, base surface to base plane to refer.
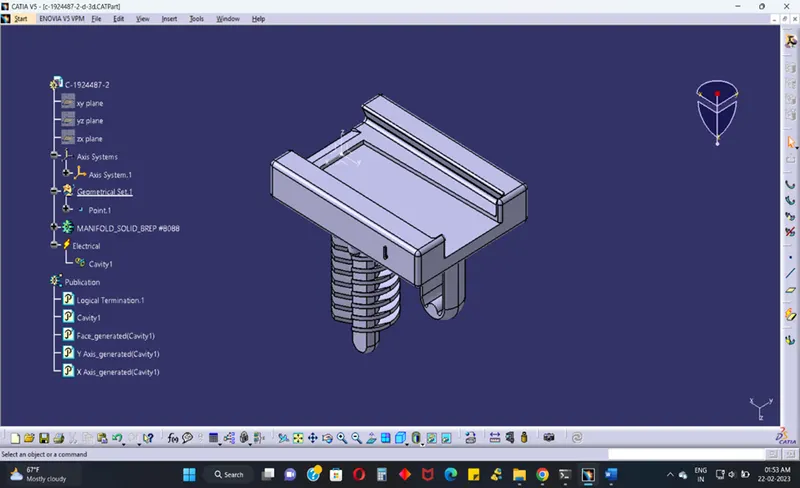
C-1924487-2:
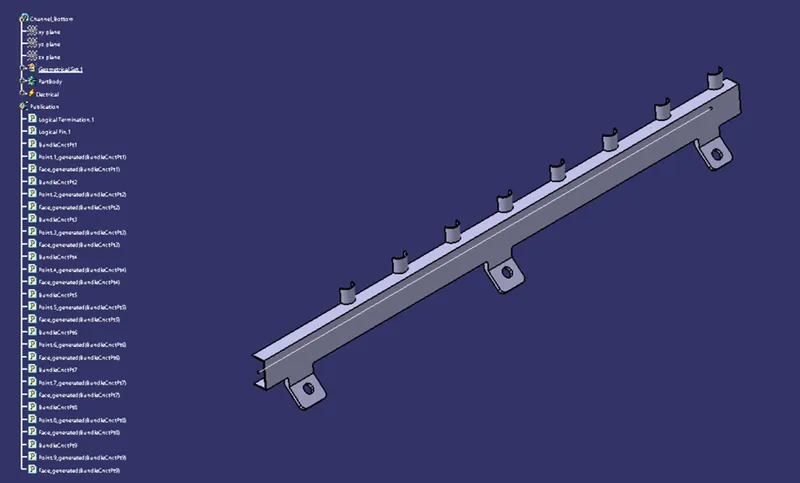
CHANNEL BOTTOM:
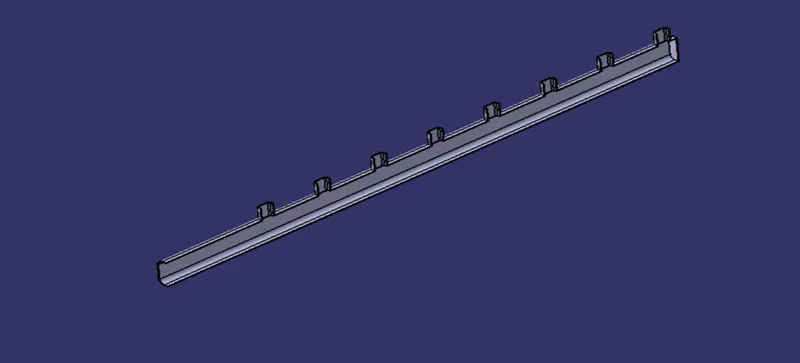
First create geometrical parameters such as bundle entry points, and external reference line in the part design workbench to route the wiring harness into the guiding channel as shown below.
CHANNEL TOP:
Go to electrical part design and define the part as equipment using equipment command and define bundle connection points using bundle connection point command towards the entry points of the guiding channel as shown in the image below.
Additional slack should be provided to the chassis bundle connecting to the engine harness interconnection connector to protect the wiring harness from vibrations caused during the vehicle operation.
Adding connectors to the all 16 fuel injector sensors and 4 cam-shaft sensors:
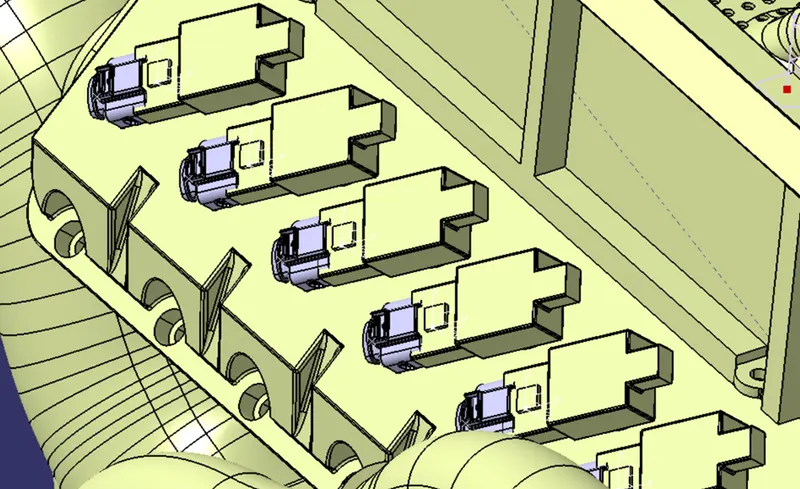
In this step, we are placing connectors to fuel injector sensors and cam-shaft sensors. So, we will require total 20 connectors which have to be added in the Engine Harness Geometrical Bundle Assembly. We have to use manipulation tools along with compass, snap and smart move features to locate all the 20 connectors at their desired locations.
Adding sheet metal bracket:
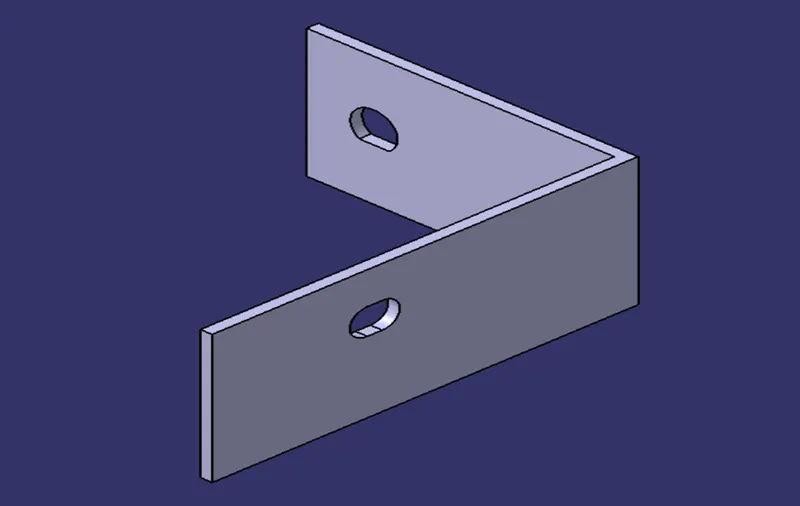
Now, we have to add sheet metal bracket in order to provide mounting for the interconnection connector. Also, we have to make sure that the bracket is placed inside the context assembly and outside of engine and geometrical bundle assembly. The bracket should be mounted on the existing bolt as shown below. This bracket should have locked system in clockwise direction so that it can't be move freely. Herein below figure, rib is performing the locking feature for the bracket. All the design ideas should be discussed with the engine designing team so that there won't be any disturbance for the smooth working of engine in real world application. Now, we have to mount that electrically connected interconnection connector and cavity on sheet metal bracket as shown in above figure. We have to mount 3 P-clamps also on the existing bolts of the engine so before that we have to define P-clamp electrically withgeometrical parameters, entry and exit point on both left and right side of the P-clamp as shown in below figure. Here, we have mounted 3 P-clamps on the existing bolts of the engine for the wire harness routing.
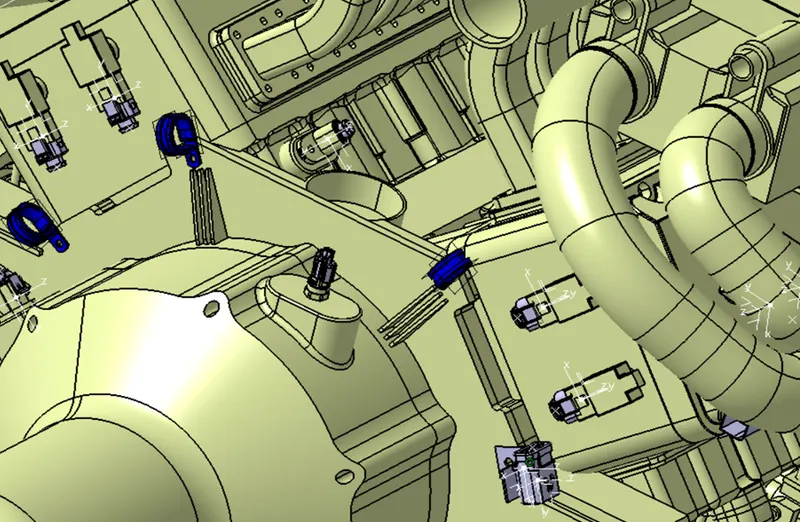
Mounting of a plastic guiding channel:(Bottom & Top channel)
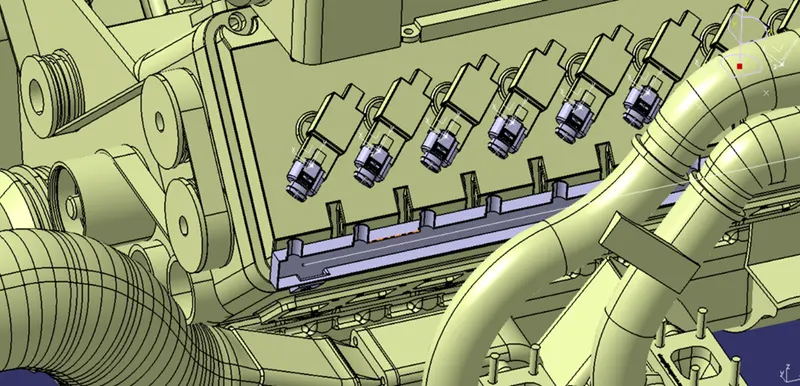
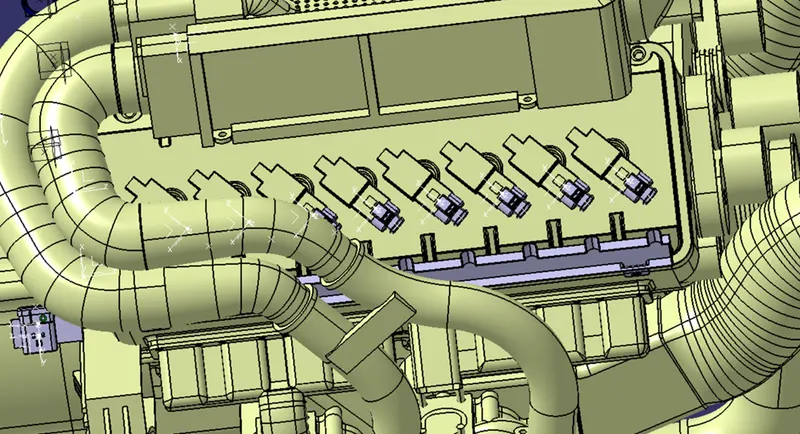
We have to add now plastic guiding channel because Bugatti V16 engine has 8 injectors on right side and 8 injectors on left side which are very close to each other. Hence plastic guiding channel is best option for proper and easy routing of the wiring harness. It will reduce the complex wiring harness routing. We will require two different guiding channels for both right and left side of the engine. Now, before placing guiding channel, we have to define geometrical parameters of guiding channel as below. After electrically define of guiding channel, we have located guiding channel at desired place as shown in above figure. Here, we have used different commands like manipulation, snap, smart move, compass etc. for placing of guiding channel. Now at this stage, we have just located bottom of the guiding channel.
THE ELECTRICAL HARNESS:
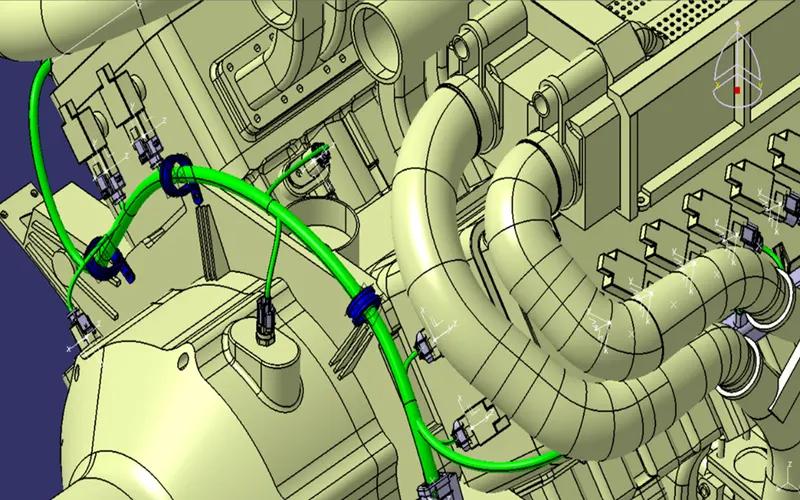
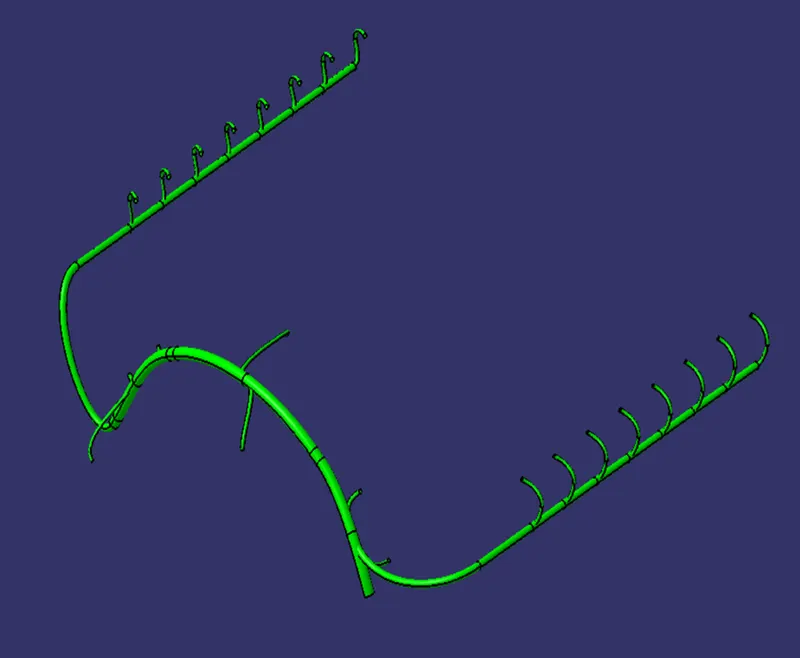
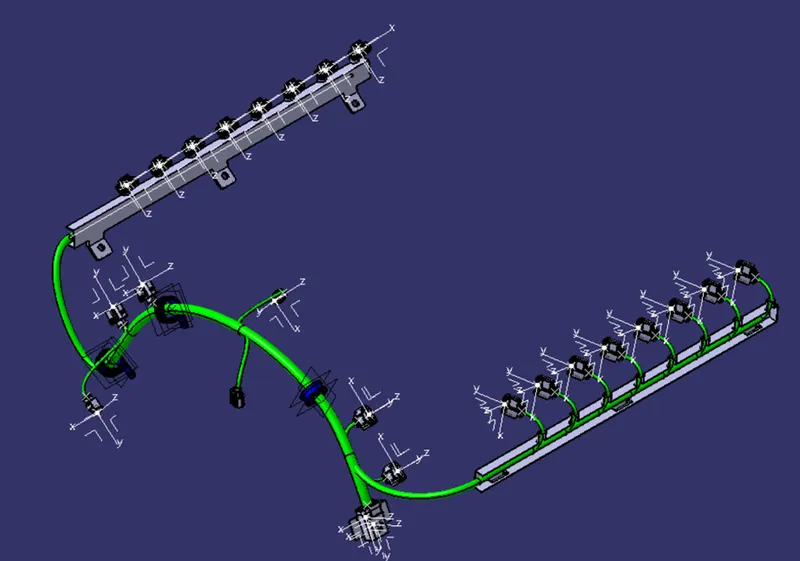
The connectors in the assembly should be electrically defined and it is placed in the appropriated position on the engine surface. After positioning the connectors place the supporting mounting clips in the engine to achieve the proper routing without fouling of the bundle with the surrounding parts. After achieving the route, the harness in the geometric bundle, make sure the bundle segment does not clash with the surrounding parts. Flatten the geometric bundle after finalised the geometric bundle, make sure for the bundle connectivity in the wiring harness.
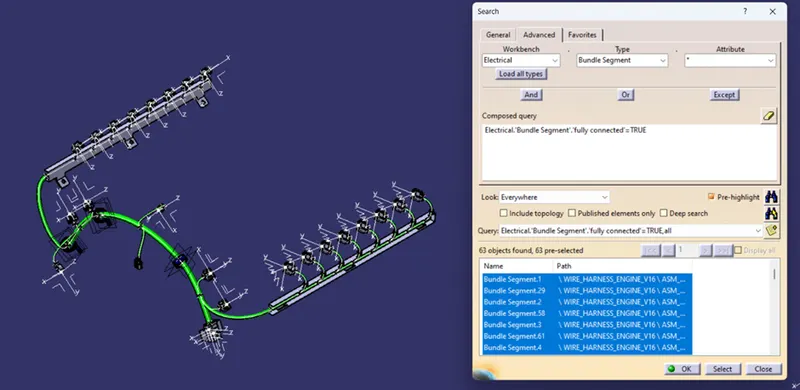
Checking bundle continuity:
To check bundle connectivity, go to edit, select search option, go to advanced tab and select the workbench as electrical, type as bundle segment and attribute as fully connected and attribute criterion as true if, you want to check all connected bundle segments and false if you want to check all the unconnected bundle segments.
Adding Corrugated tube to the Catalogue:
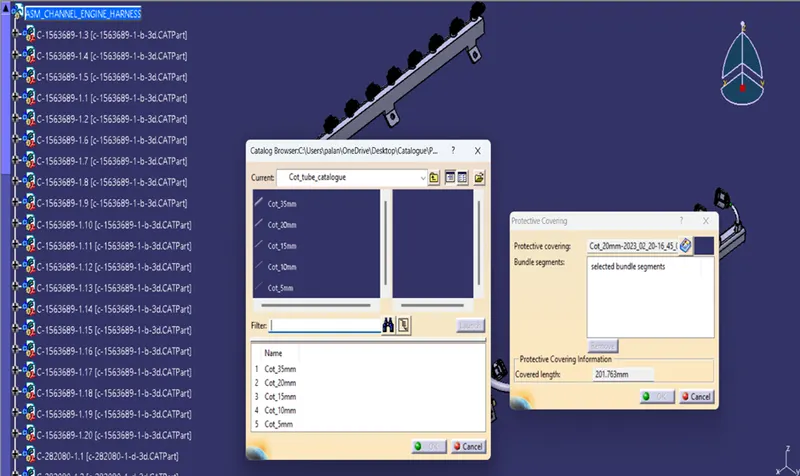
Adding corrugated tube on different size diameter (5mm,10mm,15mm,20mm, 35mm) on the catalogue.
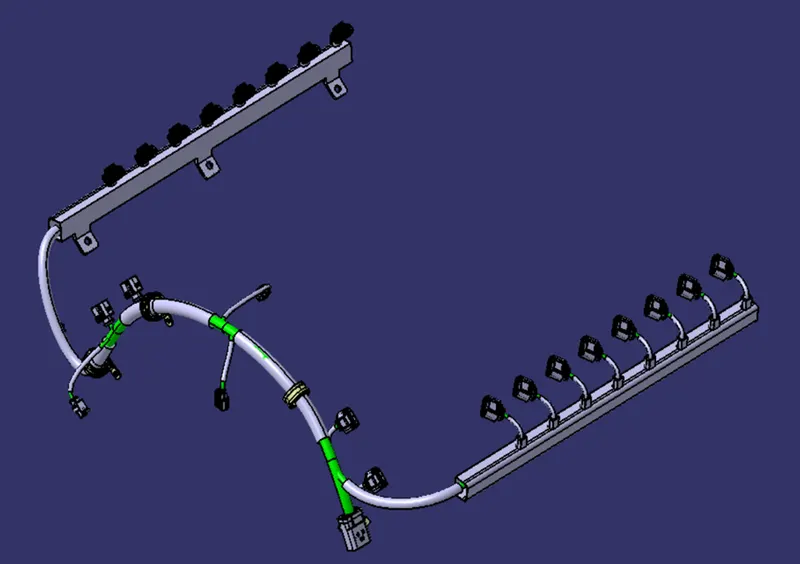
To create flatten view of the engine harness:
creating flatten view we have to work in Electrical Harness Flattening workbench of Catia V5. We should also make sure that the flattening file is saved in the same folder where other files of harness assembly are saved.
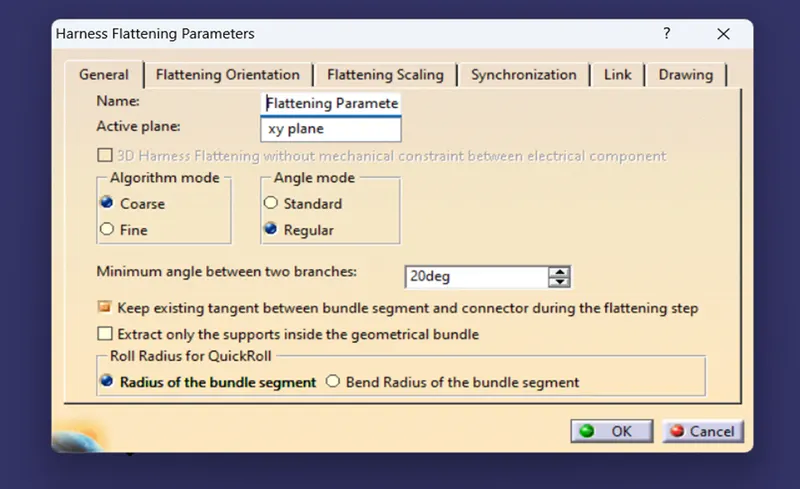
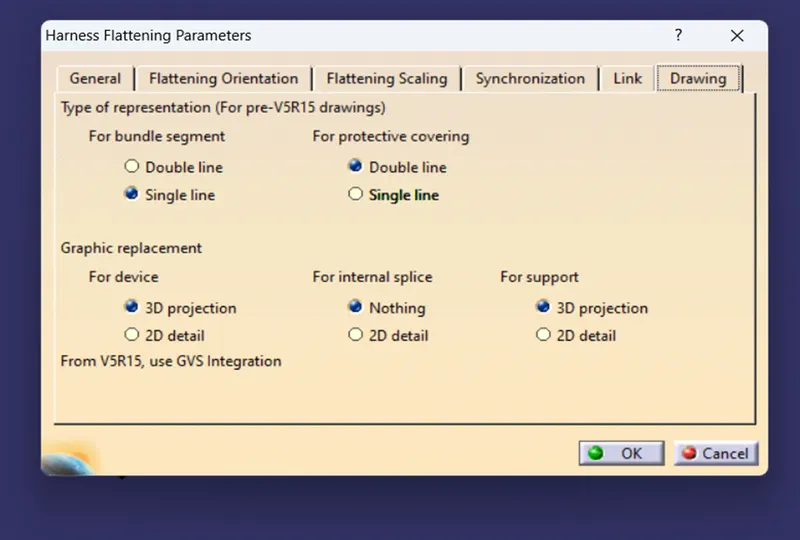
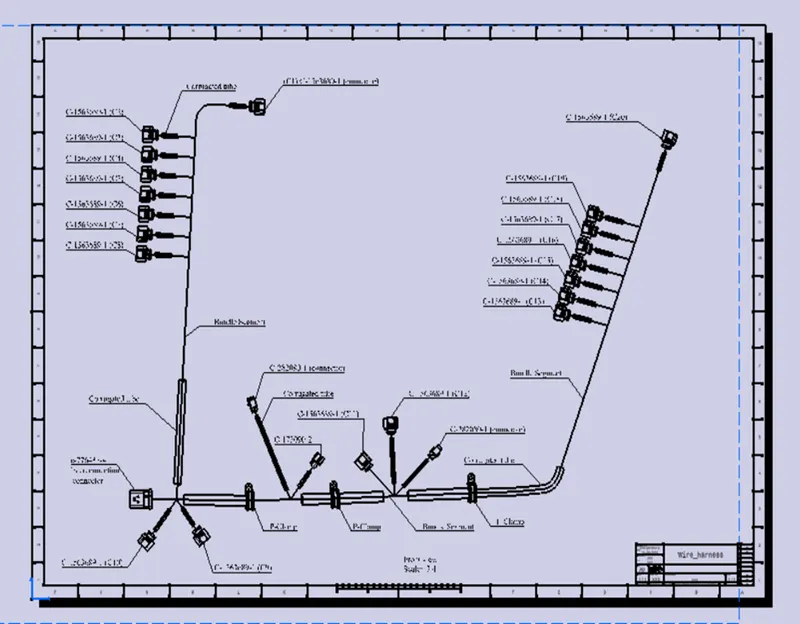
Before creating flatten view, first we have to define flattening parameters. Make sure that selecting 'Single line' for bundle segment and 'Double' line for protective covering. We have extracted the bundle assembly into Engine Harness Flattening Product file and then flattened the file along face of interconnection connector as shown in above figure. At this stage, for clarity, we have been hidden the flattening diagram of the plastic guiding channels from the drawing view.
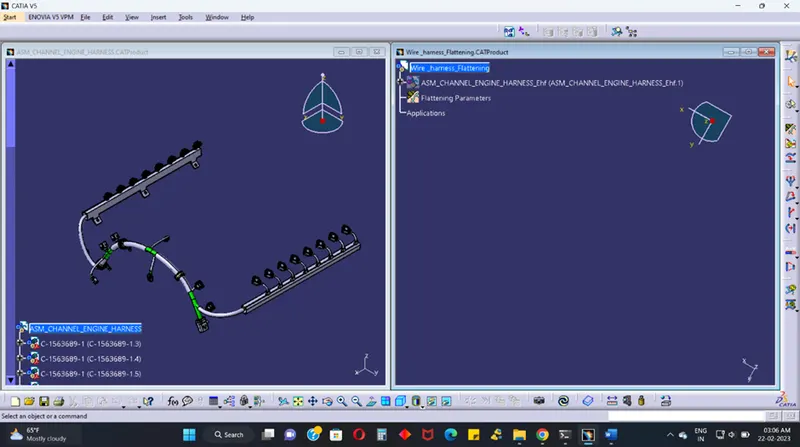
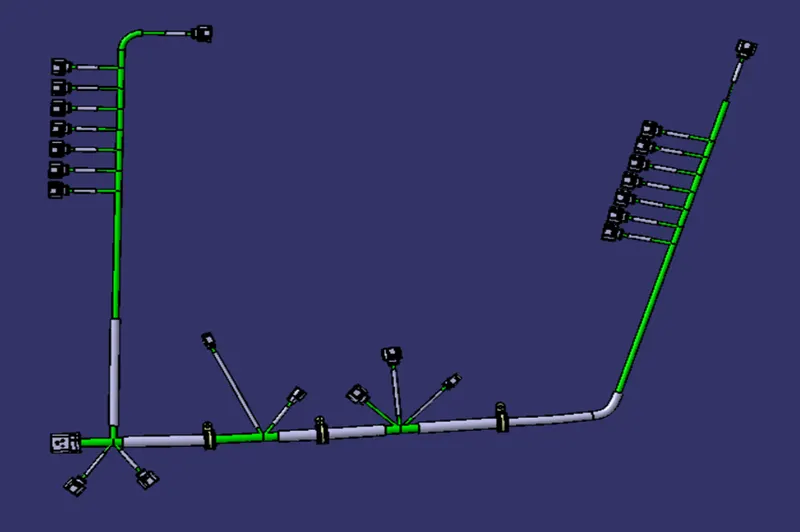
Create drawing of the flattened harness:
Go to new and select drawing to create a new drawing file. Select front view command, go to the flattened harness window and select a suitable face to create drafting of the harness. The wiring harness appears as shown below.