Hood design-Week 2
Hood design
Objective
To design inner panel with all the required things like reinforcements embosses, mastic sealant allotments, and provisions for the hinge and latch and to design the outer hood panel with hem.
SOFTWARE USED: CATIA V5
Theory
The hood of a car is basically the cover that covers the engine compartment. It consists of an outer and inner panel. The outer panel of the hood is the aesthetic part which the customer will see and feel. The inner panel gives strength and rigidity. Car hoods also contribute to the passenger safety while an event of collision. Car hoods can dissipate the impact caused by the crash outside the vehicle rather than sending it to the passenger cabin.
Two types of hoods are there:
- Active hood
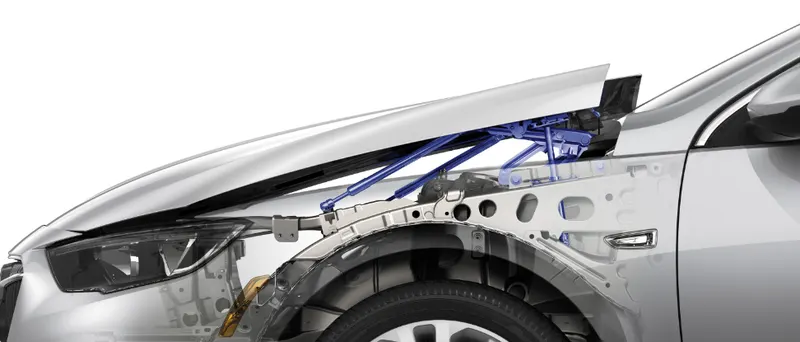
When in an event of a collision, the hood opens itself from the hinge portion n and carries the pedestrian. Here additional parts are needed to improve the strength and safety.
- Passive hood
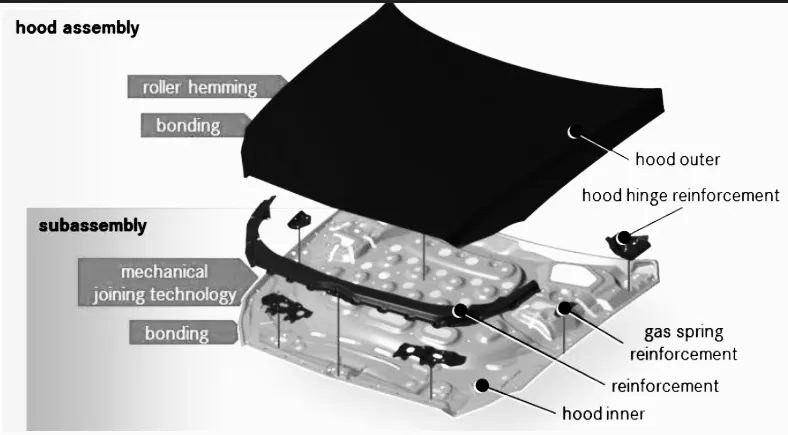
In passive hoods, the structure itself aids to improve the strength and safety. In an event of collision, the passive hoods will absorb the impact due to the design structure of it and somewhat reduces the damage done on the pedestrian.
Design criteria
Hood head zone for the lock striker
This one of the crucial design criteria one must follow while designing the hood of a car. Here the average height of the citizens of the particular country or the region the car is planning to sell is taken into consideration. Then main aim of this design criteria is to make a gap between the head of the person and the lock striker of the hood so that the head won’t hit the lock striker while the person is working inside the engine bay while hood is open. This can be done by the selecting an appropriate length for the support rod and the position which the support rod gets attached. Also note that head zone for all the regions are not the same as the average height of the person changes according to the region. Also, one thing to taken into consideration that while unlocking the hood, after releasing the first latch from inside the car, the hood should open al little of minimum of 10-15mm to accessing the secondary latch on the hood. This clearance is same for all the region as the figure size of the people all over the word will fit inside this limit. So, the first thig that taken into consideration awhile designing the hood of the car is that which region the car is going to be manufactured. After deciding that the head zone angle of opening should be considered. If this design consideration is not taken into consideration there is a big chance of hitting the persons head while working on the car.
Hood Stay
The car engine bay needs to be open for occasional inspections, maintenance, topping the windscreen washer fluids, engine oil change etc. The hood stay mechanism in the engine bay of the car is responsible for safe opening, closing and keeping the hood in the open state even if some amount of external force is applied on the hood mostly due to the wind and vibrations.
There are mainly two types of hood stays in the market.
- Support rod
Support rod is a specially designed rod which can withstand the wight of the hood and keep the hood in open position. Mostly supporting rods are fixed on the engine bay and gets attached to the hood of the car manually after opening. Some cases it done the other way around also. The main benefit of this mechanism id that its cost effective. Most of the budget friendly cars are having the support rod as the hood stay. Although its cost effective, there are some disadvantages to the support rod. Support rods can leave marks to the body panel which will in the long term may lead to rusting. Also, when the engine gets too hot, it will heat up the engine bay along with the support rod. So, while accessing the engine bay at that time, if the person is not careful, may get his/her hand burnt.
While designing the support rod, some things must take into consideration such as, where the opening and closing angle is, where it mounts and dismounts the rod etc. The support rod length is defined by the opening angle of the hood. When you observe the support rods commonly may not be straight always. It mostly has some bends to it. It is done for withstanding the weight of the hood without wobbling. But the bend should not be more than 35mm. if it goes above 35mm, the rod could bend due to the weight. The fixed end of support rod also should be determined according to some things in mind. The fixed end of the support rod must be placed at the opposite region where battery is situated. That means the battery is situated at the left region of the engine bay, the fixed end of the support rod must be at somewhere on the left region. This is done because while moving the battery, support rod must not come in-between.
- Gas stay
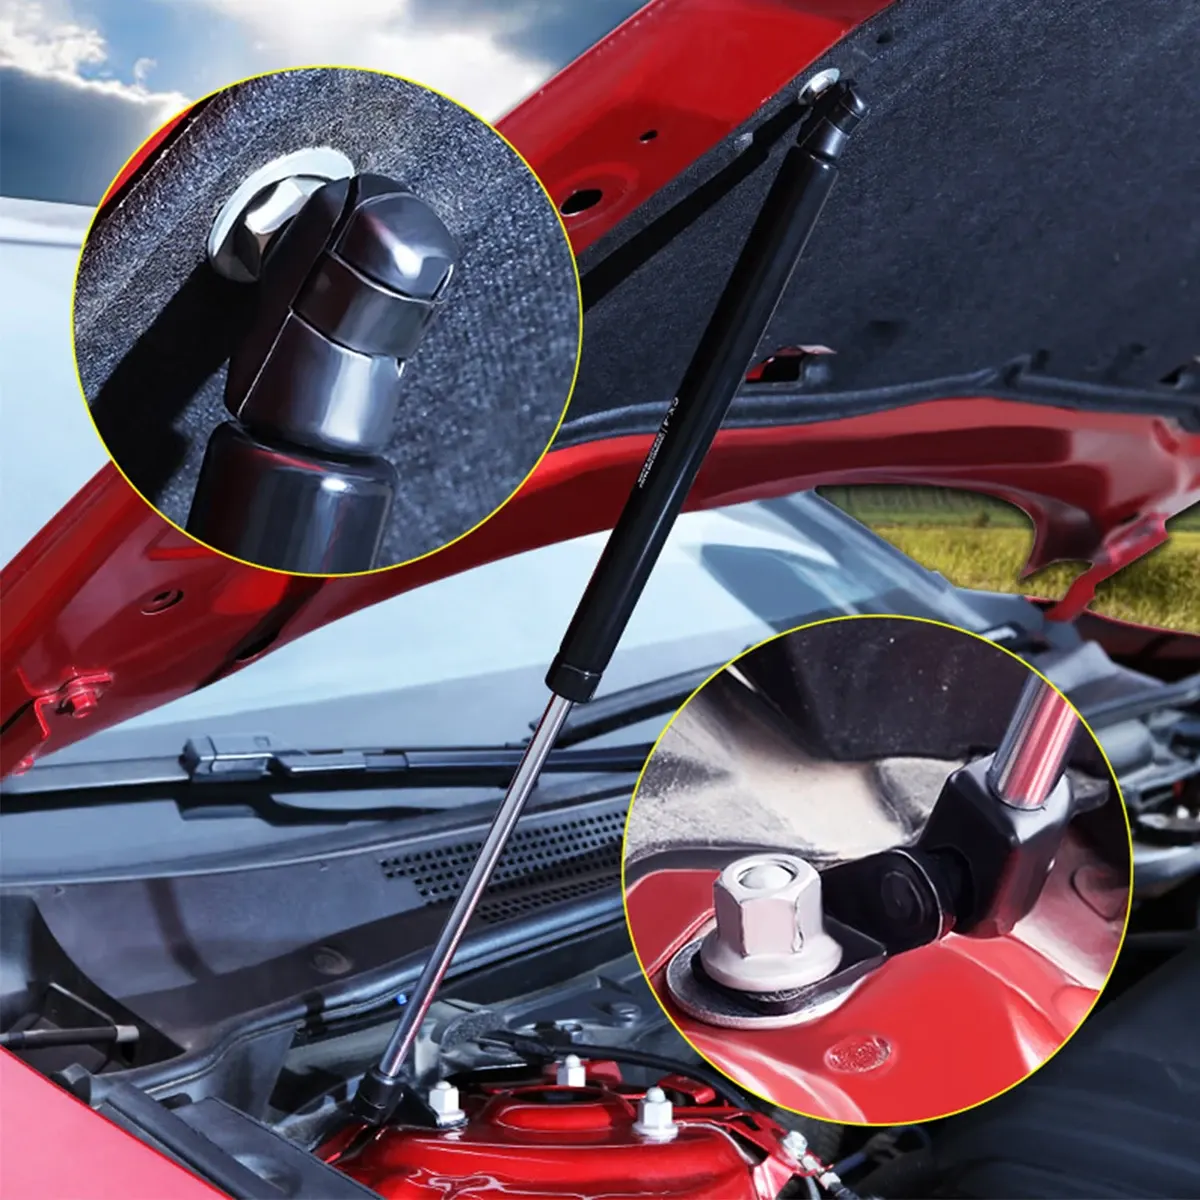
Gas stays or Hydraulic struts are the similar type of mechanism you see inside the boot of a car while opening it. Here the working principle is a little different from the support rod. In the gas stays, there are two parts, one is a piston and one is as cylinder. One end will be connected to the engine bay and the other will be connected to the hood panel. The strut cylinder will mostly be filled with gas/oil, which are ideal for compression. The piston coming from one end of the cylinder makes this system closed. So, the movement of the piston will increase and decrease the internal volume inside ethe cylinder. While opening the hood, the gas pressure pushes the piston to move outwards, giving the force to open the hood and keep the hood on open position. While closing the hood, when enough pressure is applied on the hood, the piston is pushed into the cylinder and closing the hood. This system is expensive comparing the simple support rod mechanism. But the benefit here is that there is no need for any human effort to open/close the hood. Almost all the higher end cars are equipped with gas stays. One thing to take into consideration while going for the gas stays are the centre of gravity of the hood. This can be obtained from the 3D data of the hood and the hinge. Also, must consider the weight of the hood while opting for the gas stays.
While designing, while keeping the budget and other design requirements in mind, one should select the hood stay.
Outer and Inner panel of the hood
If we consider a car hood, it will be having a class a surface and an inner panel along with all the laches, hinges and reinforcements. Class A surface is nothing but an aesthetic surface which we get to see from the outside. The inner panel is the one which give the hood its strength. Inner panel is more like a skeleton as the reinforcements are given based on the inner panel. So, for joining the inner panel with the outer class a surface, we cannot use spot welding, riveting or anything like that just because if we so that, the presentability of the outer panel will be ruined and it may not be appealing to the customer. So, we use a process called Hemming to join both the panels. For further improving the NVH we also use mastic sealants in-between the panels.
Hemming
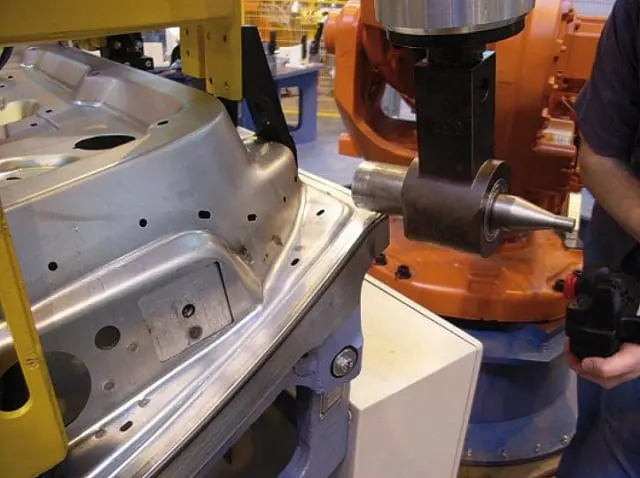
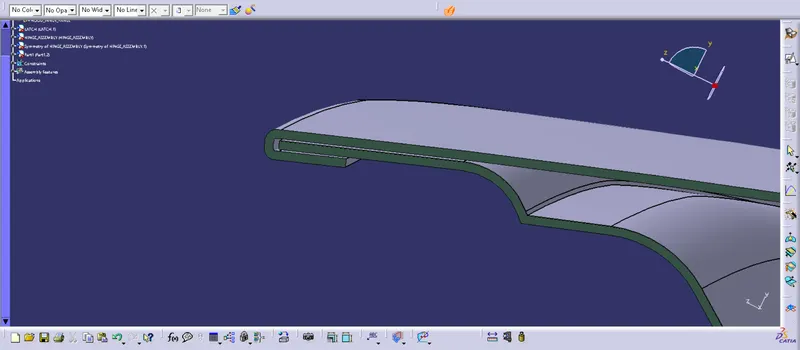
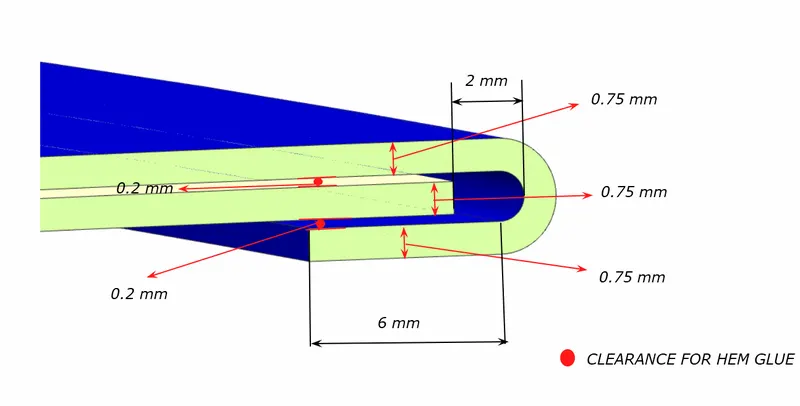
Its is the process of assembling the inner and outer portion of the car panels by folding the flange of the outer panel over the edge of the inner panel. This process will give out a good finished product without showing any joint marks or compromising the looks. Also, to making this bonding a little bit stronger, mastic sealants are used in between the panels
Deep Drawing
Deep drawing is a popular sheet metal forming process. Its is done by a flat sheet metal is formed into a body which is open one side or hollow body by radially drawing it into a die by using a punch. Basically, the flat sheet metal is drawn into a 3D part. Basically, this process is divided into 3 types:
- Deep drawing using tools
- Deep drawing using active means
- Deep drawing using active energy
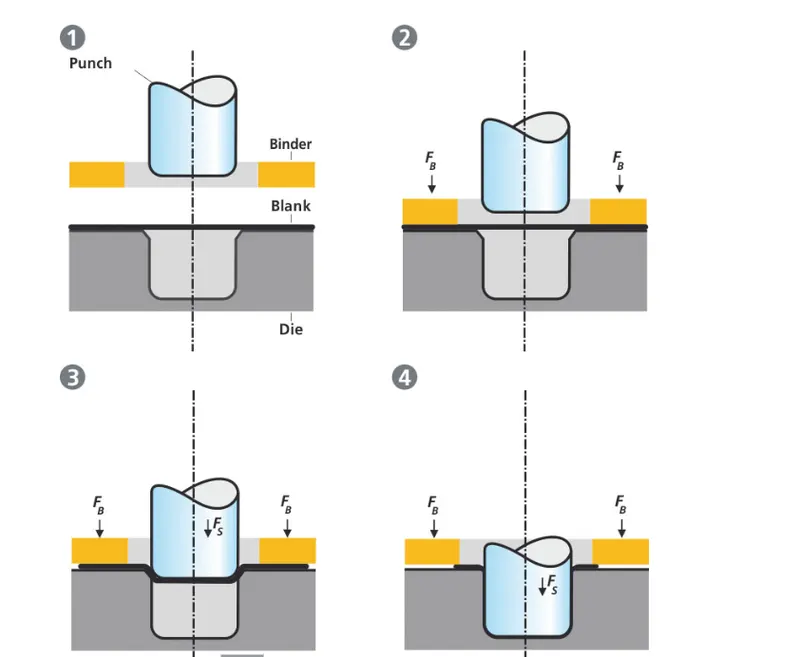
The above picture illustrates the deep drawing process. The tool has a die, punch and a binder. The plate is fastened with the plate holder. The die and binder hold the sheet, the punch will apply force on to the sheet hence the sheet will take the shape of the die.
Mastic sealants
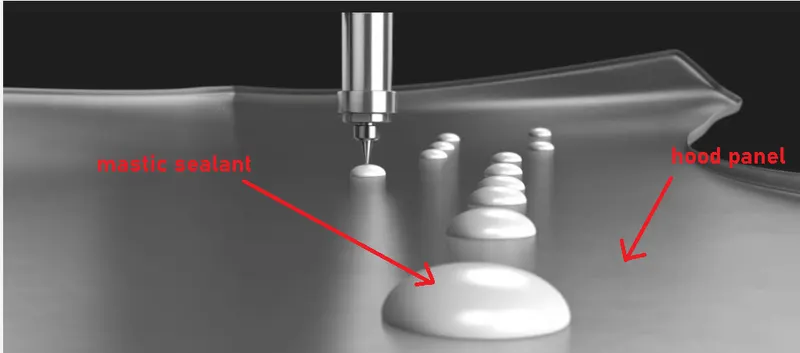
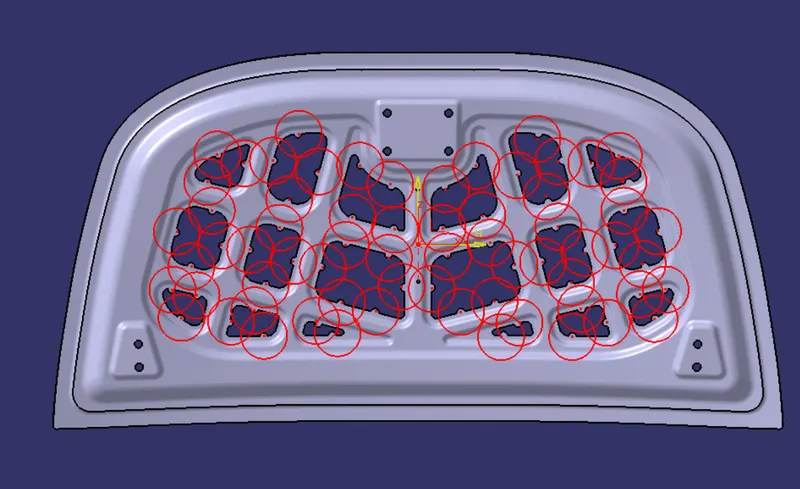
Mastic sealants are as its name suggests, adhesives which are used in between the outer panel and inner panel. Mastic sealants not only seal the panels but also resist the vibrations, hence improving the NVH levels of a car. A mastic sealant spot can manage up to 50-80 mm radius areas. So different mastic sealant spots will be added in the design part for covering the required area.
Designing the car hood in CATIA V5 using the given datas.
Hood Thickness Information
- Outer Panel Thickness = 0.75mm
- Inner Panel Thickness = 0.75mm
- Reinforcement Thickness = 1.5mm
Master Section
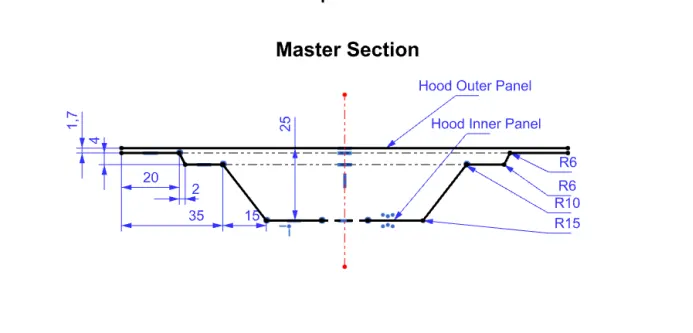
Hemming Data:
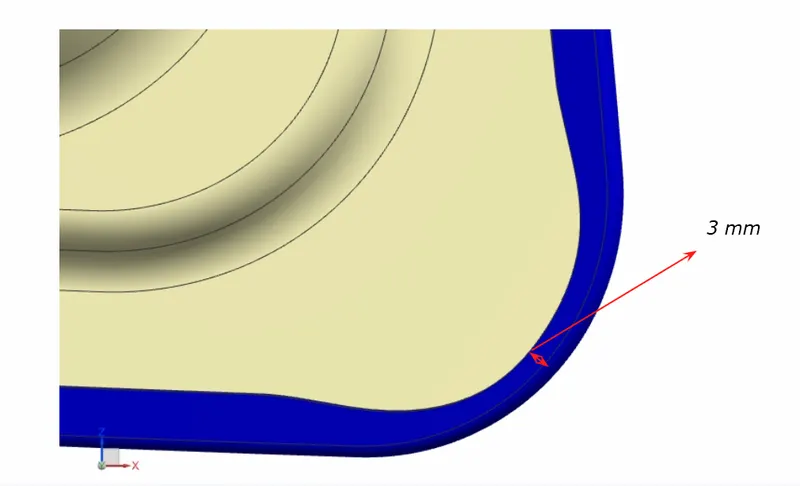
Relief rear section:
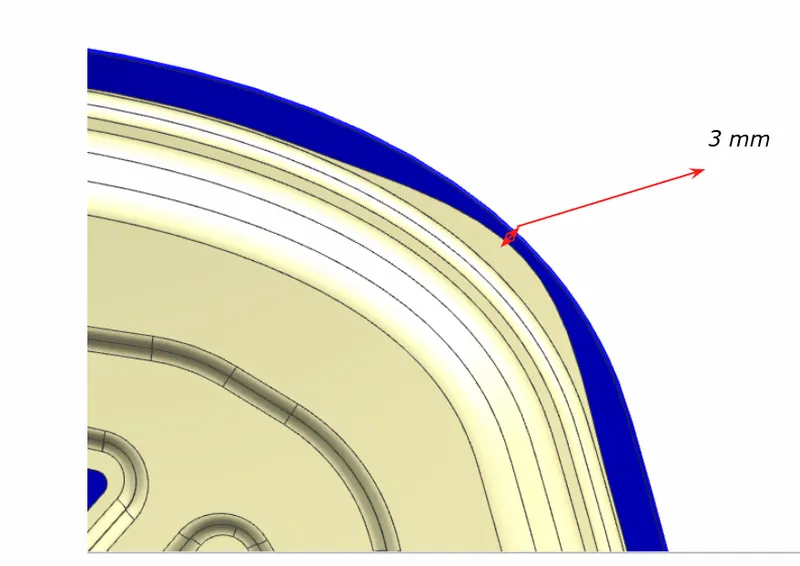
Front relief:
FINAL OUTPUT
OUTER PANEL
INNER PANEL
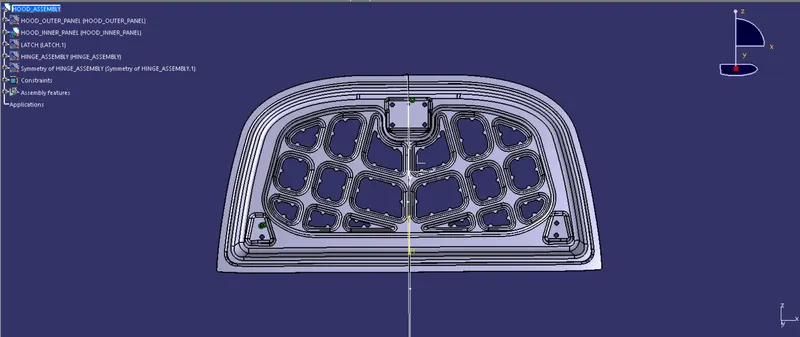
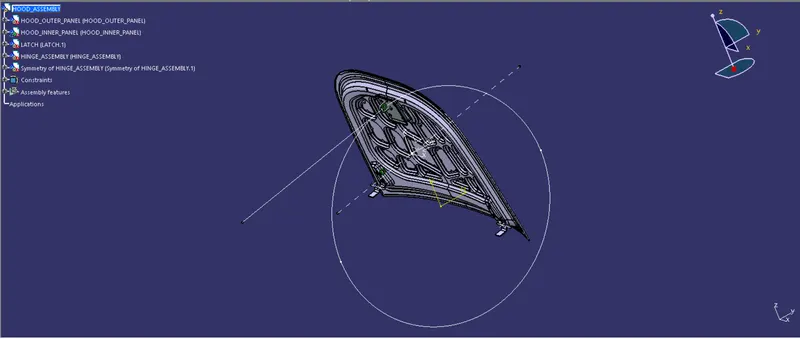
HOOD OPENING AND CLOSING TRAJECTORY WITH RESPECT TO THE HINGES (LATCH TRAJECTORY)
MASTIC SEALANT DOTS.
The red coloured circle represents the span of area which the sealant has its influence.
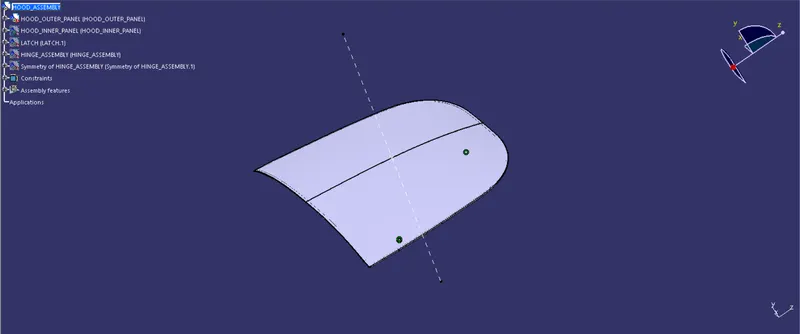
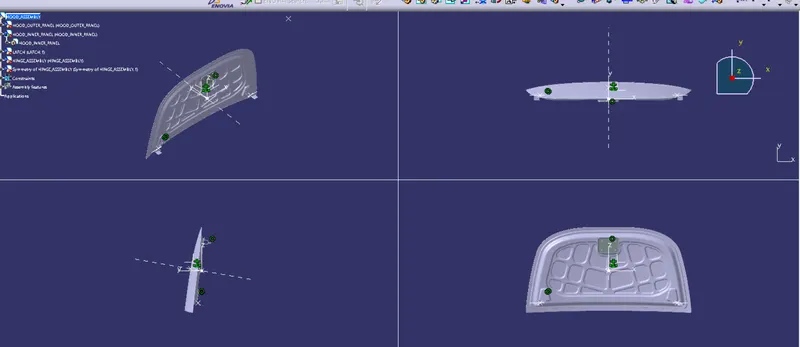
FINAL ASSEMBLY
CORNER RELIEF DATA
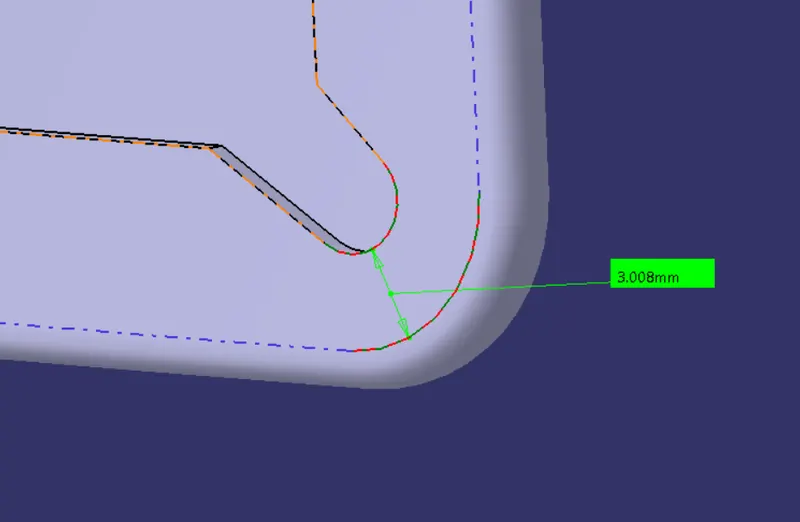
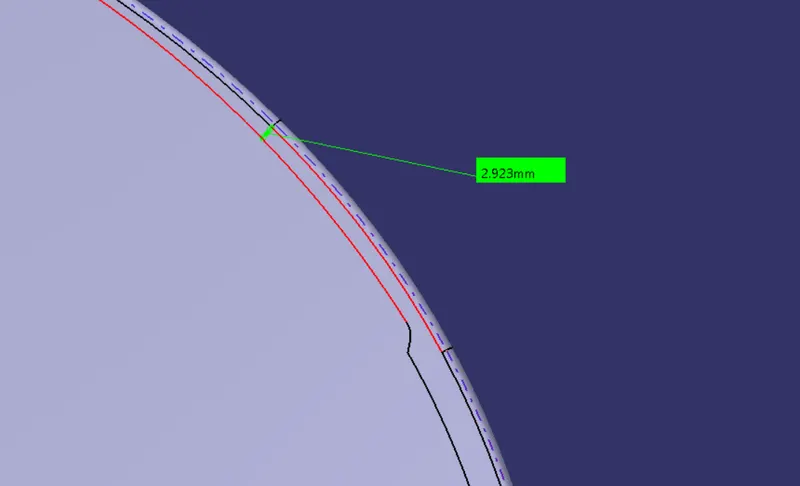
HEMMING DATA