Hood design-Week 2
AIM:
To design the Hood outer panel, inner panel and the necessary reinforcements by following the Master section. And also create an assembly of Hood inner panel, outer panel, latch, hinge and the reinforcements.
LIMITATIONS:
Hood Thickness Information
- Outer Panel Thickness = 0.75mm
- Inner Panel Thickness = 0.75mm
- Reinforcement Thickness = 1.5mm
OBJECTIVE:
- To create hood inner panel using the given outer panel and mater section.
- Also create a hemming section for the outer and inner panel.
- The inner panel should incorporate hinge, latch and striker reinforcements.
- Also create an assembly for the outer panel, inner panel, hinge, latch and striker attachments.
INTRODUCTION:
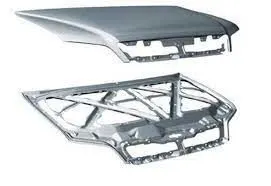
The hood or bonnet is the hinged cover over the engine of motor vehicles. Hoods can open to allow access to the engine compartment for maintenance and repair. The hood release system is common on most vehicles and usually consists of an interior hood latch handle, hood release cable and hood latch assembly. The hood latch handle is usually located below the steering wheel, beside the driver's seat or set into the door frame. On race cars or cars with aftermarket hoods (that do not use the factory latch system) the hood may be held down by hood pins. Some aftermarket hoods that have a latch system are still equipped with hood pins to hold the hood buttoned down if the latch fails.
Materials included:
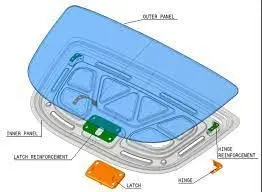
The hood is a design element and is the part of the body that borders to the front fenders, front lights, bumper and the plenum cover. The complete hood consists of an inner and an outer plate joined together by hemming around the edges of the hood. This may include steel, aluminum, fiberglass or carbon fiber. Rubber based glue is used in the flange joint as glue between outer and inner hood and on points as well in the inner plate pattern as anti-flutter. Today a certain pattern is used in order to fulfill the requirements for pedestrian safety and total stiffness in the hood. Front reinforcement (lock striker reinforcement) and hinge reinforcements (steel) are clinched to the inner plate. Spot welding is used in part assembly of front reinforcement.
| Core Material | Face Material | Face Thickness [mm] | Thickness [mm] | Bending Stiffness [GNm2] |
| SAN foam | Al | 0.5 | 3 | 216 |
| SAN foam | Al | 0.5 | 4 | 356 |
| PVC foam | Al | 0.5 | 3 | 218 |
| PVC foam | Al | 0.5 | 4 | 360 |
| PP foam | Al | 0.5 | 3 | 216 |
| PP foam | Al | 0.5 | 4 | 356 |
Pedstrian protection:
According to accident statistics in Europe about 41.000 deaths occur in traffic. 6.100 (15%) of these are pedestrians and another 3.900 (10%) are cyclists. For pedestrians the most frequent injuries occur in the head, upper and lower limbs. 62% of all fatalities are caused by head injuries. These head injuries happens when the pedestrians head contacts the vehicle or the ground. To reduce the death of pedestrian and injuries in the traffic, measures from the automotive industry as well as environmental changes are required. The European Enhanced Vehicle Safety Committee has developed test procedures to estimate the level of pedestrian protection for the front parts of the vehicles.
Head impact test:
The risk of head injuries is in free flying head impacts and that is investigated by a free flying head form impcator, impacting against the vehicle hood. The head impact test are tested for both adults and children and it is executed by, the head testing impactor is fired towards the hood and simulate a real life head impact. The impactor are equipped with a three
dimensional accelerometer.
Upper Leg Test:
To estimate the potential risk of pelvis and upper leg injuries in the event of a vehicle striking an adult, a series of impact tests is carried out at 40 km/h using an adult upper leg form impactor. Impact sites are then investigated and the protection offered is rated as good, adequate, marginal, weak or poor.
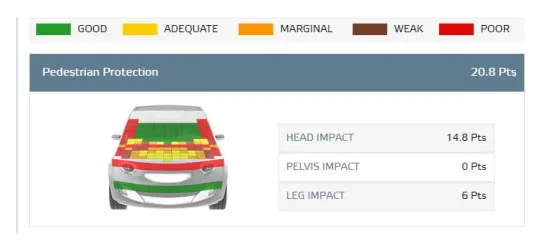
Pedstrian protection result for BMW i3
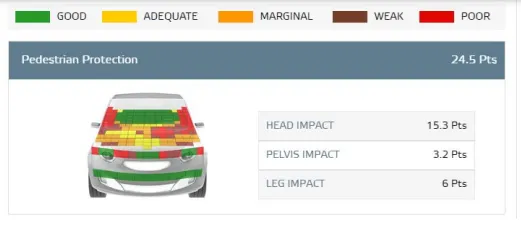
Pedstrian protection result for Renault twingo
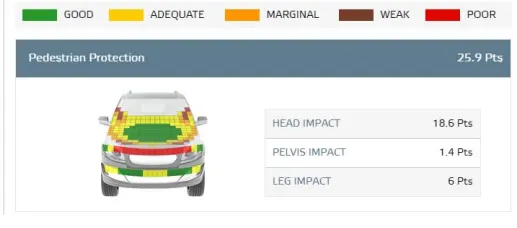
Pedstrian protection result for Volvo XC90
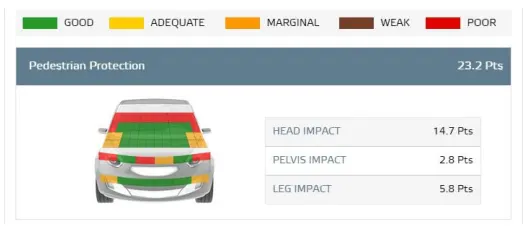
Pedstrian protection result for volvo V60
PROCEDURE:
- First we have split the class A surface of the given inner panel into half surface.
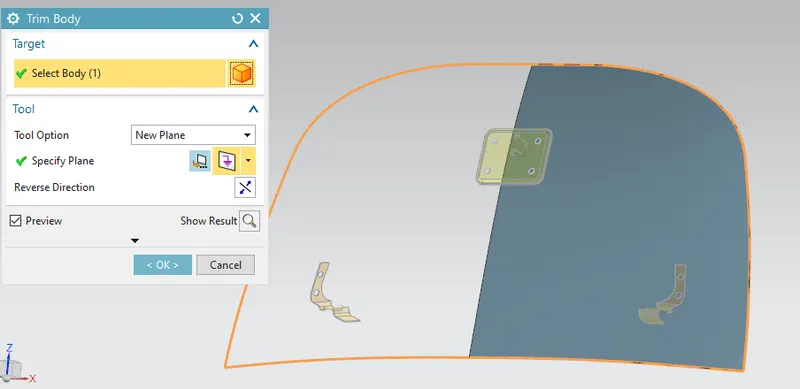
- Next offset the surface for 25 mm for the given master section.
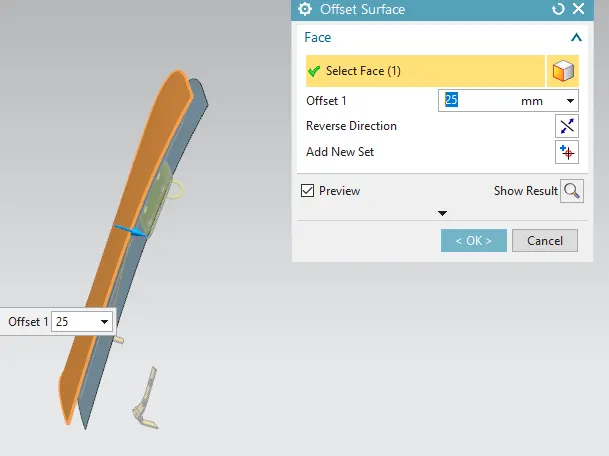
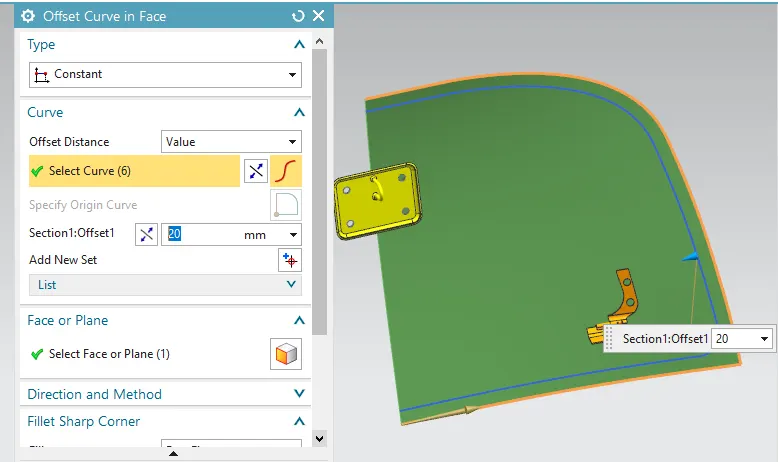
- Then offset the outer curve of the panel for 20 mm inwards.
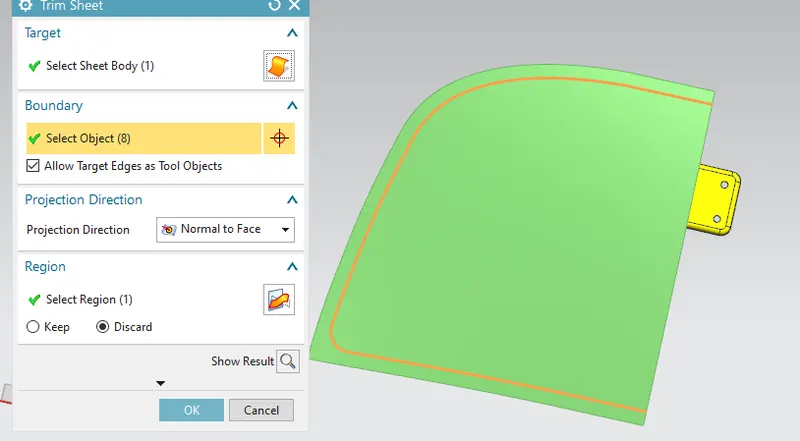
- Then trim sheet for offseted outer curve.
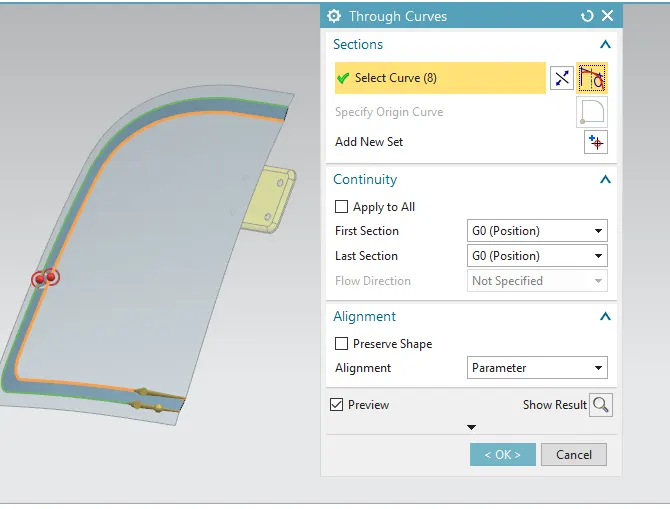
- Next the offset surface and trimed sheet should joined through curves option.
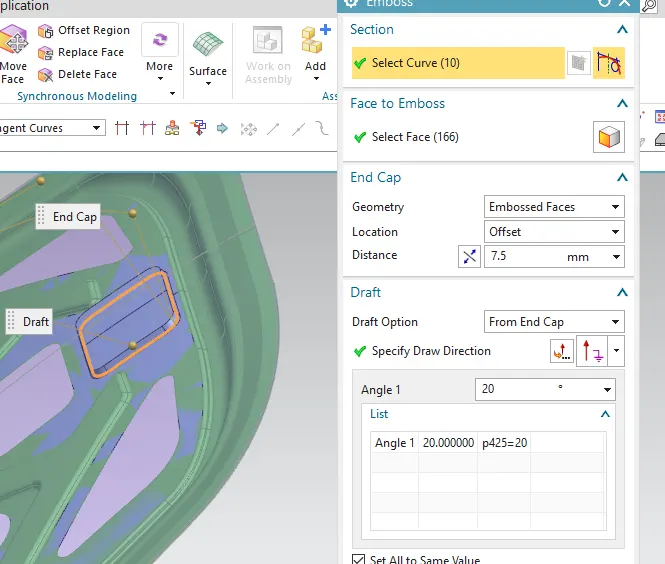
- Now emboss the inner section of panel for 15mm.
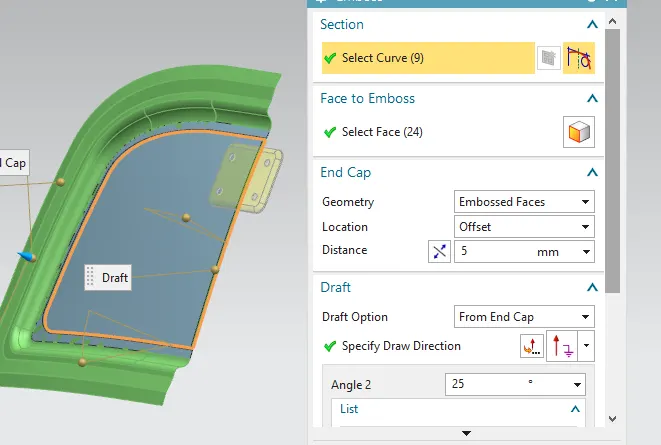
- Apply the edge blend and face blend for the base sheet of master section.
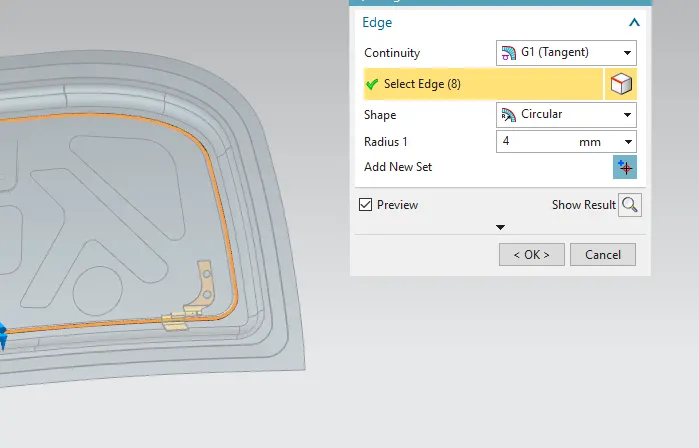
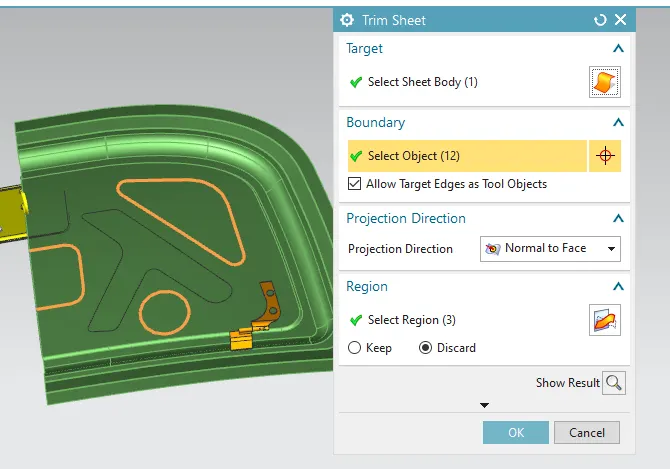
- After the embosement then create the reinforments for the inner panel and trim it using trim sheet option.
- For the latch and striker attachment, we can extract face option for the given stiker and use emboss option for the latch and striker.
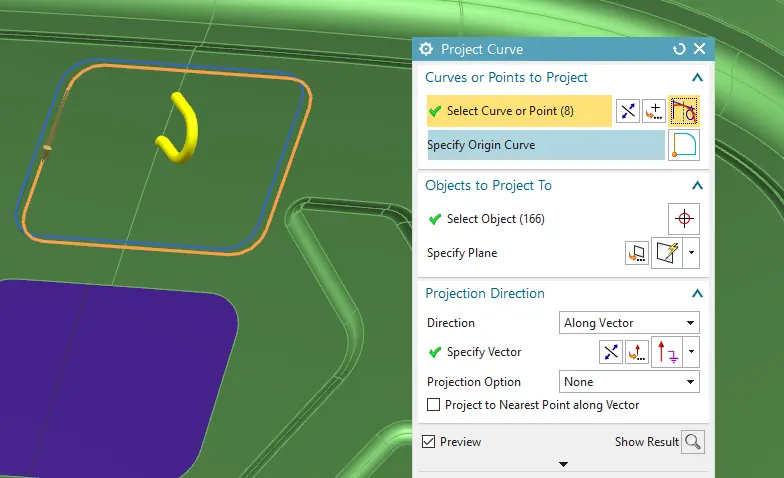
- Then add reinforcement for the hinge attachment for extracted face for the given hinge assembly.
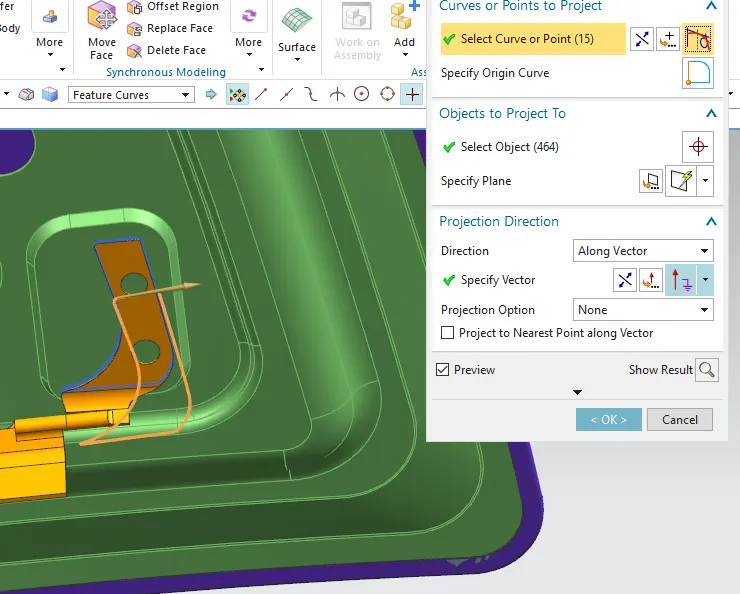
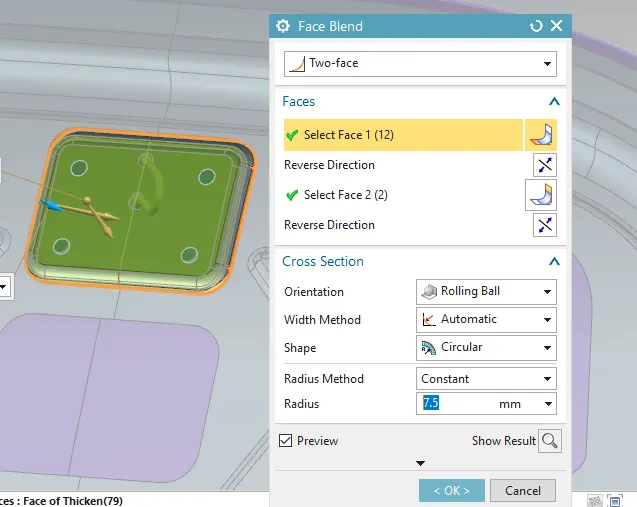
- And add face and edge blend for the attachment features.
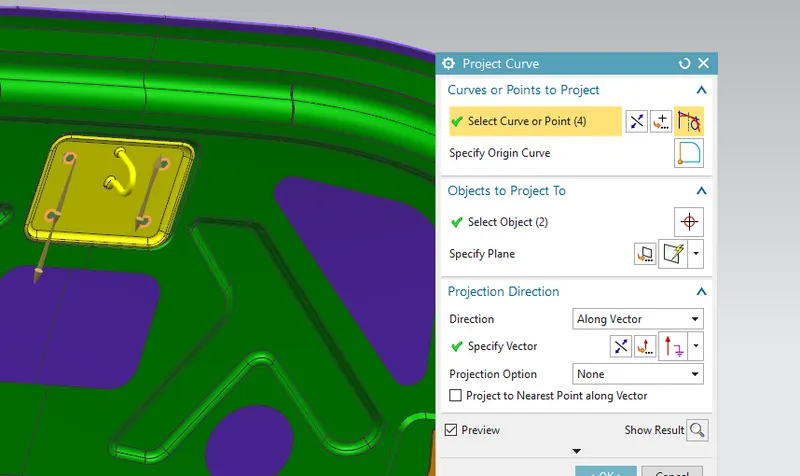
- Next add the attachment holes for the hinge assembly, latch and striker.
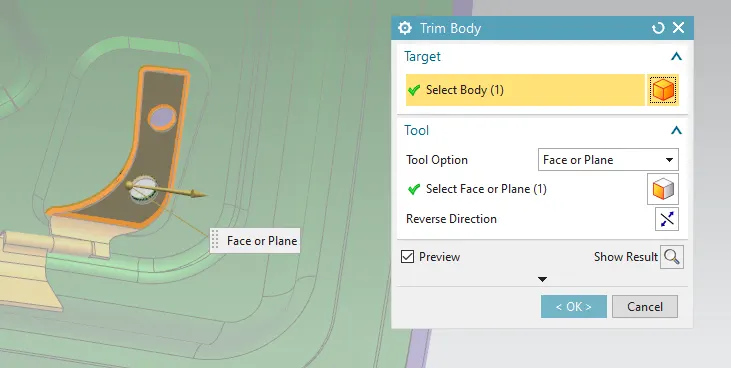
- sew it, thciken for 0.75 mm.
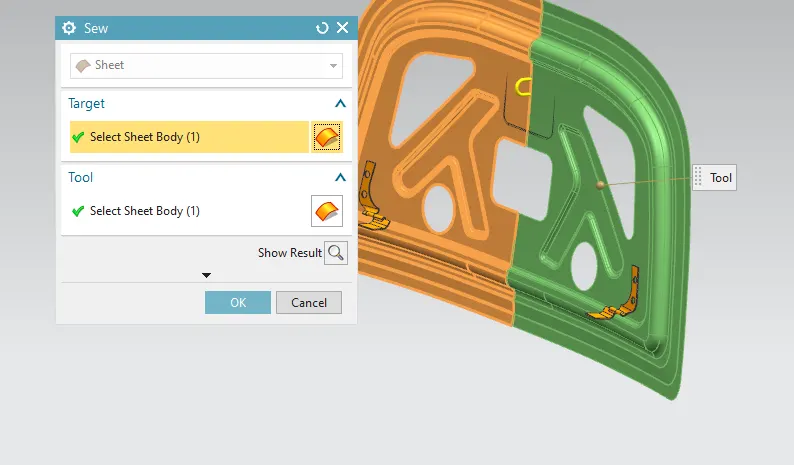
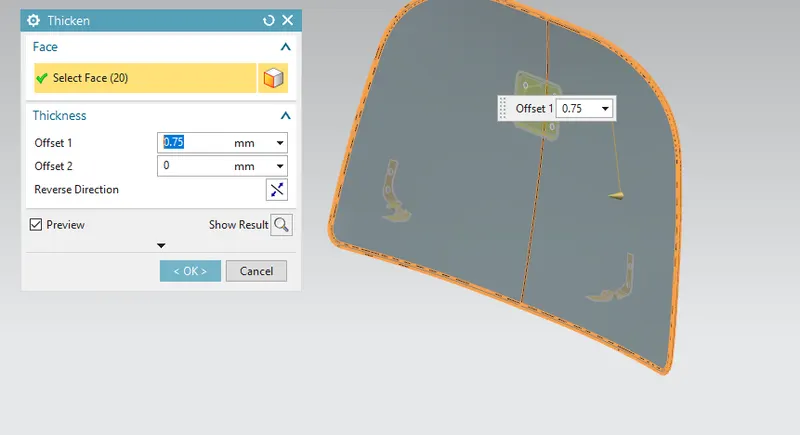
- For the next have of the section we can use mirror features and select the zx plane.
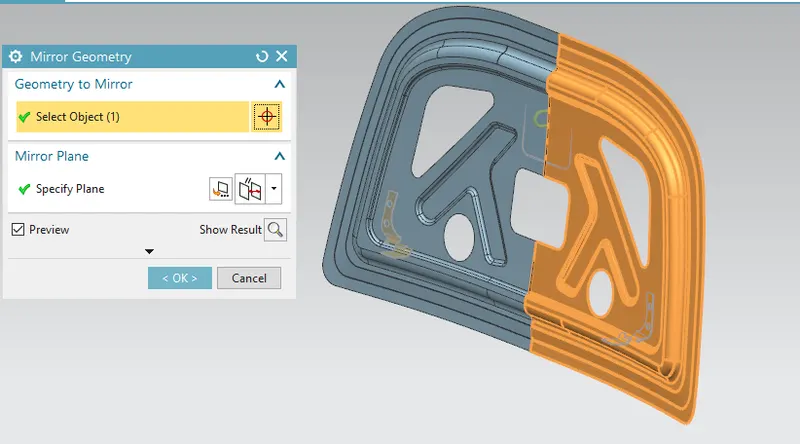
- If it pops some error, delete the excess edges and extend the sheet for 5 mm.
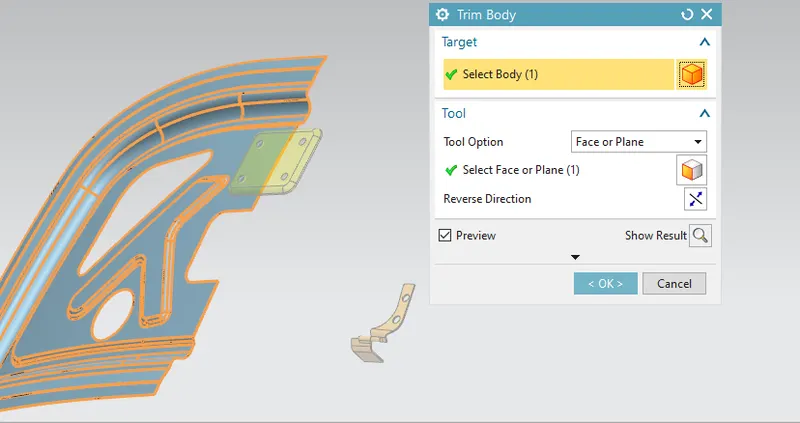
- For hemming section, first split the face for halves and offset the outer panel for 2.45 mm.
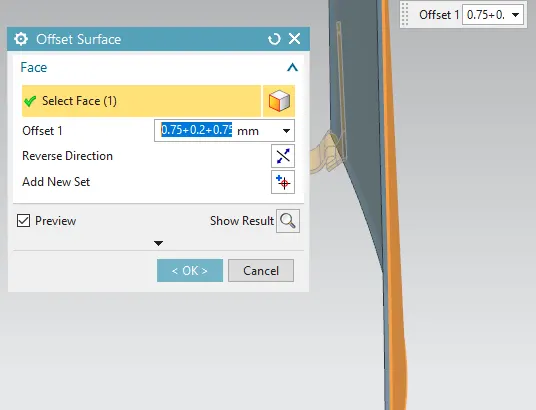
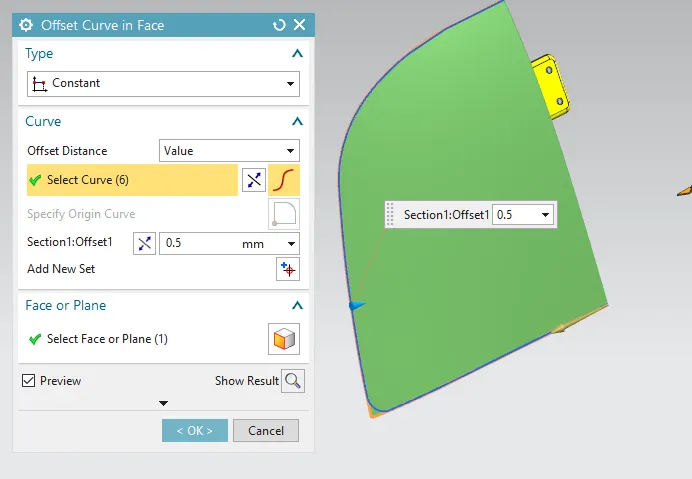
- The outer curve should be offseted in 0 mm.
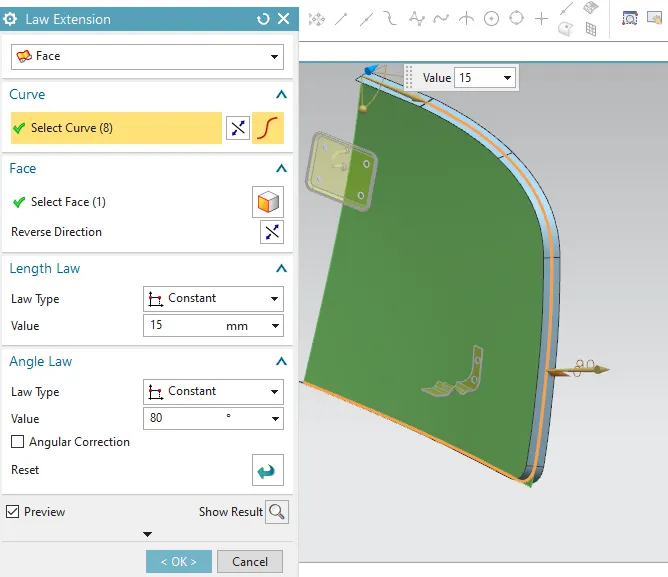
- And use law extension for the same face for 5 mm.
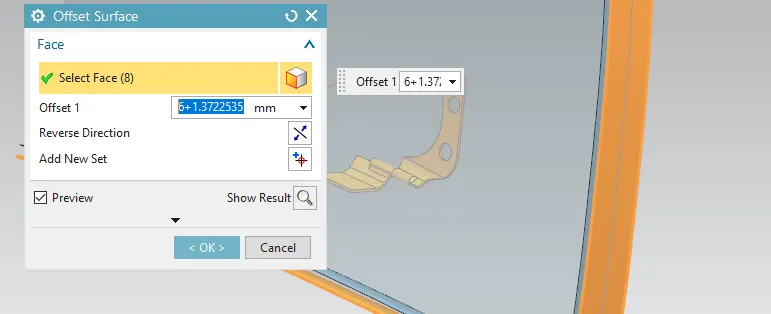
- Again offset of the law extension for 8 mm.
- Trim the body for offseted extension and offseted outer panel.
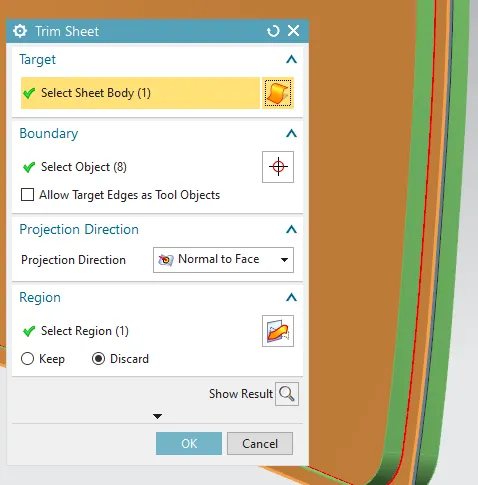
- Then use face blend for three faces of outer panel, outer law extension and trimmed body.
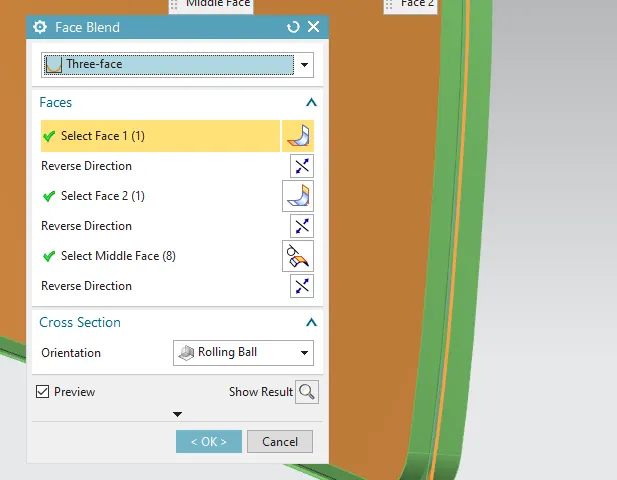
- Also create the rear relief section curve and trim it using trim sheet.
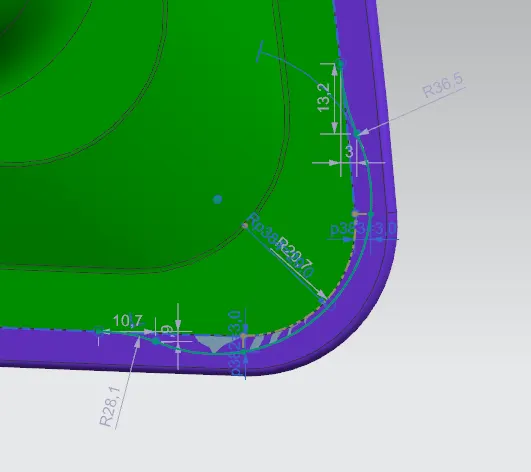
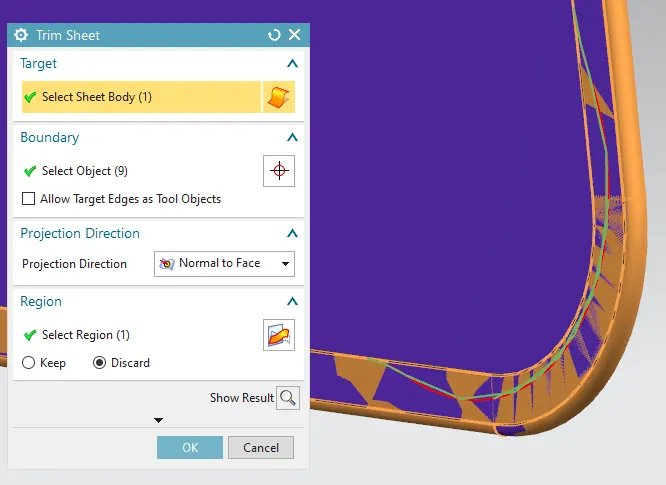
- After completing the hemming section, mirror feature option to next halve and sew it, thciken for 0.75 mm.
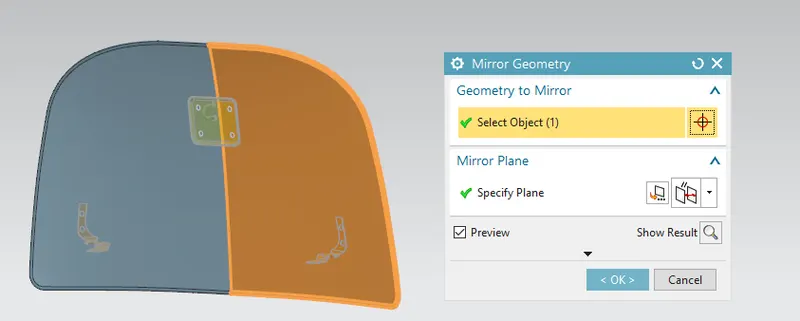
- Next we get into assembly section of the inner panel, outer panel, hinge part, latch and striker attachment.
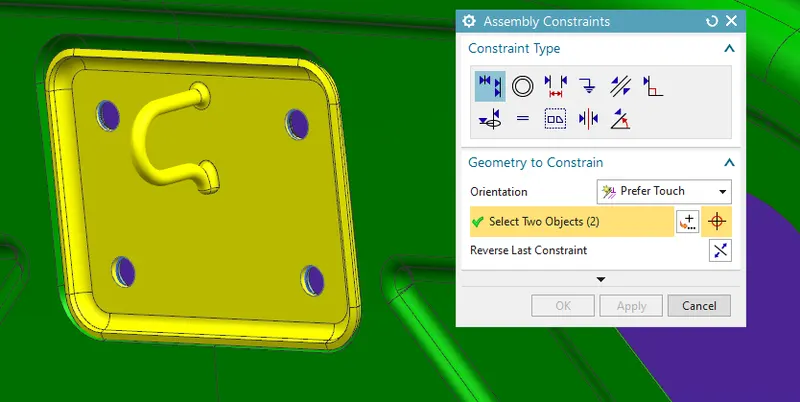
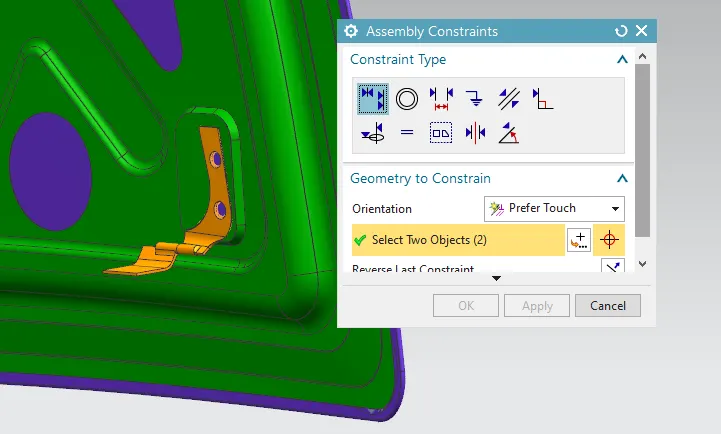
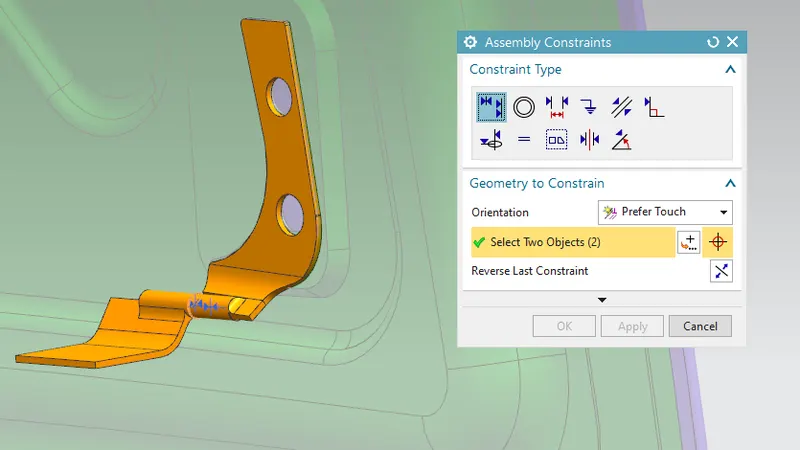
CONCLUSION:
The following images are the designed assebly of the complete hood or bonet of a car.
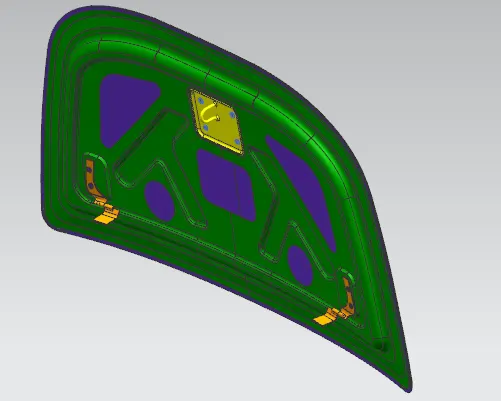
3D view
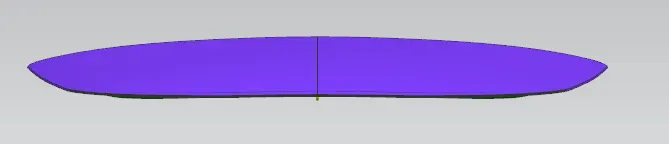
Front view
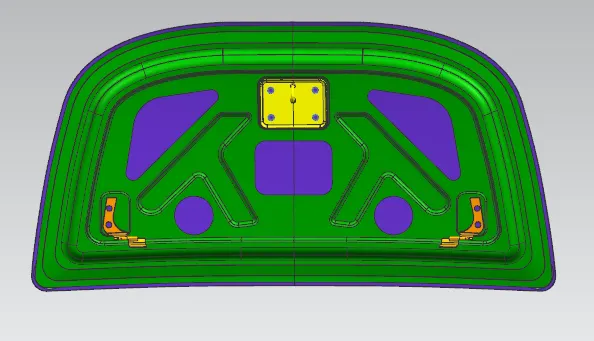
Bottom view
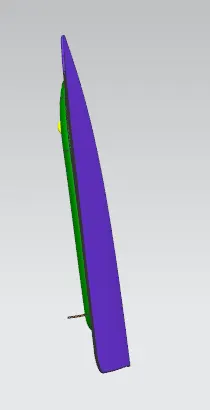
Side view