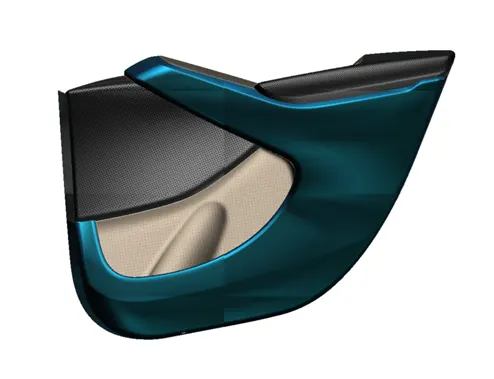
Door Trim Panel Design
Aim:-
This project is to make half of the door trim panel in catia-V5 from the provided Class-A surface of the same.
Objective:-
Our basic approach to make a plastic model from class-A surface should be:
- Run draft analysis
- Make tooling axis
- Make B surface
- Make C surface
- Trim all together and make it solid.
CLASS-A SURFACE
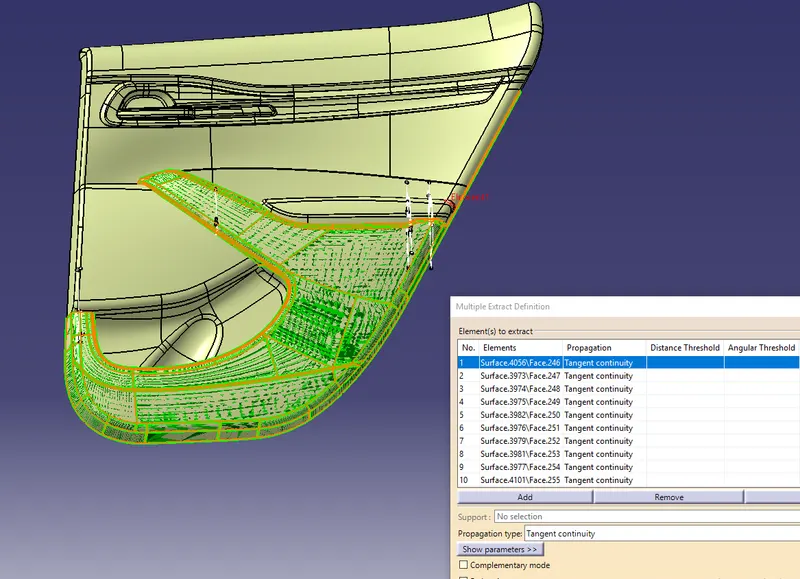
In automotive industry various teams works on various components, a car for example is not entirely designed by a single designer. There are many teams among which the task of making various components is distributed. And this is followed for every department of the industry. In this project we are given class-A surface which is designed in other software like Autodesk Alias, by a class-A designer. This is aesthetic surface and a lot of time, effort and good experience are demanded for making this continuous and a good flowing surface model. This is the major reason why, when we get this as input we are not allowed as a plastic designer to make any improvements in the class-A surface. Rather, it should be brought to the attention of the seniors which later is conveyed to the concerned team and take care of.
TOOLING AXIS
Tooling axis is the axis along which the core and cavity opens and closes. It is very important to define the tooling axis in the first step while designing a component as it is the main component which helps us to run draft analysis on class-A at initial stage to see if we can move ahead. Also for later stage, tooling axis is the direction along which class-C surface and the draft to the components is given.
In this model we have a tooling axis in the perpendicular direction to the entire door trim that is y-direction in the model. It is very evident that switch bezel will require a side core, so another tooling direction is made specifically for switch bezel. Apart from these two tooling axes we also have a side core tooling axis for dog house.
DRAFT ANALYSIS
Our first step before starting the model should always be to check is the surface has enough draft that it will not create any problems while ejecting from the mold. This seems like a big task as we have to foresee something that will come at very later stage. But this is done by a small process called draft analysis. This analysis tells us whether our component will be safely ejected in the tooling axis we have provided. Some components require side core where there are under undercuts, holes or projections on the side walls, so for this we need a different tooling axis and a different analysis is required to check those areas. Draft analysis shows color codes which are defined by the user for different values which also are defined by the user. These colors help us to analysis if the component is clearing the analysis and we are good to go ahead or not. In case the component fails the analysis for class-A then we have to submit the draft analysis report to the higher authority so that the surface of the component can be improved. Failing analysis simply means that the component does not have the required draft value it must have. In case our solid model which we develop, fails the analysis at some parts then we have to correct it ourselves.
We have to make sure that our entire model is green which means it is clearing the analysis. So we have to run analysis for class-A, solid model and other B-side features as every single component, regardless of its size should be ejected safely from the core.
DRAFT ANALYSIS REPORT ON CLASS-A SURFACE
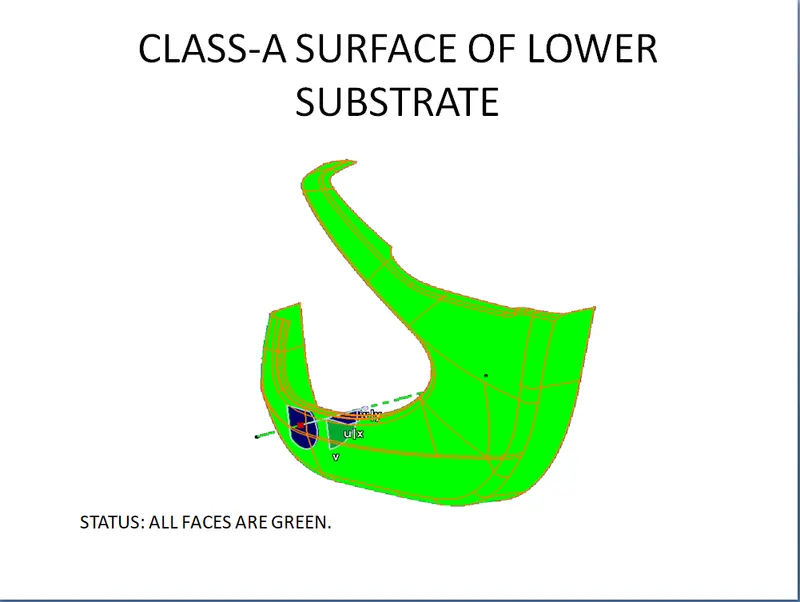
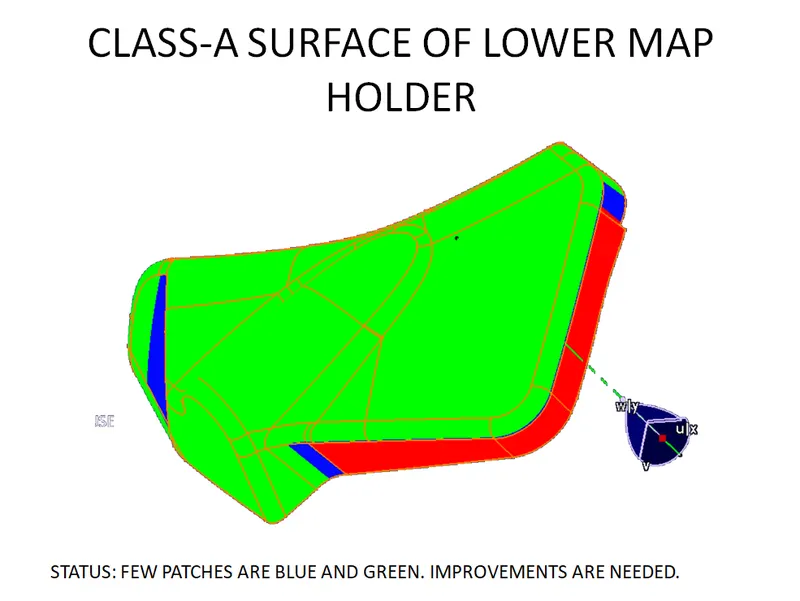
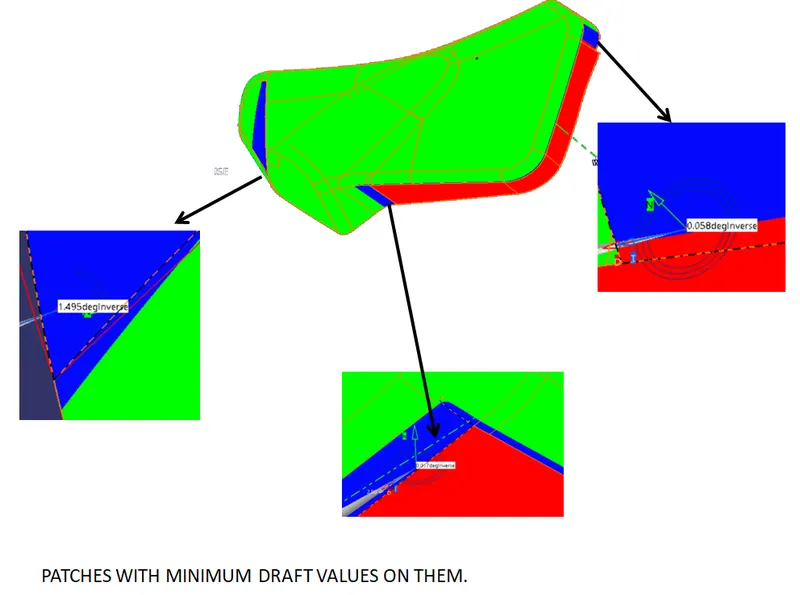
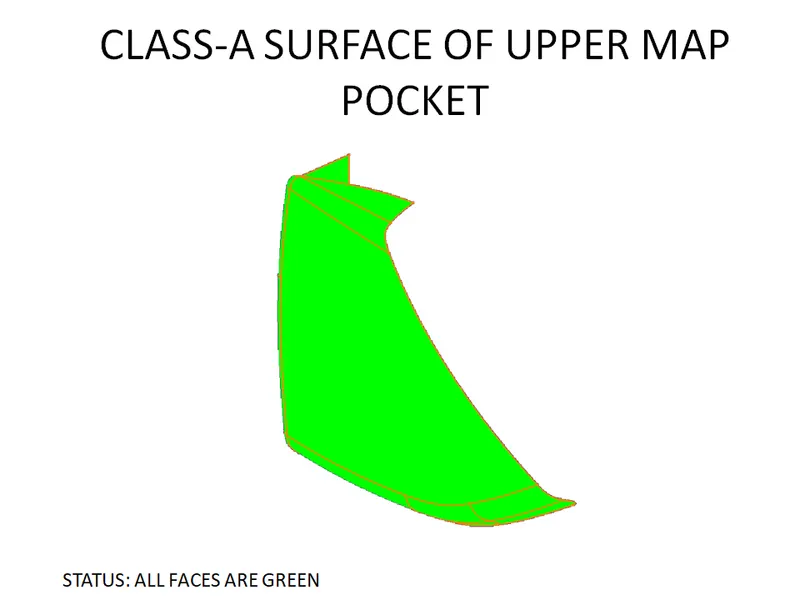
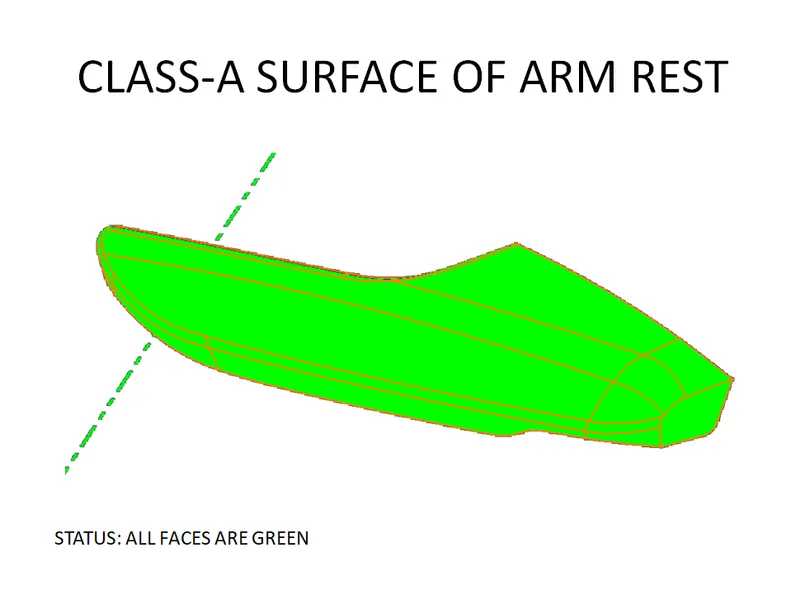
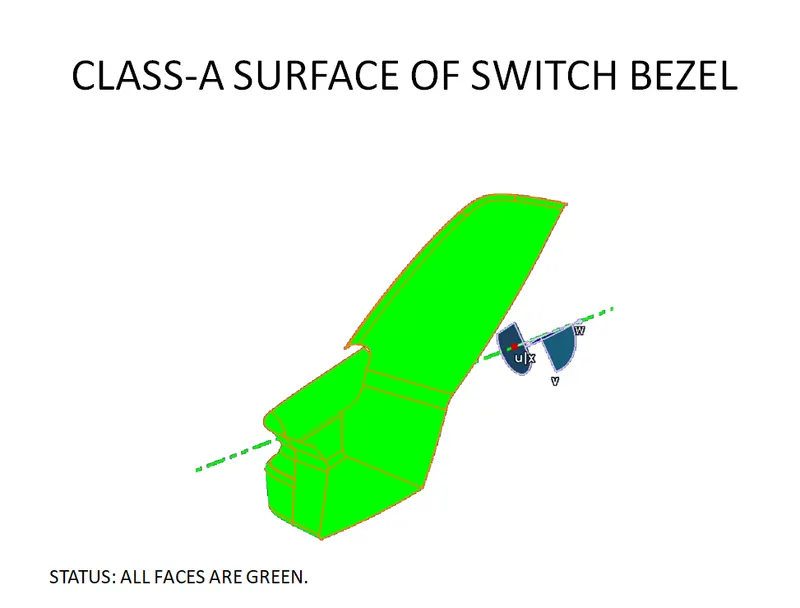
As we can see from our analysis that map holder need improvements. On industrial level in such case we cannot proceed with this class-A, but for the project we are making this model anyway. We expect this component to fail the analysis later too.
DESIGNING PLASTIC COMPONENT
As the entire door panel is divided into various components, we will make this plastic component in the same way. Following steps have been carried out to make the plastic component for every component:
The first step for every component was same. The given input was not a single unit but has numerous patches. These patches were joined together using join command. Thus after performing this operation we got our single class-A surface.
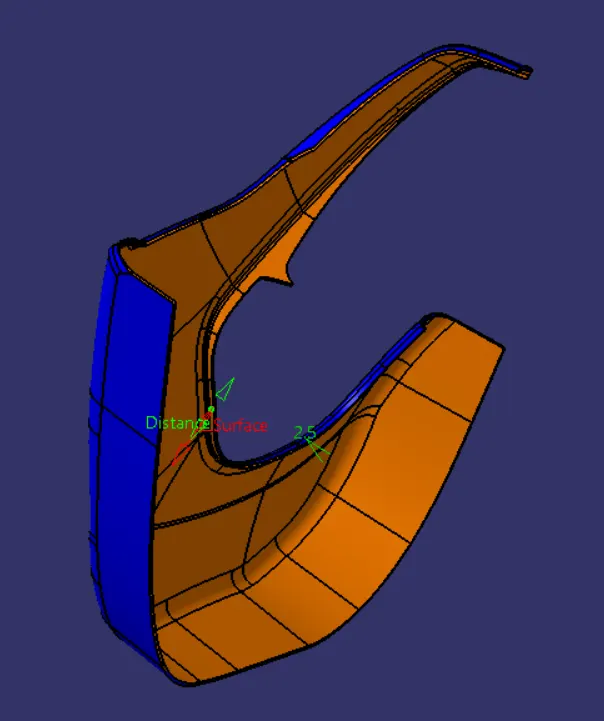
Once we get class-A, we have to proceed to make class-B surface. Creating class-B by extracting every flat surface will be a complex process in such component. So we directly offset it by 2.5mm.
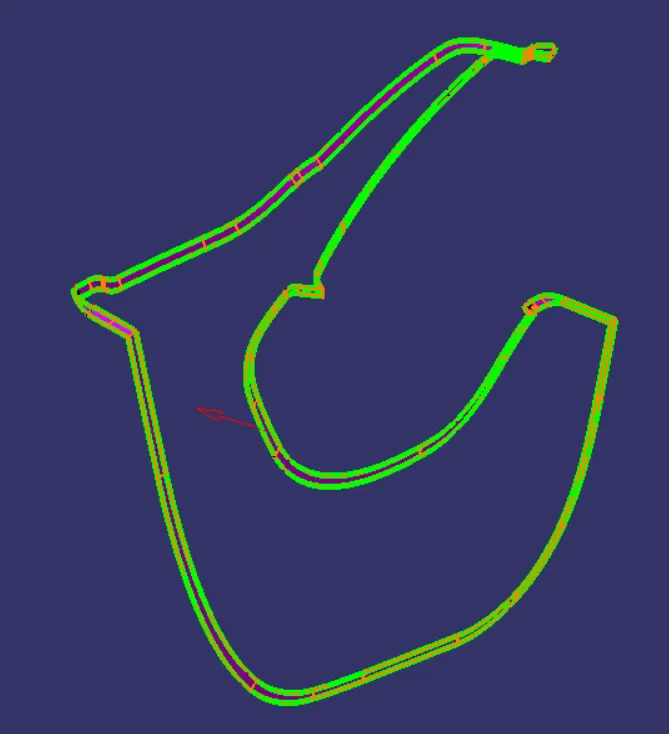
For making class-C surface we have used sweep command ‘with draft direction’ by giving 3deg draft angle and tooling axis as direction. But at many places this did not work so we have to sweep ‘with reference surface’ at 90deg. Once that was done, the C surface was joined together using join command.
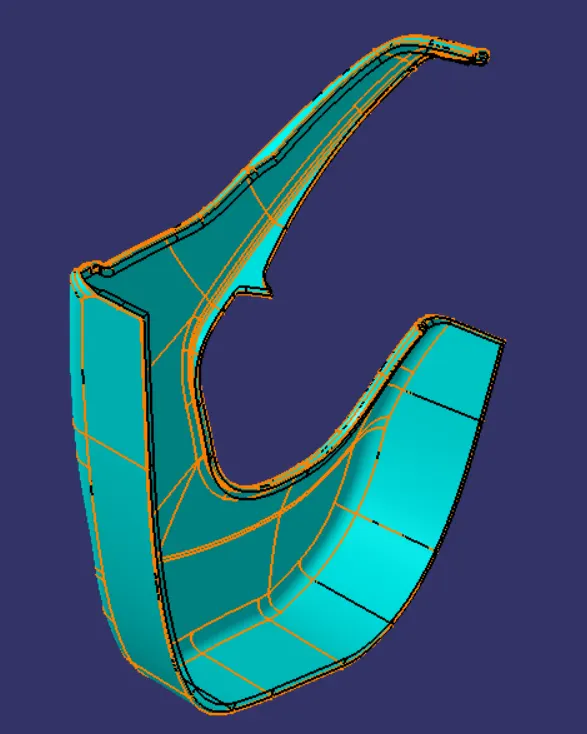
To make a final surface model, we have to trim all the three surfaces together. And later go to part design to close the surface.
HERE ARE THE IMAGES OF EVERY COMPONENT IN THE ORDER OF THE ABOVE STEPS
LOWER SUBSTRATE
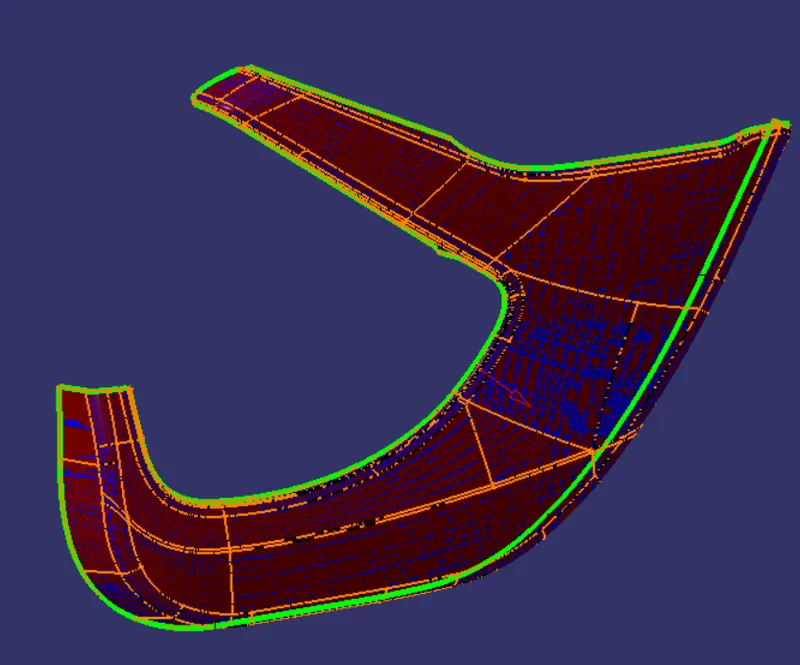
joining the class-A surfaces together so that it is easy to offset it for getting class-B surface.
Class-B surface was created by offseting class-A surface by 2.5mm distance. This is the nominal thickness of the component.
Class-C surface was created by sweeping it along tooling axis at some part and sweeping it with reference surface at other. In the end every patch was joined together to get class-C surface.
Final surface model was created by joining class-A and class-C surfaces together and later trimming them with class-B surface.
Once we get the surface model, we make it into solid model by going to part design and closing the surface. Once that is done, we run a draft analysis on the component and once it is clear, we move ahead with making B-side features and again run a draft analysis on the entire component. Below image shows the analysis on lower substrate component after making all the features.
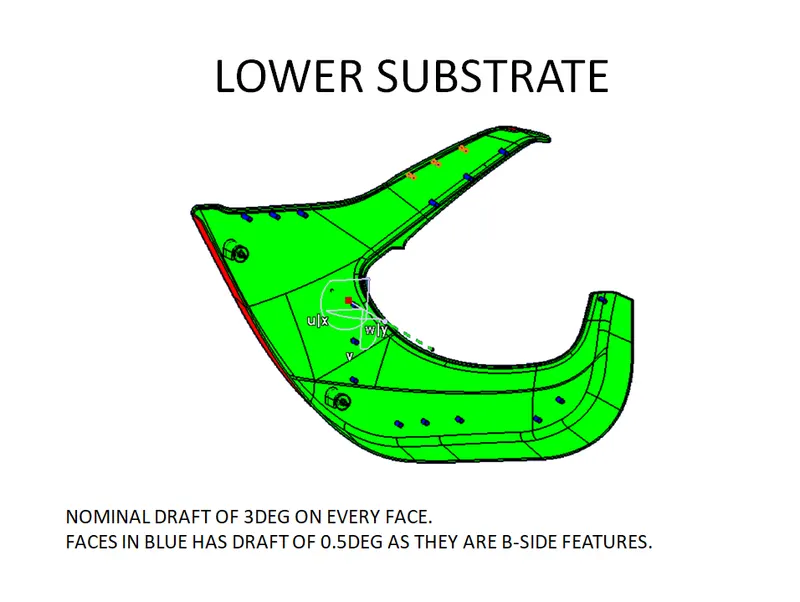
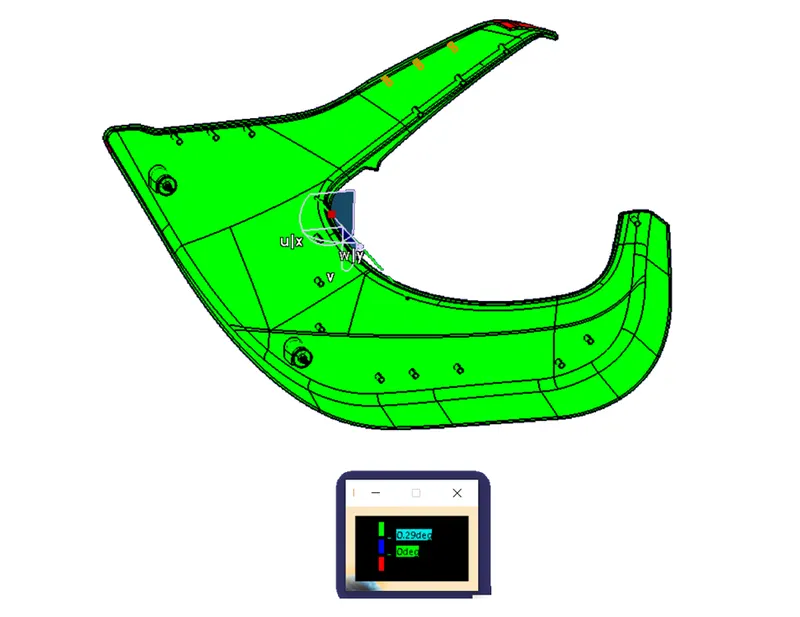
The value of draft on heat stakes is 0.5deg so it showed bluw color in the first image where acceptable value of draft was 3deg. but as we decreased the value of acceptable draft to 0.3deg it becomes green in color. The position of the heat stakes on the lower was given according to the flanges of the other component. They were made only after making all the components.
MAP HOLDER
We have divided map holder into two different parts, upper map holder and lower map holder, and worked on them separately.
LOWER MAP HOLDER
After joining class-A surface together, it was offset at a distance of 2.5mm to get class-B surface.
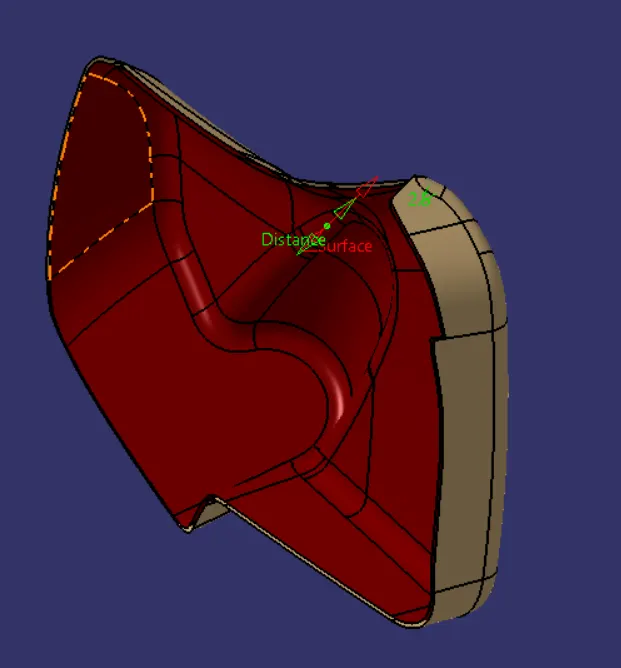
As the boundary of class-A surface is not constantly flowing in one direction and there are many round corners, sweeping along with tooling direction was creating problems, so to avoid cusps many patches of C-surface were made and later joined together.
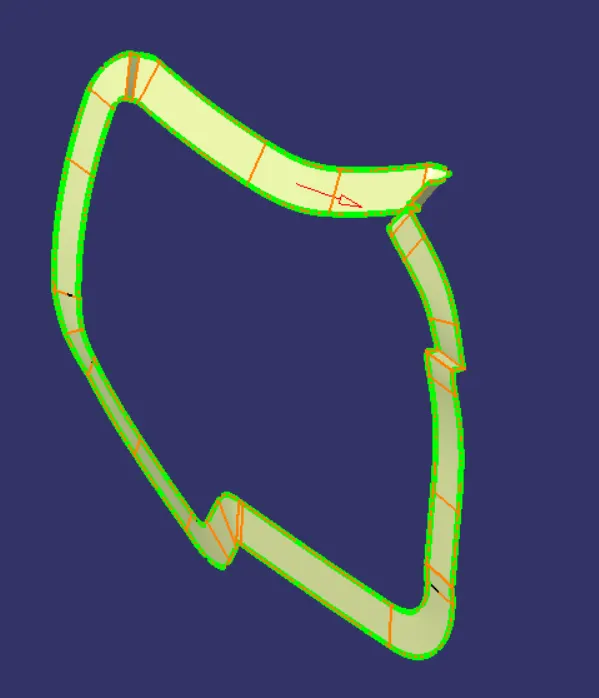
Once we get all the surfaces we have to trim all of them together to get once single closed surface model. Later we have to make it into a solid body and run draft analysis on the component.
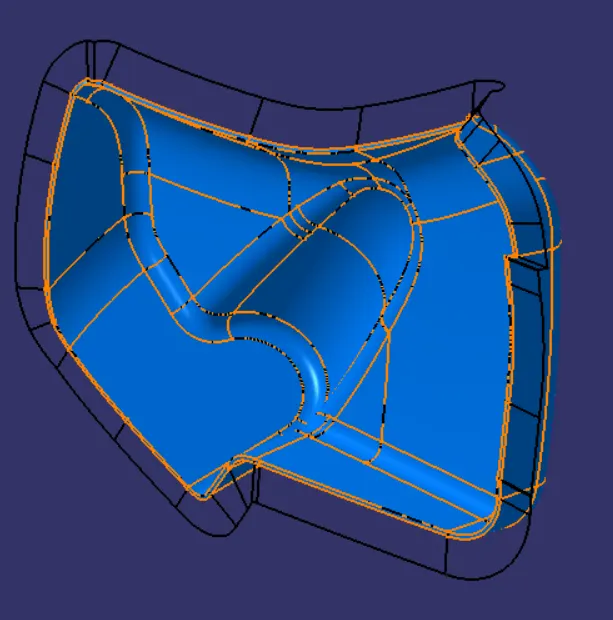
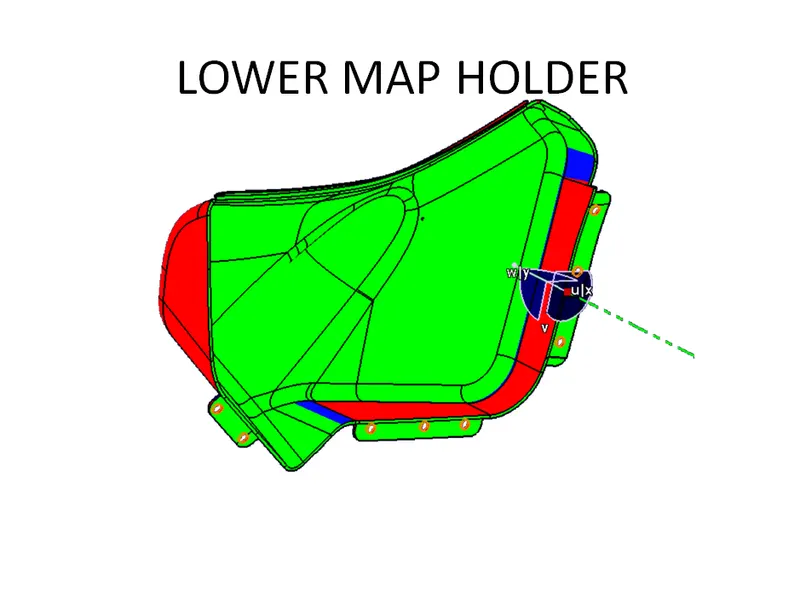
As class-A surface had problems in draft analysis, the same problem is with the component and this was expected result too. This component can cost company a loss of capital if it were to go for manufacturing. But we are considering it only for the sake of project.
UPPER MAP HOLDER
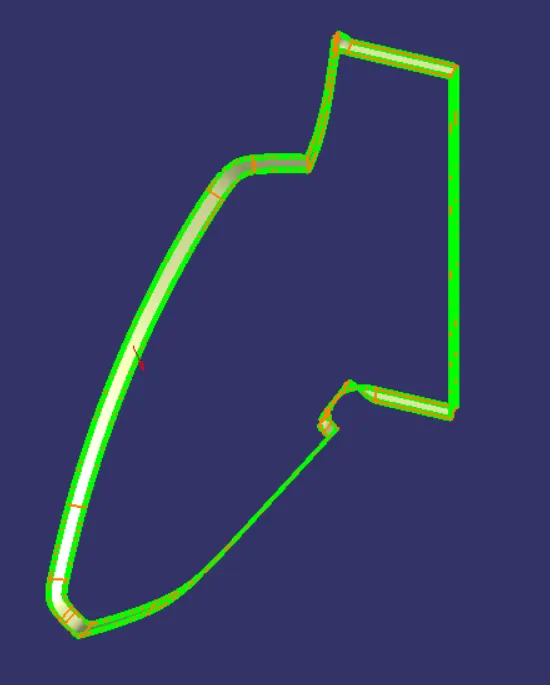
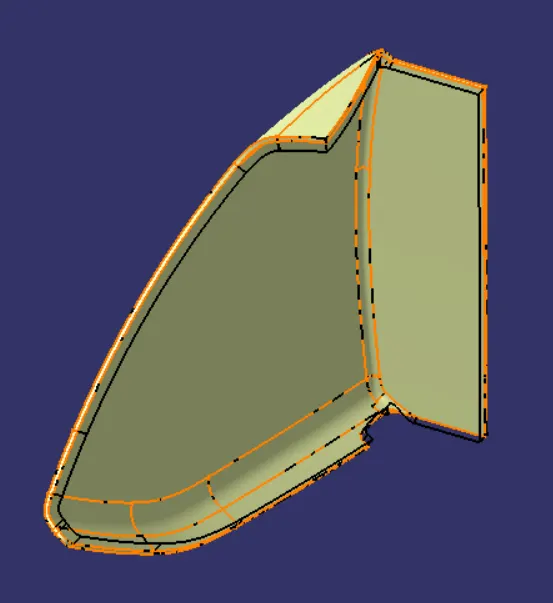
While following a general procedure, we encountered a problem with B surface. This problem was faced multiple times while making different model. When a offset of 2.5mm was given to the class-A surface, a patch of it was missing in the class-B. So we have to make that patch. A spline was created between the ends where the patch was missing and a patch of surface was created usind multisection surface. After that, we trimmed the adjacent surfaces to get a single patch and in the end joined everything together. Below images shows class-B with missing patch and final class-B surface and. The blue thick line in the second image is the spline.
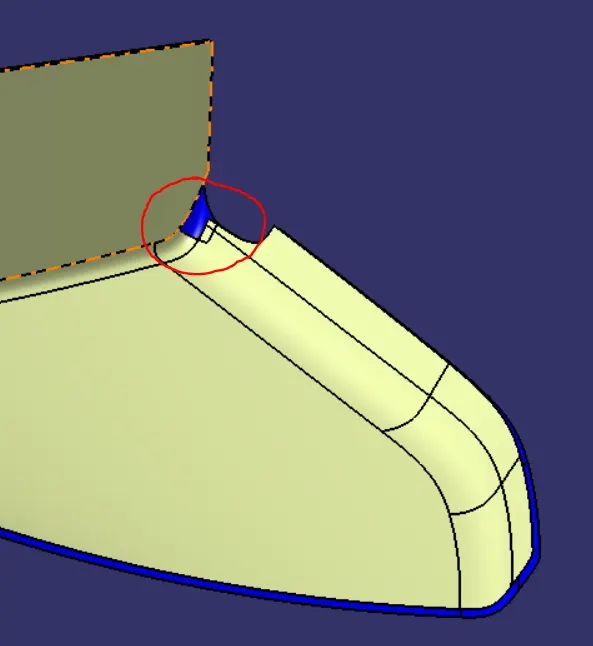
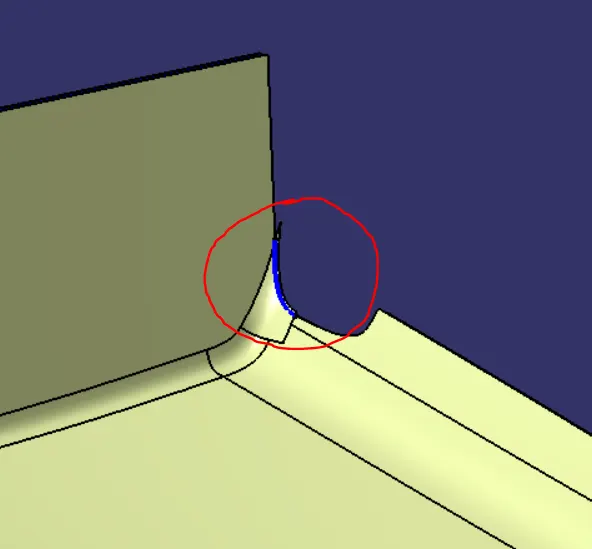
Once this was done, we move forward to make class-C surface. Like other methods, here also we used combination of both the sweeps to make class-C surface and join them together.
For making surface model, we have trimmed all of them together. Later it was made into solid component and draft analysis was run on it.
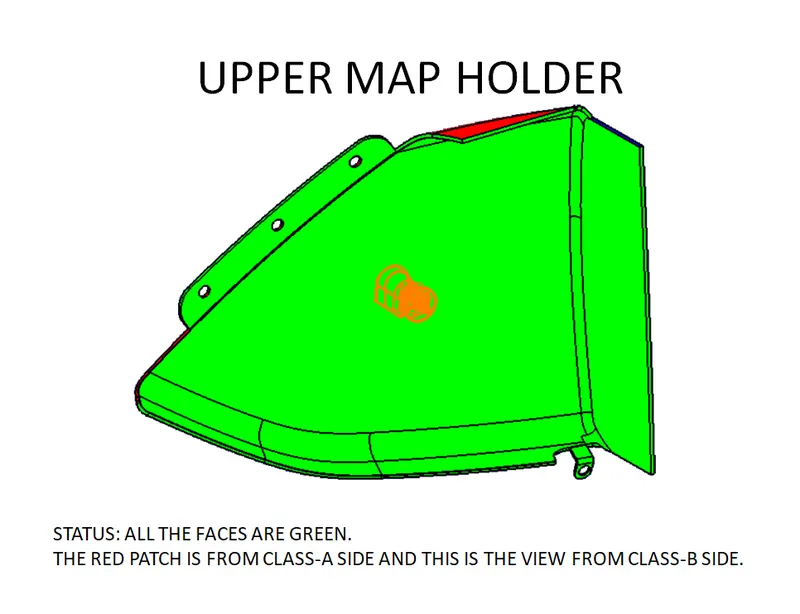
The holes on the flanges we made in the end.
ARM REST
This component too was divided into two parts. A different tooling axis was created for the side core of switch bezel part. The other part was very straight forward and there were no problems at all to make it into a solid component and run an analysis on it.
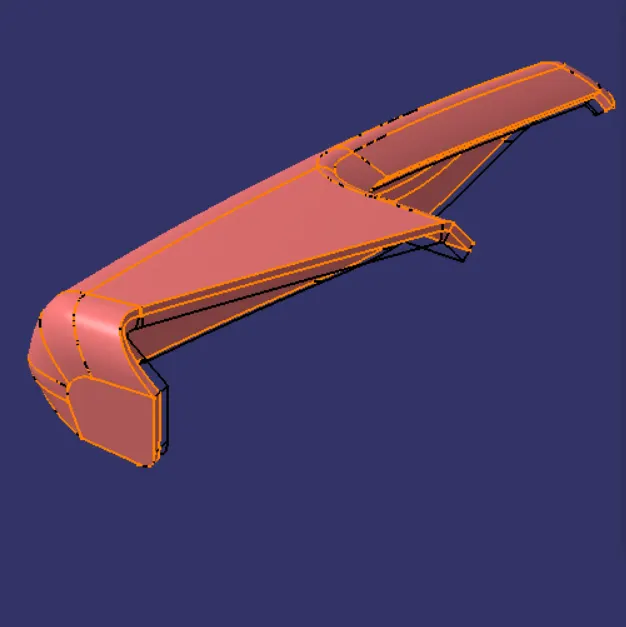
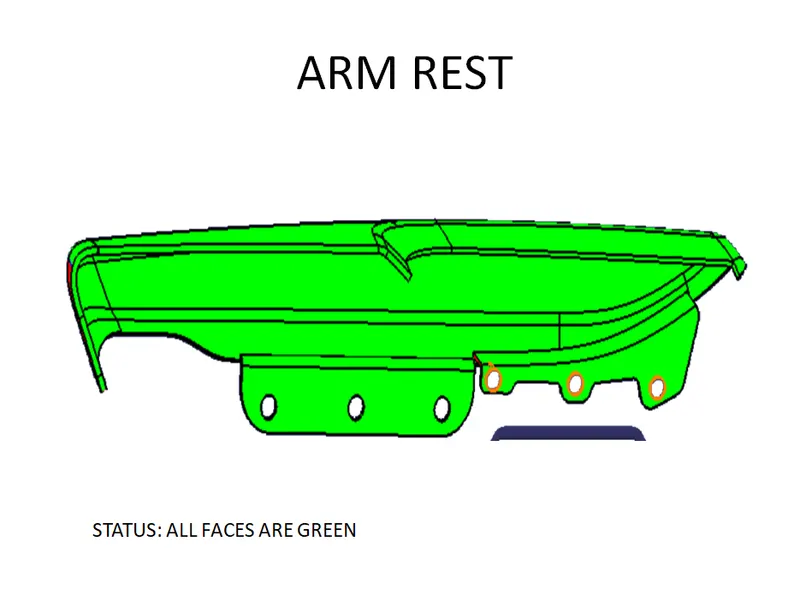
However the switch bezel was very complicated to make. There was specifically one part in the component which made it difficult to make. So a different approach was followed to make this one in the end. Every other procedure was same. There were many problems while creating B surface. Patches were made, extapolated, trimmed and various other techniques were followed on trial and error basis to get the C-surface for this components. In this model, instead of joining class-A and class-C we have to trim class-C and class-B surfaces first because the traditional method was creating problems. As mentioned earlier, everything after getting error in trditional method was trial and error only, so the method of trimming class-C and class-B too was trial and error. Numerous methods were tried but this worked. And after getting surface model everyhting was done as mentioned in the above methods.
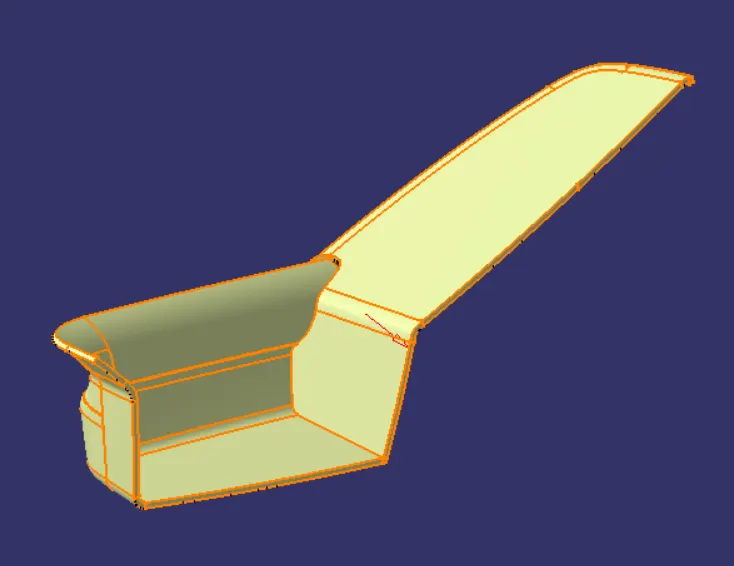
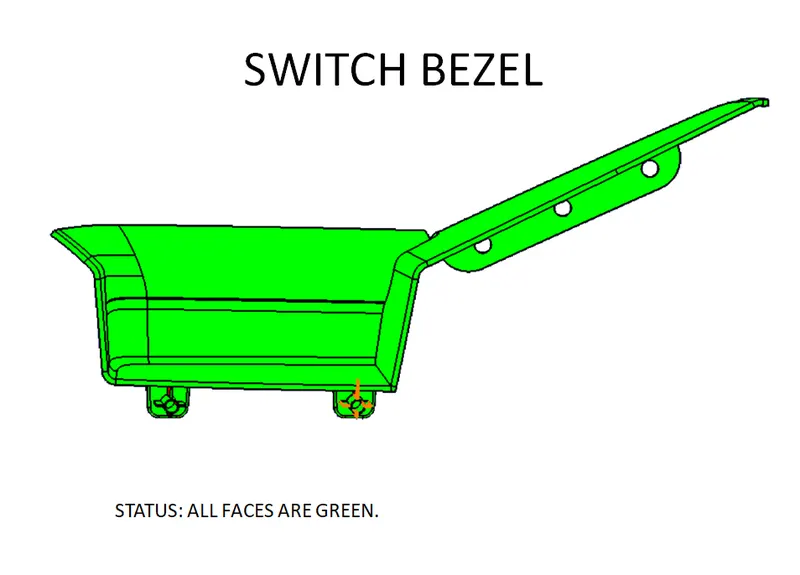
NOTE: All the engineering features we saw in the images were made later and according to the design rules.
DESIGNING B-SIDE FEATURES
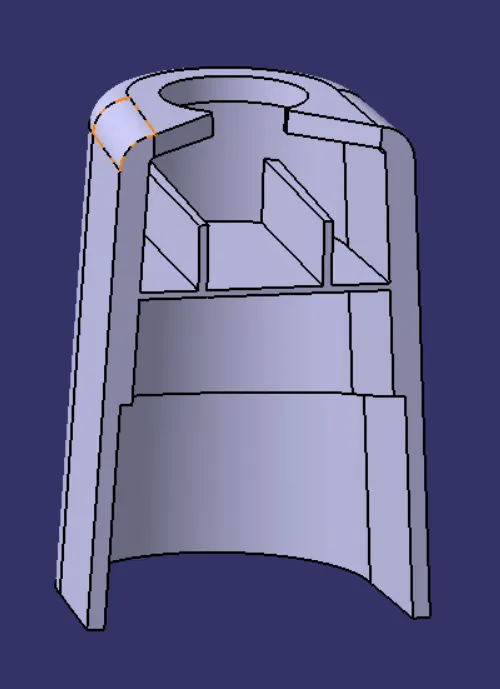
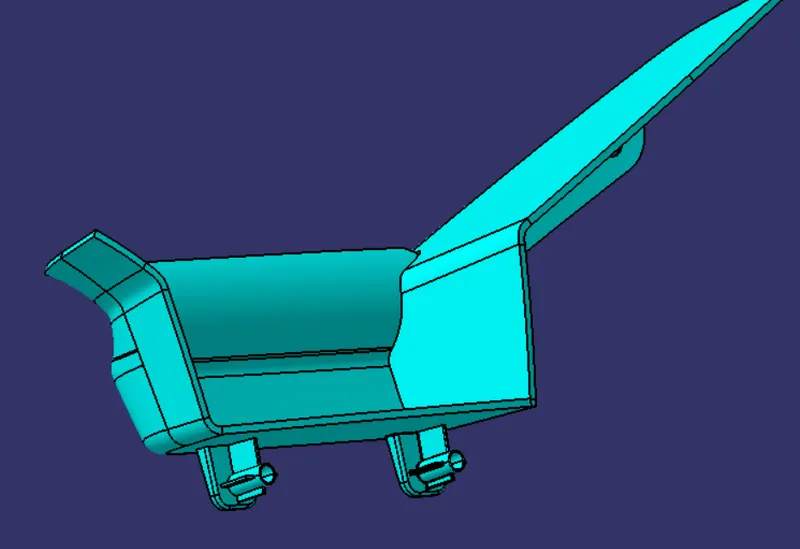
DOG HOUSE: Primary function of the dog house is to avoid sink marks. But it also helps in other things like if the mating part is to be at a greater distance then we cannot make the height of the screw boss of that greater height, thus we make dog house and mount screw boss on it. Hence it helps in solving the problem of screw boss and also it helps to have perpendicular screw boss.
GENERAL DESIGN GUIDELINES FOR DOG HOUSE DESIGN:
- Minimum height: Less than 6mm causes steel condition.
- 3:1 ratio of steel width to height. But 2:1 is preferred.
- Minimum width: 3:1 ratio of steel width to height. But 2:1 is preferred.
- Draft: minimum 1.5deg.
- Sink saver: height= 40% of nominal thickness. Width= 3.0mm-6.0mm.
- Optimal radius:25mm
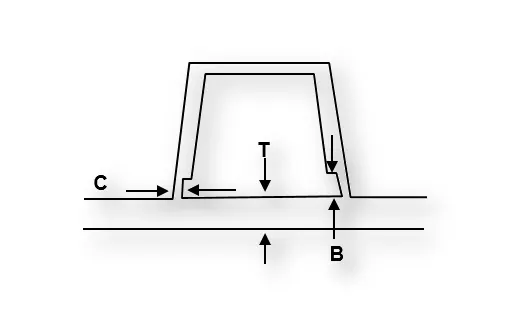
However, for this model we made a dog house which mounts push pins on it. Every above design rules were followed while making the dog house.
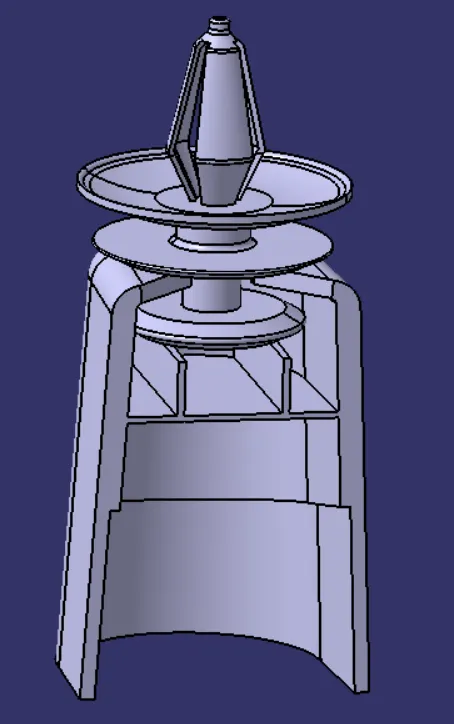
Push clips are mounted on this dog house. But as the push clips are manufactured else where and is not in our zone of concern so we have ignored the rules while making the push clips and made a general clip of similar shape in part design without following any rules.
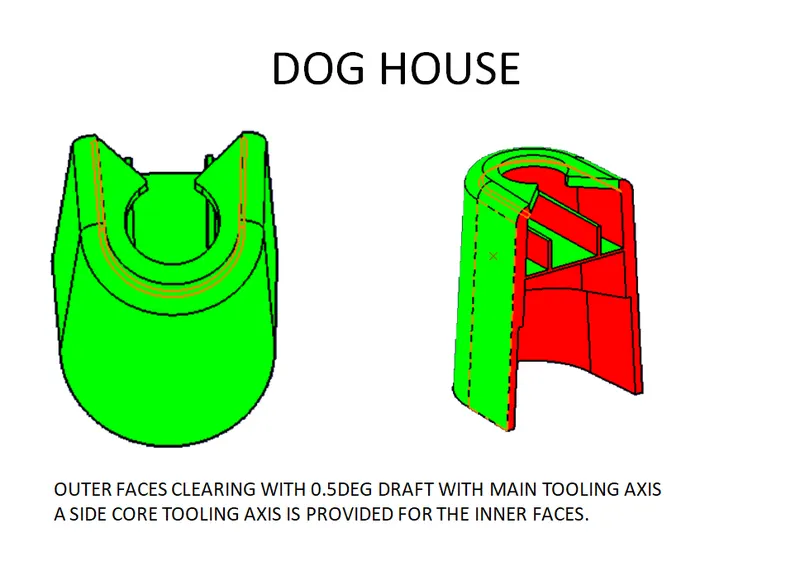
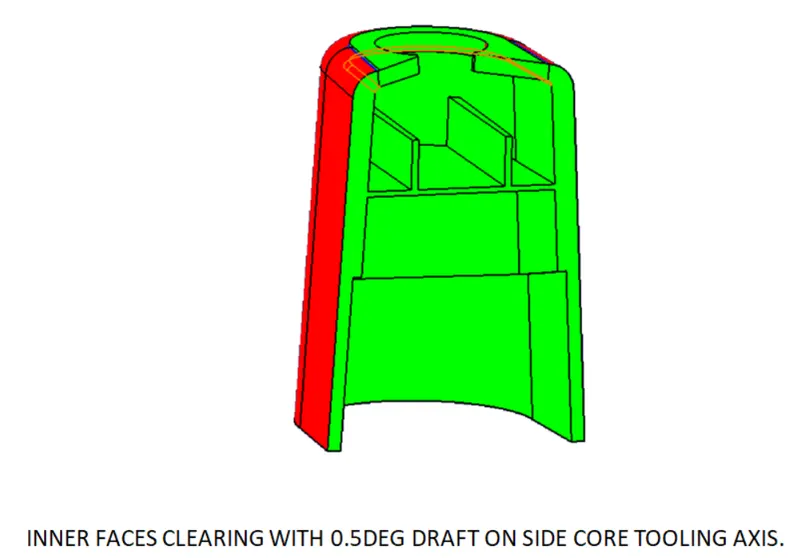
DRAFT ANALYSIS ON DOG HOUSE
Two tooling axis were made for the dog house as there will be a side core for the inside portions of the component.
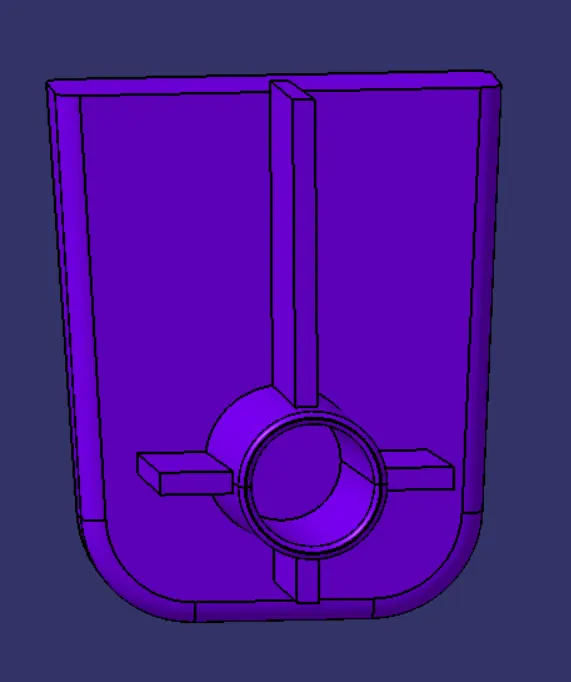
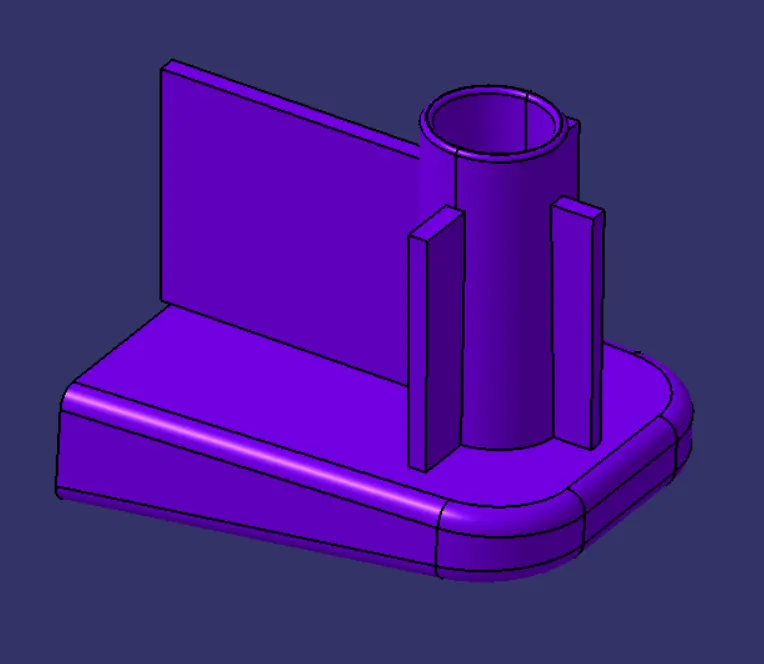
SCREW BOSS: They are used for the purpose of mating two parts. They have hole in them which accepts the threaded part of the fasteners such as screws.
GENERAL DESIGN GUIDELINES FOR SCREW BOSS DESIGN:
- Draft: 5 deg on each walls.
- Wall thickness: 40% of the nominal wall thickness i.e. 0.4*t where t is the wall thickness which is 2.5mm in this case.
- Height/diameter: 3:1 steel but 2:1 is preferred.
- Radius of the fillet: minimum 0.25mm.
- Boss gussets (rib like structure giving strength to the screw boss) must meet ribs guidelines.
- Avoid merging the screw-boss into wide wall.
RIBS/GUSSETS: They increase the stiffness and strength without increasing overall wall thickness of the model which is not desired. They also facilitate:
- Locating and arresting components of an assembly
- Providing alignment in mating parts
- Acting as stopper or guides for mechanisms.
DESIGN RULES FOR RIBS:
- Draft: 0.5 deg per side (minimum), but this value should not be high enough that it will cause failure for other consideration. For example, more draft will result in less thickness at the top surface.
- Thickness of ribs: 40% of wall thickness or 0.4*t where t is the wall thickness.
- Height: ≤ 5 times the wall thickness i.e. 5*t
- Spacing (for more than 1 rib): 3:1- steel height/width ratio (maximum). h/w =3or2(preferred) where h is the height of the rib and w is the space between two ribs.
- Minimum thickness at the tip: 0.75
- Radius: 0.25mm max
- Ribs on opposite side of the wall should be offset
- Ribs should be connected to other structural features where possible.
- Rib root thickness should not be more than 30% of the wall thickness.
IMAGES OF THE MODEL
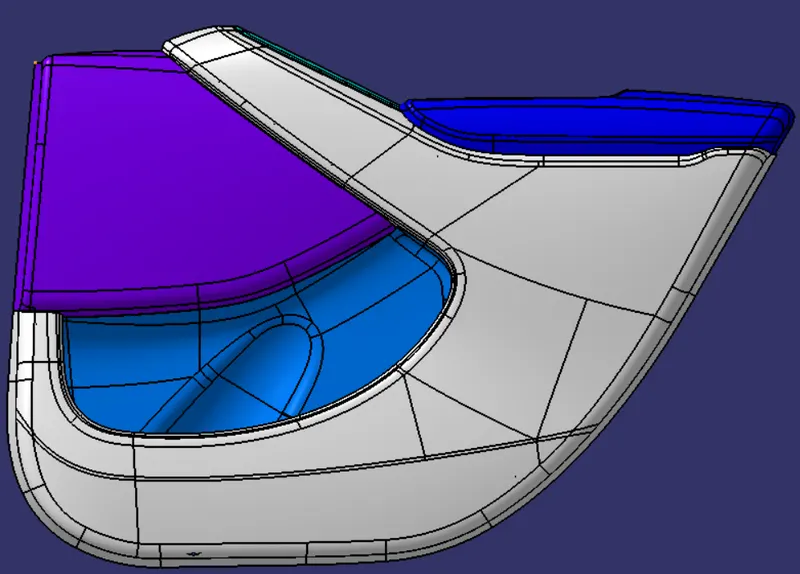
Final image renderings of the model