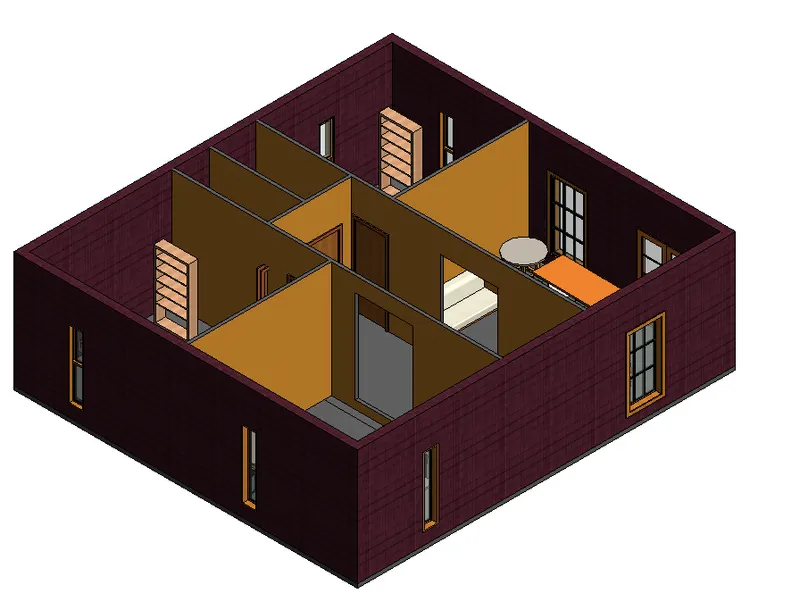
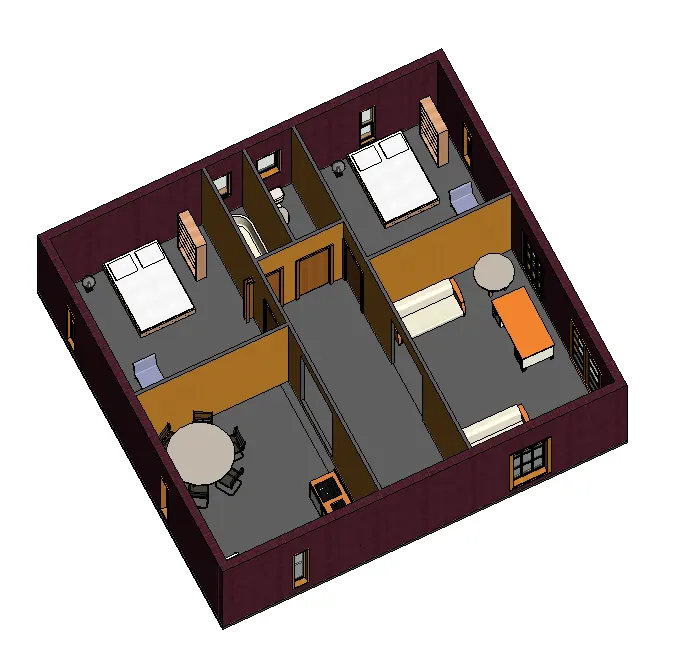
Creating Walls, Partition walls and Floors for a residential layout using REVIT
1)
Aim - i) To create a floor plan with appropriate thickness and material and place it in a plan .
ii) To align the floor plan with grids .
Introduction - 1) Revit is an Building Information Modeling software and is product of an Autodesk.
2) It can be useful for Architects , Civil engineer , Structural Engineer , Mechanical Engineer , Electrical and Plumbing
Engineers .
3) It has Benefits over 2D CAD tools . Such as Real time modeling .
4) There are various templates such as Architectural , Structural , Construction and MEP template and We can work
simultaneously by using Collaborate tool .
Procedure -
Step 1)
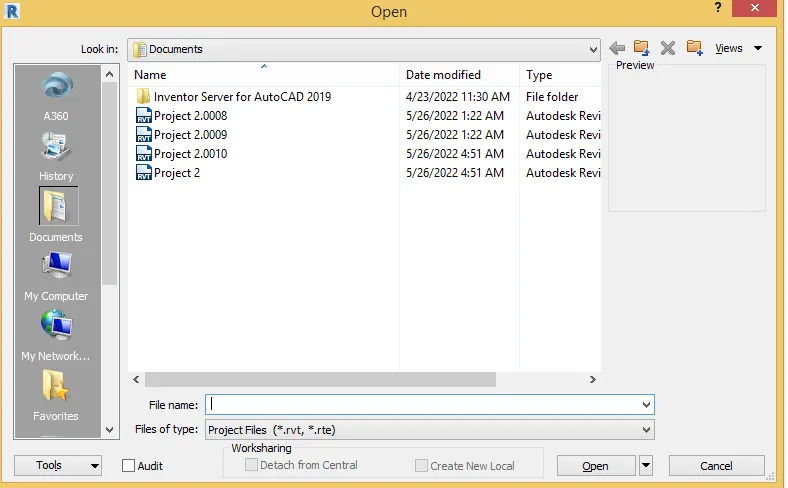
i) Open the Week 2 ( Project 2) assignment from the home page of the revit / by clicking Open option .
Step 2)
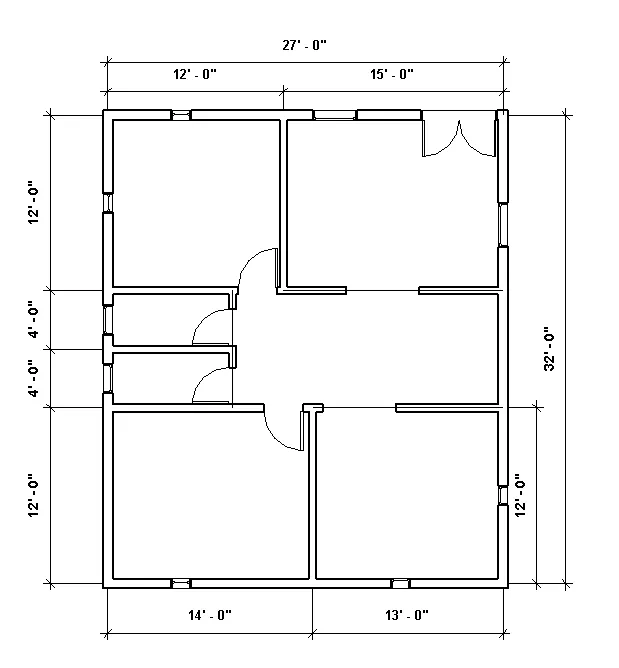
i) After opening the Project 2 file you will see your model in model space area .
Step 3)
i) Now , we have to add the floor to the plan
ii) On Home panel there is an option Architectural - Floors - Floor Architectural
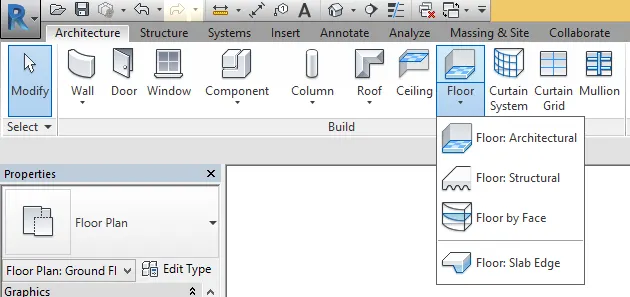
iii) Once you click Floor Architectural a Modify / Create Boundary tab will open
iv) Click on Pick wall option and Select the wall
v) and Click on Right Symbol .
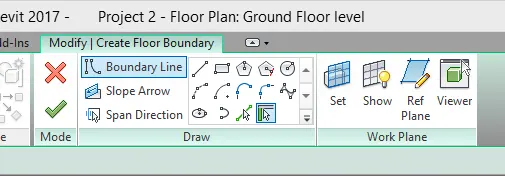
vi) Pick up the walls
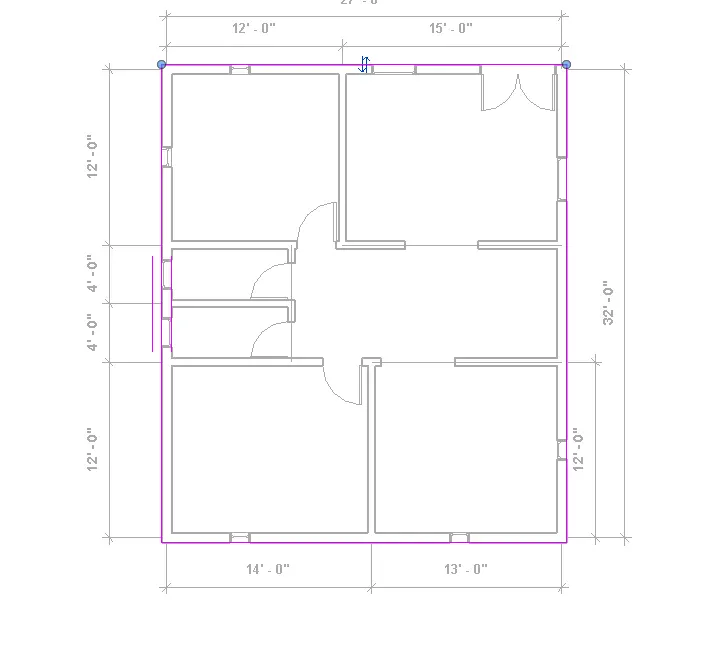
Step 4)
i) After picking up the walls .
ii) Assign the material properties from Properties tab
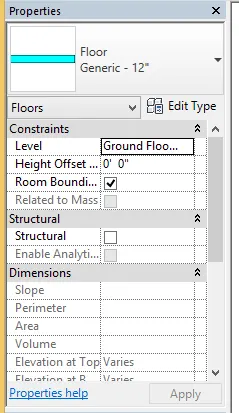
ii) Assign Generic 4" Floor and select the material by Clicking on Edit
iv) Click Okay .
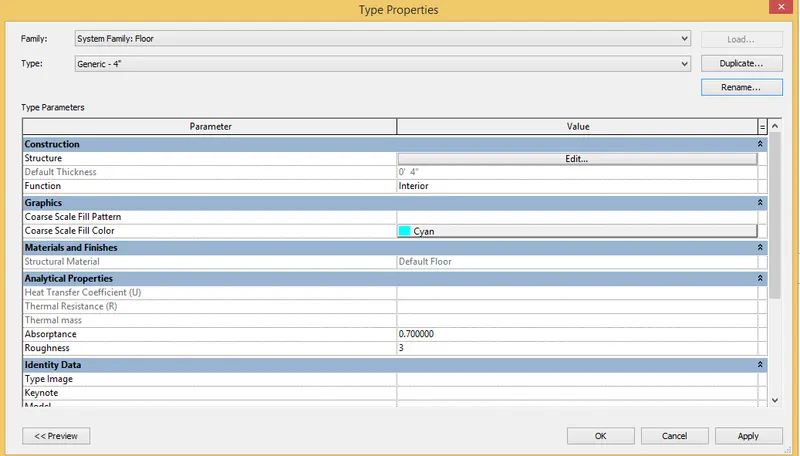
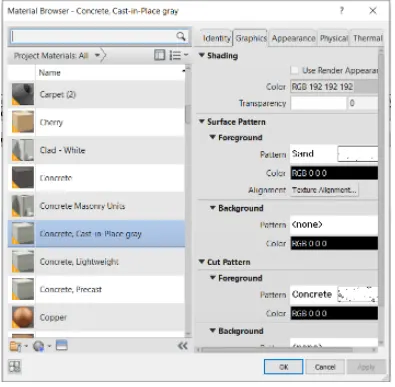
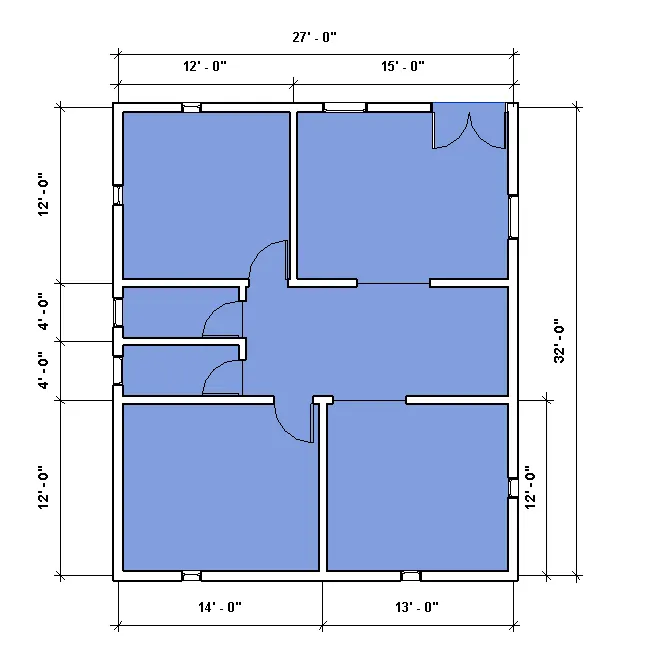
v) Floor level has been appplied to the plan
Step 5)
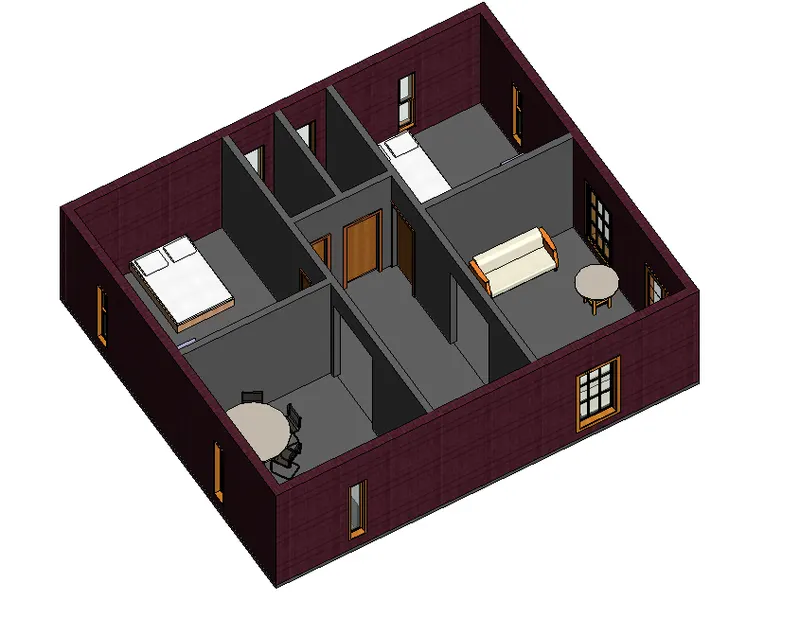
i) Change visual style to Realistic
ii) Change the view to 3D
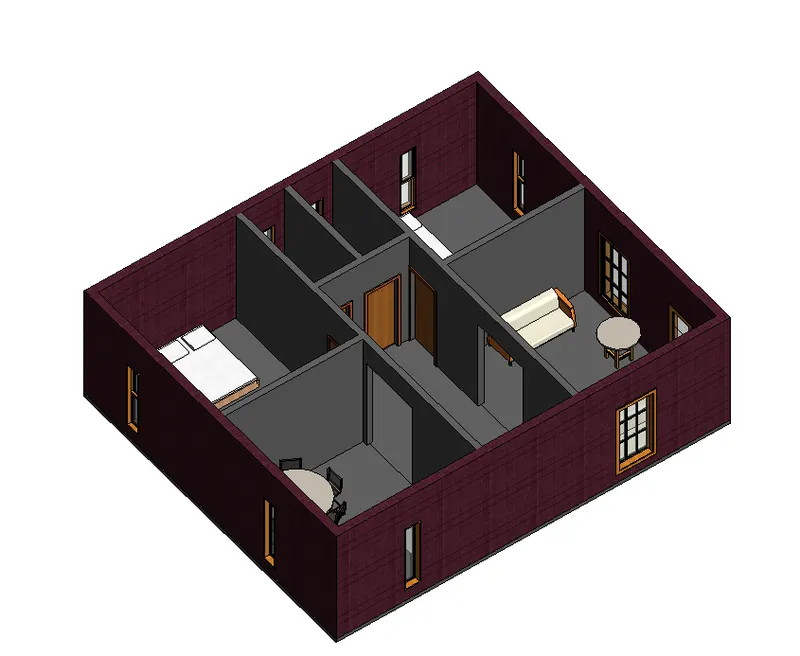
iii) We can see floor level has been applied to the floor plan .
Step 6)
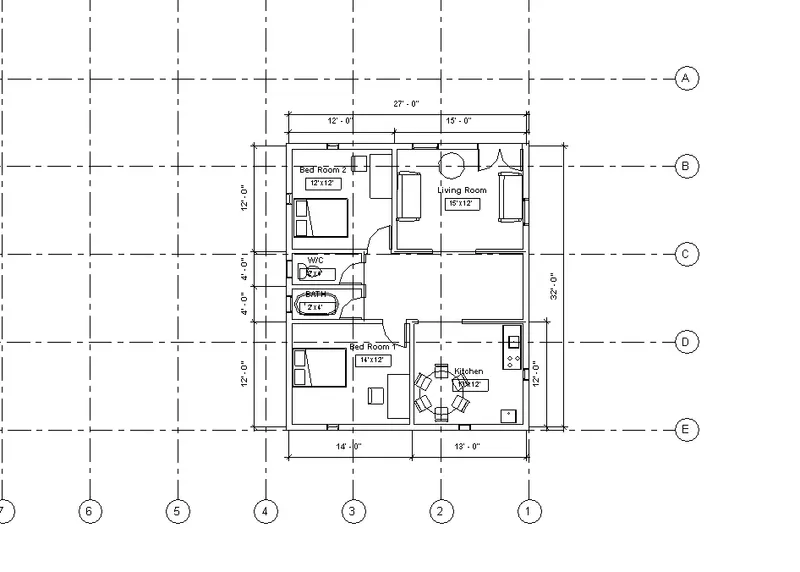
i) Now we have to assign Floor plan to the grids .
ii) As we have already created the Grids in Week 2
iii) Just assign the floor plan into that grids .
iv) Select the plan and Move the model such that Grids 1 lies at the ecterior wall of the model .
Results -
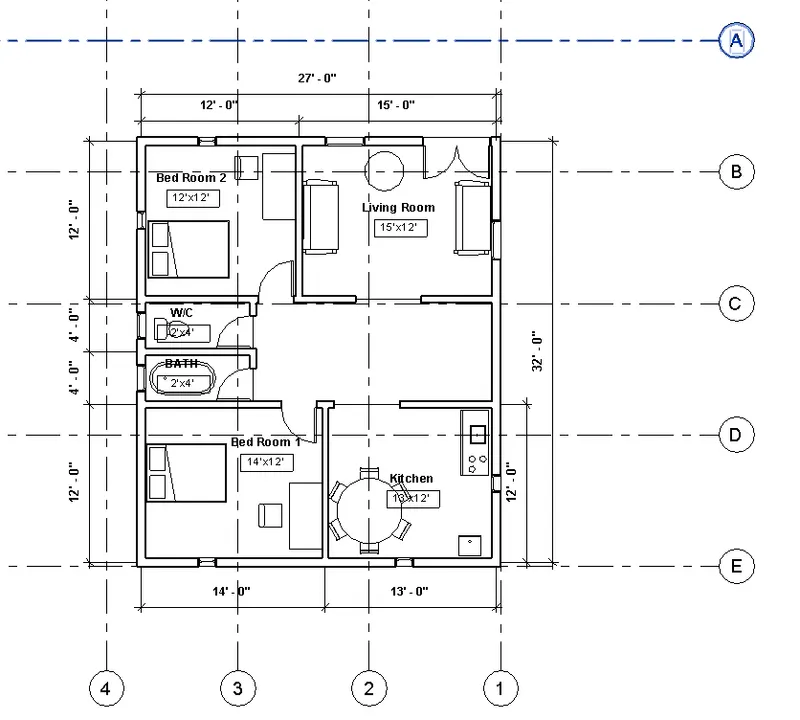
i) A Generic 4" Floor has been assign to the plan with suitable material properties
ii) And Floor plan has been aligned into the Grids as shown in fig .
1) 2D view of Floor plan
2) Realistic View
3) Grids
2)
Aim - i) To create a wall by selecting suitable material properties and thickness from material browser.
ii) Based on your observation, what is beneficial for connecting walls with associated levels rather than being Unconnected
iii) Which option is convenient for modeling walls, By Height or By Depth .
Introduction - 1) Revit is an Building Information Modeling software and is product of an Autodesk.
2) It can be useful for Architects , Civil engineer , Structural Engineer , Mechanical Engineer , Electrical and Plumbing
Engineers .
3) It has Benefits over 2D CAD tools . Such as Real time modeling .
4) There are various templates such as Architectural , Structural , Construction and MEP template and We can work
simultaneously by using Collaborate tool .
Procedure -
Step 1)
i) Open the Question 1 project file .
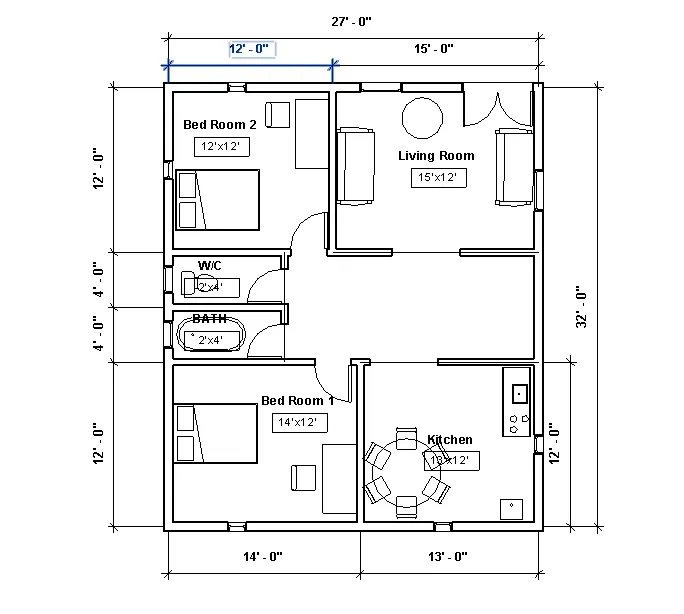
Step 2)
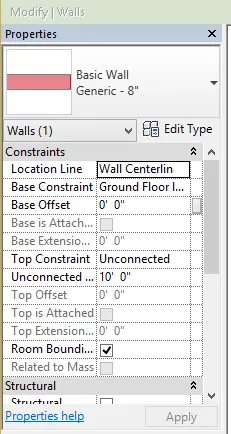
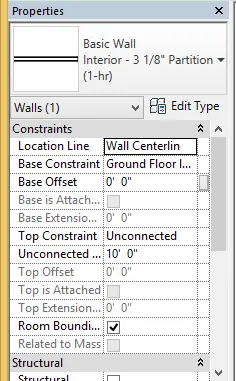
i) As we already provided the wall element of different size
ii) Click on Wall Element
iii) Assume - Exterior wall - Generic 8" wall
iv) Similarly , Asuume - Interior wall as Partition wall - Partition 3 1/8" wall
Step 3)
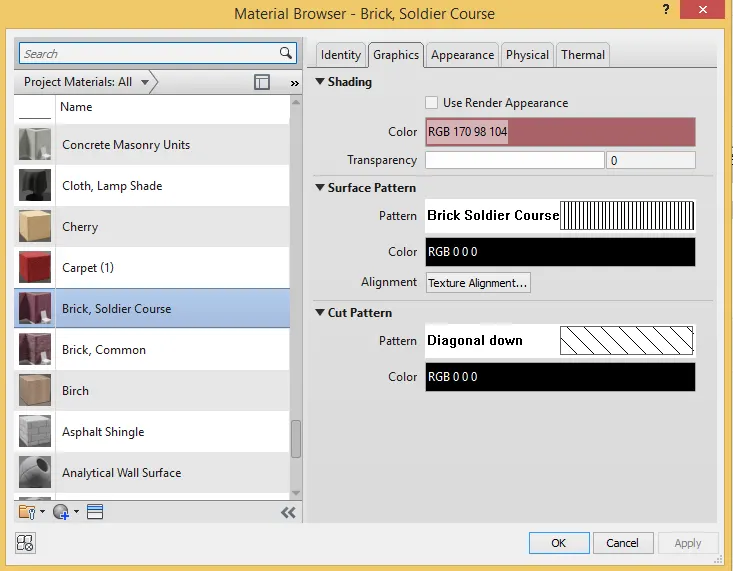
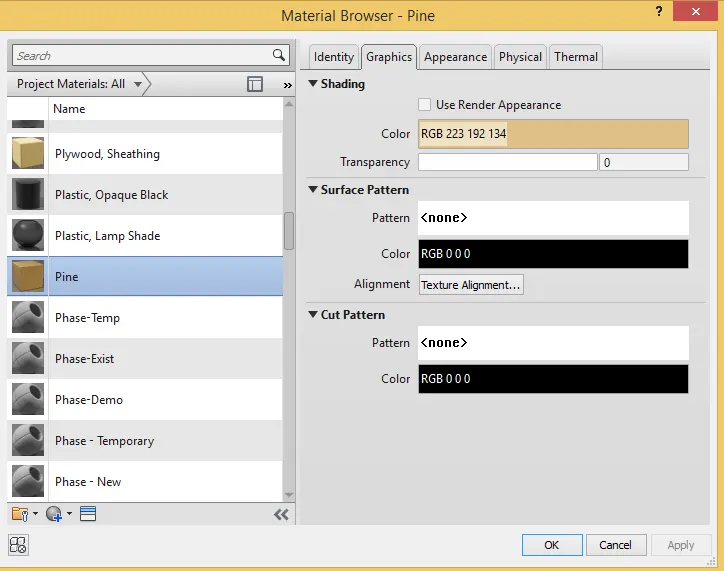
i) After assigning the wall thickness , now assign material properties from material browser
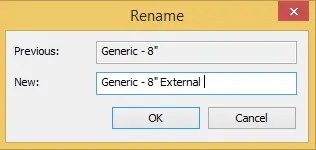
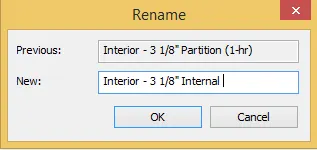
ii) Click on Edit type .
iii) Rename it - Generic 8" Exterior and click on Okay .
iv) Now Edit the material and selelct suitable material and Press Okay .
Step 4)
i) Similarly follow the same steps for Internal walls
Step 5)
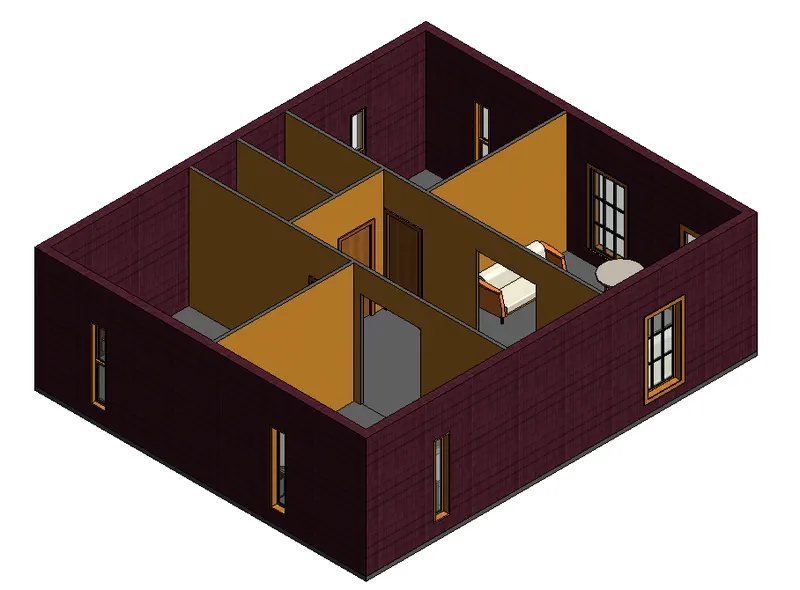
i) Assign all the wall material to the internal and external walls
ii) Change the Visual style to Realistic
iii) Change the view to 3D .
Steo 6)
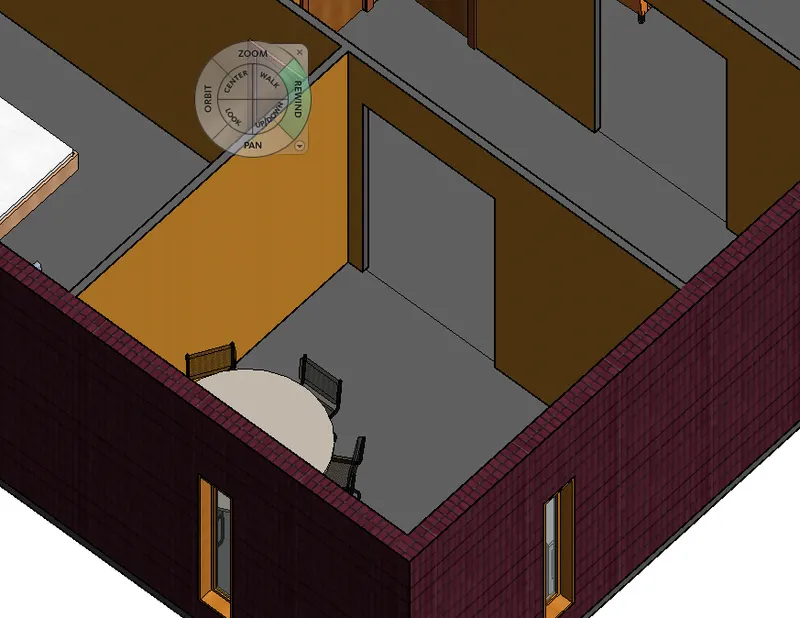
i) Using Navigation Wheel zoom the wall to see the wall materials
Step 7)
A) Based on your observation, what is beneficial for connecting walls with associated levels rather than being Unconnected .
1) When we select the top constraints - Unconnected
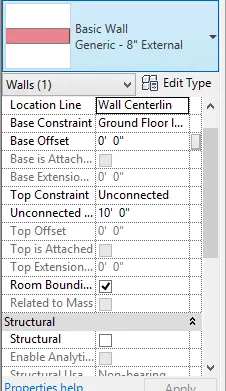
ii) It means that , If we change the the Height of Level to 15' , then Height of wall will not be change
iii) It remains Constant .
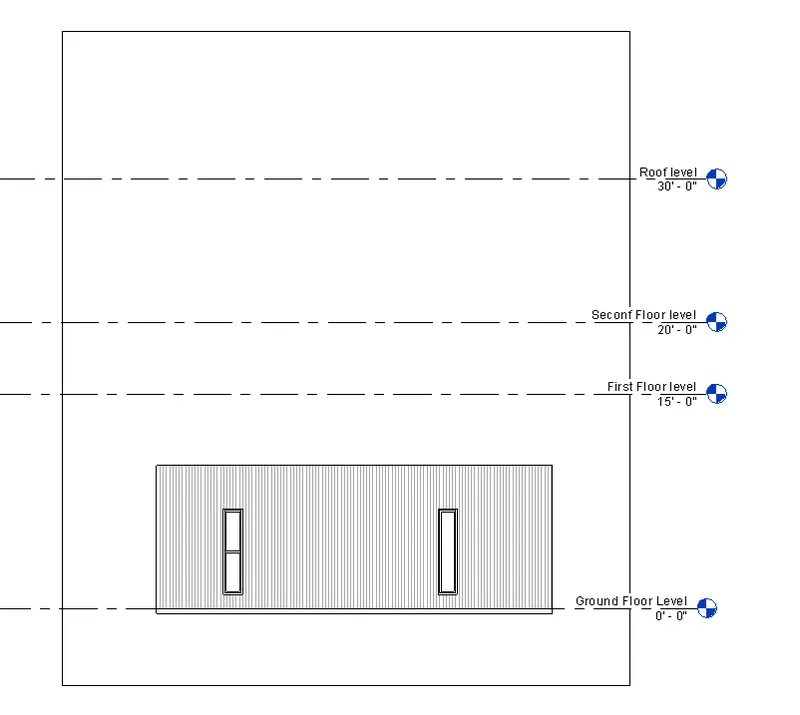
2) When we select top constraints - Upto Second Floor Level
i) Then if we change the height of the level , then the height of the wall is also gonna change
ii) We can see that the height of the wall is increases to 20' ( Upto Second Floor Level )
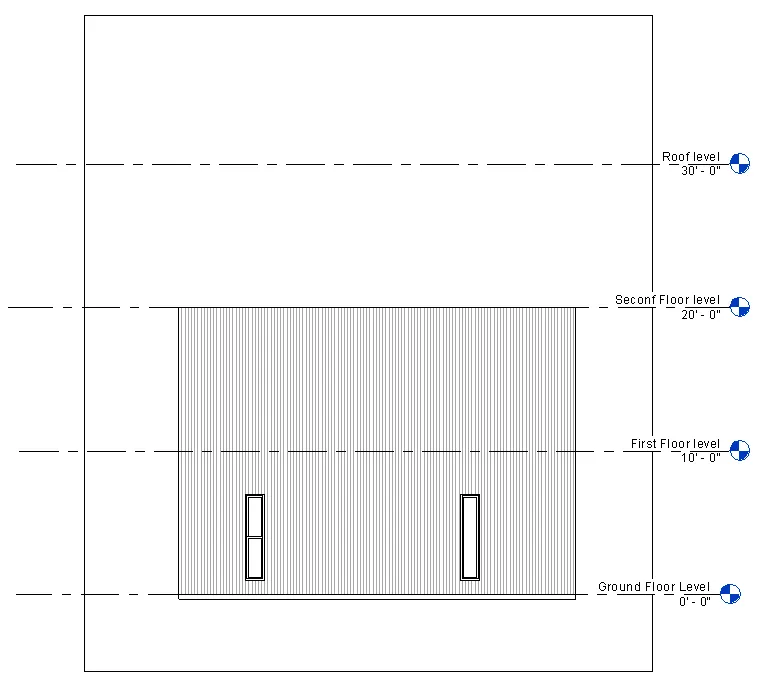
Step 8) Which option is convenient for modeling walls, By Height or By Depth .
A) Height - It is used to construct a wall element above the sub-structure. i.e Above the ground floor level
i) Selelct the Height as 10'
ii) Go to Elevations and you will see the walls are created above the Ground Floor Level
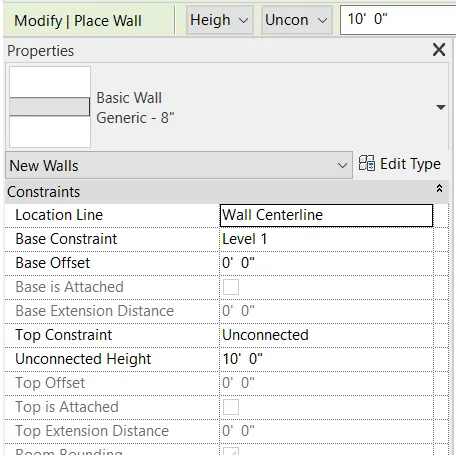
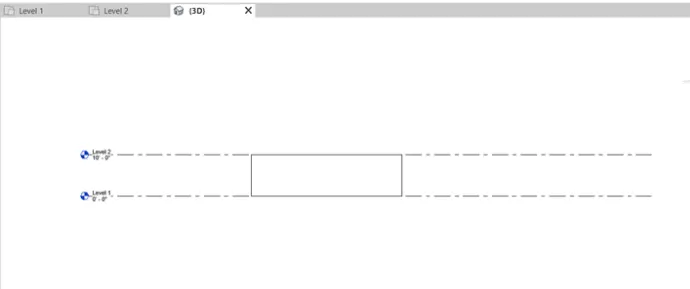
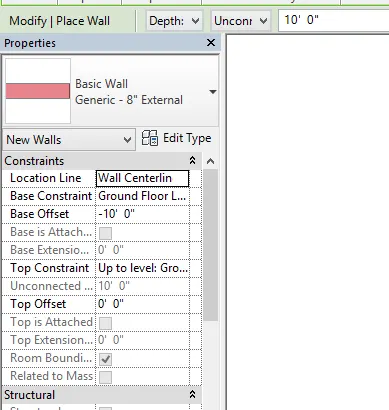
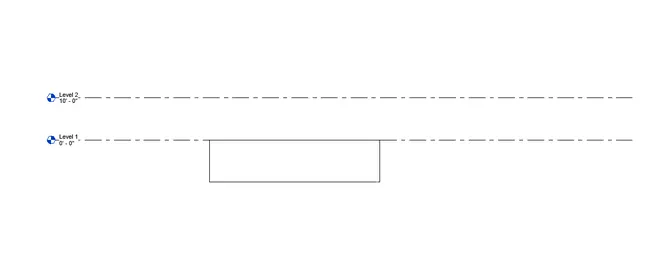
B) Depth - It is used to construct a wall element below the super-structure. i.e Below the ground floor level
i) Selelct the Height as -10' .
ii) Go to Elevations and you will see the walls are created above the Ground Floor Level
iii) Gnerally this option is used for foundation level or footing or excavation level .
Results -
i) A wall element is assigned to the plan with suitable thickness and material properties
ii) A top and bottom walls are constrained
iii) Based on our observations It is Beneficials to have unconnected top constraint when the Height of the wall remains constant
iv) If height of the wall changes then top constraint with associated levels is beneficial .
v) Modeling walls by Height or Depth option is depend upon the type construction . i) If it is sub- structure then go for Depth
ii) If it is super - structure then go for Height
i) Wall Elements
ii) Top Constraint - Unconnected
iii) Top Constraint - Associated with Levels
iii) Depth
iv) Height
3)
Aim - To copy the modal elements of Ground Floor to First Floor Level by using Modify tab
Introduction - 1) Revit is an Building Information Modeling software and is product of an Autodesk.
2) It can be useful for Architects , Civil engineer , Structural Engineer , Mechanical Engineer , Electrical and Plumbing
Engineers .
3) It has Benefits over 2D CAD tools . Such as Real time modeling .
4) There are various templates such as Architectural , Structural , Construction and MEP template and We can work
simultaneously by using Collaborate tool .
Procedure -
Step 1)
i) Open the Question 3) Project File
Step 2)
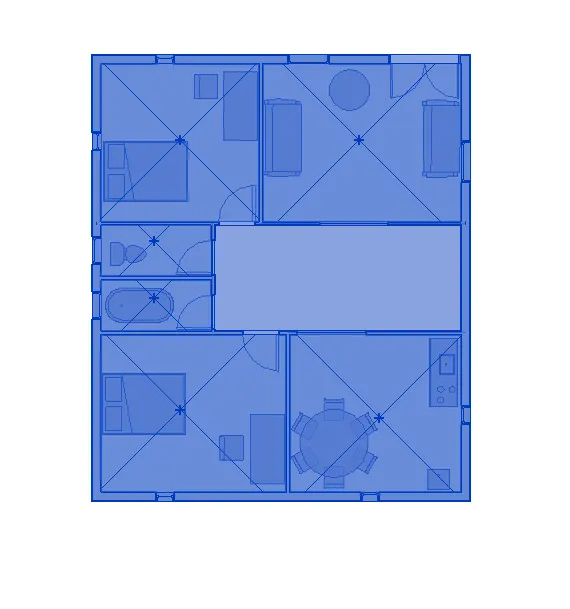
i) Now we have to Copy the Ground Floor modal element to the First Floor Element
ii) Selelct the Ground Floor modal
Step 3)
i) A Modify tab will be there on top

ii) Click On Copy tp clipboard option
iii) Then Click on Paste - Aligned to selected levels
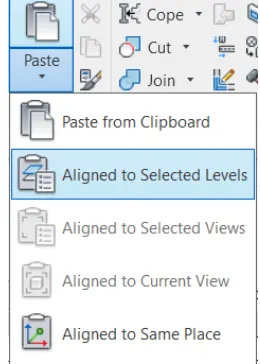
iii) And Select First Floor Levels .
iv) Modal will automatically copied to the First floor level
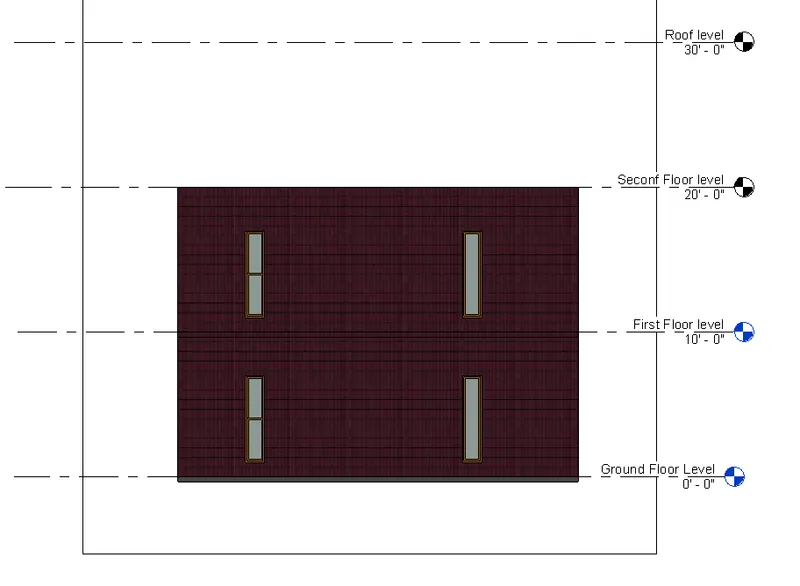
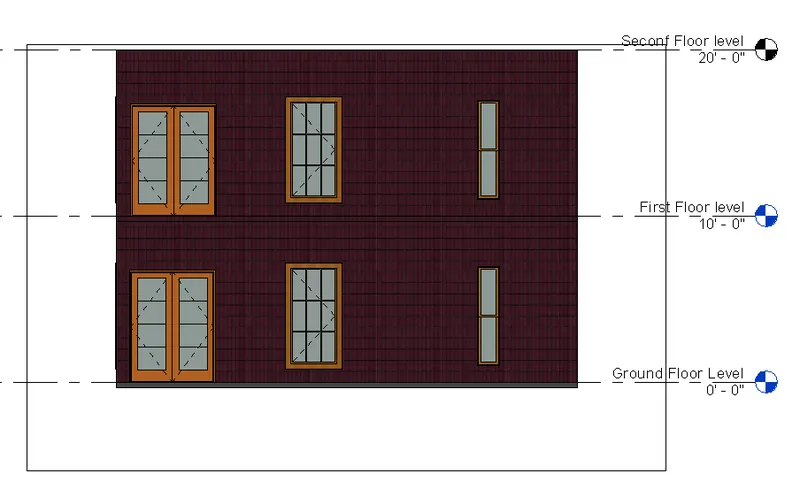
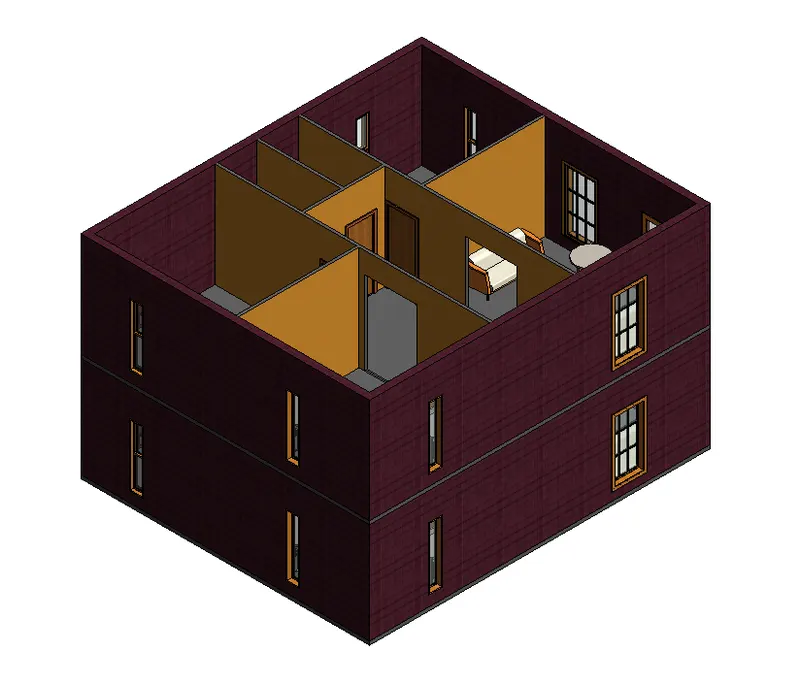
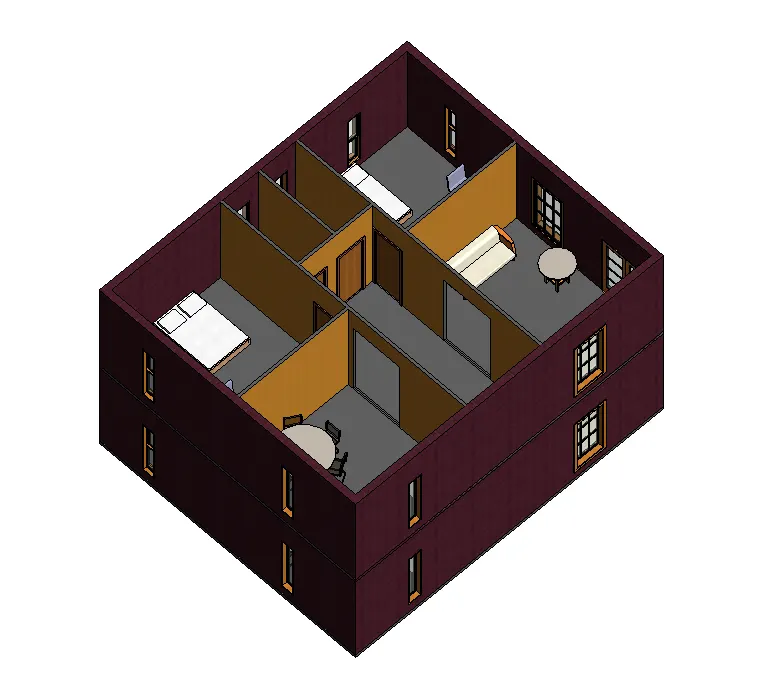
Results - A Modal element of Ground Floor plan is successfully copied to the First floor plan by using Aligned to Selected levels .
i) Elevation view
ii) 3D view
4)
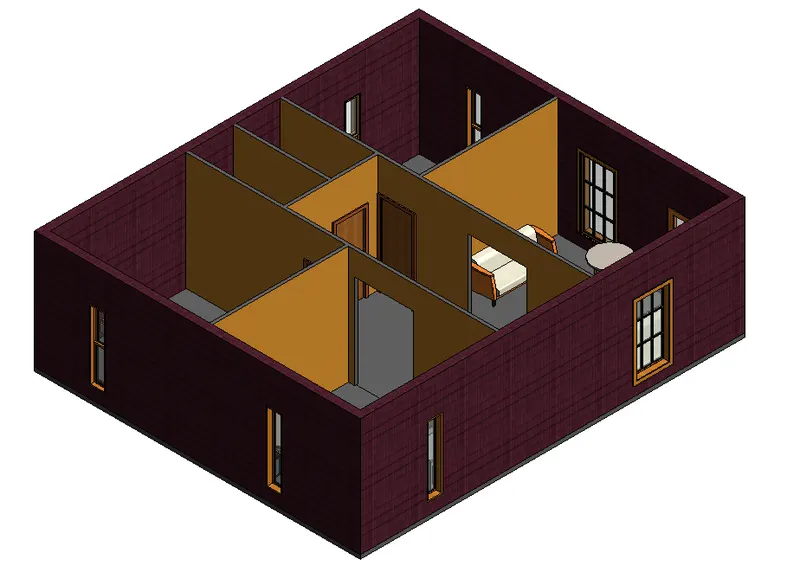
Aim - To create a seperate room in Residential Unit using Internal Partition Walls .
Introduction - 1) Revit is an Building Information Modeling software and is product of an Autodesk.
2) It can be useful for Architects , Civil engineer , Structural Engineer , Mechanical Engineer , Electrical and Plumbing
Engineers .
3) It has Benefits over 2D CAD tools . Such as Real time modeling .
4) There are various templates such as Architectural , Structural , Construction and MEP template and We can work
simultaneously by using Collaborate tool .
Step 1)
i) Open the Question 1 project file .
Step 2)
i) As we already provided the wall element of different size in Project 2 file
ii) We can refer that model as we have already provided all the rooms which is given in the question .
ii) Click on Wall Element
iv) Asuume - Interior wall as Partition wall - Partition 3 1/8" wall for separate room
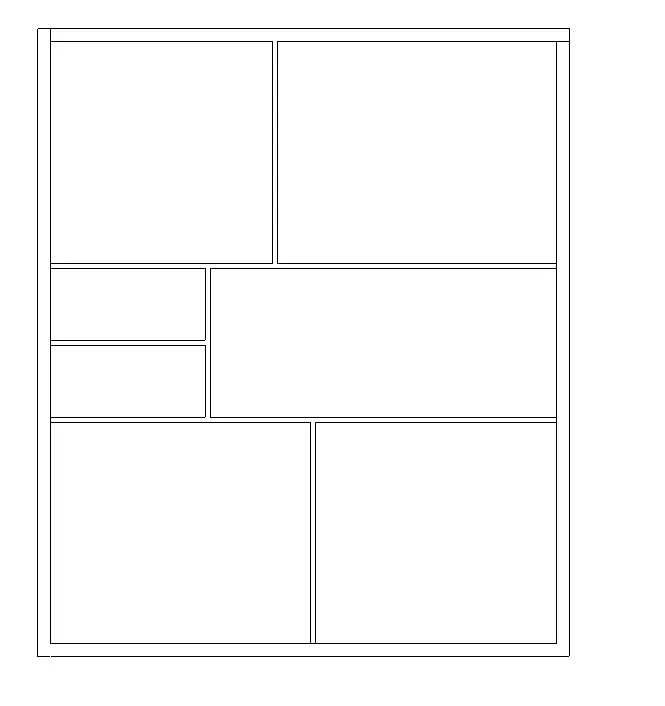
Step 3)
i) Rename the walls as shown in Fig .
ii) Click on edit to add the material properties to internal walls .
Step 4)
i) Assign all the wall material to the internal
ii) Change the Visual style to Realistic
iii) Change the view to 3D .
Step 5)
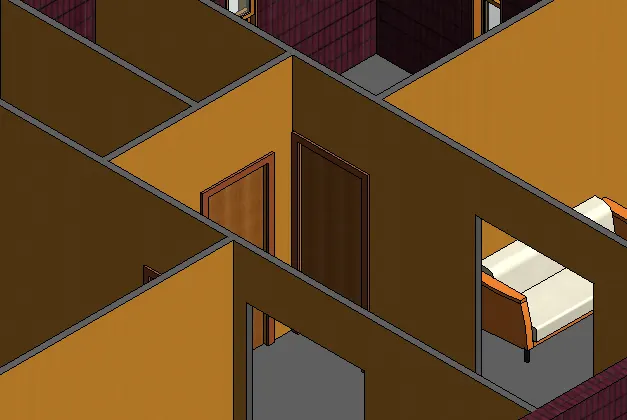
i) Use Navigation wheel to zoom in the Partition wall
ii) Check if material is assign to internal walls or not .
Results
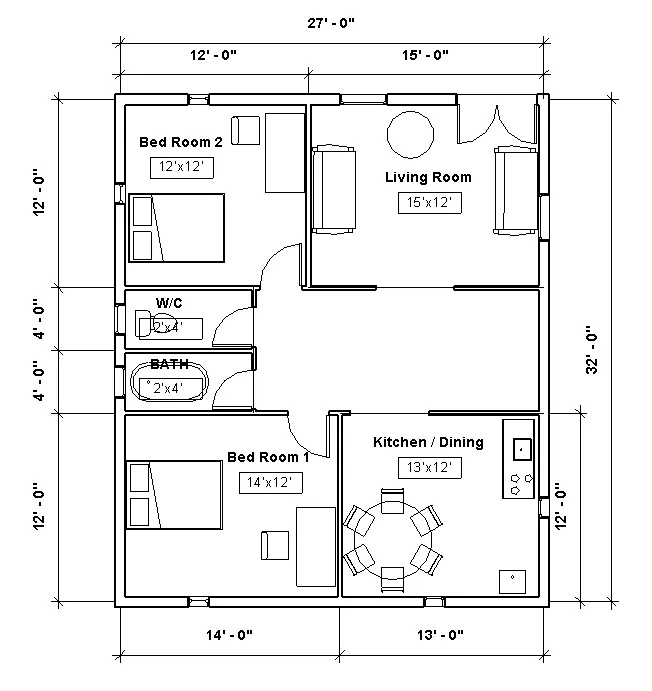
i) A separate room are create by using Partition wall and materials are assigned to the wall
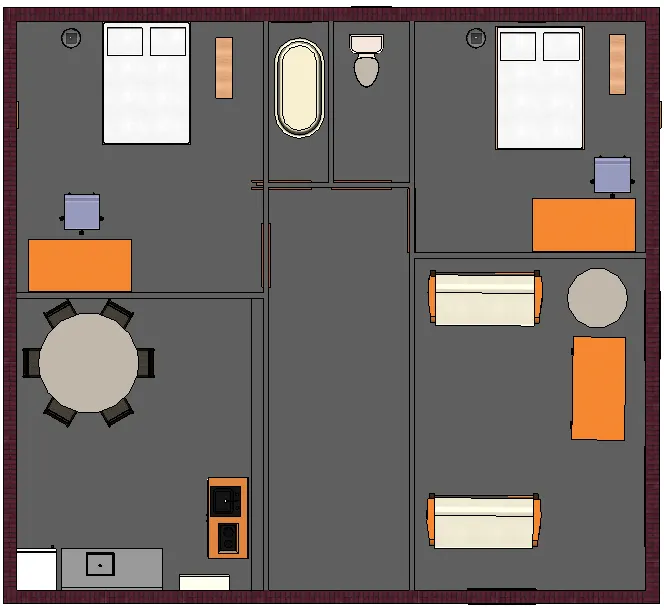
ii) A residential unit is created with following rooms ( Dimensions are assumed as per our convinent )
a) Living Room
b) Bed Room 1
c) Bed Room 2 / Rest Room
d) Kitchen and Dining Rooom
5)
Aim - To Insert the componenets in appropriate locations in Residential model based on Week 2 challenge
Introduction - 1) Revit is an Building Information Modeling software and is product of an Autodesk.
2) It can be useful for Architects , Civil engineer , Structural Engineer , Mechanical Engineer , Electrical and Plumbing
Engineers .
3) It has Benefits over 2D CAD tools . Such as Real time modeling .
4) There are various templates such as Architectural , Structural , Construction and MEP template and We can work
simultaneously by using Collaborate tool .
Procedure -
Step 1)
i) Open the Week 2 challenge project file .
Step 2)
i) Add the details component in respective rooms
ii) Click on Insert - Load Family and add the elements in respective rooms
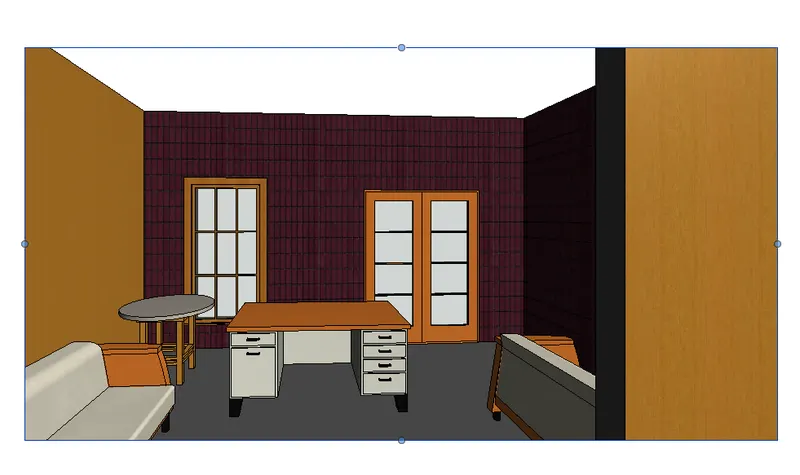
1) Living Room -
i) Add Furniture set , Couch table , TV desk
ii) Click On Inset - Load family - Add the above materials
iii) Place the camera in Living Room and see the view
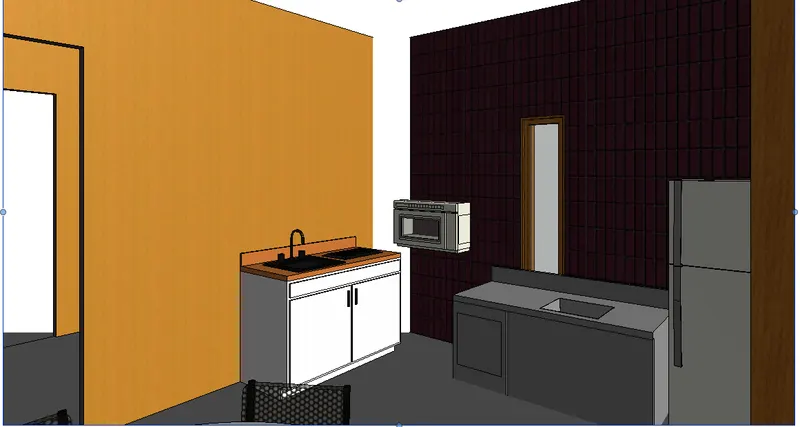
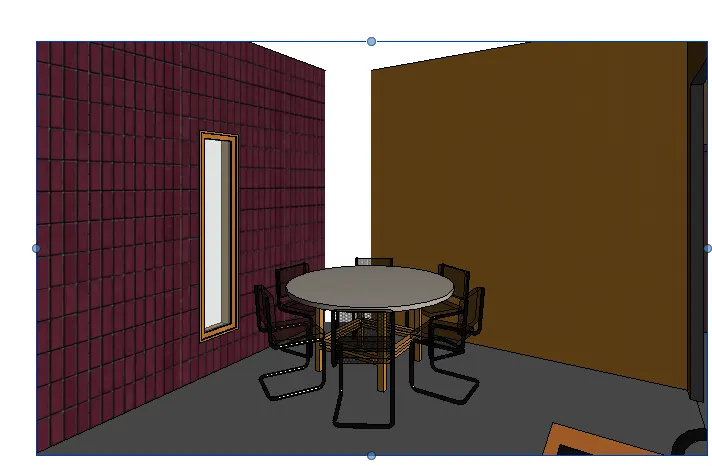
2) Kitchen -
i) Add Dining table , stoves , shelves
ii) Click On Inset - Load family - Add the above materials
iii) Place the camera in kitchen and see the view
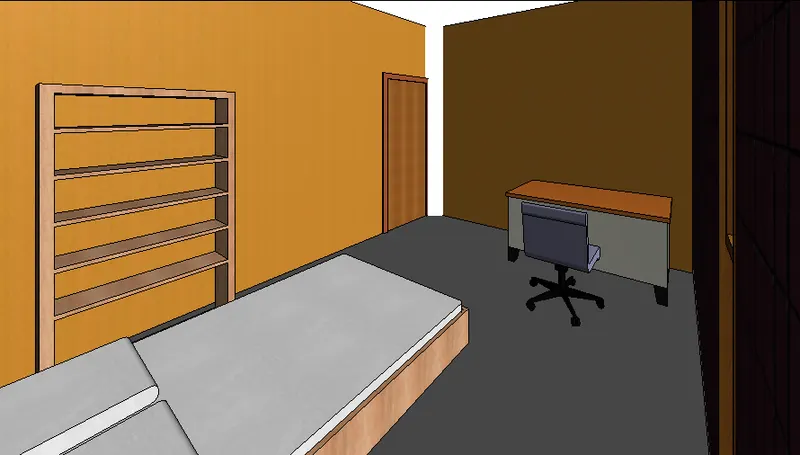
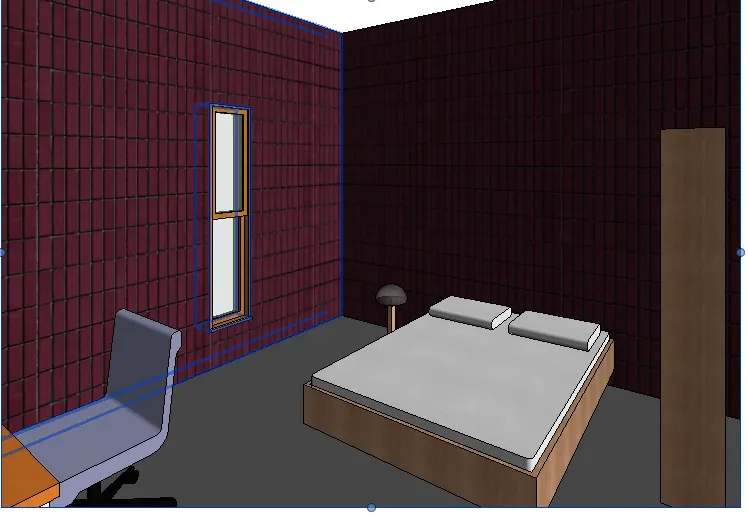
3) Bedroom -
i) Add Bed set , Study desk , shelf , lighting
ii) Click On Inset - Load family - Add the above materials
iii) Place the camera in bedroom and see the view
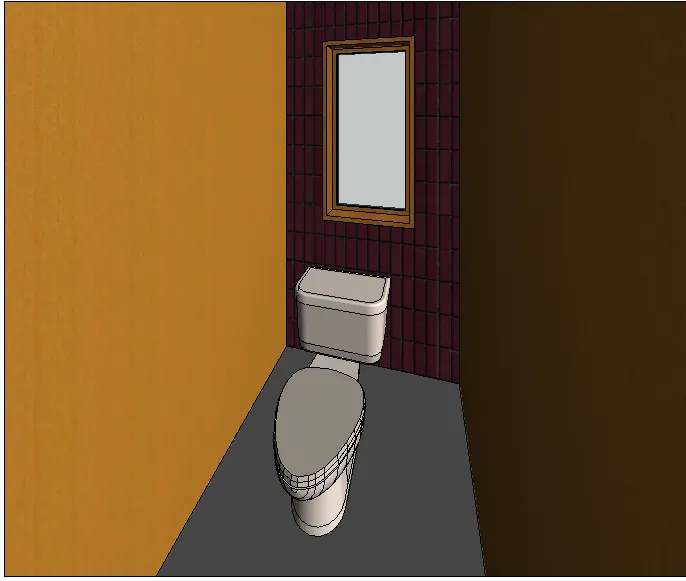
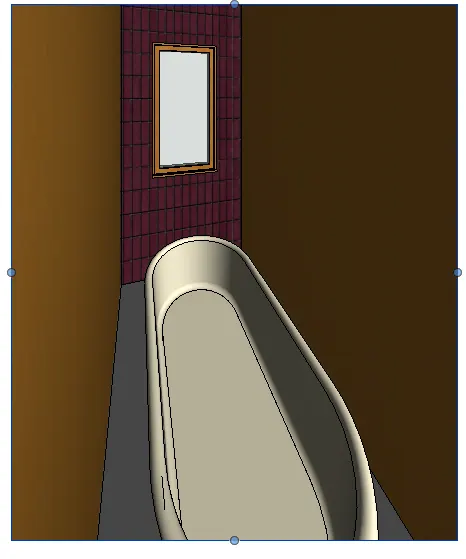
4) Rest Room -
i) Add Bath tubs , plumbing fixtures
ii) Click On Inset - Load family - Add the above materials
iii) Place the camera in rest rooms and see the view
Washing machine and Shelves to Storage for Cloth
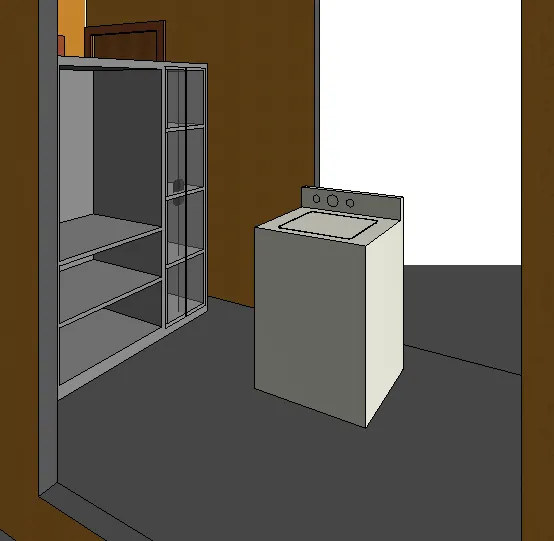
Results - All the components are added into the respective rooms from Revit Family.
1) Top View
2) 3D View