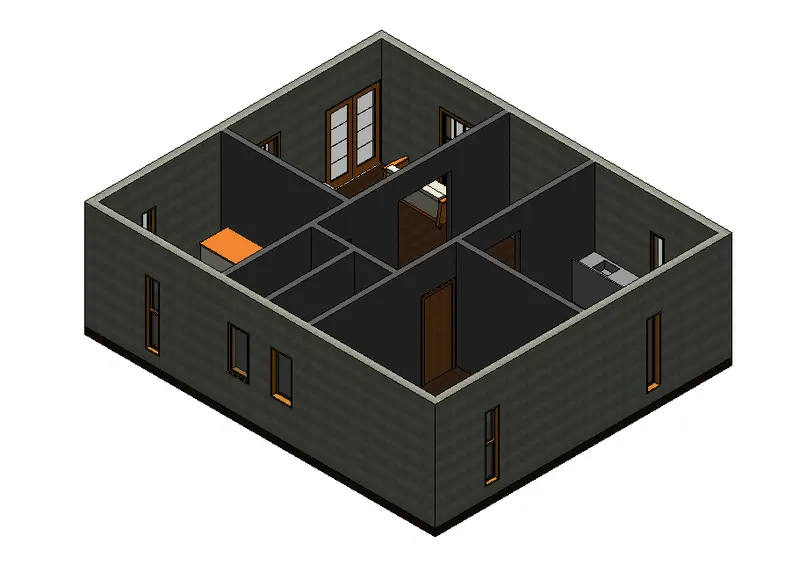
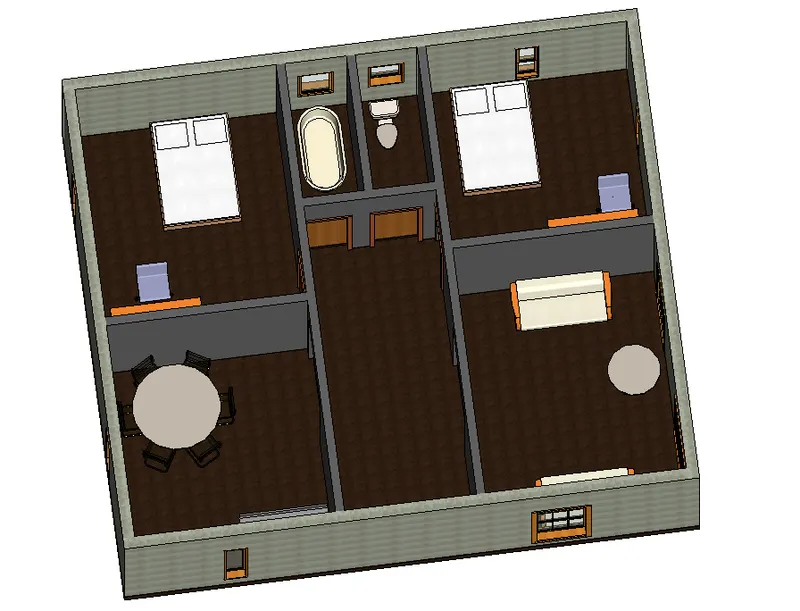
Creating Levels, Grids, Layout and model elements for a residential unit using REVIT
1) BIM -
i) BIM ( Building Information Model ) It is an process supported by various tools , technology and contracts involving the generation and management
of digital representation of physical and functional characterstics of places .
ii) It is a highly collaborate process that allows architect , structural engineers , MEP engineers , System engineers etc and other construction
professionals to plan , design and create a model or structure within one 3D model
iii) BIM is a software used by individuals , bussiness and goverment agencies who plan design , construct and maintain building and diverse
physical structure such as water , gas , electricity etc
Features of BIM - ( Collaboration and Sustainability )
i) BIM is a physical representation of physical and functional characterstics of the buildings process , that provides every minute details of project
ii) Every disciplines make the input and shared their information resources to other team members
iii) One can easily get the right information at the right time which provides a a reliable basis for decision making during lifecycle of structure
iv) BIM not only create 3D models of the structure but also provide a more comprehensive overview of the entire building process.
v) BIM covers every aspect of the structure such as geographic properties , topographic properties etc .
vi) BIM allows you to bring all your designs including CAD files into a single database . Using Cloud option BIM provides access to this databse
to all project members .
vii) You'll can work simultaneously on same model on same time .
vii) BIM allows you to design every single aspect of the building in addition to that building features such as electruical , plumbing aspects too .
Advantages of BIM over 2D CAD tools -
i) BIM offers more comprehensive representations of building design .For eg . BIM allows other disciplines to work on same model simultaneously
to design electrical plumbuing and HVAC systems etc . This team member can use all resources available .
ii) The main advantage of BIM over 2D cad tool is that BIM pulls your document into single database . Such that several people can work on
simultaneously and save it on Cloud .
iii) We can provide much more to our clients using BIM than CAD . The models you give to your clients updates constantly as yoy work on your
project. Your client can check in any time which leads to quicker approval for project and efficient project developement .
iv) Resources tracking an key componenet of BIM models. You will able to figure out how much of each resource you need during the design stage
which improves the flow and efficiency of construction .
2) Categories , Families , Elements , Instances -
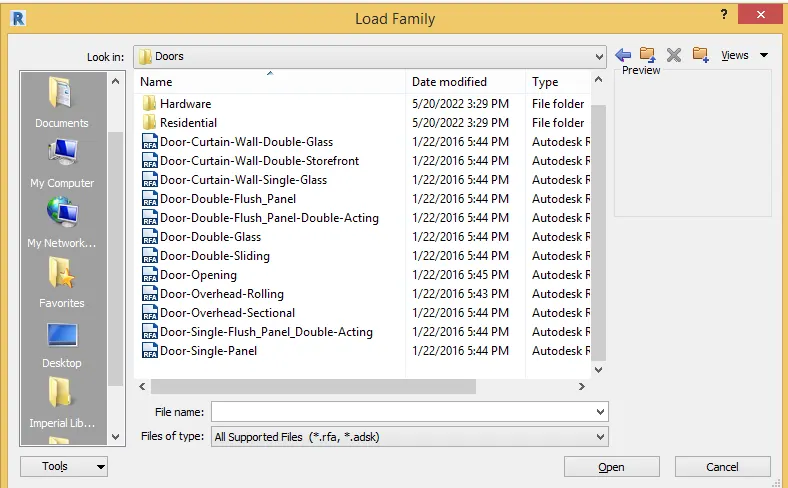
Following is the display of Family category and Element . To understand the concept of this first we have to load the family .
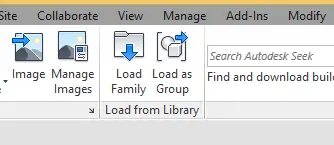
i) Click On Load Family .
ii) You will see a resources which are already there in Revit .
A) Category -
i) Category is nothing but the the classification of families which controls the organisation , visibility, scheduling option and graphical representation
for Eg Doors , Walls , Electrical , Plumbing
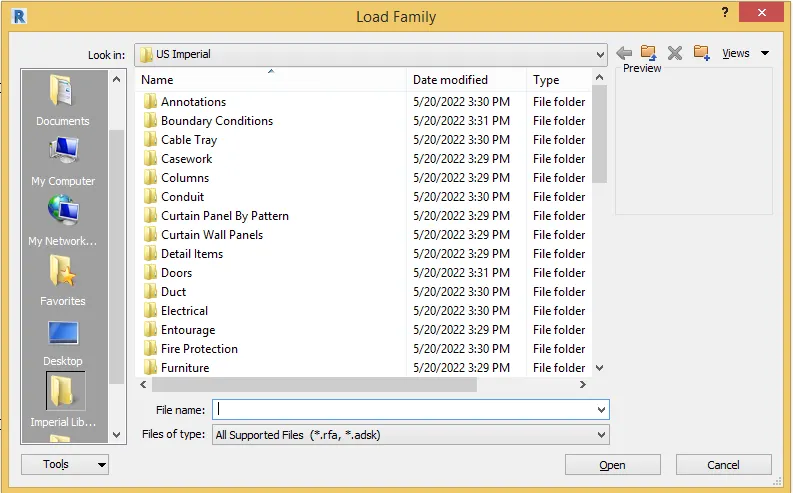
B) Family -
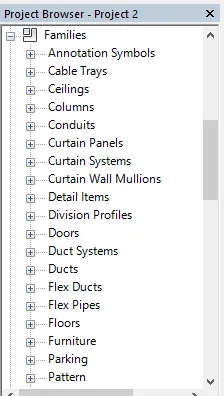
i) A family is a group of element with common set of properties called as parameters and sereves to represents graphical representation
ii) Different Elements Belonging to a family may have different values for some or all of their parameters but the set of parameters are same
iii) All the elements in Revit are families . Some of the families parameters are needed to be loaded from external library.
C) Elements -
i) Elements are the buildings block of 3D models
ii) Some elements such as walls , windows , doors are apprear in all view .
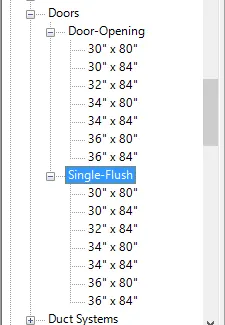
iii) For eg if we select the family from the door category , after selecting the family the new tab will be visible . In that different size of doors are
available select one of them .
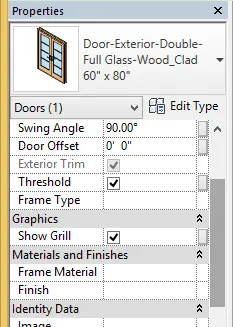
iv) Apply this elements to the 3D model and we can see that in properties tab .
\
D) Instances -
i) Instances are the individuals geometrical elements placed in a 3D model
ii) Such as Single doors , Single walls or any other single elements .
iii) Instances inherit a series of parameters from their category and might have instances parameters as well that only belongs to single instances
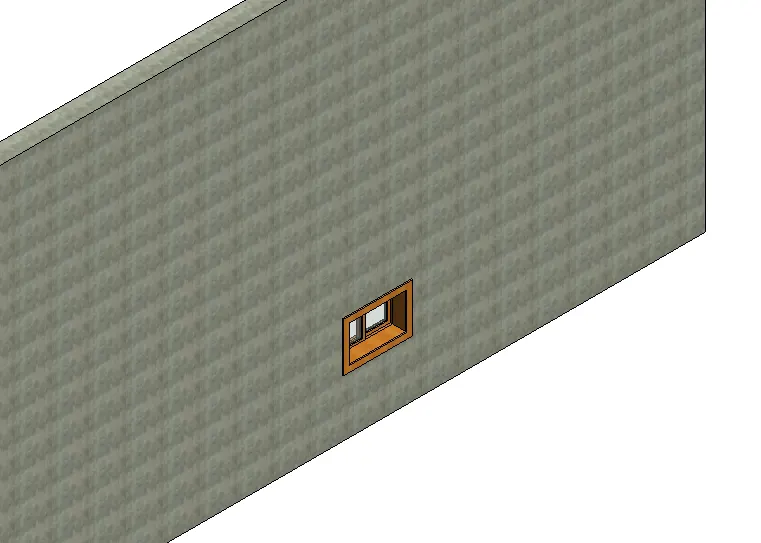
iv) A single element attached to the wall is single window
3D view
3)
Aim - To setting up the Project with appropriate project name.
Introduction - 1) Revit is an Building Information Modeling software and is product of an Autodesk.
2) It can be useful for Architects , Civil engineer , Structural Engineer , Mechanical Engineer , Electrical and Plumbing
Engineers .
3) It has Benefits over 2D CAD tools . Such as Real time modeling .
4) There are various templates such as Architectural , Structural , Construction and MEP template and We can work
simultaneously by using Collaborate tool .
Procedure -
Step 1)
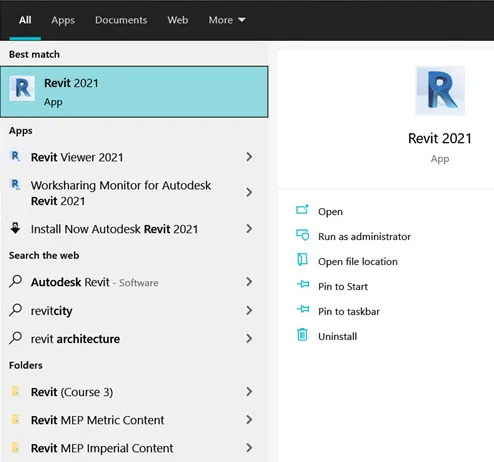
i) Open the Revit software from deskstop / you can search it from windows tool .
Step 2)
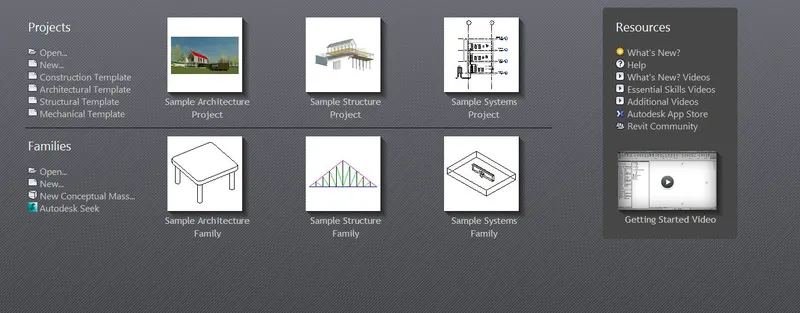
i) Once you open the Revit Software , a following tab will open
Step 3)
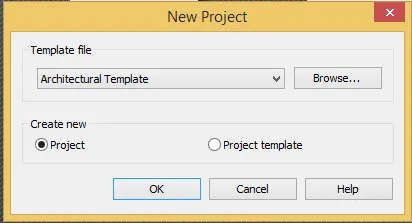
i) Click on New tab , and create a Architectural Template
ii) Click on Create New - Project
iii) Click on Okay .
Step 4)
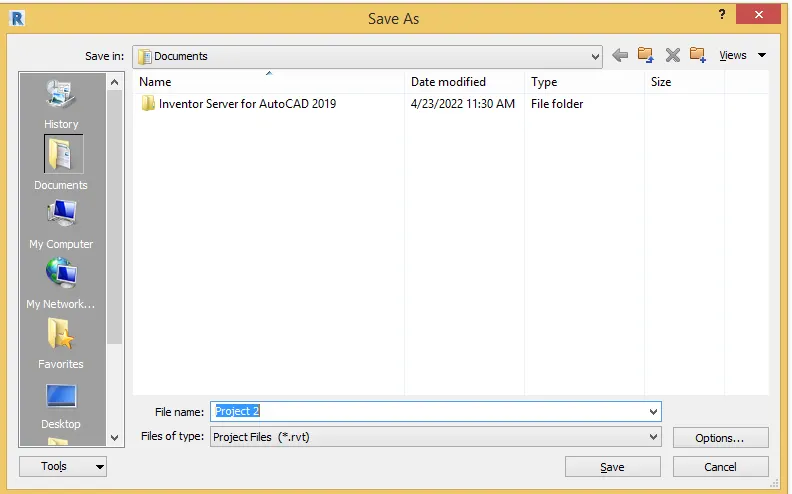
i) Click on Save button
ii) Name the File as Project 2
iii) And Save it .
Step 5)
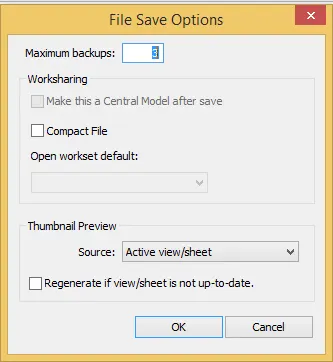
i) Click on Options
ii) Following Dialog box will open
iii) Create a maximum backups as 3
iv) Click on Okay.
Step 6)
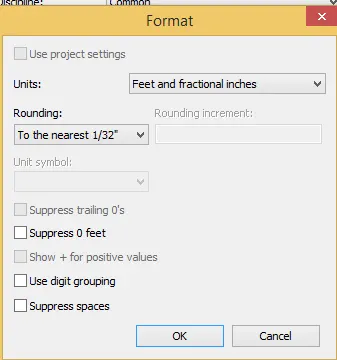
i) Click on Manage from home panel
ii) Click on Project units - and set as Imperical Feet and inches
iii) Click on Okay
Step 7)
i) Click On Manage option from home panel
ii) Click on Manage

Step 8)
i) Click on Project Informations
ii) Enter the data
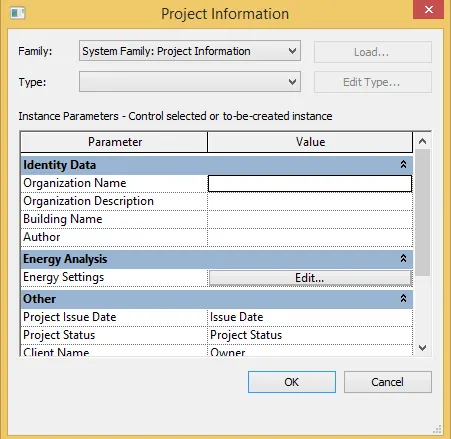
iii) Add the details,
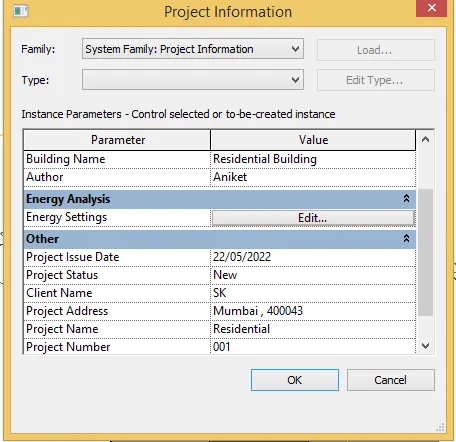
Results - i) A architecturtal template is created with name as Project 2 .
ii) A maximum backups are also created for project file as 3
iii) We have set the units to Imperical Feet and Inches
iv) We have created Project Information for project details .
i)
ii)
iii)
iv)
4)
Aim - To create the grids and levels .
Introduction - 1) Revit is an Building Information Modeling software and is product of an Autodesk.
2) It can be useful for Architects , Civil engineer , Structural Engineer , Mechanical Engineer , Electrical and Plumbing
Engineers .
3) It has Benefits over 2D CAD tools . Such as Real time modeling .
4) There are various templates such as Architectural , Structural , Construction and MEP template and We can work
simultaneously by using Collaborate tool .
5) We follow a certain thumb rule for creating a Grids line
6) For creating Horizontal grids we go through Right to left and name it as A B C
7) For Vertical grids we go from top to bottom and name it as 1 2 3
Procedure -
Step 1)
i) Open the Revit software from deskstop / you can search it from windows tool .
Step 2)
i) Once you open the Revit Software , a following tab will open
Step 3)
i) Click on New tab , and create a Architectural Template
ii) Click on Create New - Project
iii) Click on Okay .
Step 4)
i) On left side Properties Browser click on Elevations
ii) Click on East side
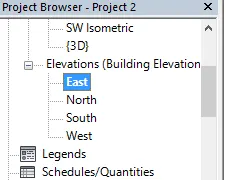
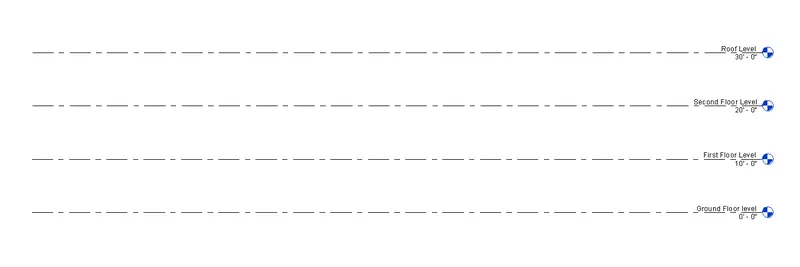
iii) Once you click on East side a followig levels are theres in Modal space

Step 5)
i) Click on Level 1 and Rename it as Ground floor level . Similarly rename it for other levels too
ii) To add second floor and Roof level
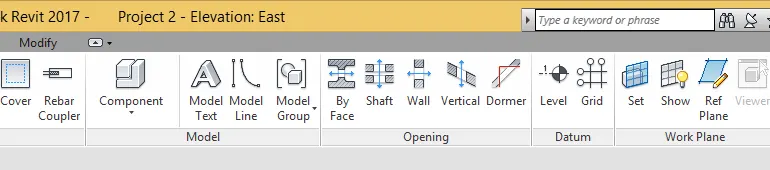
iii) Click on structure - Level
iv) Add level at height of 20' and 30' from ground floor level
Step 6)
i) Next we have to draw the grids lines
ii) Theres is an option next to levels
iii) Click on Grids
iv) Draw the Horizontal grids at spacing of 10' and name it as A B C D E
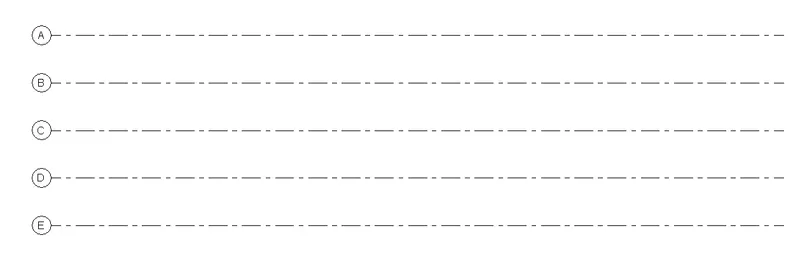
v) For Vertical grids go from Top to Bottom and name it as 1 2 3 4 5 6 7 8 9 10 at an spacing of 10'
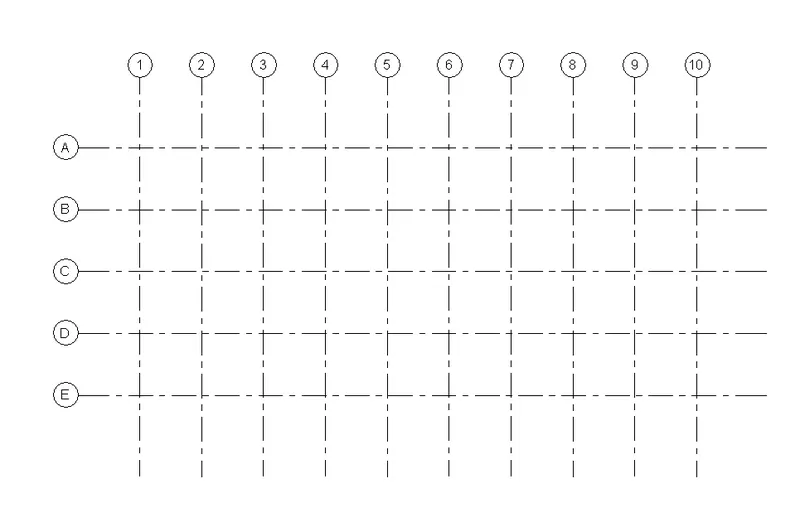
Results - A Levels and Grids are drawn successfully with given annotation tag .
i) Levels
ii) Grids
5)
Aim - To create a conceptual layout of Residential Building .
Introduction - 1) Revit is an Building Information Modeling software and is product of an Autodesk.
2) It can be useful for Architects , Civil engineer , Structural Engineer , Mechanical Engineer , Electrical and Plumbing
Engineers .
3) It has Benefits over 2D CAD tools . Such as Real time modeling .
4) There are various templates such as Architectural , Structural , Construction and MEP template and We can work
simultaneously by using Collaborate tool .
Procedure -
Step 1)
i) Open the Revit software from deskstop / you can search it from windows tool .
Step 2)
i) Once you open the Revit Software , a following tab will open
Step 3)
i) Click on New tab , and create a Architectural Template
ii) Click on Create New - Project
iii) Click on Okay .
Step 4)
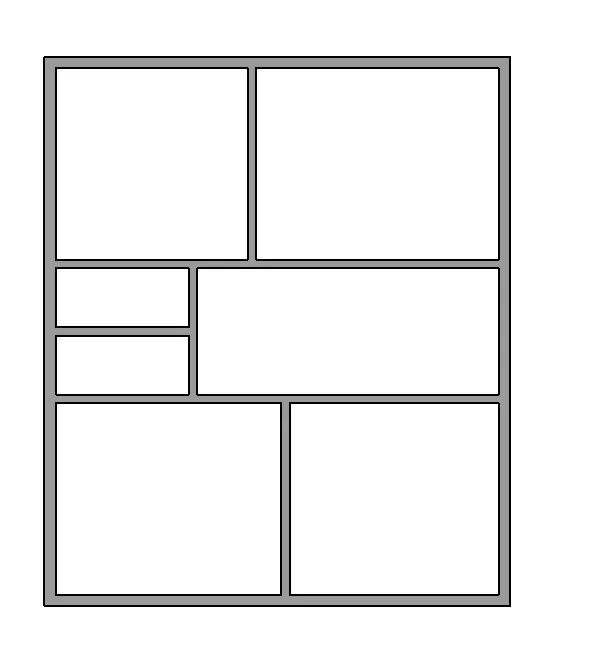
i) Use Wall option to draw the external walls and internal walls
ii) For external walls - Assign properties as Generic 8" wall
iii) For Internal walls - Assign properties as Generic 6" wall
iv) Draw the floor plan .
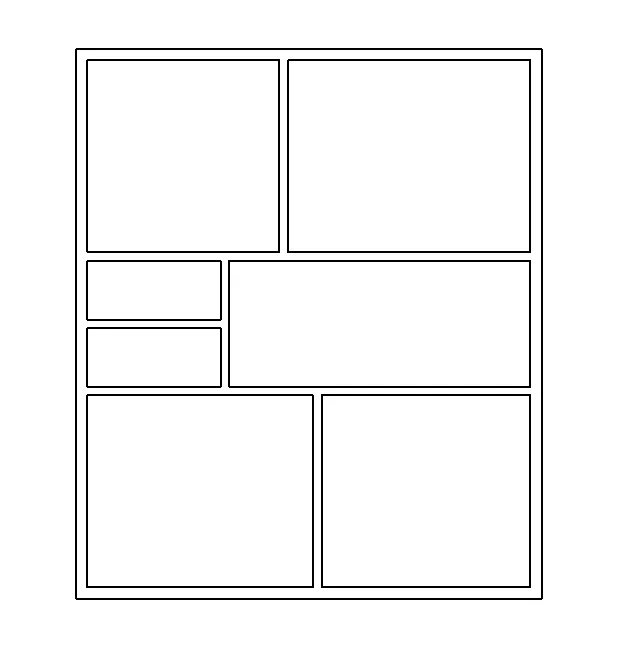
Step 5)
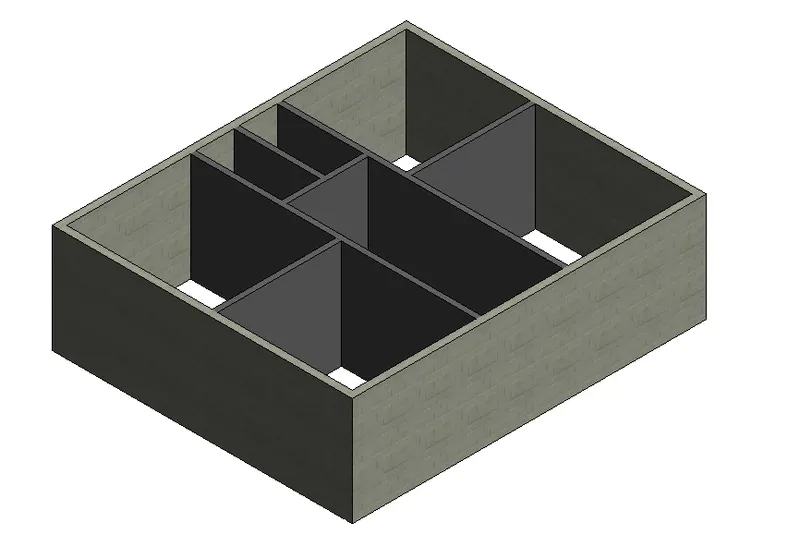
i) Change the visual style to Shaded
ii) Change the view to 3D view
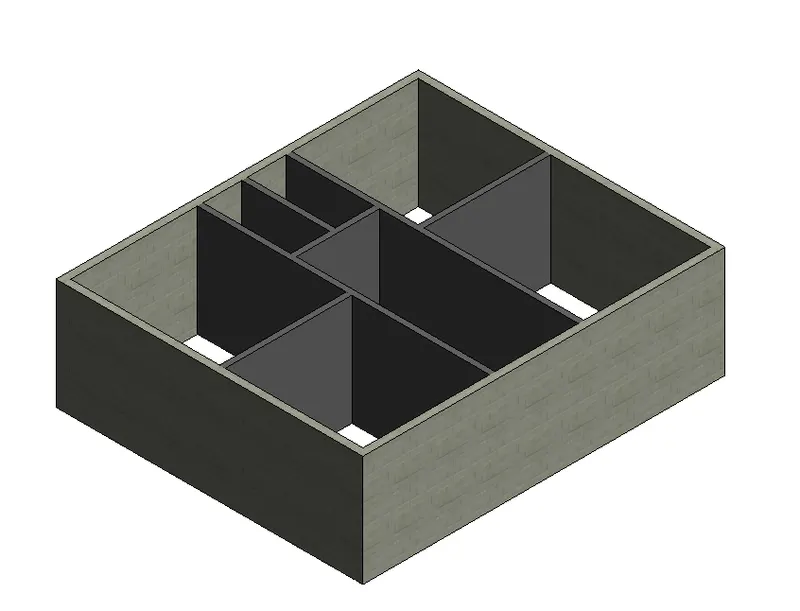
Results - The conceptual layout of Residential unit is created .
i) 2D view
ii) 3D view
6)
Aim - To draft the level of details you are planning to include dimensions of room, components you plan to add in the residential
unit.
Introduction - 1) Revit is an Building Information Modeling software and is product of an Autodesk.
2) It can be useful for Architects , Civil engineer , Structural Engineer , Mechanical Engineer , Electrical and Plumbing
Engineers .
3) It has Benefits over 2D CAD tools . Such as Real time modeling .
4) There are various templates such as Architectural , Structural , Construction and MEP template and We can work
simultaneously by using Collaborate tool .
Procedure
Step 1)
i) Open the Question 6 drawing file .
ii) We can start editing the data in that file only
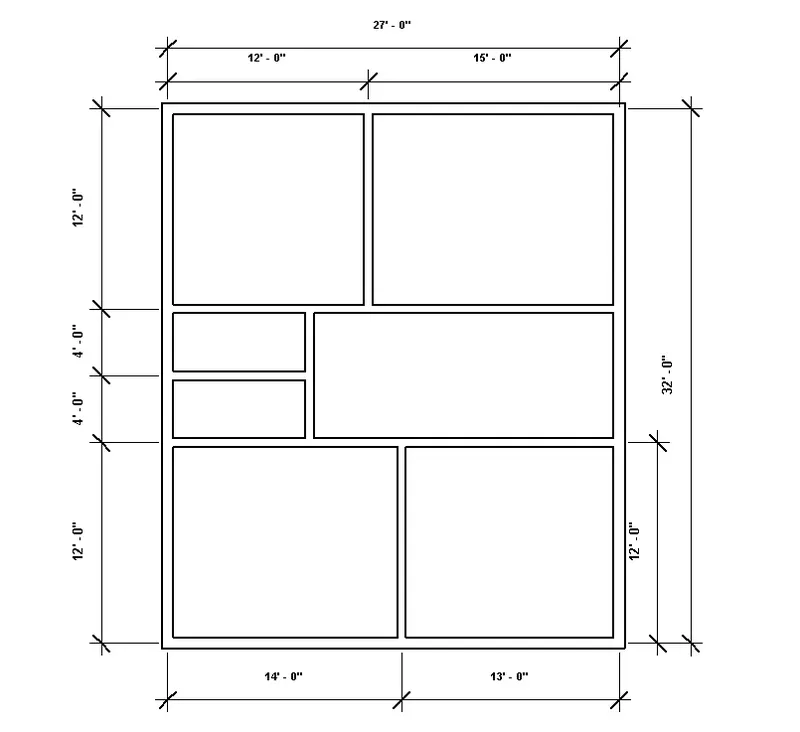
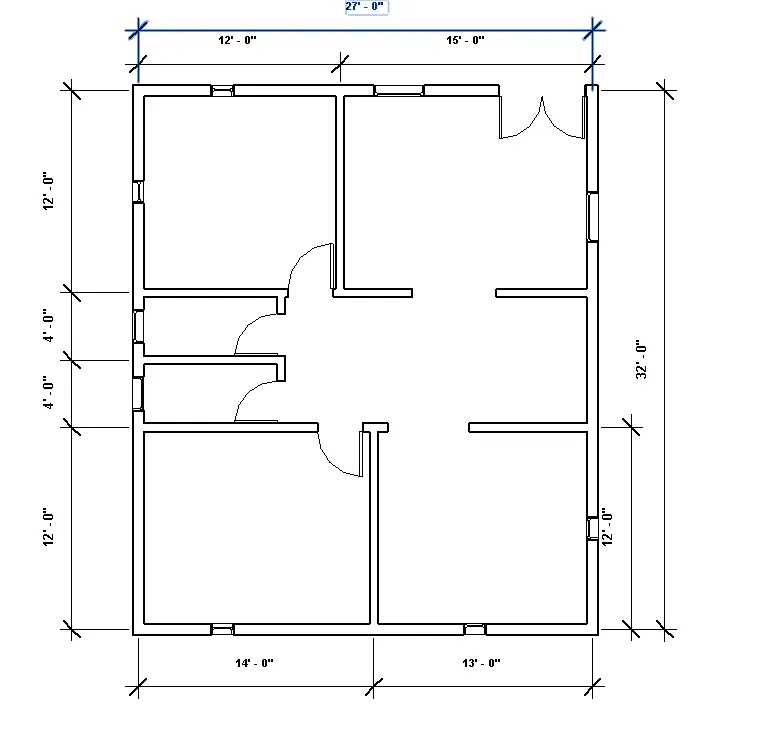
Step 2) Dimensions
i) Click on Annotate - Linear option and measure the dimensions
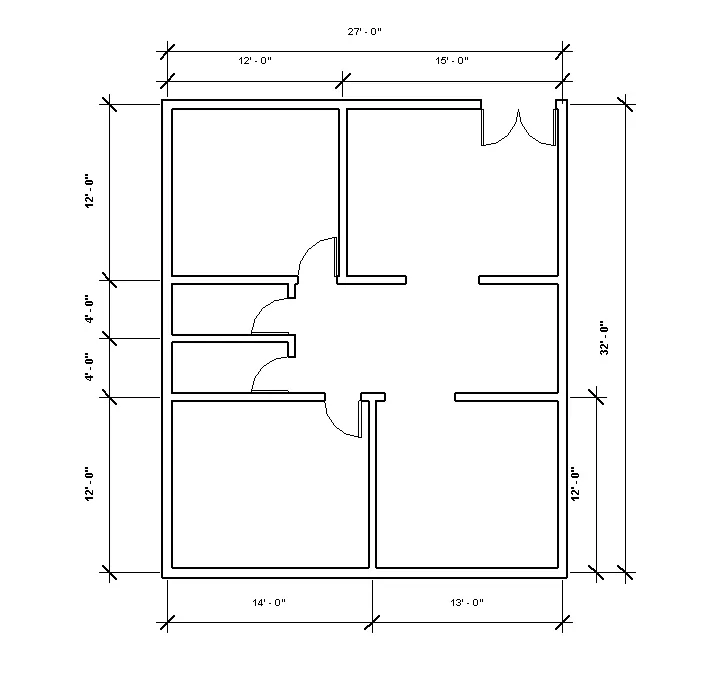
Step 2) Doors
i) Provide the doors as per our requirements .
ii) For Main door we have provided Double flush type door
iii) For Bedroom we have provide Single flush 32" x 84"
iv) For washrooms we have provide Single flush - 30" x 80"
Step 3)
i) Follow the same procedure for Window also
ii) If elements are not there then we can load it by selecting Load Family
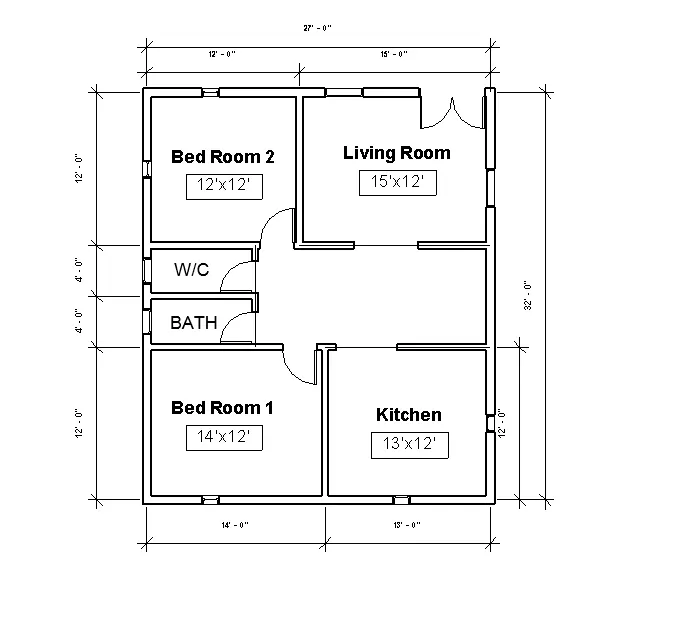
Step 4) Room tag
i) After assigning doors and window now we have to name the room
ii) Click on Architectural - Room tag
iii) Click on Room tag and place it on different rooms
iv) and Rename it as follows
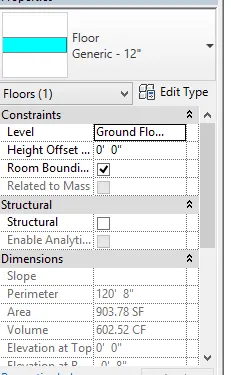
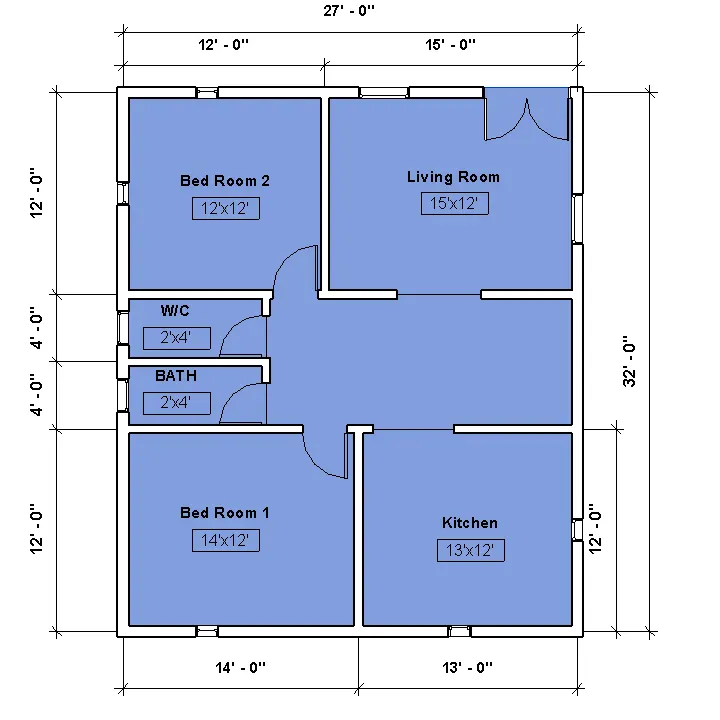
Step 5) Floor
i) Now we have to add the floor for residential unit
ii) Architecture - Floor
iii) Click on Floor
iv) Select Generic 12" Floor
Step 6)
i) Change the view style to - Realistic
ii) Change the view to 3D
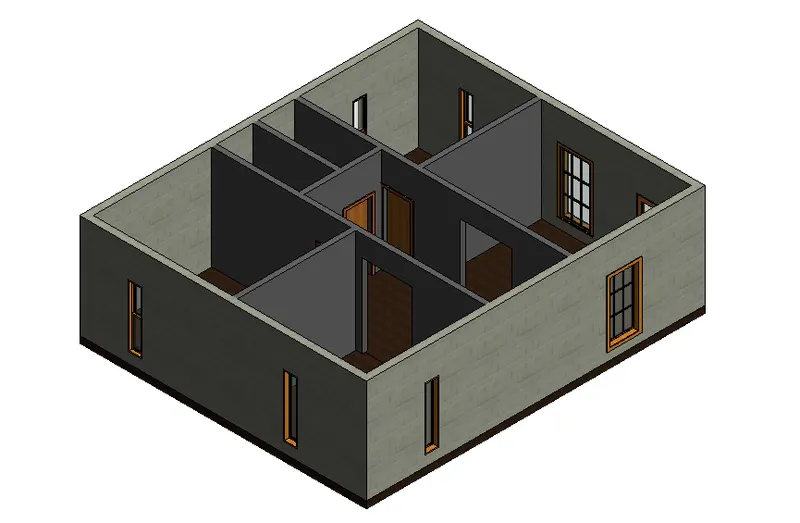
Results - The level of details are created which includes dimensions , Room tag , Doors , Windows and Floors
i) Dimensions
ii) Doors
iii) Windows -
iv) Room tag
v) Floors
vi) 3D view
7)
Aim - To insert the residential model elements such as Doors , Windows , Tables , Chairs , Bed , Lamps from the library to the model .
Introduction - 1) Revit is an Building Information Modeling software and is product of an Autodesk.
2) It can be useful for Architects , Civil engineer , Structural Engineer , Mechanical Engineer , Electrical and Plumbing
Engineers .
3) It has Benefits over 2D CAD tools . Such as Real time modeling .
4) There are various templates such as Architectural , Structural , Construction and MEP template and We can work
simultaneously by using Collaborate tool .
Procedure -
i) Open the previous drawing
ii) We already add the Doors and Windows .
Step 2)
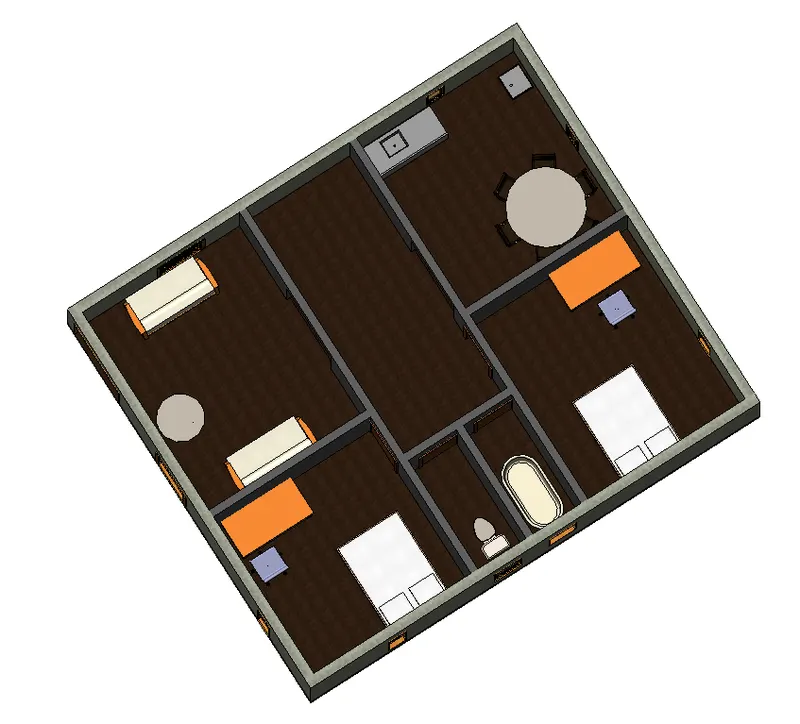
i) Now add the Beds from Insert tool
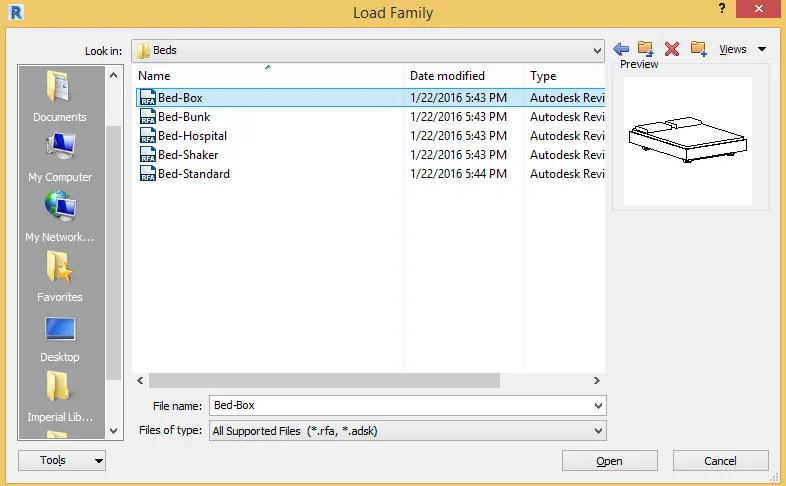
ii) Add the Beds to the Bedroom 1 and Bedroom 2
iii) Add lamps also to the bedroom
iv) Add desk and Chairs in Bedroom .
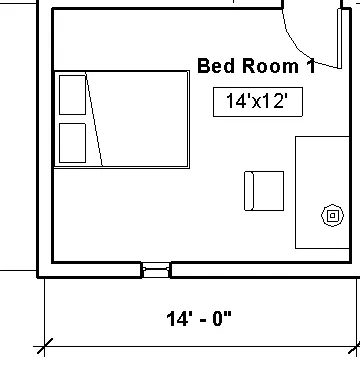
Step 3)
i) Add Kitchen units to kitchen
ii) Add kitche sink
iii) Add dining table
iv) Click on Insert - Load Families - and selelct kitchen units and add them
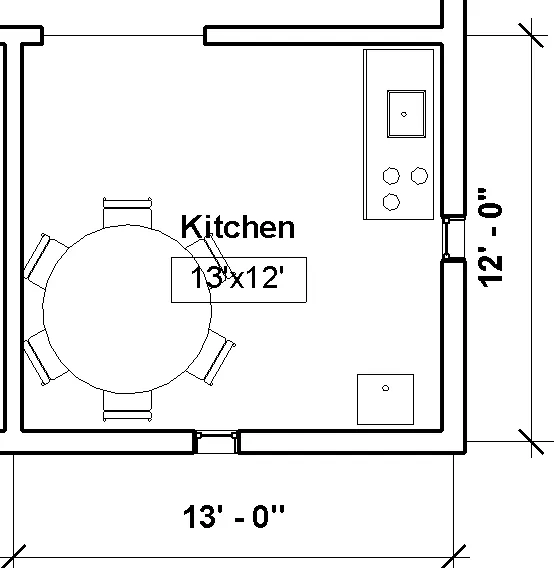
Step 4)
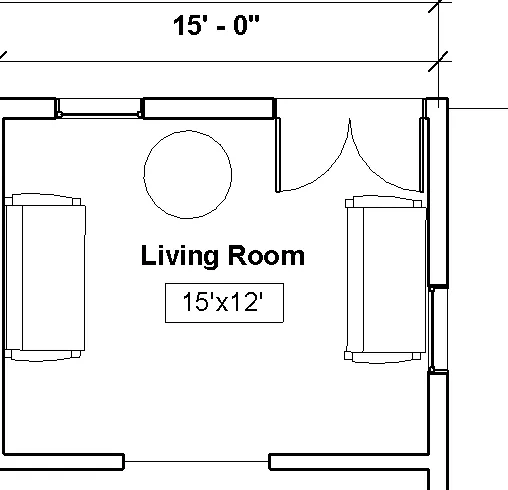
i) Add sofas and table to the Living room
ii) Click on Insert - Load families - Furnitures - select sofas and tables
iii) Add them into the plan
Step 5)
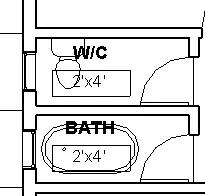
i) Add plumbing fixtures such as Toilet and bath tub
ii) Click on Inset - Load Family - plumbing - add toilets and bath tubs
Step 6)
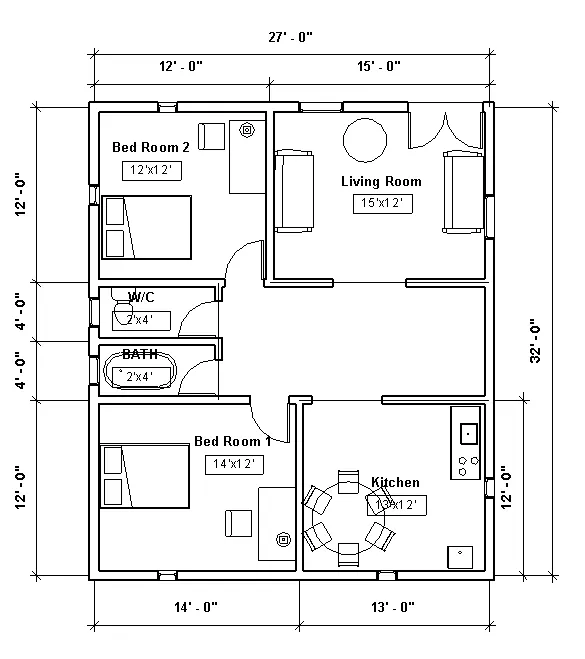
i) All the elements are added into the residential unit from library .
Step 8)
i) Change the visual style to Realistic
ii) And change the view to 3D
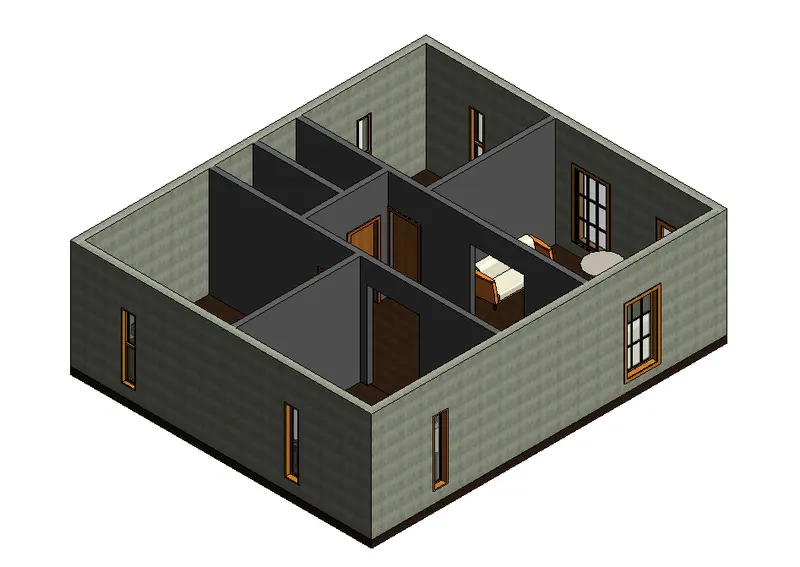
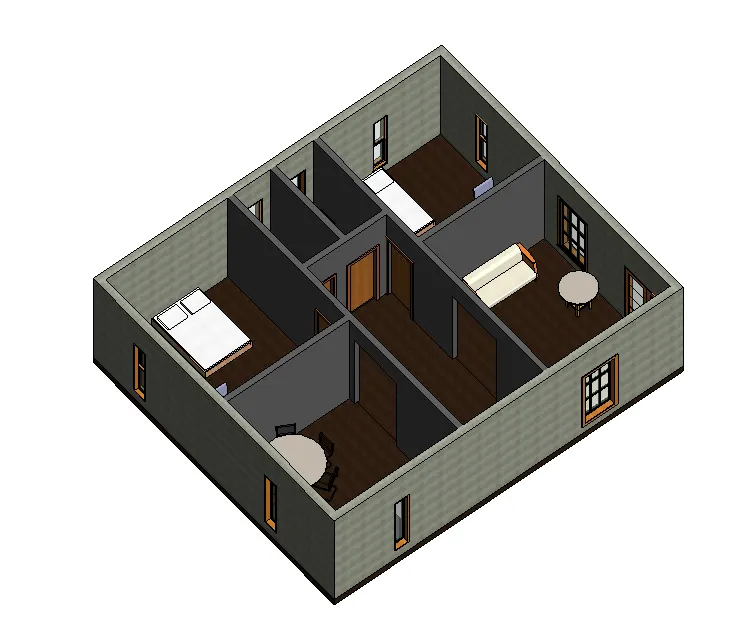
Results - The Residential unit is created by inserting Doors , Windows , Chairs , kitchen unit , Beds etc .
Following are the different views
i) 2D view
ii) Top view
iii) NE view
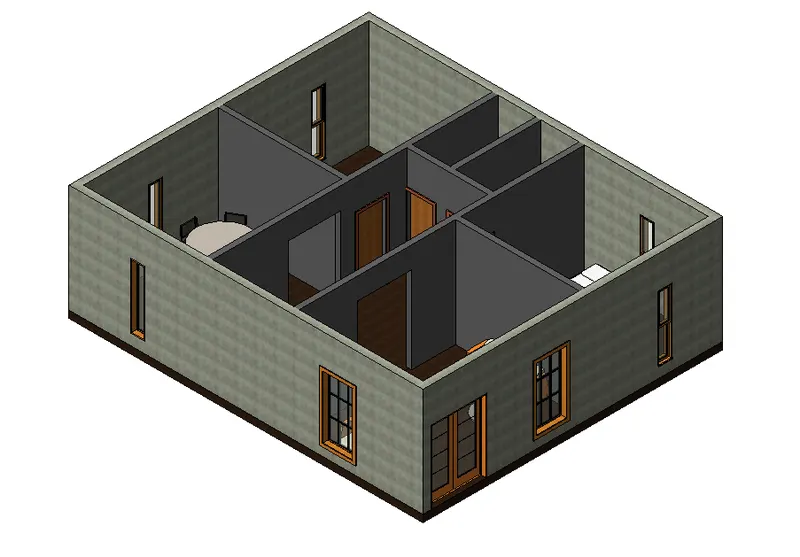
iv) SW view