Creating Conceptual mass in REVIT and Creation of Sinusoidal curve and a Parametric stadium using Dynamo
1)
Aim - To create a sinusoidal points and create a curve and create a surface out of the curve by using Dynamo
Introduction -
1) Dynamo is a visual programming software which is used to enhance the project process .
2) Its a software that allows you to type lines of code; while also creating an algorithm that consist of nodes and wires .
3) It is used to carried out to enhanced BIM capabiilities in Revit and optomization options.
4) Dynamo and Revit can together be used to create model and analyze complex geometries, curves with minimium human error .
5) Dynamo can make the design process more efficient .
Procedure -
Step 1)
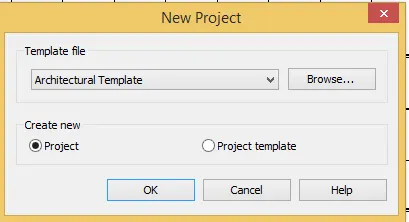
i) Open the New Project as Architectural Template .
ii) Click on Okay .
Step 2)
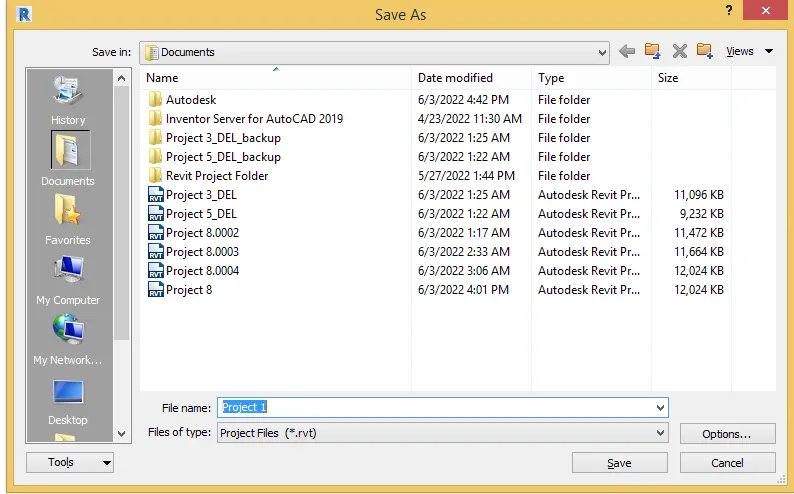
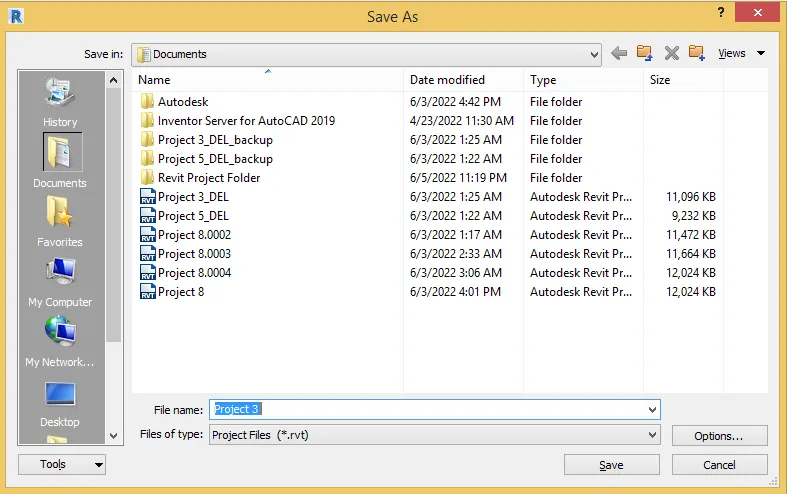
i) Save this file as Project 1
Step 3)
i) Once you click okay
ii) Go to Manage tab - Click on Dynamo option
iii) Make sure that you link the same project which you have created .

Step 4)
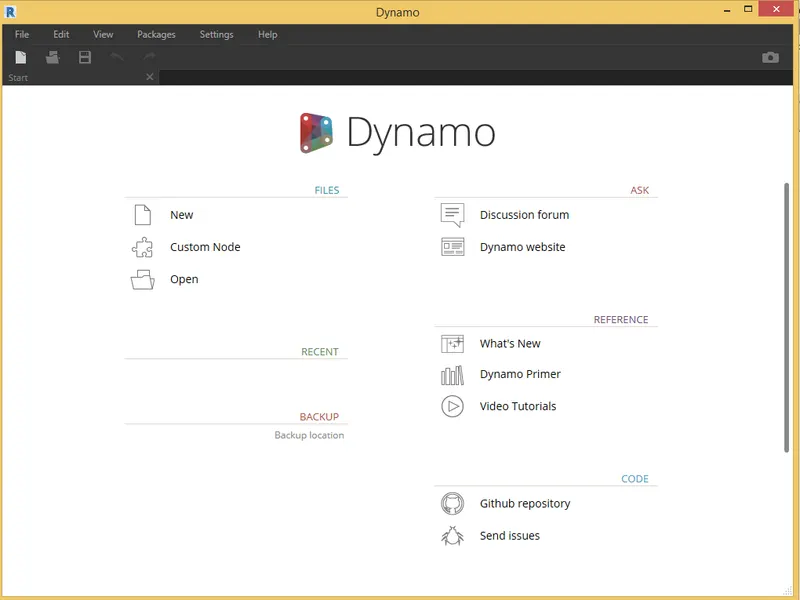
i) Once you click Dynamo , a Dynamo software window will open as shown below
Step 5)
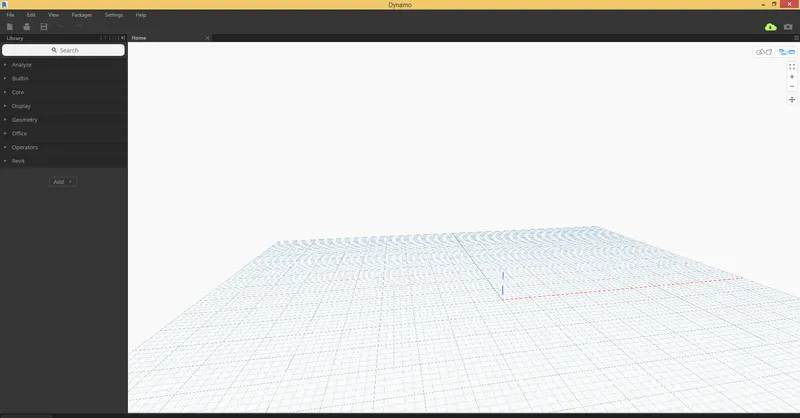
i) Click on New as we have to create a Sinusoidal points .
ii) A following modal space will open for dynamo .
Step 6)
i) Now we have to plot a points for curve
ii) Go to search - Write as Code Block
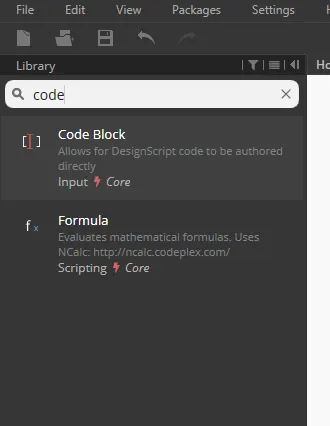
iii) Click on 3 times
iv) 3 code block will appear
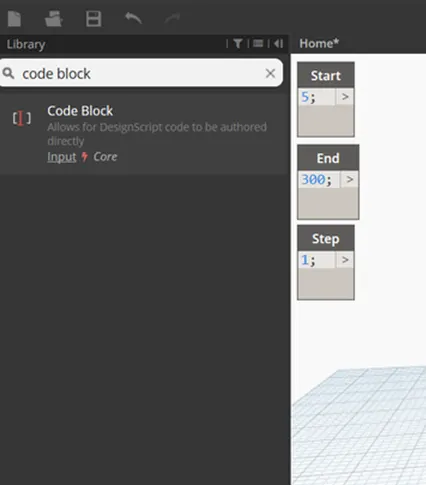
v) Rename it as Start - End - Step
vi) For Start - Enter value - 5;
vii) For End - Enter value - 300;
viii) For Step - Enter value - 1;
Step 7)
i) Once you create a Code block
ii) Now we have to create a sequences of number
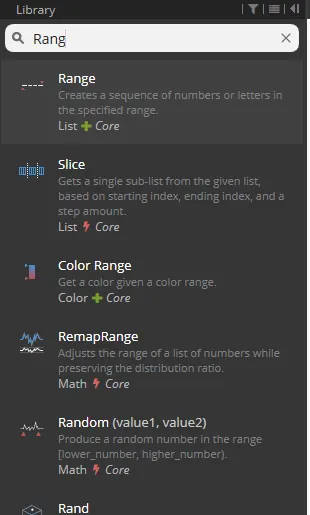
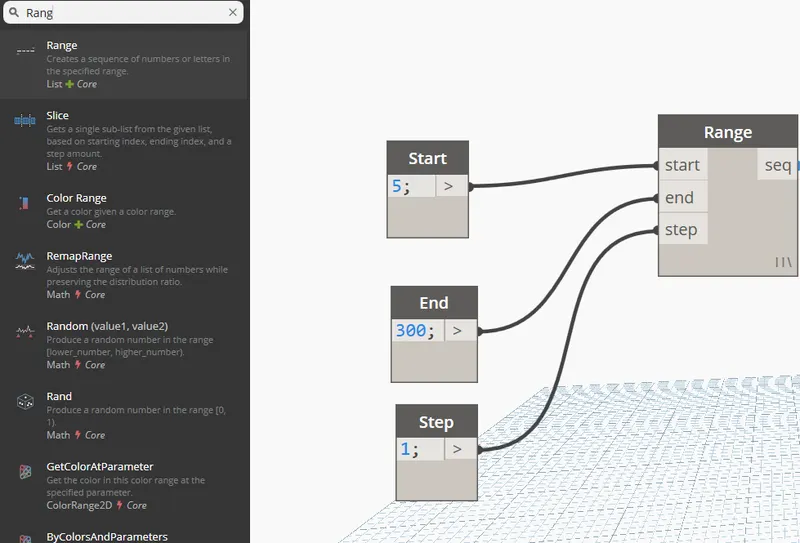
iii) For that Creat a Range
iv) Type Range in search bar
v) Now assign the code block as Input to the Range as shown in fig .
Step 8)
i) Once you create a Range Now we have to spcify point
ii) For that search points by coordinates in the search
iii) Now assign the output of Range as Input to the Points By Coordinates for X coordinates as shown below
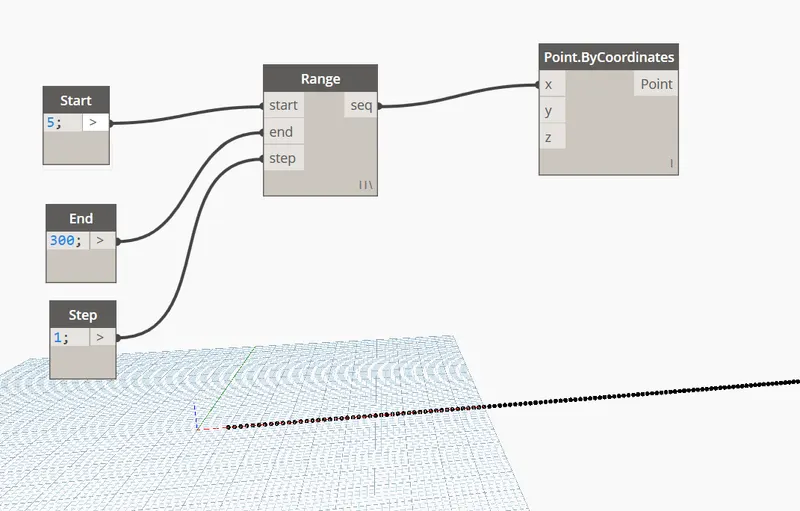
Step 9)
i) Once points are created ,
ii) We have to create sin wave from this points
iii) For that we have to create sin function which is given by math.sin option
iv) Search maths.sin
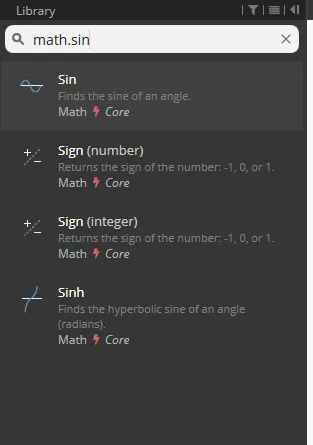
v) Assin the codes block to the Math.sin as shown in below
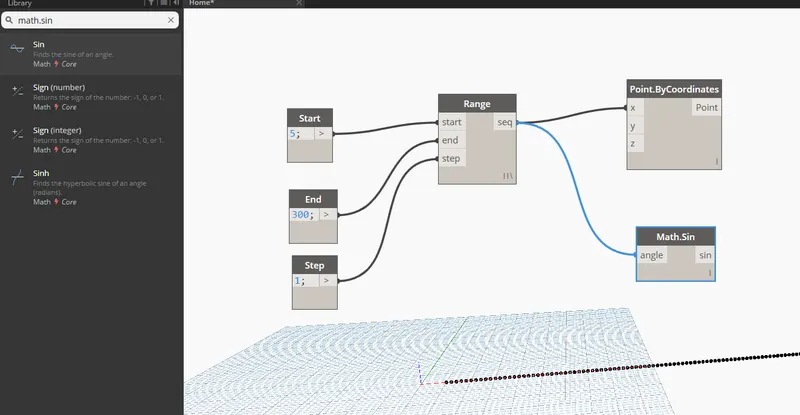
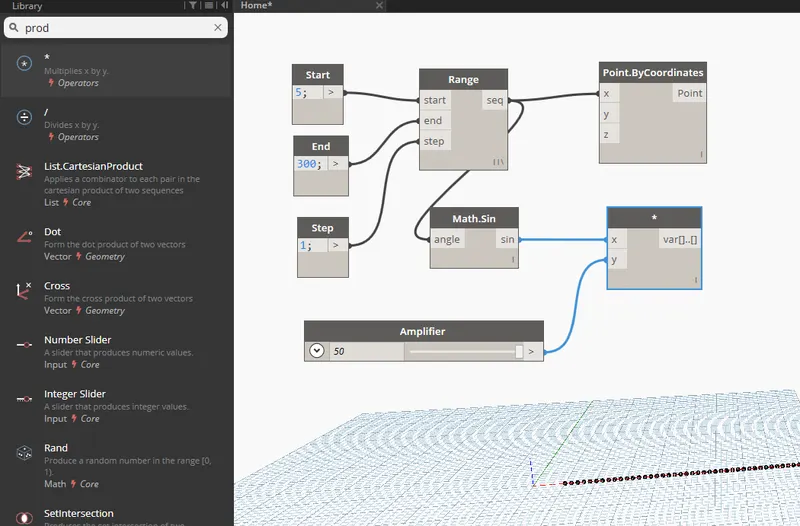
vi) As this values are small , so we have to create Amplifier
vii) For that create a Slider - and Rename it as Amplifier
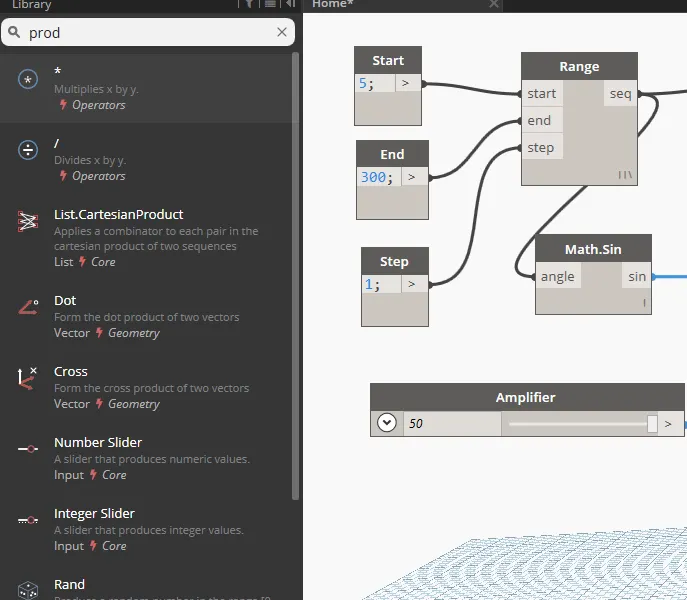
viii) This, amplifier code block needs to be multiplied to the sin block.
ix) For this search product function in search
x) Input for x value is Math.Sin block and for y value is Amplifier .
Step 10)
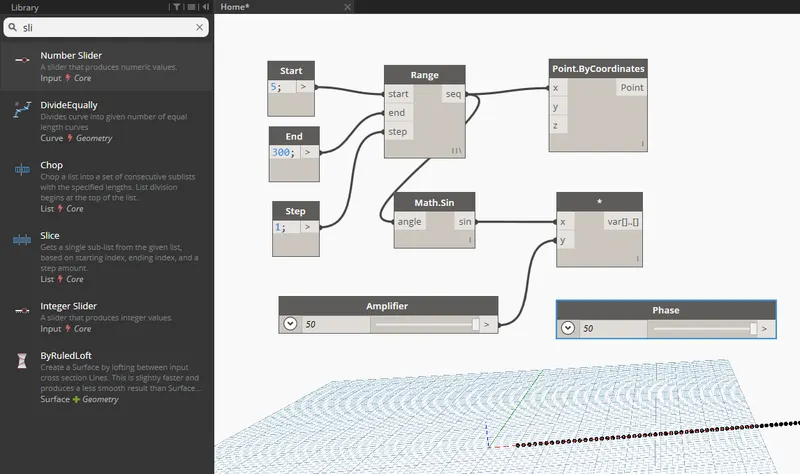
i) Now we have to create phase for the sin curve.
ii) So we have again create an integer slider and Rename it as Phase.
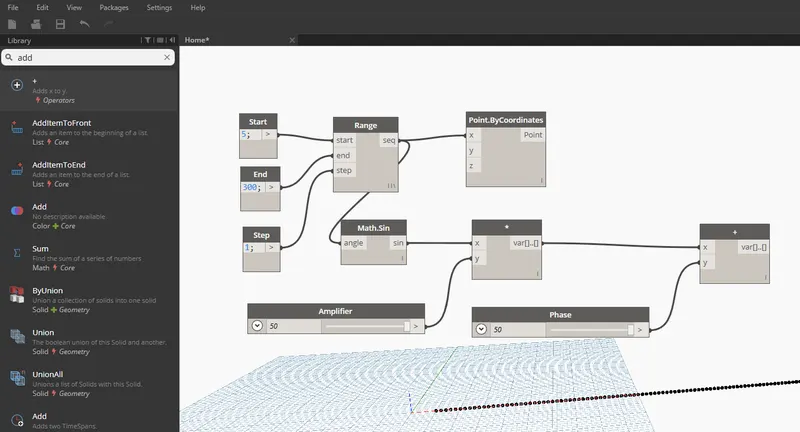
iii) Now add Phase block and Amplifier block by adding operation
iv) Search Add operator in Search panel
v) Add both the Blocks
Step 11)
i) Now assign the Y coordinate as Input to the Add operator as a output .
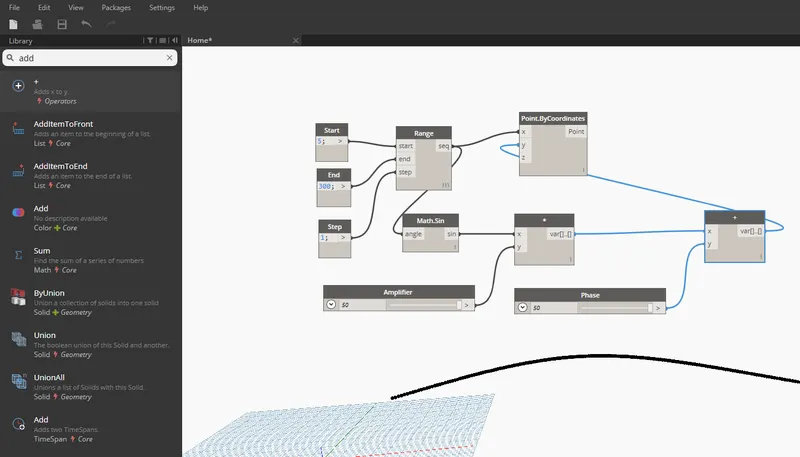
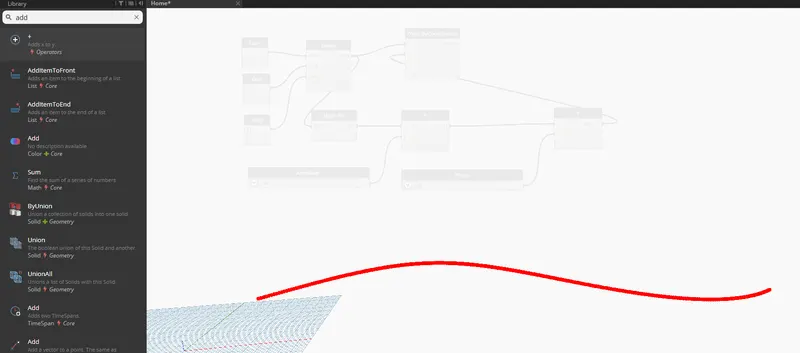
Enable the graph view - Sinusoidal curves are obtained .
Step 12)
i) Now, we have to convert the sinusoida points to the curve
ii) For that curve can be created from Nurbscurve.
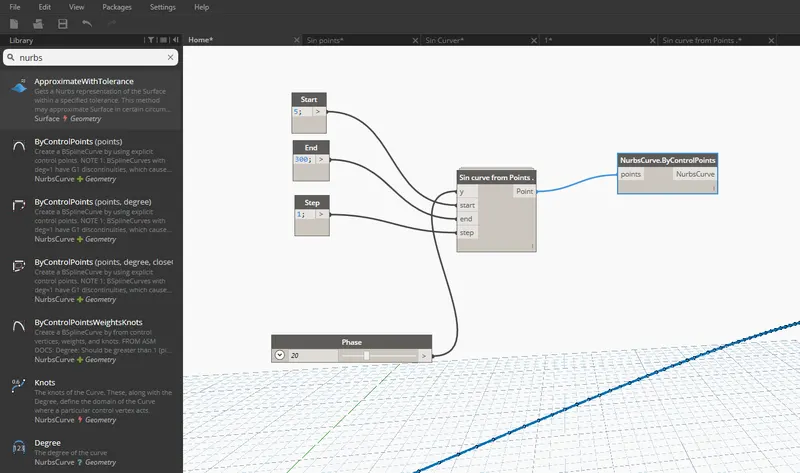
iii) Search Nurbscurve in library and choose nurbs cuvrve by control points
iv) Connect the Points by coordinate block as input for the nurbs curve.
v) A line will be developed connecting the points.
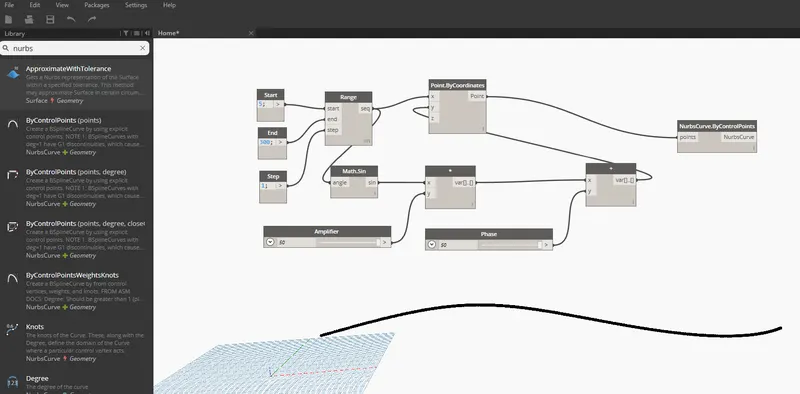
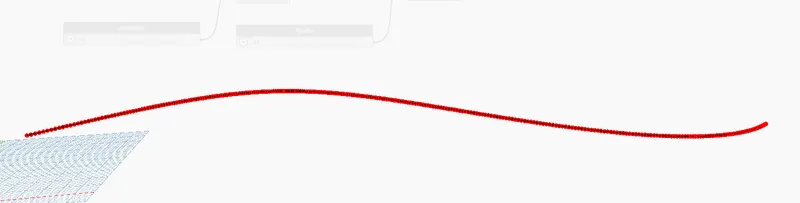
A line is creted . Hence A Sinusoidal curve is obtained
Step 13)
i) Now we have to develop surface.
ii) For that we have to create a group of these items for our understanding
iii) This can be done by selecting the required input blocks and then go to edit option in the top portion and then choose create node from
selection.
iv) The entire thing will be grouped together.
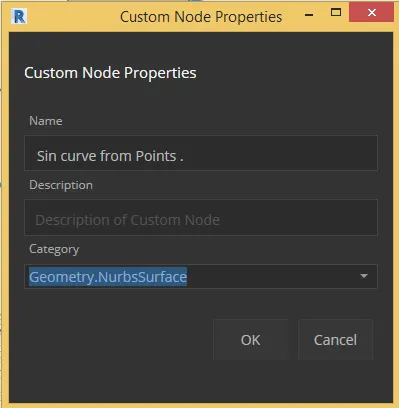
v) Click on Okay
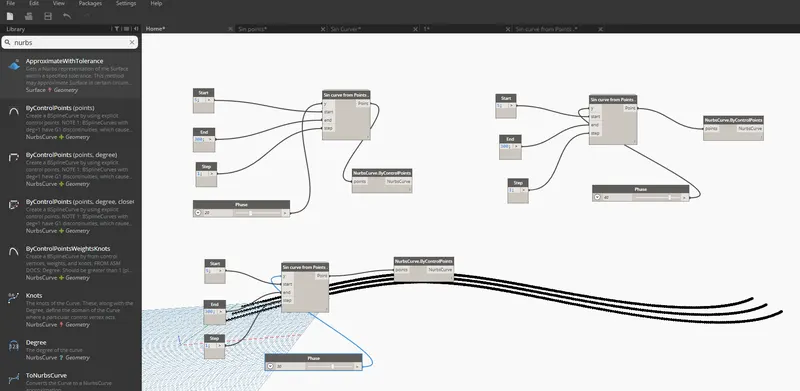
vi) Now, copy this entire blocks two times to create the surface.
vii) Adjust the Phase view such as 30 , 40 to see the curve
Step 14)
i) Now we have to create the surface.
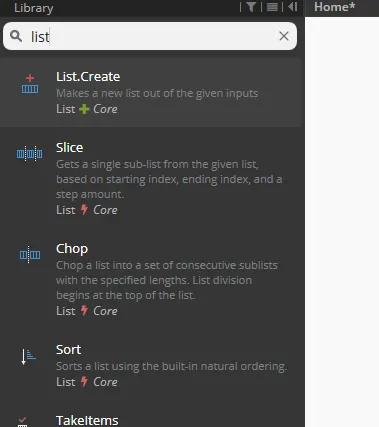
ii) Before creating surface create List
iii) Search List .
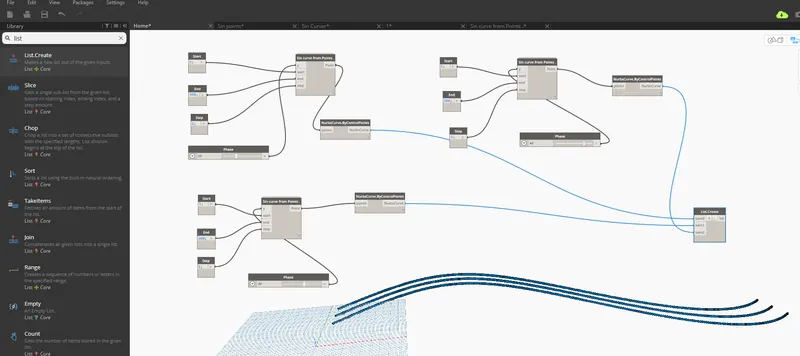
iv) Then connect all the output of the sine curves as input for the list.
v) This will act as the input for Surface .
Step 15)
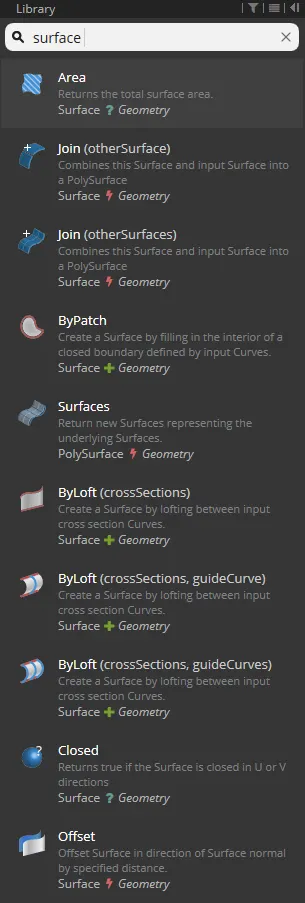
i) Search Surface
ii) Select Surface by loft ( Cross Sections)
iii) Assign the Output of List to Input of Surface by loft
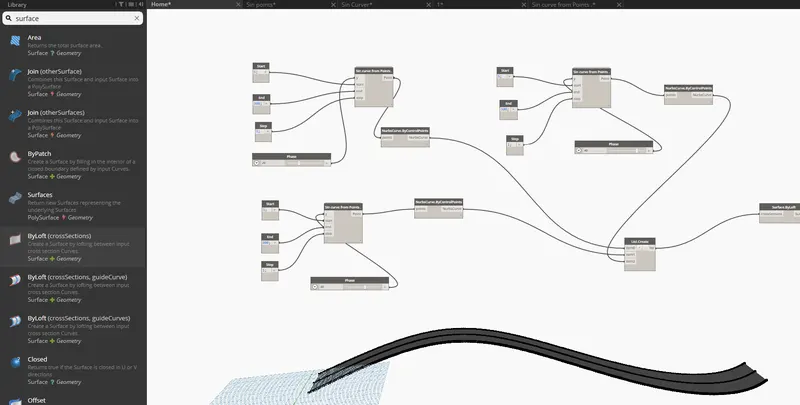
Change the view to Graphical
Results -
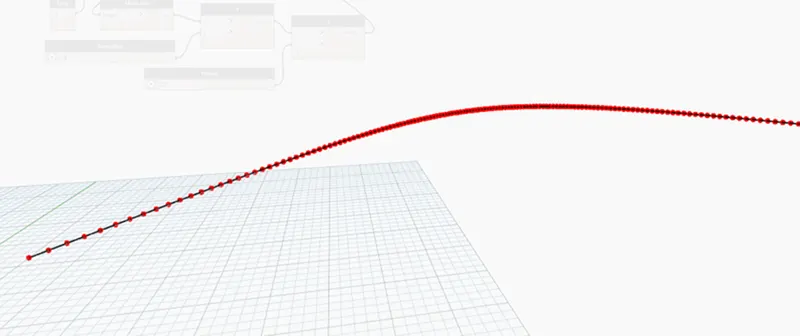
1) A Sinusoidal curves are created by using Dynamo
2) A curve is Created by using this points
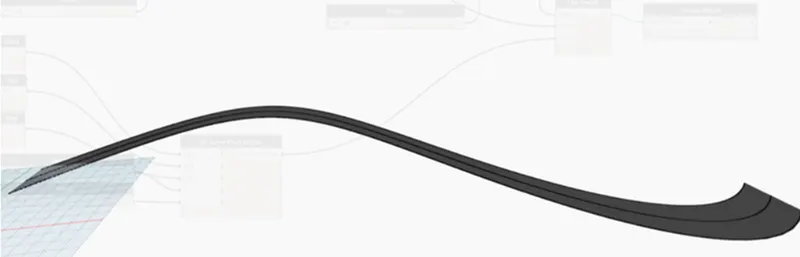
3) A surface is created
2)
Aim - To create a conceptual layout of a floor plan in dynamo.
Introduction -
1) Dynamo is a visual programming software which is used to enhance the project process .
2) Its a software that allows you to type lines of code; while also creating an algorithm that consist of nodes and wires .
3) It is used to carried out to enhanced BIM capabiilities in Revit and optomization options.
4) Dynamo and Revit can together be used to create model and analyze complex geometries, curves with minimium human error .
5) Dynamo can make the design process more efficient .
Procedure -
Step 1)
i) Open the New Project as Architectural Template .
ii) Click on Okay .
Step 2)
i) Save this file as Project 2
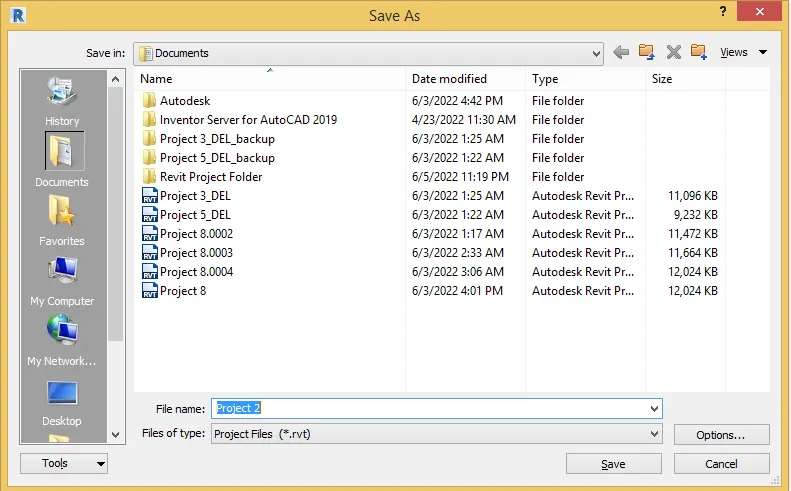
Step 3)
i) Once you click okay
ii) Go to Manage tab - Click on Dynamo option
iii) Make sure that you link the same project which you have created .
Step 4)
i) Once you click Dynamo , a Dynamo software window will open as shown below
Step 5)
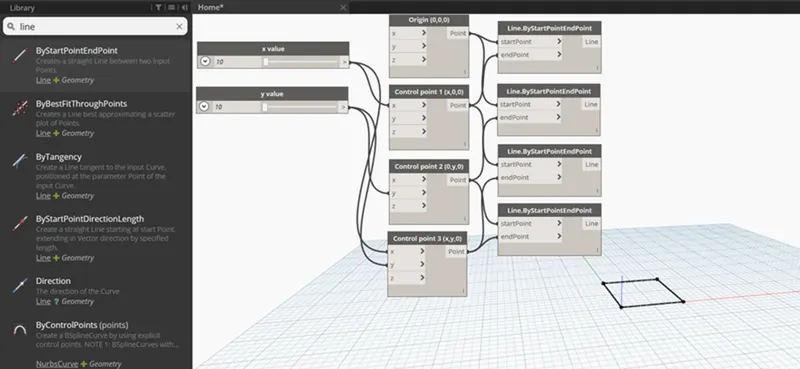
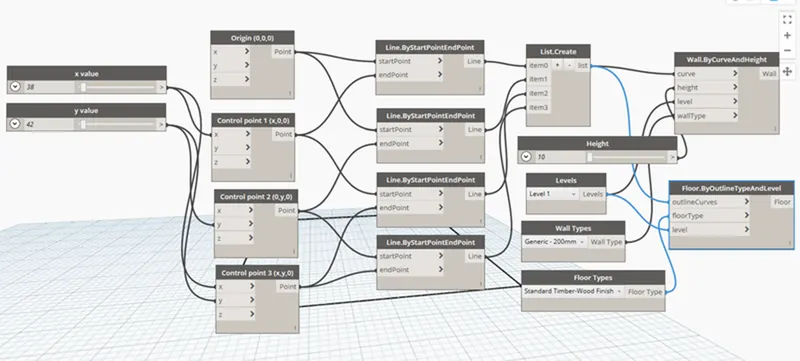
i) First we have to create the wall
ii) For that we have to create a 4 points
iii) Search - Points by Coordinate
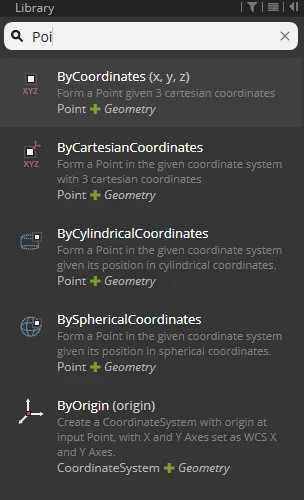
iv) Enter 1st point as - Origin (0,0,0)
v) Enter 2nd point as - Control point 1 (x,0,0)
vi) Enter 3rd point as - Control point 2 (0,y,0)
vii) Enter 4th point as - Control point 3 (x,y,0).
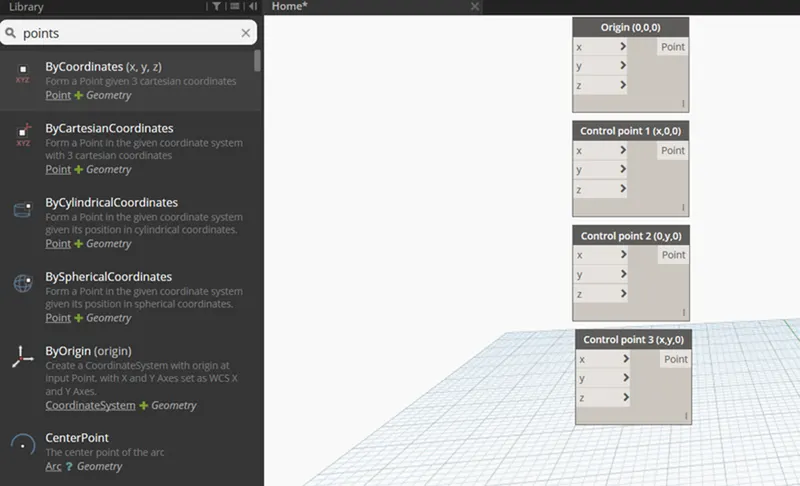
Step 6)
i) Now we have to provide two integer sliders for the input to the coordinates
ii) Enter the value for x and y
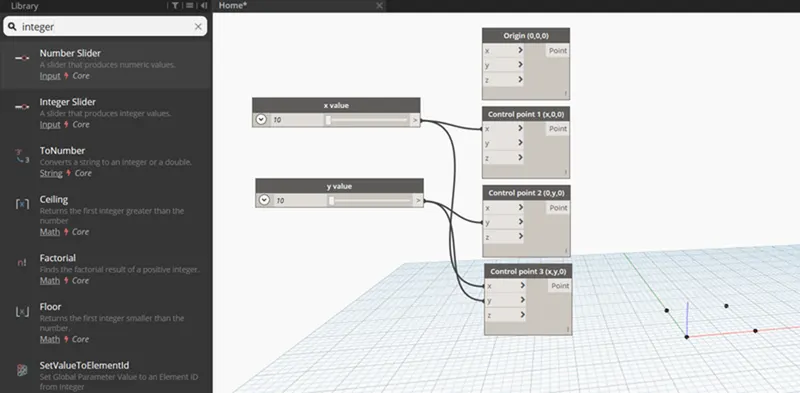
Step 7)
i) Now we have to connect these points by a line.
ii) Search - Lines and Select Lines by start and end type
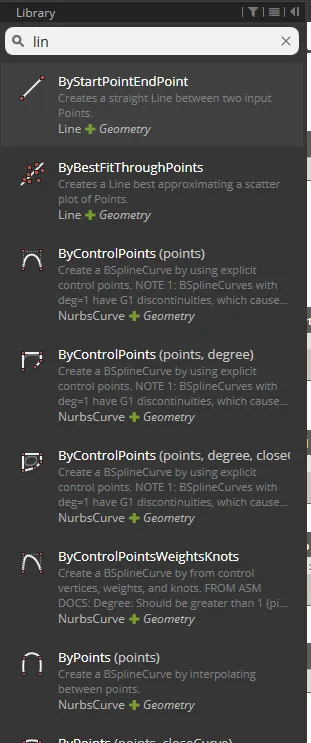
iii) Add them 4 times to create 4 lines .
iii) Assign the points as an input for the Lines by points block .
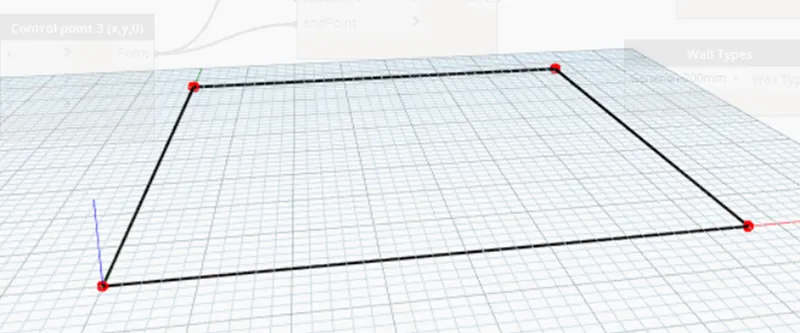
iv) We can see that plane is created at the modal space .
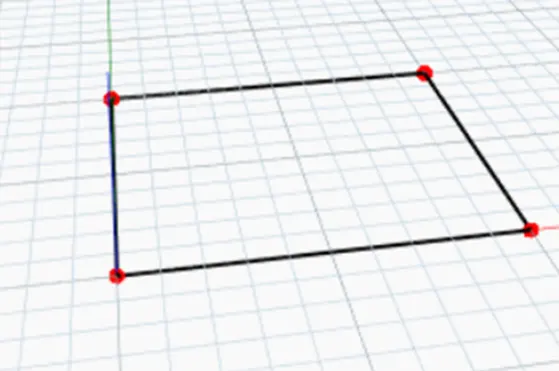
Step 8)
i) Therefore layout of the floor plan is created
Step 9)
i) Now we have to provide wall
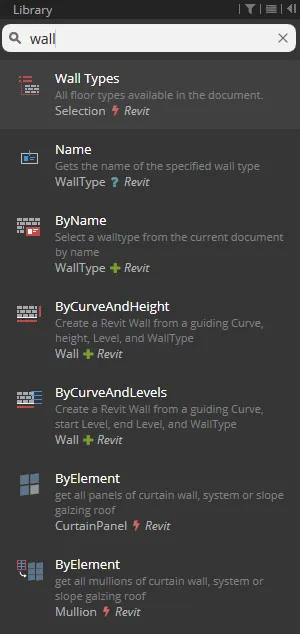
ii) Search wall and Select wall by curve and height.
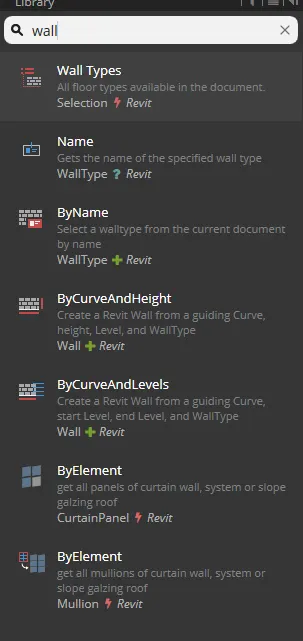
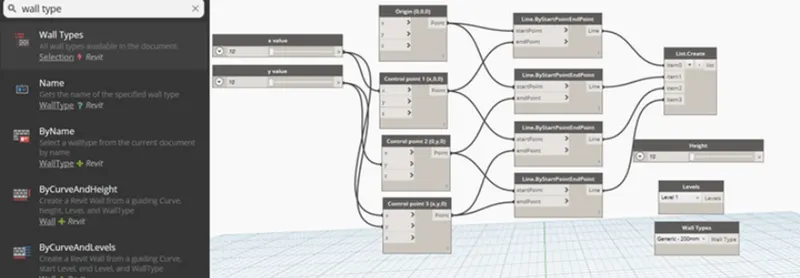
iii) We have to provide input such as curve, height, level and wall type.
iv) For curve - assign all the lines in a List by selecting List
v) For height -Add Slider and Rename it as Height
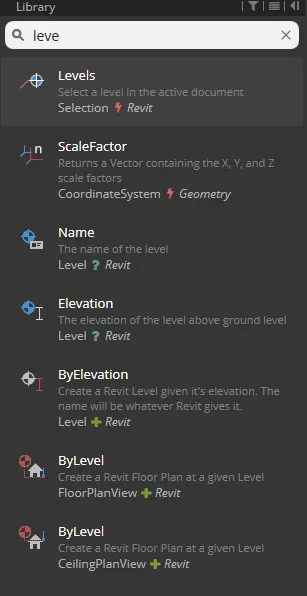
vi) For level - Search Level and Select Level 1
vii) For wall type - Search wall type - Select Exterior Brickover CMU
Step 10)
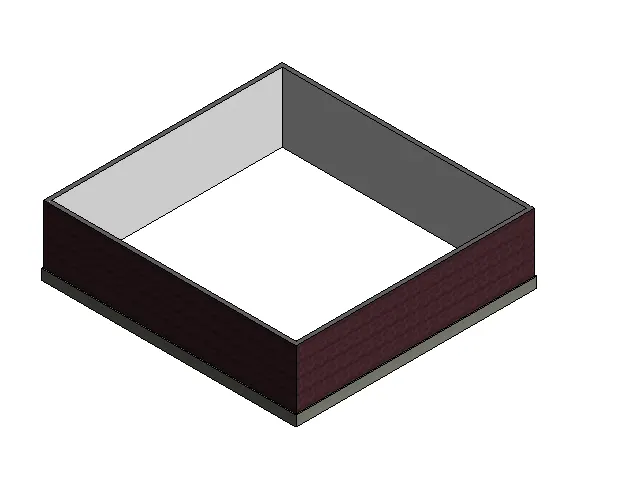
i) The wall layout is created
ii) Go to Revit file where you will see the wall
iii) Go to 3D view .
Step 11)
i) Now we have to assign the floor.
ii) Follow the same procedure as wall
iii) Search - Floor and Select By Outline Type Curve
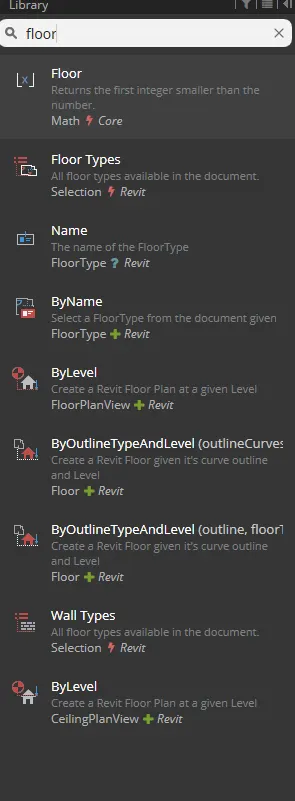
iv) Assign the Input parameters
v) Outline curve - Assign all the lines in a List by selecting List
vi) Floor Type - Timber Wood Finish
vii) Level as - Level 1
Step 12)
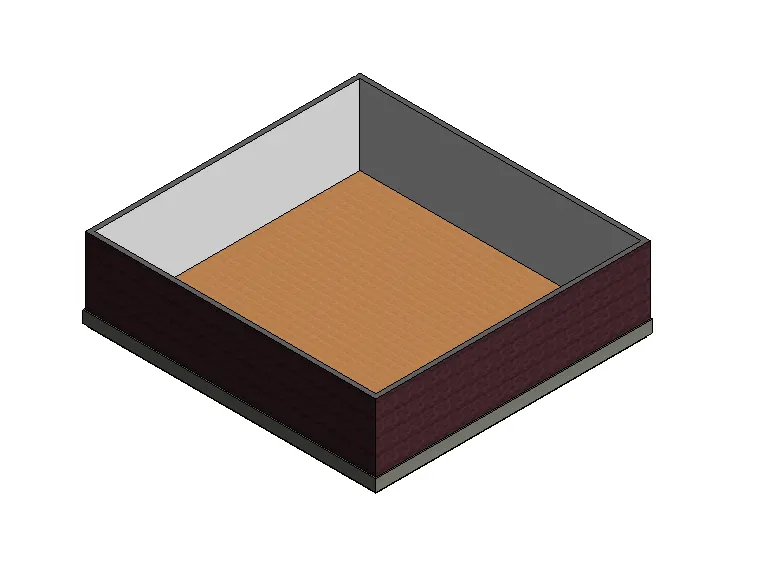
i) The floor has assign .
ii) Go to Revit file where you will see the floor
iii) Go to 3D view .
Result:
1) The conceptual floor plan layout has been created
3)
Aim - To create an array of model elements in revit.
Introduction -
1) Dynamo is a visual programming software which is used to enhance the project process .
2) Its a software that allows you to type lines of code; while also creating an algorithm that consist of nodes and wires .
3) It is used to carried out to enhanced BIM capabiilities in Revit and optomization options.
4) Dynamo and Revit can together be used to create model and analyze complex geometries, curves with minimium human error .
5) Dynamo can make the design process more efficient .
Procedure:
Step 1)
i) Open the New Project as Architectural Template .
ii) Click on Okay .
Step 2)
i) Save this file as Project 3
Step 3)
i) Open Architecture tab
ii) Select Columns
iii) Select Architectural column
iv) Draw the Columns
Step 4)
i) Use Commad Array to draw the columns .
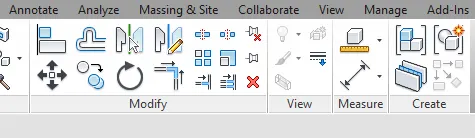
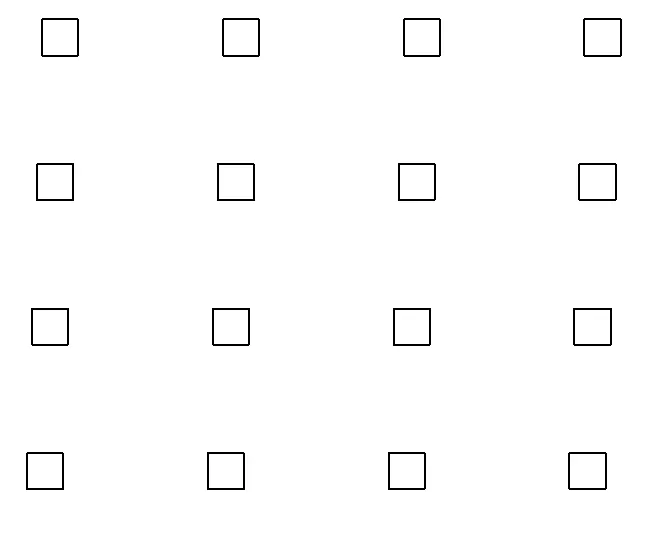
ii) Select the Column and draw the columns
iii) In X direction - draw 4
iv) In Y direction - draw 4 columns
Step 5)
i) Once you created Columns .
ii) Go to Manage tab - Click on Dynamo option
iii) Open the same project in Dynamo
Step 6)
i) Once you click Dynamo , a Dynamo software window will open as shown below
Step 7)
i) Now we have to created properties of elements
ii) For that Search - Model Elements and Select Model Elements
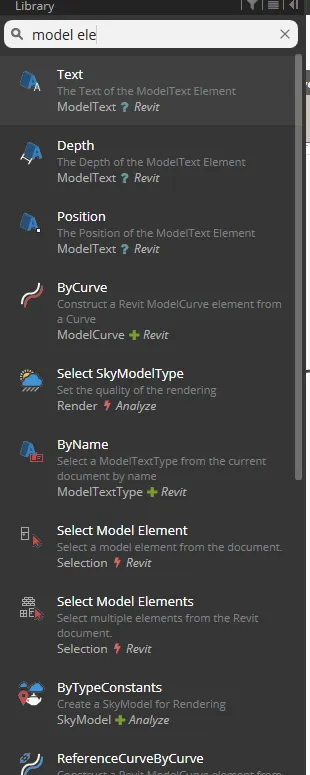
iii) Now Search - Set Rotations
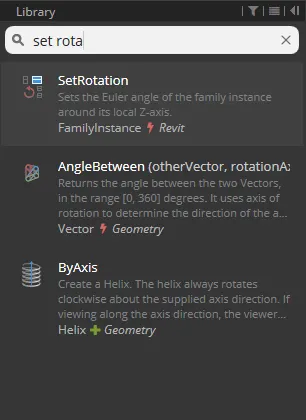
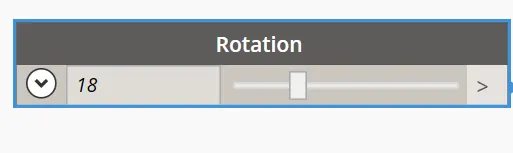
iv) We have to add slider to rotate the Column
v) Rename it - Rotation
Step 8)
i) Now select model elements block from Revit File .
ii) It willact as a input for family instance
iii) And add integer slider for rotation angle
Result -
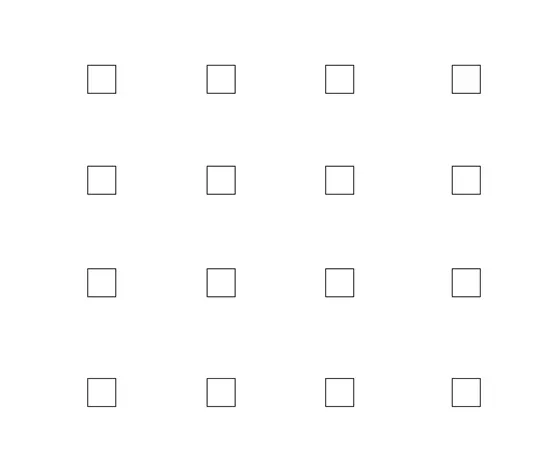
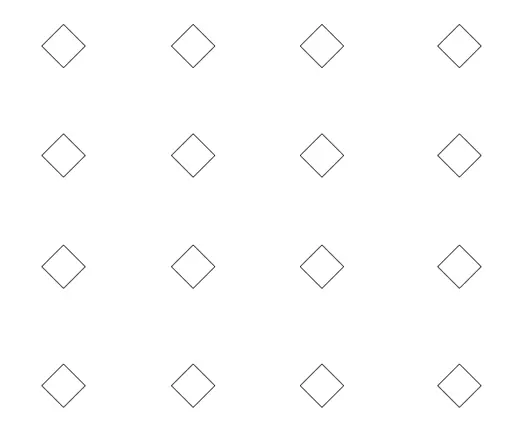
The array of model elements have been created in Revit and their properties are being varied through the blocks created in
dynamo.
4)
Aim - To create a conceptual mass in Revit and develop a parametric column by dividing the surfaces.
Introduction -
1) Creating Conceptual mass families means that the mass is external to the project
2) It has same tools to create a mass families
3) It can be saved and can be loaded into project as a family .
Procedure:
Step 1)
i) Open the Revit Software
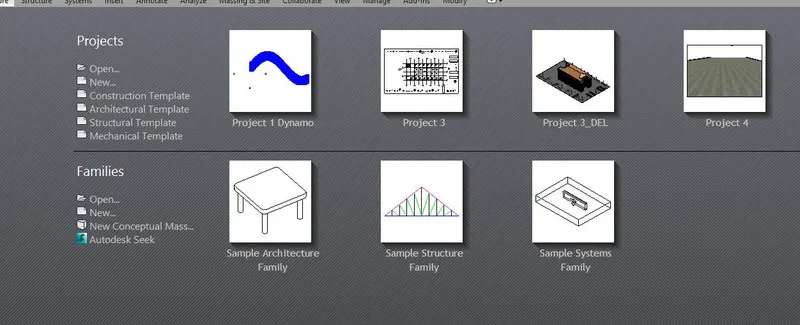
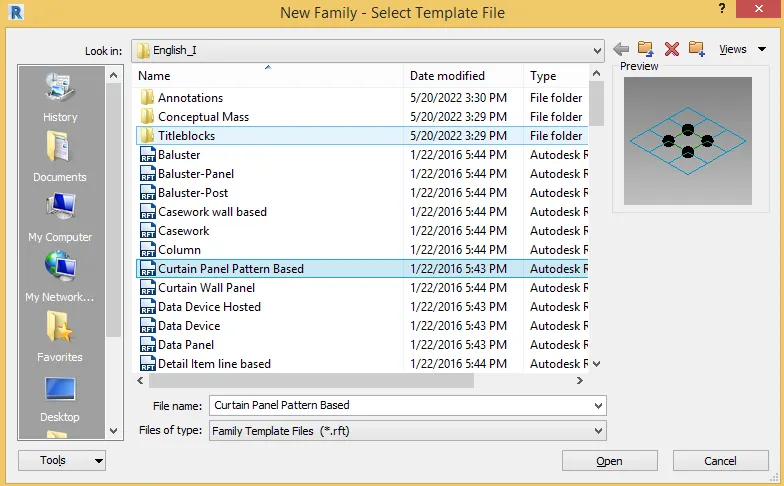
ii) Click on Families - and Open New file
iii) Once you click on New file a following dialog box will open
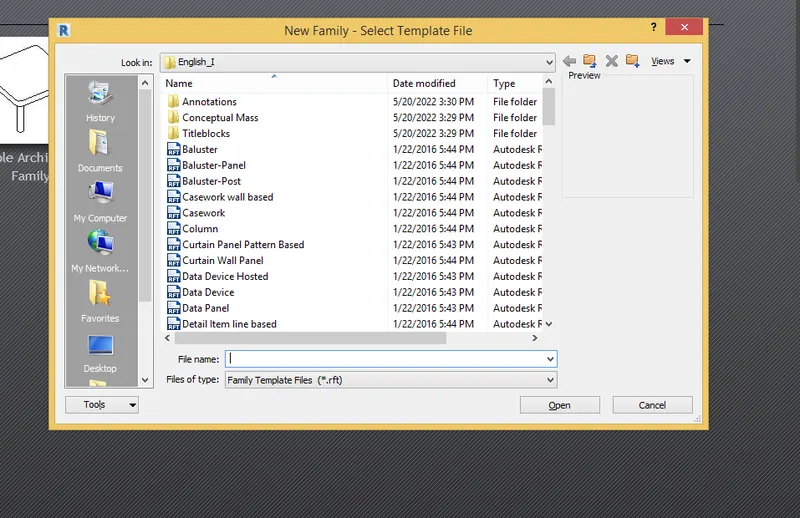
Step 2)
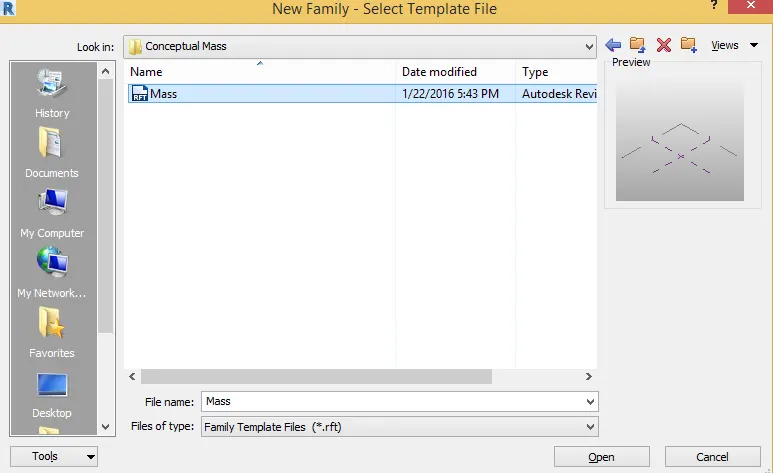
i) Click on Conceptual Mass
ii) and Select Mass
Step 3)
i) Once you open the Conceptual Mass a following modal space will open
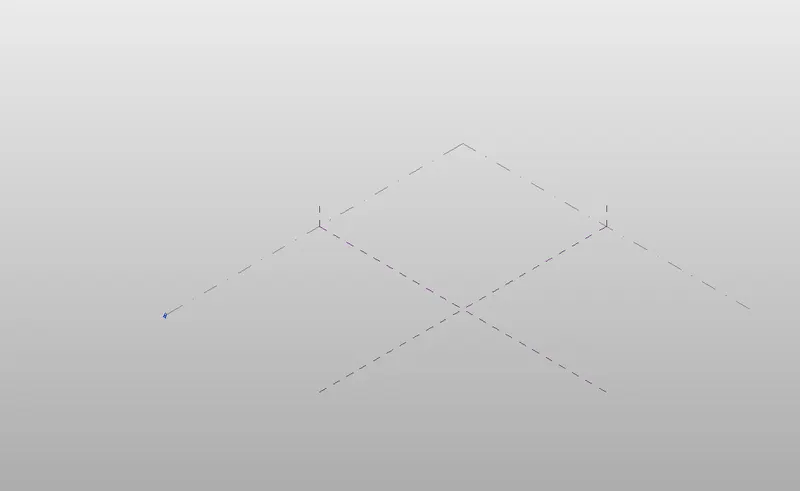
Step 4)
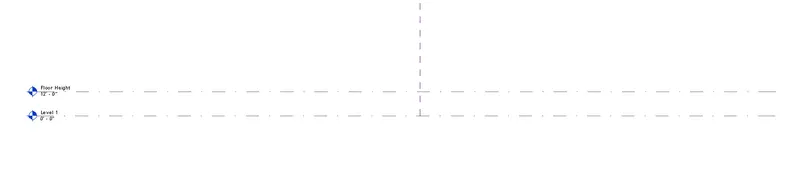
i) Now we have to set the level
ii) Go to Elevation
iii Draw the levels from Create options -
iv) Draw the level at an Height of 12'
v) And Rename it as - Floor Height
Step 5)
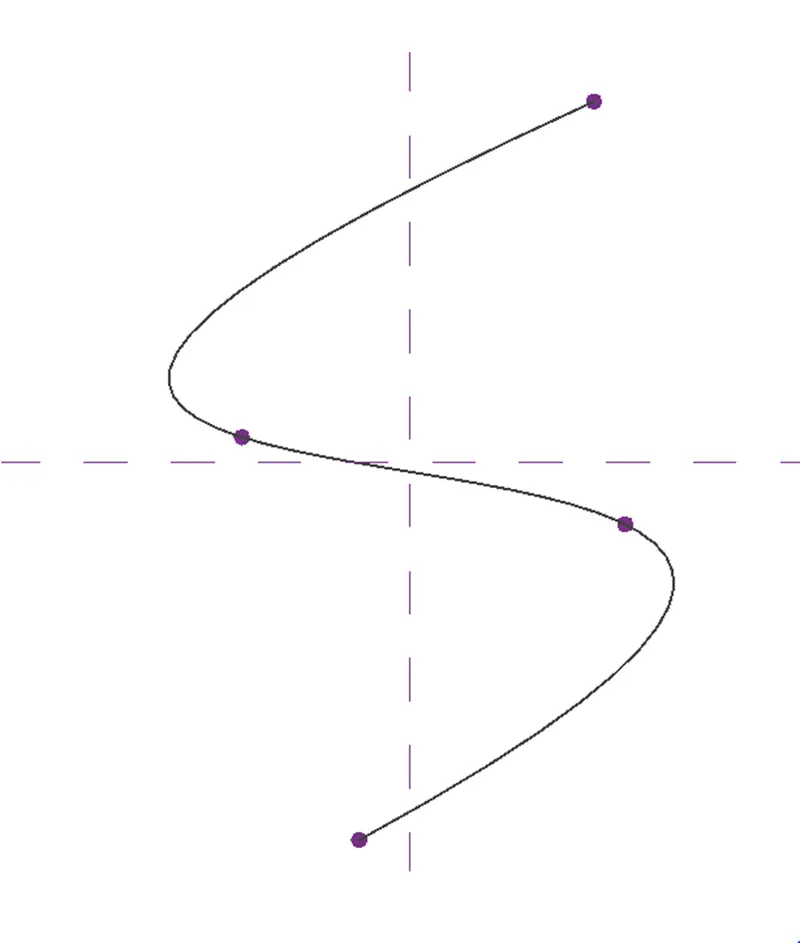
i) Now we have to draw the outline for walkway
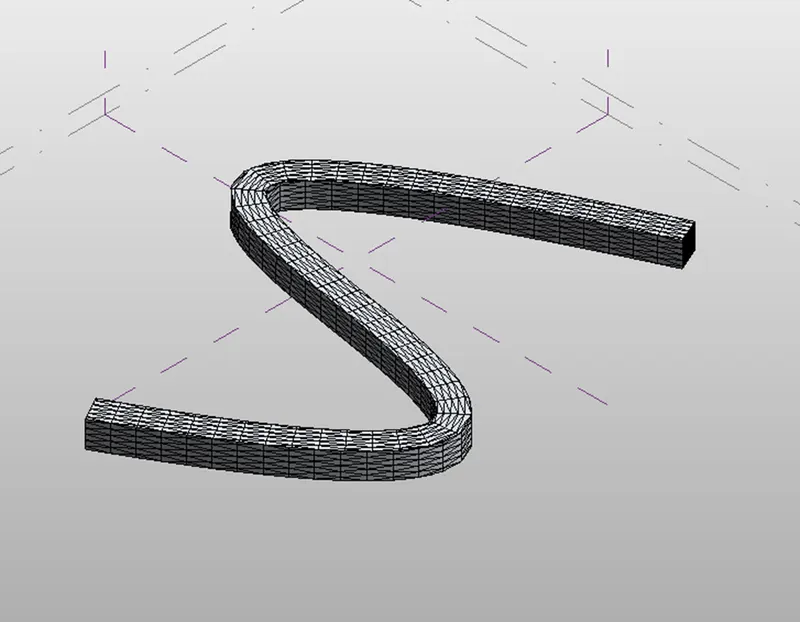
ii) Click on Model - Select Spline tool option
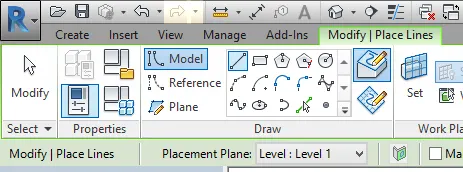
iii) Draw the Spline curve as shown below
Step 6)
i) Now we have to create a profile to sweep through the curve.
ii) So we have to set a plane and we have to create a Polygon
iii) For that Select Set of plane
iv) Click on Show if its not visible
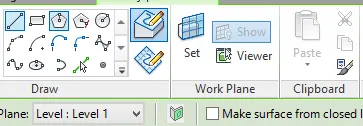
v) Click on 1st node and Click on set of plane
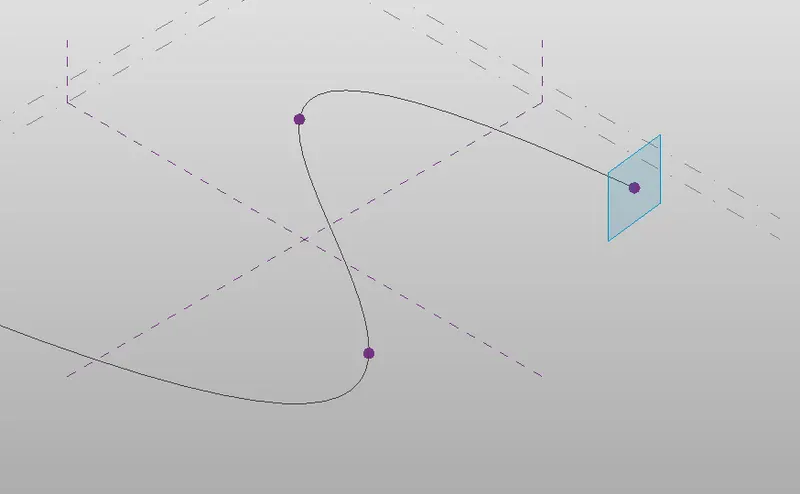
vi) Click on Polygon option - Select 4 sides and Select the Center point and create a polygon
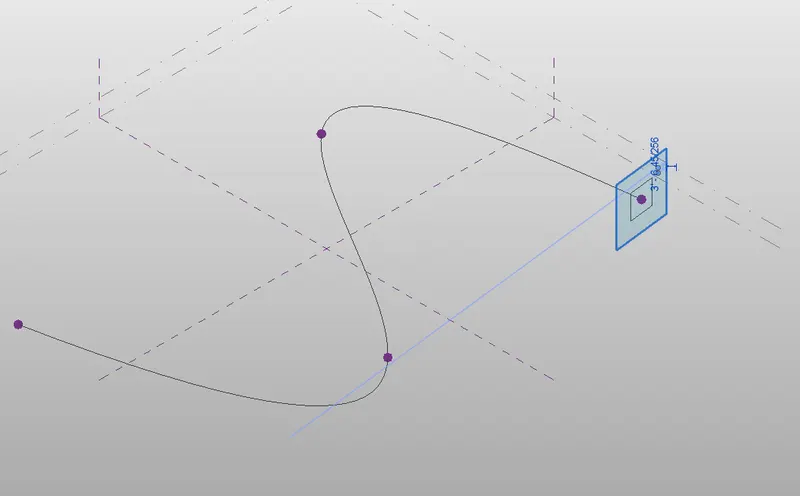
vii) Similarly draw the Polygon at all 4 nodes as shown below
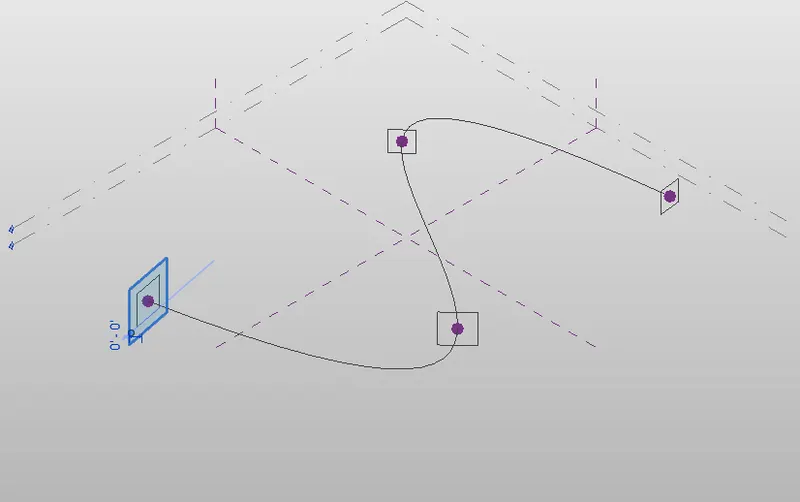
Step 7)
i) Now we have to create a surface
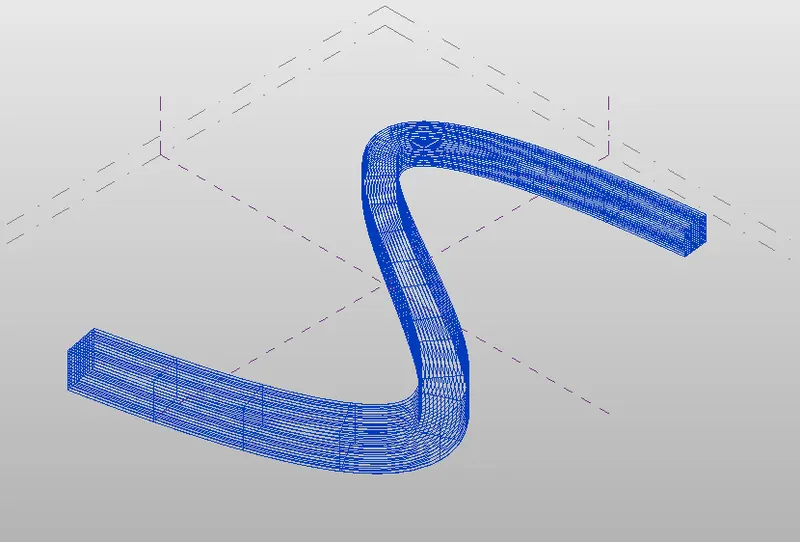
ii) So Select the all the polygons and the curve line
iii) Once you select all there is an option in Ribbon bar as Create a Form
iv) Click on Create a form- Select a Solid form

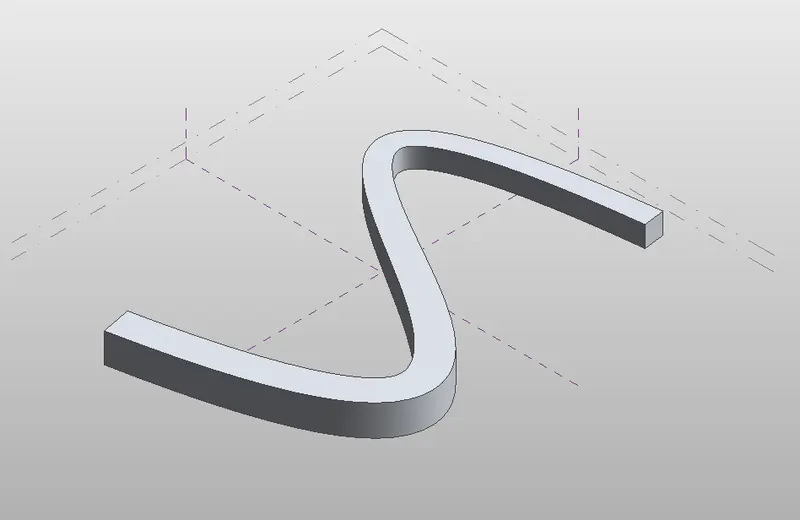
Step 8)
i) So now we have to divide the surface
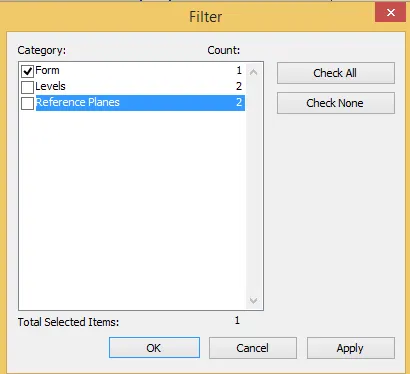
ii) So select all the elements
iii) Filter it and Untick the Reference planes and Levels
iv) Click Apply .
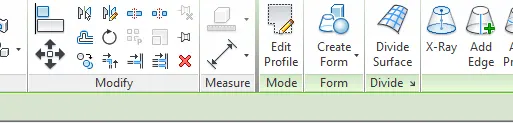
v) And Click on Divide the Surface
Step 9)
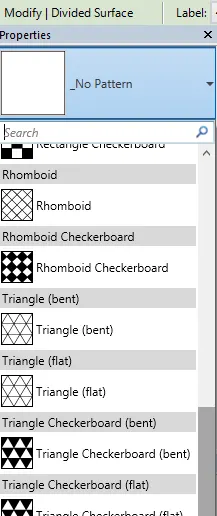
i) Click on surface and from properties select Triangula Bent
Step 10)
i) Open New family
ii) Select - Curtain panel pattern
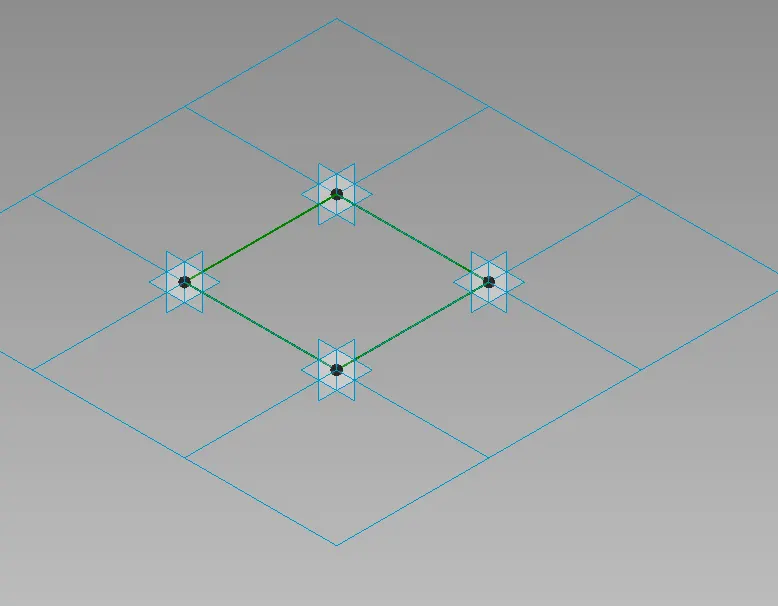
iii) Once you open a followng modal space will open
iv) Select the Patttern as - Triangle bent from properties .
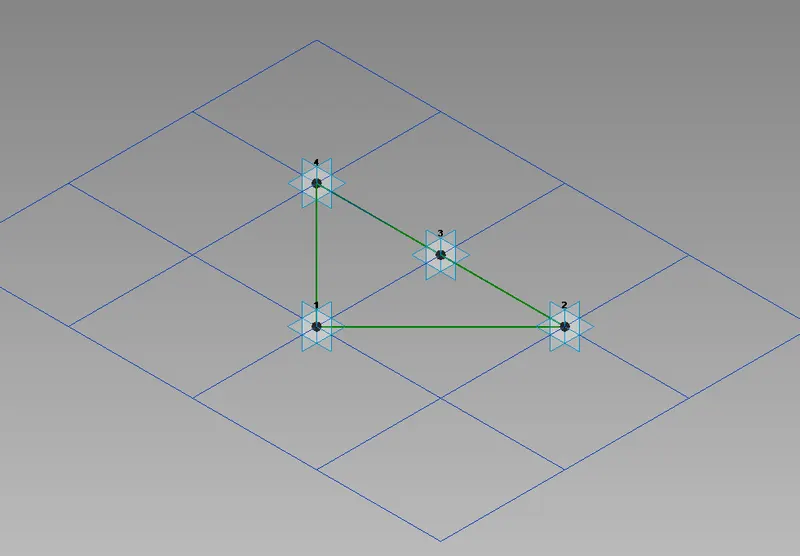
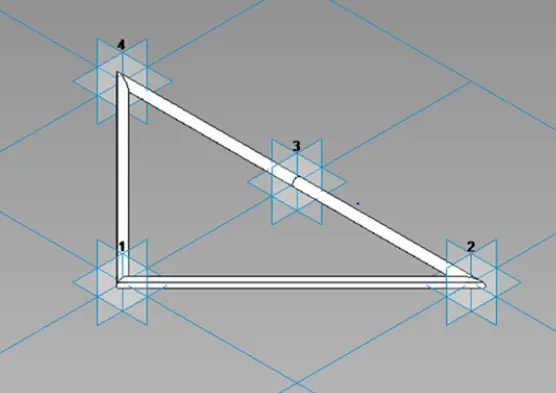
v) Then we have to create a reference point at centre of the face.
vi) Then draw a circle of radius 5" at that reference point.
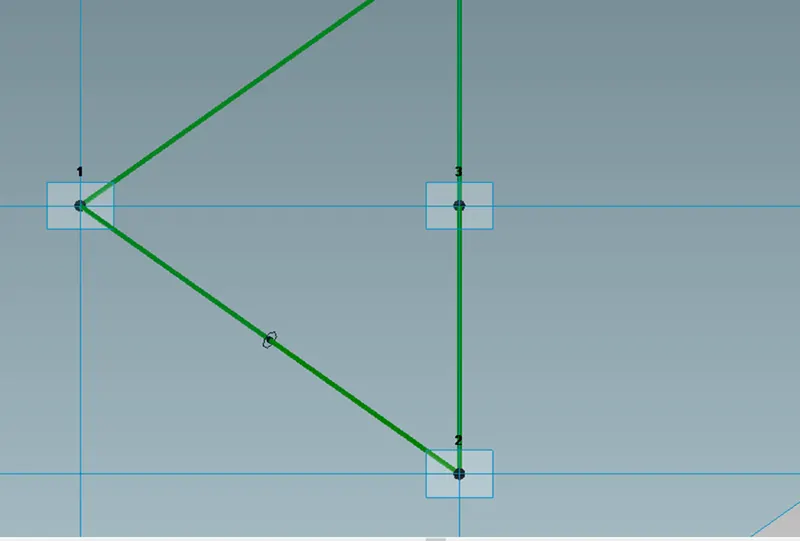
vii) Select all the Reference pattern , circle and plane and Click on Create a form .
Step 11)
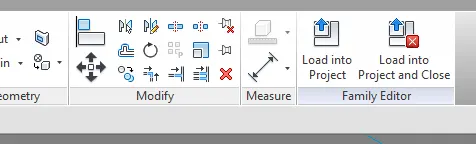
i) Now Load this into Project
ii) Now select the enitre element and filter select divided surface and unticked the others
iii) Select the pattern which we have created .
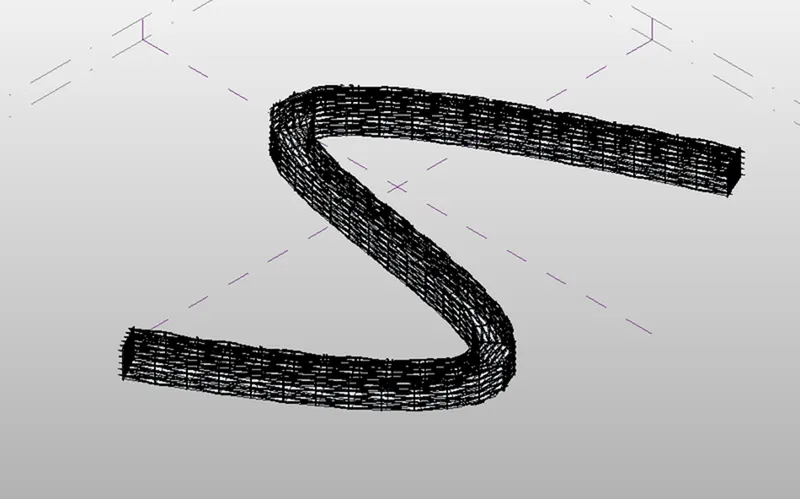
Results - The Conceptual Mass is created in Revit and parametric column is developed
5)
Aim - To develop a Parametric Stadium using dynamo in Revit.
Introduction -
1) Dynamo is a visual programming software which is used to enhance the project process .
2) Its a software that allows you to type lines of code; while also creating an algorithm that consist of nodes and wires .
3) It is used to carried out to enhanced BIM capabiilities in Revit and optomization options.
4) Dynamo and Revit can together be used to create model and analyze complex geometries, curves with minimium human error .
5) Dynamo can make the design process more efficient .
Procedure -
Step 1)
i) Open the New Project as Architectural Template .
ii) Click on Okay .
Step 2)
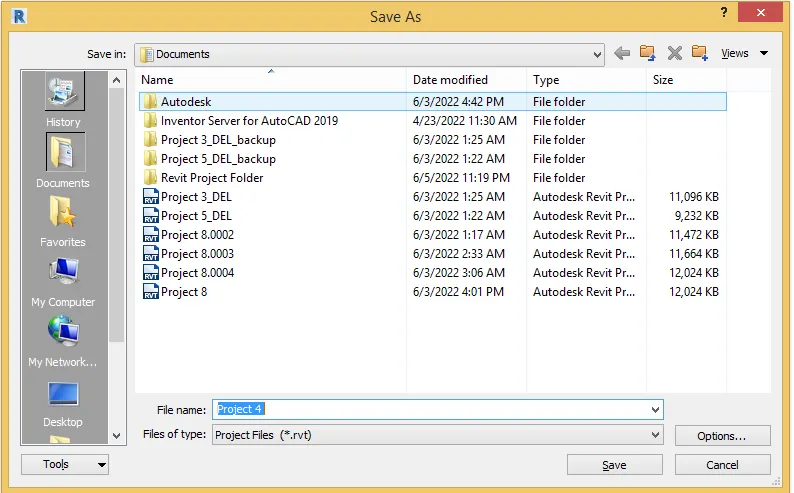
i) Save this file as Project 4
Step 3)
i) Once you click okay
ii) Go to Manage tab - Click on Dynamo option
iii) Make sure that you link the same project which you have created .
Step 4)
i) Once you click Dynamo , a Dynamo software window will open as shown below
Step 5)
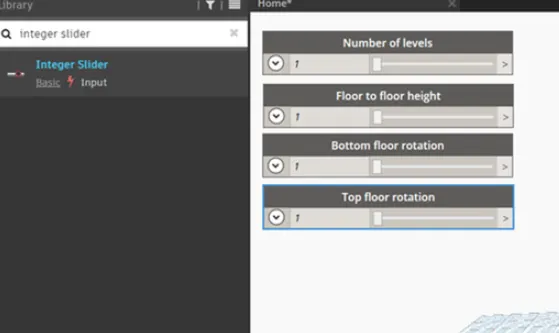
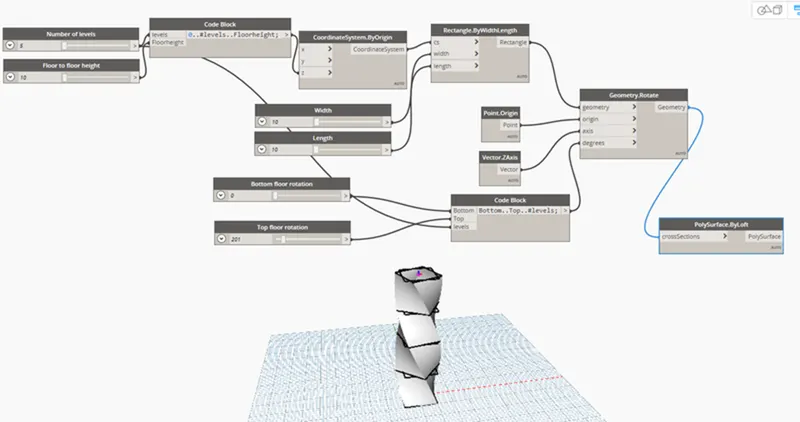
i) Create a Slider as a input
ii) Search - slider
iii) Add 4 Sliders
iv) Rename it as - Number of levels , Floor to floor height , Bottom floor rotation , Top floor rotation
Step 6)
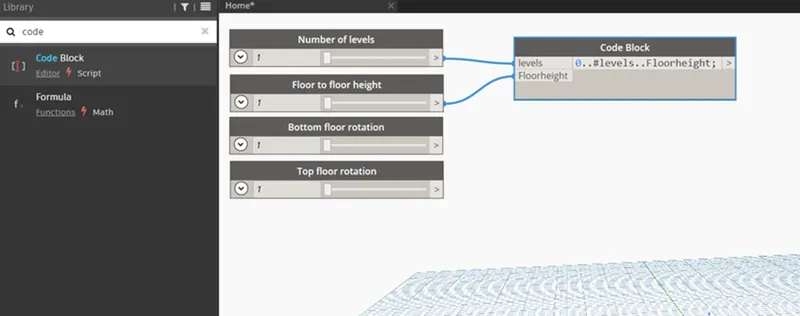
i) Now,create a code block from the search
ii) Insert a Code as - 0..#levels..Floorheight.
ii) Now, connect the integer sliders as a input to the code block .
Step 7)
i) Now, search coordinates by origin
ii) Then connect the output of code block as input for z coordinate
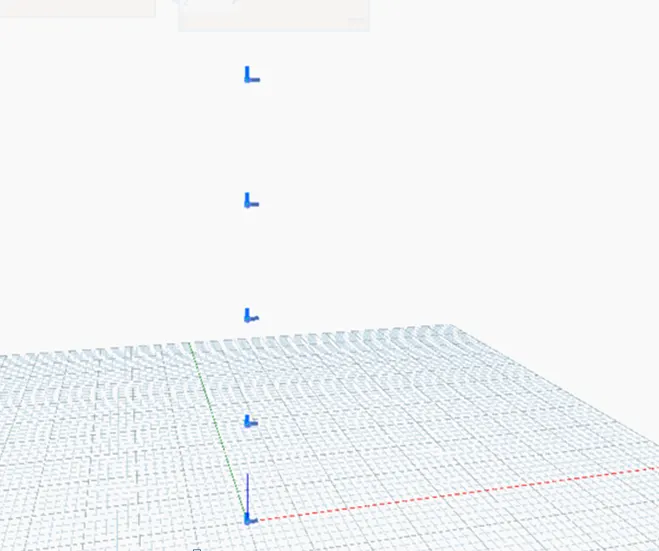
iii) You will see the 5 points are created
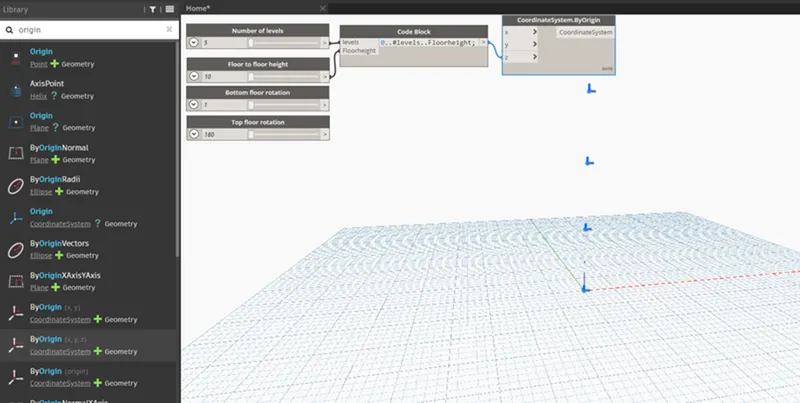
Enable the graph view
Step 8)
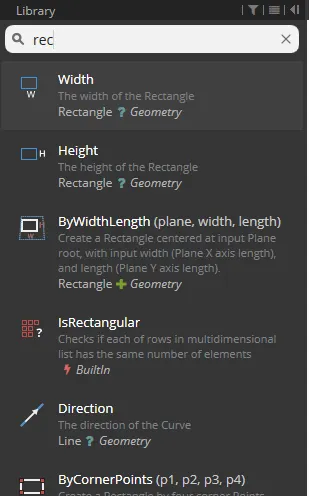
i) Now,create a rectangle by width and length from the library.
ii) Search - Rectangle and Select by width and length
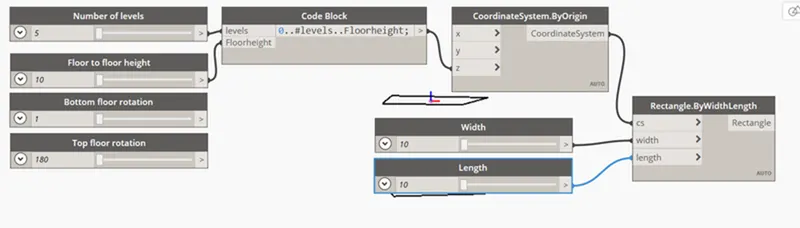
iii) Connect the Output of coordinate points to the Input for Rectangle Coordinate system
iv) Create a slider for length and width.
v) Assign this as Input to Rectangle as Width and Height
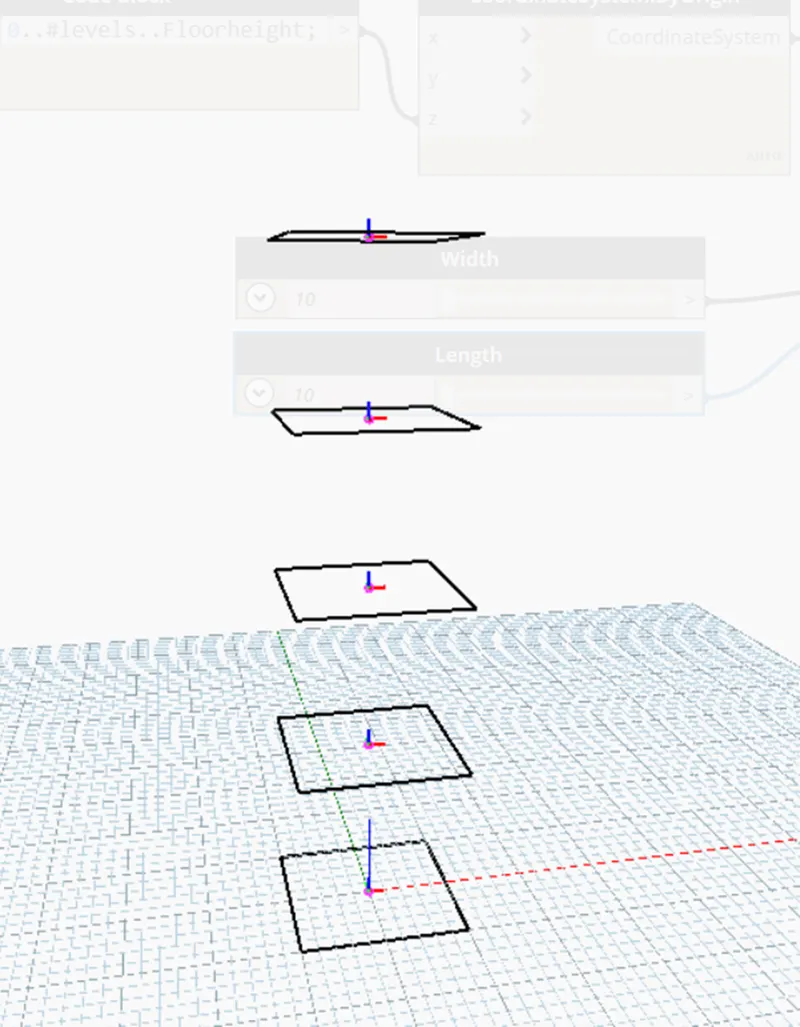
Enable the Graphical view
Step 9)
i) Now we have to rotate the geometry.
ii) For that Search - Rotate - Select Origin , Axis , Degree
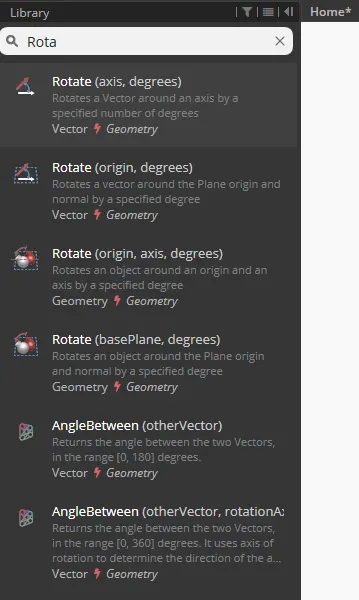
iii) For Geometry - Asssign the output of Rectangle block
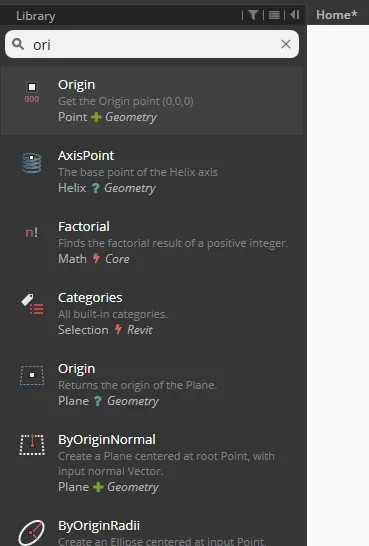
iv) For Origin - create an origin block from the library.
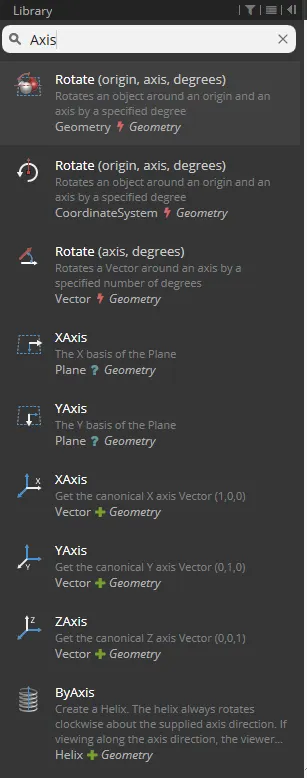
v) For Axis- Search Axis - Select Z axis
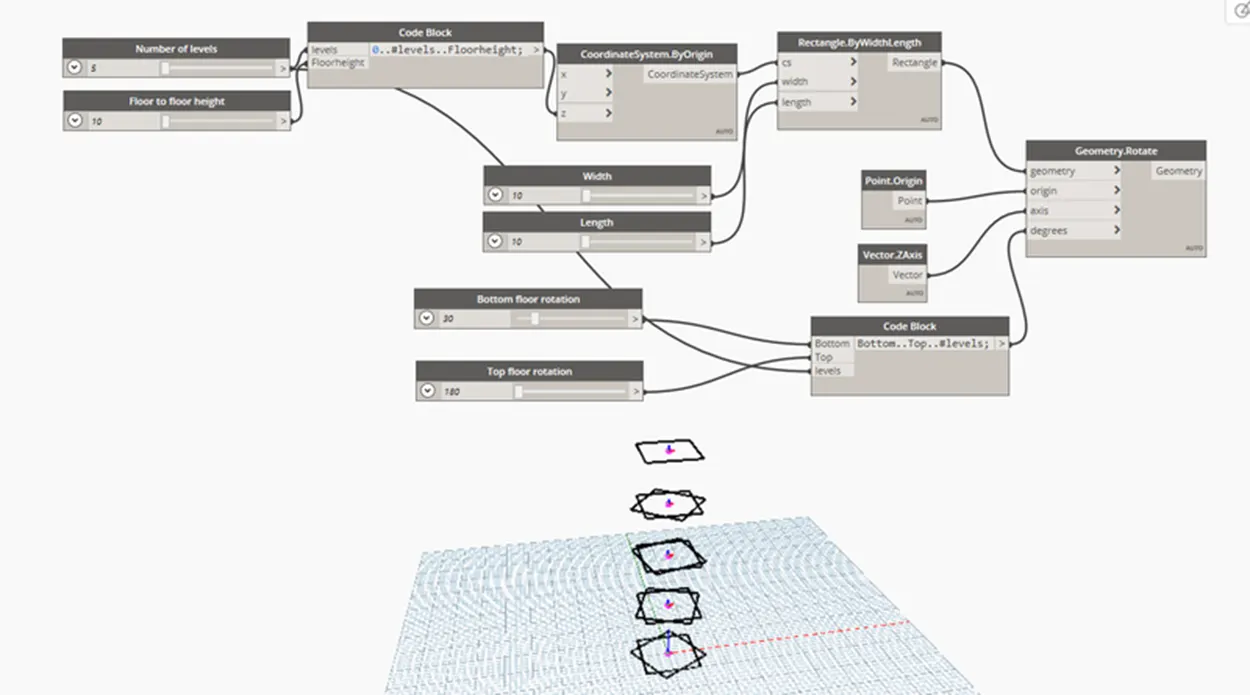
vi) For Degrees - Create code block as Bottom..Top..#level.
vii) The inputs for this code block is already Created in Step 5 .
viii) Assign all the parameters .
Step 10)
i) Now, we have to create surface
ii) Search - Surface - Select Surface by loft
ii) Then assign the output of Geometry.rotate block as an input for Surface by loft.
Step 11)
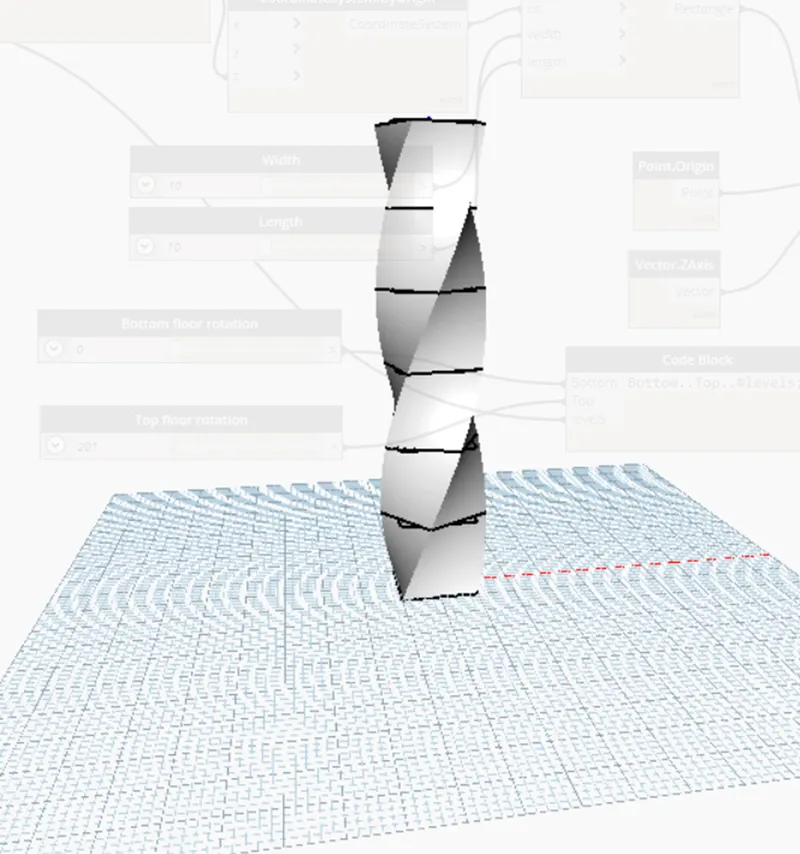
i) The number of levels and width and Length of the rectangle can change accordingly .
Step 12)
i) Now Open the Revit file and you will see the geometry for parametric stadium
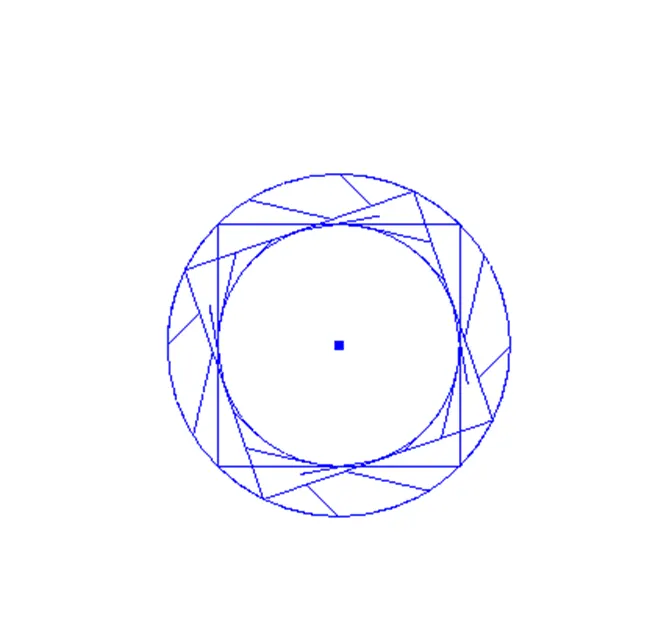
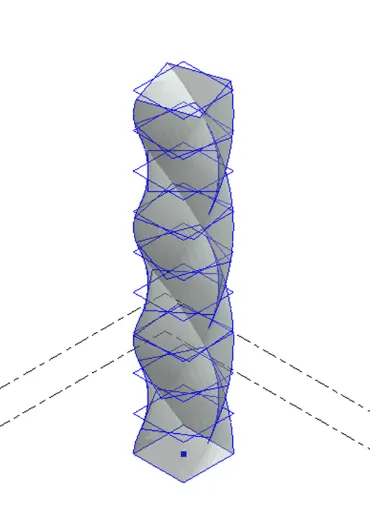
Results - A Parametric Stadium has been created by using Dynamo .