Challenge 5 : Concept Modeling of Car Bumper
Concept modeling of a car bumper (Front & back)
Objective:
To be able to model a car bumper using concept modeling and to maintain continuity of surface well.
Introduction:
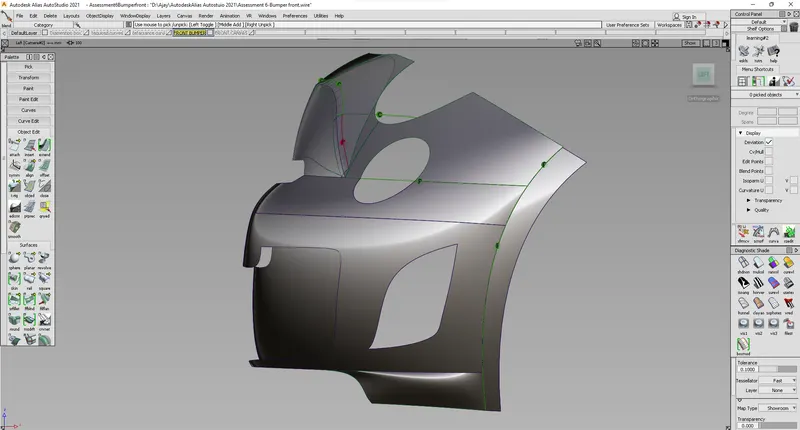
In this project, I used only 2 Views and an additional perspective view of a car for the model. Then started to build the curves and surface set by set, so that I achieved greater continuity between the surfaces.
Design Methodology/Approach:
BUILD CURVES
BUILD SURFACE TO THE SET OF CURVES BUILD
BUILD NEXT SET OFF CURVES
THEN BUILD SURFACE FOR THE NEXT SET OF CURVES BY MAINTAINING THE CONTINUITY
Repeat the procedure for building all surfaces required
ADD REQUIRED DETAILS LIKE HEADLIGHT SLOTS AND FRONT AIR INTAKE
ADD FILLTES
Description :
The Below Mentioned tools are used to complete the project.
>CV Curves
The CV Curves are used to make the boundary for the surfaces and these curves are the basement for our model.
How to build a curve: to build a curve we have to select the CV Curve tool from the pallet and then at first we have to specify the first point of our required, then mention the next CV points to get a curve as required.
>Curve Edit
To edit the CV Curves we will use the Curve Edit Tools Like Duplicate, ADD points to change the curve as required.
>Align
Align is the Tool that will help to maintain the continuity between the curves and surfaces.
IF our Cuves are having sharp edges at the joint of two curves we can't achieve the continuity, so we will give the connectivity at the joint so it will maintain the flow of curves as positional(G0), Tangent(G1), Circular(G2, G3)
>Extend
To Adjust the length of the curve we can use the Extend tool.
First, select the curve and select the endpoint, then the arrow mark will be visible, hold and drag the arrow to adjust the curve length.
>Duplicate Curves
To Get curves at the end of the surface Build using rail and skin.
Select the surface end border required and click enter then a Curve will be built at the position.
>Blend
Used to join two curves smoothly
Selec the end CV's of two curves one by one then a blend will form between them.
By using the edit tool we can adjust the tightness and direction of the bend curve
>Surface
>Skin -Need two curves
>Rail -Need rail and generation
>Square-need 4 Boundary curves
>Project
Selec the surfaces on which we need projection, then select the curves which need to be projected. (we need to be in a certain plane in which direction we need to project the curves)
>Trim
Select the surface and then select the area required and click enter to trim
>Untrim
Select the surface and enter to Untrim
>Intersection
To intersect Select both objects and give enter to intersect
>Coninuity Check
Evaluate>Surface Continuity Tool> select the joint of the surface to check the continuity.
>Fillet
Surface Edit>Surface Fillet Tool>Select the two surfaces one by one then click enter to give surface fillet
>Divide
Select the surface which need to divide and select the refacrance curve the click enter to divide.
Procedure:
First select the plane in which we need to start building curves and then edit the curve to match with the blueprints, Then build surface for the curves and, next move to the next partition and build curves then build surface by maintaining the continuity.
Then continue the procedure to build all the surcafes, and add the details to it and add filltes at corners to get smooth finish
Conclution:
As the continuity between the surfaces is important and essential we build the surfaces one by one maintaining the continuity.
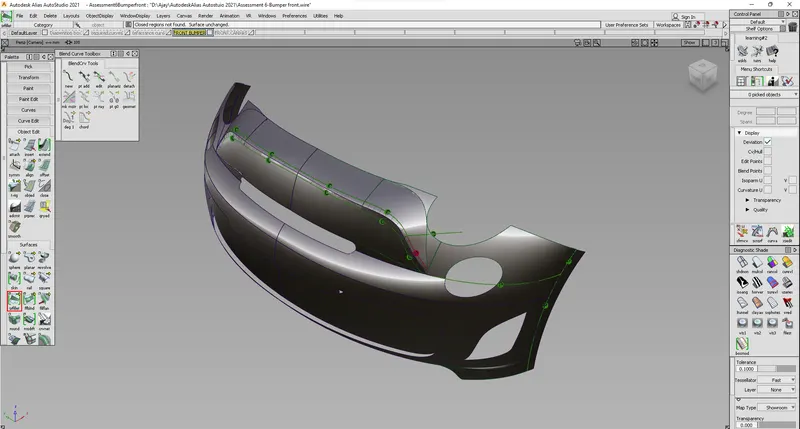
FRONT BUMPER ISO
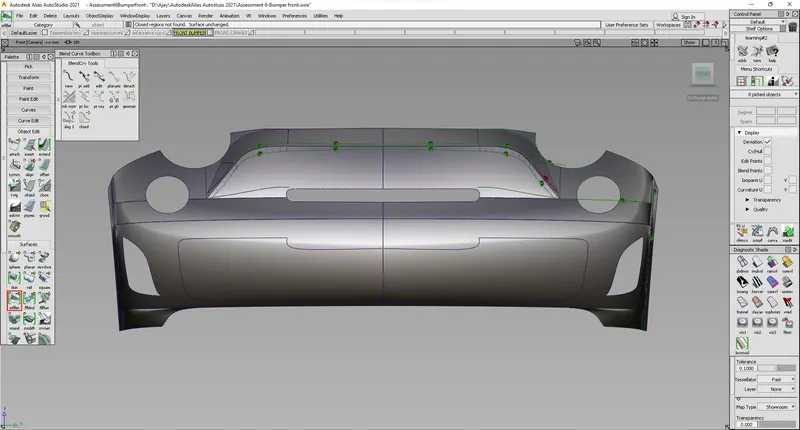
FRONT BUMPER FRONT
FRONT BUMPER LEFT
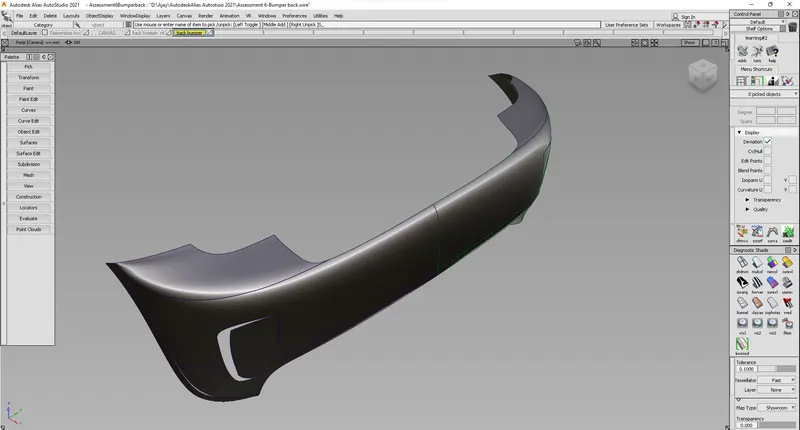
BACK BUMPER ISO
BACK BUMPER BACK
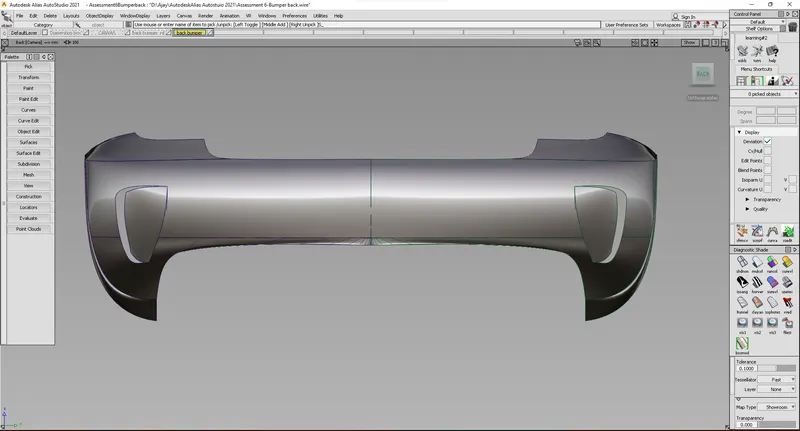
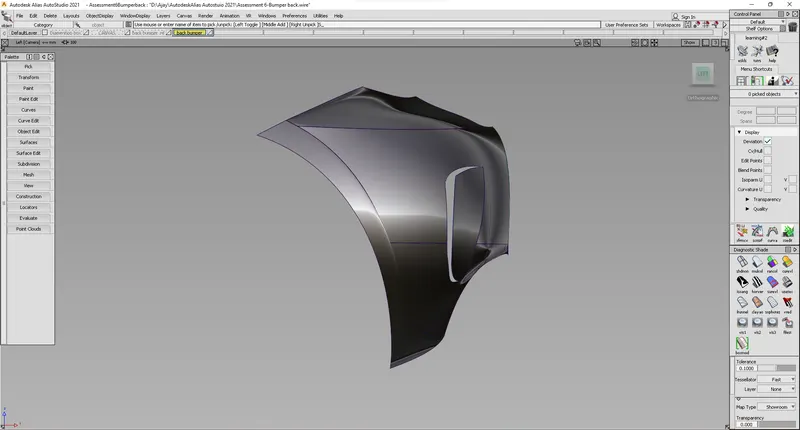
BACK BUMPER LEFT