Advanced Sheet Metal Design Using NX Cad Challenge_7_ Metal bracket-II
TITLE: SHEET METAL MODELLING OF A METAL BRACKET DESIGN
OBJECTIVE:
The objective of this design is to create a Sheet metal Component of a Metal Bracket Design. In this We are Using NX Siemens as a software to create a Sheet metal component by using different commands having a easy interface.
INTRODUCTION:
NX Siemens is software used for the modeling , aerospace , simulation, sheet metal. It is very well known for the User friendly environment and a user friendly tools which makes the work more easy and accurate . We will design the Bracket model in the sheet Metal modelling.
Sheet metal is one of the fundamental process in metal working in which sheet metals are converted to bends for the required purpose. Sheet Metal Modelling is very much necessary in the most of the industries like Aerospace, Utensils, and covering Cases for all electrical components.Sheet metal Modelling now a day had become more easy due to the Use of different software .In this we are also creating a Sheet Metal Bracket Design using NX Siemens.
DESIGN METHODOLOGY:
To create a Sheet metal Modelling of a Bracket By Using different process steps which Shown in the Below Flow Chart.
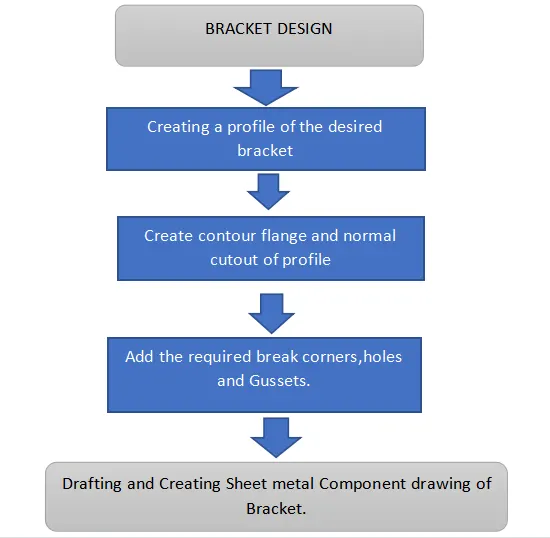
As shown in the Flow chart we will on different stages for the creation of the required sheet metal of Bracket and after the completion of the designing stage we will go for drafting phase and create the Flat pattern for drafting which will have the details of the bending of the component. In Nx there are so many tools which are used for making sheet metal designing workflow so easy but in this we will use a set of tools to create the final sheet metal model. Some of the used tools are listed below.
SHEET METAL TOOL FEATURES:
TAB: This tool is used to create a base tab with uniform thickness by create a sketch and adding with this is referred as base an we can create the other tab secondary for the different sheet metal design.
FLANGE: This tool is used to create a tab like attachments which makes it with the base tab and specifying bend radius and the length of the flange and required angles.
DIMPLE: This tool is used to crate a another layer accommodated with the bend radius on the tabs and flanges which is like stamping or will lift the surface by creating a sketch on the required surface of the required face of the tab. Dimple dies are used to add strength and rigidity while lightening sheet metal panels
BEAD: This tool is used to create a bead operation which is nothing but it will make a hollow flow operation nothing like a dimple creating only on the line of curve which will select. Draw beads are used to control the flow of sheet metal into the die cavity during stretch-draw forming of large panels. They prevent wrinkling in formed panels, reduce the blank holder force, and minimize the blank size needed to make a part.
UNBEND: This tool is used to unbend the flanges in to sheet metal operation sheet for layouts and this is doing by simply selecting the bend which we want to unbend.
REBEND: This tool is used to rebend the shape of the bend which is unbend and made in to flat shape after the operations like drawn cutout are other . The NX will now the save the bend and again the shape of the bend is regained
CLOSED CORNER: This tool is used to create a closed two different bends and close them and making closed and having relief and different circular or oval and different corners.
THREE BEND CORNER: This tool is used to create a closed bend of three different bends and making closed and having relief and different corners.
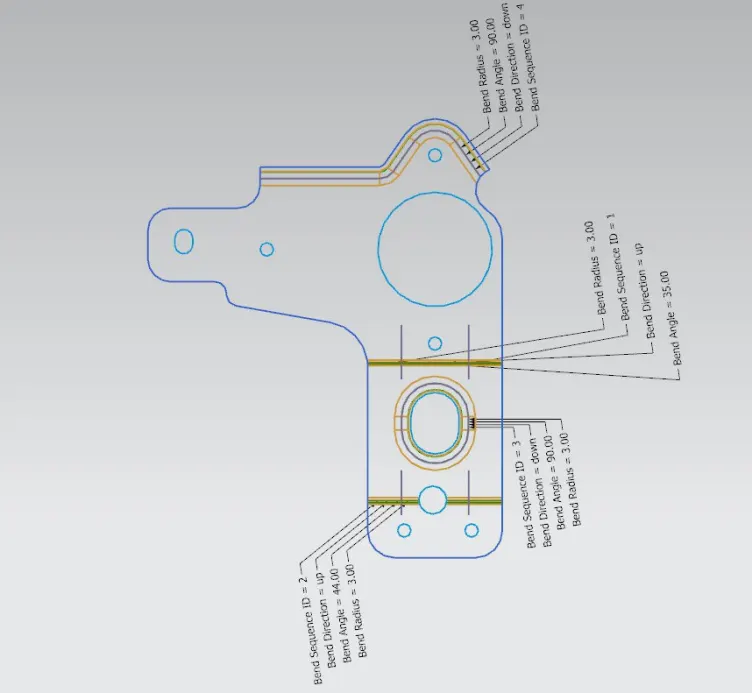
FLAT PATTERN: This tool is used to create a flat pattern for drafting and sheet metal operations and for metal working purposes. We can create the flat pattern by considering the base tab surfaces.
DRAFT: This tool is used to create a draft for and make a document layouts of the required views and bends of the sheet metal we prepared in the sheet metal window.
BREAK CORNER: This tool is very necessary in the sheet metal operations to create a best cutting operation as it removes the pointed edges or corners of the sheet metal by making rounded corners by the specified radius.
HOLE: This tool is used to create different types of holes like screwed holes and of different size by selecting the features of the hole.
MIRROR BODY: This tool is used to create a Mirror of the selected body by taking the reference of the any plan as we specify.
HEM EDGE: This tool is used to create Hem edge by selecting the edge of the flange and giving the details of the loop and distance of the Hem.
NORMAL CUTOUT: This tool is used to create a cutout which is normal after creating a sketch we will select the curve for the required cut out.
DATUM PLANE: This tool is used to create a user specific plane in which we can draw sketch and use the plan for reference.
SHEET METAL FROM SOLID: This tool is used to create a sheet metal over the solid body model with the desired thickness by selecting the surfaces and the bends.
GUSSET: This tool is used to create a kind of embossing given to a sheet metal to increase its strength.
SKETCH TOOLS IN SHEET METAL:
LINE: This is tool feature which is used to create a line by specifying the coordinated and angles or by selecting the different points on the plane.
RECTANGLE: This is a tool feature which is used to create a rectangle with different ways by three point , or by corner method etc ..after that we can specify the dimensions.
POINT: This tool is used to create a point at the require distance or angle and highlighting it for the further drawings and features on the sheet metal.
CIRCLE: This tool is used to create the circle by consider the point by using the diameter and radius of the circle.
MIRROR FEATURE: This tool is used to create a mirror of the features by selecting the features and sketches of the feature . we have to make sure that we select the sketch of the feature to mirror.
STUDIO SPLINE: This is tool which used to create a spline by taking the reference of points and the tool will automatically create a curve and we have to select points it by clockwise or anticlockwise
MOVE CURVE: This tool is used to move the curve or shift the curve to distance and to rotate the curve by specifying the angle and distance by specifying a center point to move the curve.
DESIGN CONSIDERATIONS FOR SHEET METAL PARTS:
- Wall Thickness:
While designing any geometry, it is always a good idea to maintain uniform wall thickness throughout the body. Geometry with more than one wall thickness requires sheets of different thicknesses, which requires reorientation and alignment of parts that consume time. Parts with different thicknesses will have different bend parameters which may result in the inaccuracy of the desired shape.
- Bend Radii:
To avoid any fractures or distortions, it is necessary to keep inside bend radius at least equal to sheets thickness. The bend radii should be maintained consistently throughout the part as keeping the same bend radii across all bends makes the part cost effective. Whenever making a bend, it is always preferred to make bends in a single plane as this will avoid any additional reorientation while manufacturing that part.
- Orientation of Holes & Slots:
Keep holes and slots diameter at least as large as sheet metal thickness. Holes diameter less than the sheet metal thickness results in higher punch loading, longer burnish in the holes and excessive burr. If the hole gets too close to an edge a bulge can appear near an edge. Spacing between holes should be at least two times the sheet metal thickness.
- K Factor:
The K Factor in sheet metal working is the ratio of the neutral axis to the material thickness. K Factor changes its value with respect to physical properties and thickness of materials. Generic values for K Factor varies from 0.3 to 0.5.
- Bend Allowance:
The Bend Allowance is defined as the material to add to the actual leg lengths of the part to develop a flat pattern. When the sheet metal is put through the process of bending the metal around, the bend is deformed and stretched. This elongation can be calculated from the below formula of which Bend Allowance is a function of Material Thickness (MT), the Bend Angle (B<), the Inside Radius (IR), and the K Factor (K):
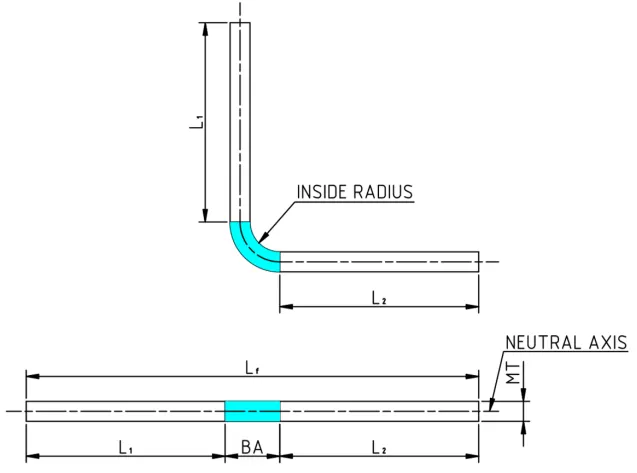

To find the total flatten length, we can use the formula given below:
Lf = L1 + L2 + BA
Where, Lf = flatten length, L1 = Flange length after bend of side 1, L2 = Flange length after bend of side 2, BA = Bending Allowance
You can also use the above formula to back calculate the exact value of K factor by measuring the flat length (Lf) and then bending it to a known bend angle (B<), inside radius (IR) and measuring flange length L1 and L2. This data can then be inserted in the bend allowance equation to calculate the K factor for your specific material and thickness.
- Bend Deduction:
The Bend Deduction is defined as the material that needs to to be removed from the total length of your flanges to arrive at the flat pattern. When trying to develop a flat pattern, the deduction has to be subtracted to get its overall length as show in the below image. The Bend deduction can be calculated using the below equation.
Where, Sheet Metal Thickness (MT), Bend Angle (B<), Inside Radius (IR), KFactor (K)
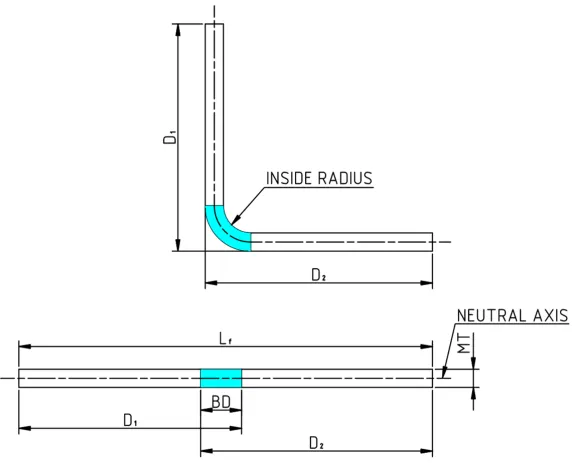

Also, the below equation can then be used to determine the flat pattern length.
Lf = D1 + D2 + BD
Where, Lf = Flatten length, D1 = Flange length with bend side 1, D2 = Flange length with bend side 2, BD = Bending Deduction
- Bend Reliefs:
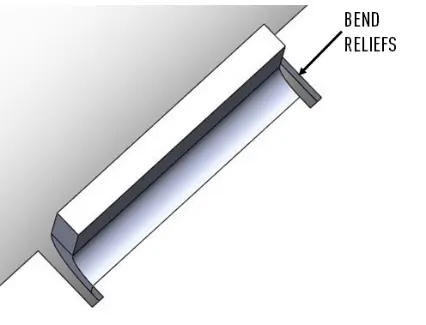
Bend reliefs are implemented where a bend extends on an edge. The relief notches are added to prevent tearing and easy bending of the part. Relief helps to control unwanted the sheet metal deformation. Bend reliefs should be at least same as the thickness of sheet metal in terms of width and should be equal to or greater than inside bend radius in terms of depth. Bend reliefs can be rectangular, tear and obround.
- Some Additional Features:
- Hems are folds at the end of a part to create a rounded edge and it is recommended to have the minimum inside diameter is same as the material thickness and the hem return length should be minimum four times the sheet thickness.
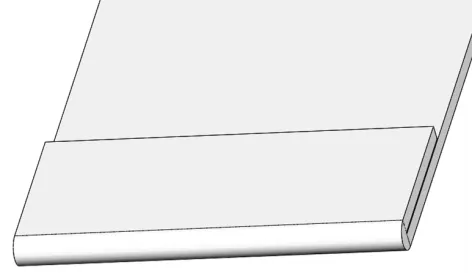
- Notches must be at least same as the sheet metal thickness or 0.04" (1mm), whichever is greater and can be no longer than 5 times its width.
- Tabs must be at least 2 times the sheets metal thickness or 0.126” (3.2mm), whichever is greater and can be no longer than 5 times its width.
- Curls dimension outside radius must be at least twice the material’s thickness.
- When Sheet metal parts have sharp corners, try designing a fillet half of the material thickness.
- Countersinks must be separated from each other by a distance of at least 8 x sheet metal thickness, 4 x sheet metal thickness from an edge and 3 x sheet metal thickness from a bend.
PROCEDURE FOR CREATING THE METAL BRACKET BY USING ABOVE LISTED TOOLS:
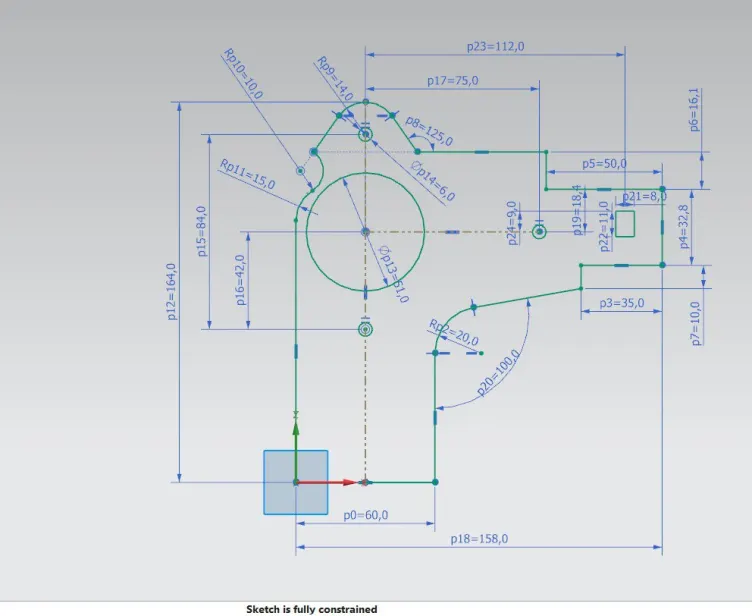
- Create a sketch in YZ plane as shown below.
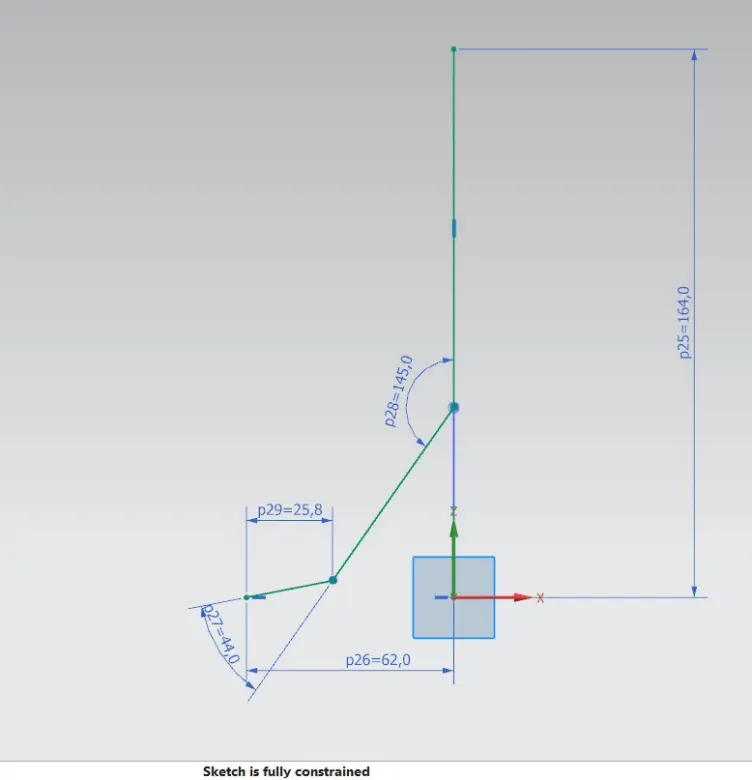
- Create a sketch in XZ plane as shown below.
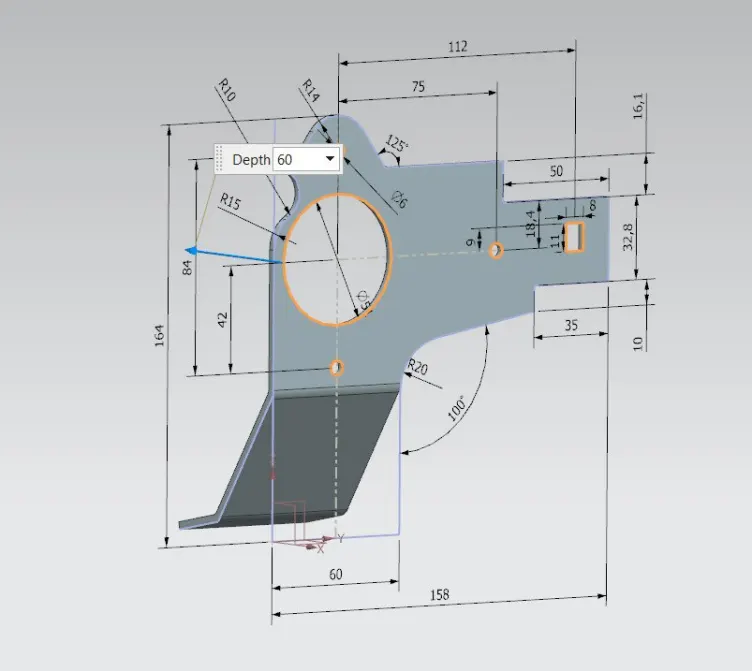
- Using Contour flange create a extrusion of sketch-2 of thickness 3mm and using normal cutout cut the extrusion using sketch-1 as shown below.
- Apply break corners to the sharp edges and create holes as shown below.
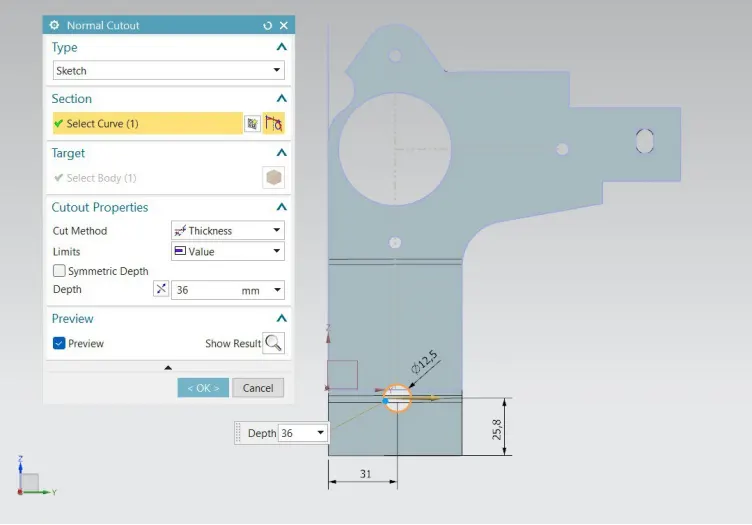
- Create an advanced flange as shown below.
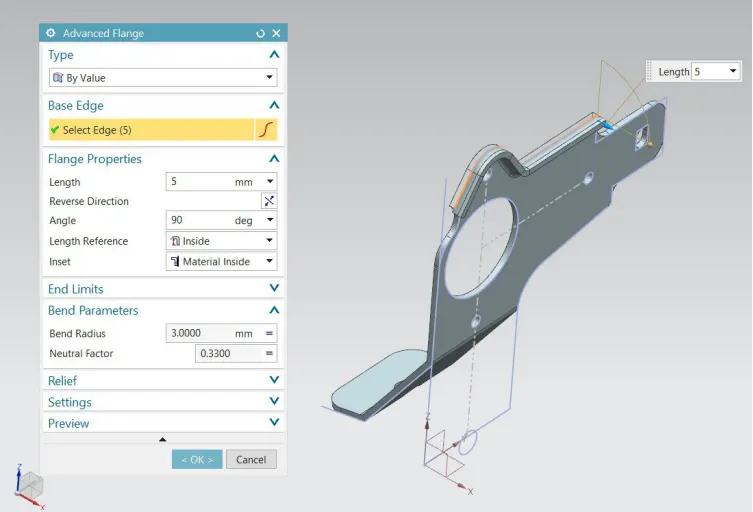
- Create more holes as shown below.
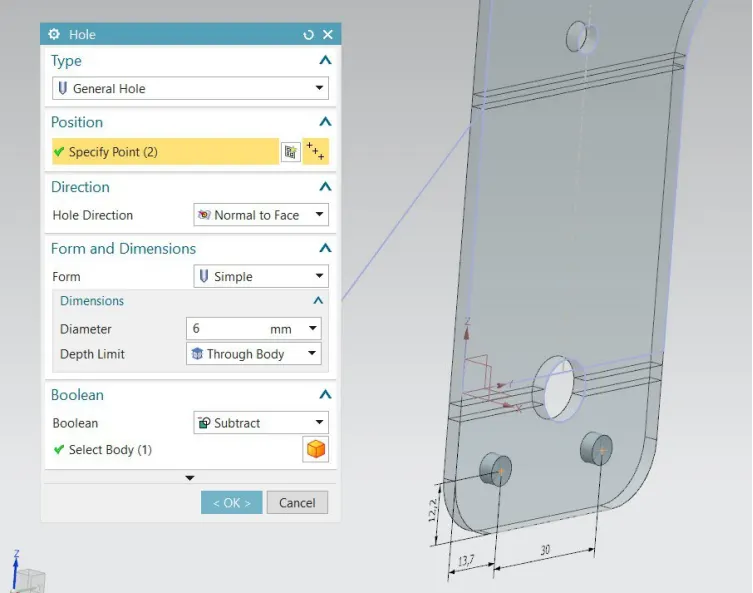
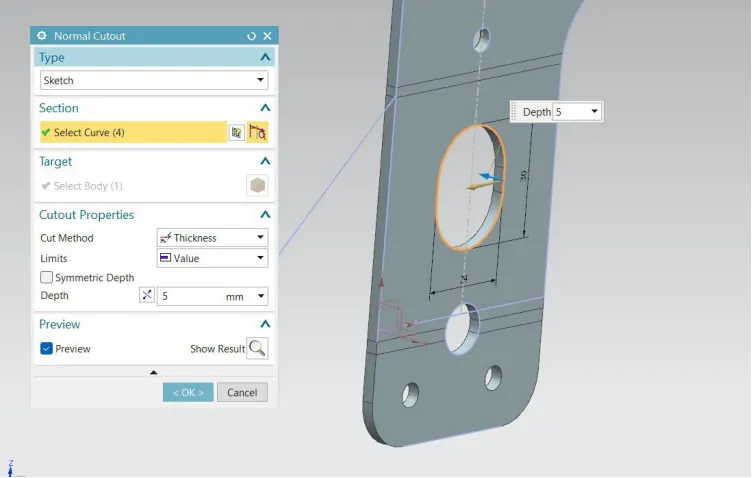
- Create an advanced flange as shown below.
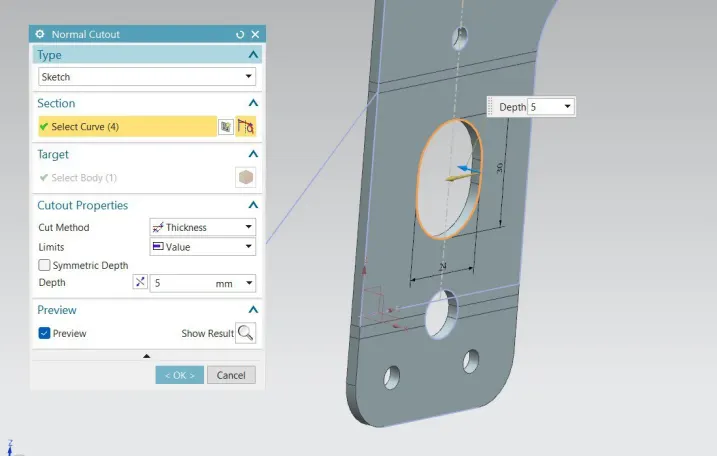
- Create gussets as shown below.
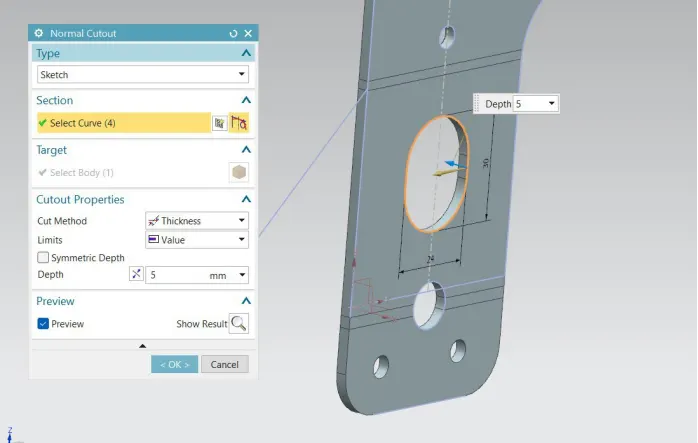
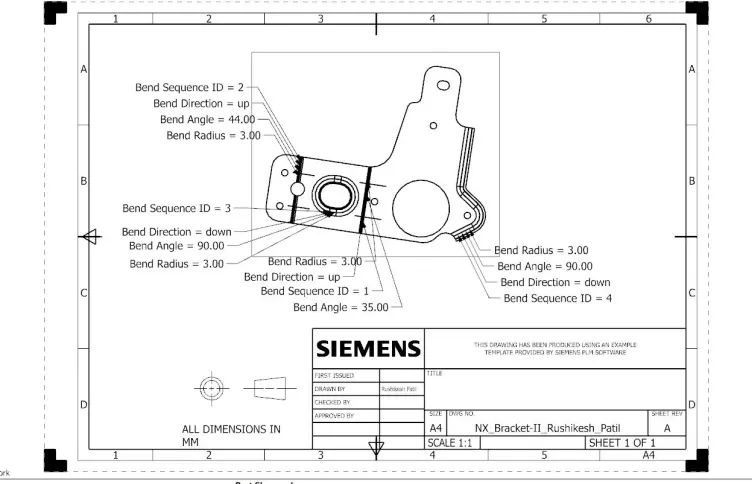
- Create a flattened pattern of the design and create a draft of it.
DIFFERENT VIEWS OF DESIGN:
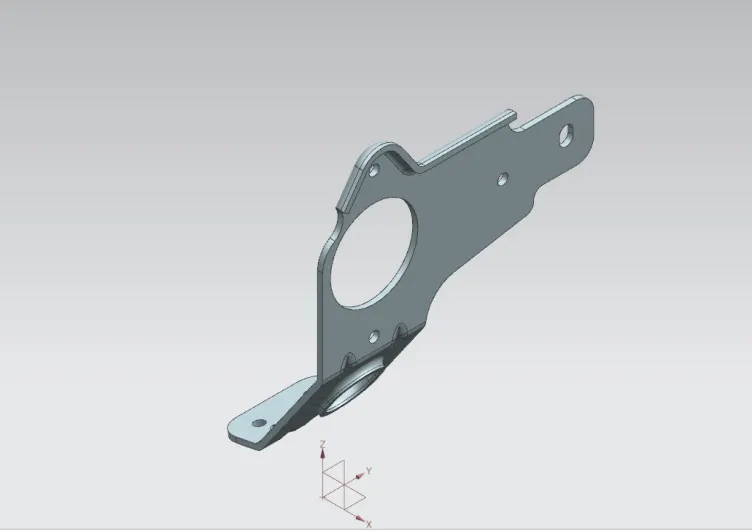
ISOMETRIC VIEW:
FRONT VIEW:
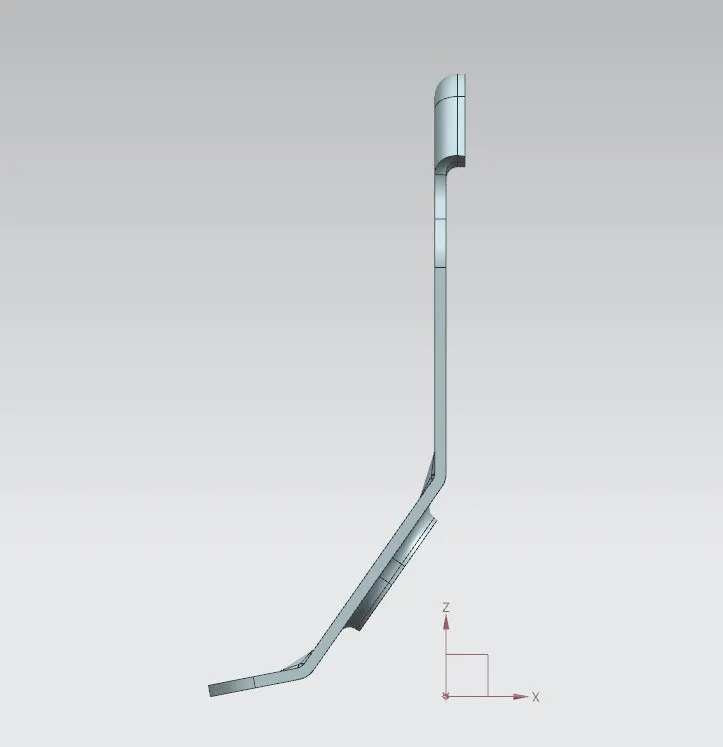
RIGHT VIEW:
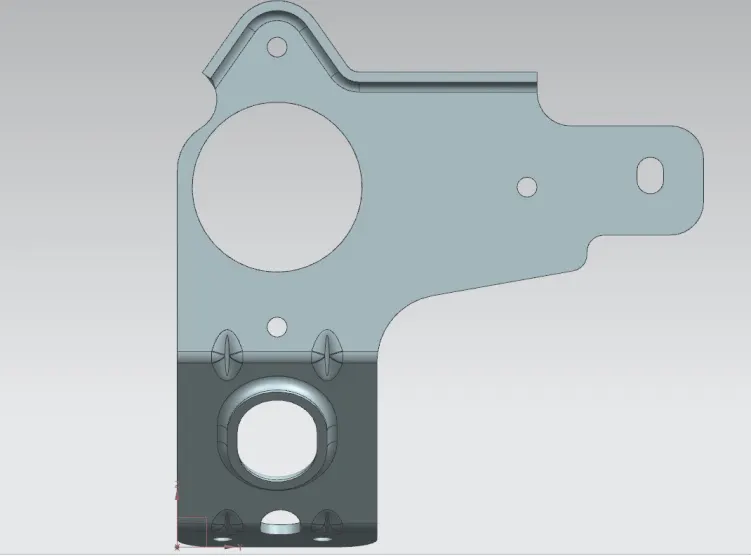
LEFT VIEW:
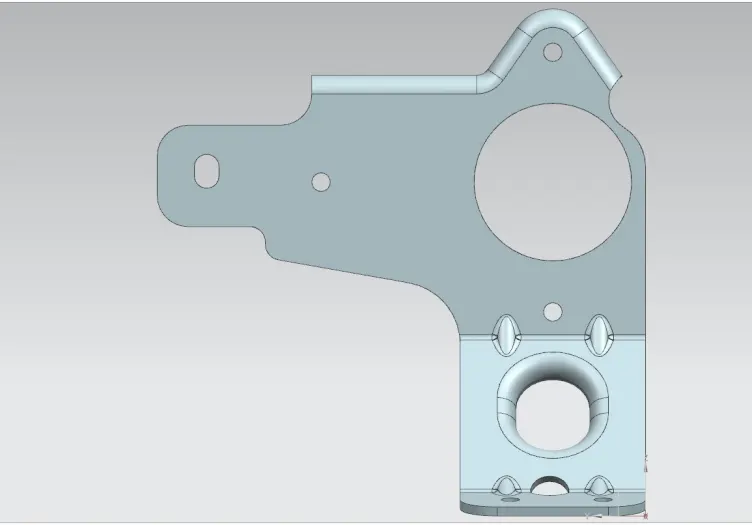
TOP VIEW:
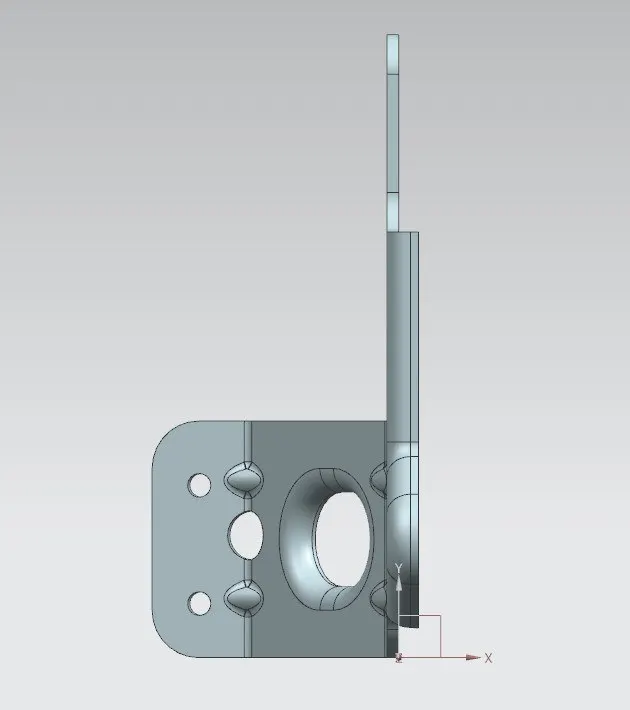
DRAWING:
CONCLUSION:
In this Metal Bracket design we have made use of the different sheet metal tools and feature knowledge to create the desired modelling for the sheet metal operation.