Advanced Sheet Metal Design Using NX Cad Challenge_7_ Metal bracket-II
DESIGN OF A METAL BRACKET USING NX
OBJECTIVE
To design a metal bracket using sheet metal features in NX.
INTRODUCTION
Software
Formerly known as Unigraphics, NX is an advanced CAD/CAM/CAE owned by Siemens PLM Software. It utilizes a parasolid geometric modeling kernel and is mostly used when advanced modeling features are required in a product. The ownership of the software belongs to the American Software company, Siemens (owned since 2007).
The NX 12 version has been used in this project.
Sheet metal
One of the fundamental forms used in metalworking, sheet metals are thin pieces which can be cut and bent into a variety of shapes. Thickness can vary from 0.5mm to 6mm. This process has been employed in this project to ensure a realistic approach in designing the part.
Target Model
The target model chosen for this project is a metal bracket. Usually used for mounting components, brackets can take a variety of sizes depending on the load to be carried.
DESIGN METHODOLOGY
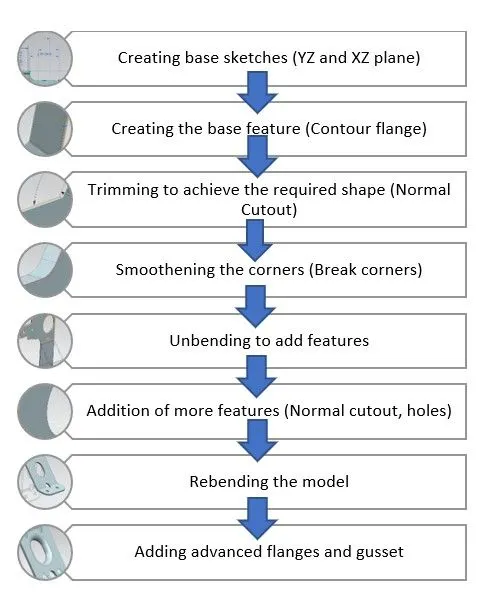
Process flowchart
Tools and features used
- Sketch: Line, Circle, Point, Arc, Rectangle, Trim, Profile Curve
- Sheet Metal (Bend): Contour Flange, Advanced Flange
- Corner: Break Corners
- Punch: Gusset
- Feature: Normal Cutout, Hole
- Form: Unbend, Rebend
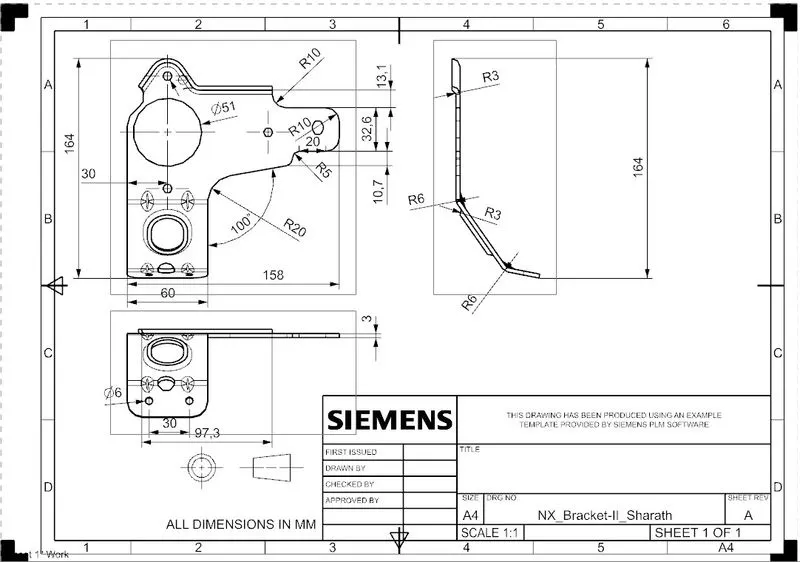
- Drawing: Base View
DESIGN PROCESS
Units
All dimensions associated with this project are in Millimeters.
Description of Processes
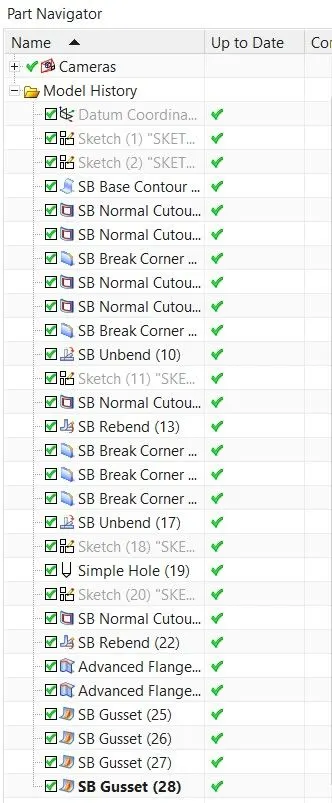
- The design approach was to create a sketch on the YZ plane, outlining the profile of the model and then trimming a base feature based on the front view using it.
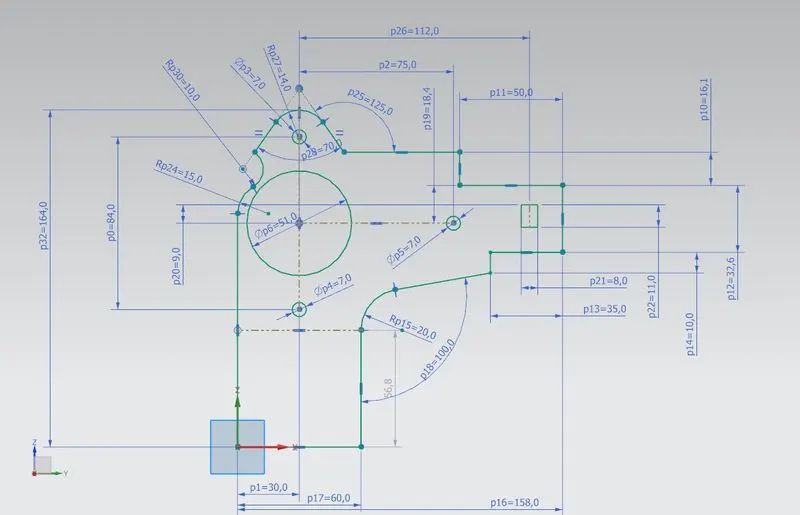
- A sketch detailing the profile of the metal bracket (viewed from right) was first drawn on the YZ plane. Dimensions for the same were taken from an existing 2D drawing with approximations and geometric constraints applied wherever necessary.
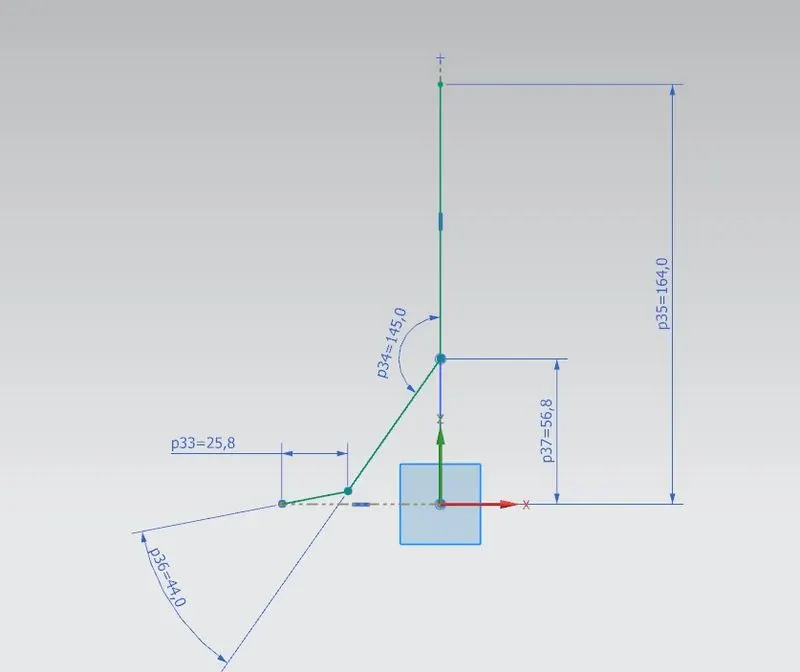
- To create a base feature, a base sketch detailing the front view of the model was drawn on the XZ plane. The vertical dimensions for this sketch was matched with the previous sketch (Side view) to ensure proper dimensions in the final model.
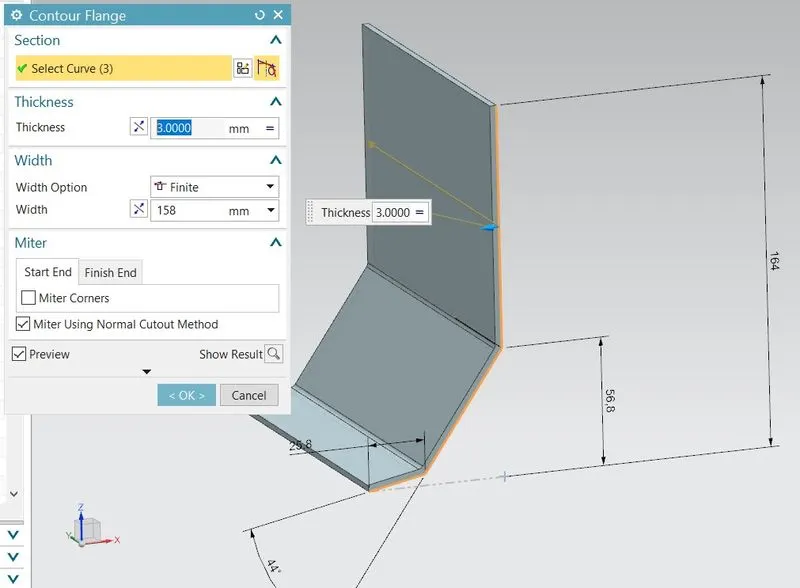
- Using this sketch, a base feature was created with the aid of the Contour Flange feature under the Bend features in Sheet metal application ribbon. This command, when used, sweeps a profile along a specified magnitude and direction to create a base feature.
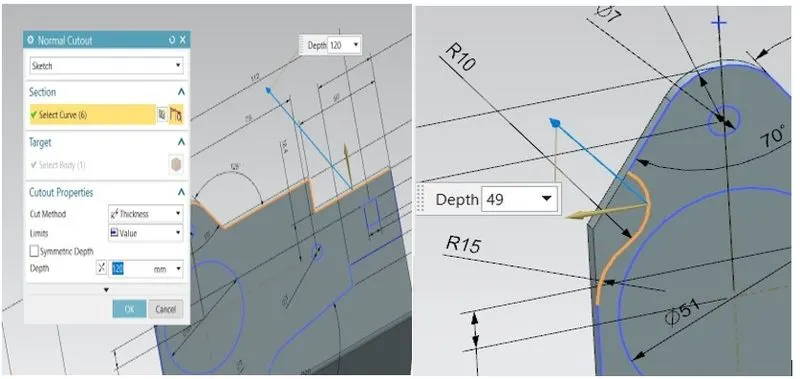
- To create the proper profile for the bracket, some material needed to be removed from the flange. This was done using the Normal Cutout feature which referenced the sketch on the YZ plane to remove material according to user defined curve selection. This command was used twice to create the top profile of the bracket.
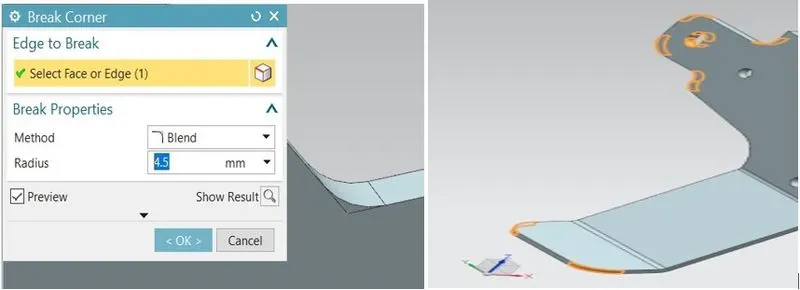
- Normal cutouts often result in sharp corners for models. From a design point of view, sharp corners should be rounded off using fillets or chamfers to provide better stability for the corner. To achieve this design modification, the Break Corner feature was used. This feature was used at multiple stages in this project. To avoid repetition the succeeding break corner feature usages has been avoided in this report.
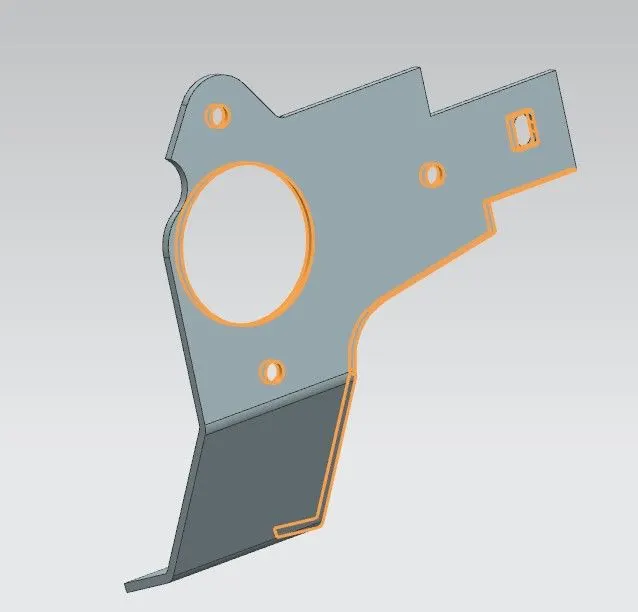
- The bottom profile of the bracket and the hole cutouts were modelled using the Normal cutout which referenced the side plane sketch curves to achieve the result.
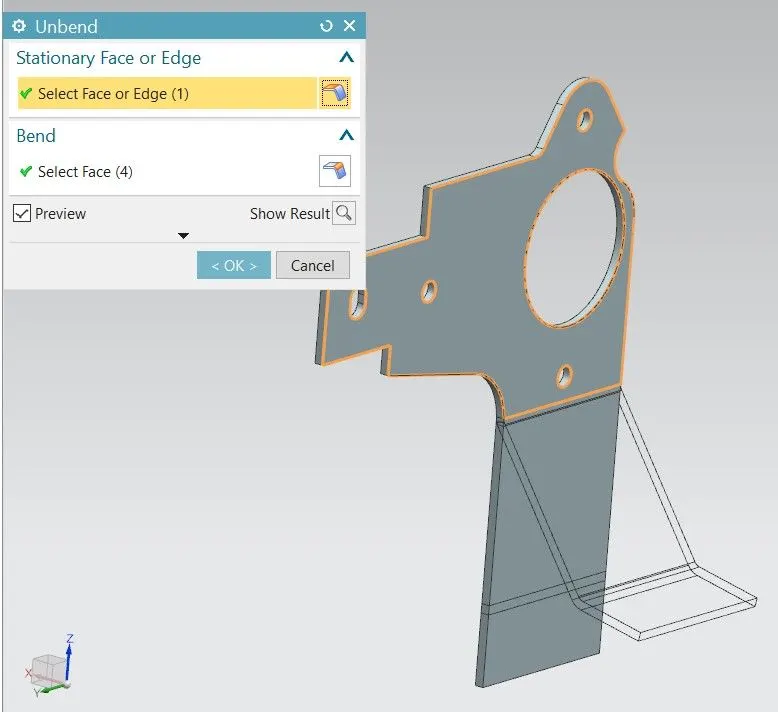
- To create further features, some of the faces of the model, being bent, posed a hindrance to select as a sketch plane. This was rectified using the Unbend feature under the form tools of sheet metal application, which referenced a planar face and removed bends from all non planar faces (adjacent to the bend) to make the model flat.
- A circular sketch was drawn at the bottom bend face (now flat) and a Normal cutout was applied to the face.
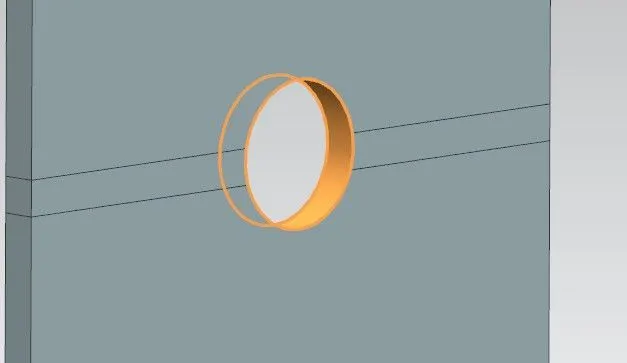
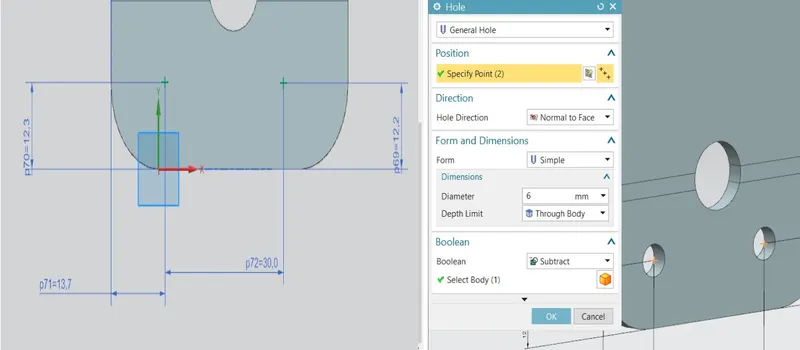
- Two sketch points were created on the bottom area of the leg to add simple holes using the Hole feature under the design features in the application.
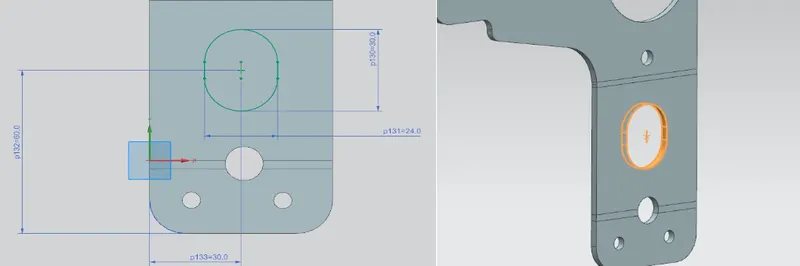
- Another sketch was created on the middle area of the leg to add a Normal Cutout on it.
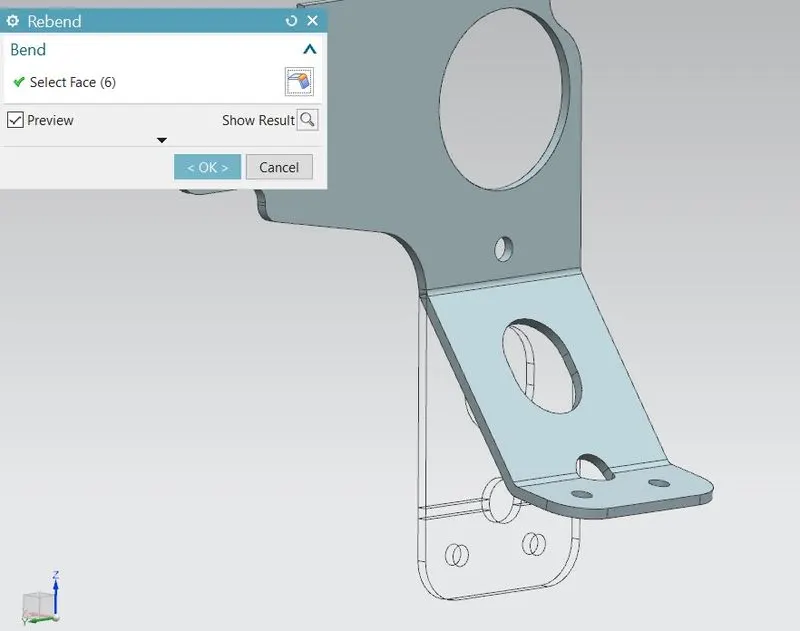
- Once the necessary modifications were added to the flattened faces, the model was reverted back to its original state (with bends) using the Rebend feature which referenced bend corners to restore the previous configuration.
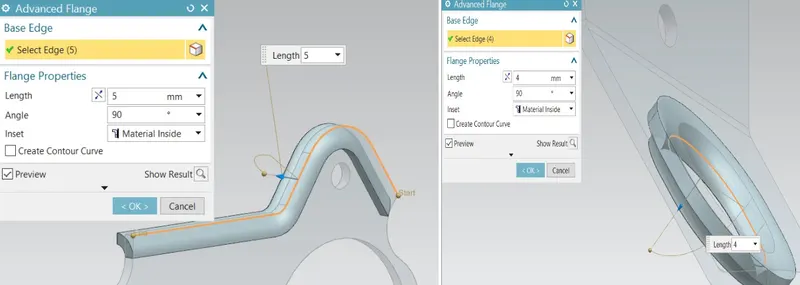
- An Advanced Flange was added along the top edge and around the slot shaped cutout at the bottom leg by accessing the feature under advanced bend commands in the sheet metal application. The advanced flange, unlike a normal flange, had no planar face condition defining it, thereby making it a valuable tool for flange design in curved parts like a bracket.
- Gussets were added to the curved faces on the bottom leg using the Gusset feature from the punch tools in the sheet metal application. They are a stamped feature used to reinforce bends. This command, referenced a bend face along with the position of a plane to create a gusset symmetric to that plane. The profile for the gusset was chosen as an automatic profile to match the bend.
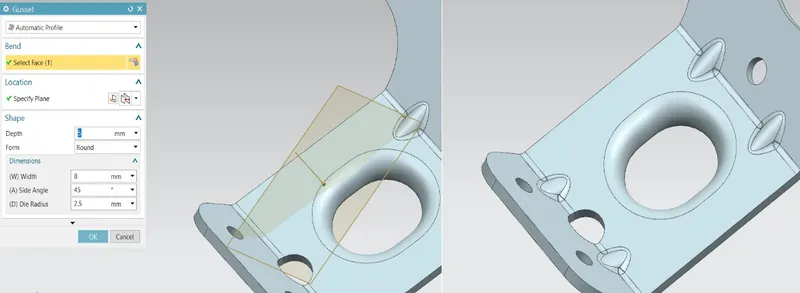
- With the addition of gussets, the model for the metal bracket was complete.
STANDARD VIEWS
Top view
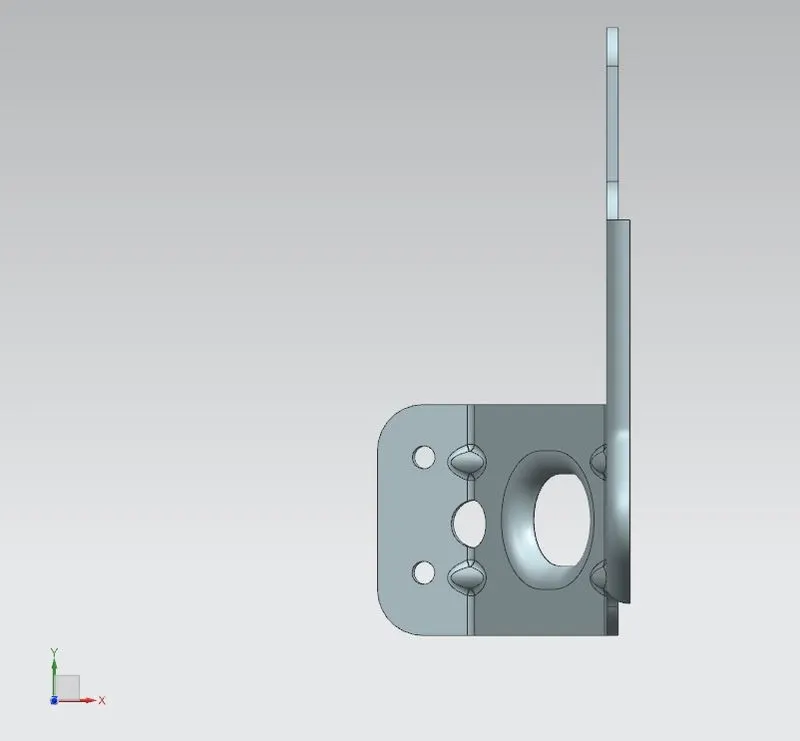
Front View
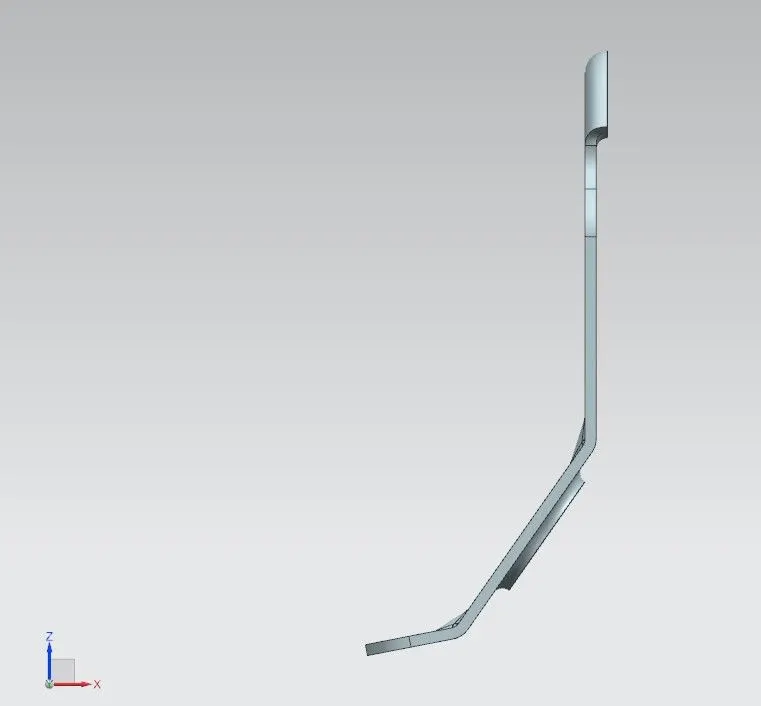
Side View (Right)
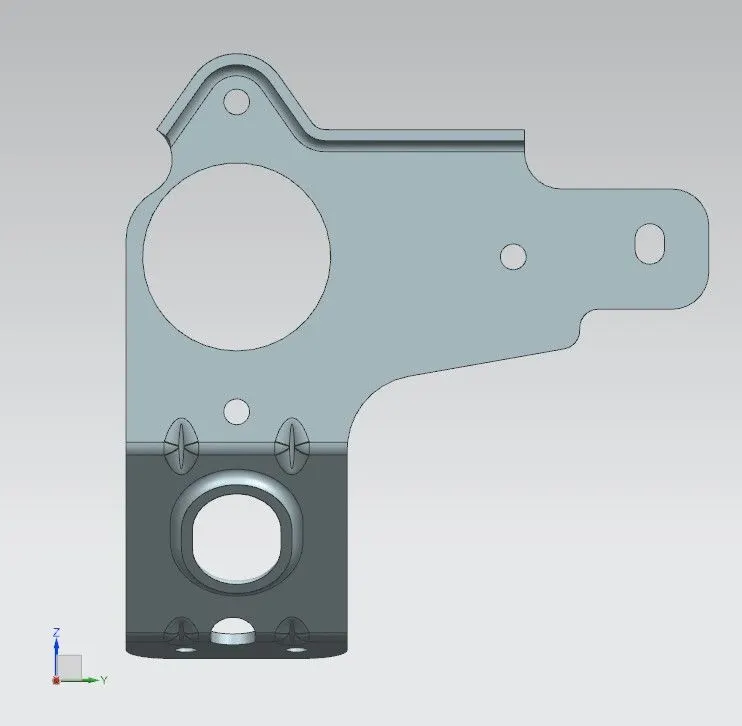
Side View (Left)
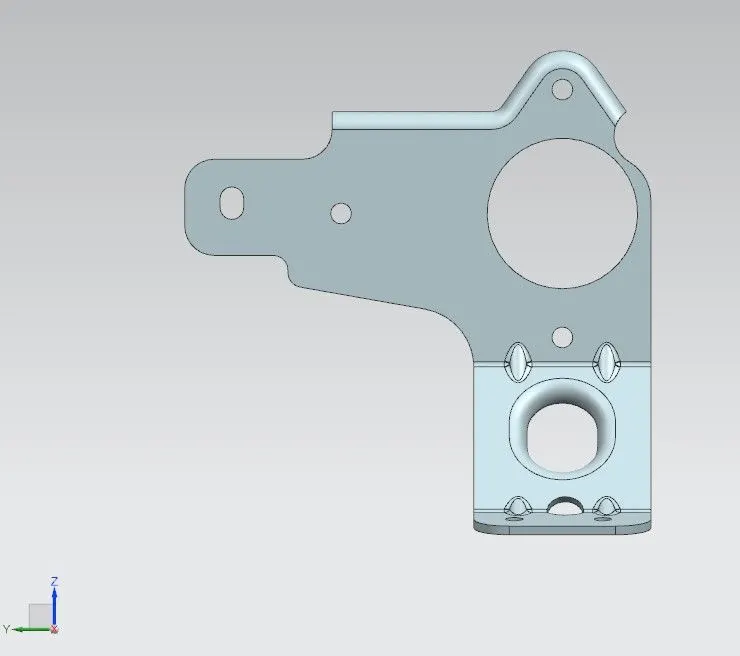
Isometric View
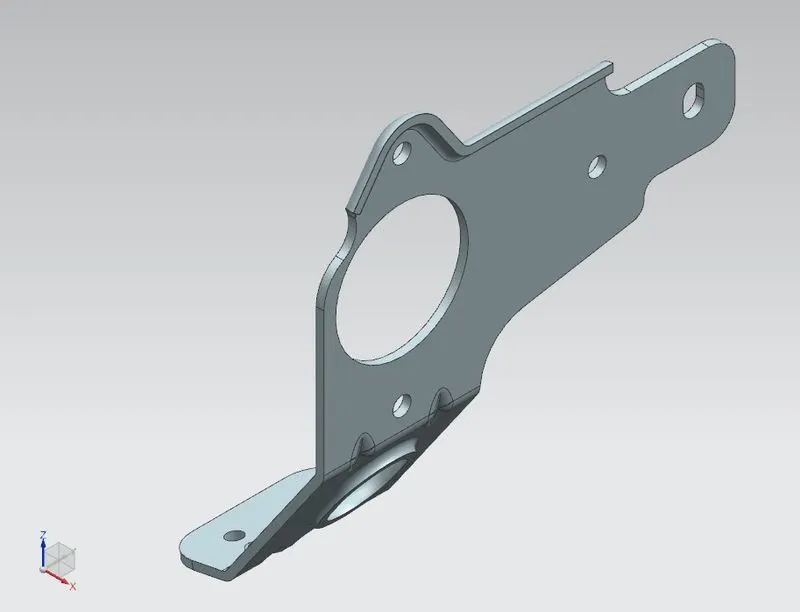
FEATURE TREE
DETAILED DRAWING
CONCLUSION
With the help of the simple and complex modelling tools under the sheet metal application in NX, the metal bracket model was created successfully. This project imparted a great deal of knowledge regarding the complex modelling capabilities of the software.