Analyzing Results of a Centrifugal Pump Simulation in SolidWorks
Learn how to analyze results from a centrifugal pump CFD simulation in SolidWorks. This guide covers key techniques such as checking convergence, visualizing flow trajectories, and conducting parametric studies. Enhance your CFD basics with Skill-Lync's CFD Course and boost your skills through practical projects in Skill-Lync's Full Course.

Welcome back to our CFD Simulation Using SolidWorks series! In this blog, we will analyze the results of the centrifugal pump simulation that we set up in the previous post. After running the simulation for 500 iterations, we'll focus on how to interpret the output, check for convergence, and understand the flow patterns within the pump. This is a critical step in any CFD analysis software workflow, and it helps ensure accurate and reliable results.
Let’s dive into the details of how to effectively use CFD software to validate your simulation results, along with some tips on conducting parametric studies for optimizing pump performance.
Step 1: Checking for Convergence
After the 500 iterations, we are primarily looking at the total pressure at the outlet. As the simulation progresses, the pressure values start to stabilize, indicating that the solution has converged.
One crucial lesson here is to not solely rely on the solver’s convergence criteria. While CFD software might stop the simulation when it determines convergence based on its internal checks, these criteria can sometimes be misleading. Always verify by observing the behavior of important physical quantities, such as pressure or velocity, to ensure they stabilize over time.
Tip: Monitor critical variables to see if they are flatlining, as this shows they have reached a steady state. This is a good practice for any CFD analysis.
Step 2: Addressing Goal Convergence Issues
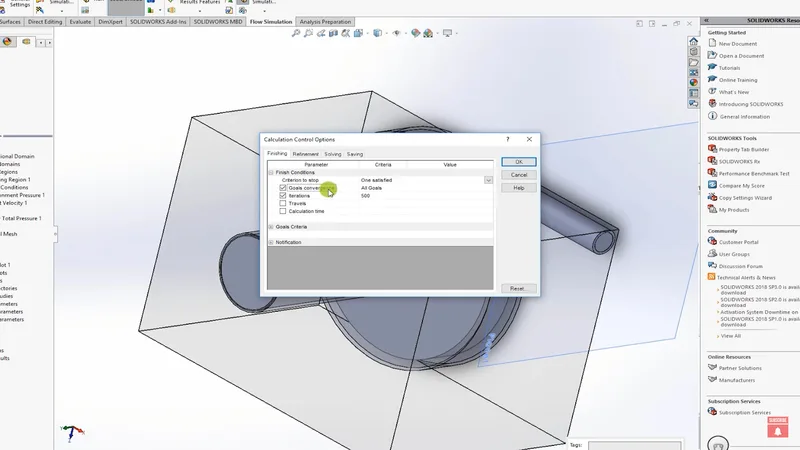
During my run, I encountered a common issue with goal convergence. If you notice that your simulation stops prematurely (e.g., at 173 iterations), it's likely because the goal convergence box is checked. This can cause the solver to terminate the simulation before the desired iteration count is reached. To avoid this:
- Go to Calculation Control Options: Uncheck the goal convergence option to prevent the simulation from stopping early.
- Re-run the Simulation: After making this adjustment, run the simulation until the full 500 iterations are complete.
Step 3: Visualizing Flow Trajectories
With the simulation results in hand, the next step is to visualize how the flow moves through the pump. Using flow trajectories in SolidWorks flow simulation, we can gain valuable insights into how the fluid behaves inside the pump.
- Select Intake and Outlet Phases: Start by selecting the intake and outlet phases and generate flow trajectories using around 200 points.
- Hide the Geometry: To get a clearer view of the flow, hide the pump geometry and computational domain.
- Play the Animation: When you animate the flow, you’ll notice how the fluid spins and gets sucked into the low-pressure region created by the impeller, causing high-velocity flow. The fluid then exits at higher pressure.
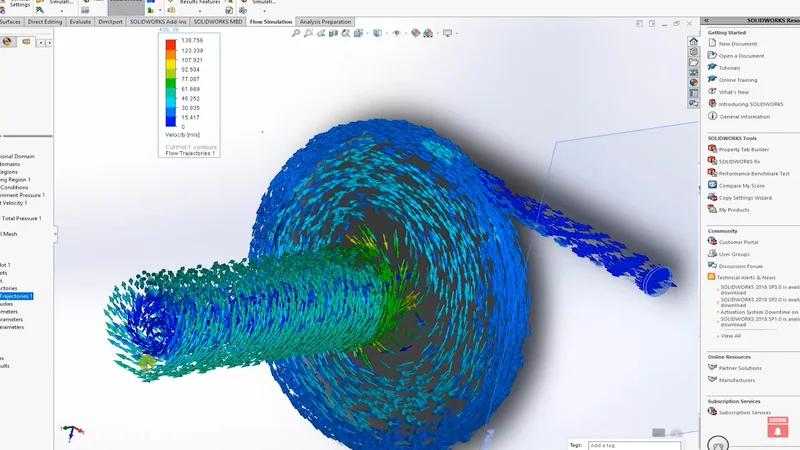
This is a perfect demonstration of the moving reference frame (MRF) approach, which allows us to simulate the effects of rotation without physically moving the geometry.
Observation: Some recirculation is observed in this simulation, indicating suboptimal pump design. This is common in a mockup geometry like ours, where the clearances between the impeller and casing are not ideal.
Step 4: Conducting a Parametric Study
Now that the base simulation is complete, let’s move on to performing a parametric study. This allows us to evaluate how changes in boundary conditions affect the pump’s performance.
- Set Up a Parametric Study: Right-click on the simulation and select New Parametric Study.
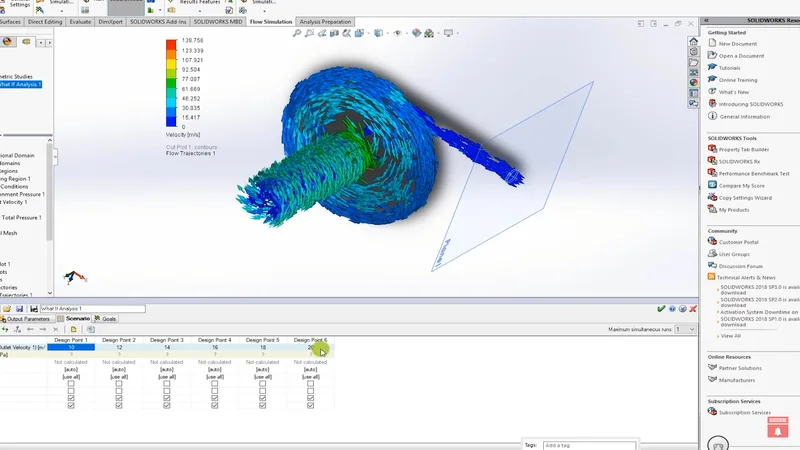
- Adjust Boundary Conditions: For this study, we will vary the outlet velocity. Start with a velocity of 10 m/s and increase it to 30 m/s over five different values.
- Output Parameter: Select the total pressure at the outlet as the main output variable.
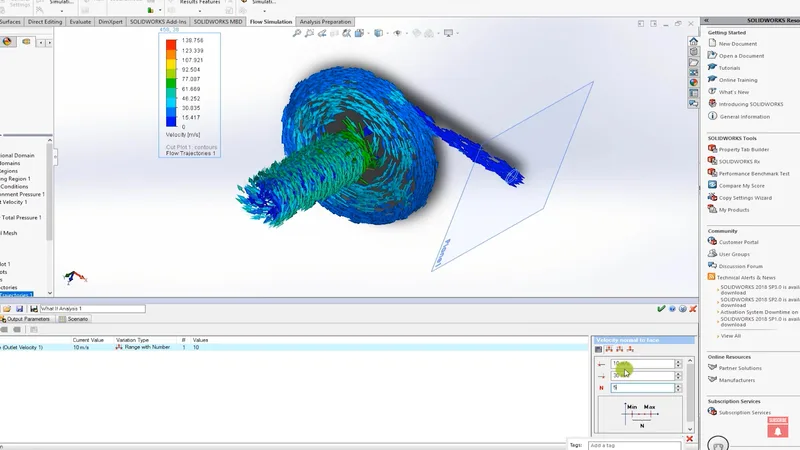
The goal of this study is to generate a performance curve, which plots pressure vs. flow rate. In a real-world scenario, you would compare these results with the pump’s performance curve to validate the design. Since we are using made-up geometry, this parametric study serves as a good example of how to conduct similar analyses for realistic designs.
Task for You: Run this parametric study with your own boundary conditions, generate the data, and analyze the results.
Step 5: Running the Parametric Study
Once the parametric study is set up:
Set the Iterations: Ensure that each scenario runs for the full 500 iterations to guarantee accurate results.
Run the Simulation: Hit the submit button and let the simulation run for each of the scenarios. By the end, you’ll have data for velocity and total pressure at the outlet.
Create the Performance Curve: Using the collected data, plot pressure vs. flow rate to visualize the pump’s performance.
This method can be applied to various types of CFD projects for mechanical engineering and is an essential skill for any CFD engineer career path.
Conclusion
In this blog, we walked through the process of analyzing results for a centrifugal pump simulation in SolidWorks. We discussed how to monitor convergence, visualize flow trajectories, and conduct a parametric study to evaluate pump performance. These steps are foundational for working with CFD analysis software and understanding computational fluid dynamics basics.
Whether you're studying CFD for mechanical engineering, working on CFD projects, or aiming for a CFD certification course, mastering these techniques will greatly enhance your simulation skills. For more in-depth knowledge, consider enrolling in Skill-Lync’s CFD Course or Skill-Lync SOLIDWORKS Training. These courses offer comprehensive insights into computational fluid dynamics using SolidWorks and practical experience through various CFD methods and projects.
Best of luck with your simulations.
Happy Simulating!
This blog is part of our ongoing series on CFD Simulations using SolidWorks.
If you missed the previous posts, check them out here.
Would you like to have a more interactive demonstration of the above concepts?
Skill-Lync has released a FREE comprehensive course covering CFD Simulations using SolidWorks in detail!Check it out here.
Right from the user interface's fundamentals, menus and options, this course covers most aspects of the tool from a practical perspective. It even includes a certificate to add to your resume after completion!
Check out our hands-on course today and add SolidWorks to your list of skills!
Let’s get #IndustryReady together, one skill at a time!


