Wiring harness design in CATIA V5 - 3D modeling Week 7 Challenge
W_7_CHALLENGE - WIRING HARNESS 3D DESIGN & FLATTEN DRAWING
OBJECTIVE:
To create the Flatten Harness & drawing sheet from the Electrical Wiring Harness Assembly component by using the given connectors & routing as per layout.
INPUTS:
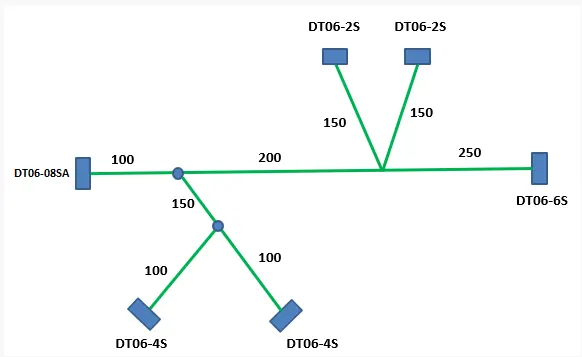
TOOL USED: CATIA V5
WIRING HARNESS ASSEMBLY DESIGN & FLATTEN:
STEP_1: ELECTRICAL PART DESIGN WORKBENCH
In this Electrical Part Design Workbench thus the given Mechanical part bodies of the connectors will get converted into Electrical Part by defining its appropriate Electrical definitions and its Electrical properties. And here by following below as,
1_ Create/Download the CAD data for the required Part 3D.
2_ Create required Geometrical properties by using Part Design Workbench.
3_ Define Electrically like Define as Connector, Back shell, Supporting, & Mounting Equipment, etc.
4_ Define its required Electrical properties like Define as Connector connection point, Bundle connection point, Cavity connection point & etc., after that add the entire cad data in to the catalogue browser itself with electrically defined.
And here thus the given Connectors are become electrically defined by applying the above all and the followings are,
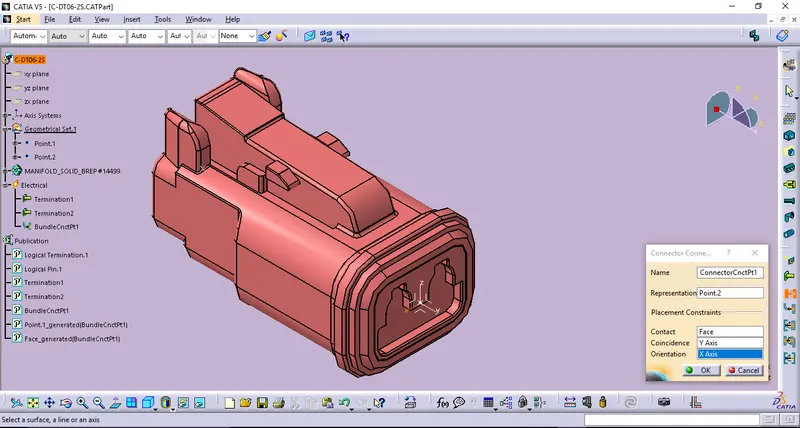
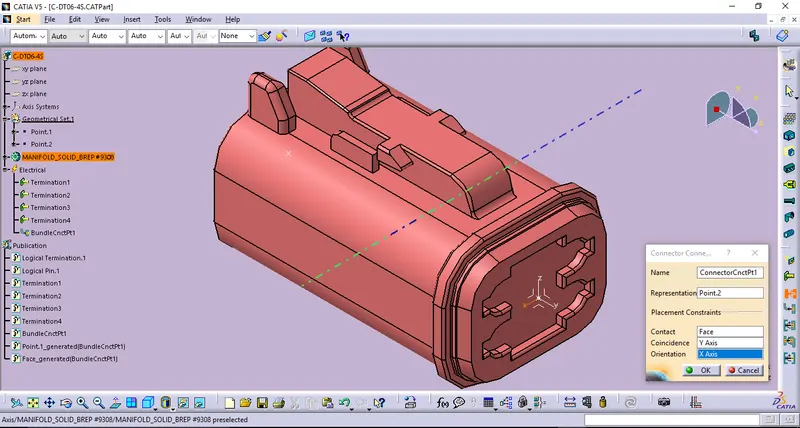
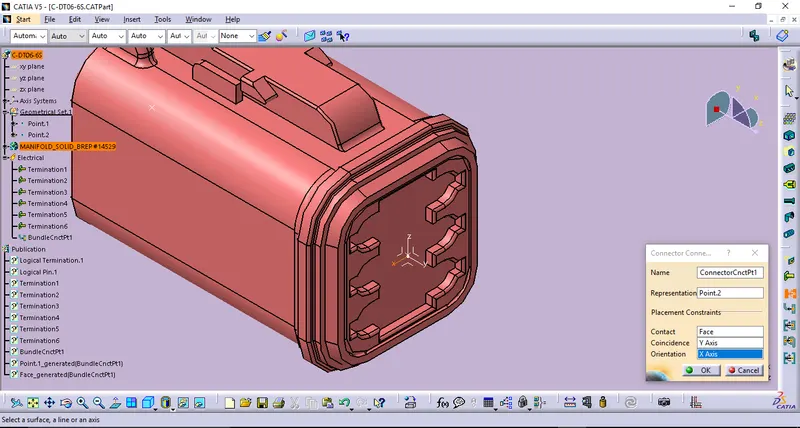
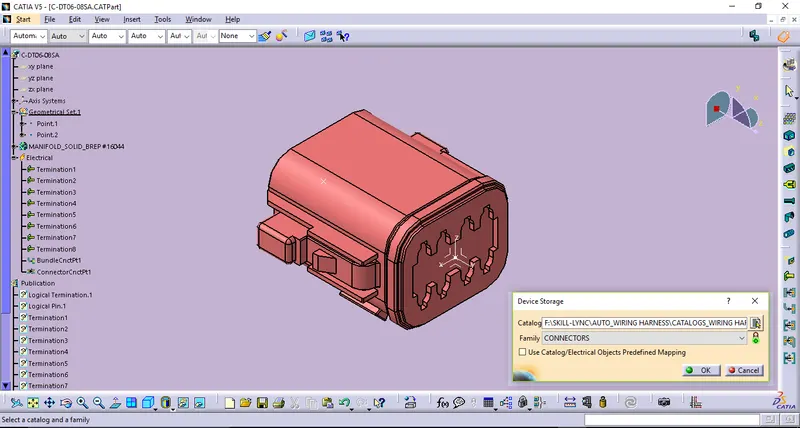
STEP_2: ASSEMBLY WORKBENCH
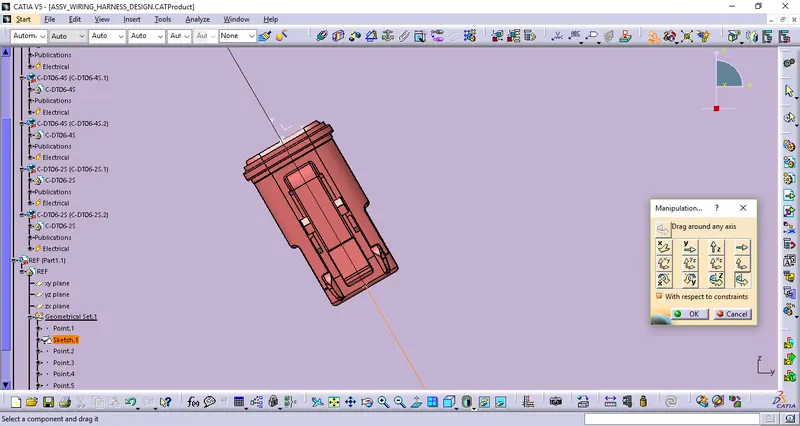
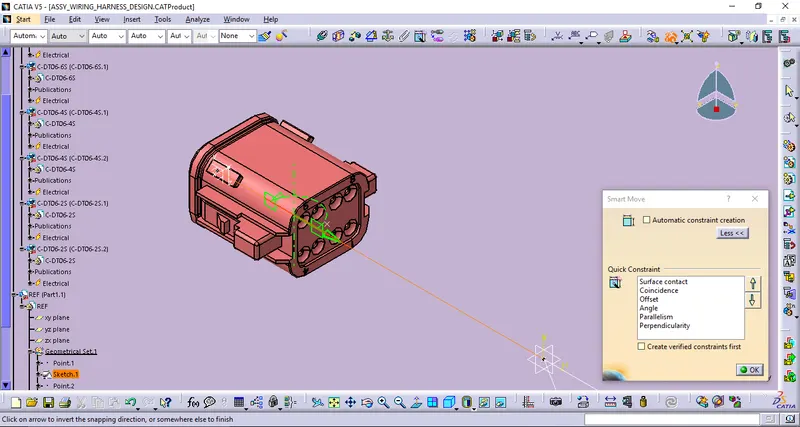
In this Assembly Workbench (Mechanical) has to be widely used to allocate the electrically defined parts in the proper positions based on the layout. And here few commands are used to locate the electrical parts by using Move toolbar commands like Manipulation, Snap, Smart move and by using the Translation/Rotation by using Compass. In before start positioning ensure that all the Electrical parts add into the Product file and keep following measurements in the given layout, here I create a layout Sketches by using the Part workbench in the appropriate dimensions which will helps us easier to locate And the followings are,
STEP_3: ELECTRICAL HARNESS ASSEMBLY
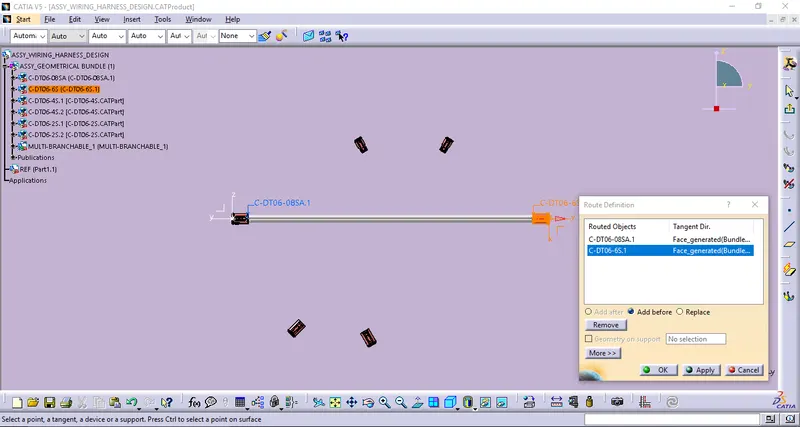
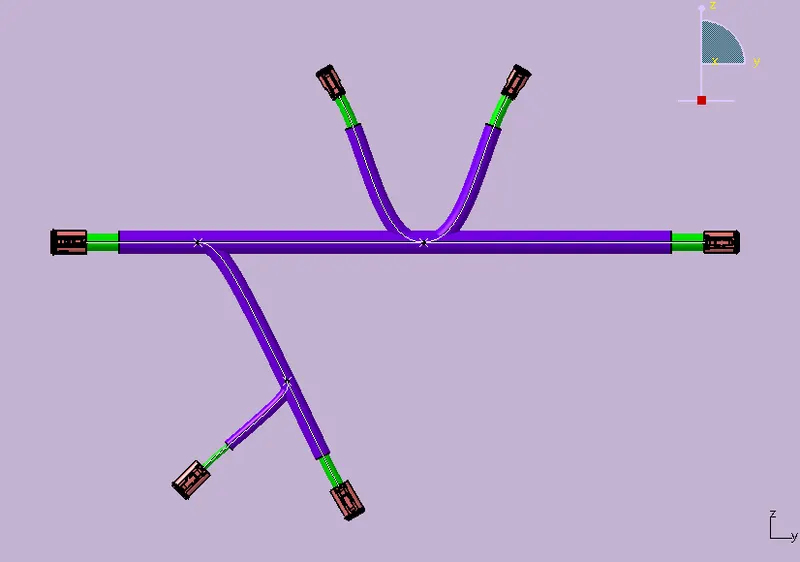
In this Electrical harness assembly workbench which will used creating harness routings by defining the Mechanical product file becomes converted as Electrical Harness by clicking Geometrical bundle. Then by using multi branchable command start routing the harness assembly design. And the followings are,
Defining Routing definition.
Creating Branch Points.
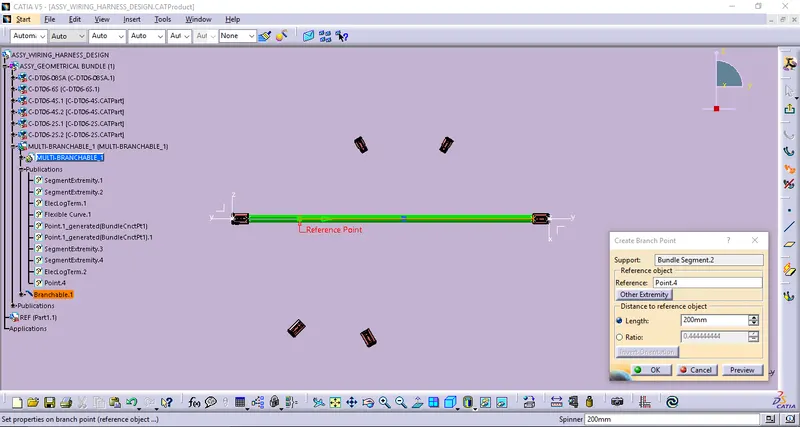
Defining Branch definition.
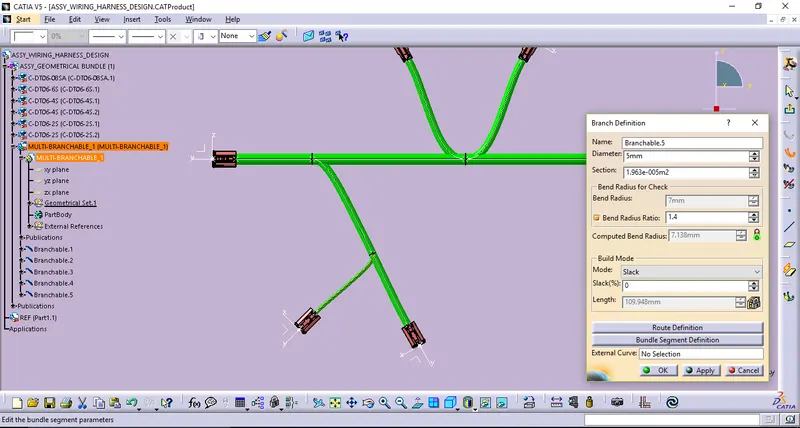
Defining Protective Covering.
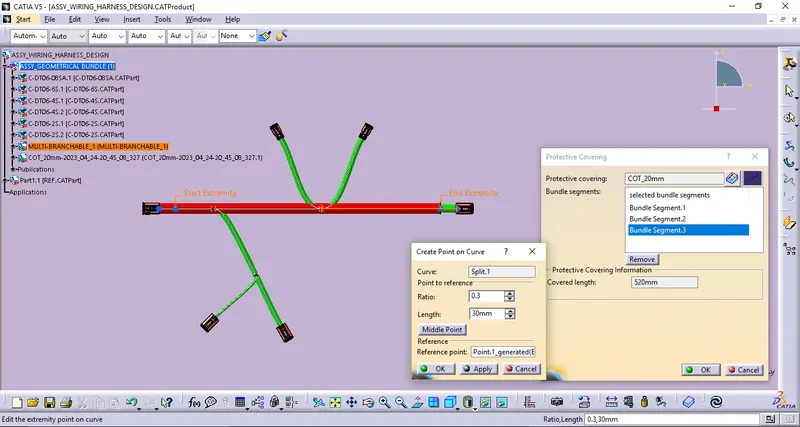
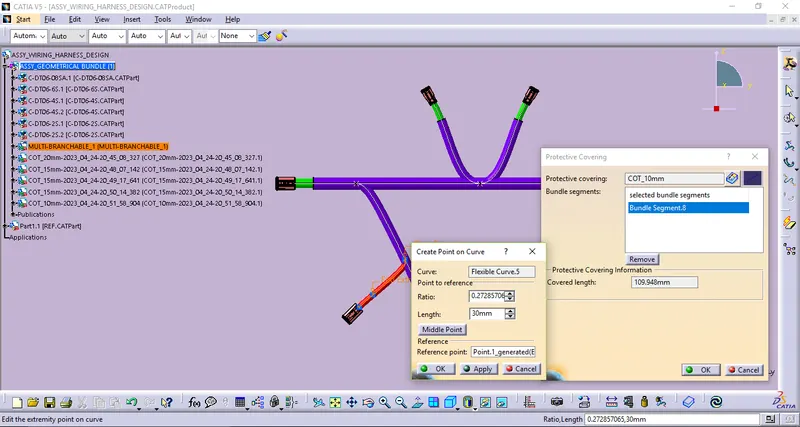
Electical Harness Assembly,
STEP_4: ELECTRICAL HARNESS FLATTEN
- Complete flattening of a 3D electrical harnesses for manufacturing documentation according to user specifications.
- Manipulate bundle segments for flattening arrangement.
- Propagate modifications from the 3D harness design to the flattened harness including update of drafting documentation.
- Powerful capabilities for documentation dress-up (e.g. wire reports, connector reports, length).
In this Electrical Harness Flatten work bench thus the Harness Assembly should be followed certain steps to converts into flatten and the followings are,
- Create a Product file.
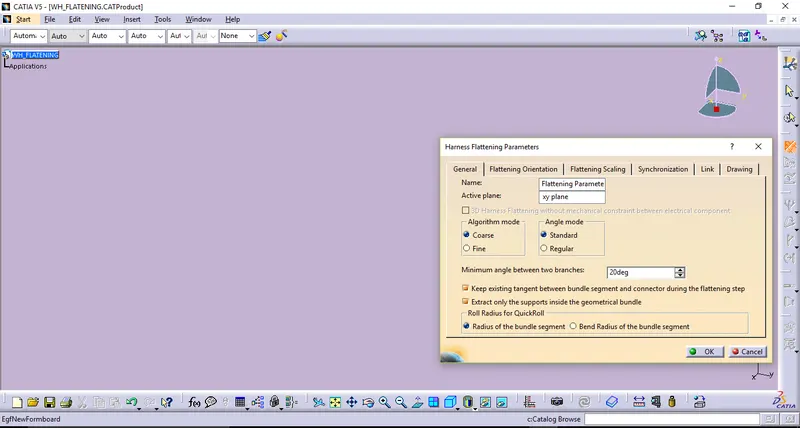
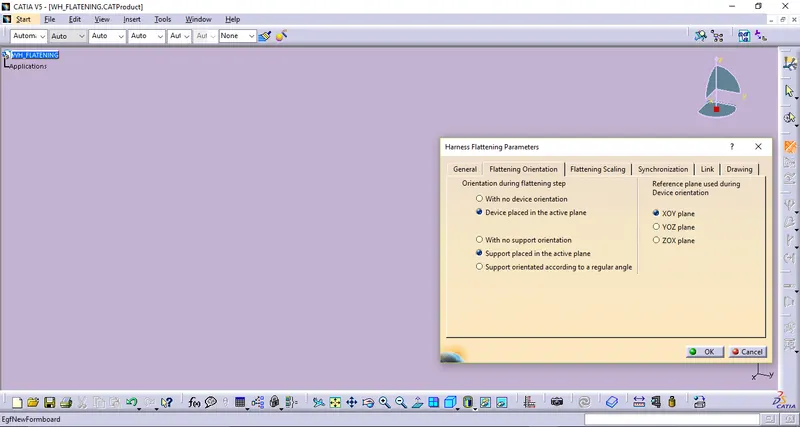
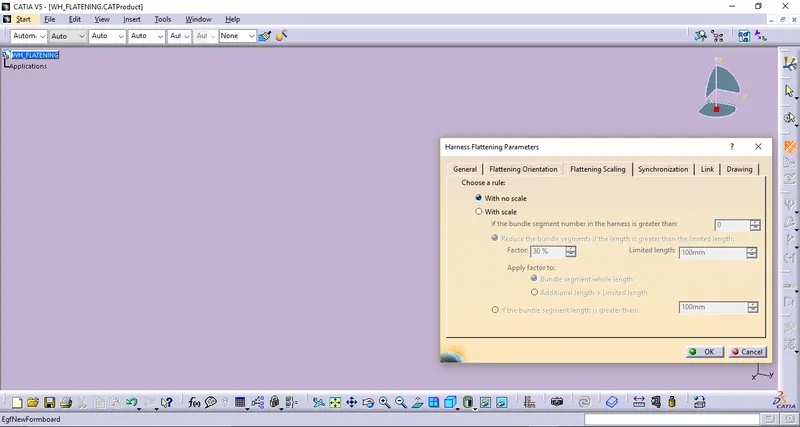
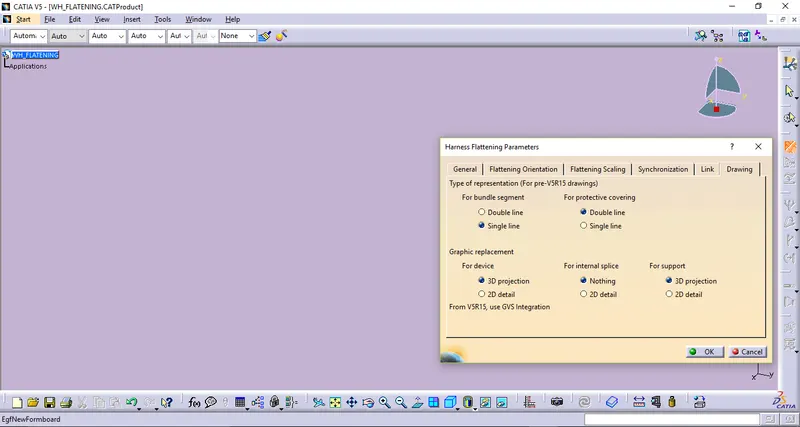
- Define Flatten parameters.
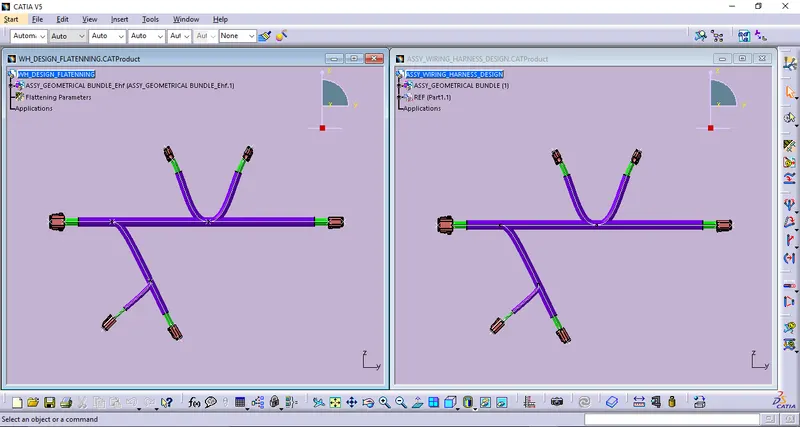
- By Extracting Electrical Harness Assembly into the the Electrical Harness Flatten Workbench.(Then the harness becomes denoted at its end as "_Ehf".)
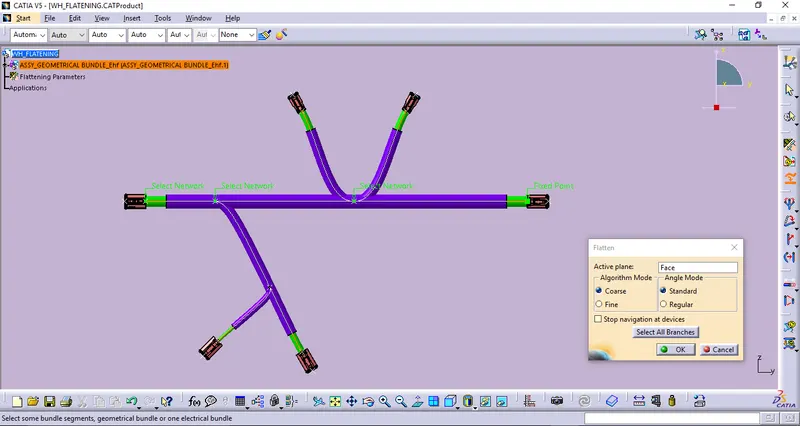
- Apply Flatten to the entire Harness Assembly in a defined plane view.
- Modifiing the flattened harness by using the EHF commands (Ex: Straigthen, Rotate, Roll, Bend, etc.,).
FLATTEN PARAMETER SETTINGS
Defining Extract.
Defining Flatten.
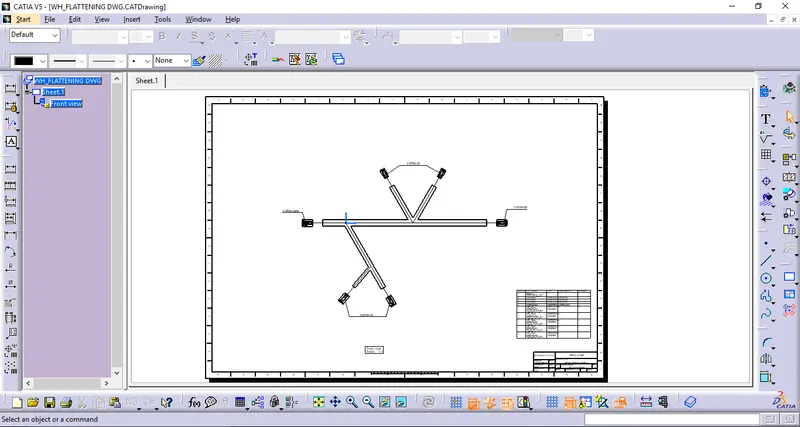
DRAWING SHEET_DRFATING WORKBENCH:
CONCLUSION:
Thus flattening & drawing sheet were created by following the given connector in a appropriate routing assembly followed as per the layout by using the CATIA Electrical decipline tools like Electrical Part Design,Electrical Harness Assembly, Electrical Harness Flatten & Drafting workbenches.