Wiring harness design in CATIA V5 - 3D modeling Week 7 Challenge
AIM : To prepare a flattened view of a previously created harness assembly.
OBJECTIVE : The objective of this project is to create a flattened view for a harness assembly and then place it on the drawing sheet. It is desired that the bundles with protective coverings are represented with different visuals on the drawing sheet.
Route the following harness layout in Electrical workbench. Make assumption for harness bundle diameters. Use Following connectors as shown in layout diagram.
Add protective covering on all branches connected to DT06-2S & DT06-4S connectors. Keep end extremity at 30mm (from connectors end)
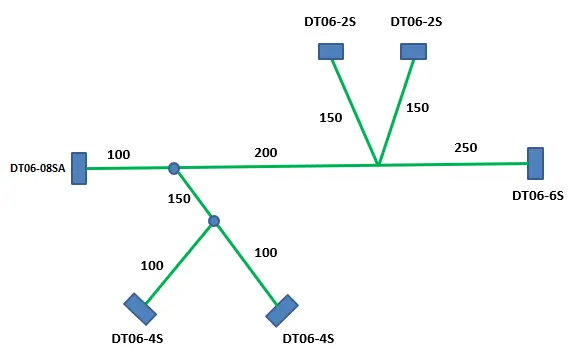
Flatten Process :
First of all, we import the week 4 challenge harness bundle to the catia V5
The following steps are to be done to complete this project.
STEP1- Defining Harness Flattening parameters
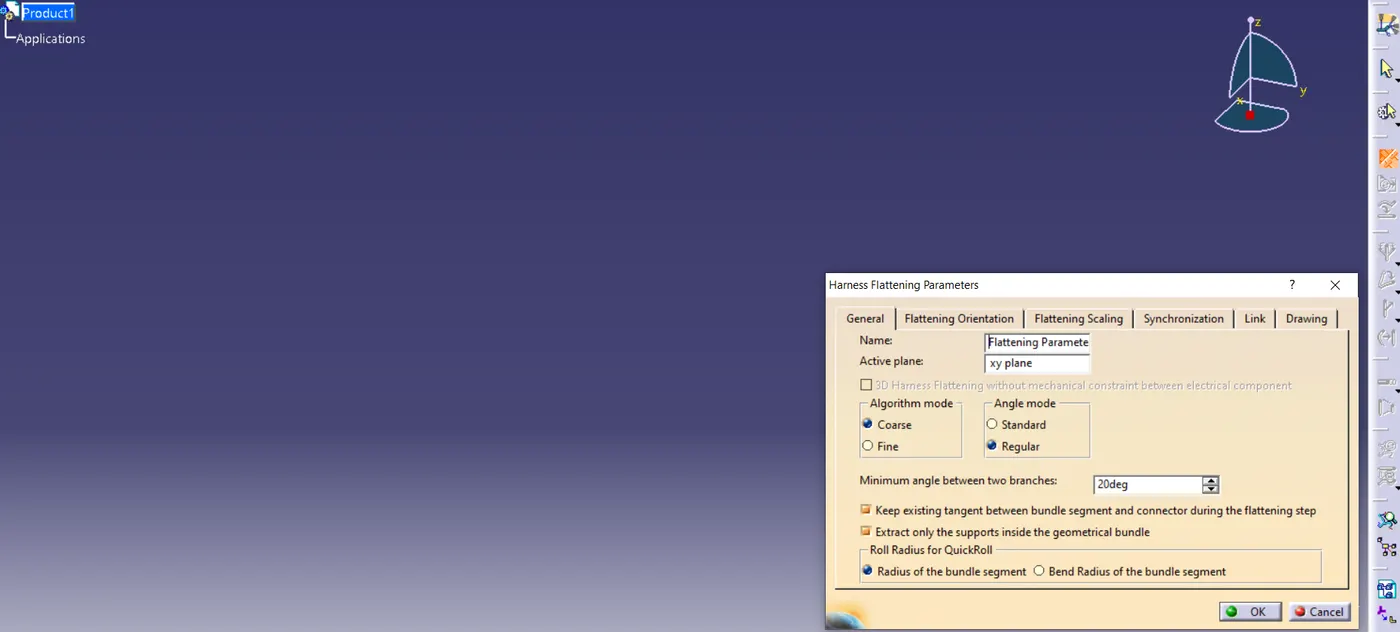
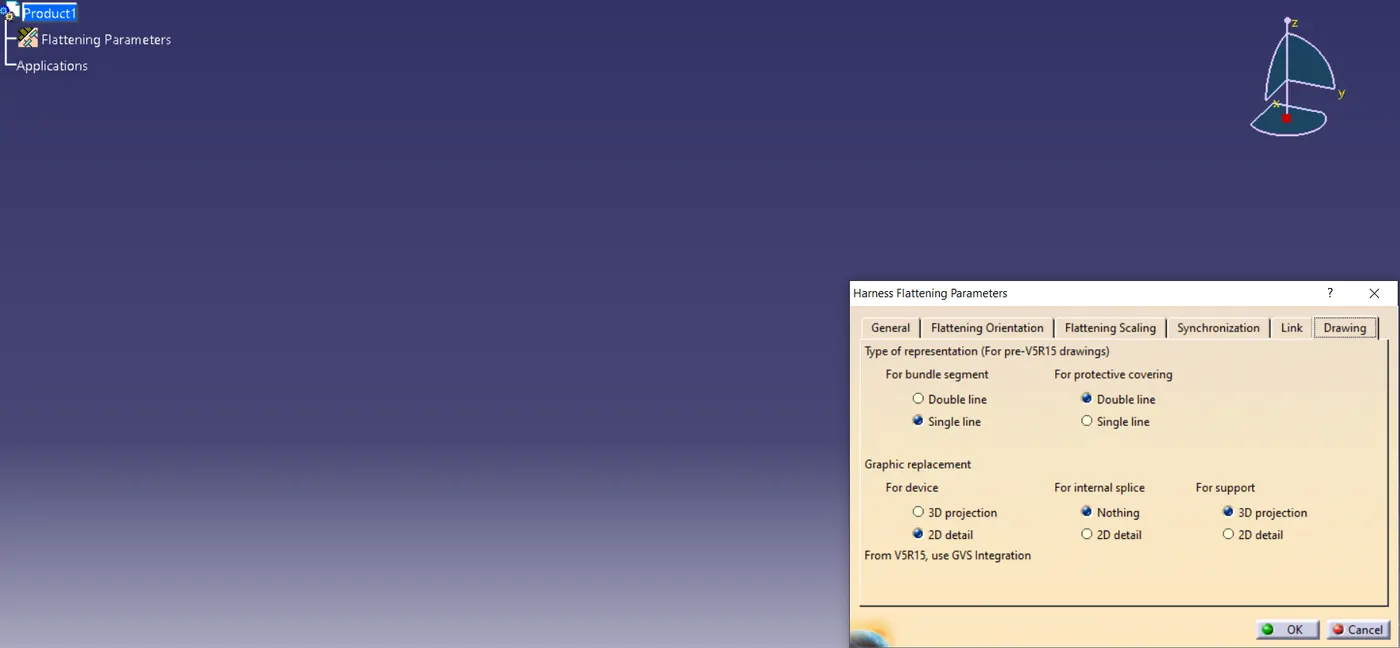
First, we should make a new product file inside the Electrical Harness Flattening workbench. Second, we should define the harness flattening parameters by clicking on its icon as shown above. In the general tab, we should select the settings as shown above. After the general tab settings are complete we should define the settings for the drawing tab as shown below.It should be noticed that the types of representation for the bundle segment and protective covering are different from each other. Also for devices, "3D projection" can be used if the connectors are added to the electrical drawing catalog.
STEP 2- Bring the harness assembly into the newly created Flattening Product by using the "Extract" feature.
First, we should align the Flattening Product and Harness Bundle tabs vertically. Now, as shown below, we should use the "EXTRACT" feature in the electrical harness flattening workbench to bring the harness assembly into the Flattening product.
It should be noted that our geometrical bundle assembly or harness assembly file is now changed to an "EHF" file which stands for "Electrical Harness Flattening".
STEP 3- Flattening of the harness
To flatten the harness we should select the flatten plane and then select all the branches present in the harness assembly as shown below.
The above image shows the raw flattened view of the wiring harness along the selected XY-Flattening Plane.
STEP 4- Rotate the bundle segments
All the bundle segments if needed should be rotated in the desired direction as needed by using the "Rotate" feature in the flattening workbench. It should be noted, that as we have "XY-plane" as the flattening plane so we should make sure that we rotate the bundle segment only along the "XY-plane".
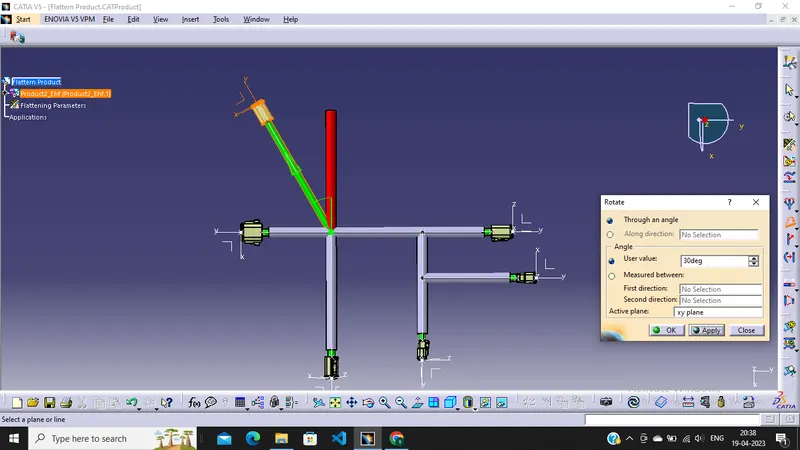
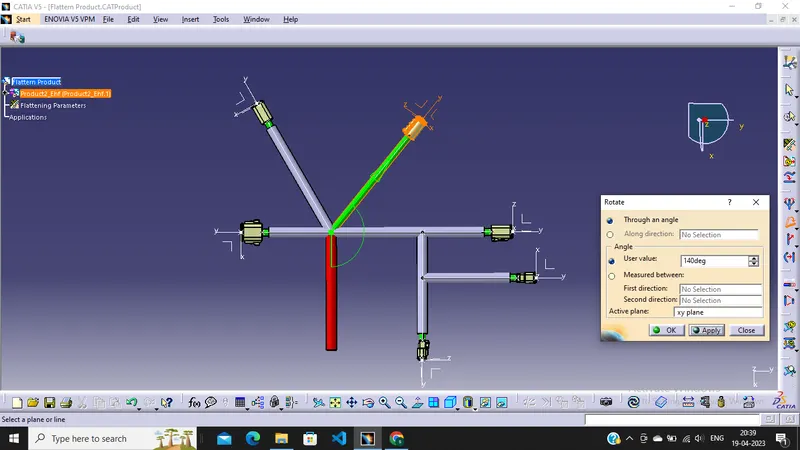
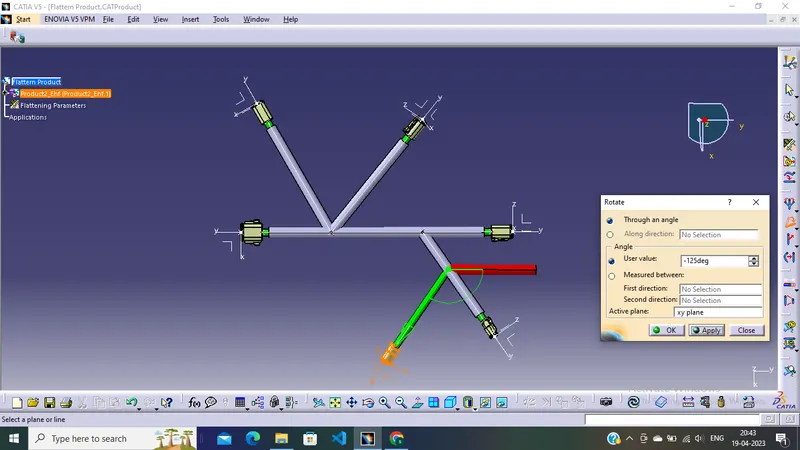
Now we perform the rotation and straightening functions to bring the wire to a standard view using the rotate and straighten tools.
Now create a drawing sheet from the file - new , drawing
Select the inputs standard and sheet style then create. Now select the required view ie front view and select the required view /face from the flattened wire. now the drawing is imported.
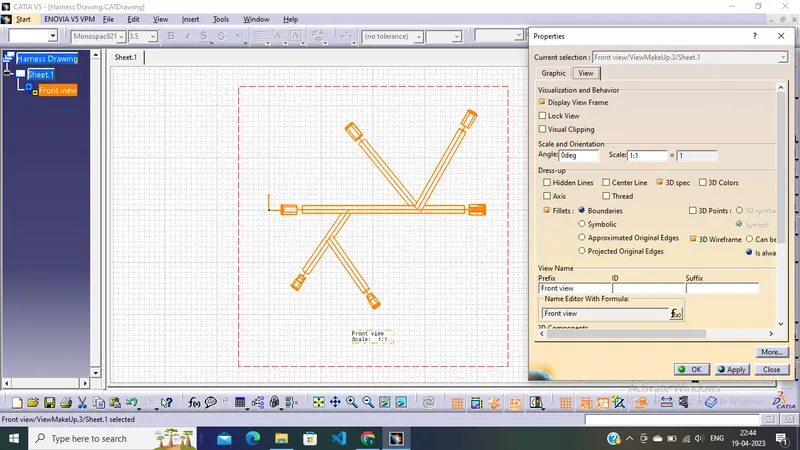
Now in order to get the bundle lives visible we adjust the properties by right-clicking on the drawing frame. Change the dress-up settings and tick 3D colors and 3D Wireframes and the drawing will become visible.
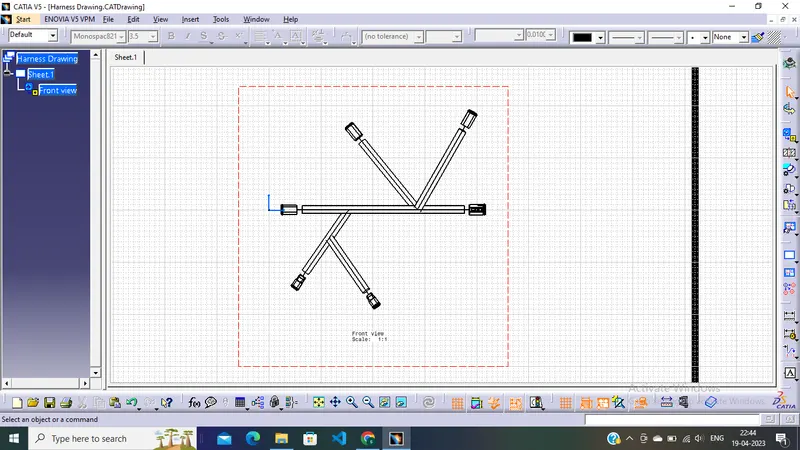
Conclusion :
Flatten the wiring harness assembly in the week 4 challenge with the help of catia v5 in that Electrical Harness Flattening workbench.