Wiring harness design in CATIA V5 - 3D modeling Week 7 Challenge
objective:
Q1. Flatten the harness assembly completed in “ week 4 challenge”. Place the flattened view on drawing sheet. Ensure bundles with protective coverings has different visuals on drawing view.
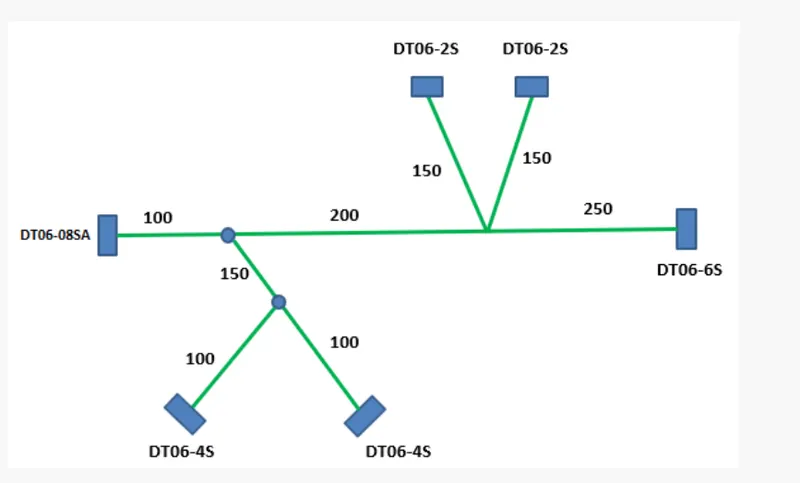
Procedure:
- Open the assembly model already created in Catia V5.
- Now open the new product file and select Electrical harness flattening workbench.
- Rename the product file name as required as shown below or flattening_assy_exercise .
- Give flattening parameters first.
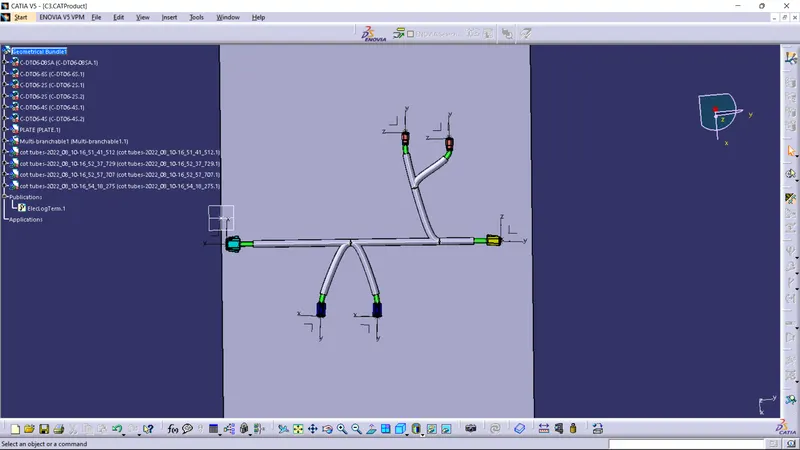
- Bring the harness to assemble in the flattening product file using the extract option.
- After the assembly is extracted the file type is changed to.EHF (which stands for electrical harness assembly flattening) is shown in the below image.
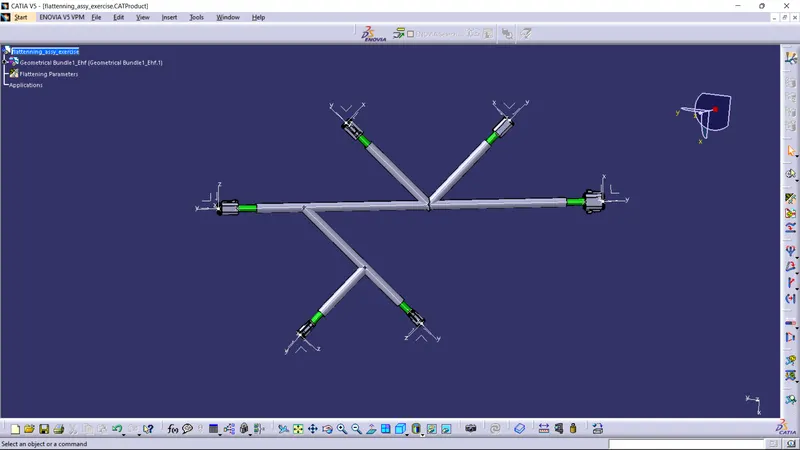
- Select flatten option due to this option all the bundles are visible as flat to the view you have selected.
- Then select all the electrical bundles which have to be flattened as shown below.
- One can also select one main bundle branch and then click Select all branches in the flatten window.
after choosing the flatten option these bundeles are visible like this.....
DRAWING sheet of that example....
- Open a new drawing file and set the following parameters as shown in the figure.
- First, save the drawing file as drawing_exercise.
- Adjust both the windows side by side for better understanding
- Click the front view option in the drawing file and then select any one to flatten surface of the assembly.
- Enable the 3D wireframe option.
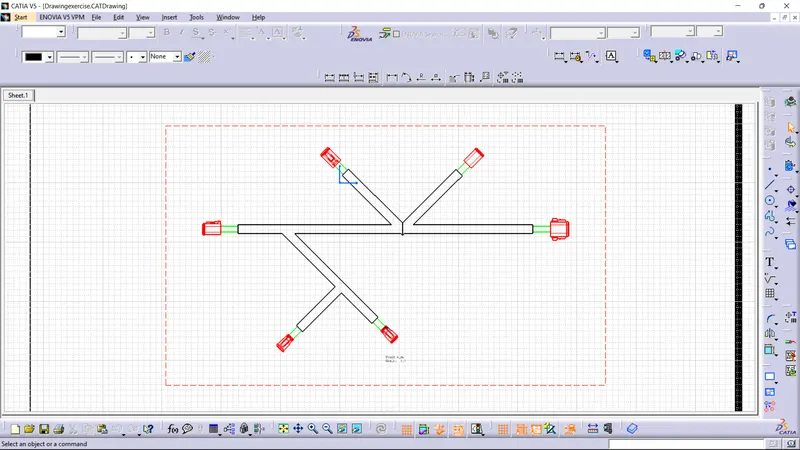
- here connectors are visible in red color
- bundles are visible in green color
- and cot tubes are visible in black color.
thankyou....