Wiring harness design in CATIA V5 - 3D modeling Week 5 & 6 Challenge
Wiring harness design in CATIA V5 - 3D modeling Week 5 & 6 Challenge.
Objective:
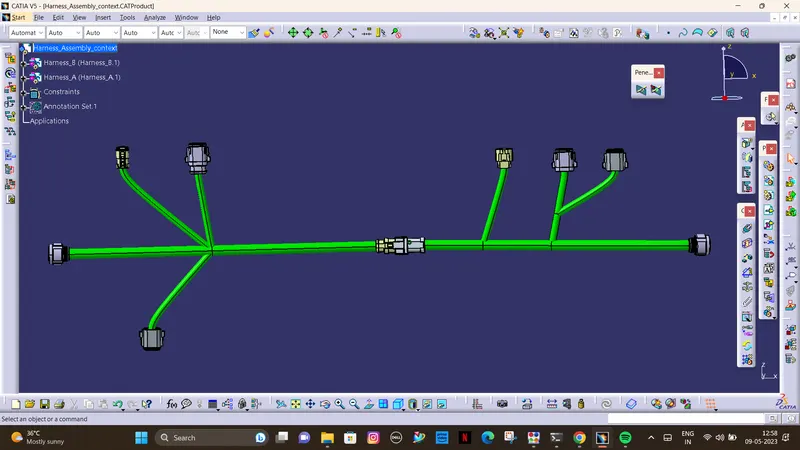
Route the following harness layout in Electrical workbench. Make assumption for harness bundle diameters. Use the connectors provided. After completion of routing,
- Check the bundle Continuity. Add snap of result in submission
- Add annotation to all connectors. Make an assumptions for annotations like connect 1 , 2 etc
- Check for the bundle warning. Add snap.
- Generate CAT.part of harness assembly and convert is in. igs format.
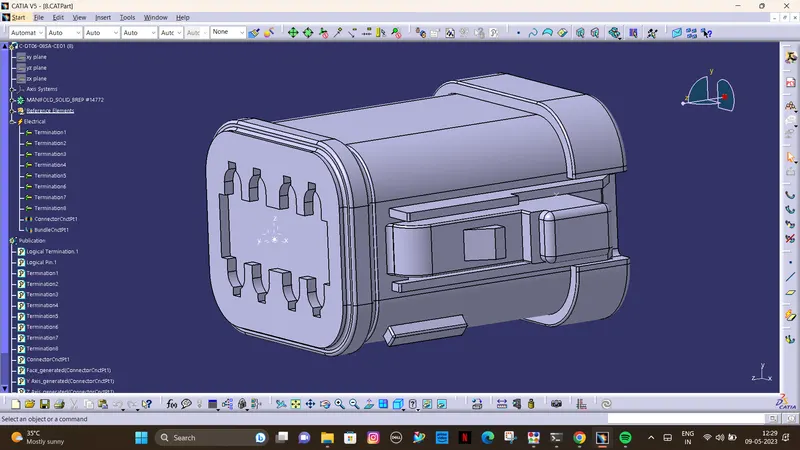
Methodology for define the Connector.
- First imported models from given link. open mechanical part design.
- Defined the middle point with help of the mid point. On the connector side and bundle side.
- Given axis system to connector side.
- Now changing the workbench electrical part design.
- Defined as a connector with required terminations.
- Then Defined the connector side as the connector connection point.
- Defined bundle connection side as a bundle connection point.
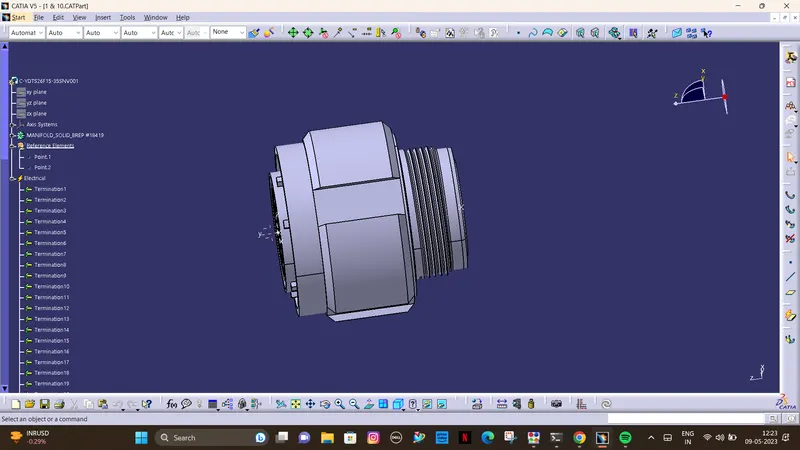
Connector 1 & 10.
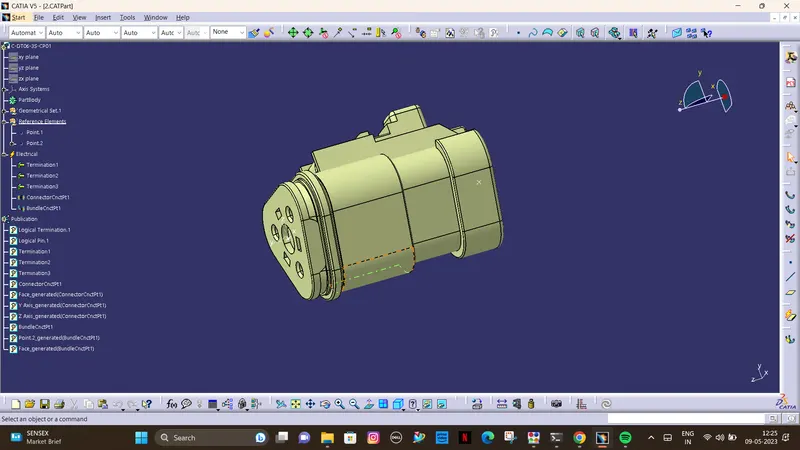
Connector 2.
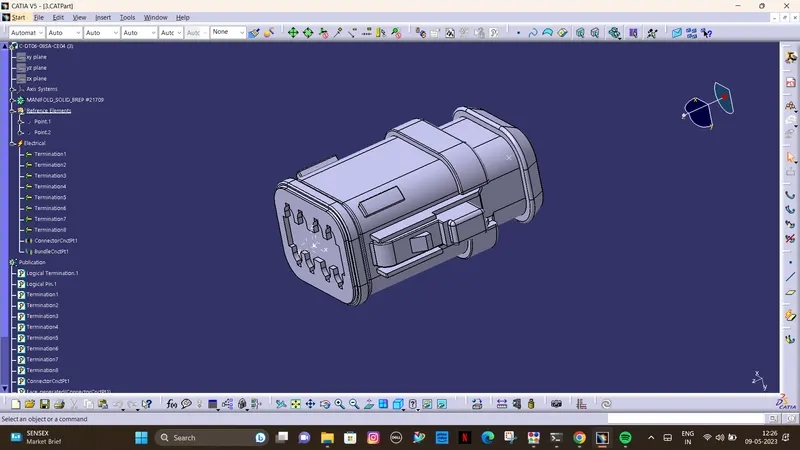
Connector 3.
Connector 4 & 9.
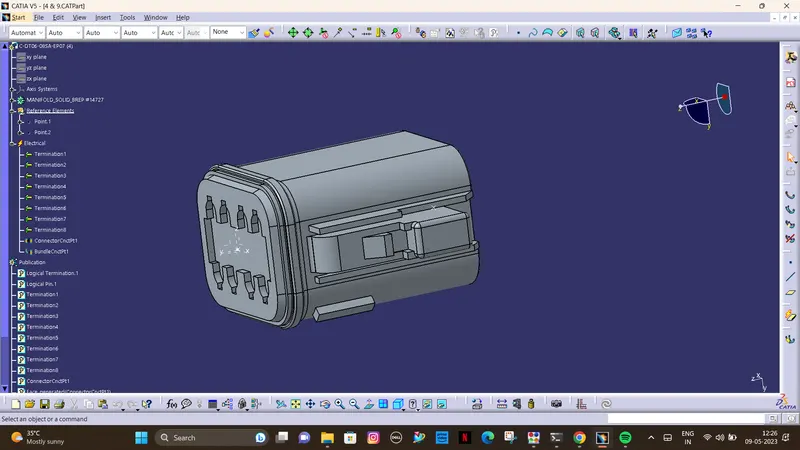
Connector 5.
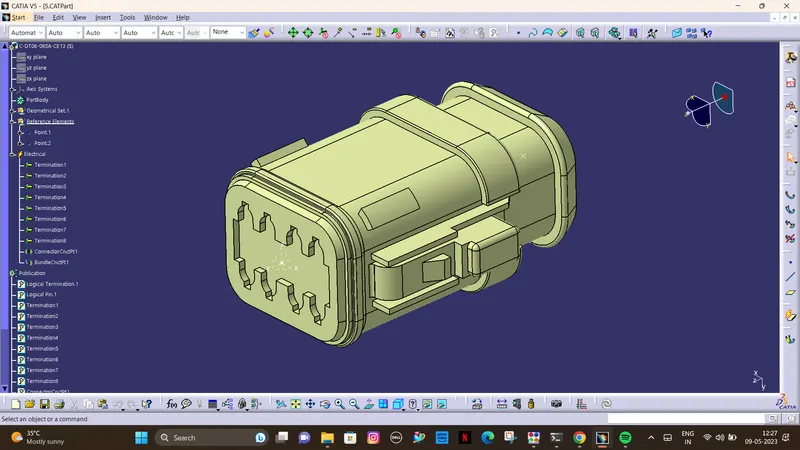
Connector 6.
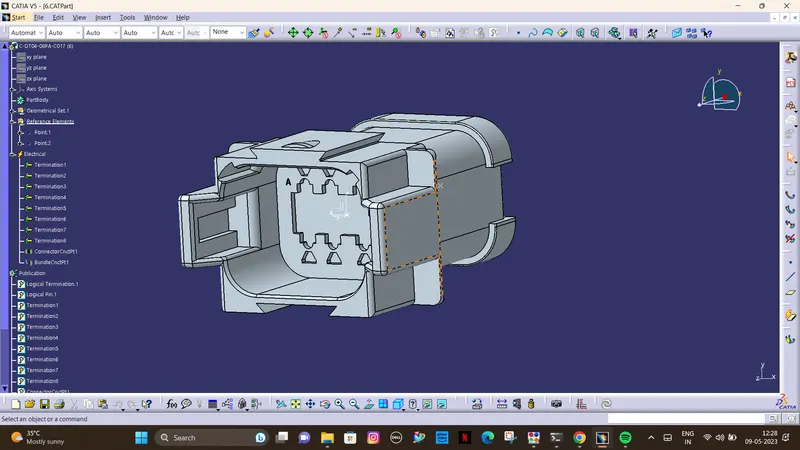
Connector 7.
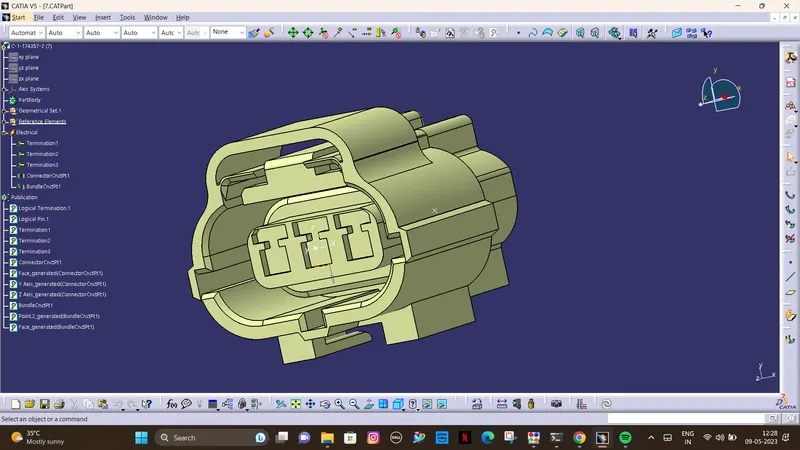
Connector 8.
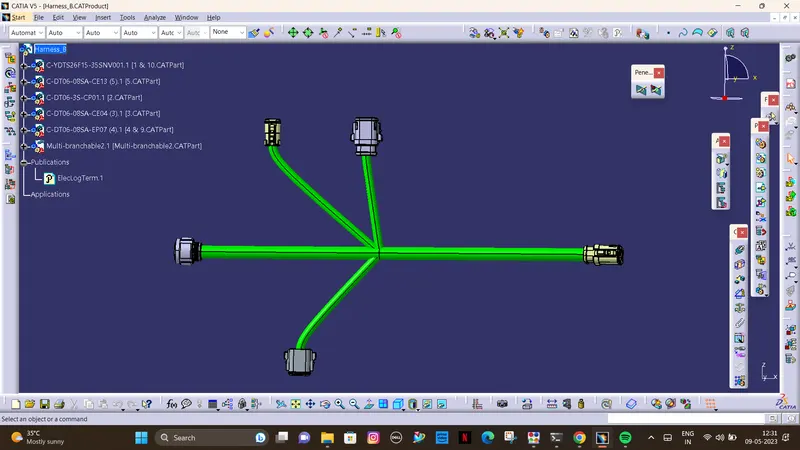
Harness_B
- Open a new product file and imported all the defined models into it.
- Manipulated all the models into the required positions.
- Rotated all the connectors as required.
- Made the main branch Bundle to bundle.
- Create a Branch point for required distance by Add brand point command.
- Then create the sub branches according to the given Layout.
Positioned the Connectors as per in Layout.
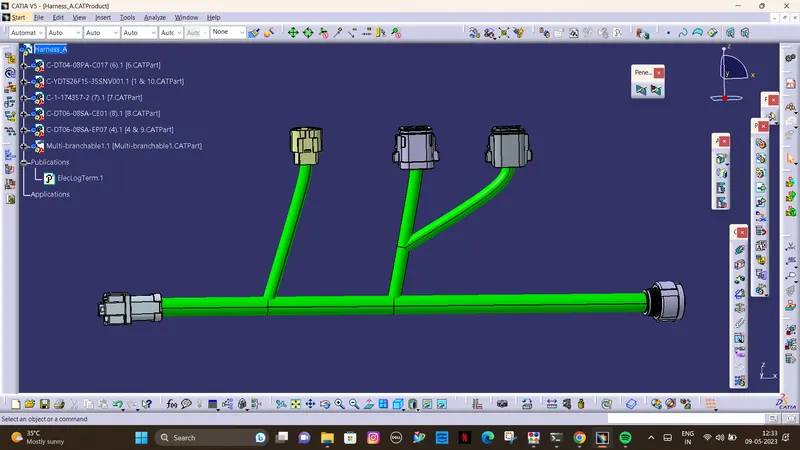
Harness_A
- Open a new product file and imported all the defined models into it.
- Manipulated all the models into the required positions.
- Rotated all the connectors as required.
- Made the main branch Bundle to bundle.
- Create a Branch point for required distance by Add brand point command.
- Then create the sub branches according to the given Layout.
Positioned the Connectors as per in Layout.
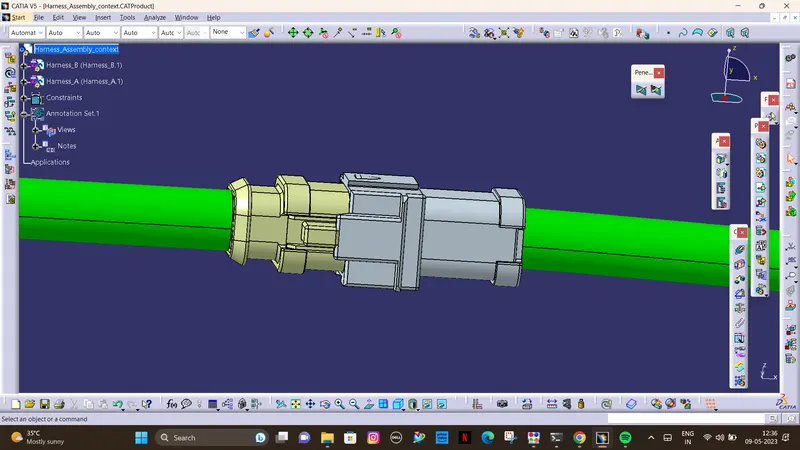
Interconnections.
- In this step, we have to interconnect both Harness A & Harness B.
- For that, we have to create new product file and can give name as Assembly.
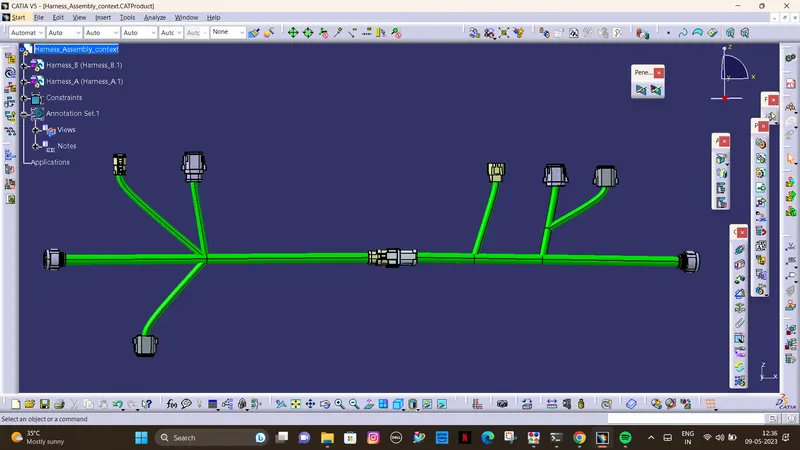
- Then, copy both harnesses and paste it in newly created product file or call both harnesses in mechanical assembly design as below image.
- We have to go in Electrical Assembly Design to connect both the harnesses electrically. So for that, select the option 'connect electrical devices' and both the harnesses will get connected electrically as below.
- As shown in below image, male connector should have to be inserted into the female connector.
Check the bundle Continuity.
- It is need to check bundle continuity in both Harness A and Harness B.
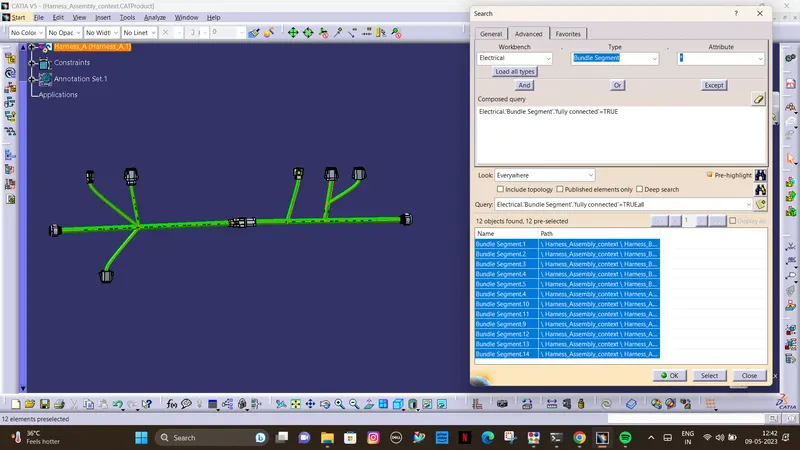
- So for that, go in Edit>Search>Workbench-Electrical>Type-Bundle segment>Attribute-fully connected.
- We will get one window, in that selecting True option will show all the connected bundle segments while selecting False option will show all the non-connected bundle segments.
- Now, we will check for True condition and search for result.
- All the bundle segments are showing connected. So there is bundle continuity in both Harness A & Harness B as shown in below images.
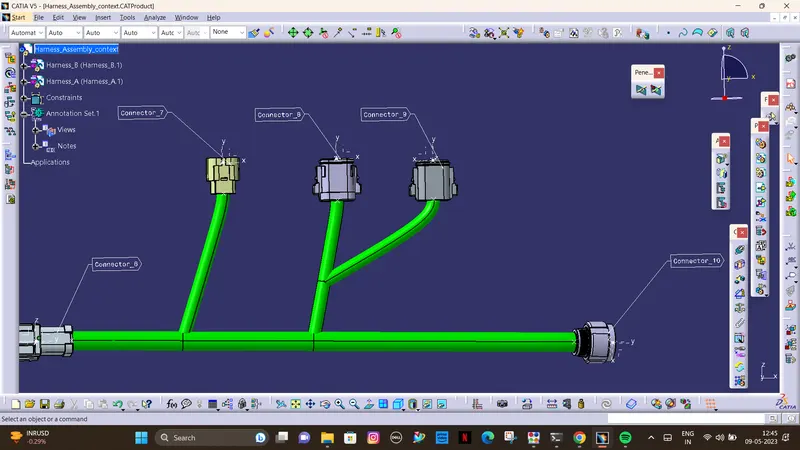
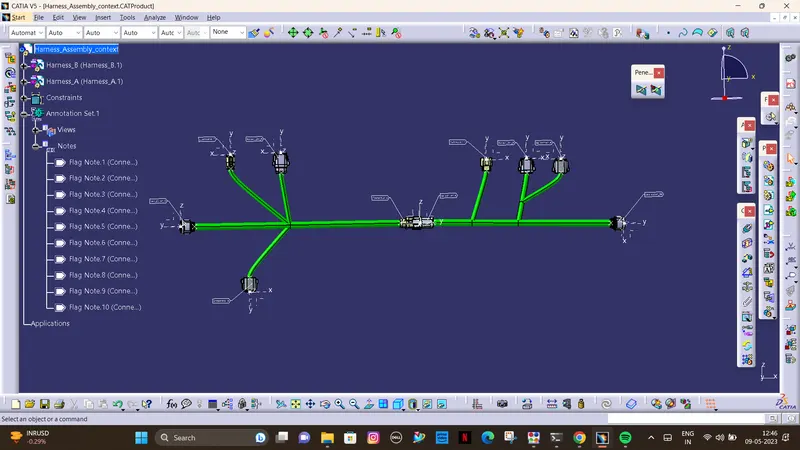
Add annotation to all connectors.
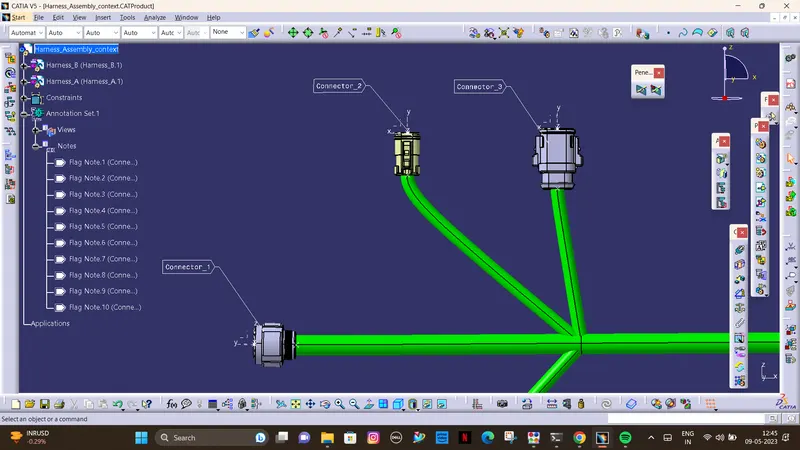
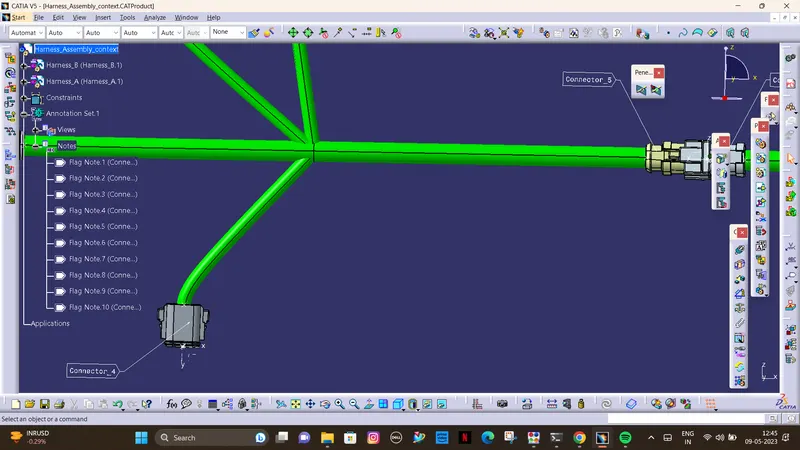
- In this step, we have to add annotations for all the connectors in mechanical assembly design workbench.
- Annotations are used for giving connector name, functions etc.
- For this, we have to select plane where annotation will be placed. In below image, we have selected front plane.
- We should make sure that the geometrical bundle is active before selecting the annotation plane.
- We can change a font, font color and font size by going into the properties as shown in below image.
- So after giving annotations to all connectors, the whole assembly will look as below.
Check for the bundle warning.
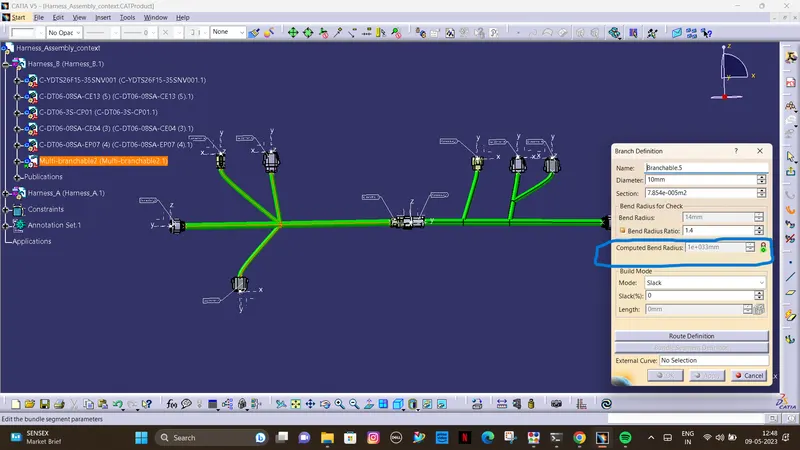
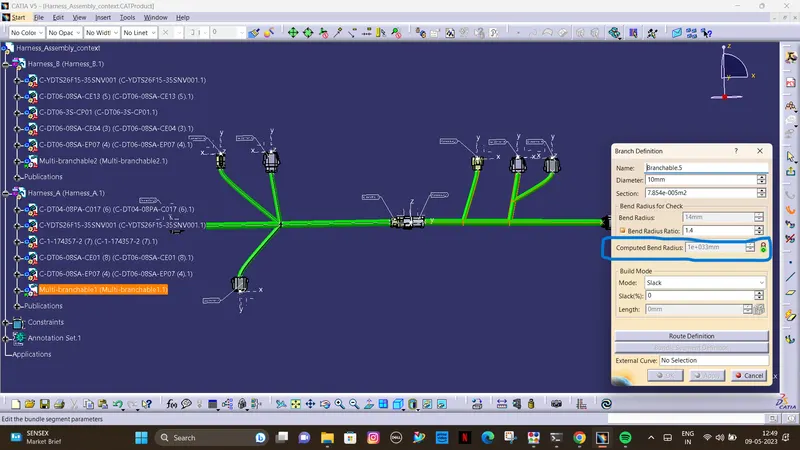
- In this step, we will be checking the bundle warning in Harness A & B.
- Geometrical bundle warnings are shown for bend radius, bundle diameter and vector position.
- So if there is any incorrect value or input regarding these factors then yellow colored flash will be appear in the model tree structure next to the branchable with problems and in branch definition dialog box it flash a red colour.
- Here, we dont have any error in Harness Assembly context in branch definition dialog box it flash a green colour it means our branches are in correct manner.
Generate CAT.part of harness assembly and convert is in. igs format.
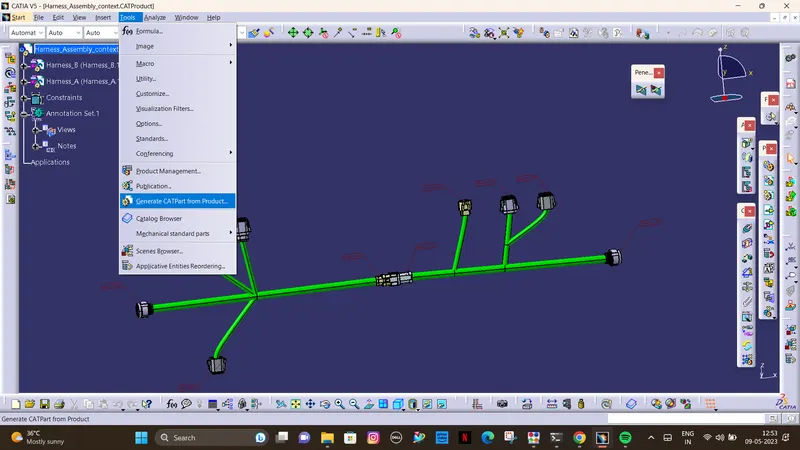
- Now, in this step we have to convert final harness assembly file into IGS format. So for that we need to follow below steps.
- Mechanical Assembly Design workbench>Tools>Generate CAT Part from product.
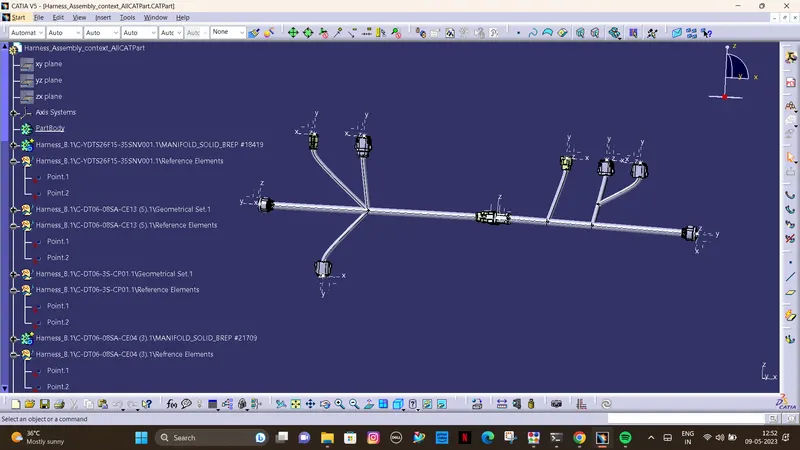
- Once the CAT part is created, the whole product file is converted into a single part.
- Now, whole file is converted into the IGS format and we can see all the harness assembly is looking in grey color.
- If we need to change color as before in green, we can go back and give green color to each bundle segment.
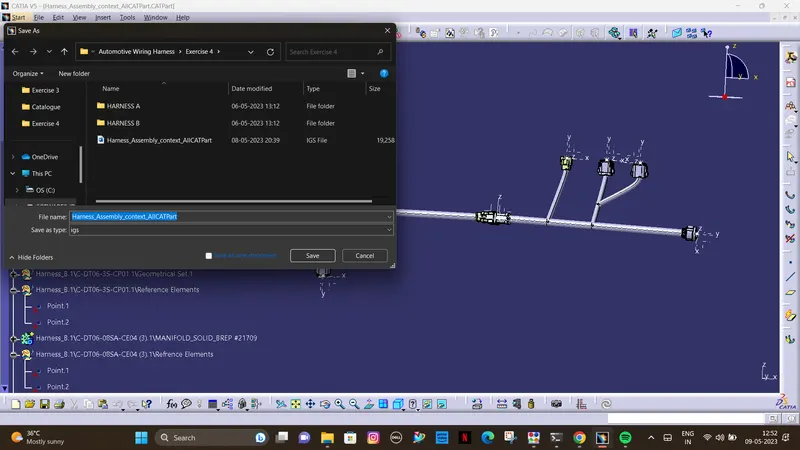
- To save CAT part file as IGS file, we have to use 'Save as' option as shown in below image.
Finally, we have done with the harness routing and interconnection of both the harness A&B according to given layout. Both the harnesses are checked and corrected for bundle continuity, bundle warnings, annotations are added for all the connectors and at the end whole CAT part file is converted into the IGS format.