Wiring harness design in CATIA V5 - 3D modeling Week 2 Challenge
Wiring Harness
Aim: To Download following connectors and Connector clip cad data from given link and define it as electrical connector using Electrical part design workbench .
- Deutsch DT06 – 08SA ( https://www.te.com/usa-en/product-DT06-08SA.html)
- Tyco 174357-2 (https://www.te.com/usa-en/product-2-174357-2.html?source=header-match)
- Tyco 85229-1 – (https://www.te.com/usa-en/product-85229-1.html?q=85229&source=header)
Introdution to Wiring Harness :
Electrical Distribution Systems : Electrical distribution system basically deals with physical and logical architecture,schematic development ,power distribution,wiring harness design,wiring harness component design of given electrical systems .
E&E Architecture: It is high level logical connectivity diagram represente the number of systems,sub systems and logical connectivity between them .
Logical schematics: Logical schematic is the detailed design of E&E Architecture which is the extended to show the logical connectivity between difference components & controls of given,sub-systems .
Electrical schematics : Electrical schematic is the detail deisgn schematics which descreibes the pin to pin connectivity ,properties ,fusing distribution, grounding distribution,interconnects etc .this is the end result of electrical core of system and used as an primary input for harness design .
Wiring harness topology:
Wiring harness topology is the stratagy to divide or split the harness betwee different pieces to achive the best manufacturability,serviceability & cost effective Design .
wiring harness Routing :
Wiring harness routing deals with desired path of wiring harness into given vehicle environment by applying set of design rules & Industry best partices .
Wiring harness Packaging
Wiring harness packaging deals with Fixing/Mounting strategy of wiring harness routing to ensure the safe ,relaibility & Durability of wiring harness by applying set design rules & Industry best parctices .
Connector Definition:
Geomentry paramaters: point & coordinate Axis systems .
Connector connection Points : this point is used for the connection of one to anothre connector
Harness Bundle entry point -This point defines where the harness bundles segment point will end when routed to the electrical connector.
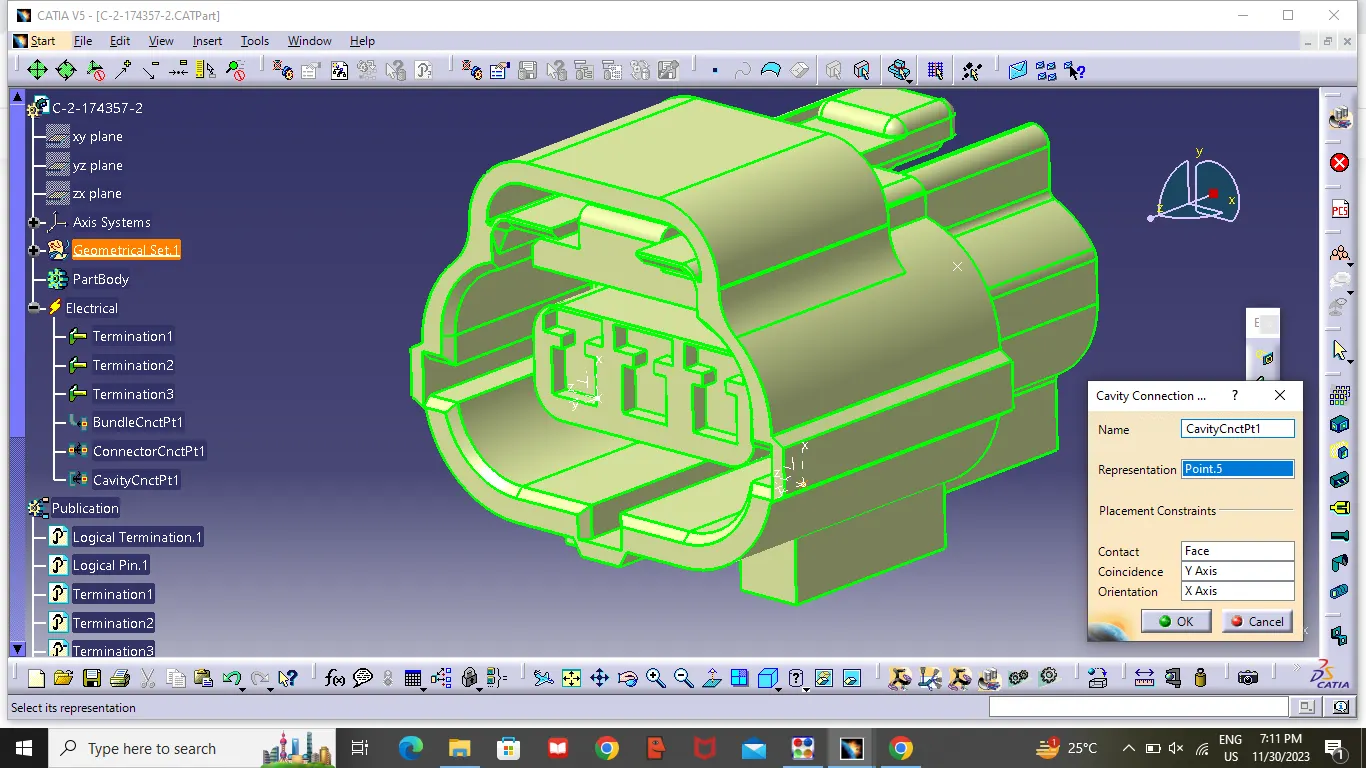
Cavity Connection Point : This point is used to define the connection of a connector to connector clip. this only applies to connector which have the mounting feature for a connector clip.
Procedure :
Download all the connectors and connector clip cad data from the link .
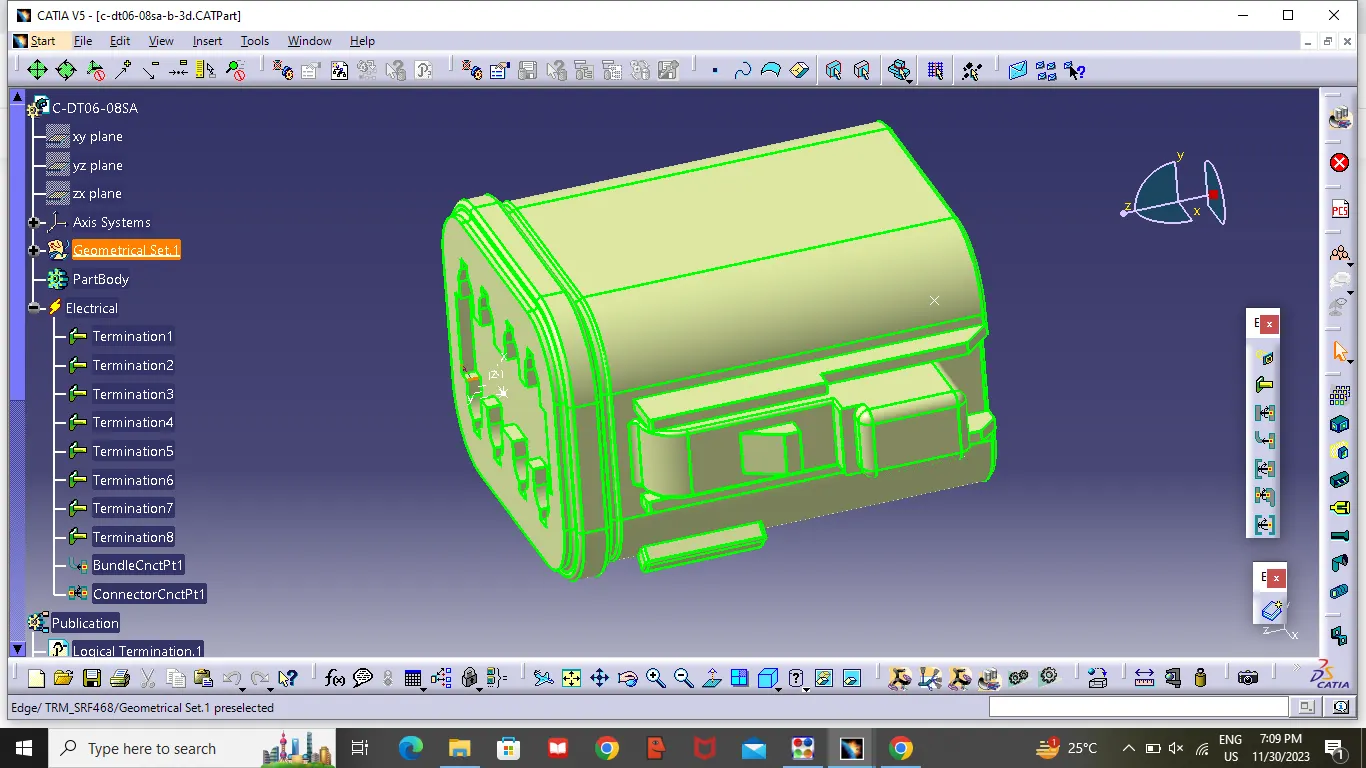
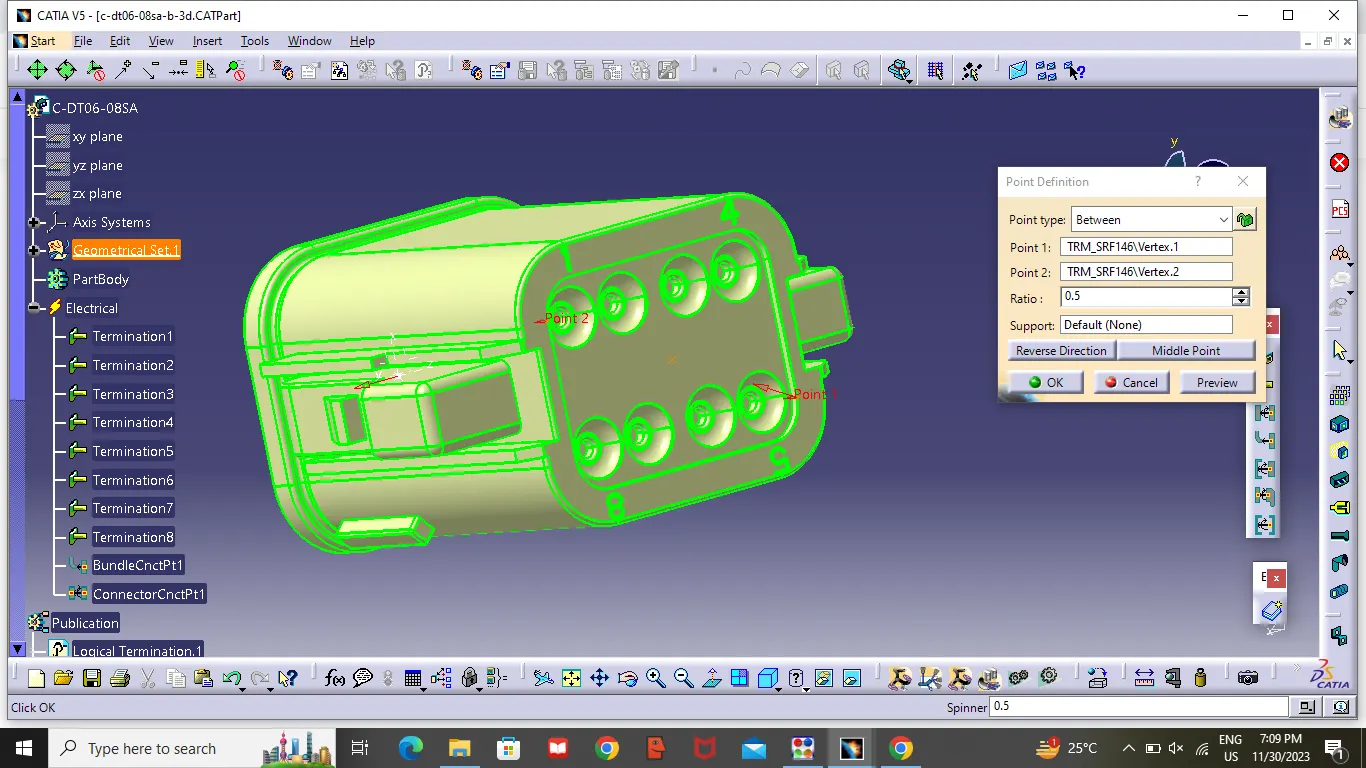
1.Deutsch DT06 - 08SA
- Create a midpoint on the Bunddle connection point as showen in the figure .
- Then create an another midpoint on contact face which will be normal to wire bunddle insertion.
- Create a Axis system respect to the point which we have created .
- After completing the Axis system. Then switch to "Electrical part Design" .
- Select the Define connector tool and select the connector and given termination as 8 number .
- then select Define Bundle connection point definition Tool and select the Rare face of the connector as showen in the figure .
- Then Select Connector Connection point as showen in the figure select the point first and select the Front face as contact and coincidence Y-direction,orientation as X-axis .
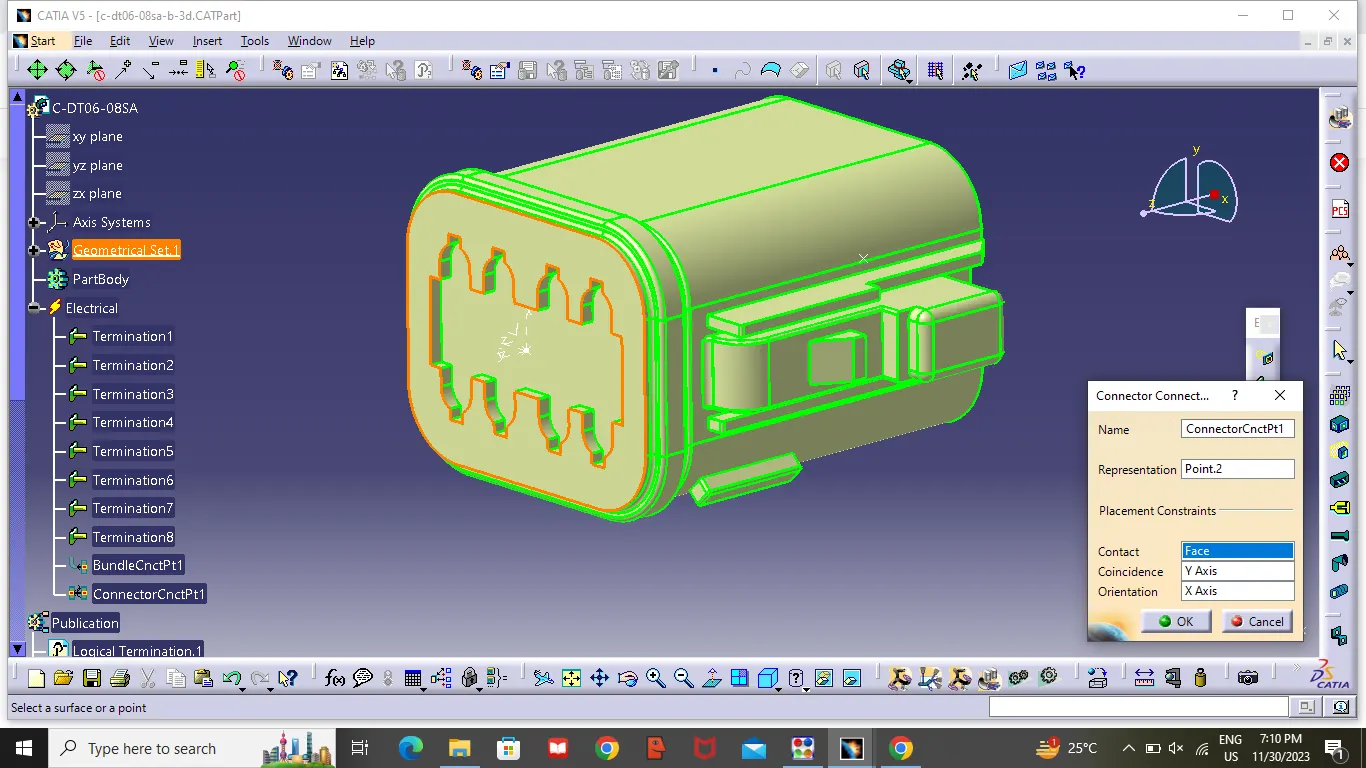
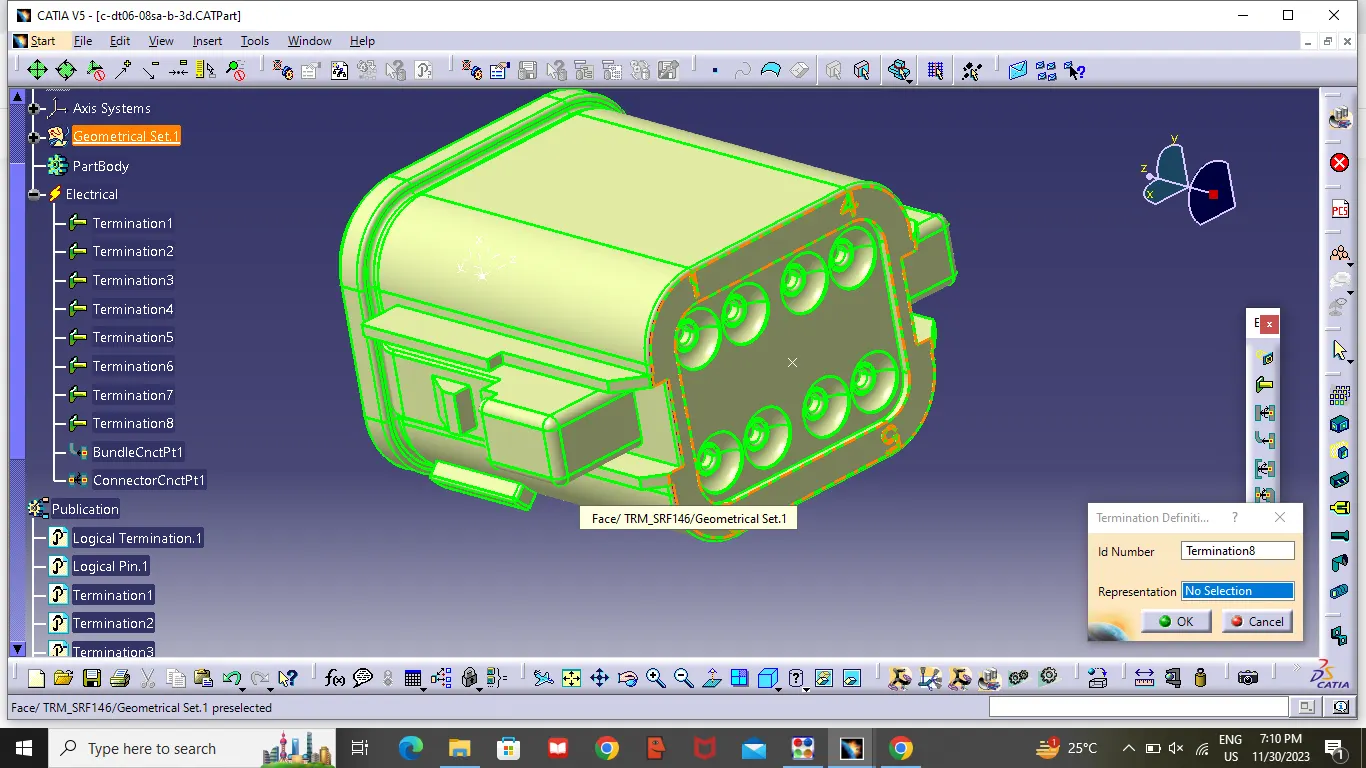
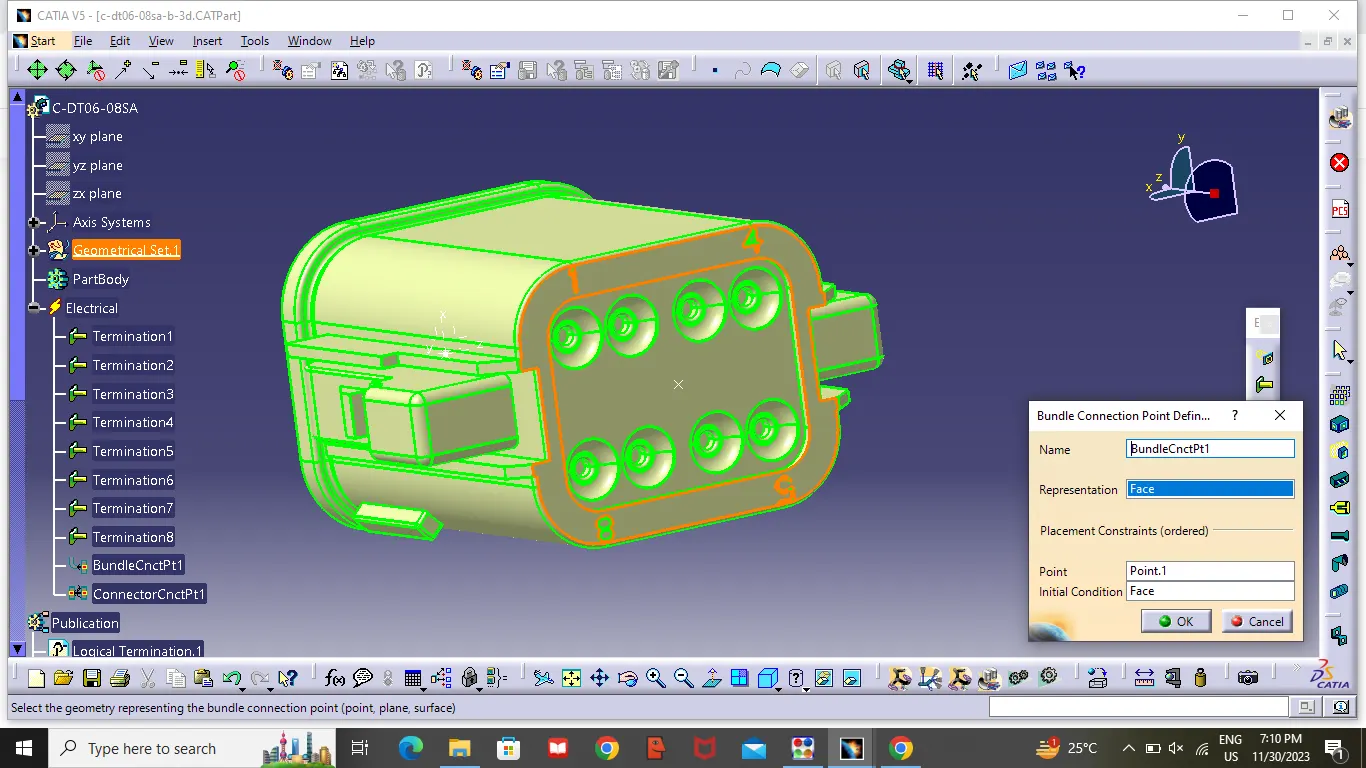
2.Tyco 174357-2:
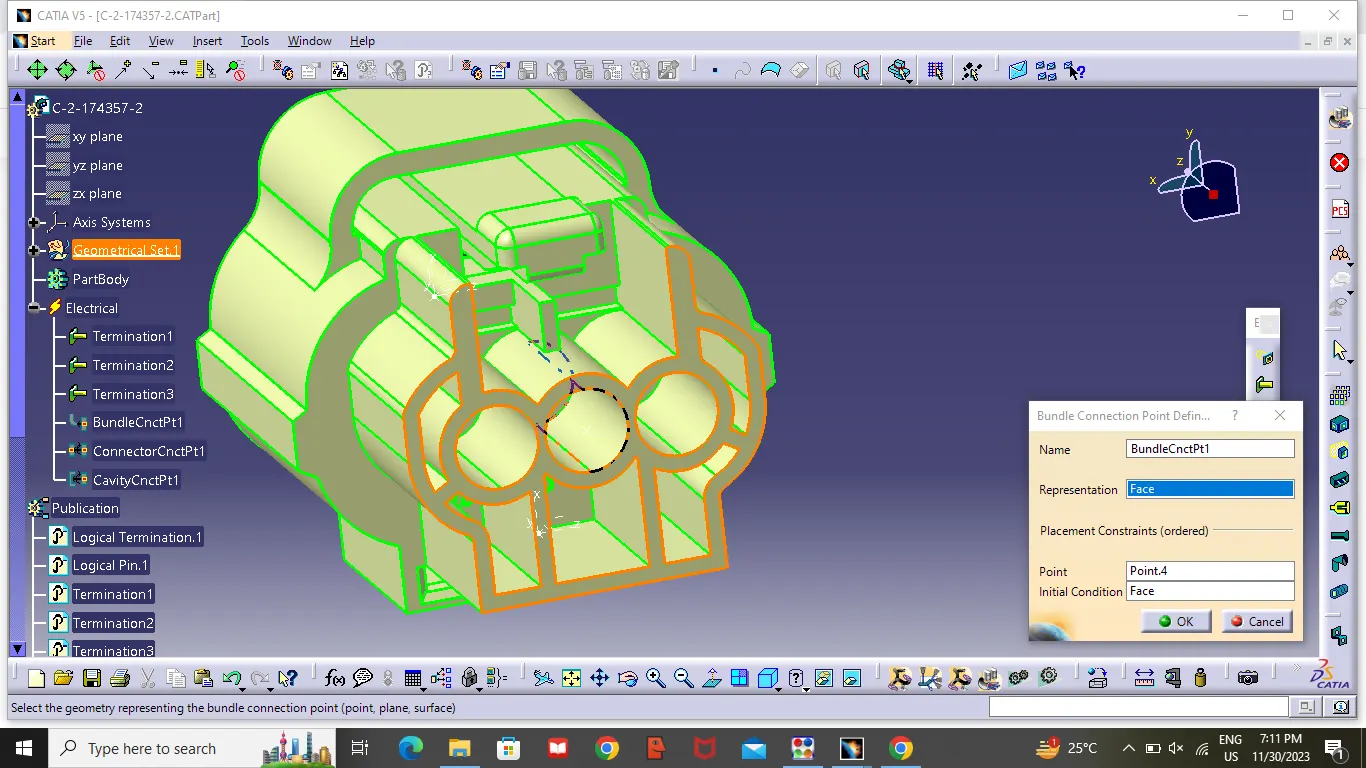
- Create a midpoint on the Bunddle connection point as showen in the figure .
- Then create an another midpoint on contact face which will be normal to wire bunddle insertion.
- Create a Axis system respect to the point which we have created.
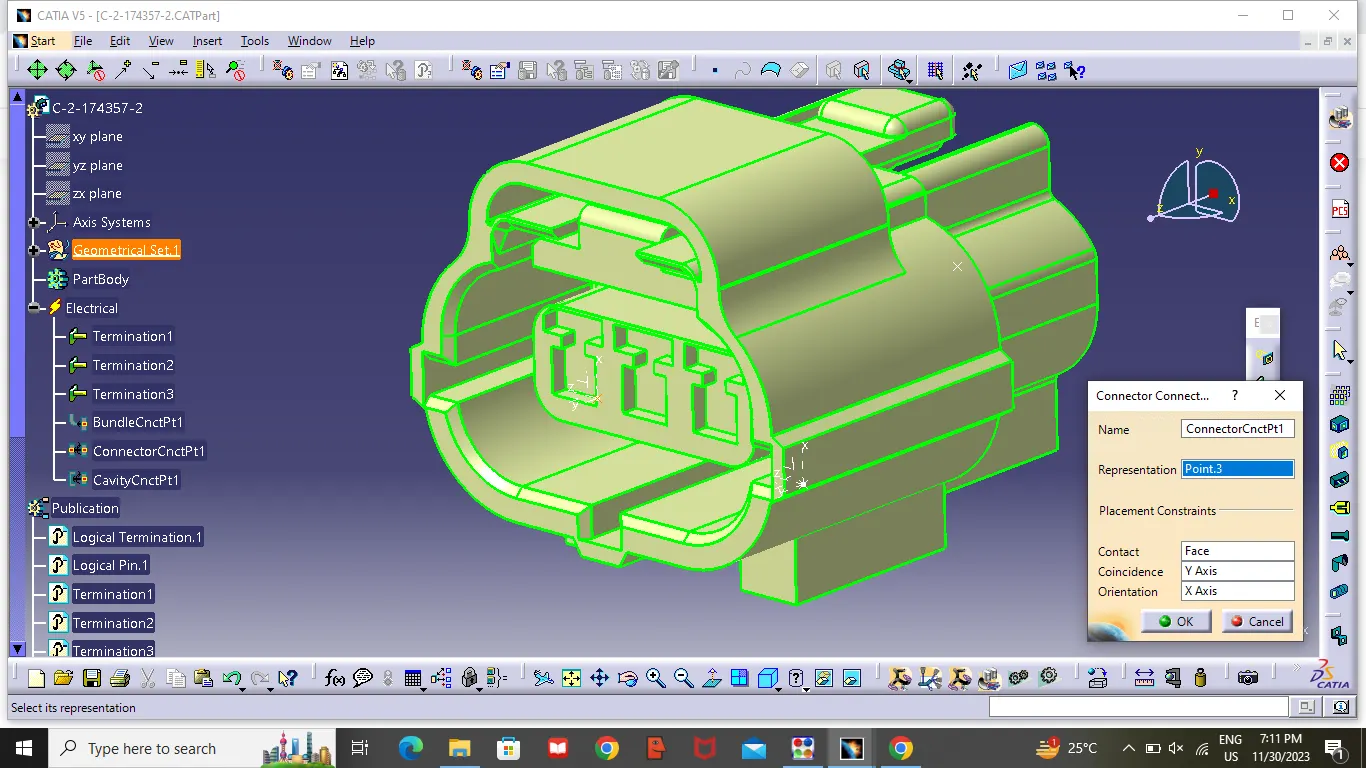
- After completing the Axis system. Then switch to "Electrical part Design" .
- then select Define Bundle connection point definition Tool and select the Rare face of the connector as showen in the figure .
- Then Select Connector Connection as showen in the figure select the point first and select the front face as contact and coincidence Y direction,orientation as X-axis .
- Create a cavity connection point .
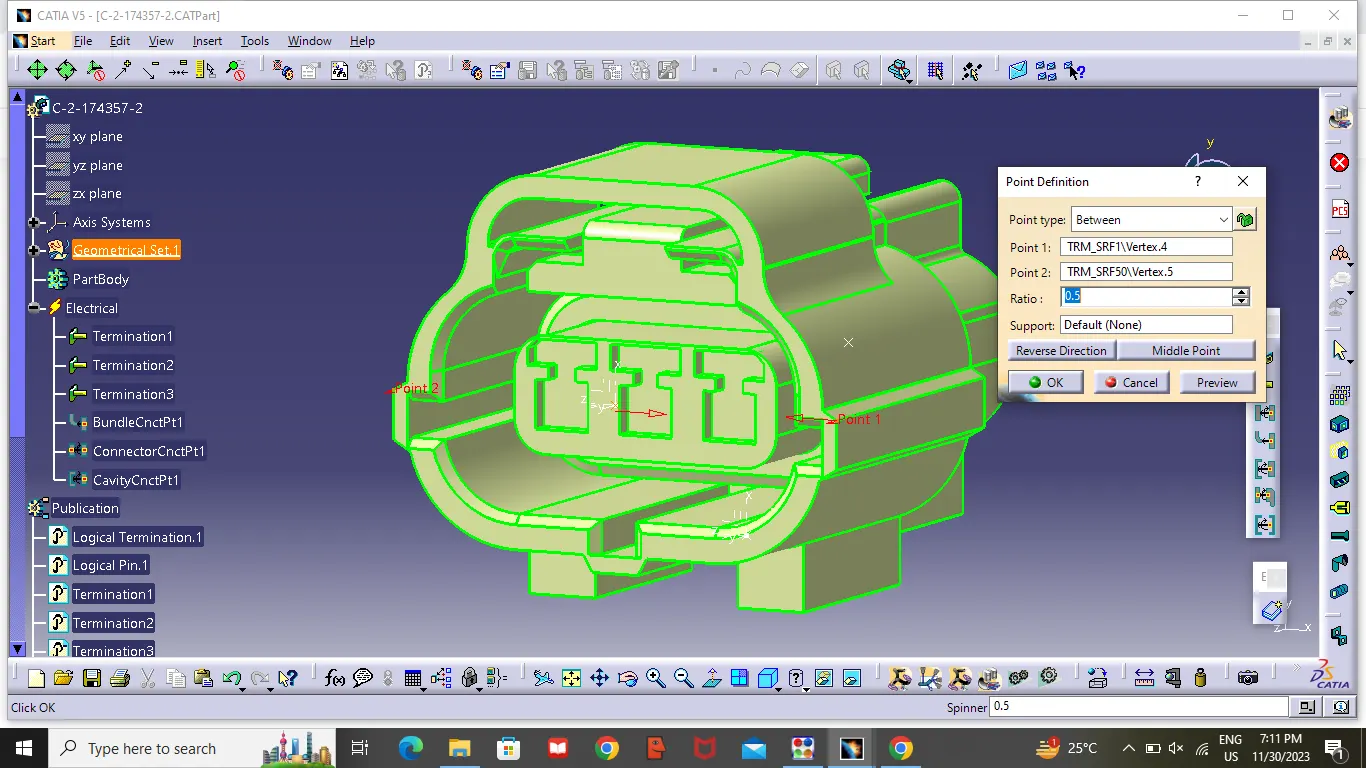
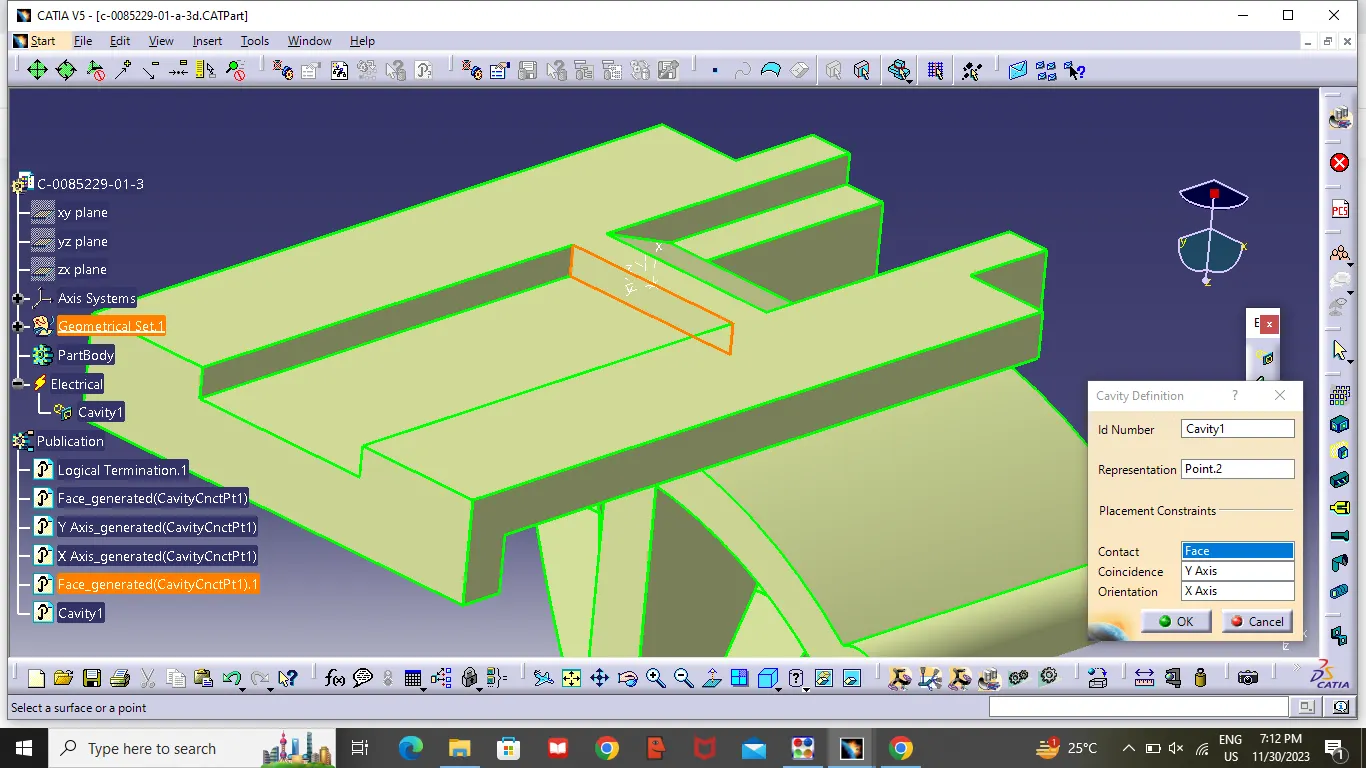
3.Tyco 85229-1:
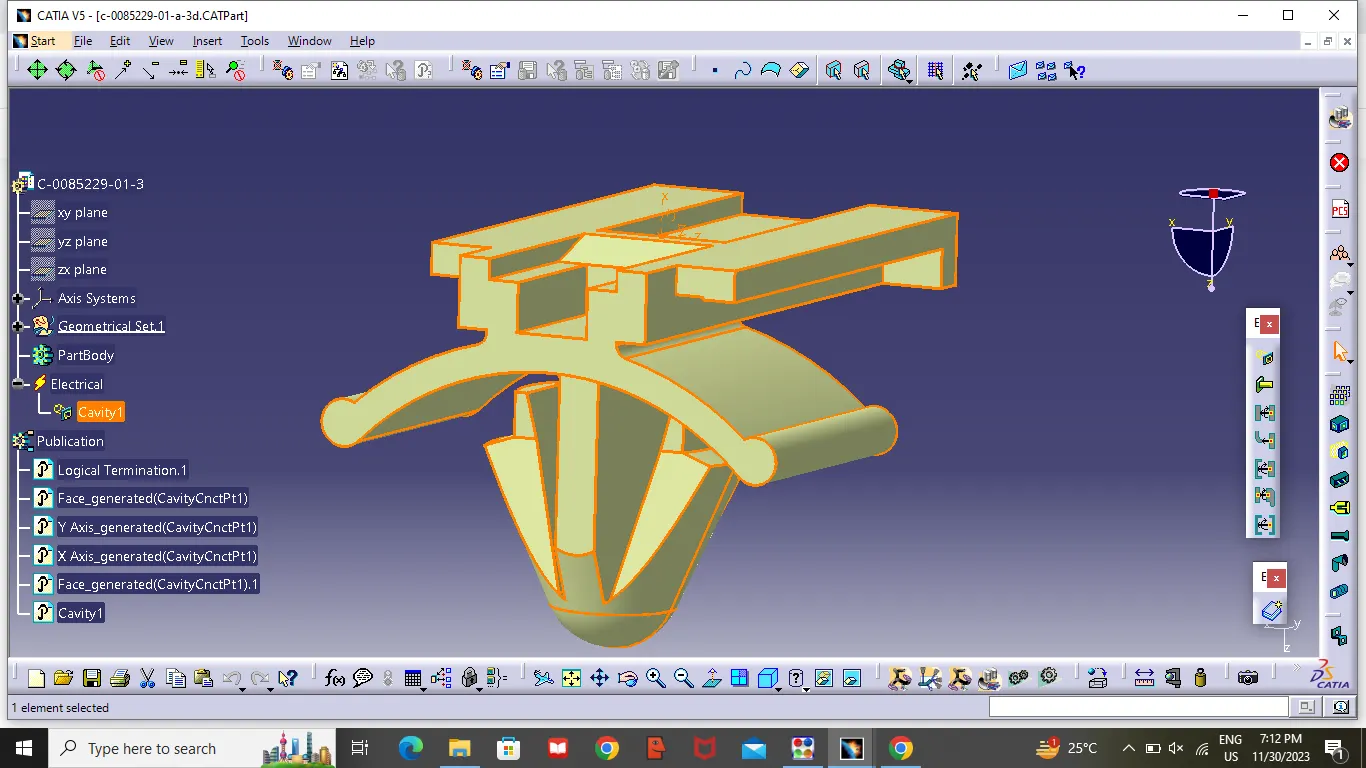
- Create a midpoint as showen in the figure .
- Then select Cavity Definiction and select Representation as point and select the frount face as contact and coincidence Y direction,orientation as X-axis .
Electric Assembly design :
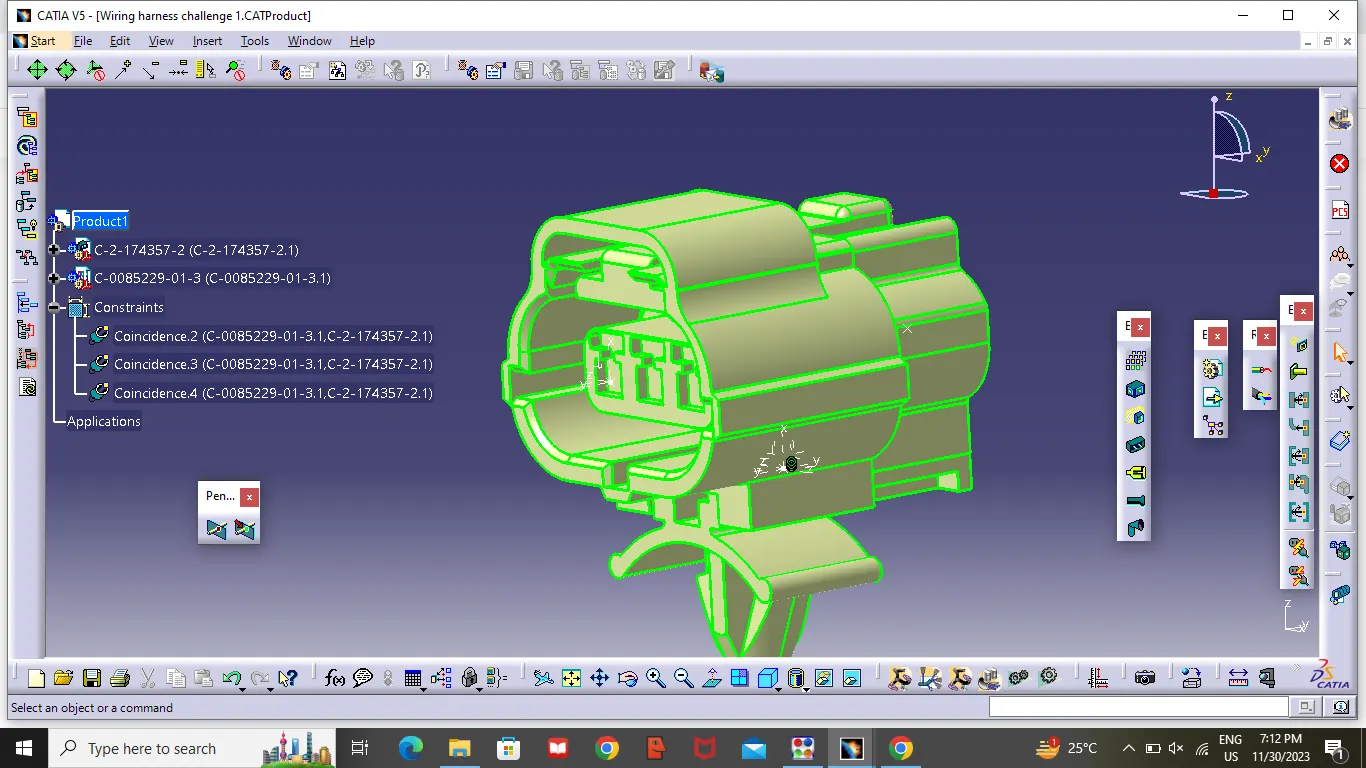
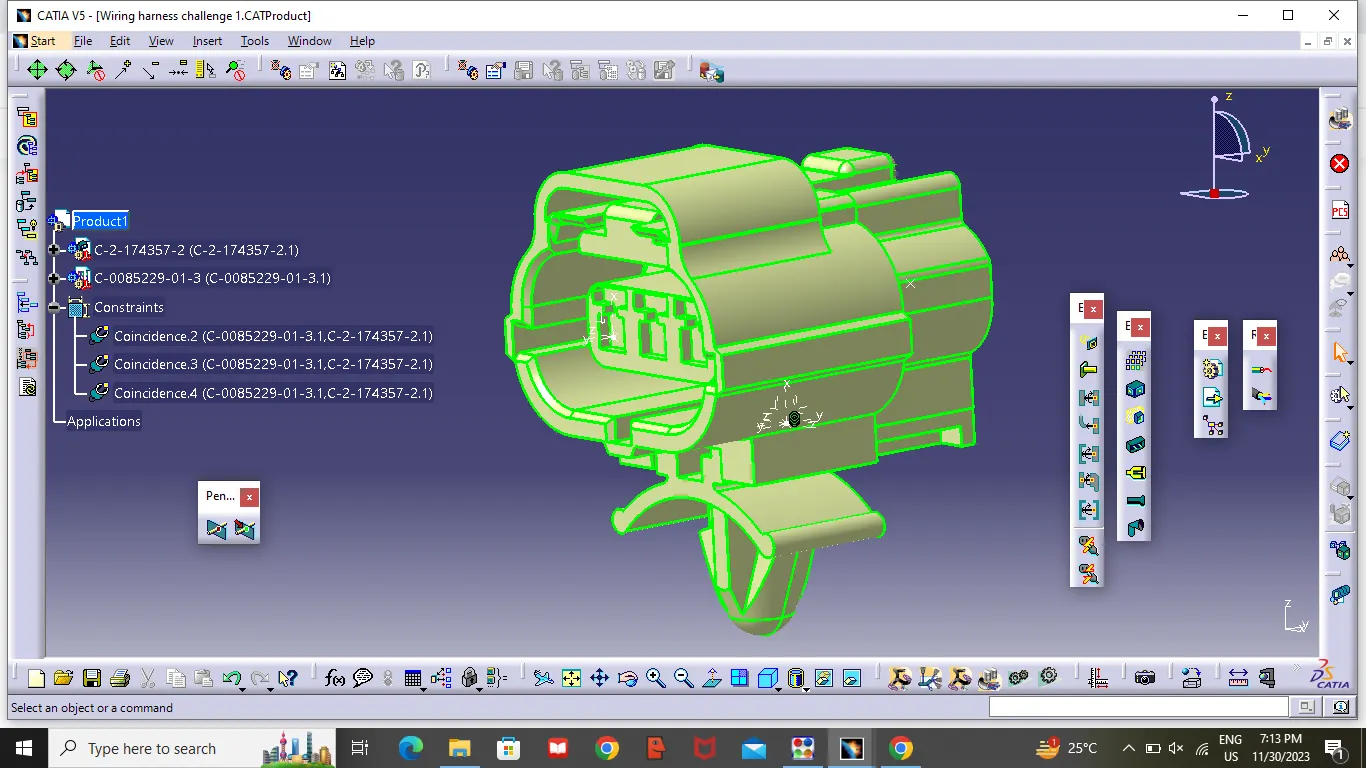
- Open the Electric Assembly design and import connector and cavity mounting clip.
- Then Select define Electric Connection then select cavity mounting clip and Connector .