Week 9 - Project - A pillar Design with Master Section
Aim:
To create a master section of the given A pillar.
- Picture of the sketches with Sketch solving status’s geometry tab
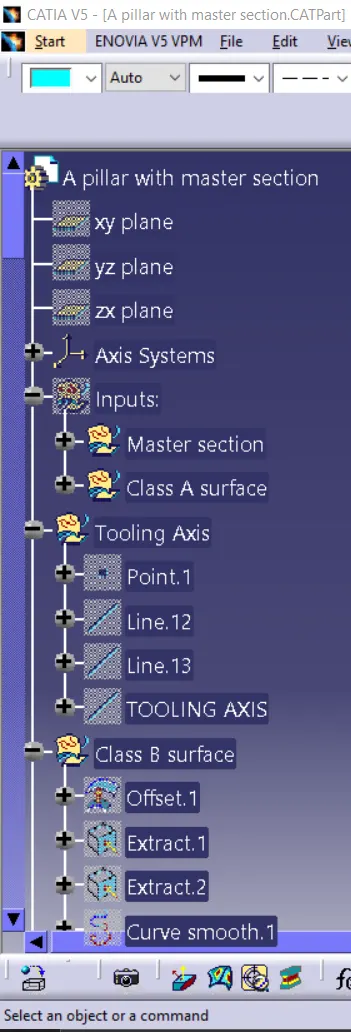
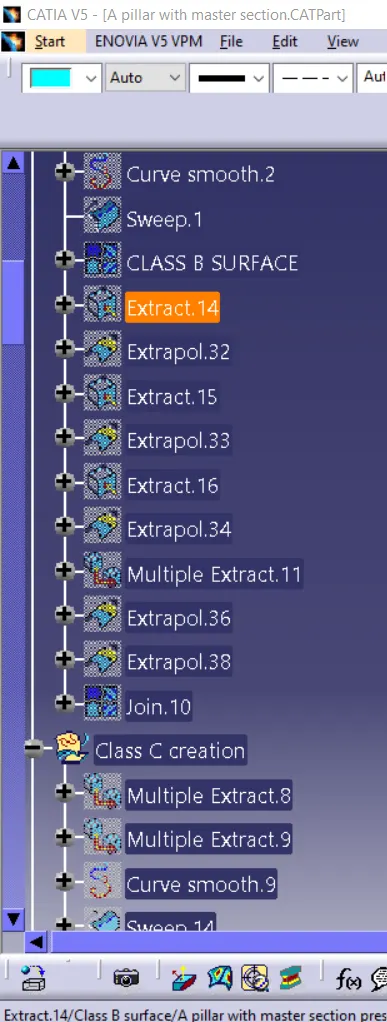
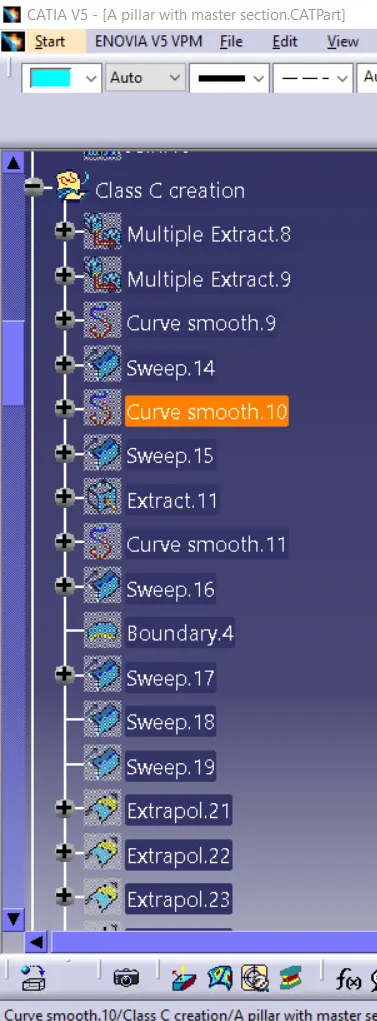
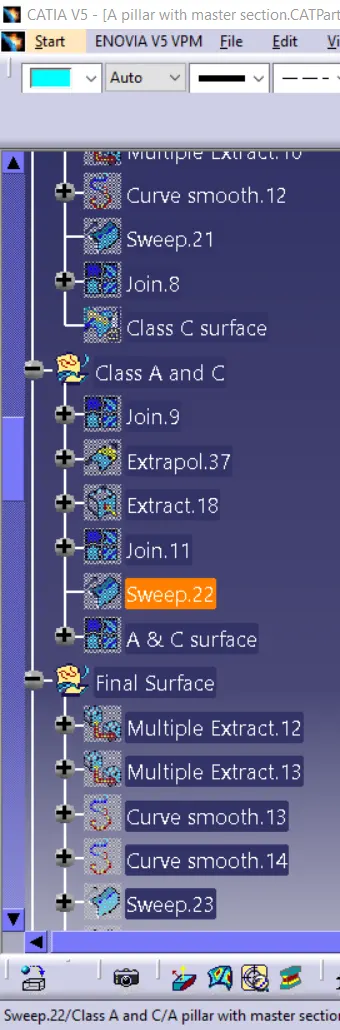
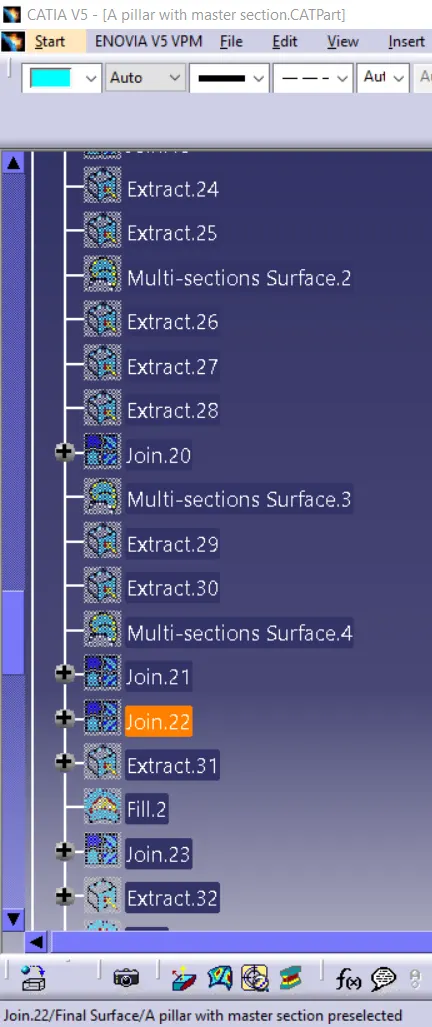
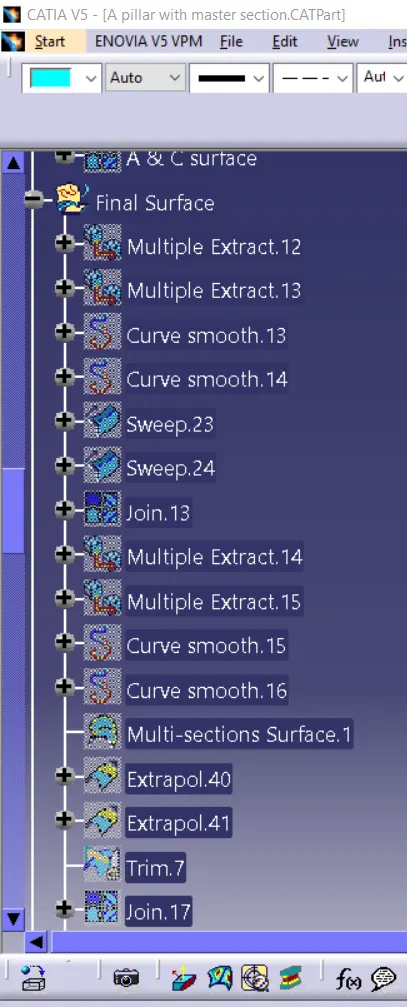
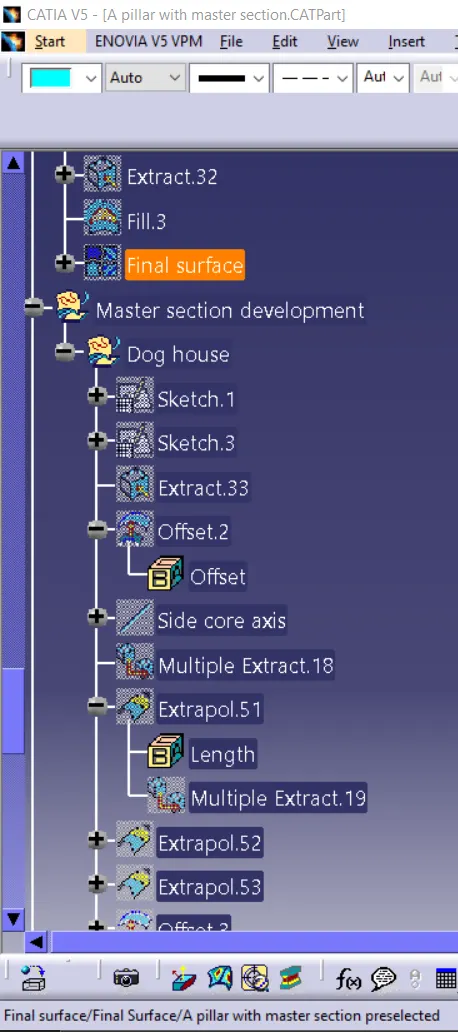
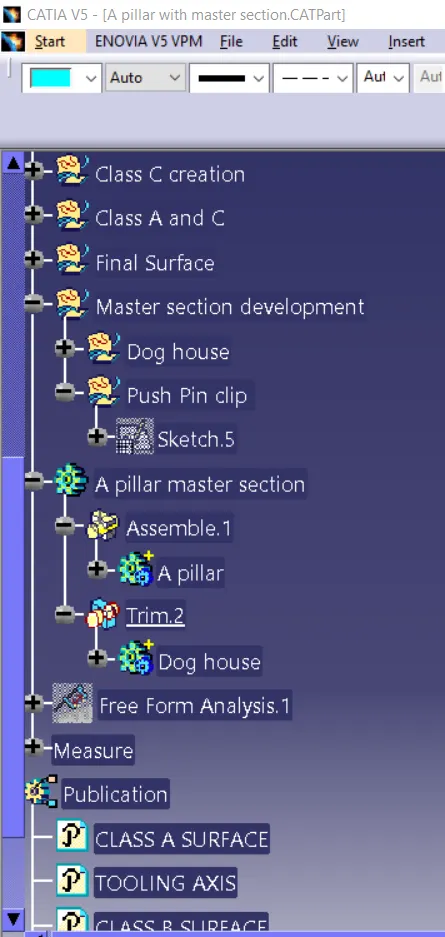
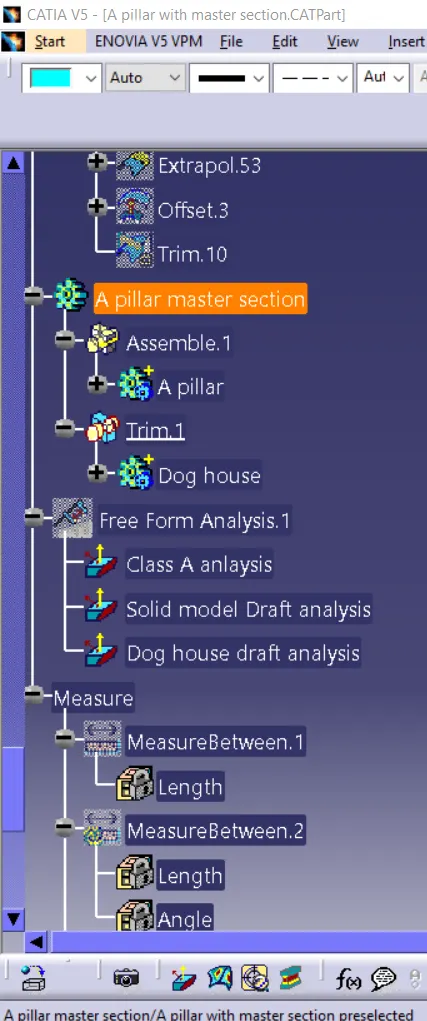
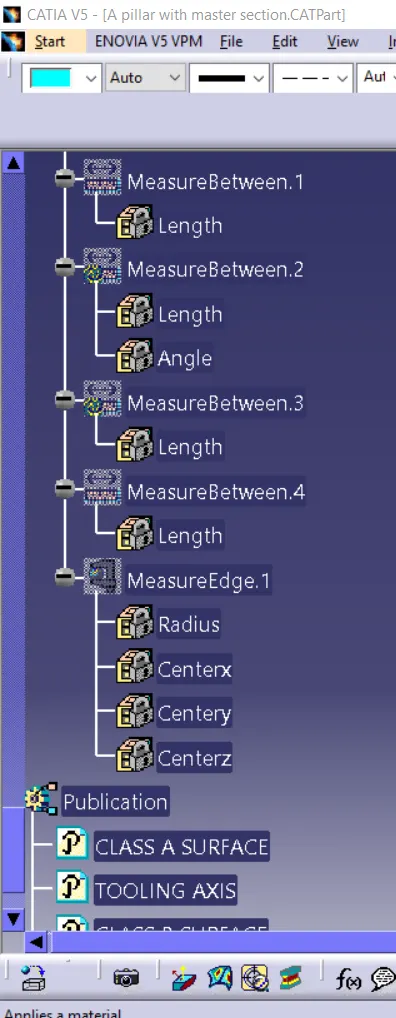
- Picture of the Detailed tree structure.
- Picture of the 3D CAD
- Create closed body
- Create tooling axis and follow design rules.
- Follow the Master section to create flange
- Follow the master section for thickness and to create the Closed volume.
- Follow master section to create Attachment features
Solution:
Download the file from the given link and savve it as CATPART and work on it.
Intoduction of Master section:
MASTER SECTION:
Master sections development takes place during feasibility check and concept validation stages of the product life cycle. These are typically the guides for design requirements and which decides the component packaging after the development of the concept design, i.e class A surfaces.
Master section helps us to decide the feasibility of the concept design, the clearances, the packaging and the fixation strategy of a component before converting the concept design into a solid 3D engineering design.
During the period of vehicle concept design the evaluation of the master section performance depends mainly on the reference vehicle data and experience of structure design engineer.
Class A Surface:
The class A surface is given with a master section.On observing the master section we can conclusde the master section given is a dog house.Dog houses are used as supporting feature. Sometimes other engineering features like snaps; locators etc. are mounded on them to increase their strength. Dog houses are subjected to draft analysis to prevent breakage of the component during ejection from mould cavity
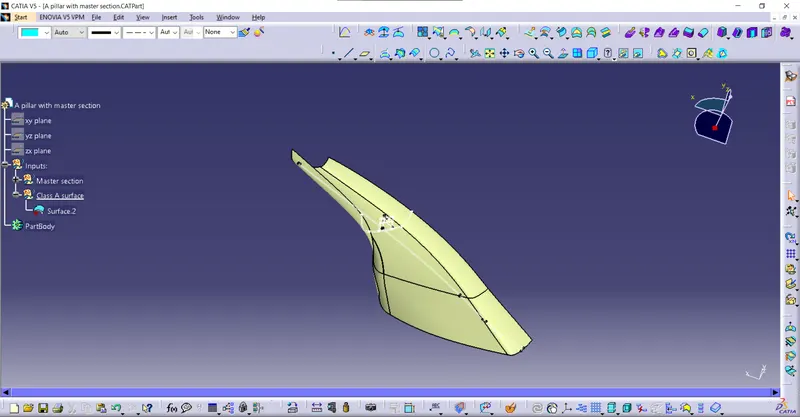
As we have less engineering features or B side features like
- Screw boss
- 2 way & 4 way Locator
- Heatstakes
- Dog house
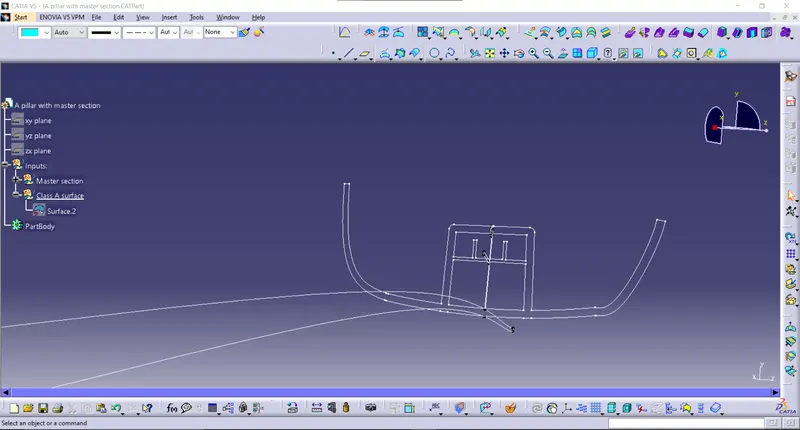
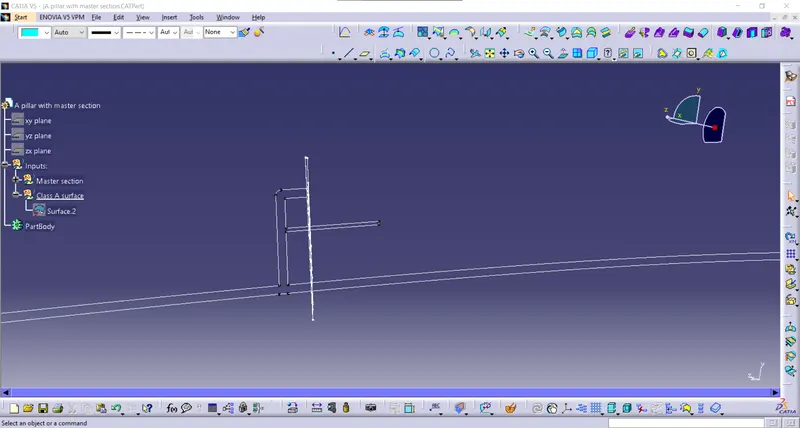
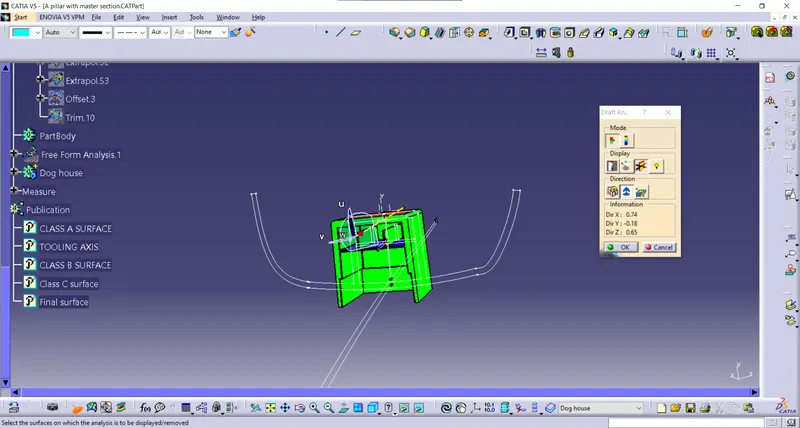
The master section has a box shape in front view and an L shape in the side we analysing that we can assure that its a Dog house mastrersection given.
Front view:
Side view:
The next Step the creation of Tooling axis:
Since its a flat surface we can create a point on the surface and create the tooling axis.the other method is bisecting method using the mastersection given.We are going to create with the bisecting method for better understanding and not to face any issues further.
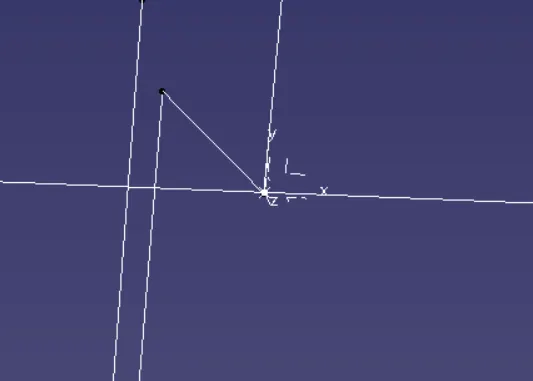
Creating a point using the between option in the mastersection and insterting an axis system.We can deselct the current adn aling according meant straight to the master section.Create a two lines at he end od master section and align them to the and using bisecting line create the main tooling axis.
Axis System:
Bisecting method:
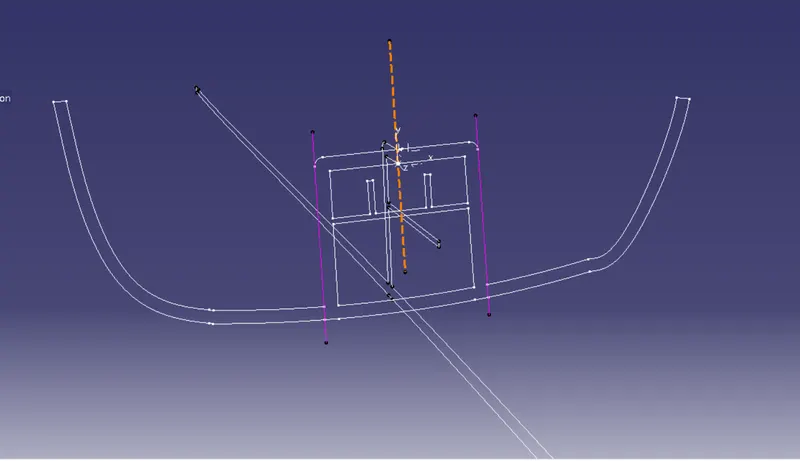
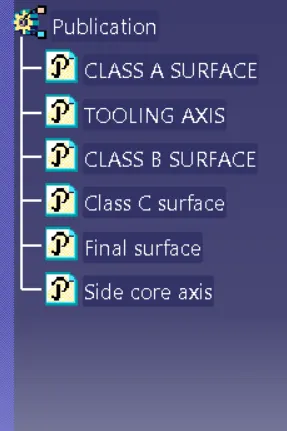
The purple line are created for the bisceting line to be created using point to point the purple lines are created and the orange line indicates the tooling axis created by bisecting line command.With this tooling axis the class c surface is created and even ofr dog we use this tooling axis and also create a side core axis for the dog house.
Draft Analysis:
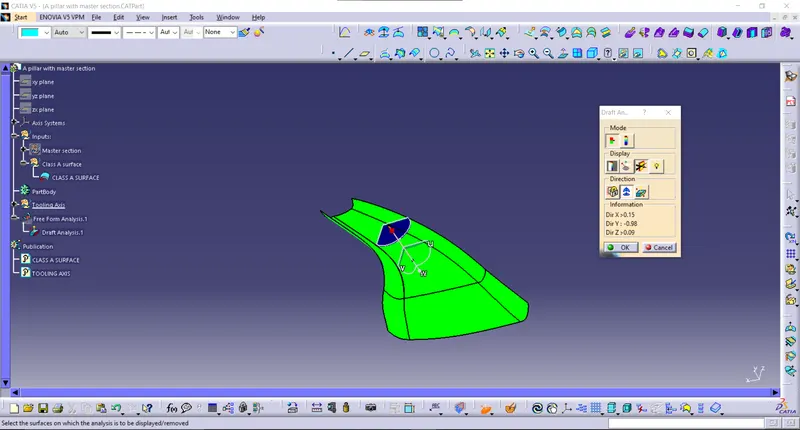
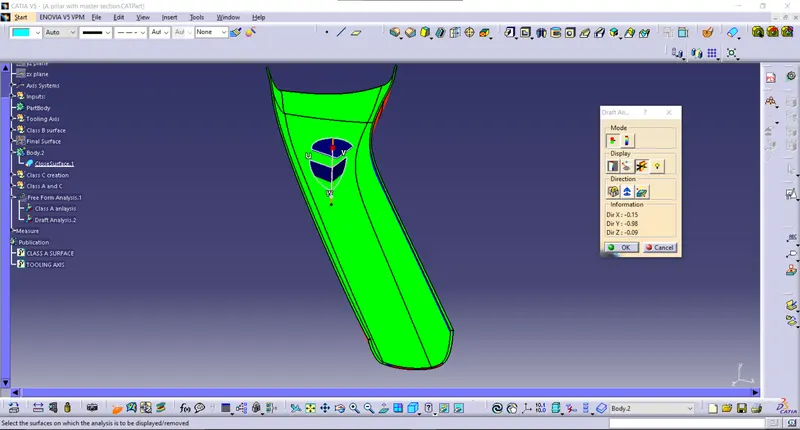
The Draft Analysis command enables you to detect if the part you drafted will be easily removed. This type of analysis is performed based on color ranges identifying zones on the analyzed element where the deviation from the draft direction at any point, corresponds to specified values.The Draft Analysis allows the user to easily analyze a part for proper draft angle. A Draft Angle describes the amount of taper for molded or cast parts perpendicular to the parting line
Creation Of B Surface:
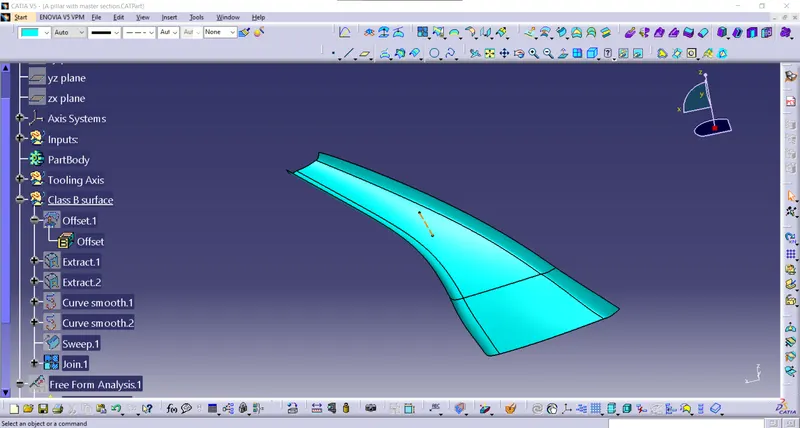
As we know B surface can be created by offset method as we dont know the thickness we can use the mastersection to consider the thivkness.We can see there is two linws in a master section we can measure the distance between them and offset accordingly.
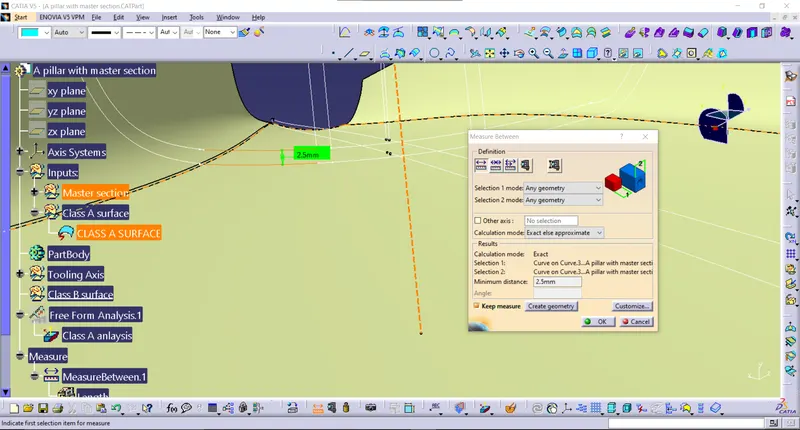
As shown in the above image the thivkness is 2.5mm so we can offset the b surface for 2.5mm distance and remove the patch work the Class B surface is been created.The patch or unoffseted surface can be done by using sweep or multi surface creation.Noted always the thickness to be measured in a flat surface or line to get the accurate value.
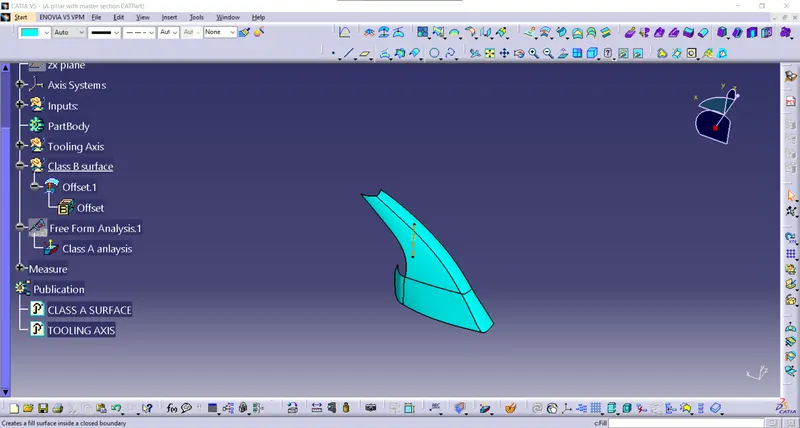
The B surface is offseted. So, we can see there is a missing part or surface this can be done usong sweep option.The final class B surface is been created.
Class C surface creation:
We can create the class C surface with sweep option but we can created in a single go as we reference is tooling axis if the surface is perpendicular 90 degree and parallel we can create 3 degree.
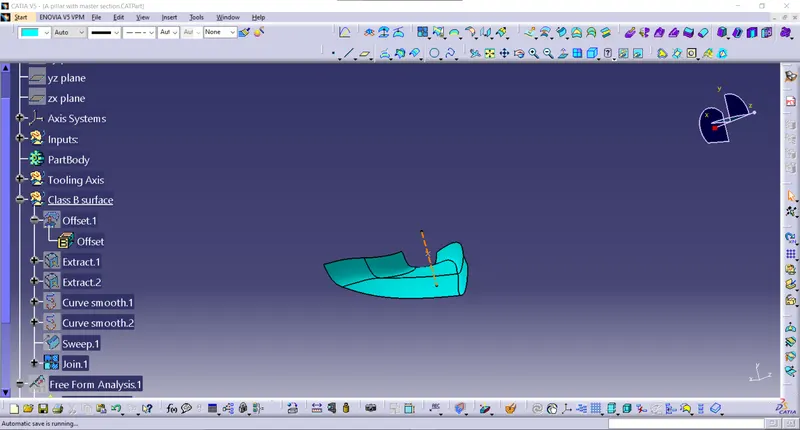
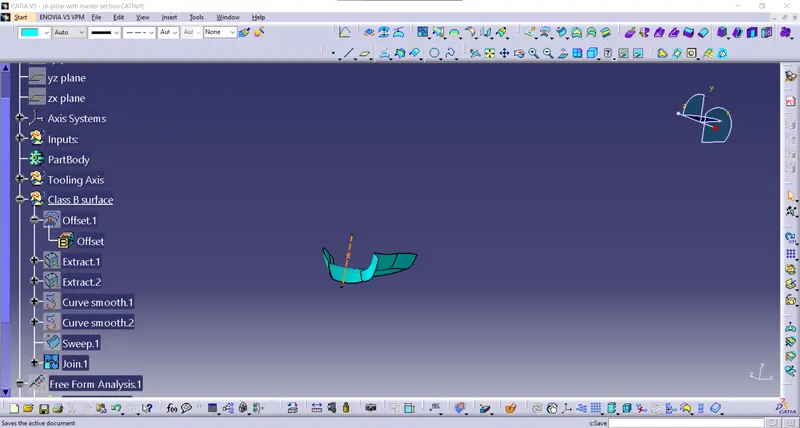
In the above image the two images the sweep is 3 degree
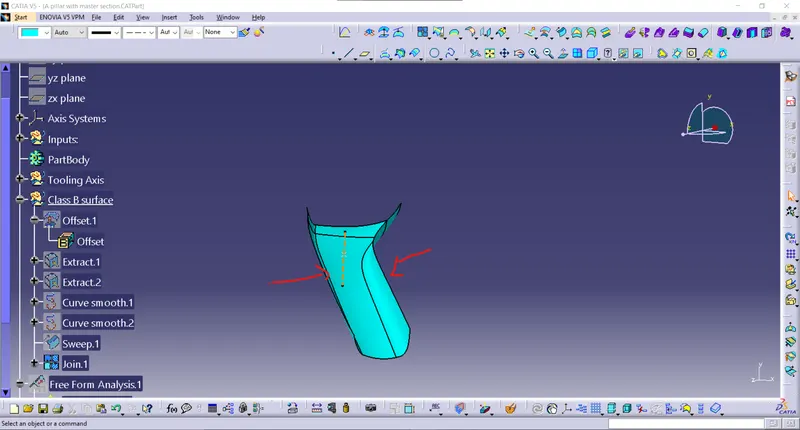
the above image shows we shld do 90 degree sweep.
The class C surface is been done using extract sweep and multiple extract direction tooling axis and for some using reference surface coomand.the Final Class C surface is given below.
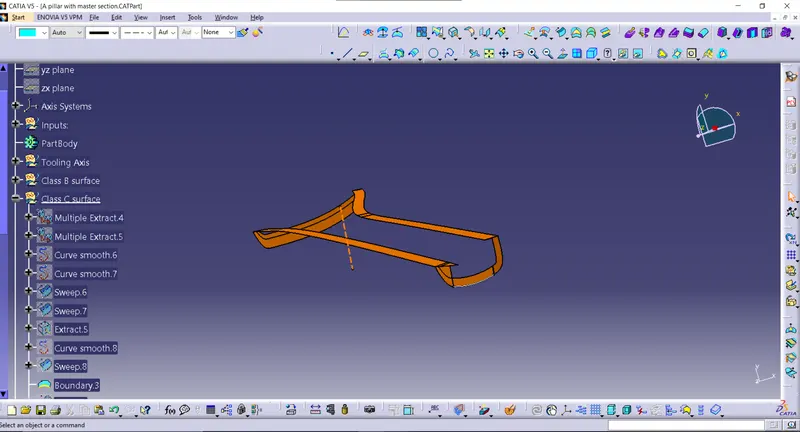
Joining class A and C Surface:
The class C surface is been created and unhide the class A surface and join both the surface To form a surface name it as Class A and C Surface.
Then check the boundary if any boundary is shown inside then the joining of two surface htem u need to alter the trim option in for C surface.If the boundary is outside the joining its fine.As shown in the image below.
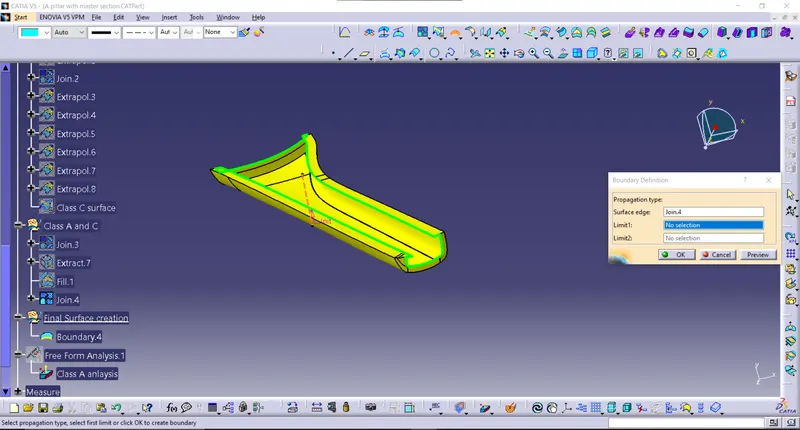
The final surface creation:
The final surface is been trimed and obtained.If the boundary is not shown then the surface is closed surface.
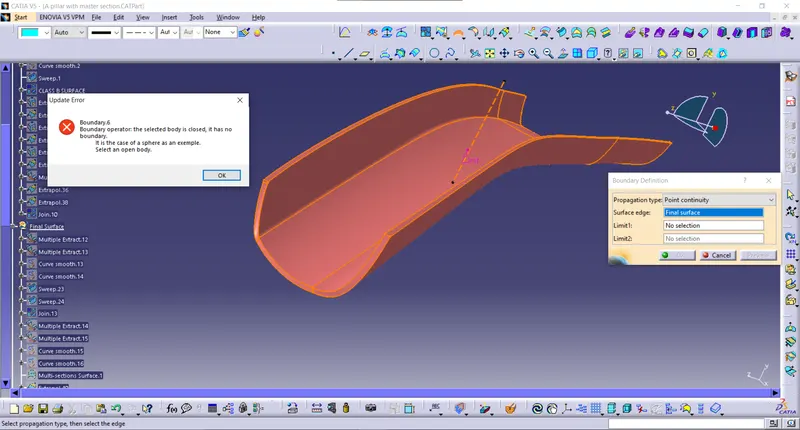
The solid model;
Shift to part workbench then insert a body and click on the closed surface option to create a solid model.Then solid model is created now work on the B side features using the given master section.
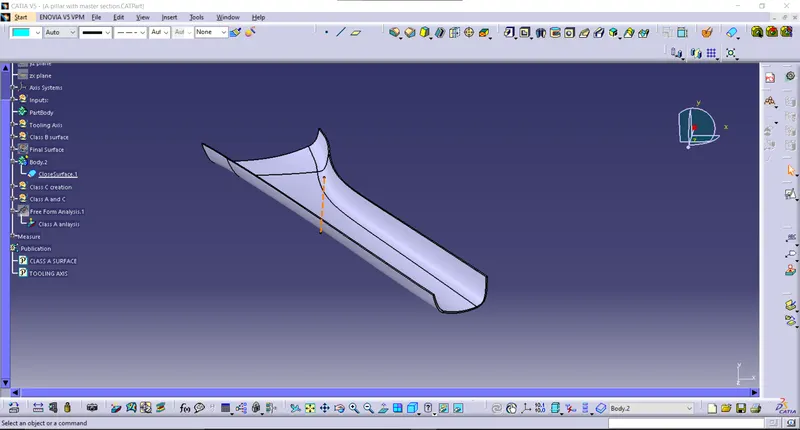
Before creating the master section we should check the draft analysis for the solid model created.The image is shared below.
Master section development:
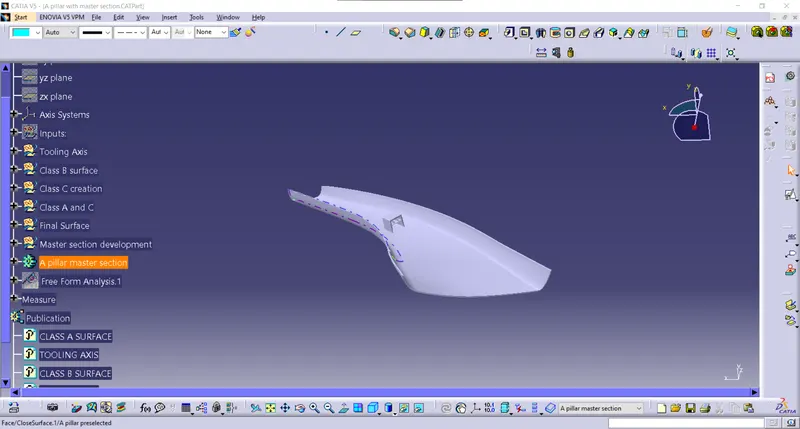
The final A pillar:
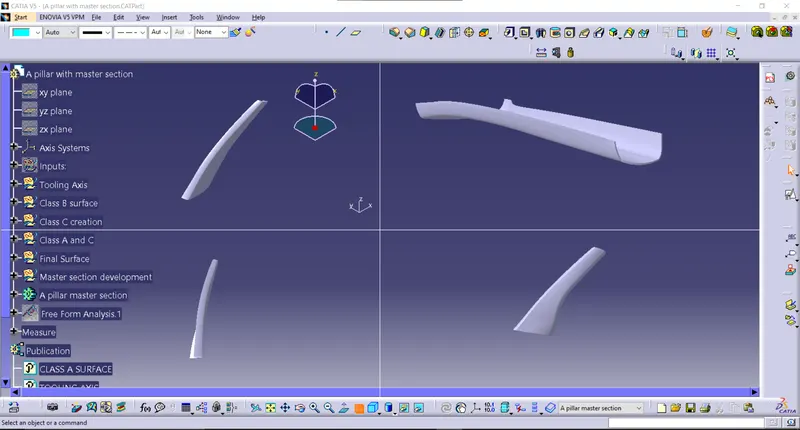
Design tree:
Publications:
Conclusion:
The given A pillar is beens designed using the mastersection and the catpart file has been attached.