Week 9-Creation of 1D Connectors Challenge
AIM :
- To Mesh the given geometry and create 1D connectors at desired locations using Hypermesh.
- The following connection have to be realized in each respective component.
-
1. Right_Rail_2 & Front_truss_1:- Seam-Quad(angled+capped+L)
2. Left_Rail_2 & Front_truss_1:- Quad elements
3. Front_truss_2, Front_truss_1 & Right_Rail_1:- Spot weld with 2 Layers and 5 mm Diameter
4. Front_truss_2, Front_truss_1 & Left_Rail_1:- Hexa (Adhesive)
5. Rear_truss_2 & Right_Rail_2:- Bolt Connector
6. Rear_truss_2 & Left_Rail_2:- Bolt Connector
7. Right_Rail_1 & Right_Rail_2:- Spot-weld with Rigid Elements
8. Left_Rail_1 & Left_Rail_2:- Spot-weld with Spring Elements
9. Rest all the component left Join them with suitable connectors.
IMPOARTANCE :
- Connectors are geometric entities primarily used used to create Spot and Seam welds, but also used to create adhesives,bolts and masses.They are mainly used to define which parts of a model have to be fastended to each other and how connections have to be performed.The connectors can take into account the mechanical and structural condition of the model.
PROCEDURE :
- First , we need to import the given model and the connector points in the model tree are hidden while meshing.
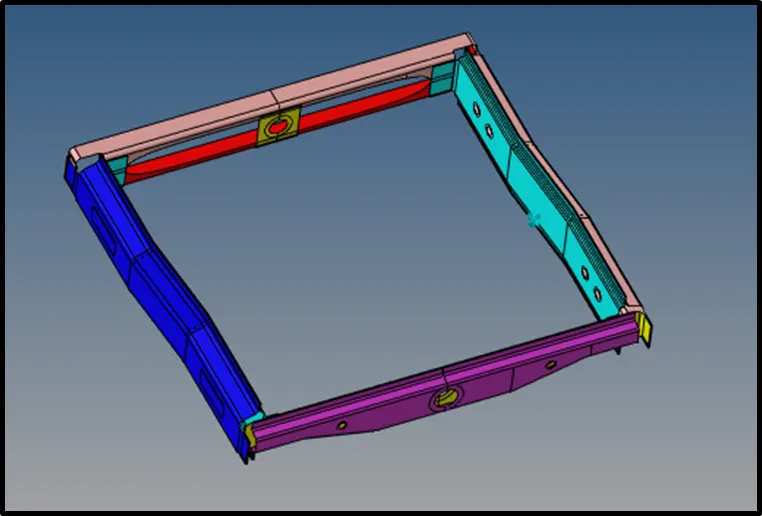
- Each indiviual components is separted and meshed separetly.
- If required , the component can be cleaned for topological errors and defeatures using manual or autocleanup method.
- To cleanup geometrical errors : GEOM > AUTOCLEANUP > SET PARAMETER > CLEAN.
2D Surfae Meshing :
- To generate a shell mesh over each component.2D > AUTOMESH > SURF (DISPLAYED) > TARGET = 5 > MESH.
- However to acheive a perfect mesh without quality errors the comp is sectioned into different surfaces using surf trim option and meshed separetly.
- The surface can be meshed with quads majority.
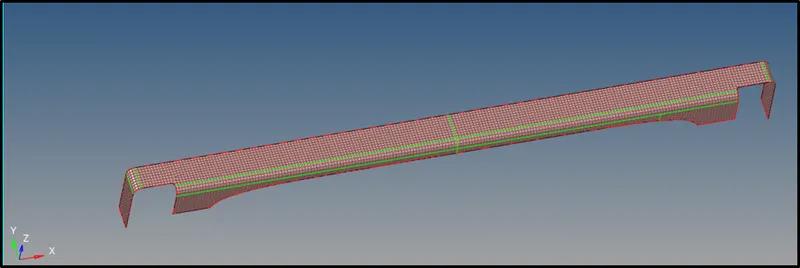
- Similarly, symmetrical components can also be trimmed about the mid point and meshed and reflected about the central axis.
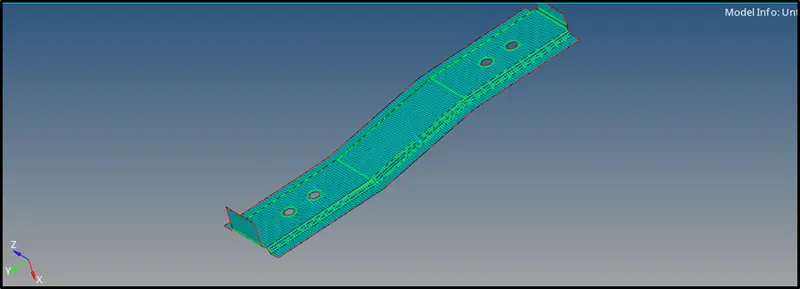
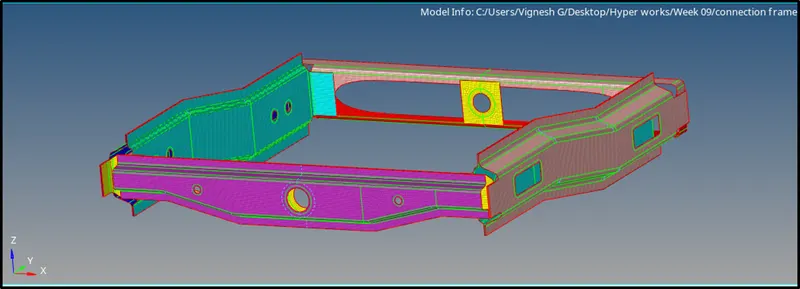
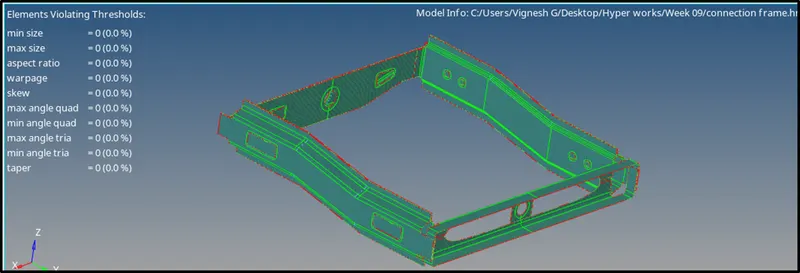
- Finally all components have been meshed using 2D elements ( Trias and Quads )
Assigning Property Card:
- A single property and material card is added for every component.
- Assuming every comp has the identical thickness and material , a single card is added to each.
- Then the necessary material values like poission ratio, young's modulus etc.. are specified.
- Similarly a new property card is created with the PSHELL card image and the above mat card is assigned to it.
- The thickness of the comp are also specified in each property card.
- Each card is assigned the perperty card which is linked to the material card.
1D Connections :
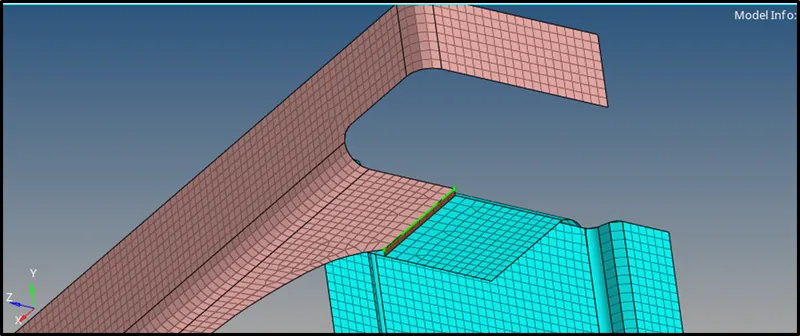
1. Right_Rail_2 & Front_truss_1:- Seam-Quad(angled+capped+L)
- To create a Seam weld : Connectors > Seam . select the nodes ( by path ) on one of the component.
- Tolerance = specify the search distance (10mm).select the two component and keep the imprint check on
- Weld type is set as SEAM - QUAD ( angled + capped + L ).
- The weld angle can be altered but an anle of 60 to 45 is widly preferred based on the alignment of the two components.
- The Spacing is set a 5mm . Spacing defines the distance between the two adjacent weld elements.
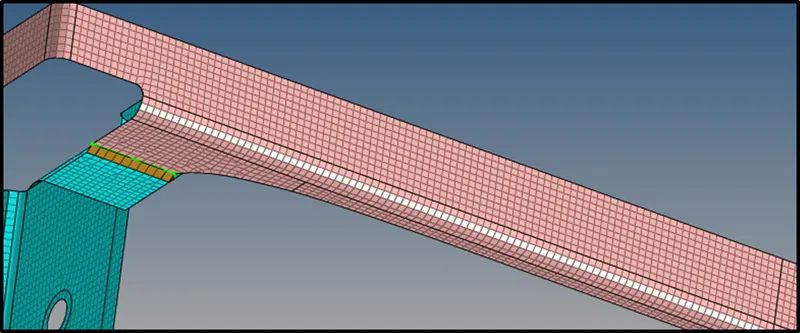
2. Left_Rail_2 & Front_truss_1:- Quad elements
- To create Seam weld : Connectors > Seam
- Select the nodes (by path) on one of the components.
- Tolerance = specify the search distance (10mm) . Select the two componets and keep the imprint check on
- Weld type is set as QUAD and the spacing ( distance between the two adjacent weld elements ) is kept as 5mm
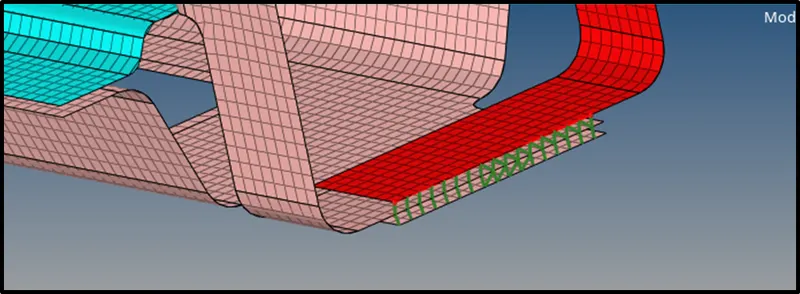
3. Front_truss_2, Front_truss_1 & Right_Rail_1:- Spot weld with 2 Layers and 5 mm Diameter
- To create a spot weld : 2D > Connectors > Spot > Type = Weld
- Select all the required nodes where the location of the spot weld has to be placed.Then select all the 3 components.
- Specify a diameter of 5mm and number layer as 2.
4. Front_truss_2, Front_truss_1 & Left_Rail_1:- Hexa (Adhesive)
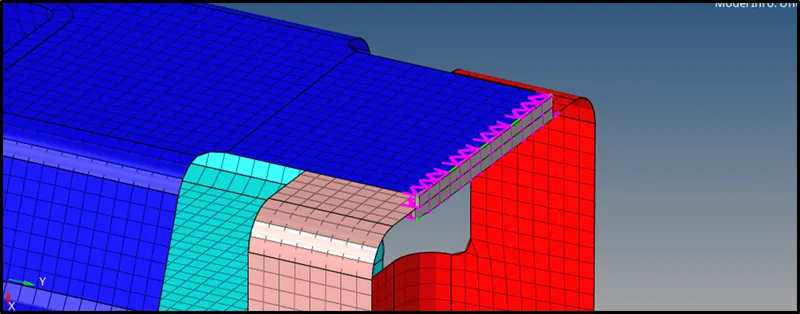
- To create a Seam weld : 2D > Connectors > Seam.
- Select the nodes (by path) on one of the component.
- Tolerance = Specify the search distance (10mm).select the two component and keep the imprint check on.
- Weld type is set as HEXA (adhesive) under the weld type category.
- The strips and coats of the weld can altered. In this case, the strip is set as 2 and a single coating is specified.
5. Rear_truss_2 & Right_Rail_2:- Bolt Connector
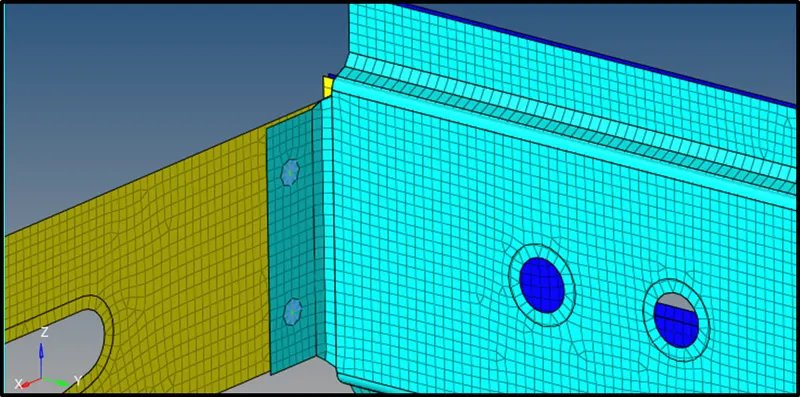
- To create Bolt connectors : 2D > Connectors > Bolt.
- Specify the location of the bolt by selecting two single nodes at a certain distance in one of the component since two bolt connectors are being realised.
- Select the two components which has to be fixed by the bolt.
- Select the option to create a hole to define the bolt as a physical element ( Note that is will modify and alter the neighbouring mesh ).
- Specify the search distance as 10mm
- The realized bolt connection is shown below.
6. Rear_truss_2 & Left_Rail_2:- Bolt Connector
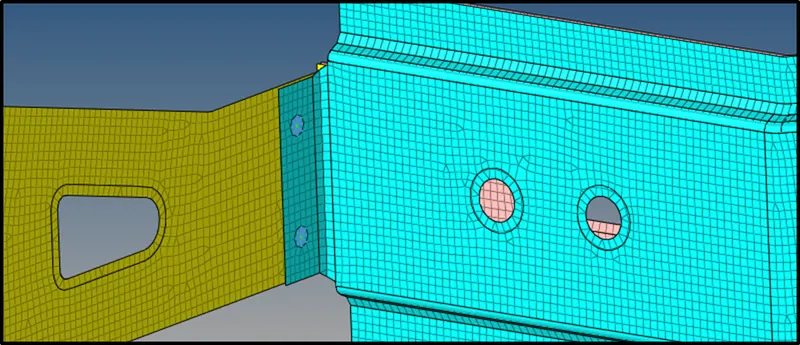
- To create Bolt connectors : 2D > Connectors > Bolt.
- Specify the location of the bolt by selecting two single nodes at a certain distance in one of the component since two bolt connectors are being realised.
- Select the two components which has to be fixed by the bolt.
- Select the option to create a hole to define the bolt as a physical element ( Note that is will modify and alter the neighbouring mesh ).
- Specify the search distance as 10mm
- The realized bolt connection is shown below.
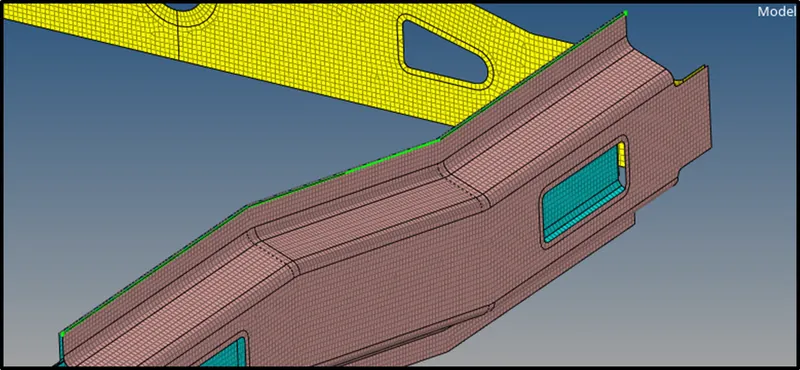
7. Right_Rail_1 & Right_Rail_2:- Spot-weld with Rigid Elements
- As specified to previous spot weld creation , this spot weld is created using rigids instead of weld.
- To create Spot weld : 2D > Connectors > Spot > Type = Rigids
- Select all the required nodes (By path) where the location of the spot weld has to be placed.
- Then select all the 2 components.specify the diameter and number of layer as 2
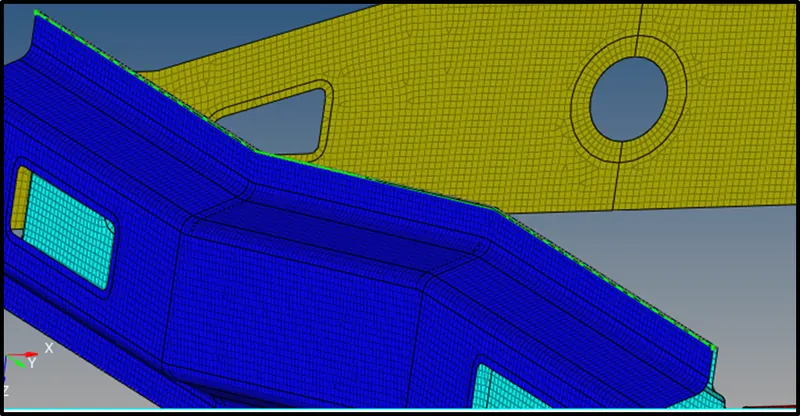
8. Left_Rail_1 & Left_Rail_2:- Spot-weld with Spring Elements
- Similarly as done for the previous case, here the spot element type is set as spring instead of rigid or weld.
- To create Spot weld : 2D > Connectors > Spot > Type = Spring
- Select all the required nodes (By path) where the location of the spot weld has to be placed.
- Then select all the 2 components.specify the diameter and number of layer as 2
9. Rest all the component left Join them with suitable connectors.
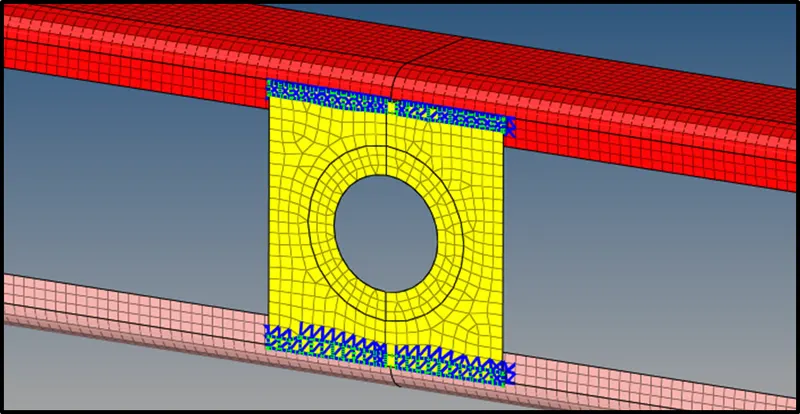
- In case of the shell element component with the hole. a adhesive connections is made.
- Adhesives are RBE3 elements that distribute the load applied to its master node.
- To create adhesives using area connector method.
- 2D > Connectors > Area > Type = Adhesive > Select elems and components > specify coat layer > Specify search tolerance > Create.
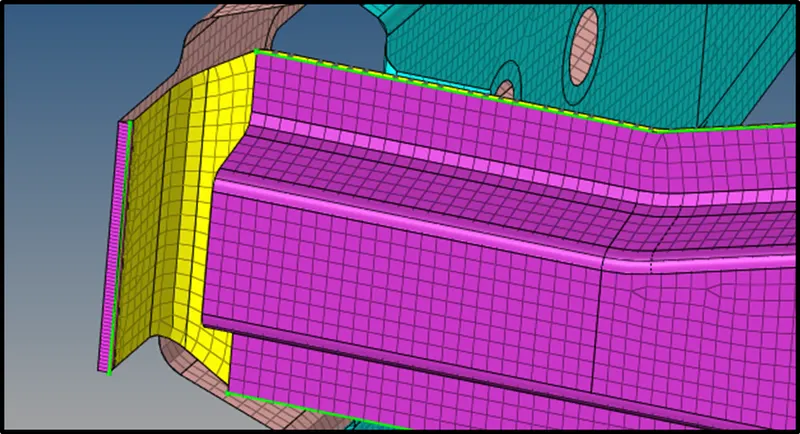
- Similarly , a Seam weld is created on other components.
- A Seam weld with a ( Vertical + angled )type is created as shown below.
- 2D > Connectors > Seam > Type = Quad ( Vertical +angled )
- Then specify the weld angle as 45 degree and select the required elems and components .
- The realized connection is shown below.
CONCLUSION:
- Hence every components have been meshed and required connections have be defined and successfully realized.
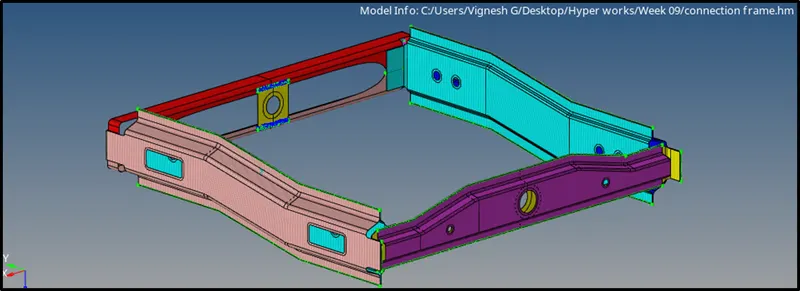
- Finally the entire connections and meshed components are shown below.
FINAL OUTCOME IMAGE :