Week 9 - Challenge 1 - Base Bracket Design
BASE BRACKET DESIGN
OBJECTIVE:
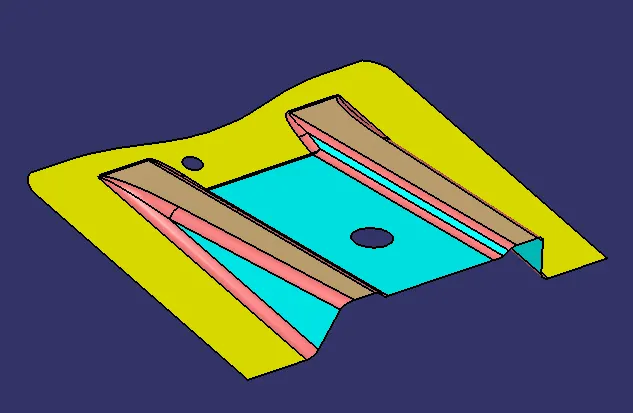
To create the base bracket plastic component from the given class A surface as an input.
Class A surface:
STEPS:
- Understanding the Class A surface.
- Creating tooling axis.
- Draft analysis for Class A surface.
- Creating geometrical sets for Class B surface.
- Creating Class C component (Thickening part).
- Draft analysis for Class C component.
1.) Understanding the Class A surface:
The Class A surface is input to the product designers, in which the surface gets thickend and the engineering feature are been added. We are developing a part which is going to manufactured and use in real time application. So the part which we designed from the Class A surface must be ease to manufacture. The boundary condition of Class A surface is checked.
2.) Creating the tooling axis:
From the Class A surface we have decided the tooling axis, in which the component going to molded. It should be easy for injection molding. Complicated tooling axis for a product will be difficult to manufacture and increase the time and cost of the product. So the tolling axis must be simple, efficient and ease to manufacturing.
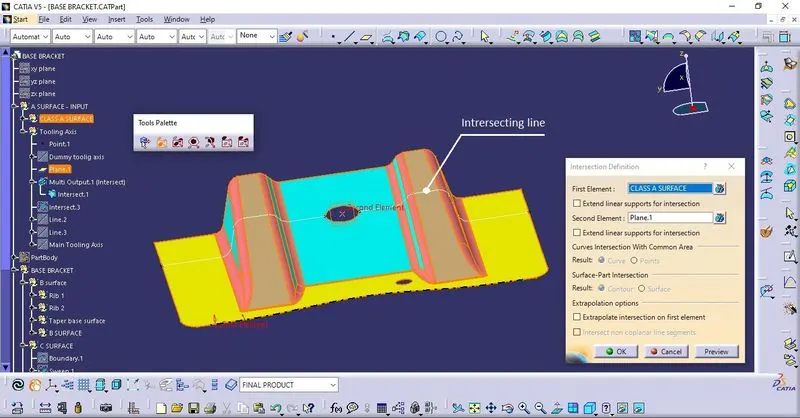
Creating the intersecting line with class A surface and plane using intersection tool:
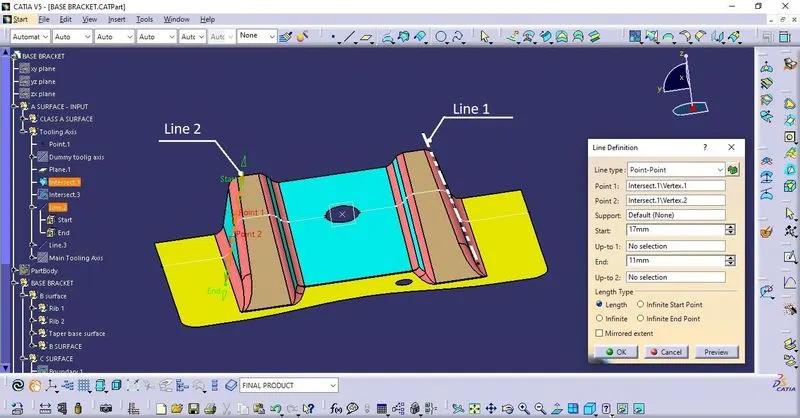
Creating reference line along the tapper face:
Bisecting these two lines with reference point to create the tooling axis:
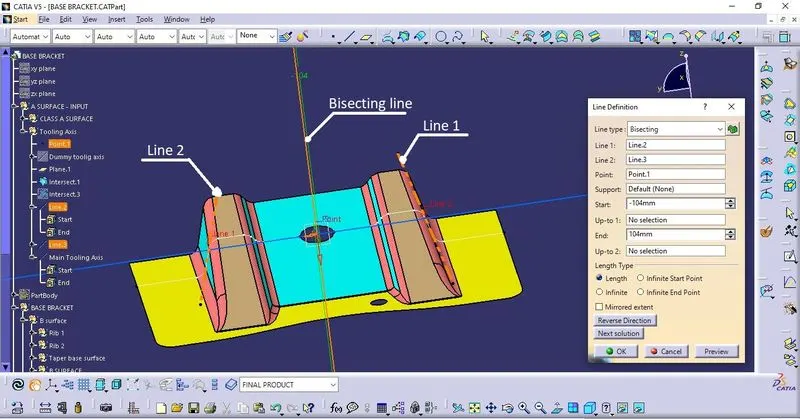
The main tooling direction for the base bracket design is:
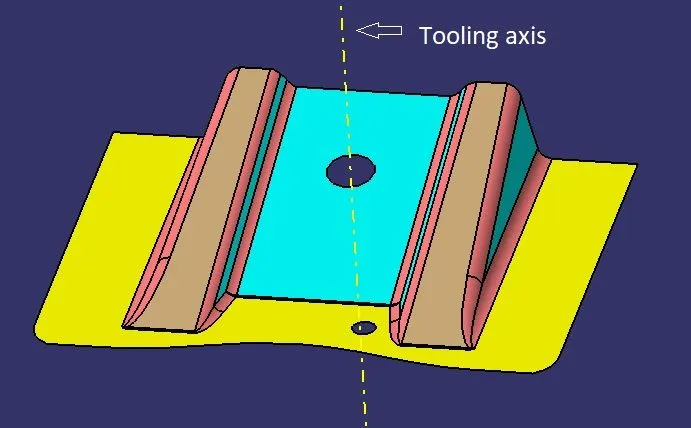
Always choose the tooling direction which has multiple holes in the direction of tooling, to avoid the usage of side core in a mould. A single side side core can increase the cost of a mold by 30%. Also consider the maximum flat face in the tooling direction. In some cases the side cores are carried out, where the side core are unavoidable.
3.) Draft analysis for Class A surface:
Draft analysis technique is used to analyse the product we designed is manufacturable and prevent the part being parallel to the direction of mold opening. The product can not be manufacturable if it has 90° profile which is parallel to the tooling axis. A small draft angle is applied in order to remove the component from the mold. No part is manufacture without the draft angle.
The draft angle are carried out from - 0.3° to 3°
The nominal draft angle is - 3°
The draft angle for texture face is - 7°
Draft analysis for Class A surface:
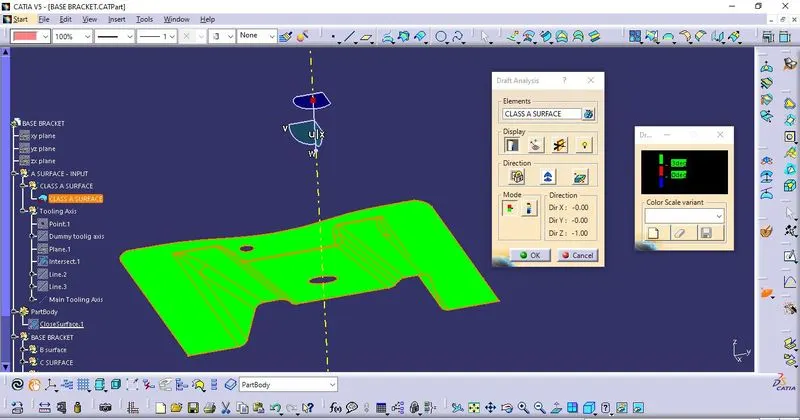
The 'green colour' represent the draft angle is above 3°.
The 'red colour' represent the draft angle is 0°.
The 'blue colour' represent the draft angle is in negative side.
4.) Creating geometrical set for Class B surface:
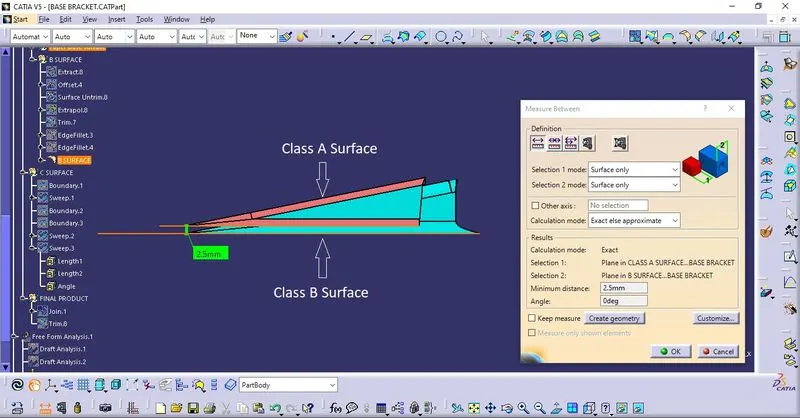
The given input is 2.5mm thickness
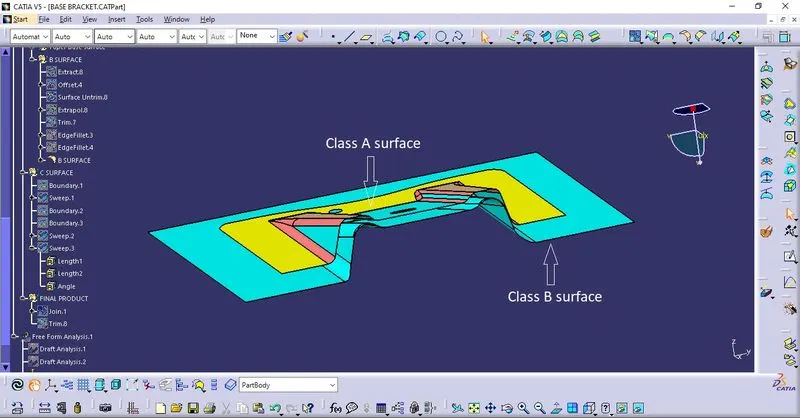
The class B surface is derived from the class A surface with 2.5mm offset. In which the Class C product (final product is sweeped). Class B surface is created by using extract, surface untrim, extrapolate, trim, offset commands for the ribs, base surface.
Isometric view:
Side view:
Front view:
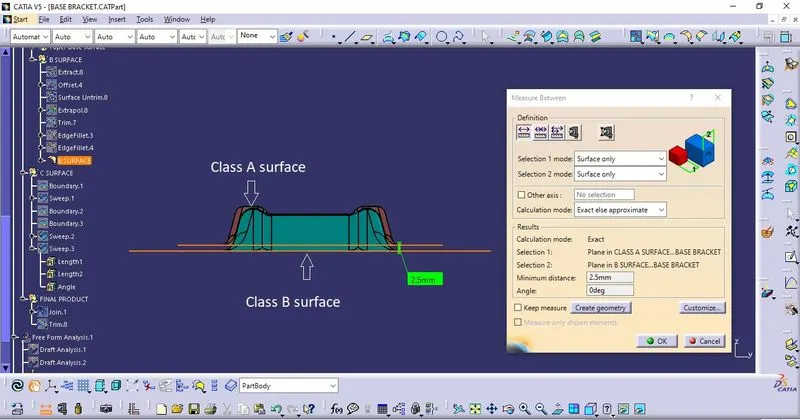
The offset value 2.5mm should be ensured from each side.
The offset value for fillet size:
- Thickness + radius - Offset outside the Class A surface
- Thickness - radius - Offset inside the Class A surface
Here the radius value for given base bracket is 3mm, thickness is 2.5mm. The offset is outside the Class A surface
- 3 + 2.5 = 5.5mm fillet size required
5.) Creating Class C component:
The Class C componenet is the final output derived from Class A and Class B. The Class C product has the thickness of 2.5mm and the draft values as per requirement. It is the manufacturable part from the molding.
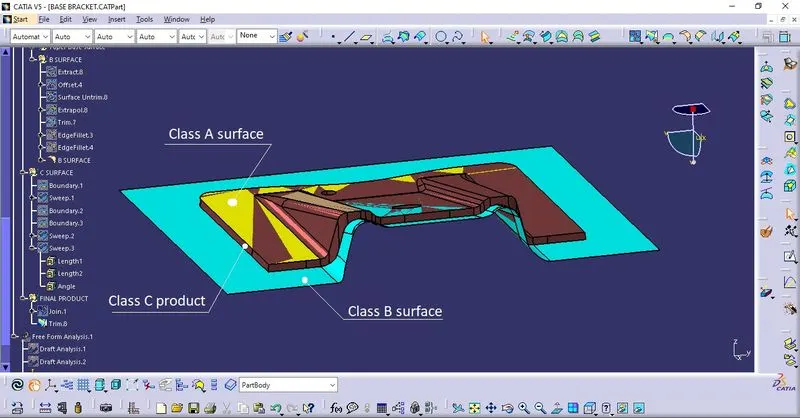
The Class A surface and Class C surface are joint and trimmed with the Class B componenet to form the final Class C component.
6.) Draft analysis for final product:
Top view:
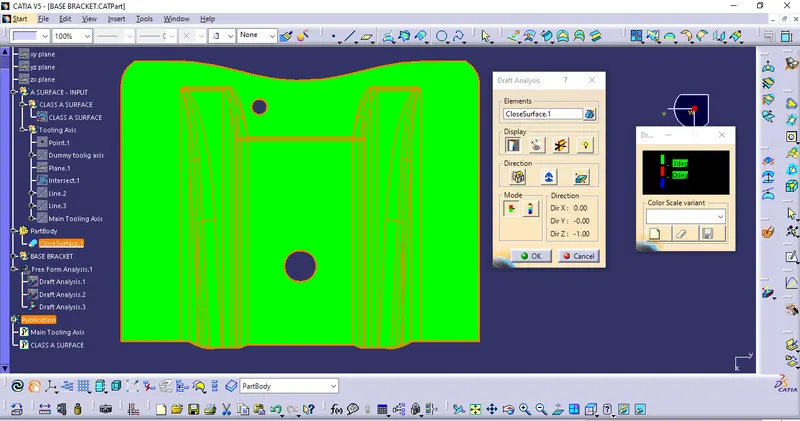
Front view:
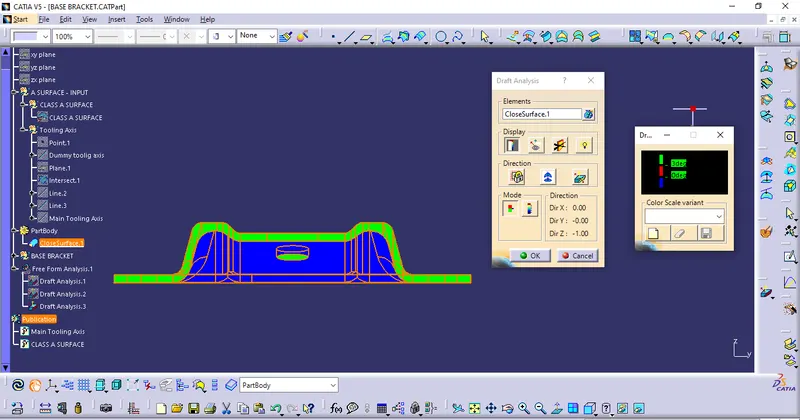
Side view:
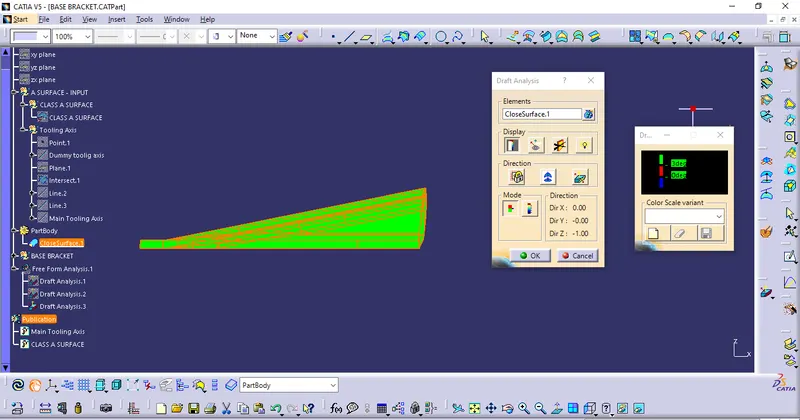
Isometric view:
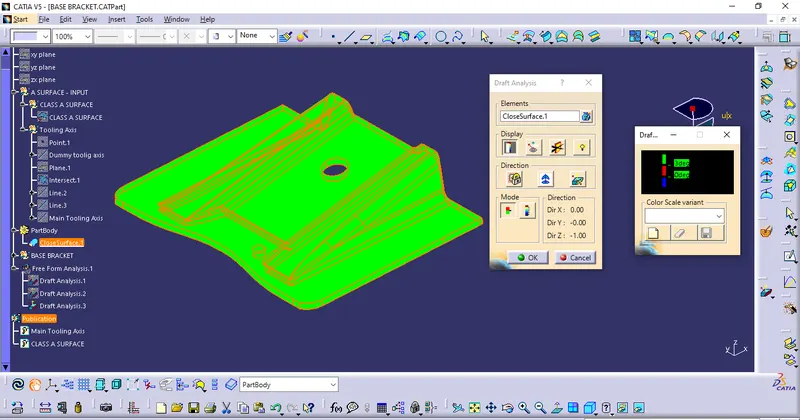
Final product:
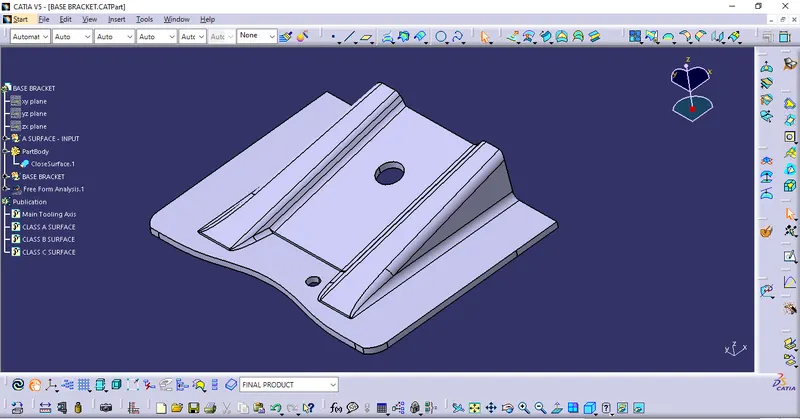
Conclusion:
The Class C component is made into a solid part using close surface and ready for the next stage process for adding engineering feature like boss, ribs, gusset etc. as per the requirement.