Week 9 - Attachment Feature Creation - Challenge 2
SCREWBOSS AND DOGHOUSE DESIGN
Objectives;
- To study the principles of attachments on plastic components
- To design screwboss projection on class B side of a solid part
- To design 3d structure for a doghouse using proper principles.
Software used: DS CATIA P3 V5 2018 - GENERATIVE SHAPE DESIGN, PART DESIGN WORKBENCHES
Introduction:
For any plastic product to be applicable for an assembling process, the basic attachment features need to provide. When designing the object, it needs to consider how the part is going to attach to its fixture or near element. Mostly used techniques for attachments are clips, screws, resin-based adhesives. It does require a form of the projected plastic element along with the 3d part for different types of attachments. It also needs to analyze thier manufacturability using draft analysis. These components might require the application of side core since the attachments can also occur in different directions than the tooling axis. These features must be made on the class b surface as it is not proper to be placed visibly. the visible areas are aesthetically created so that the placement of attachment features needs to be avoided.
Screw boss:
Here we consider screw boss as our attachment feature for assembling the coin holder part. So the part can be hold on to it's position using srews. A screwboss is a projection made onto the solidpart. It enables the facility to fix the component using screws. There are certain principles for generating a screw boss. According to the type of component and size, multiple bosses need to be made in different positions.
Guidelines for creating screw boss:
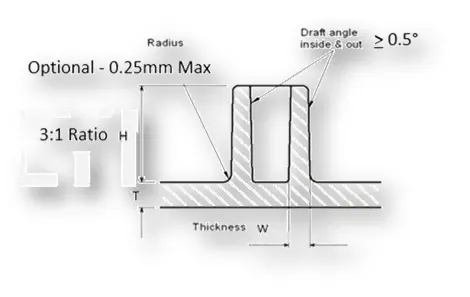
- Draft - 0.5 degrees on walls of boss
- Thickness - Typically 40%* of the nominal wall at the base.
- Height to Diameter Ratio - 3:1
- Radii - 0.25mm maximum radii.
Dog house:
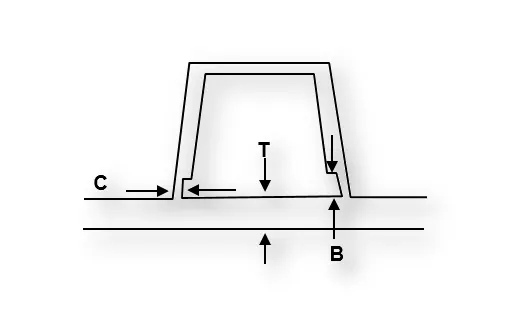
In some cases, the generation of screw boss is not possible directly on the part. The attachment feature may need to extend from the part or needs to change its direction with respect to the walls of the component. In these cases, we need to make proper extension elements onto the solid part and then the screw boss will be applied on it. A simple type of dog house and its design principle is shown below:
Dog house design principle:
-
Doghouse wall thickness at the intersection of the part wall ( C ) should be 40% or less than the main wall stock ( T ).
-
Height of ( B ) should be between 3.0 – 6.0 mm
Design methodology:
Screw boss:
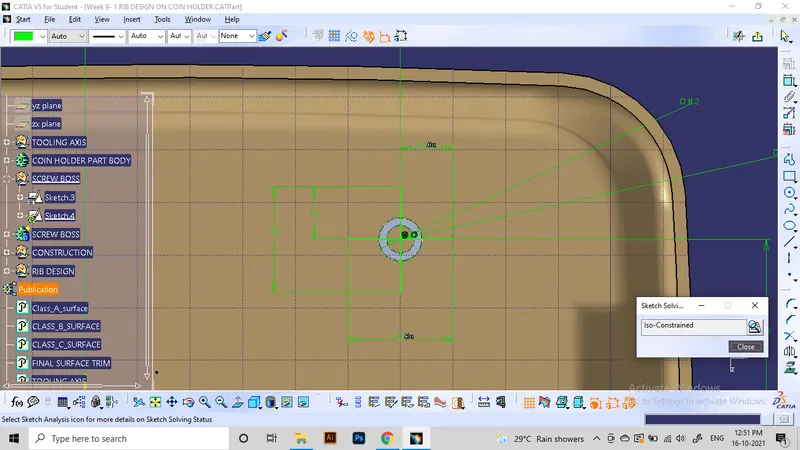
The type of fastener and their specifications need to be formulated before doing this design. Using positioned sketches, we can enter the values for diameter and position required for screw boss. it is then used to extrude as screw boss.
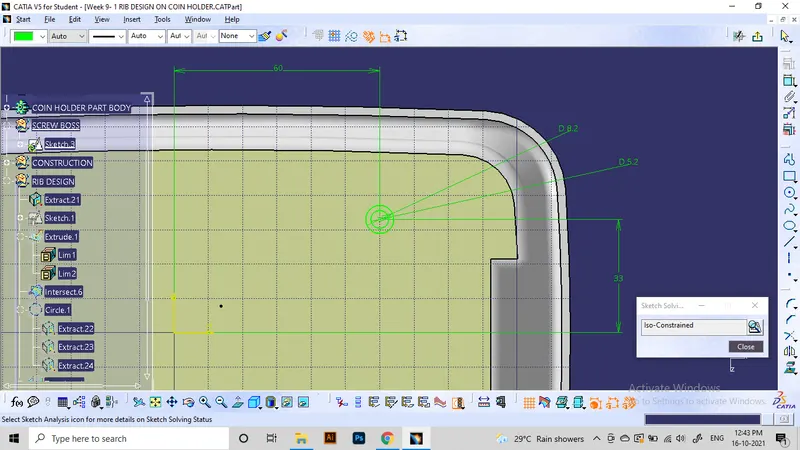
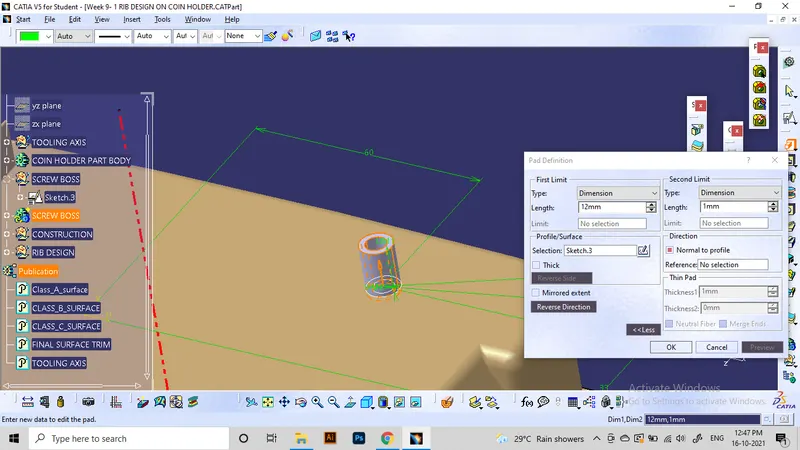
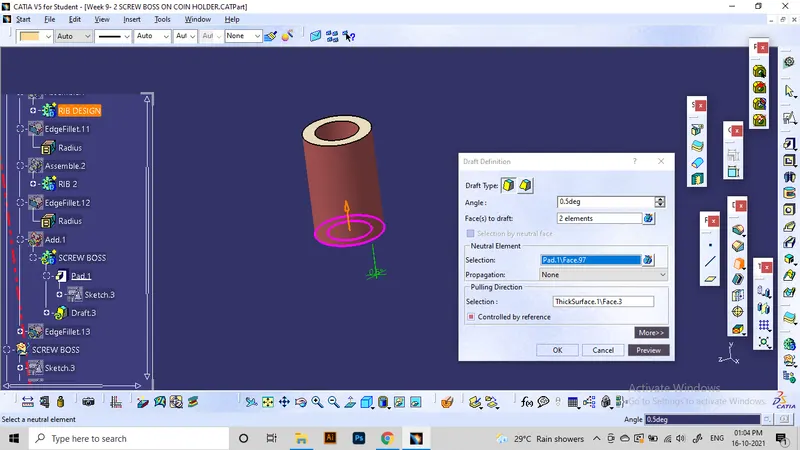
Apply 0.5 degree drafts on outside and inside surface.
This simple structure will not be strong enough to function. Pulling force applied by the screw might fail the joint. So it is required to make some ribs outside the boss for extra support.
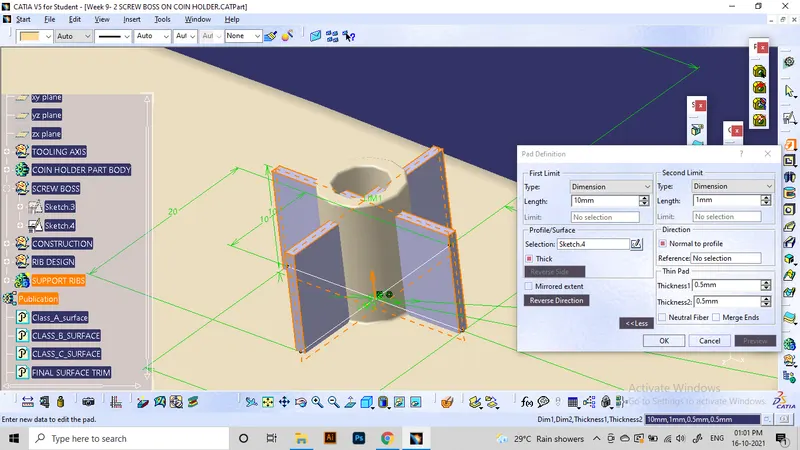
Rib thickness: 1mm
faces come inside the screw boss is removed using union trim.
Ribs also need to draft at 0.5 degrees. Finally all sharp edges can be filleted for a radius of 0.25 mm. And add the part onto the main partbody of coin holder
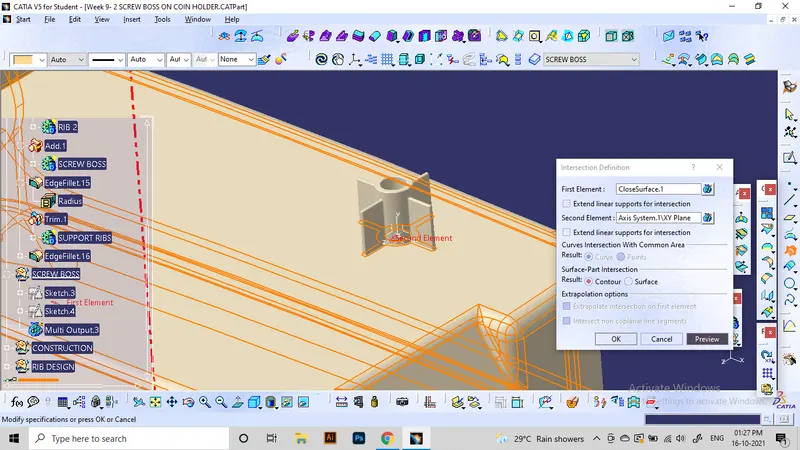
Intersection view of screw boss to the part body:
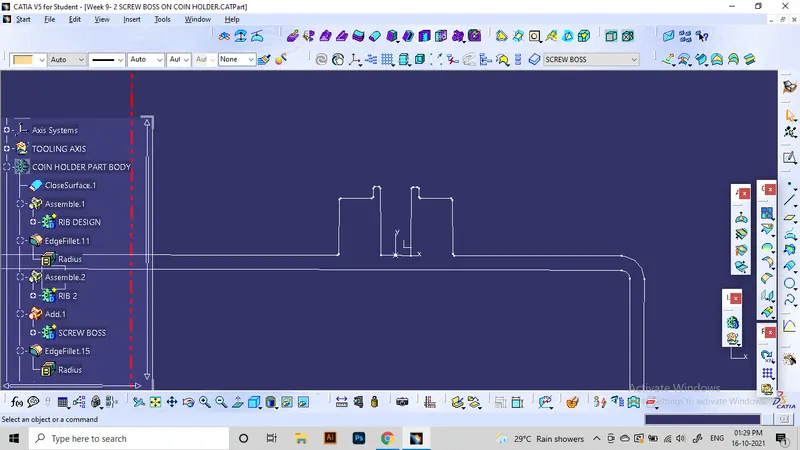
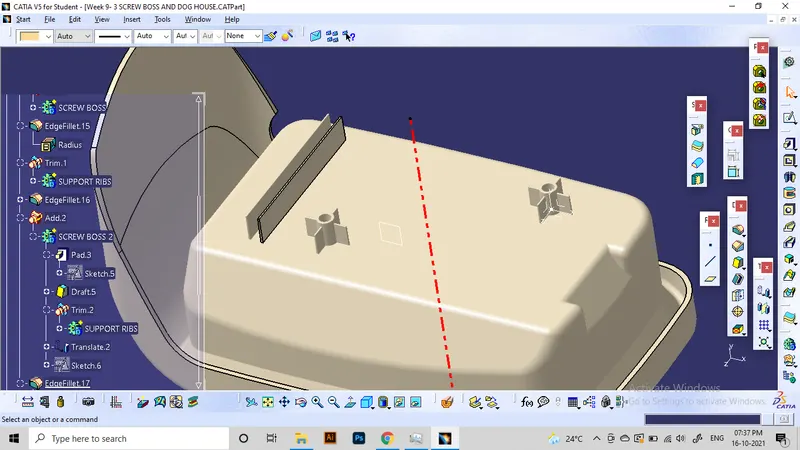
More screw bosses are made using copy and translation:
Dog house:
To practise the making of a dog house, I will be using the second screwboss to place above a dog house.
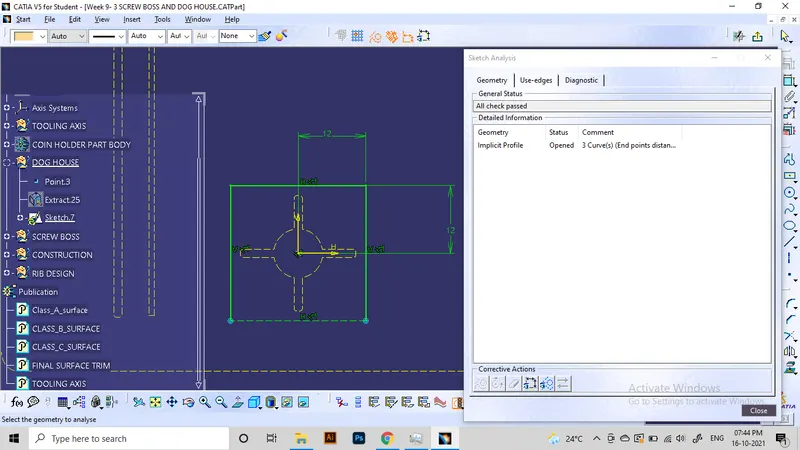
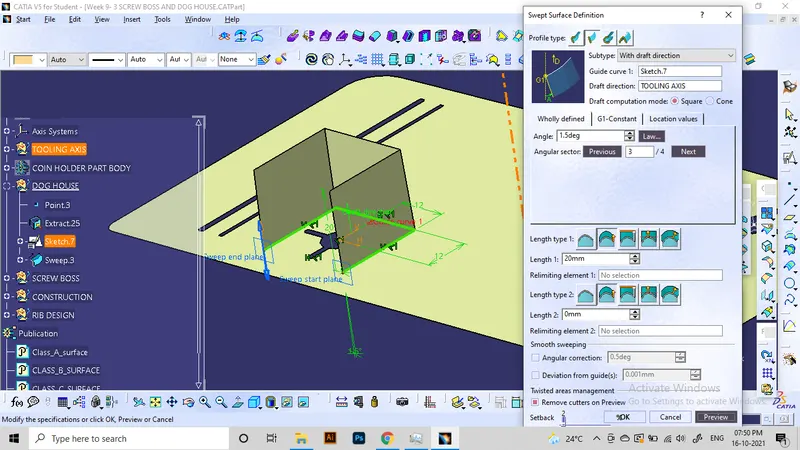
Normally, A doghouse includes 3 sided patch with a closed upper surface. To make the side walls of the dog house, we need 3 line segments which can be swept along the tooling axis with a draft angle of 0.5 degree, and thickened as follows. 2mm thickness is ideal since the wall thikness is 2.5 mm.
Also we need to close the above part. It is done using the extract surface, offset and trimming.
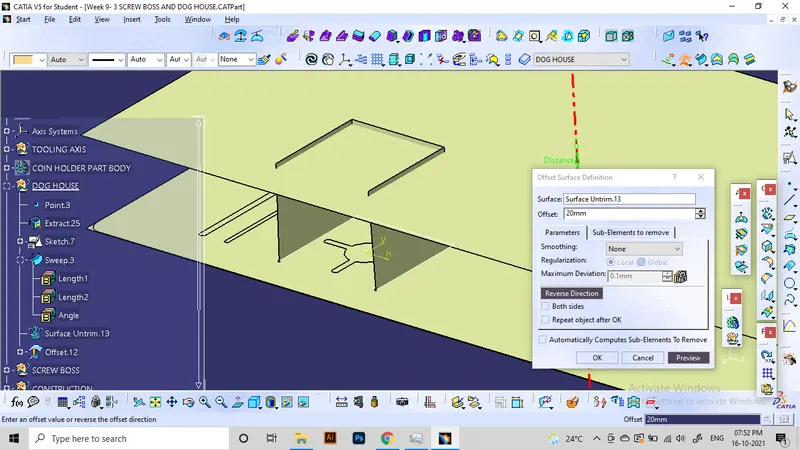
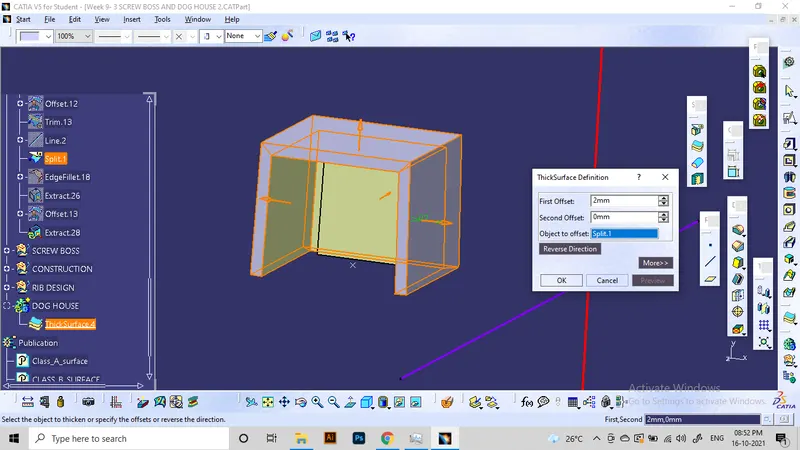
When considering the manufacturability of this part, we can see that, it can only made through a side core application. So we require a side tooling axis perpendicular to the main tooling axis ( marked as blue line).
Hence we also need the drafting for inside surfaces of the dog house.
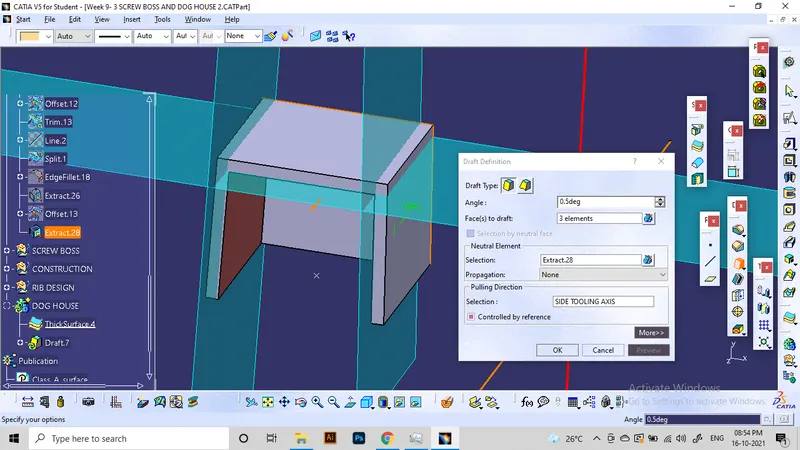
from the principles, we know that the lower part joining the dog house to the component have less thickness. it is around 40% of the main wall thickness. ie, 1mm, for a height of 3 to 6 mm.
To remove the excess material, we need another surface patch as per these dimensions. It can be made using extraction and offseting methods. and trimming the excess.
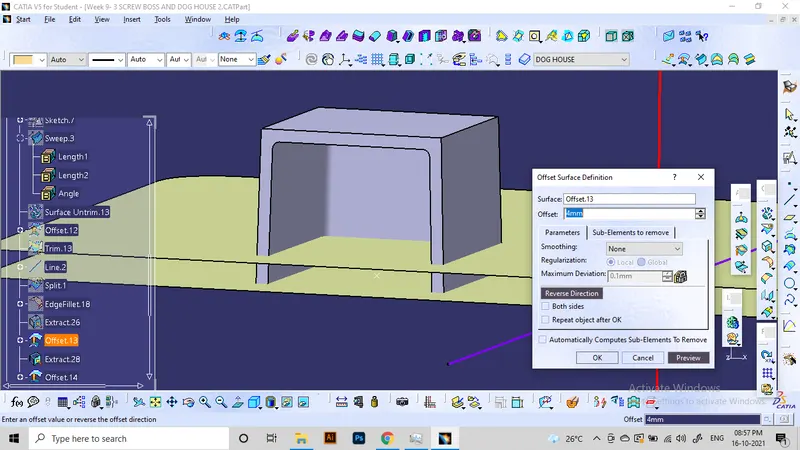
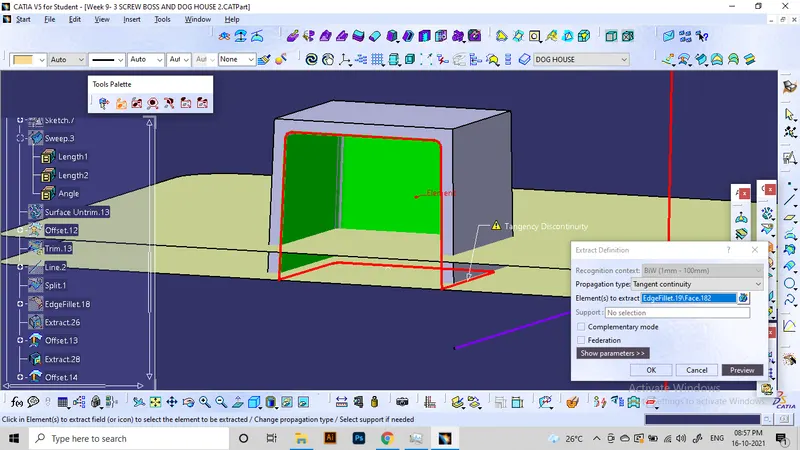
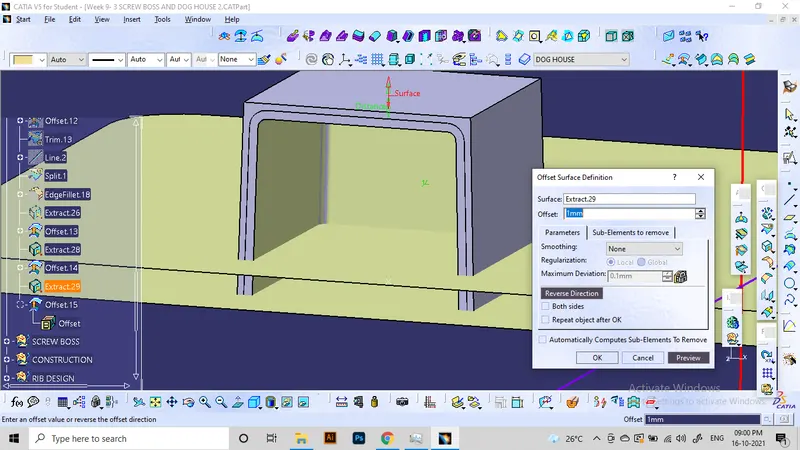
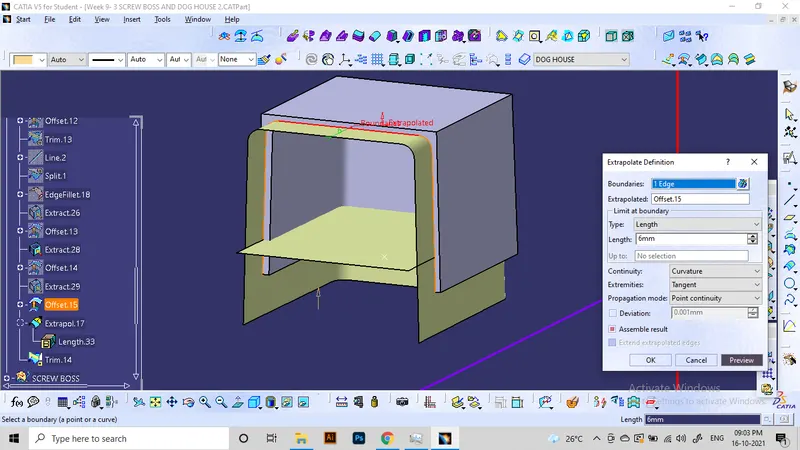
After trimming, split the dog house with this surface patch in part workbench.
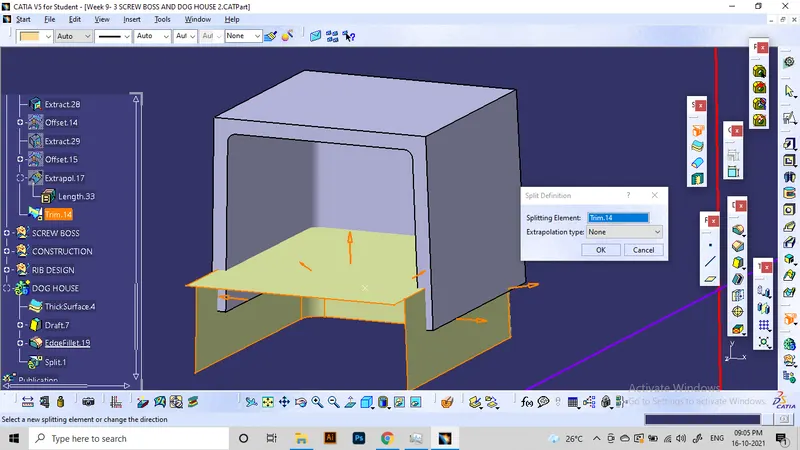
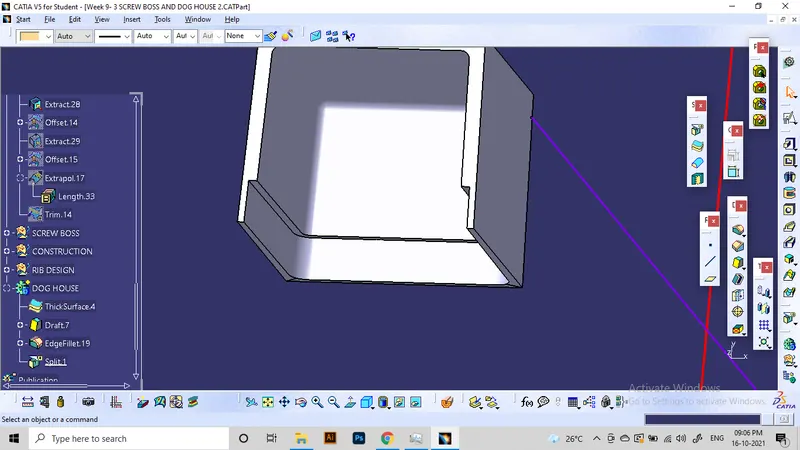
Hence the required part is made. fillet all edges considering thickness of wall.
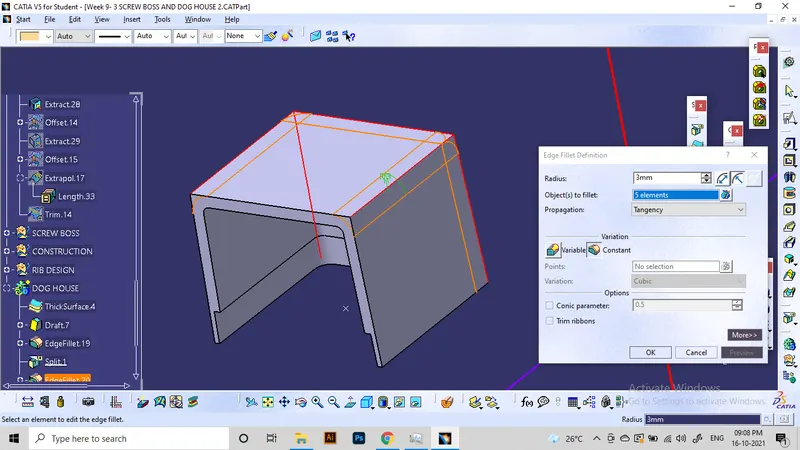
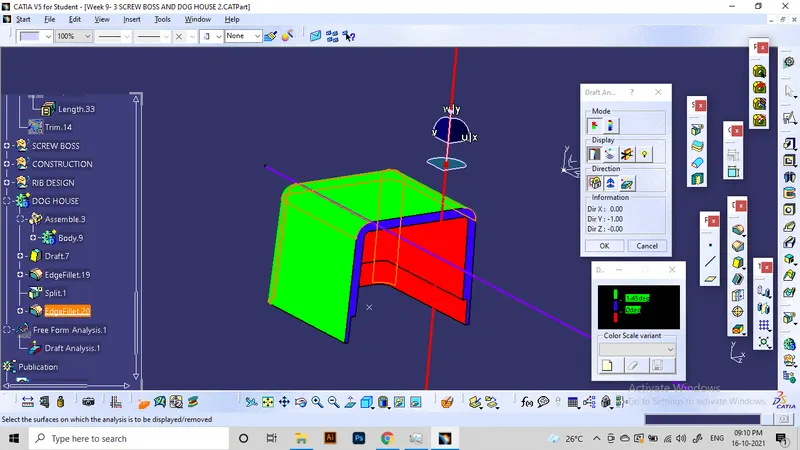
Draft analysis:
- Outside walls of dog house are resolved for manufacture along the main tooling axis
- Side tooling axis is provided for inside walls.
- Surface drafts are made at an angle of 0.5 degree. All surfaces passing above 0.4 degrees are accepted
So, for the main tooling axis:
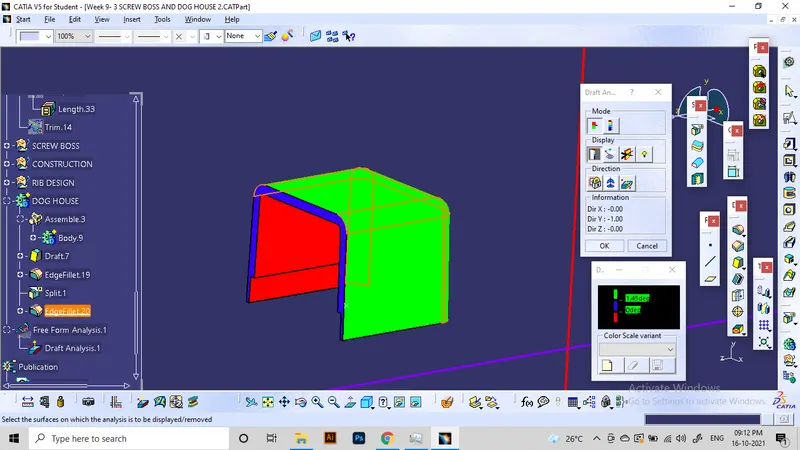
For the side tooling axis:
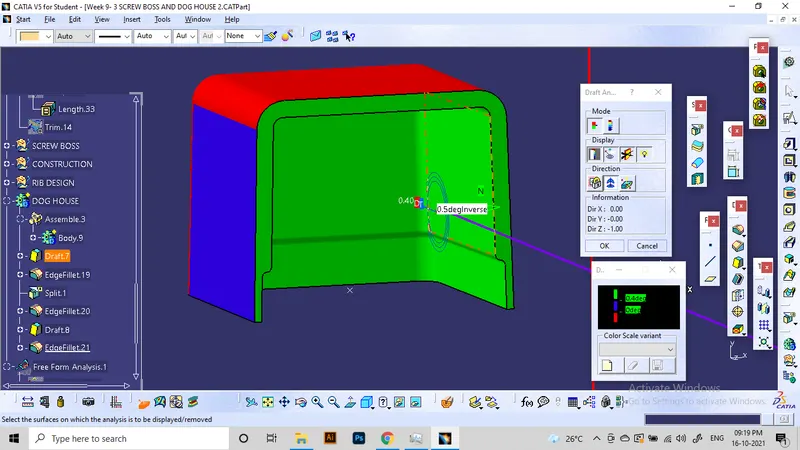
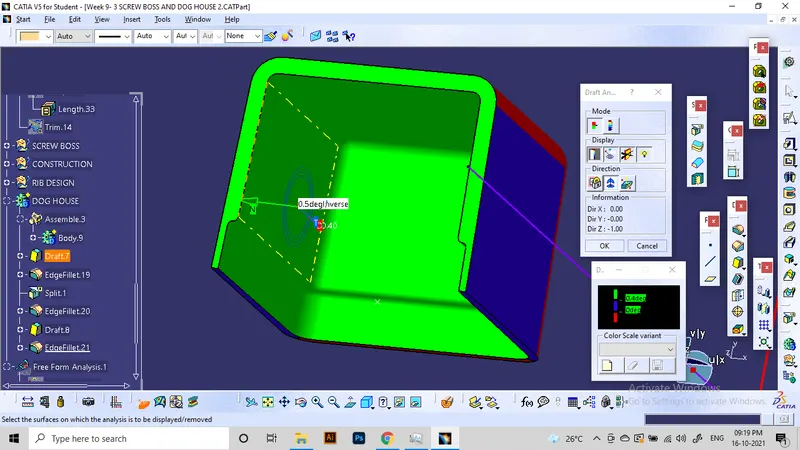
The resulted surfaces passes the draft analysis with proper draft angles.
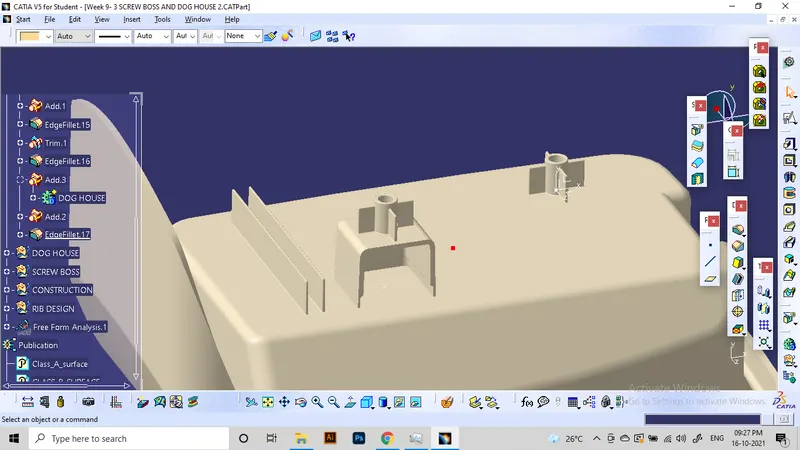
Then we can attach the previously made screw boss on the dog house.
Conclusion: Studied various attachment features of plastic part design and their design principles. These principles allow us to generate highly professional plastic models with ensured manufacturability. Also, learned to Design and model screw boss and dog house on solid parts.